 electronicsworkshops
Introduction
In this project, we are going to make a simple lipo battery charger using TP4056 module with battery protection. The circuit that charges the battery by supplying the charge carrier (i.e-electrons) to it is battery charger circuit. Most of the rechargeable battery has common problem of over charging and over discharging. we need a smart charging solution that protects our battery from over charging and damage cause by over charging.
This lithium battery charger circuit automatically cut off the charging process when the full charge limit of battery is reached (i.e-4.2V) . This circuit also protect our battery from over discharging by automatically cutting the output power when the battery voltage falls below 2.4 volt.
PCB Manufacturer
JLCPCB is quite professional in the field of PCB manufacturing; you can try their services at extremely low prices, Only 2 dollars for 5 PCBs , besides this the new members also get a bonus Coupon.
You can now upload the Gerber File to the Website and place an order. The PCB quality is superb & high standard. That is why most of people trust JLCPCB for PCB & PCBA Services.
You Will get FREE prototype pcb from JLCPCB. So do not be late to register and place your first order from JLCPCB.
If you want to order your pcb from jlcpcb just go through the link below:
https://jlcpcb.com/EWS


Bill Of Materials
| Value | Reference | Quantity |
| U1 | TP4056 | 1 |
| IC1 | DW01A | 1 |
| Q1 | FS8205A | 1 |
| RV1 | 1K pot | 1 |
| R1-R6 | 0.4, 220, 100, 1KOhms | few |
| C1, C2 | 100nF, 10uF | few |
| D1, D2 | 3 mm led | 2 |
TP4056 Chip
The TP4056 is a complete chip for designing a constant-current/constant-voltage linear charger for single cell lithium-ion batteries.
Features
Programmable Charge Current Up to 1000mA
Constant-Current/Constant-Voltage
Preset 4.2V Charge Voltage with 1.5% Accuracy
Automatic Recharge
Two Charge Status Output Pins
Pin Description

Pin Description of TP4056

Circuit Diagram of Lipo charger using TP4056 with out protection unit


Power Pin
Starting with the power pin, Pin 4 is Positive input supply voltage. We can provide voltage from 4V to 8V in this pin. In this project, we are providing 5V from any external source to this pin. For bypassing unwanted voltage spikes and noise, a capacitor is also connected from Vcc to ground. However the large value of capacitor (C1 -10uF) need to decouple with a series resistor(shown as resistor R3 in the circuit diagram) of 0.2 ohms to 0.5 ohms which reduces the ripple voltage.

Pin 3 of this pin is connected to ground which mean to sayo, this pin has been directly connected to the supply voltage to enable the IC. that negative terminal of battery is connected to this point as a common ground.
Pin 8 of TP4056 is chip enable pin. A high input to this pin enables the chip and low input disables this chip. In our case, we have directly connected this pin to input power supply. so, our chip is enabled.
Programming pin
Pin 2 is very important pin of TP4056 form where we can set the charging current. The charging current plays a important role in charging a battery and it must be programmed according to the battery used. The main advantage of using this TP4056 chip is we can program the charging current by selecting the proper resistor as per our requirements.

The Programming resistor with corresponding current value shown in the table below :

The value of program Resistor can be calculated by using the below formula
RPROG = (Vprog/ Ibat)* 1200 (Icharge =1A and VPROG = 1V)
Charge Indication Pins
The charge pin or pin 7 of TP4056 is use to indicate the charging process of the battery. This pin goes to the low state while the...
Read more »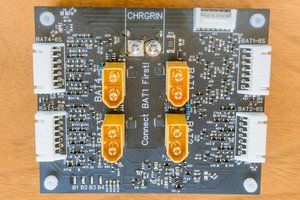
 Bud Bennett
 Maximiliano Rojas

 Lithium ION