 Alpenglow Industries
-
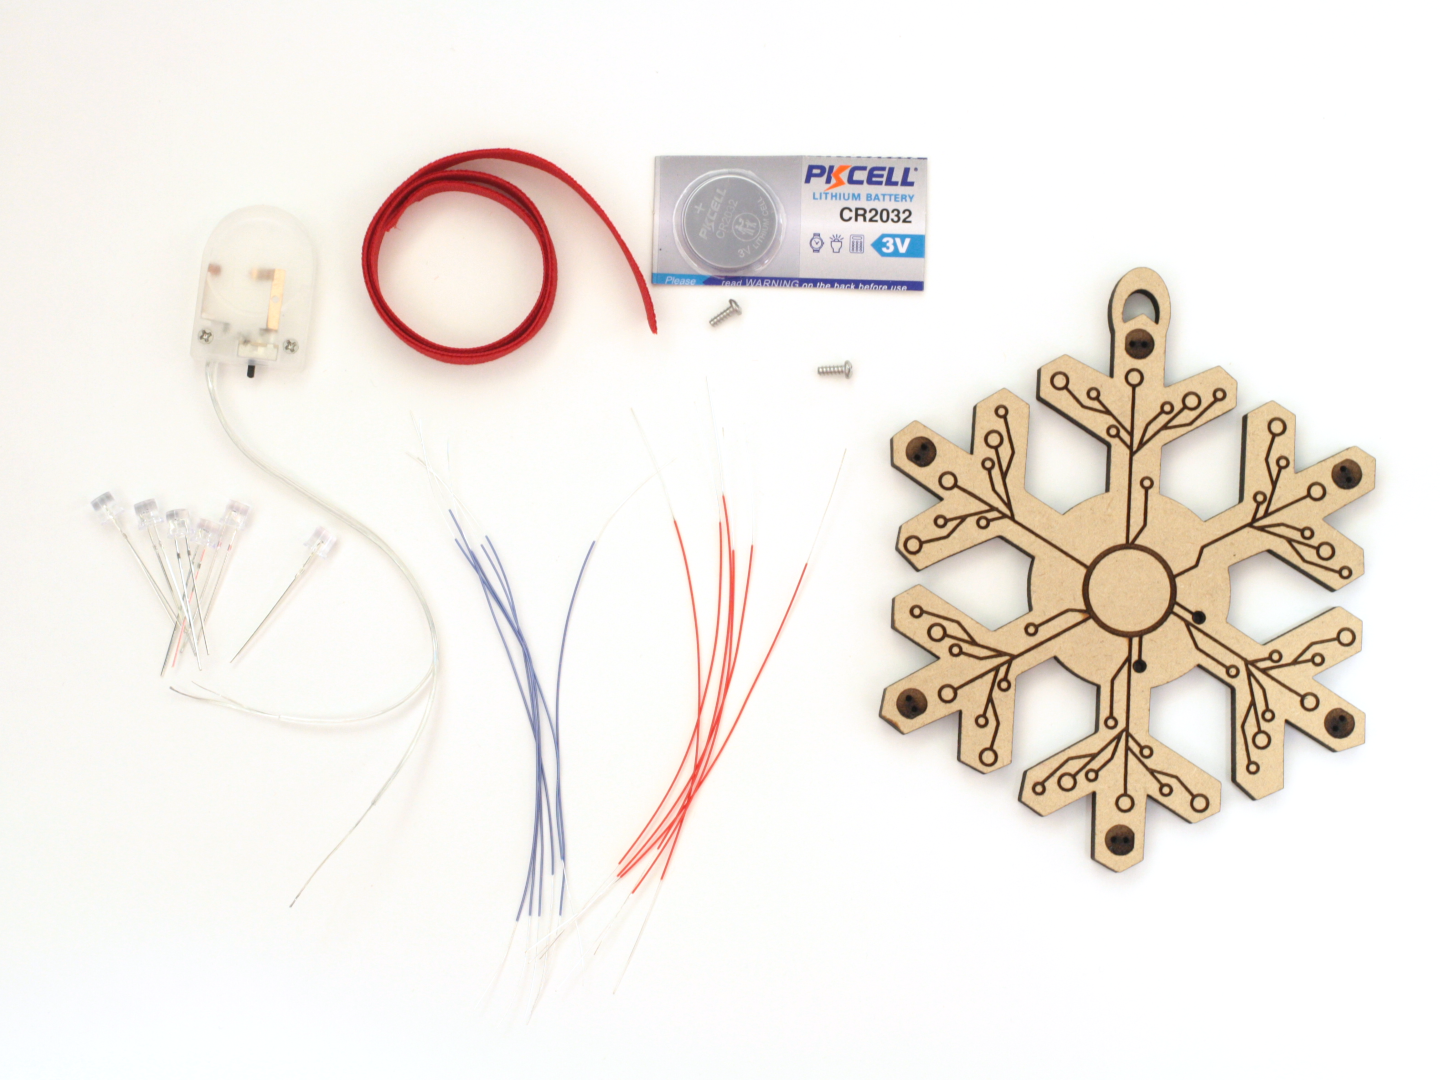
1Unpack your Kit
*Note: If you chose the unstripped wire option, strip approx. 1" off the ends of each wire using 30AWG wire strippers. Strip approx. 1" off the ends of the battery holder using 24AWG wire strippers.
Helpful Tips for stripping wire:
- To prevent breaking the Red & Blue wires when stripping we suggest stripping in 1/2" or 1/4" sections until you reach 1". If you do break the wire they should still be long enough to reach from LED to screw.
- To prevent breaking the battery holder wires when stripping we suggest using wire cutters to remove the exposed ends of the wires before stripping to reduce the changes of the insulation snagging.
![]()
Each kit has the following items included:
1 - Circuit Snowflake
1 - Length of Ribbon
1 - Battery Holder
1 - CR2032 Battery
2 - Screws
6 - Self Flashing RGB LEDs
6 - Red Wires
6 - Blue Wires
-
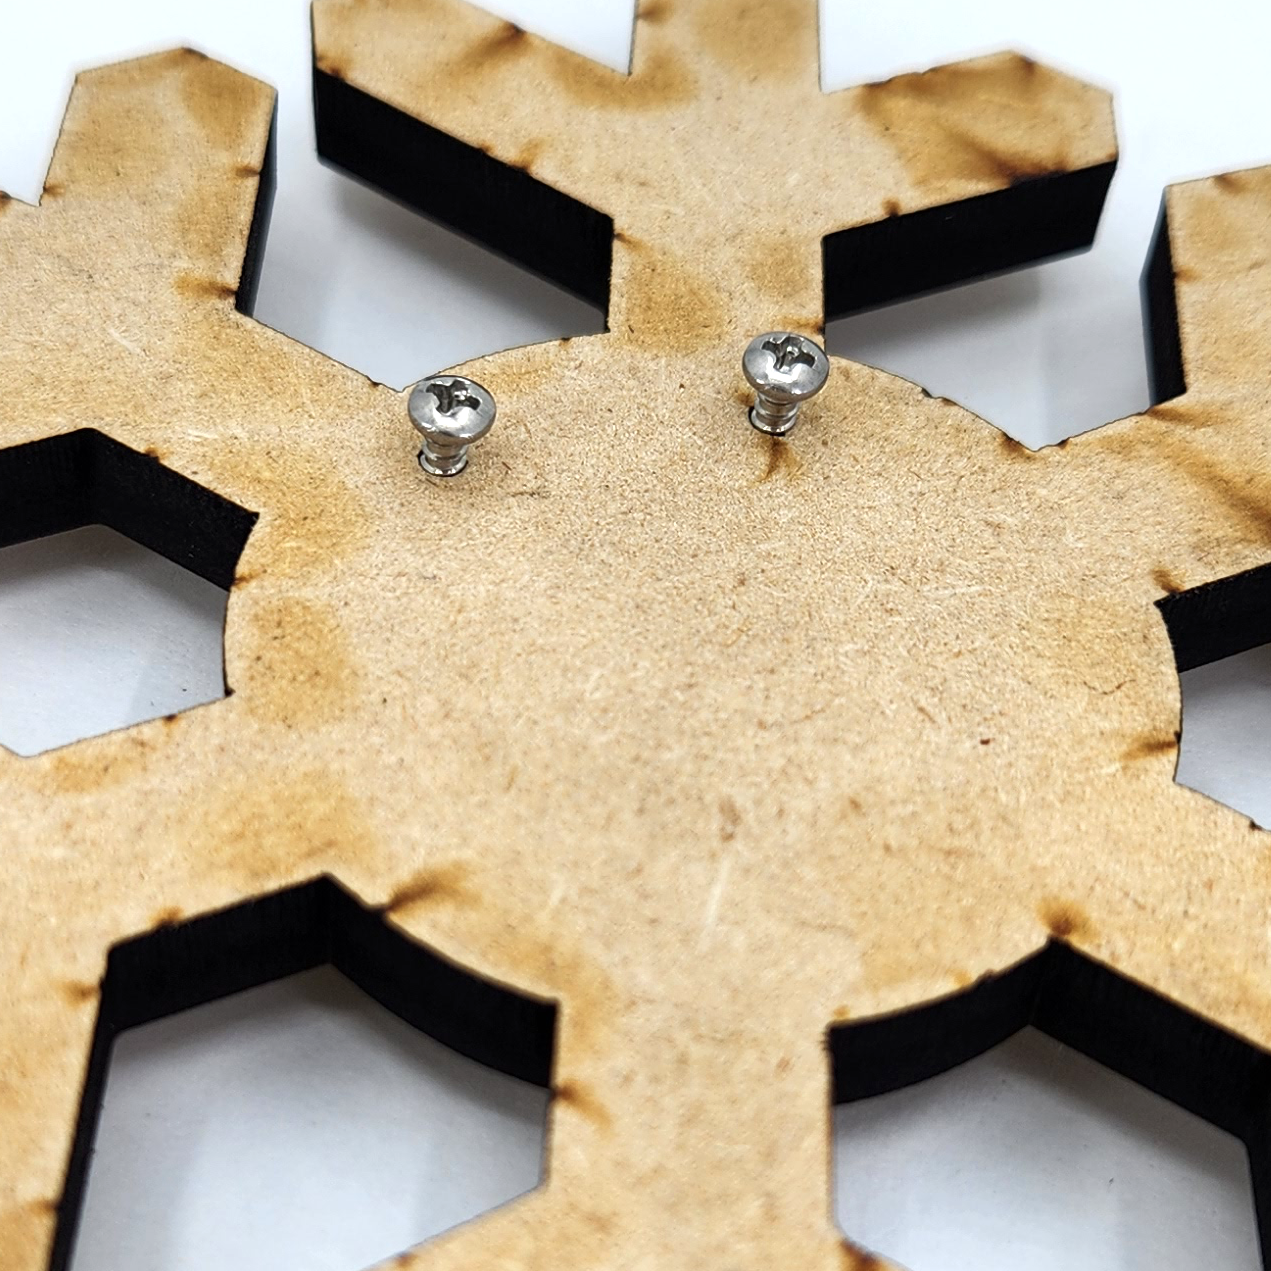
2Screw screws into holes
Give each screw about 3 twists. You don't want them falling out but you want to keep enough room to wrap wires around them.
![]()
-
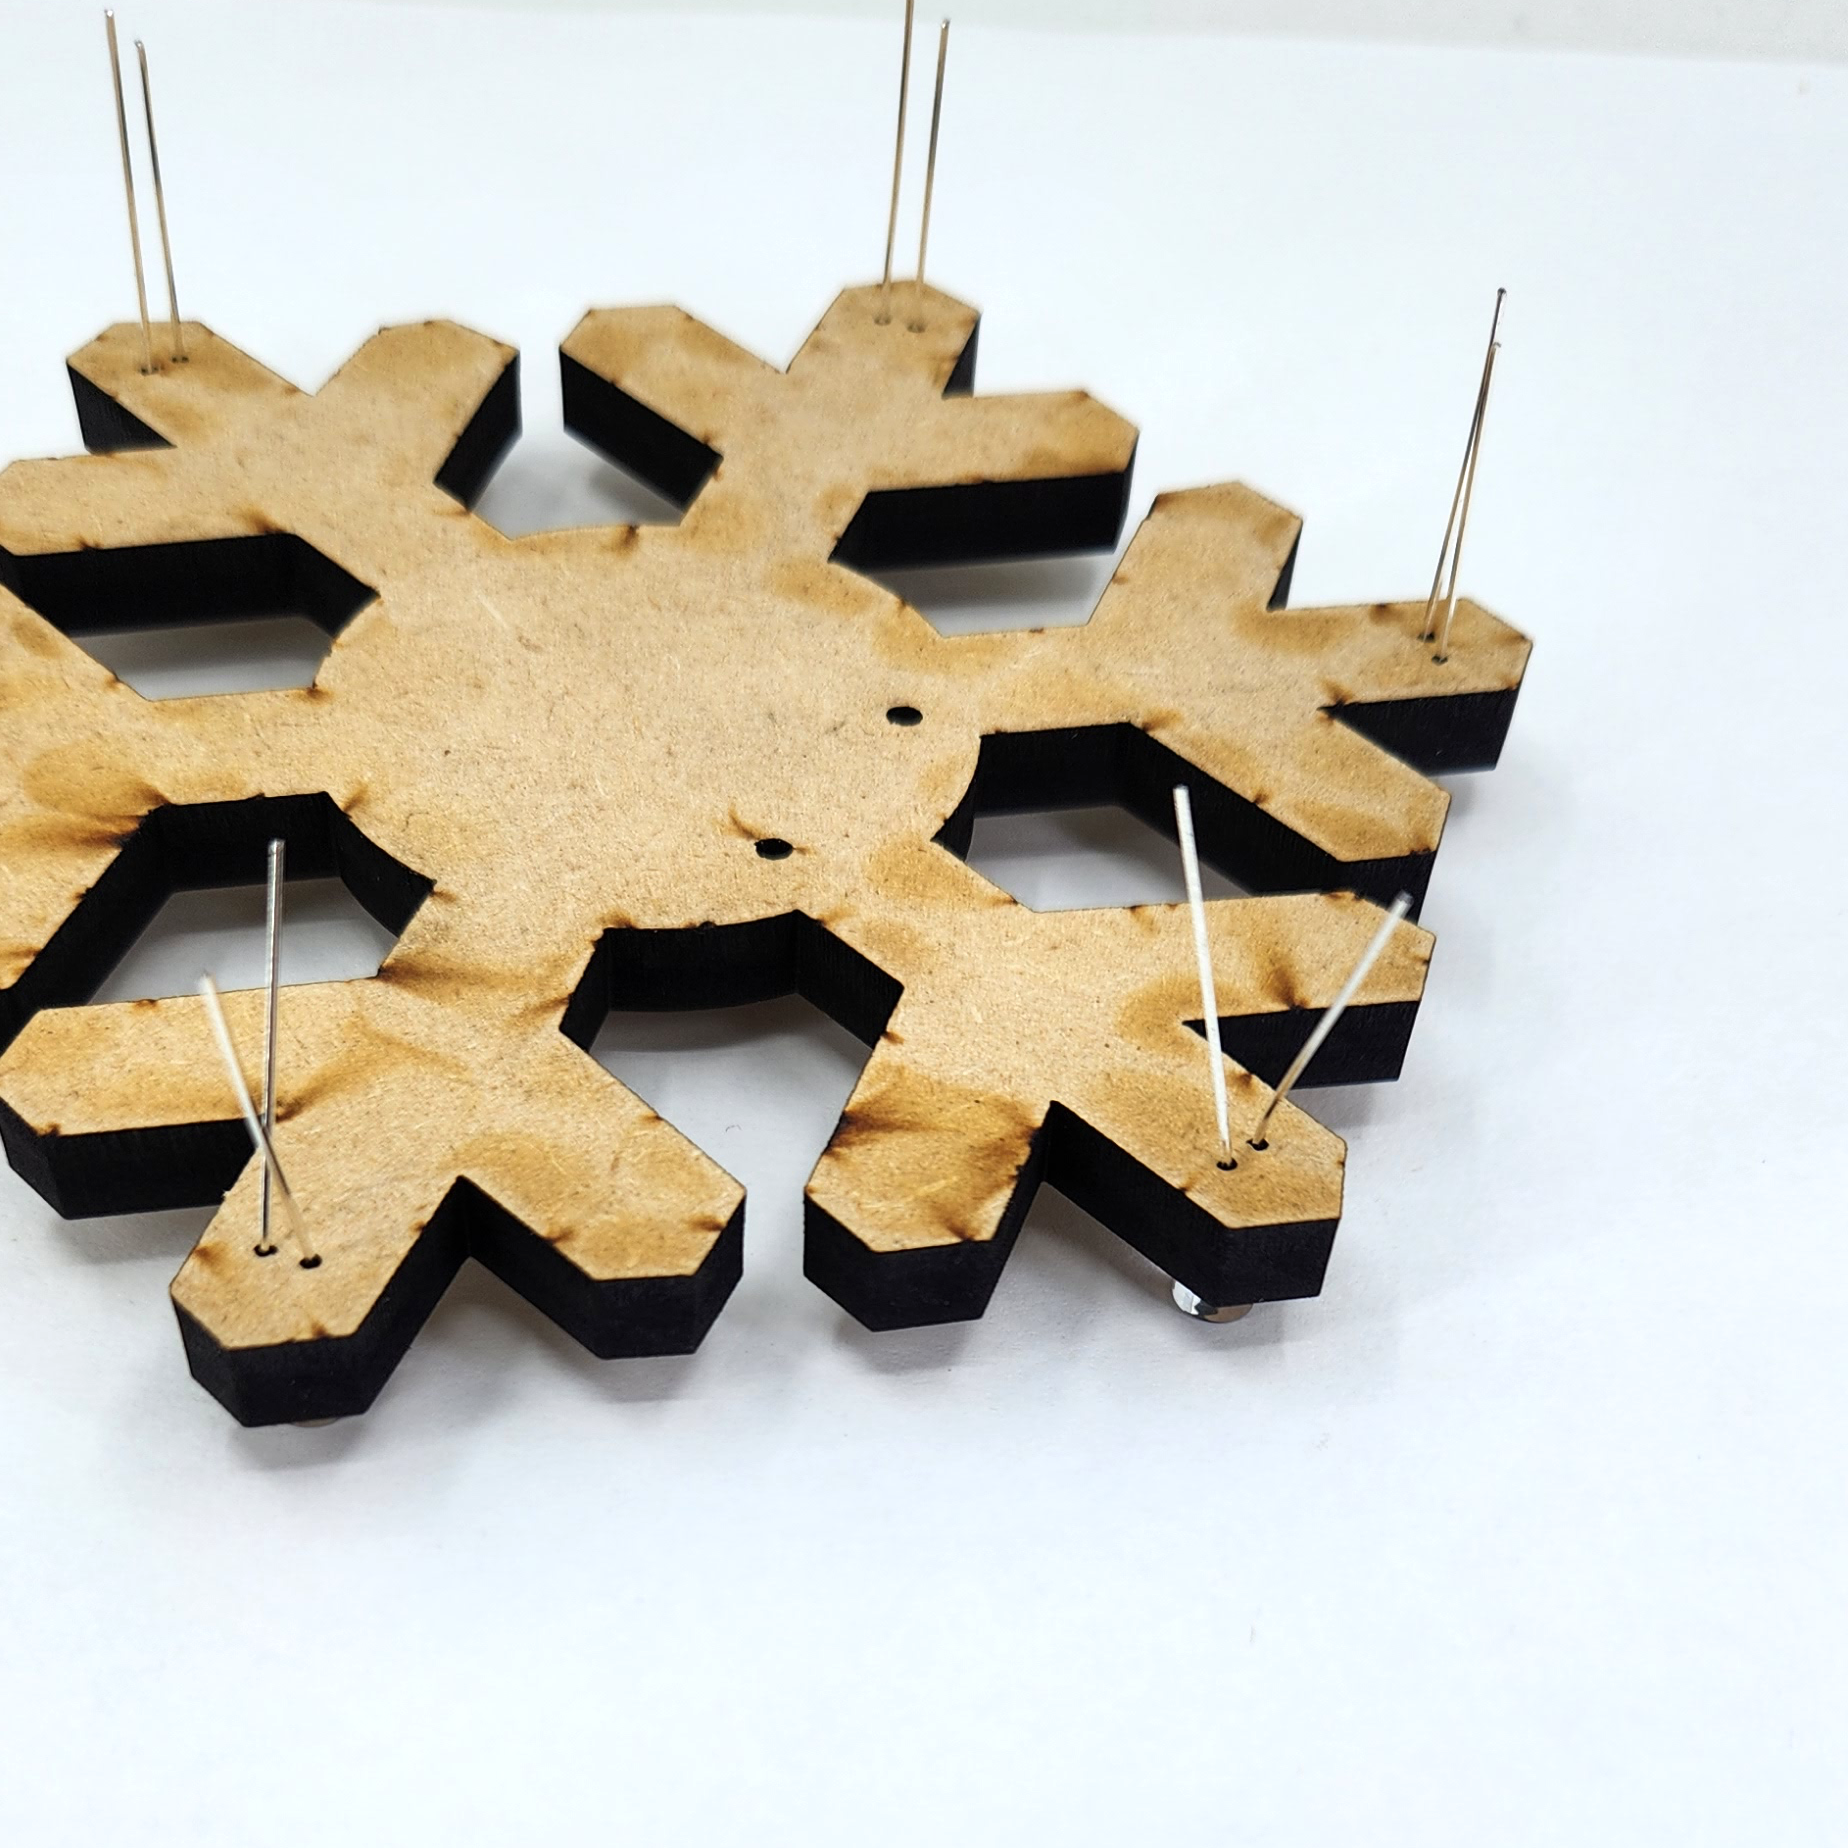
3Place LEDs
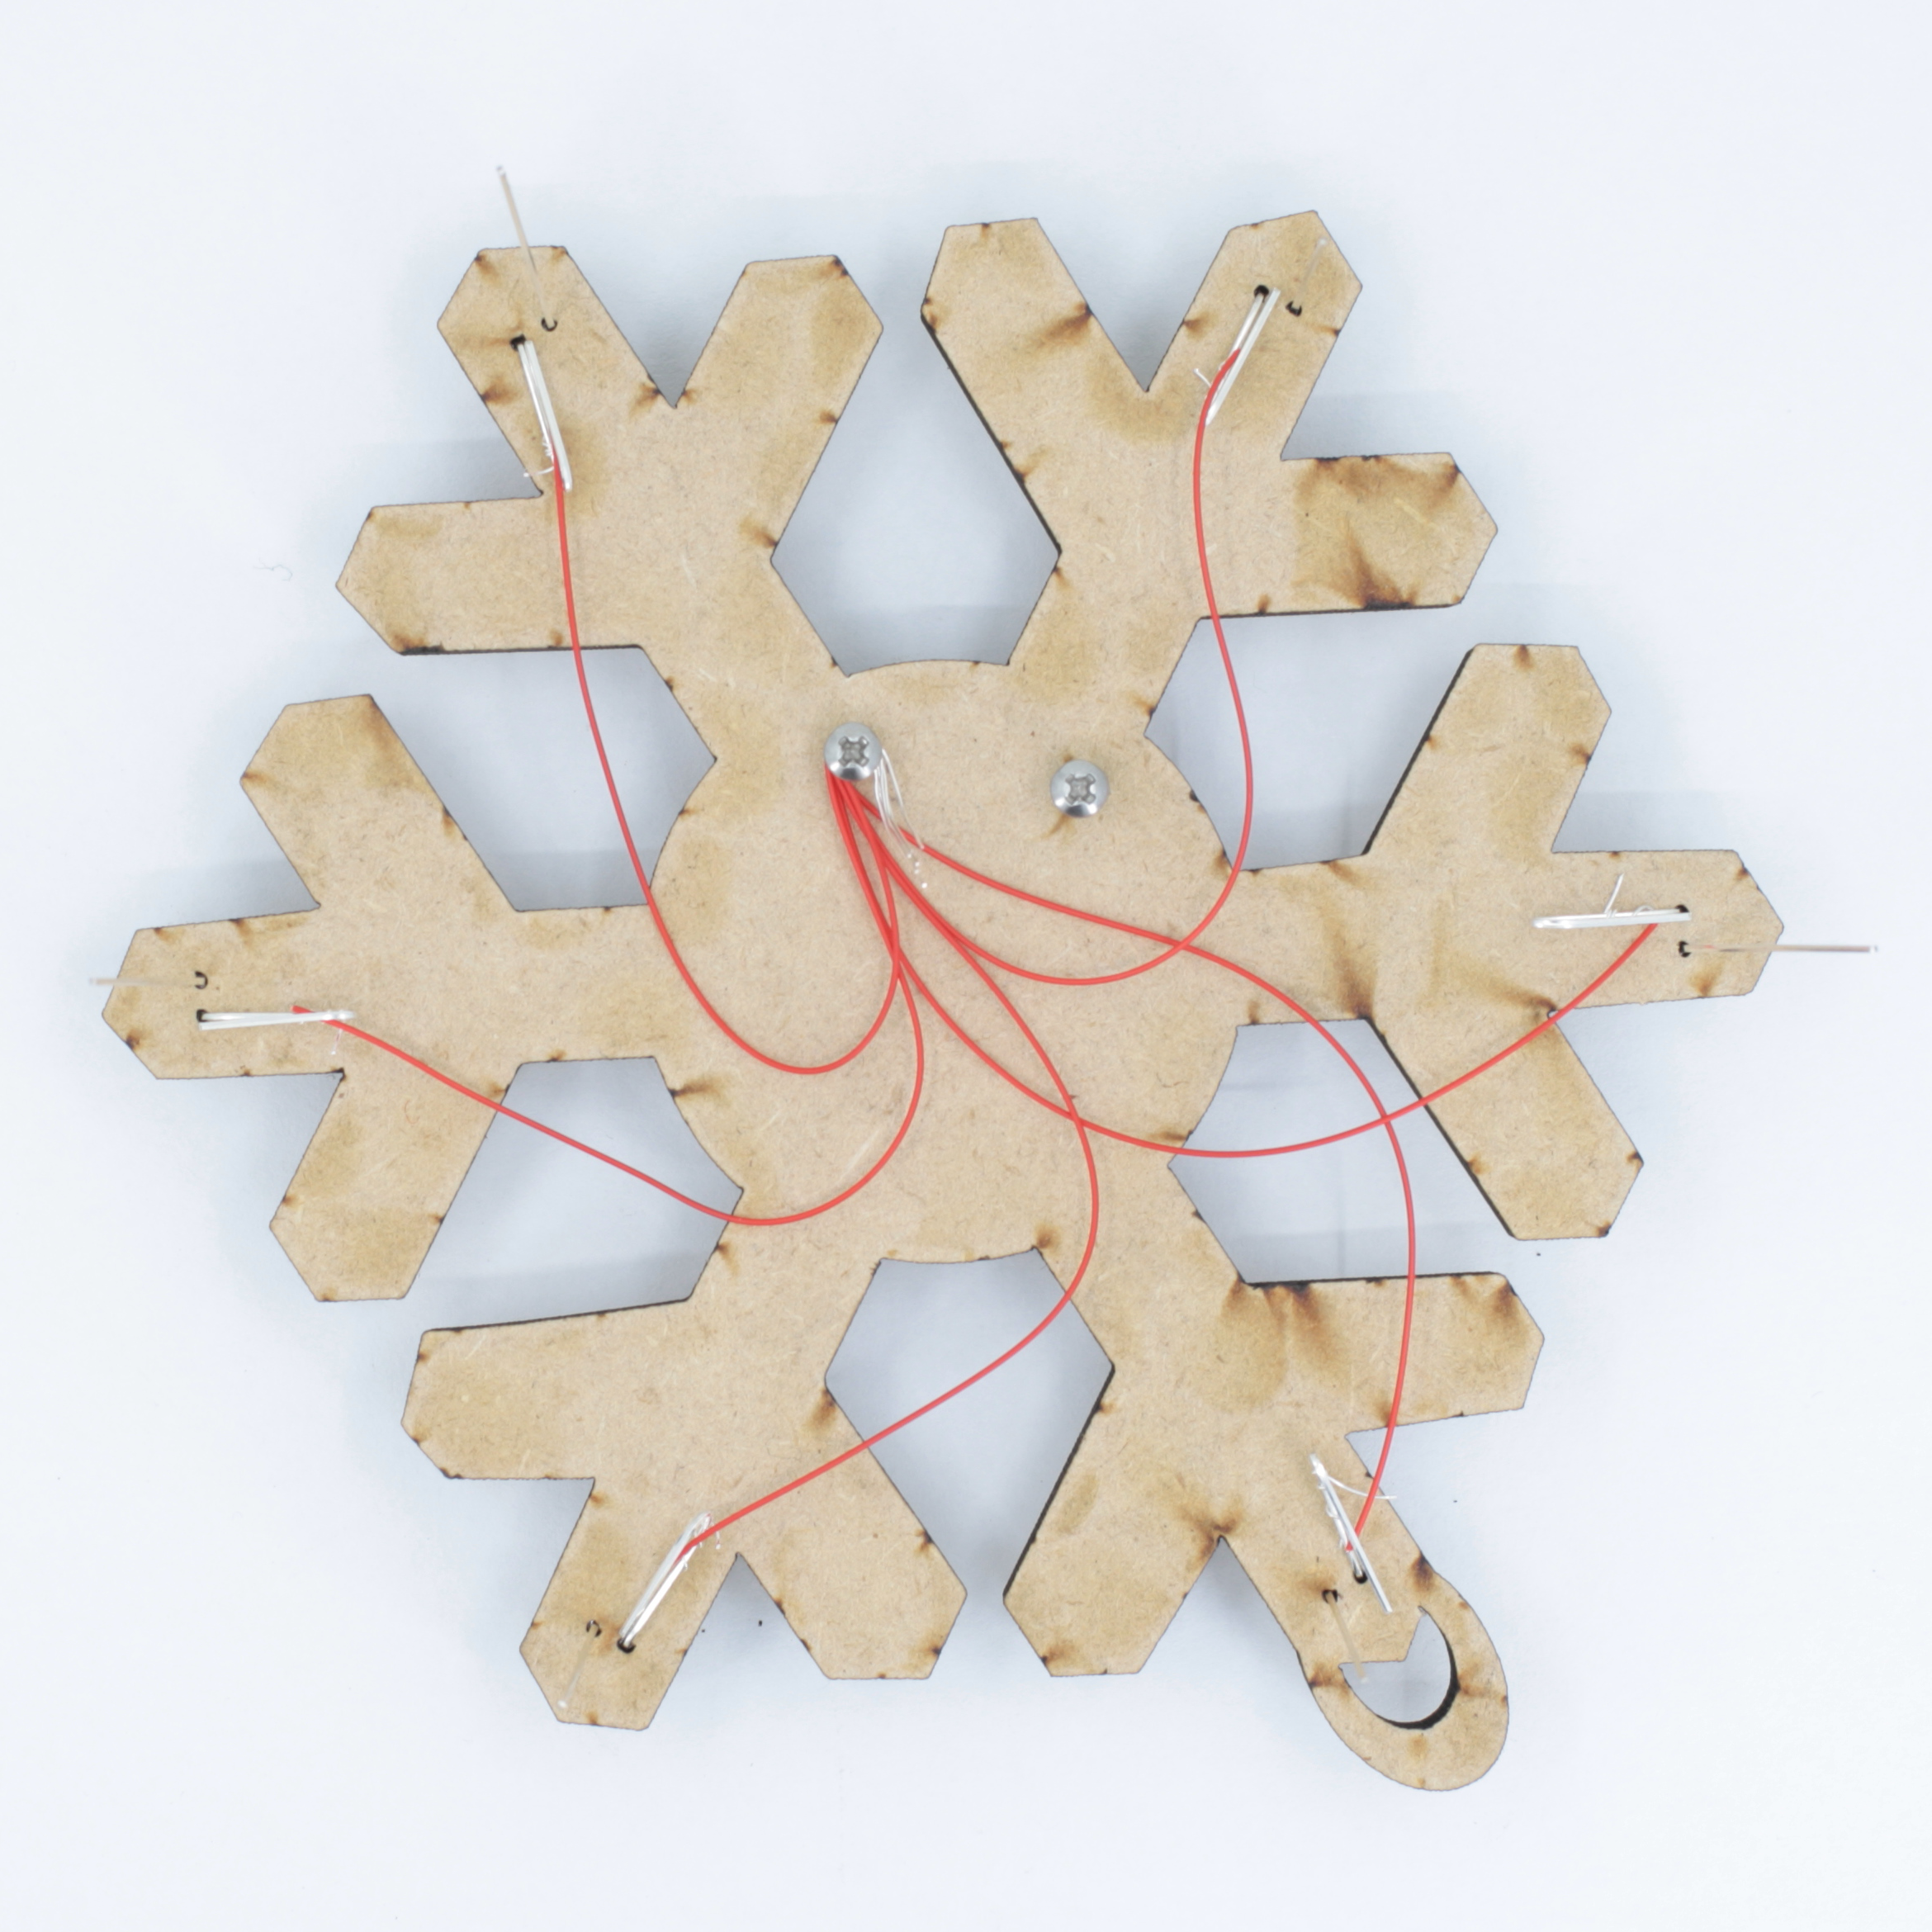
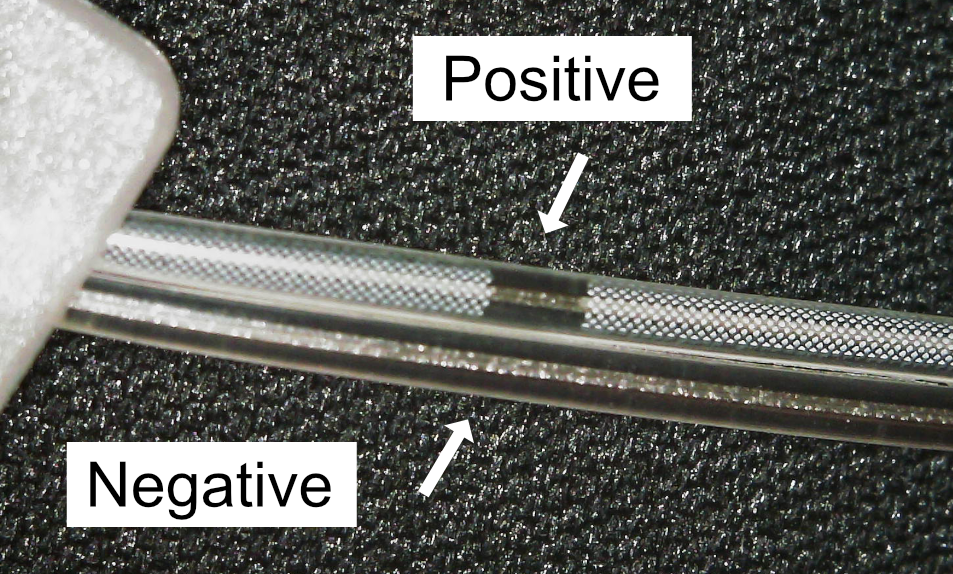
Match the flat side of the LED to the flat side of the engraving. Alternatively you can also match the long and short legs to the flat side of the engraving. Long legs are positive and short legs are negative. The flat side marks the negative on the engraving so match the short leg to the flat side. Once all LEDs are in place, flip the board over.
![]()
Bend LED legs one going away from the center and one going towards the center (make sure to keep bending consistent on each LED (if you bend the negative leg away and the positive towards repeat for all LEDS
-
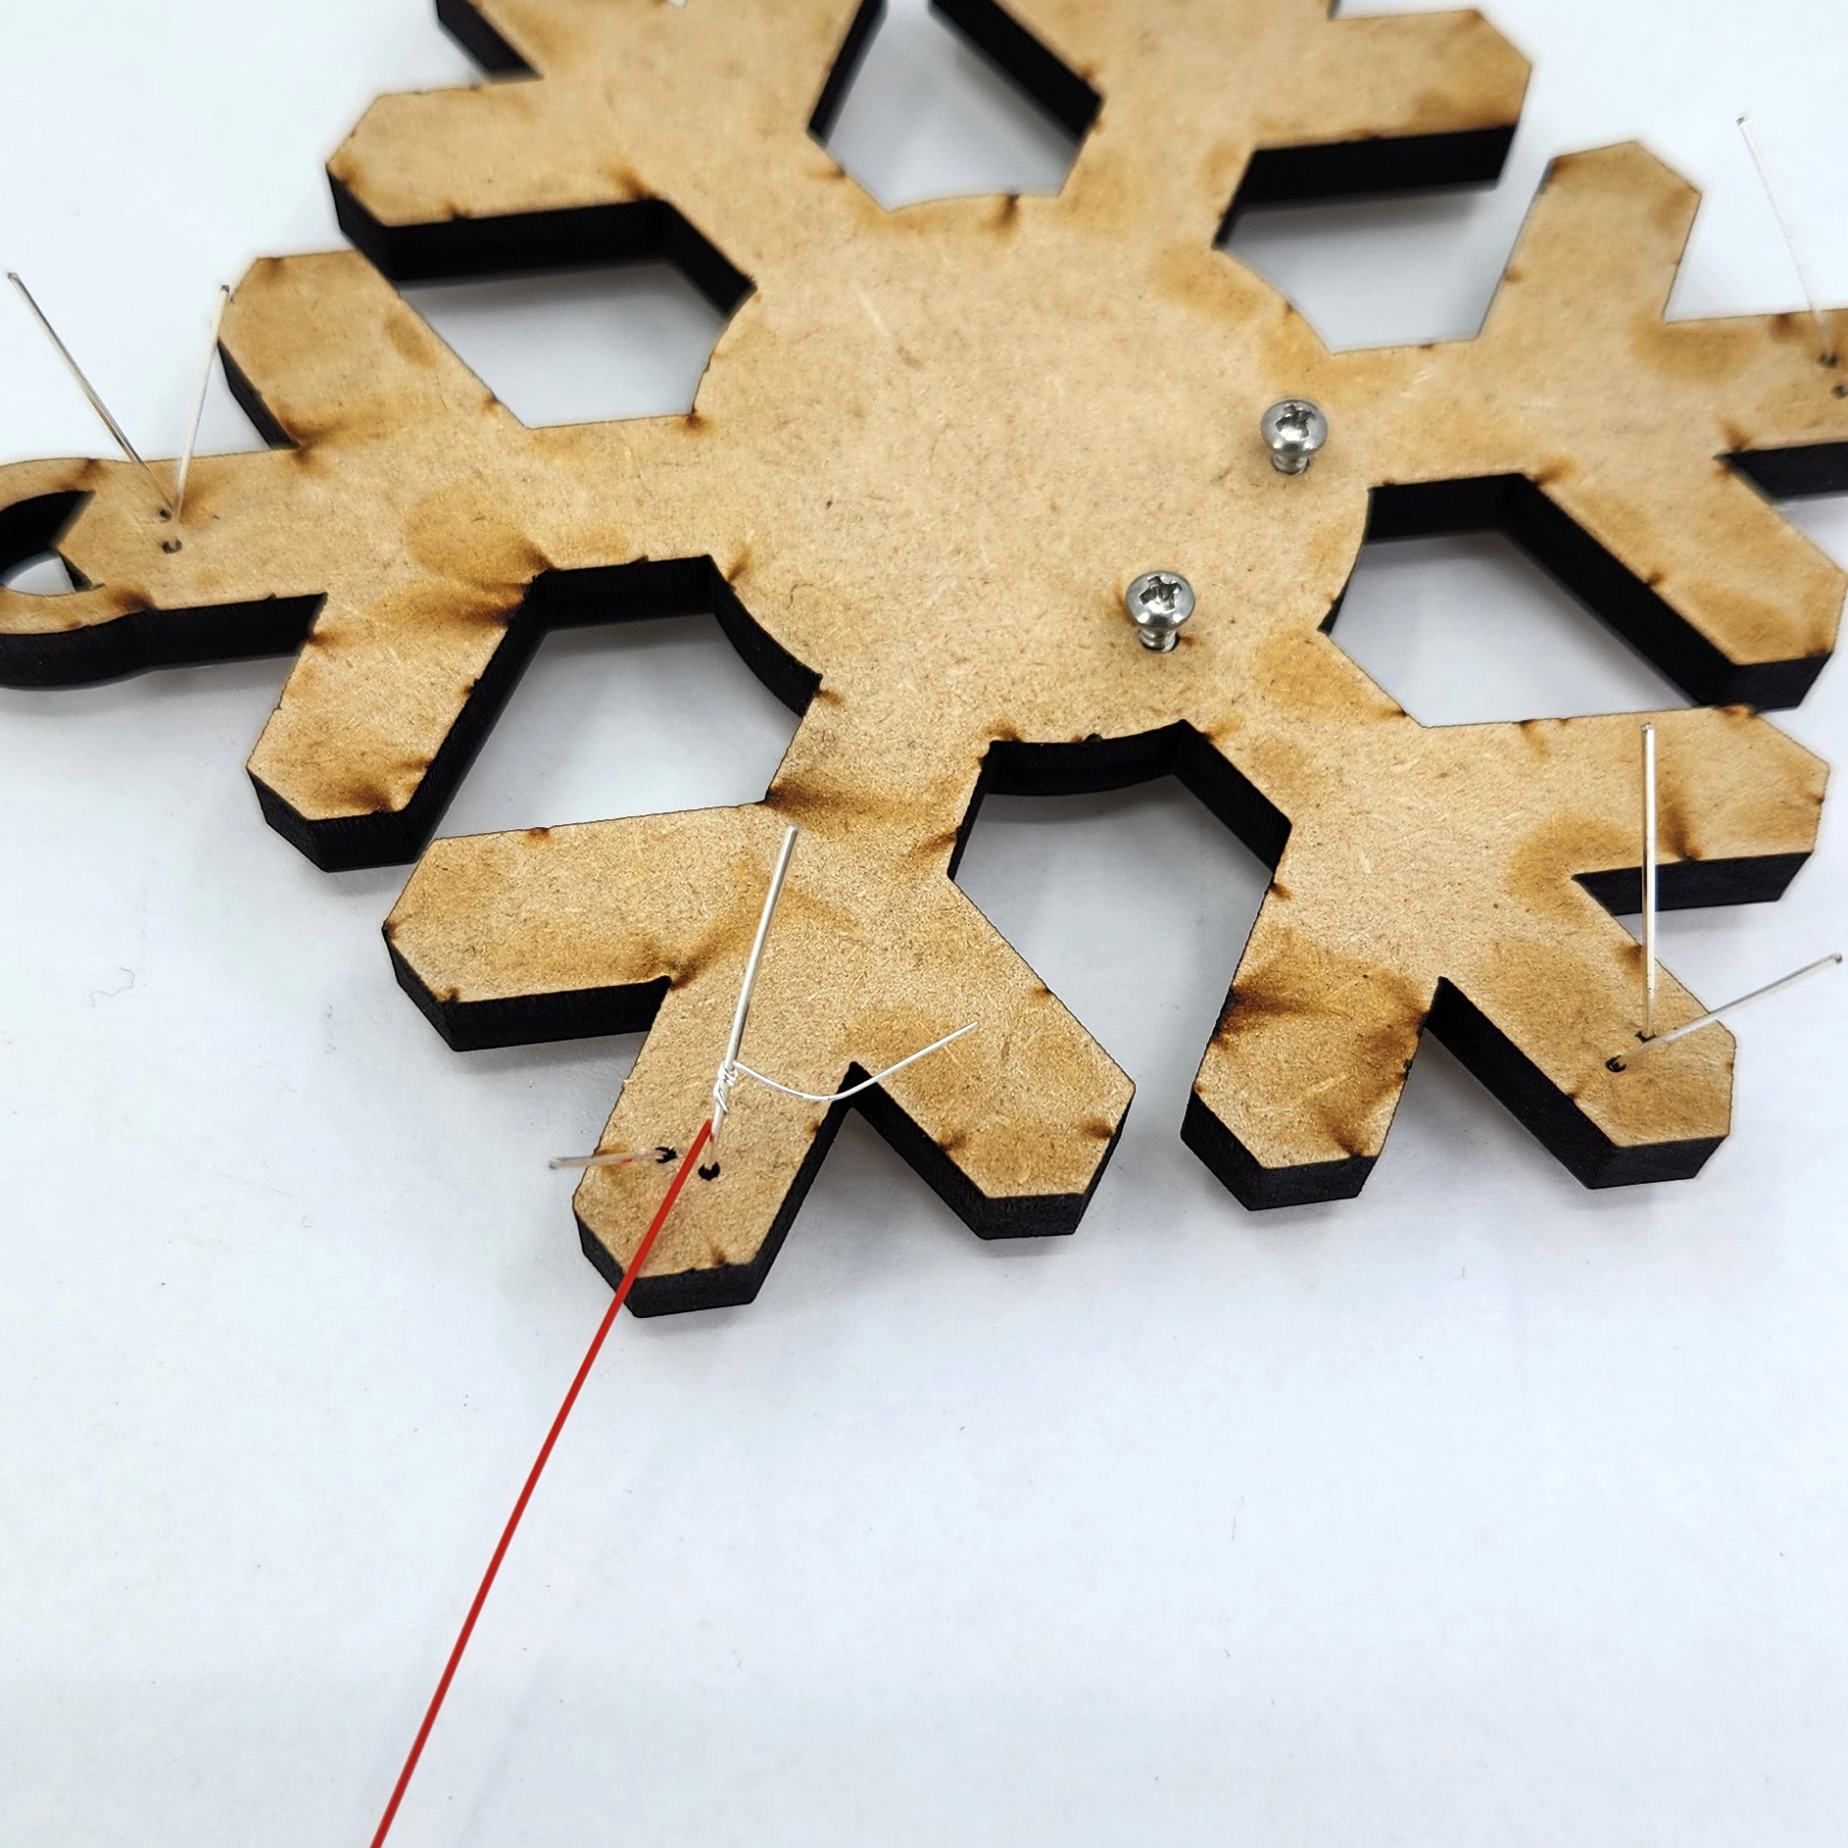
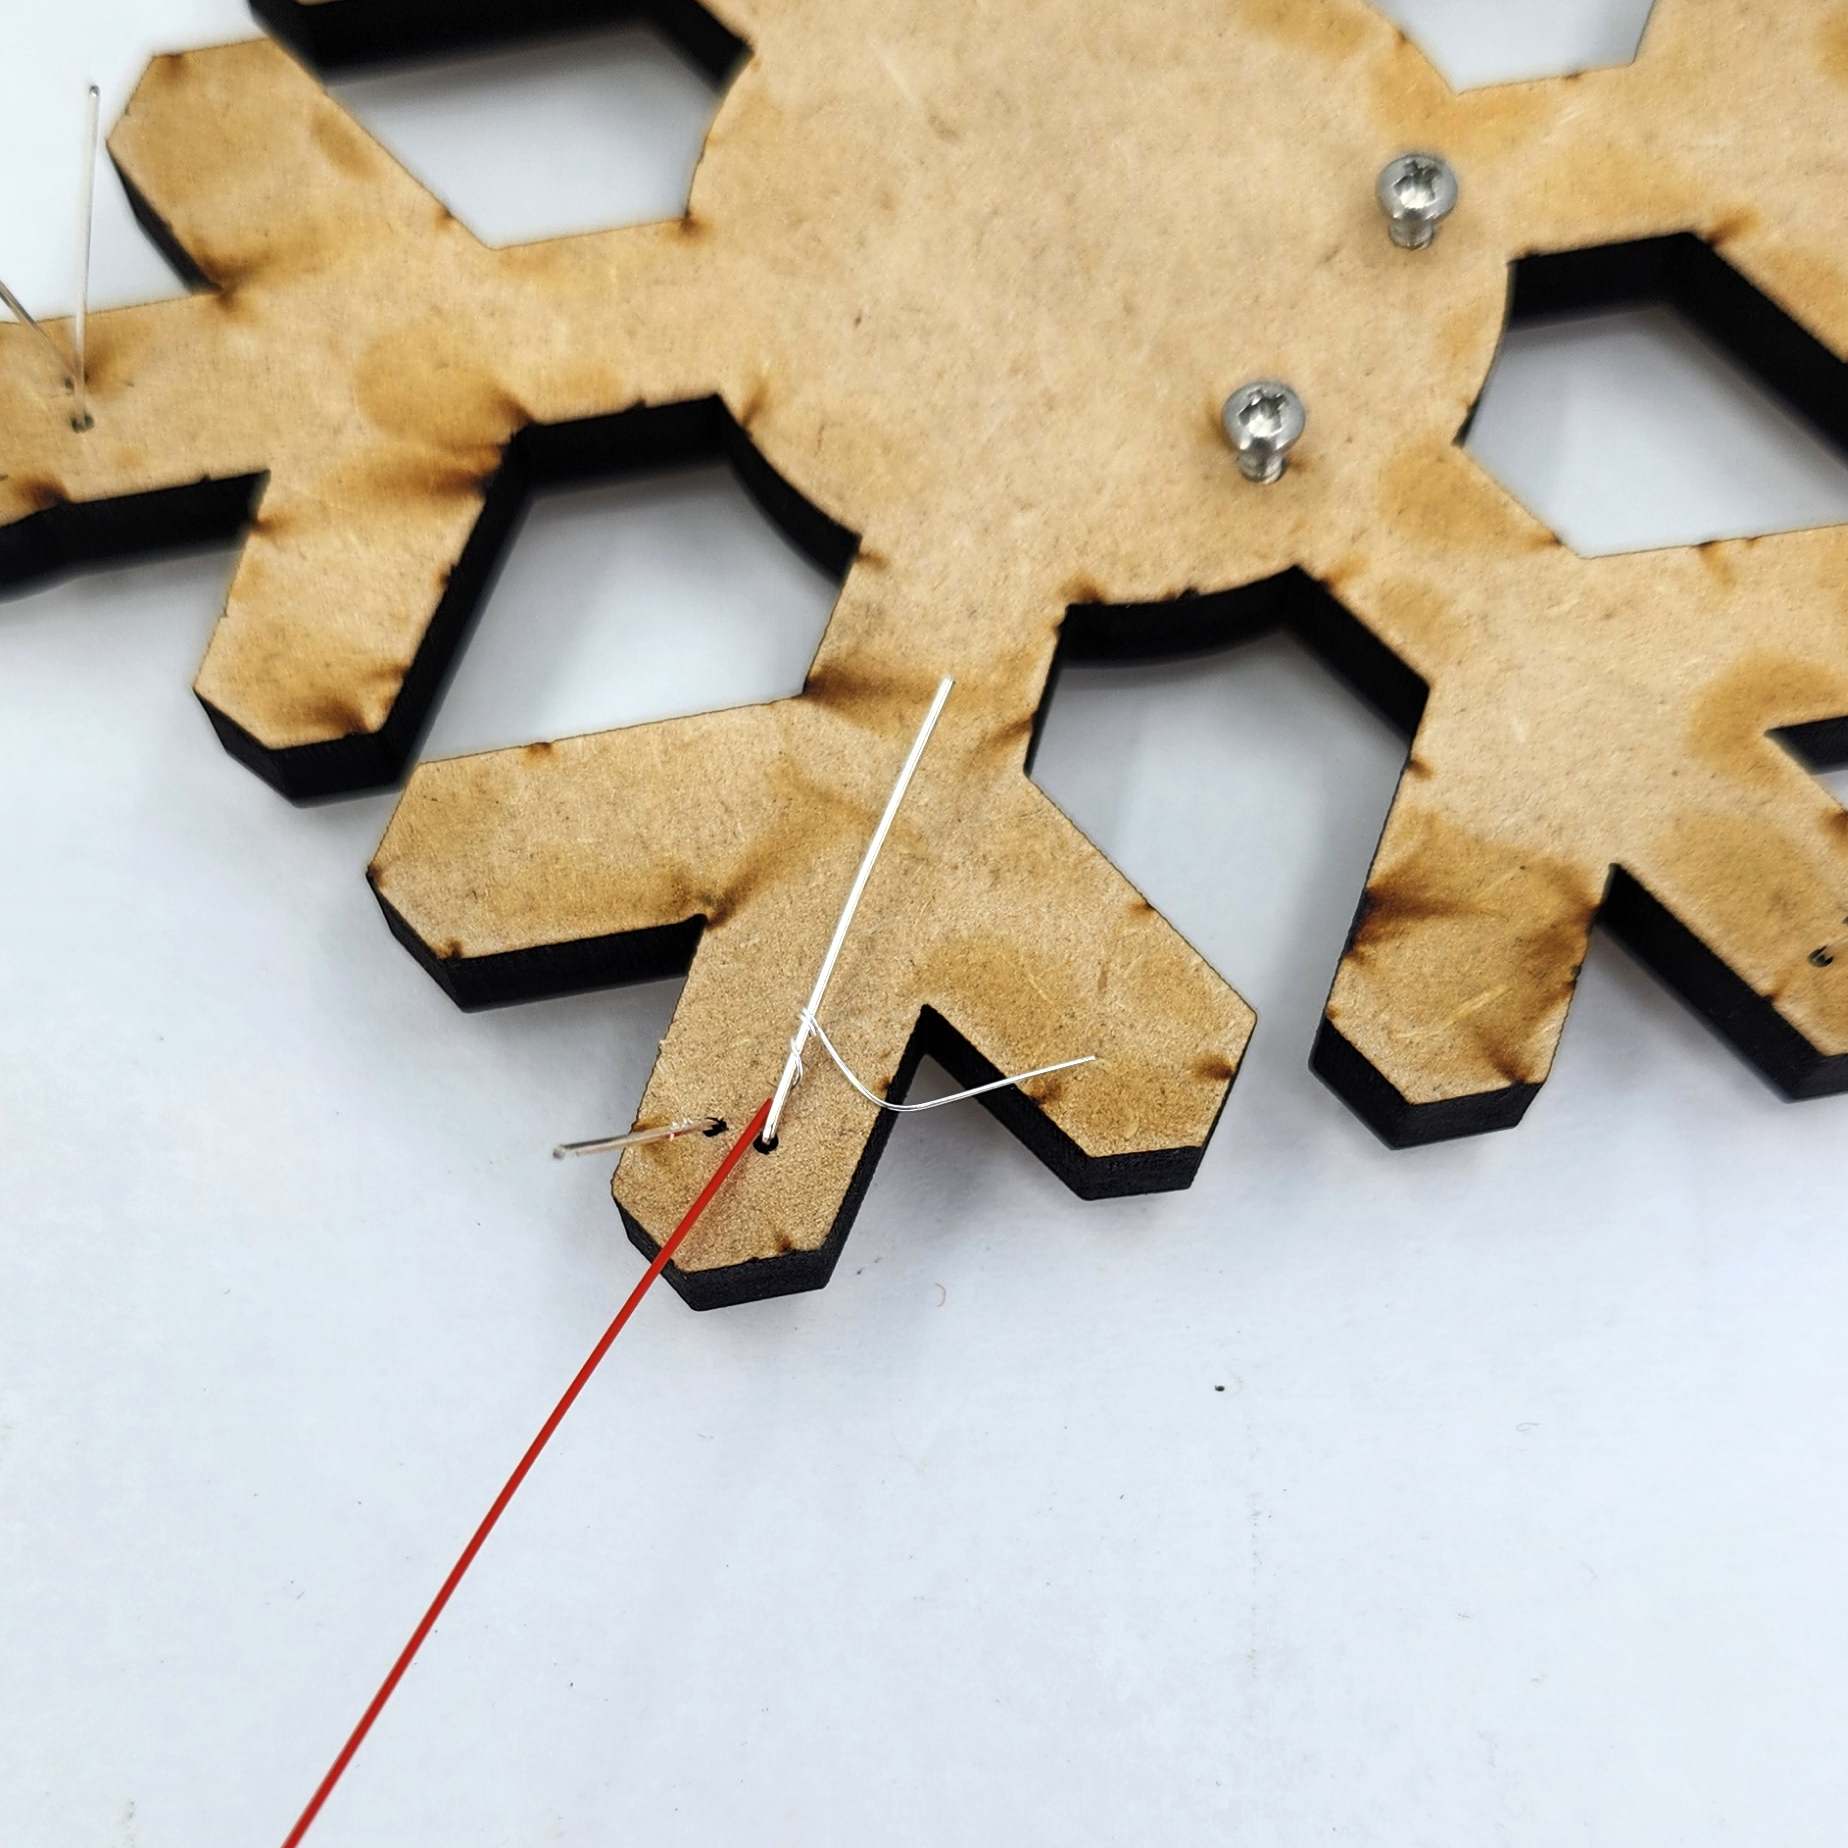
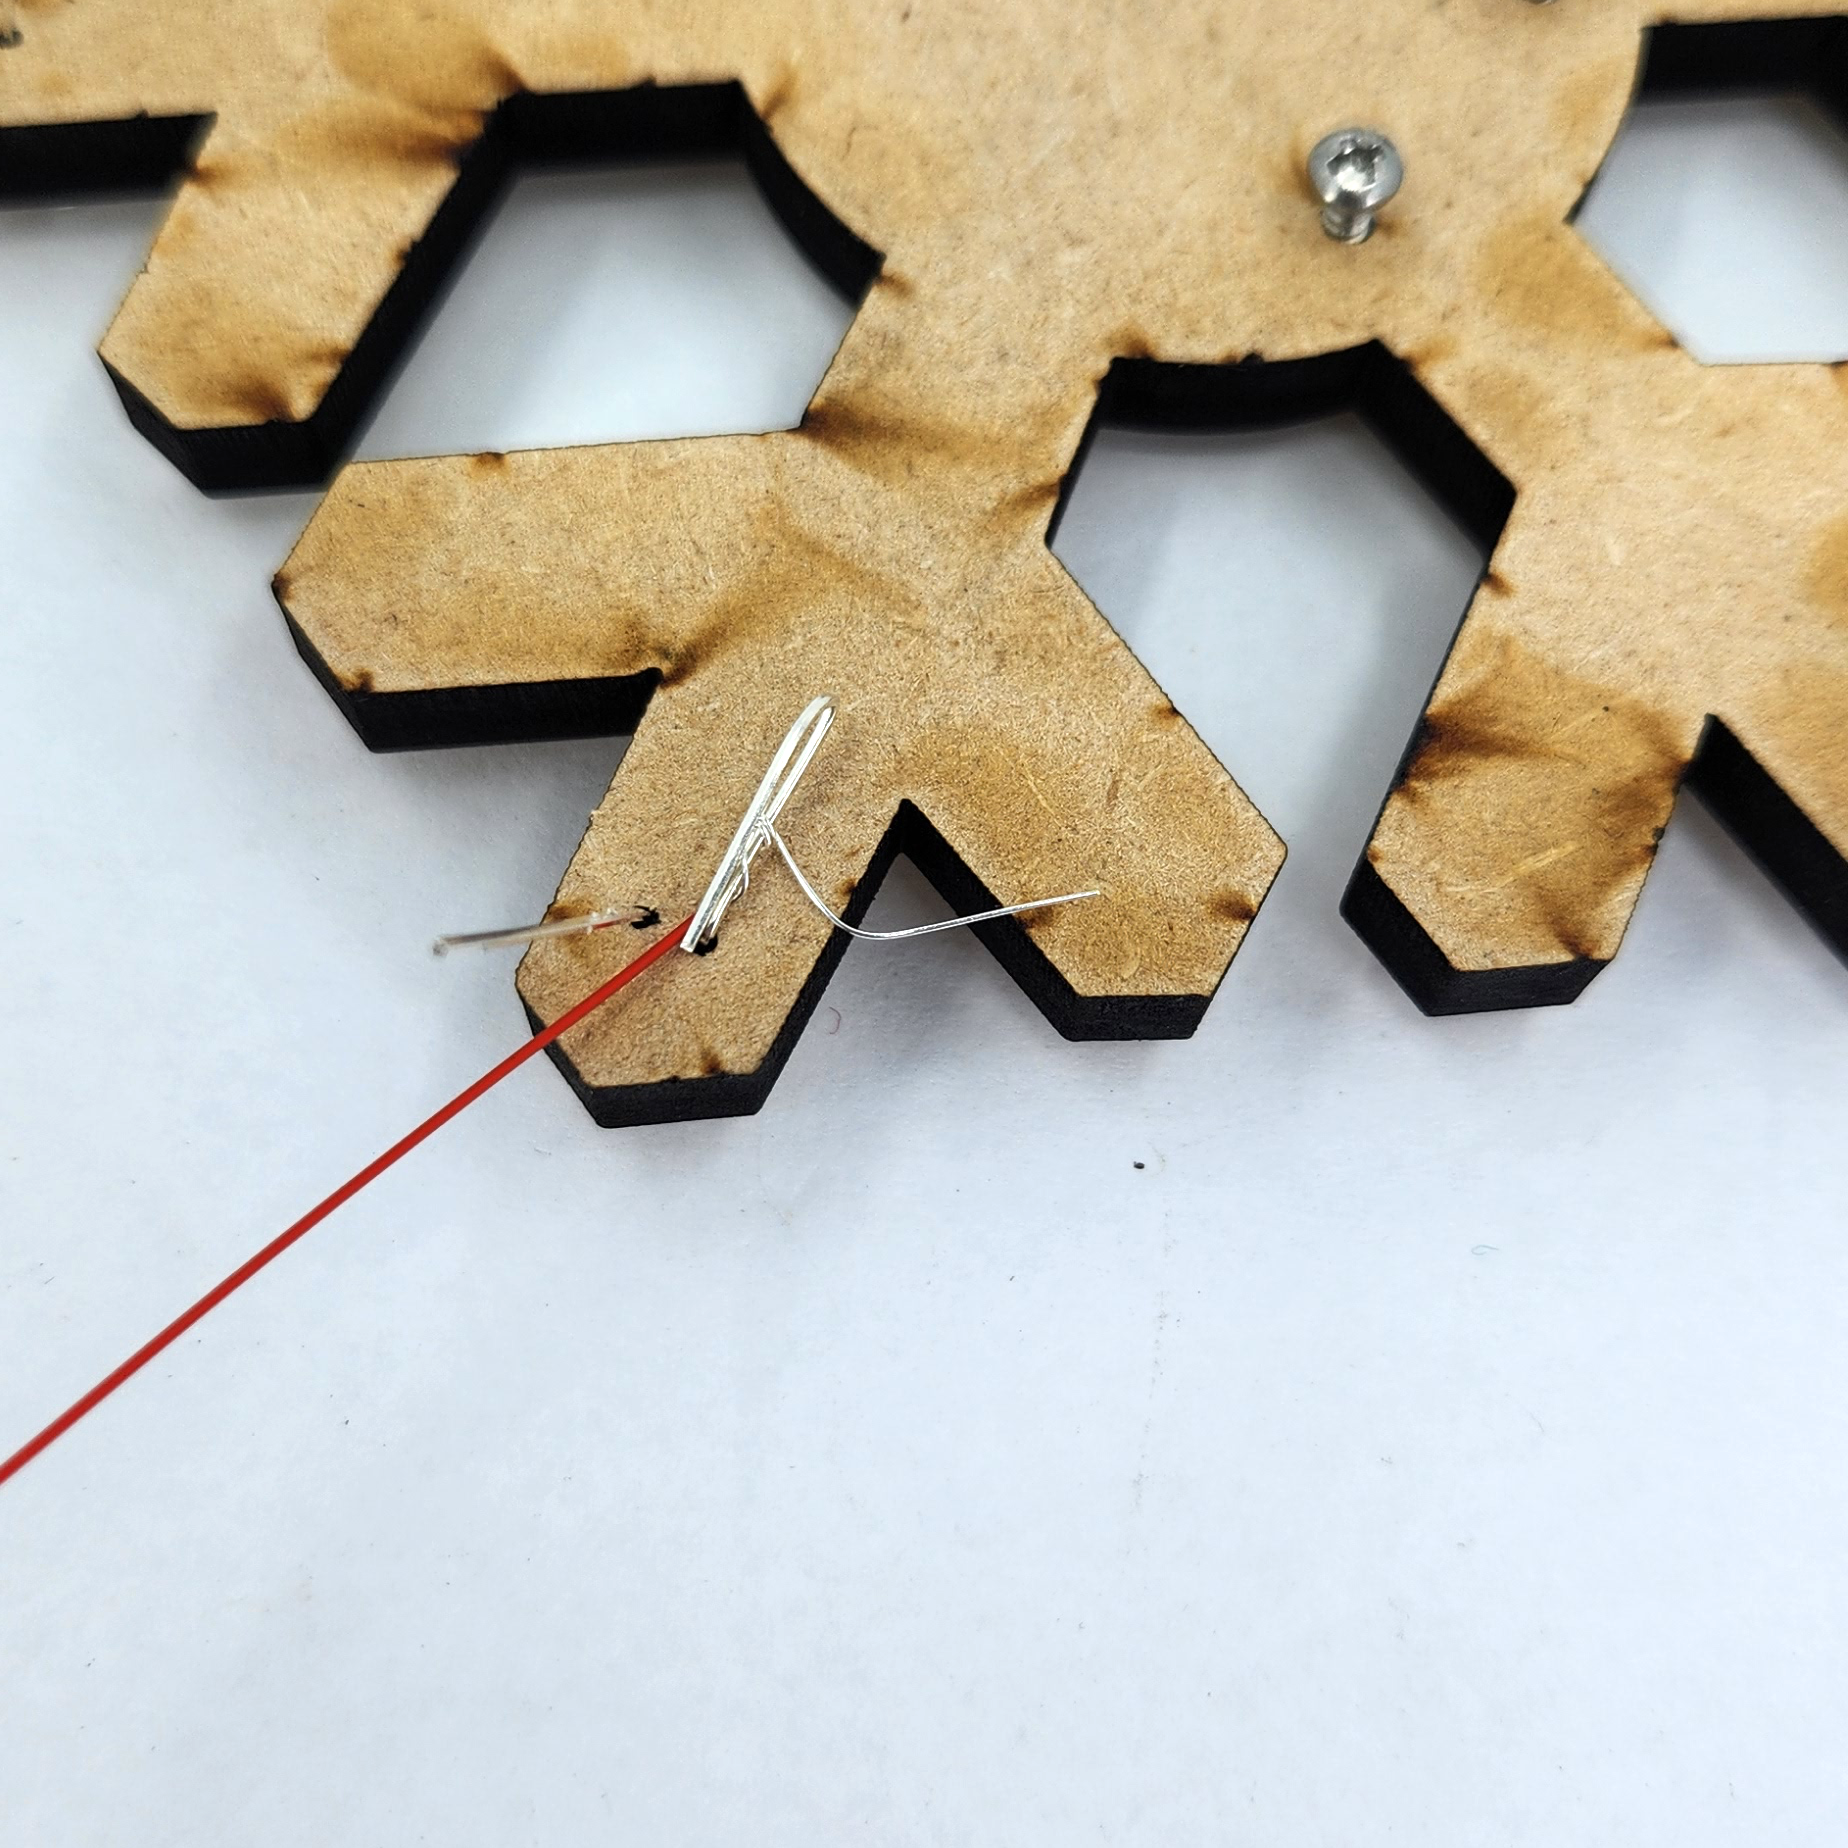
4Wrap wire around LED legs
*Note: Do one color completely (Steps 4 & 5) before moving on to the other color (do all positives then all negatives)
You want to have the insulation as close the the LED as possible to avoid possible shorts. Wrap the wire around the leg 3 or more times then bend the leg flat. After the leg is flat bend it back towards itself at the halfway point. (Optional step is to cut off excess wire with wire cutters) Make sure you wrap all the positive legs with red wire and all negative legs with blue wire.
![]()
![]()
![]()
![]()
-
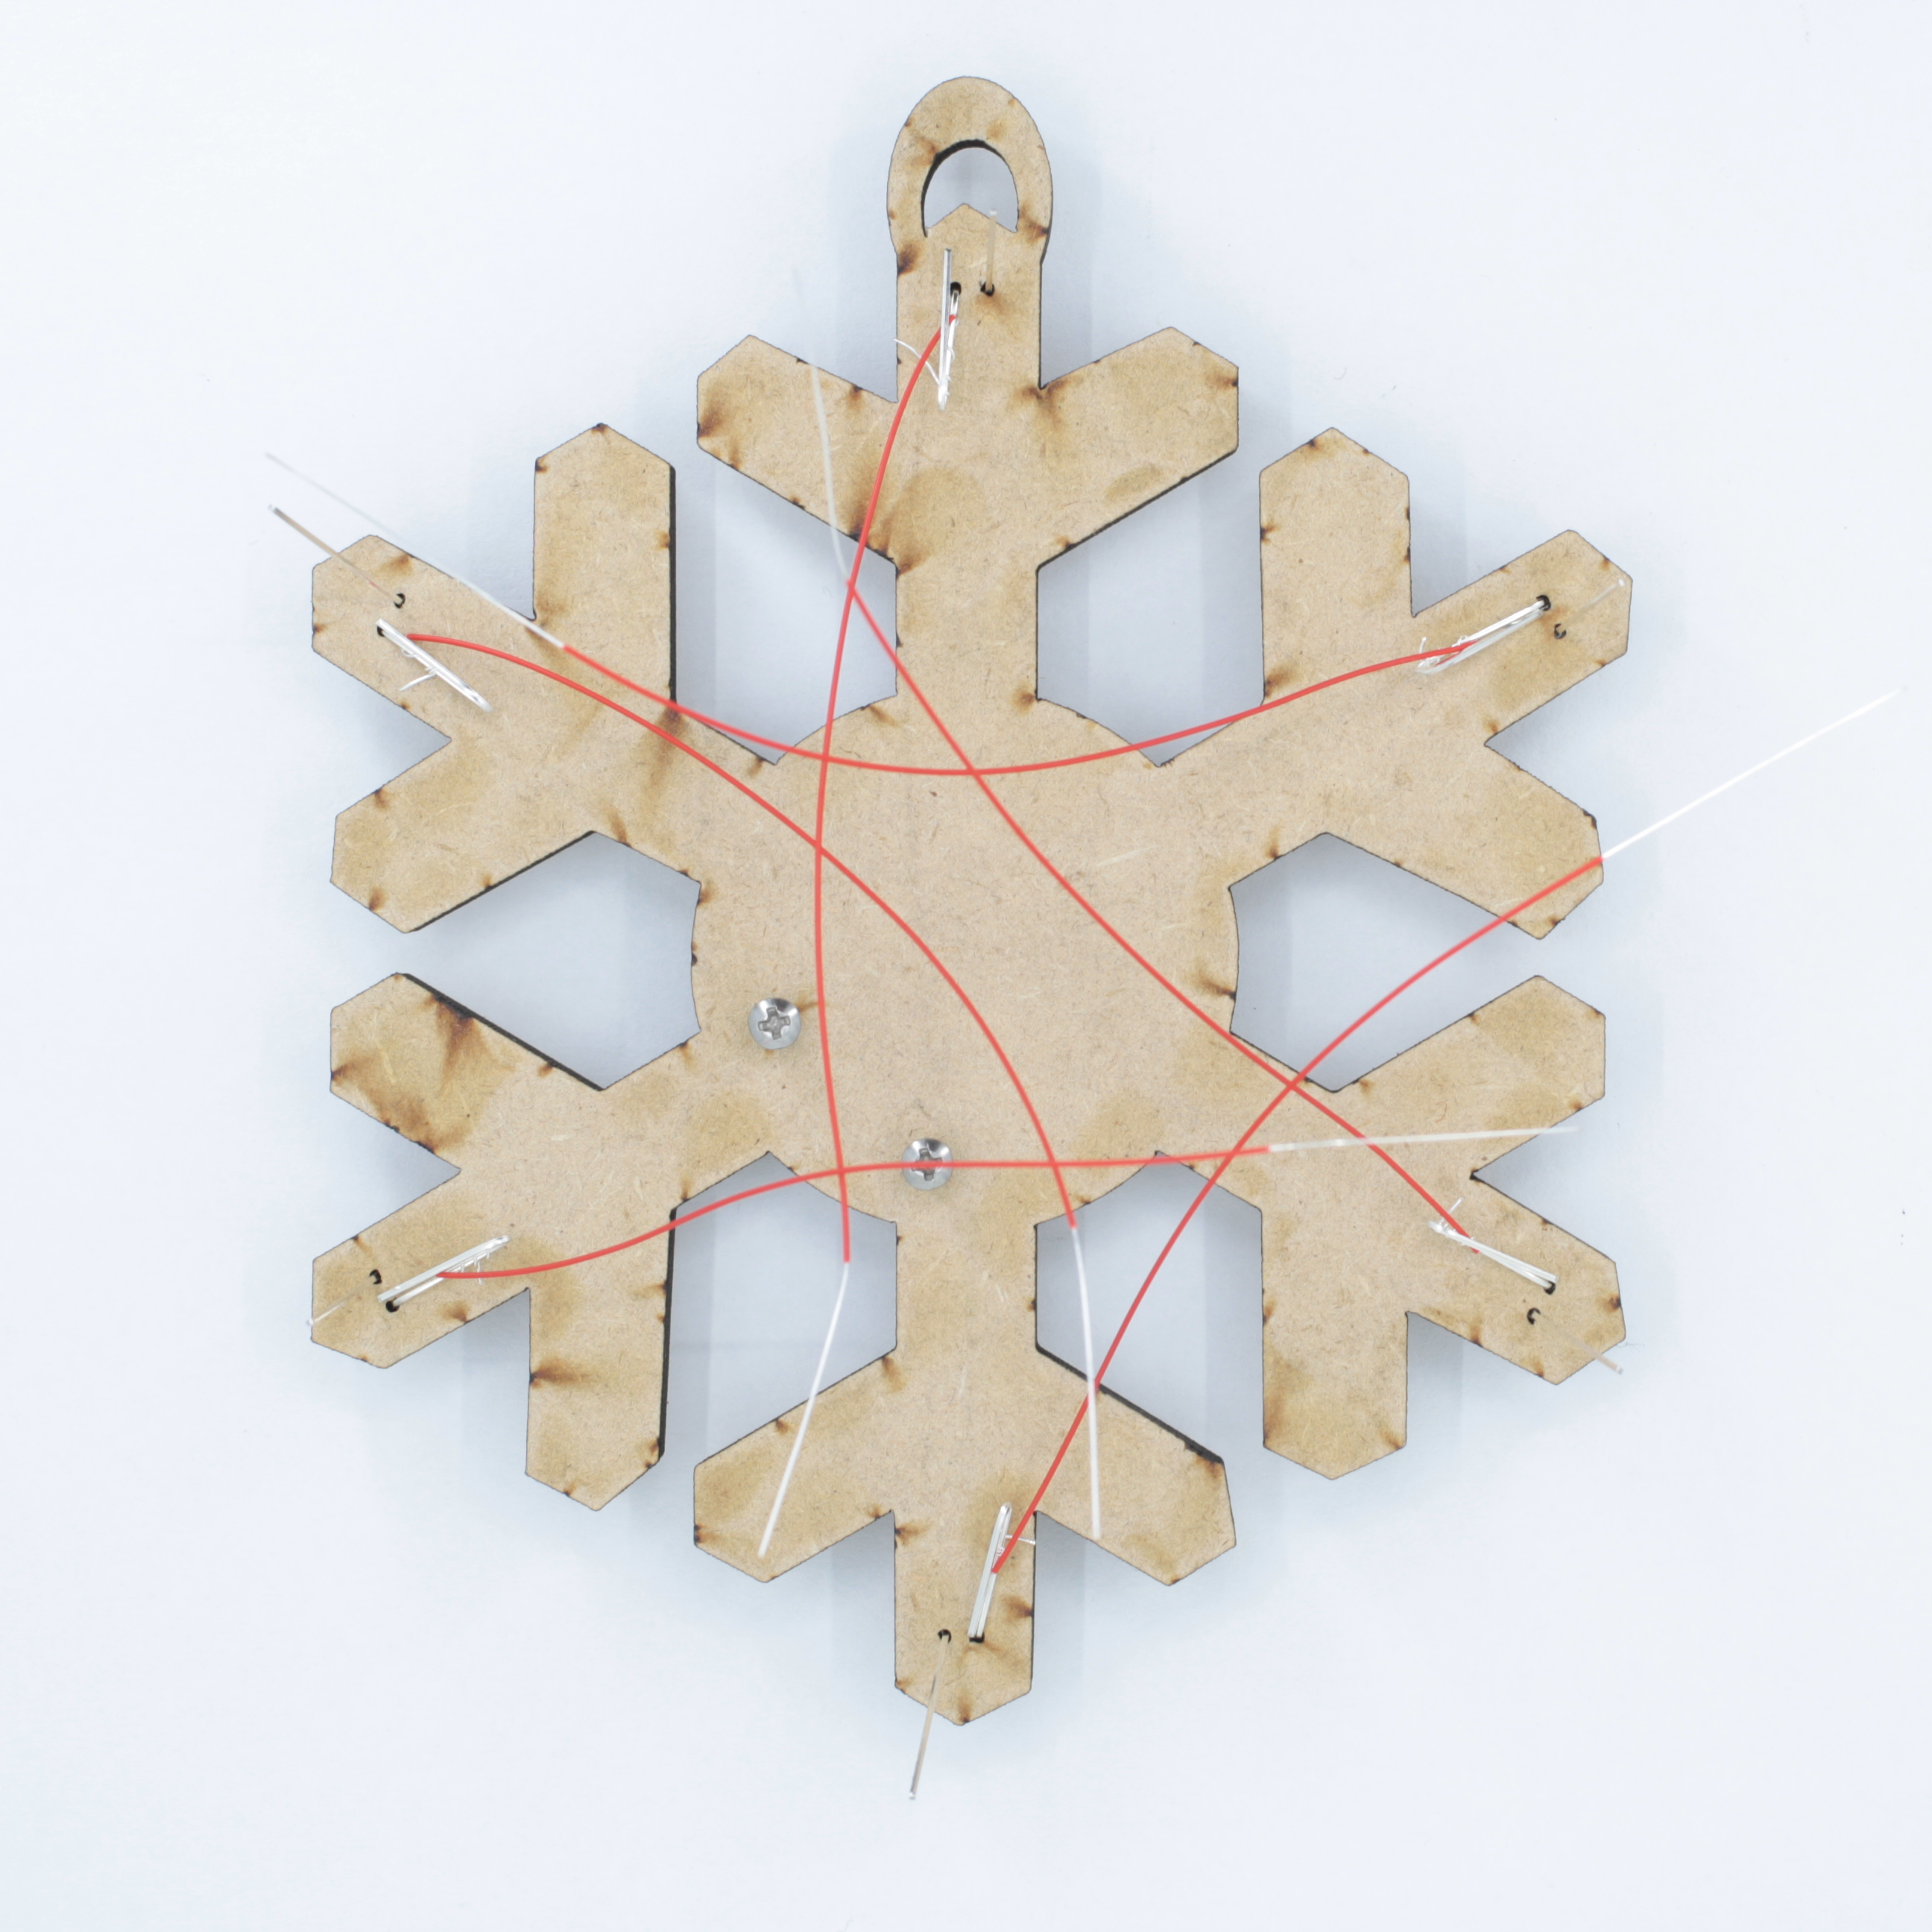
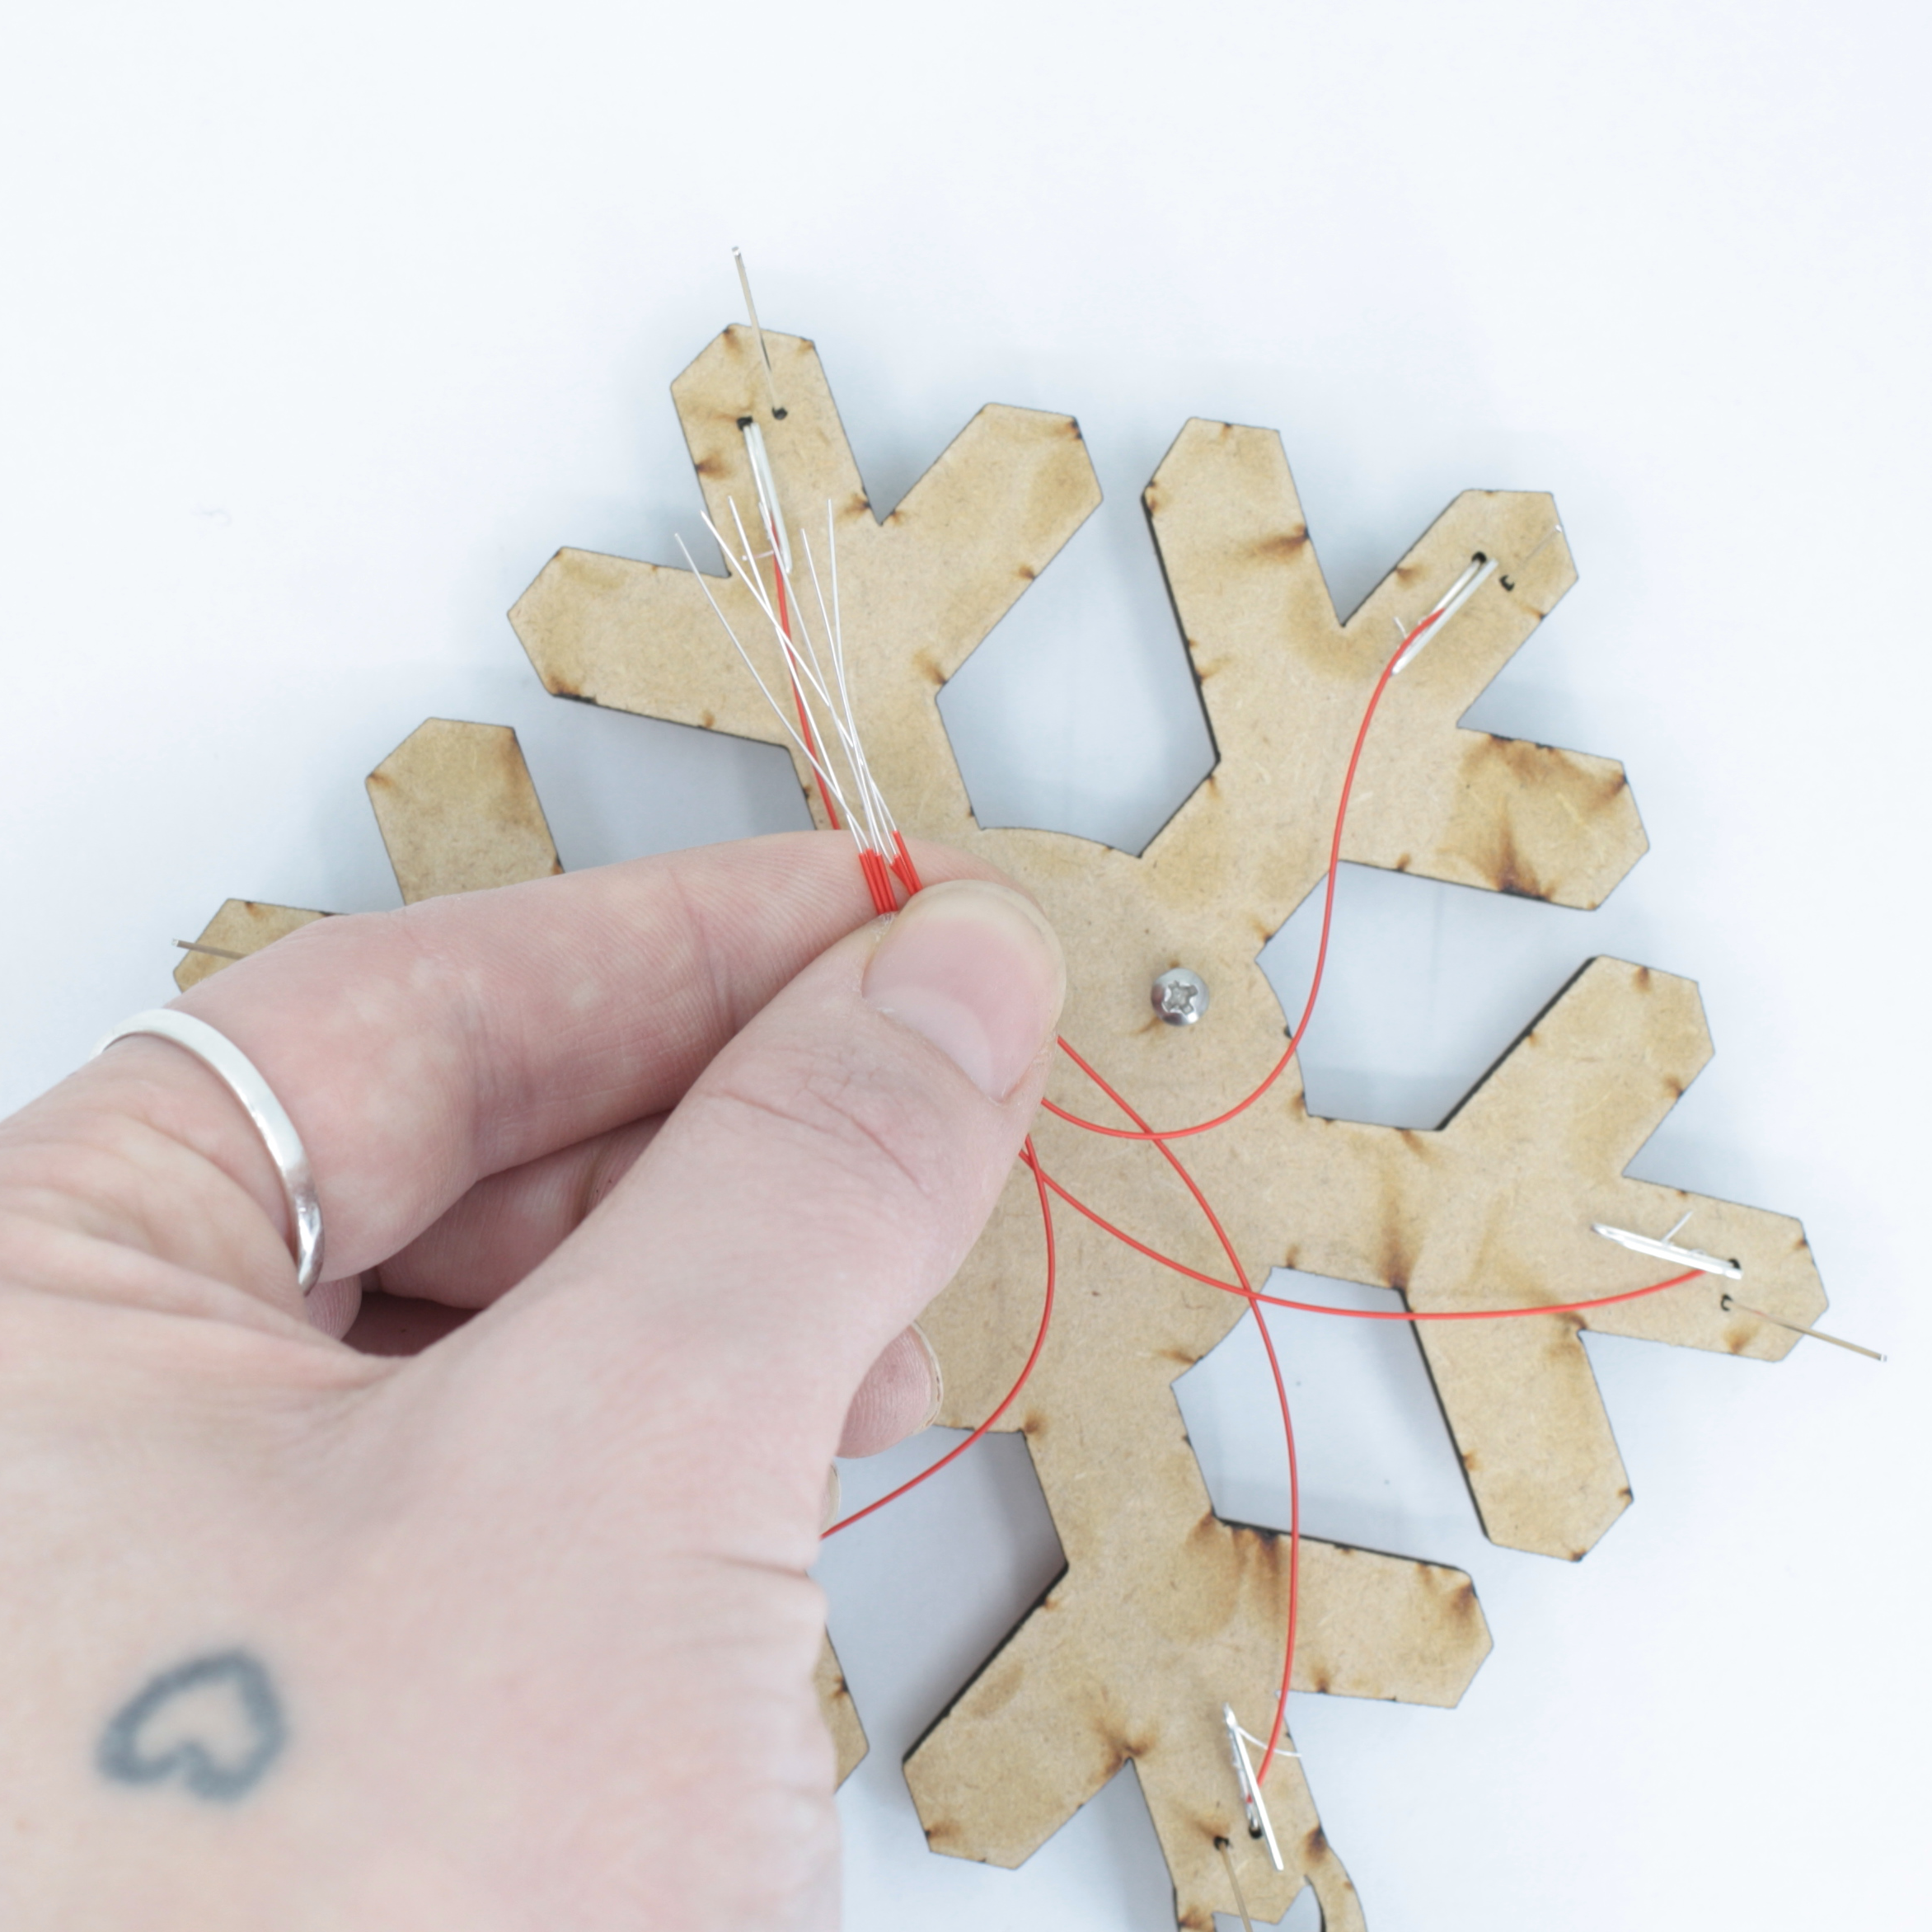
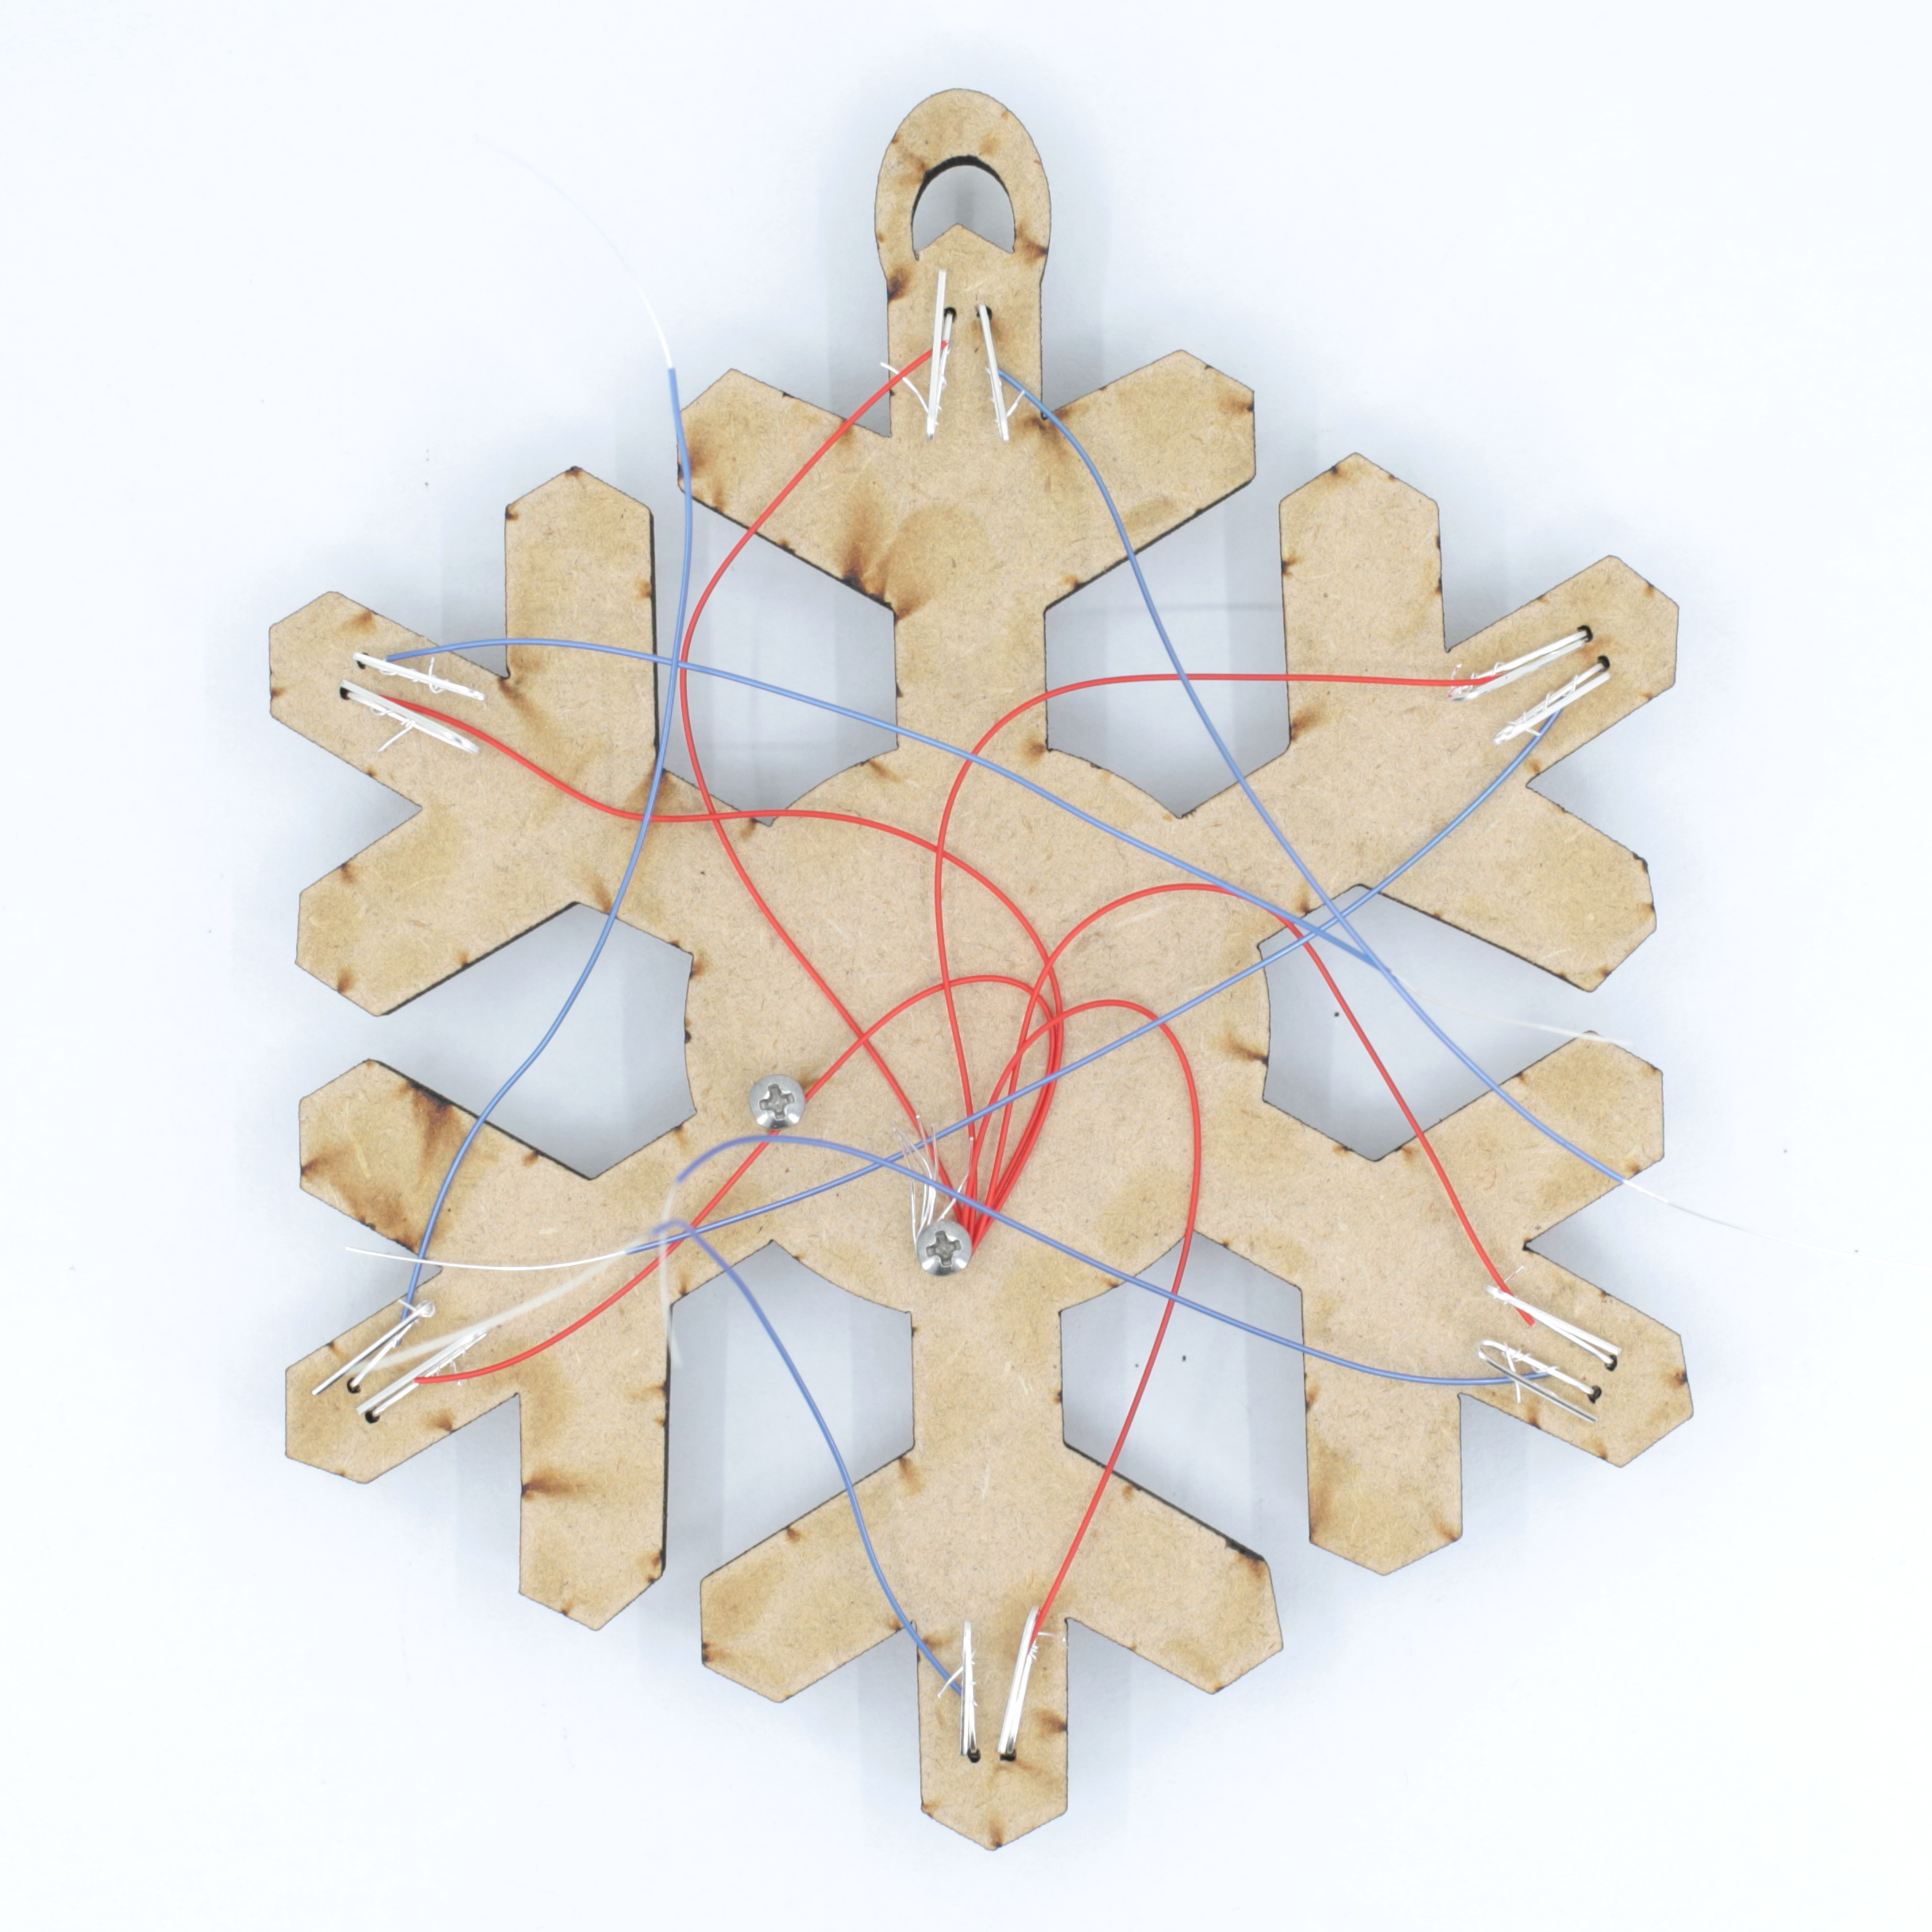
5Wrap Wires Around Screw
Once all of your LEDs are wrapped with one color of wire, gather them all up in your hand. Line up the insulation so each wire is the same. Give the wires a twist then wrap them all around the screw 1-2 times. Go back and repeat steps 4 & 5 with the other color wire.
![]()
![]()
![]()
![]()
-
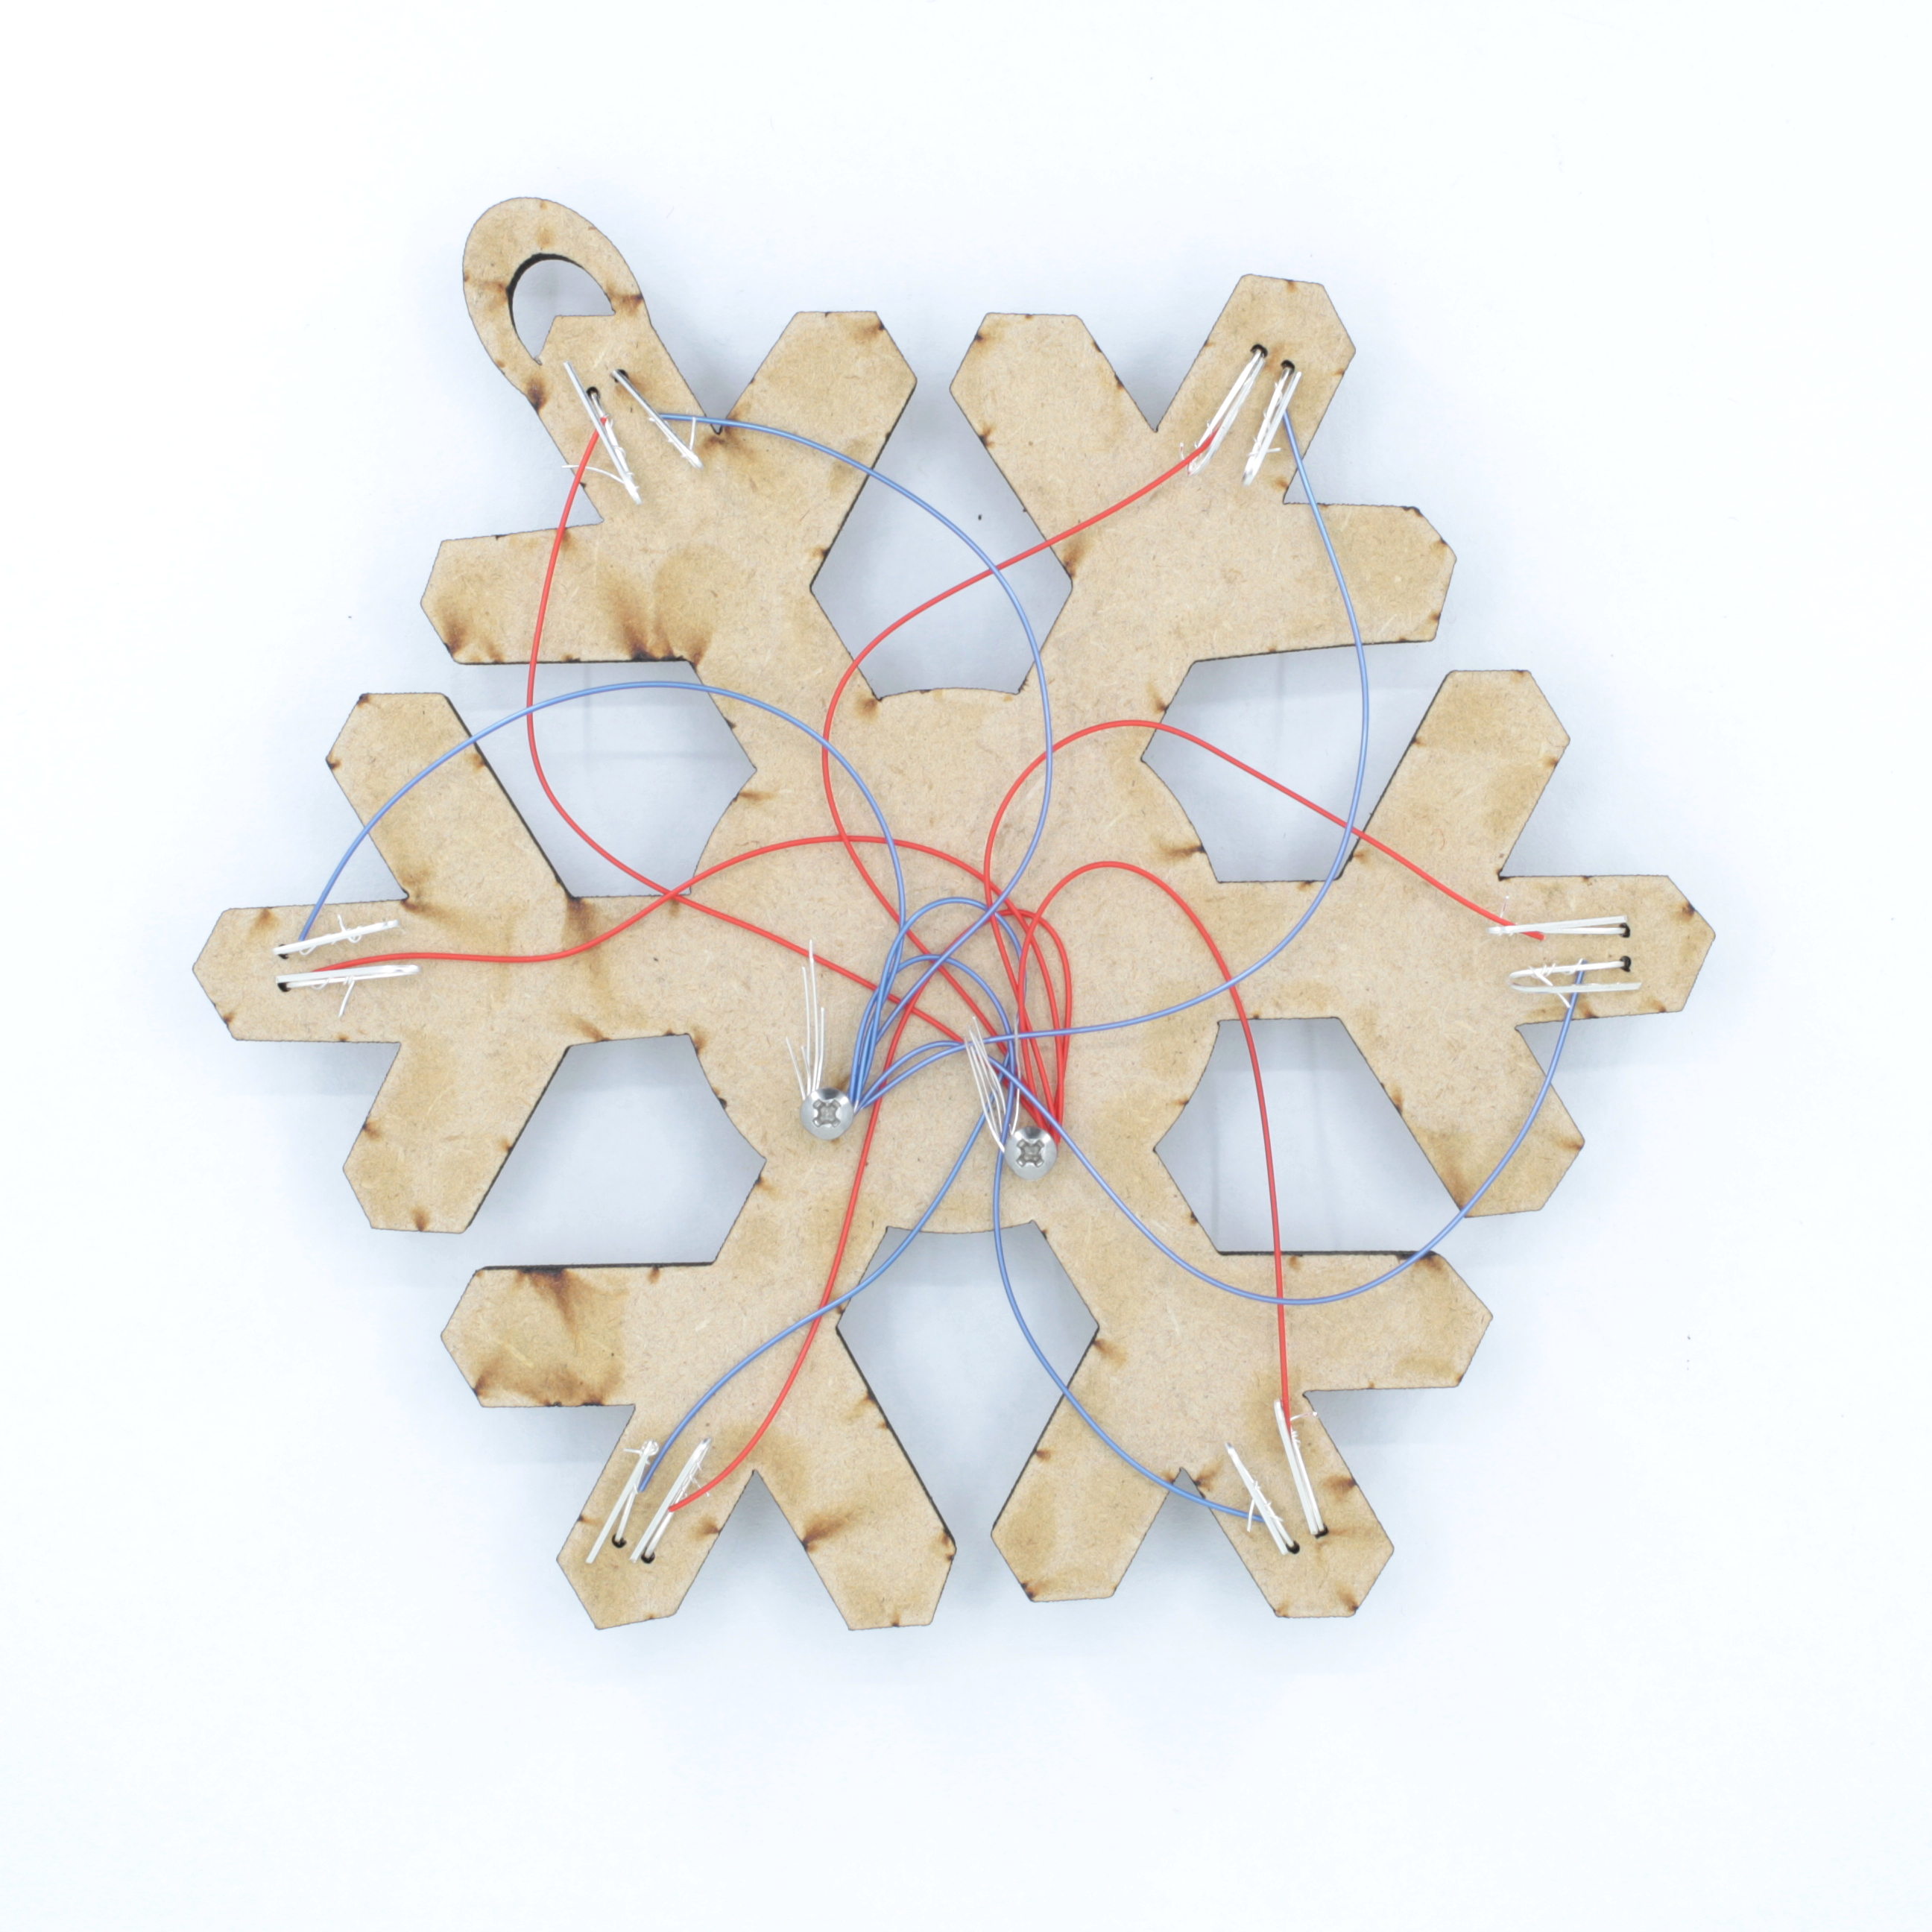
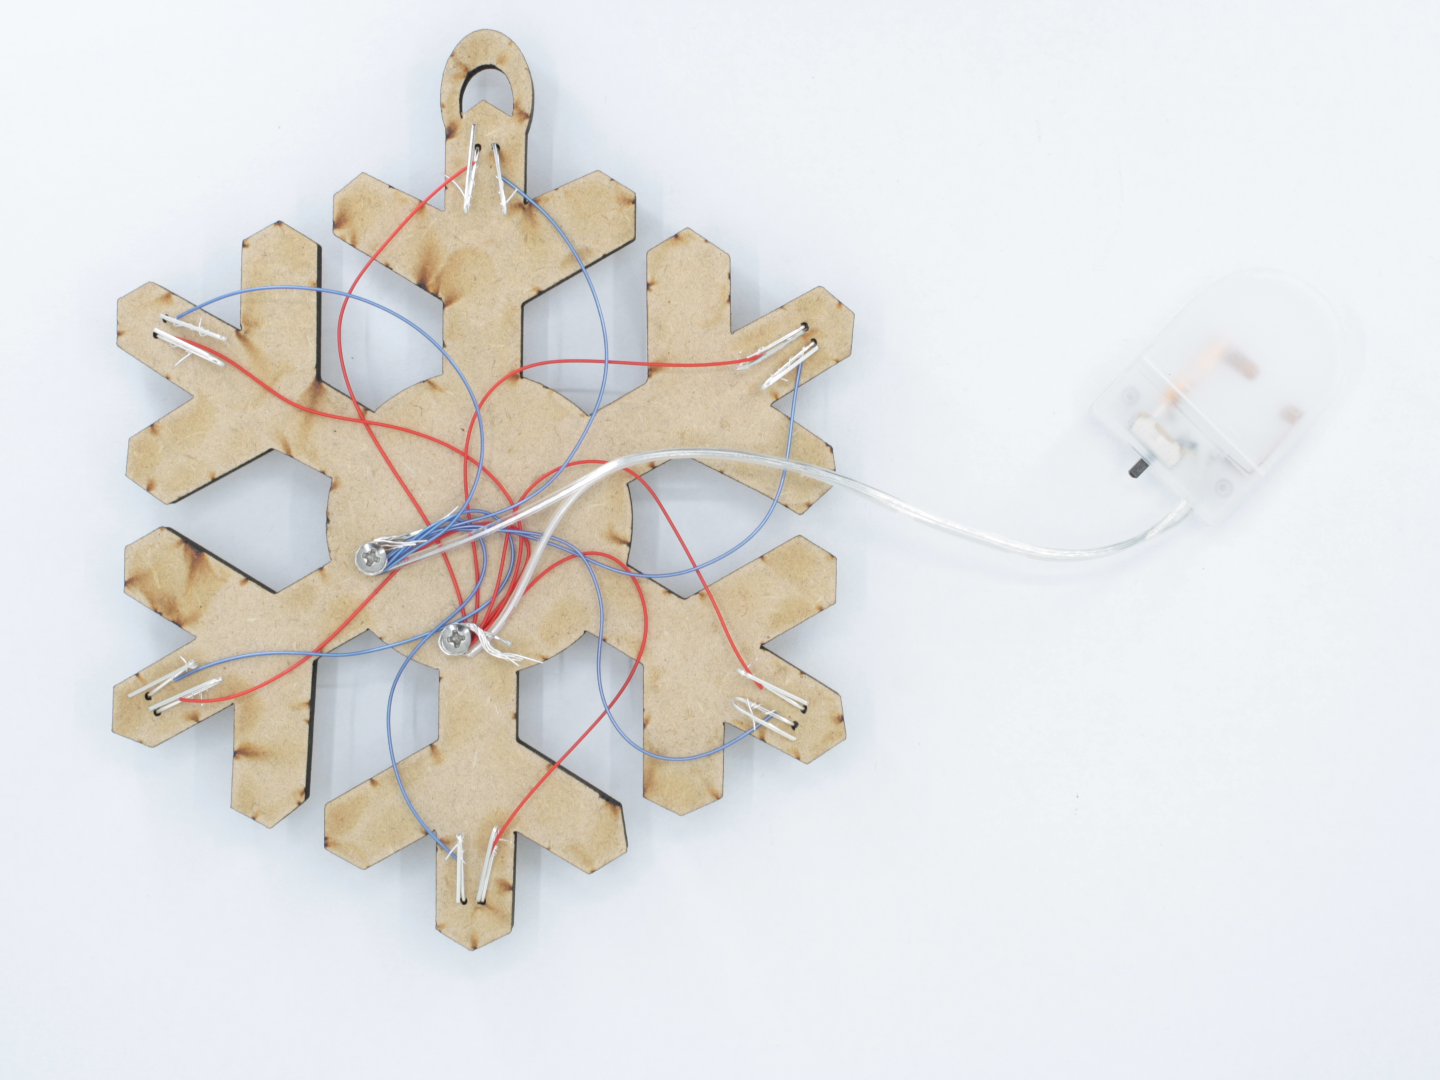
6Wrap Battery Holder Around Screws
Wrap the positive wire around the screw with red wire and the negative wire around the screw with the blue wires. Hold in place and screw down screw to secure wires (be sure not to over screw which will cause the wires to be pushed out from under the screw head.)
![]()
![]()
-
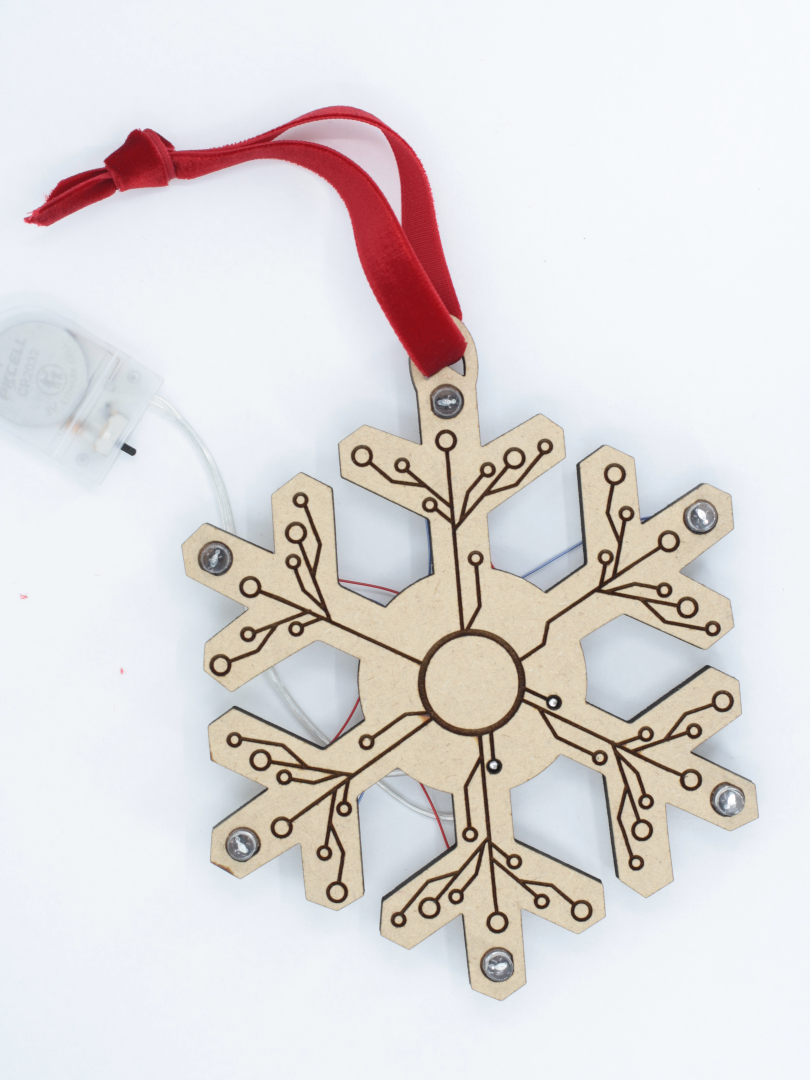
7Tie Ribbon to Top Loop
![]()
-
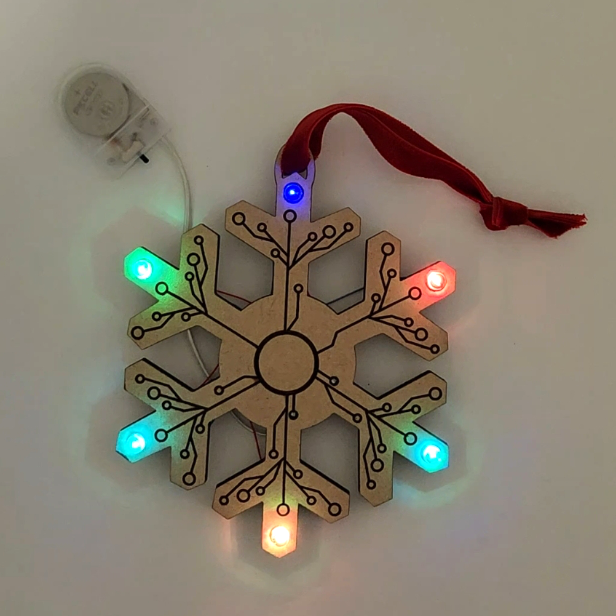
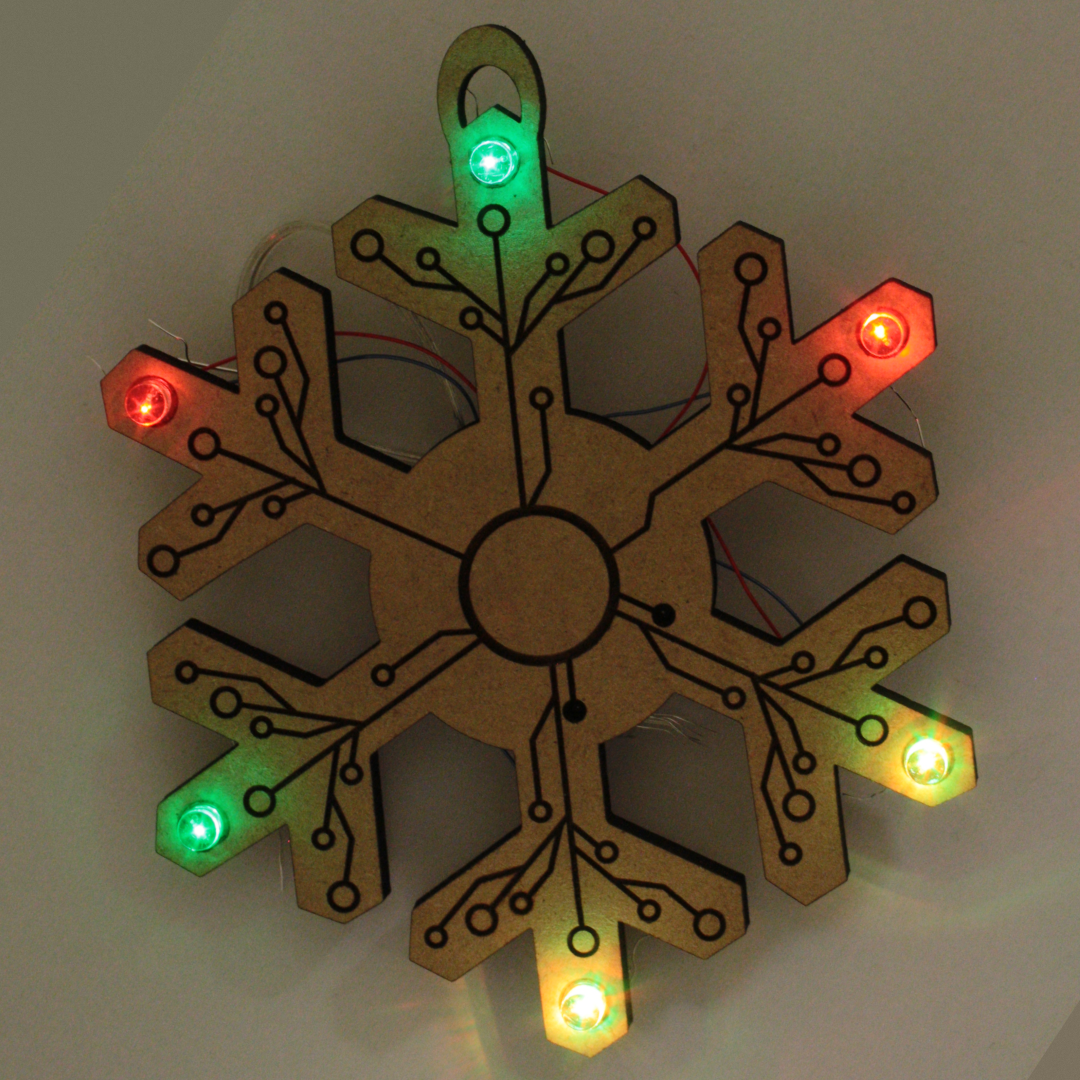
8Place Battery in Battery Holder and Turn On!
The battery sits in the battery holder and is held in place once the battery holder is closed.
![]()
![]()
![]()
Circuit Snowflake
Step-by-step instructions on how to put together the Winter Snowflake Kit.

Discussions
Become a Hackaday.io Member
Create an account to leave a comment. Already have an account? Log In.