To begin, I took several picture (29) of my rear hatch button with my smartphone (moto g7 play) with the "manual" settings and imported them in meshroom. I wasn't expecting much from such a featureless / glossy plastic but the results turned up to be really good.
2
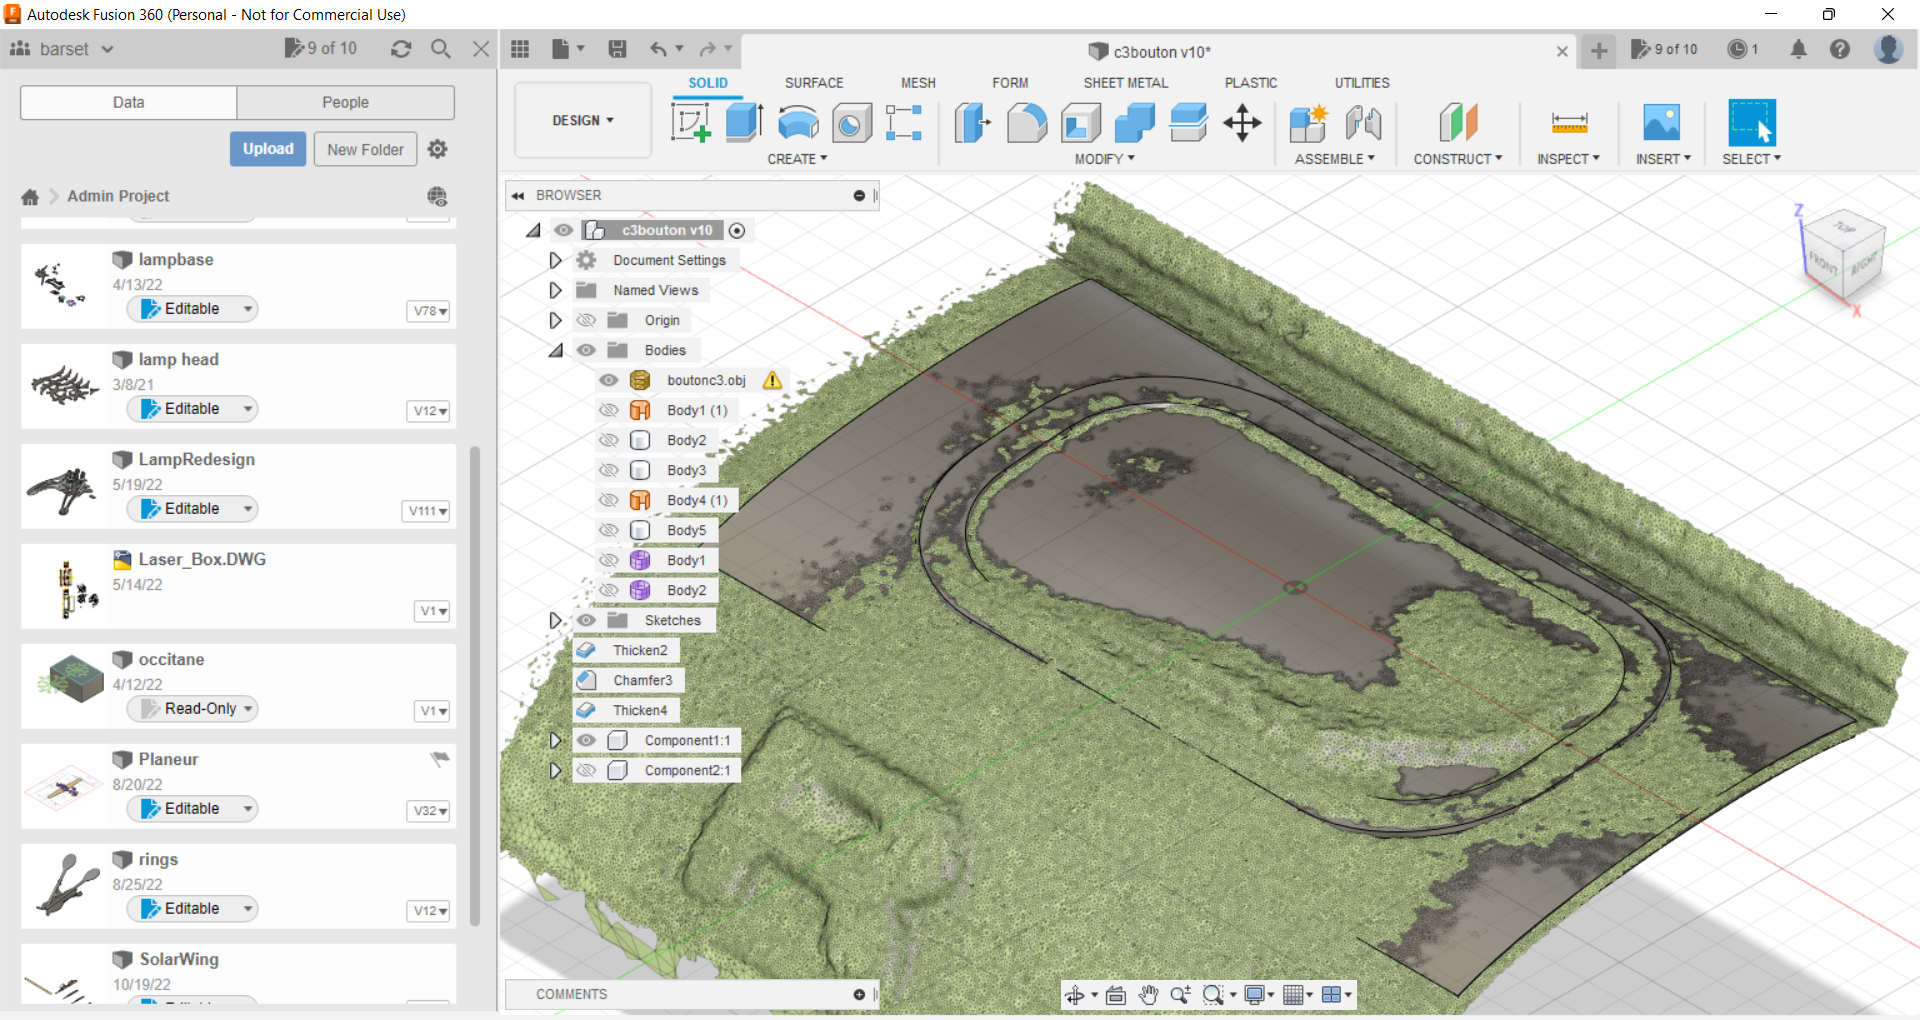
Modelling the button in fusion 360
After a bit of mesh cleanup/alignment in Blender, I imported it in fusion 360 and started surface modelling . I tried to match the surface of the mesh as much as i could
3
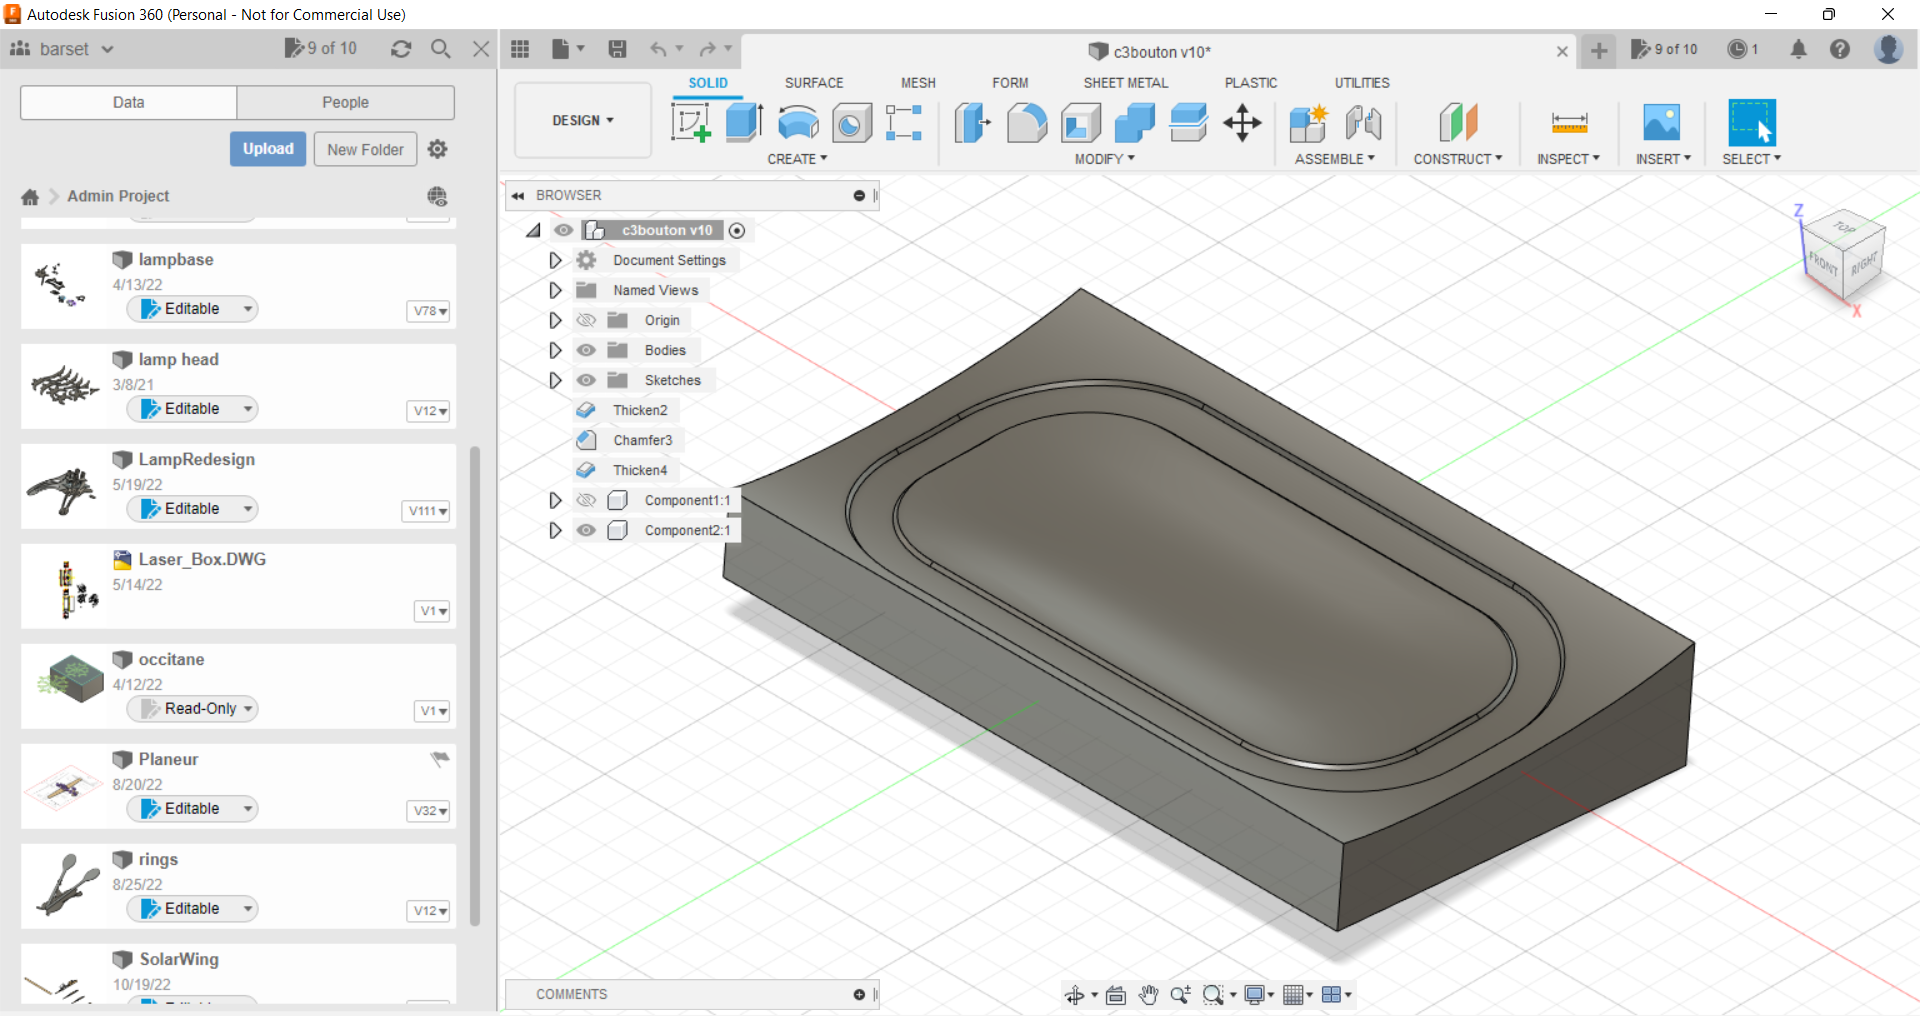
Creating the mold
I did a boolean operation to create the negative shape of the mould
4
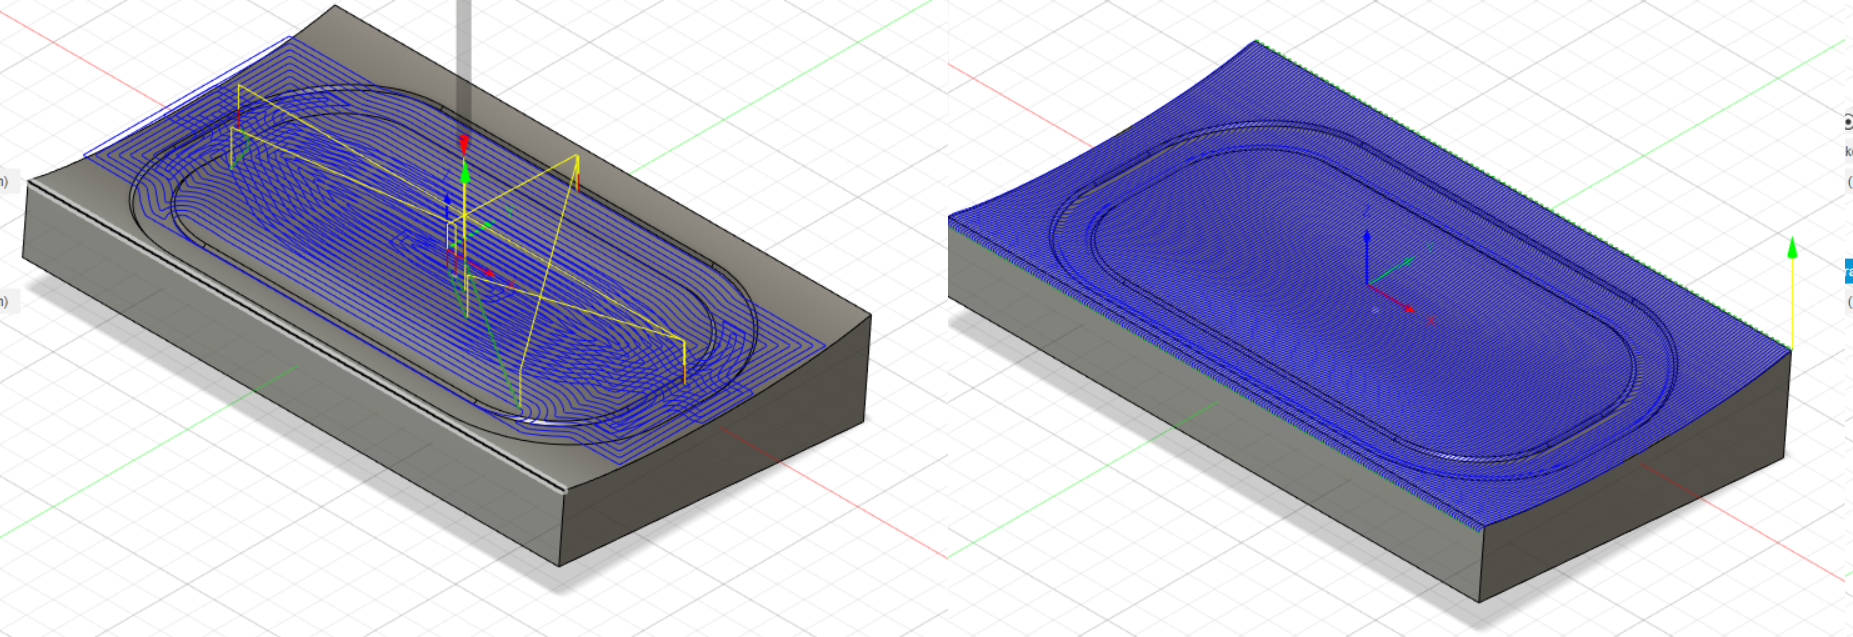
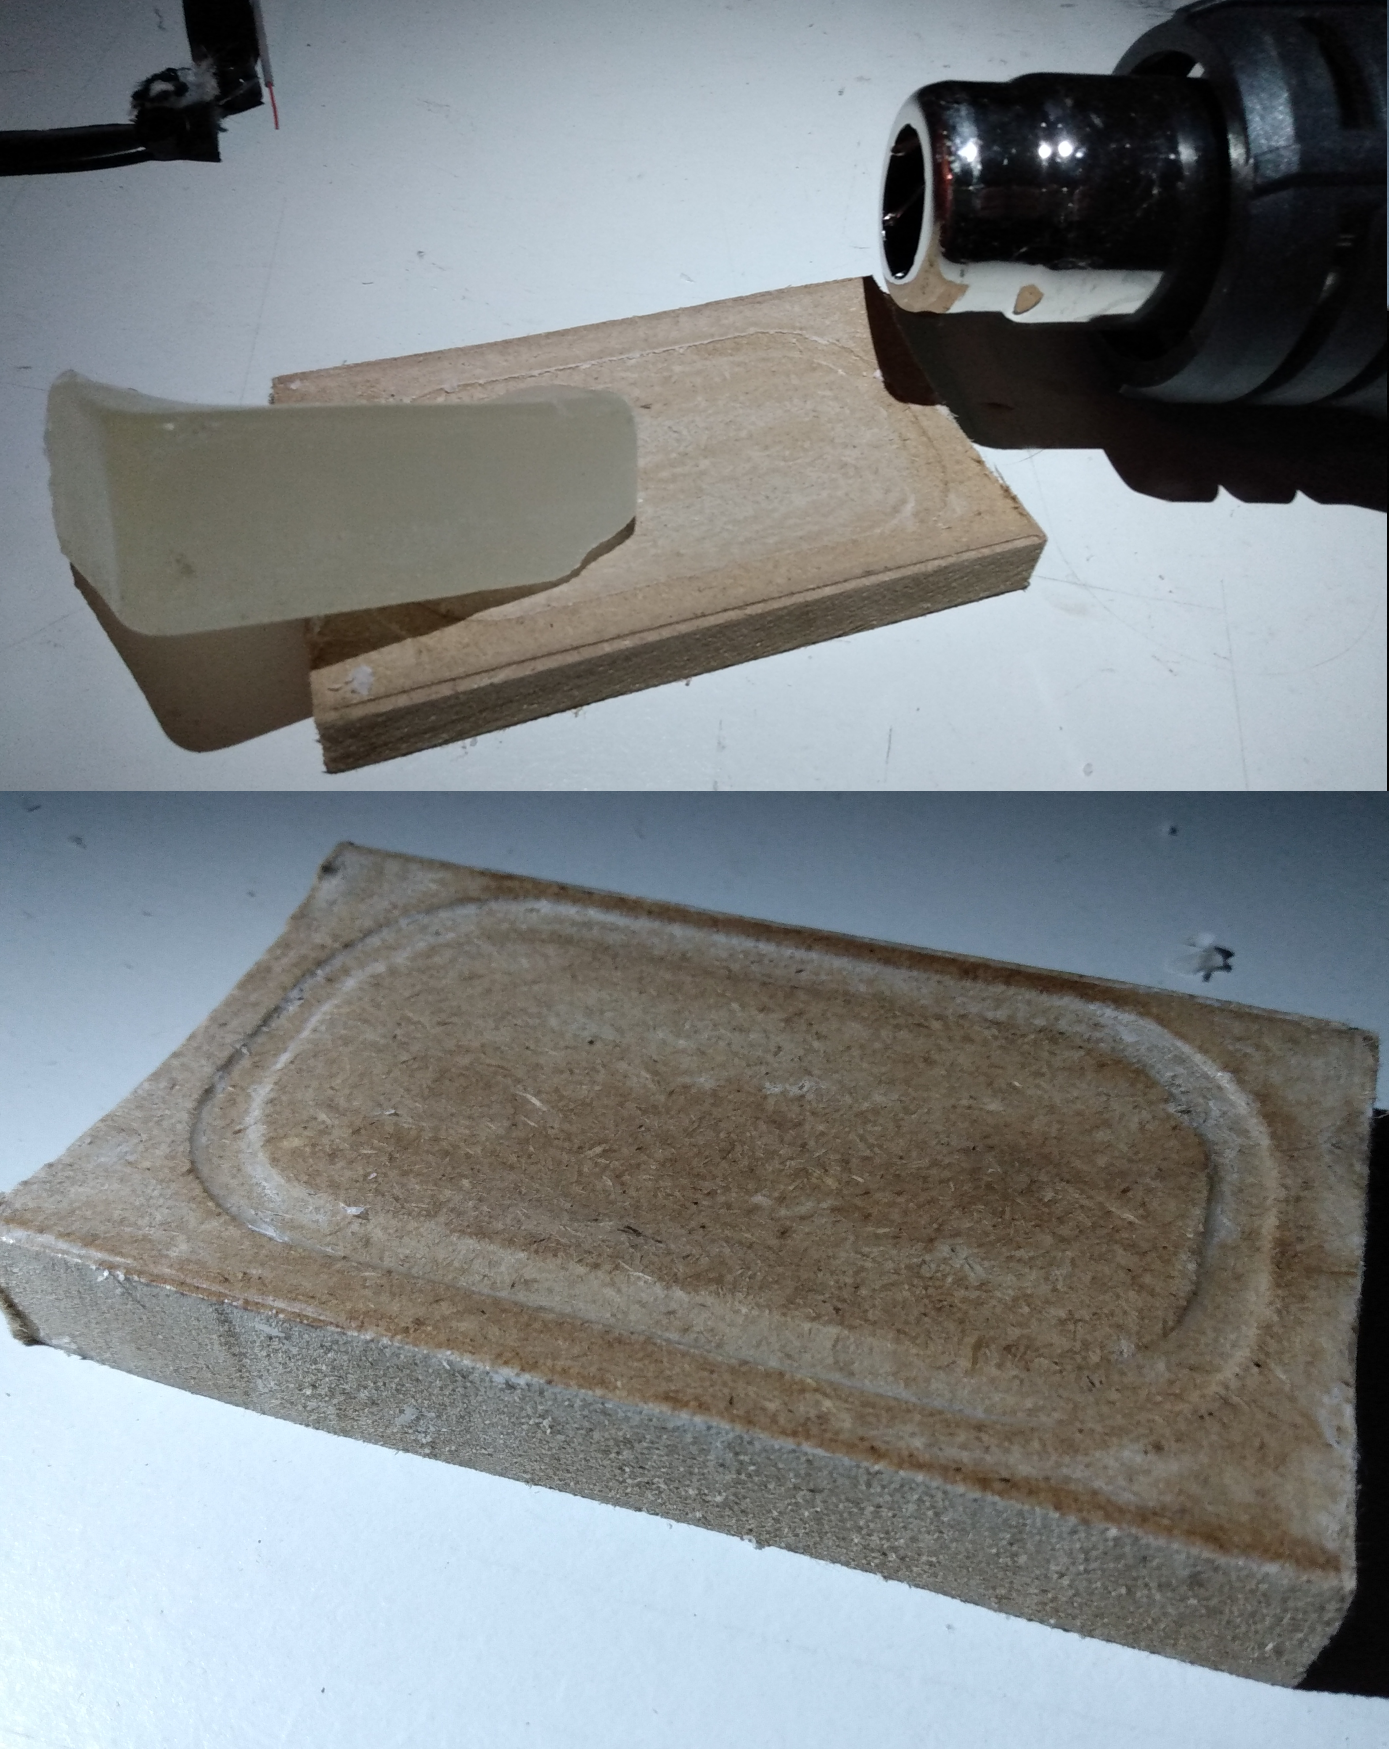
Cutting the mold on the cnc
I generated a bit of G-Code for the 3018 CNC
Cutting the rough pass from a 10mm thick MDF board
After the finishing pass:
you can see the curvature matching the plastic part profile
5
Preparing the mold
I prepared the mold surface with 600 grit sandpaper and applied some release agent in the form of paraffine wax ( e.g candle) with the help of a heatgun.
6
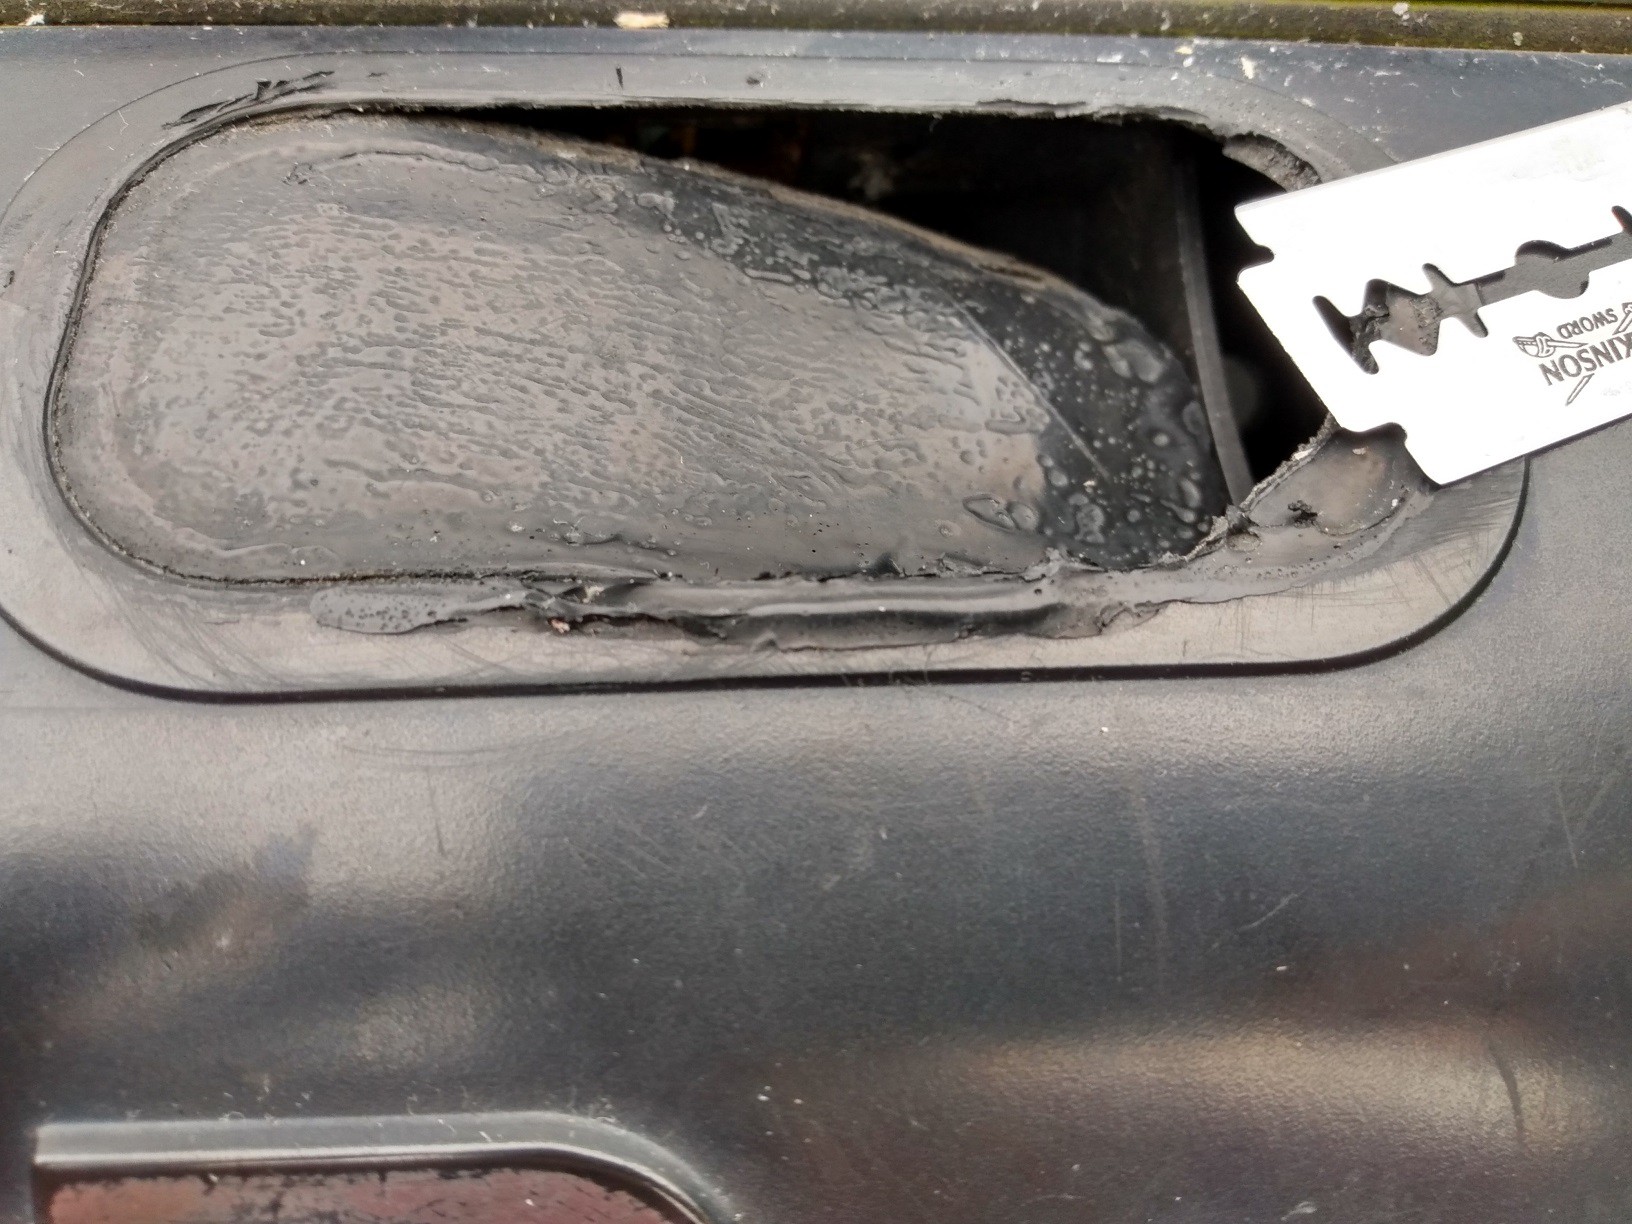
Preparing the plastic hatch part
First step was to remove the cracked rubber membrane of the button carefully with a razor blade.
The whole part can be removed with six screws, you can gently heat it with a heatgun to soften the tar-like substance that "helps" with the waterproofing ( now i know why i have this awful goop every summer)
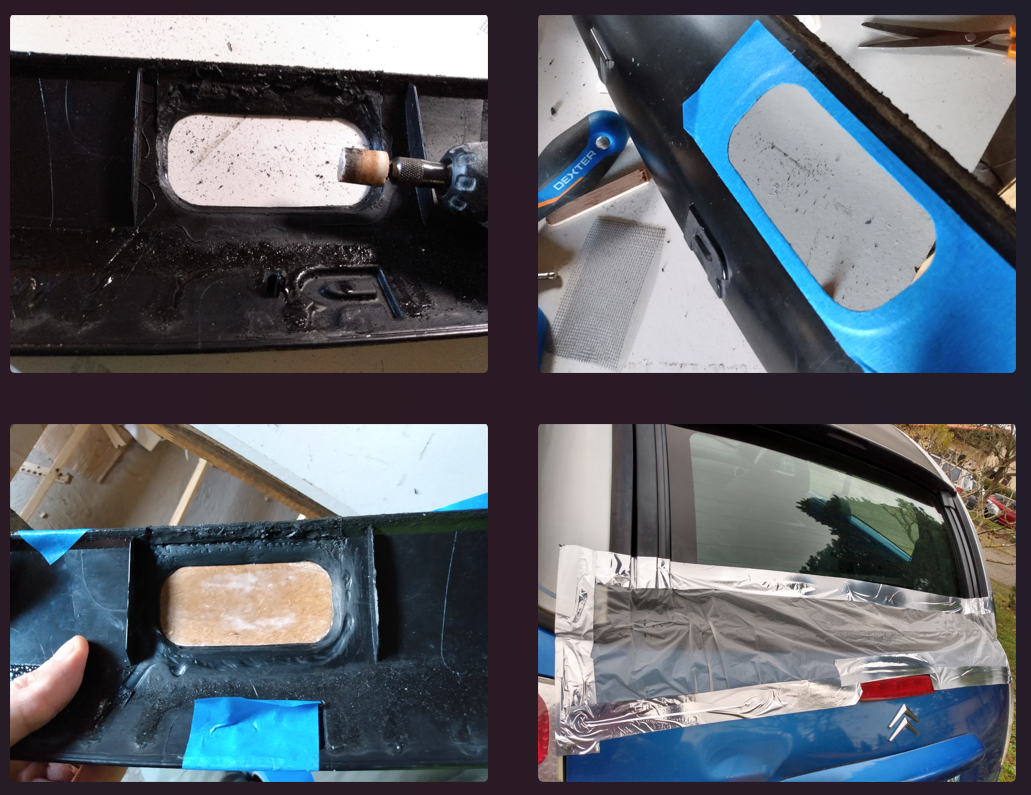
Scrapping the remaining rubber, masking the outside and keeping the car dry:
7
Molding
The time has come to "mold" the part! I used a black silicone sealant for boat and supposedly UV-resistant. I embedded a plastic mosquito mesh hoping to improve its durability and rigidity. Unfortunately, after 3 days of drying at room temperature, the silicone was still liquid in the middle . I tried to remove it very slowly but bubbles were created in the process. Apart from that, the result was satisfying: the membrane was flexible enough, yet it looked well glued to the plastic.
8
Surface finition
To improve the surface finish, i filled the bubble cavities with two layer of silicone diluted in white spirit. I tried several tool but the best one remained the soap dipped finger to smooth the surface

 After the finishing pass:
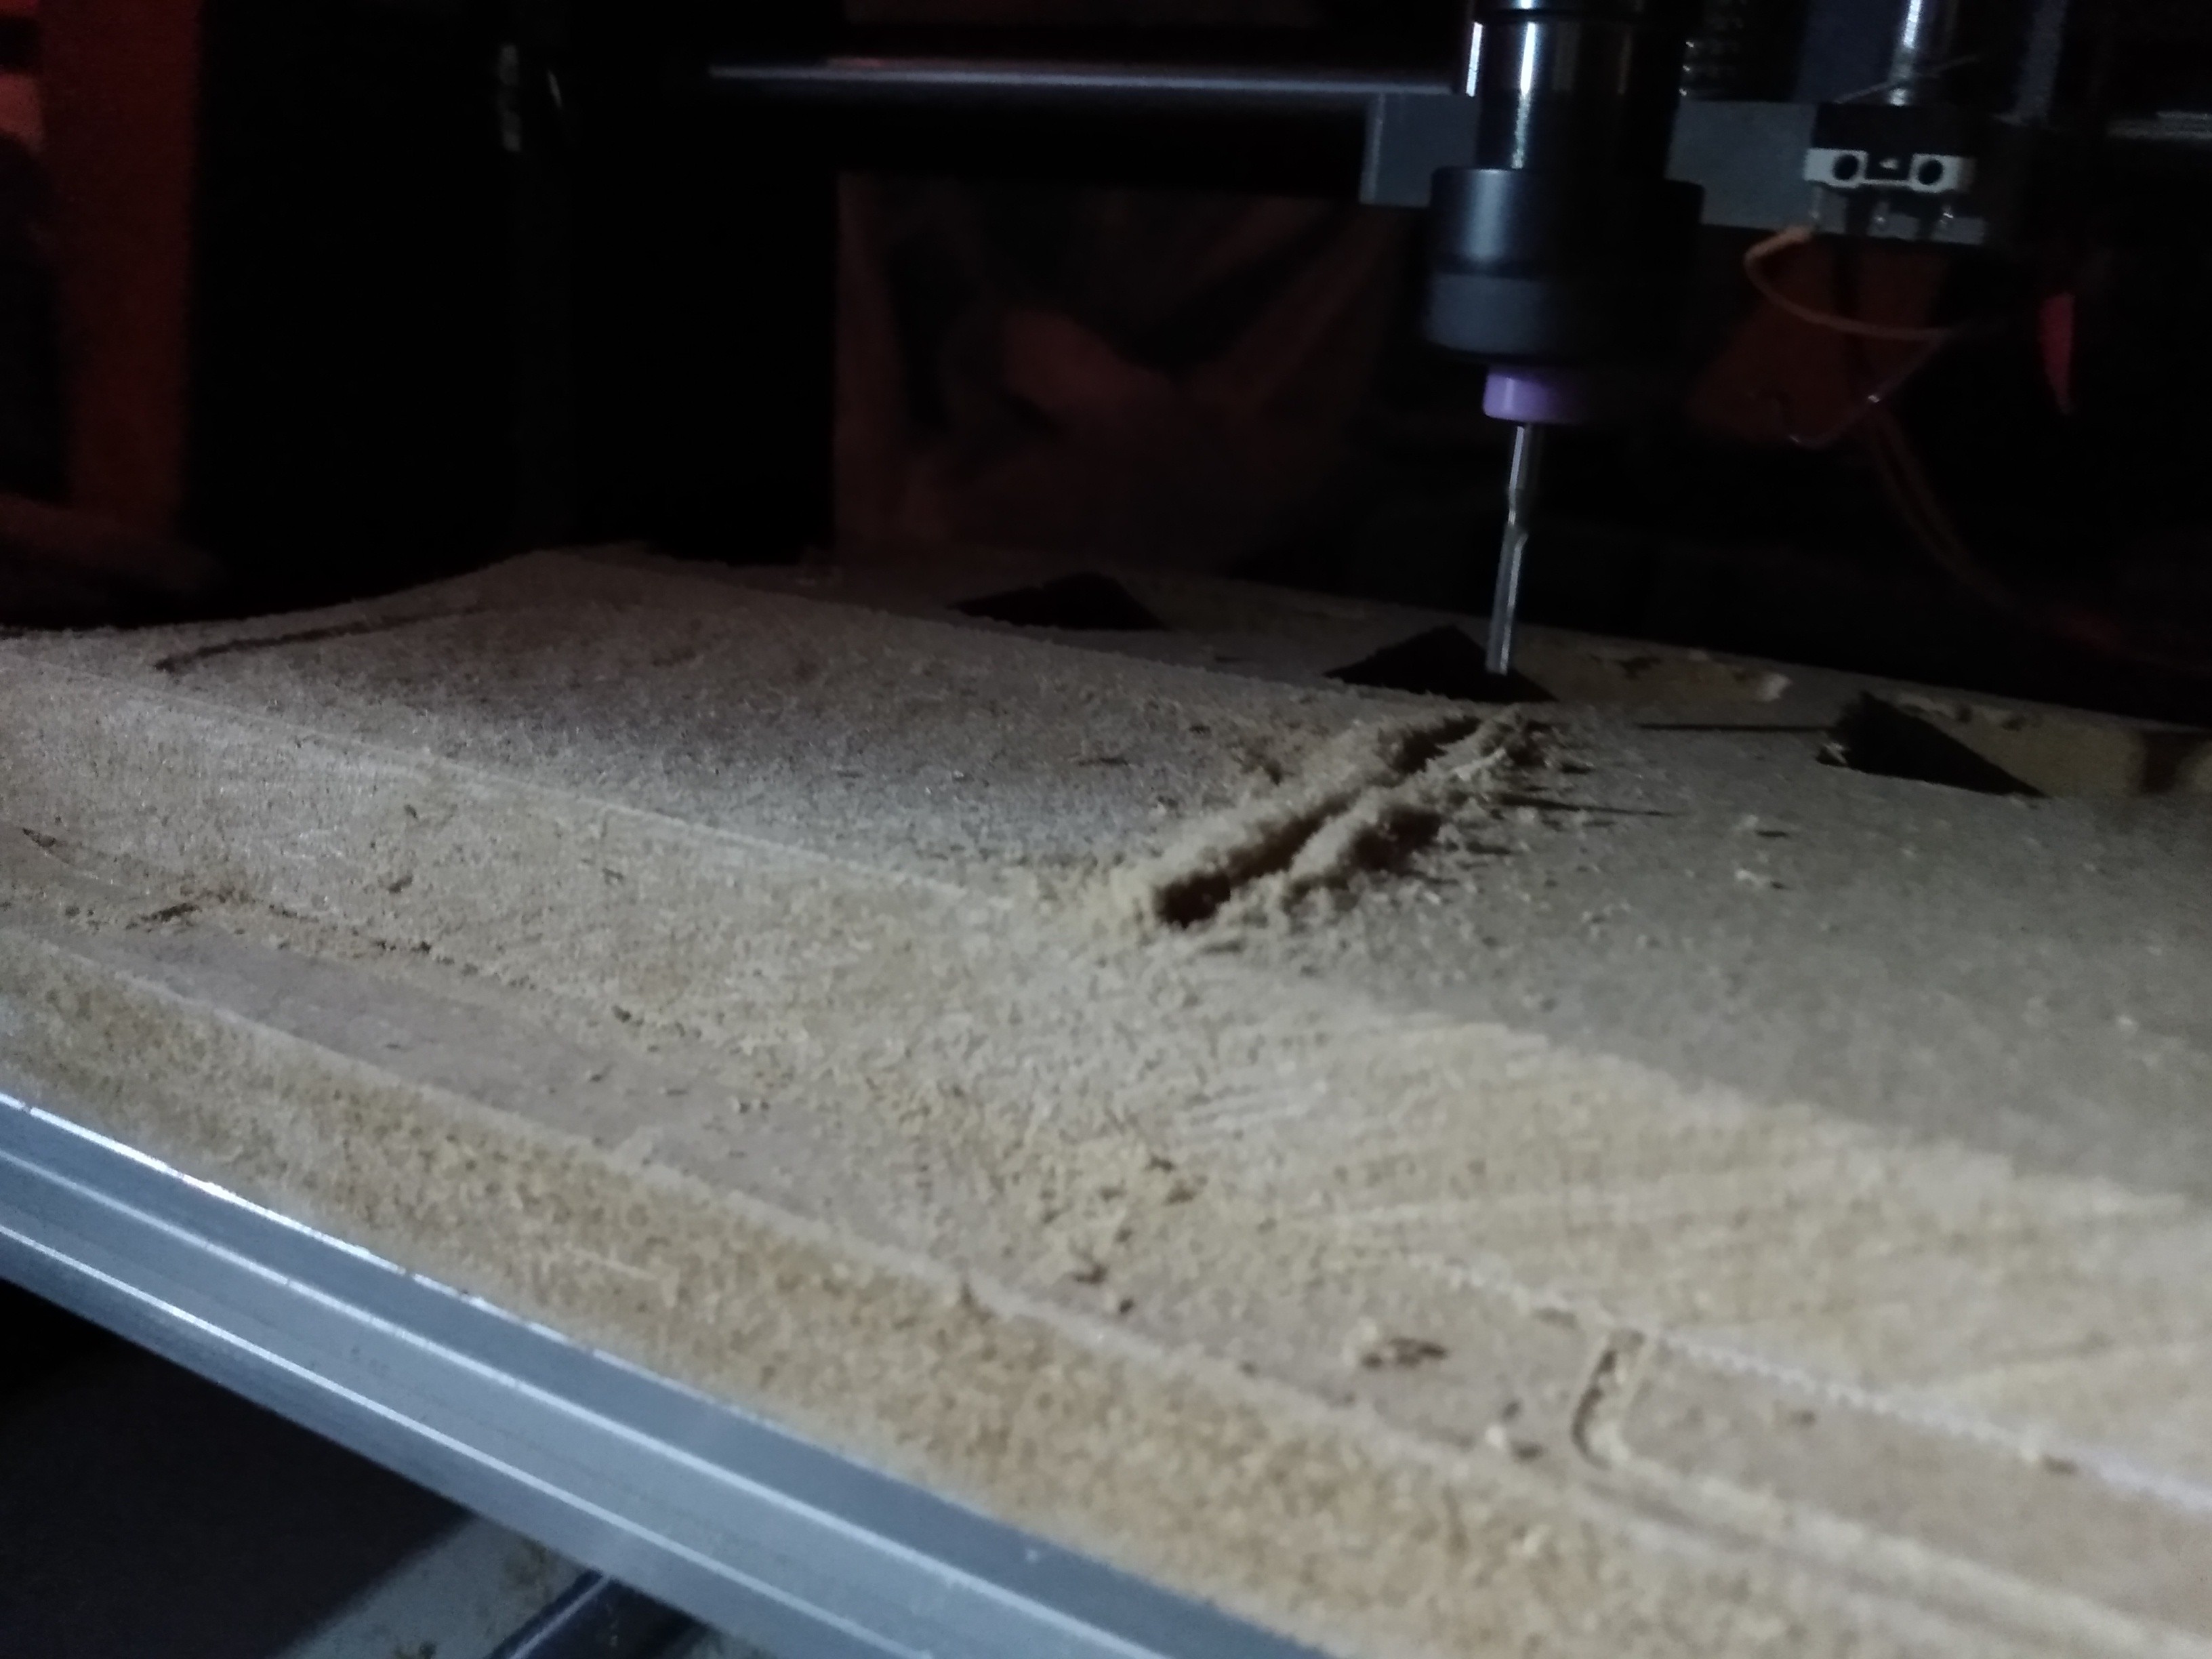
 The whole part can be removed with six screws, you can gently heat it with a heatgun to soften the tar-like substance that "helps" with the waterproofing ( now i know why i have this awful goop every summer)
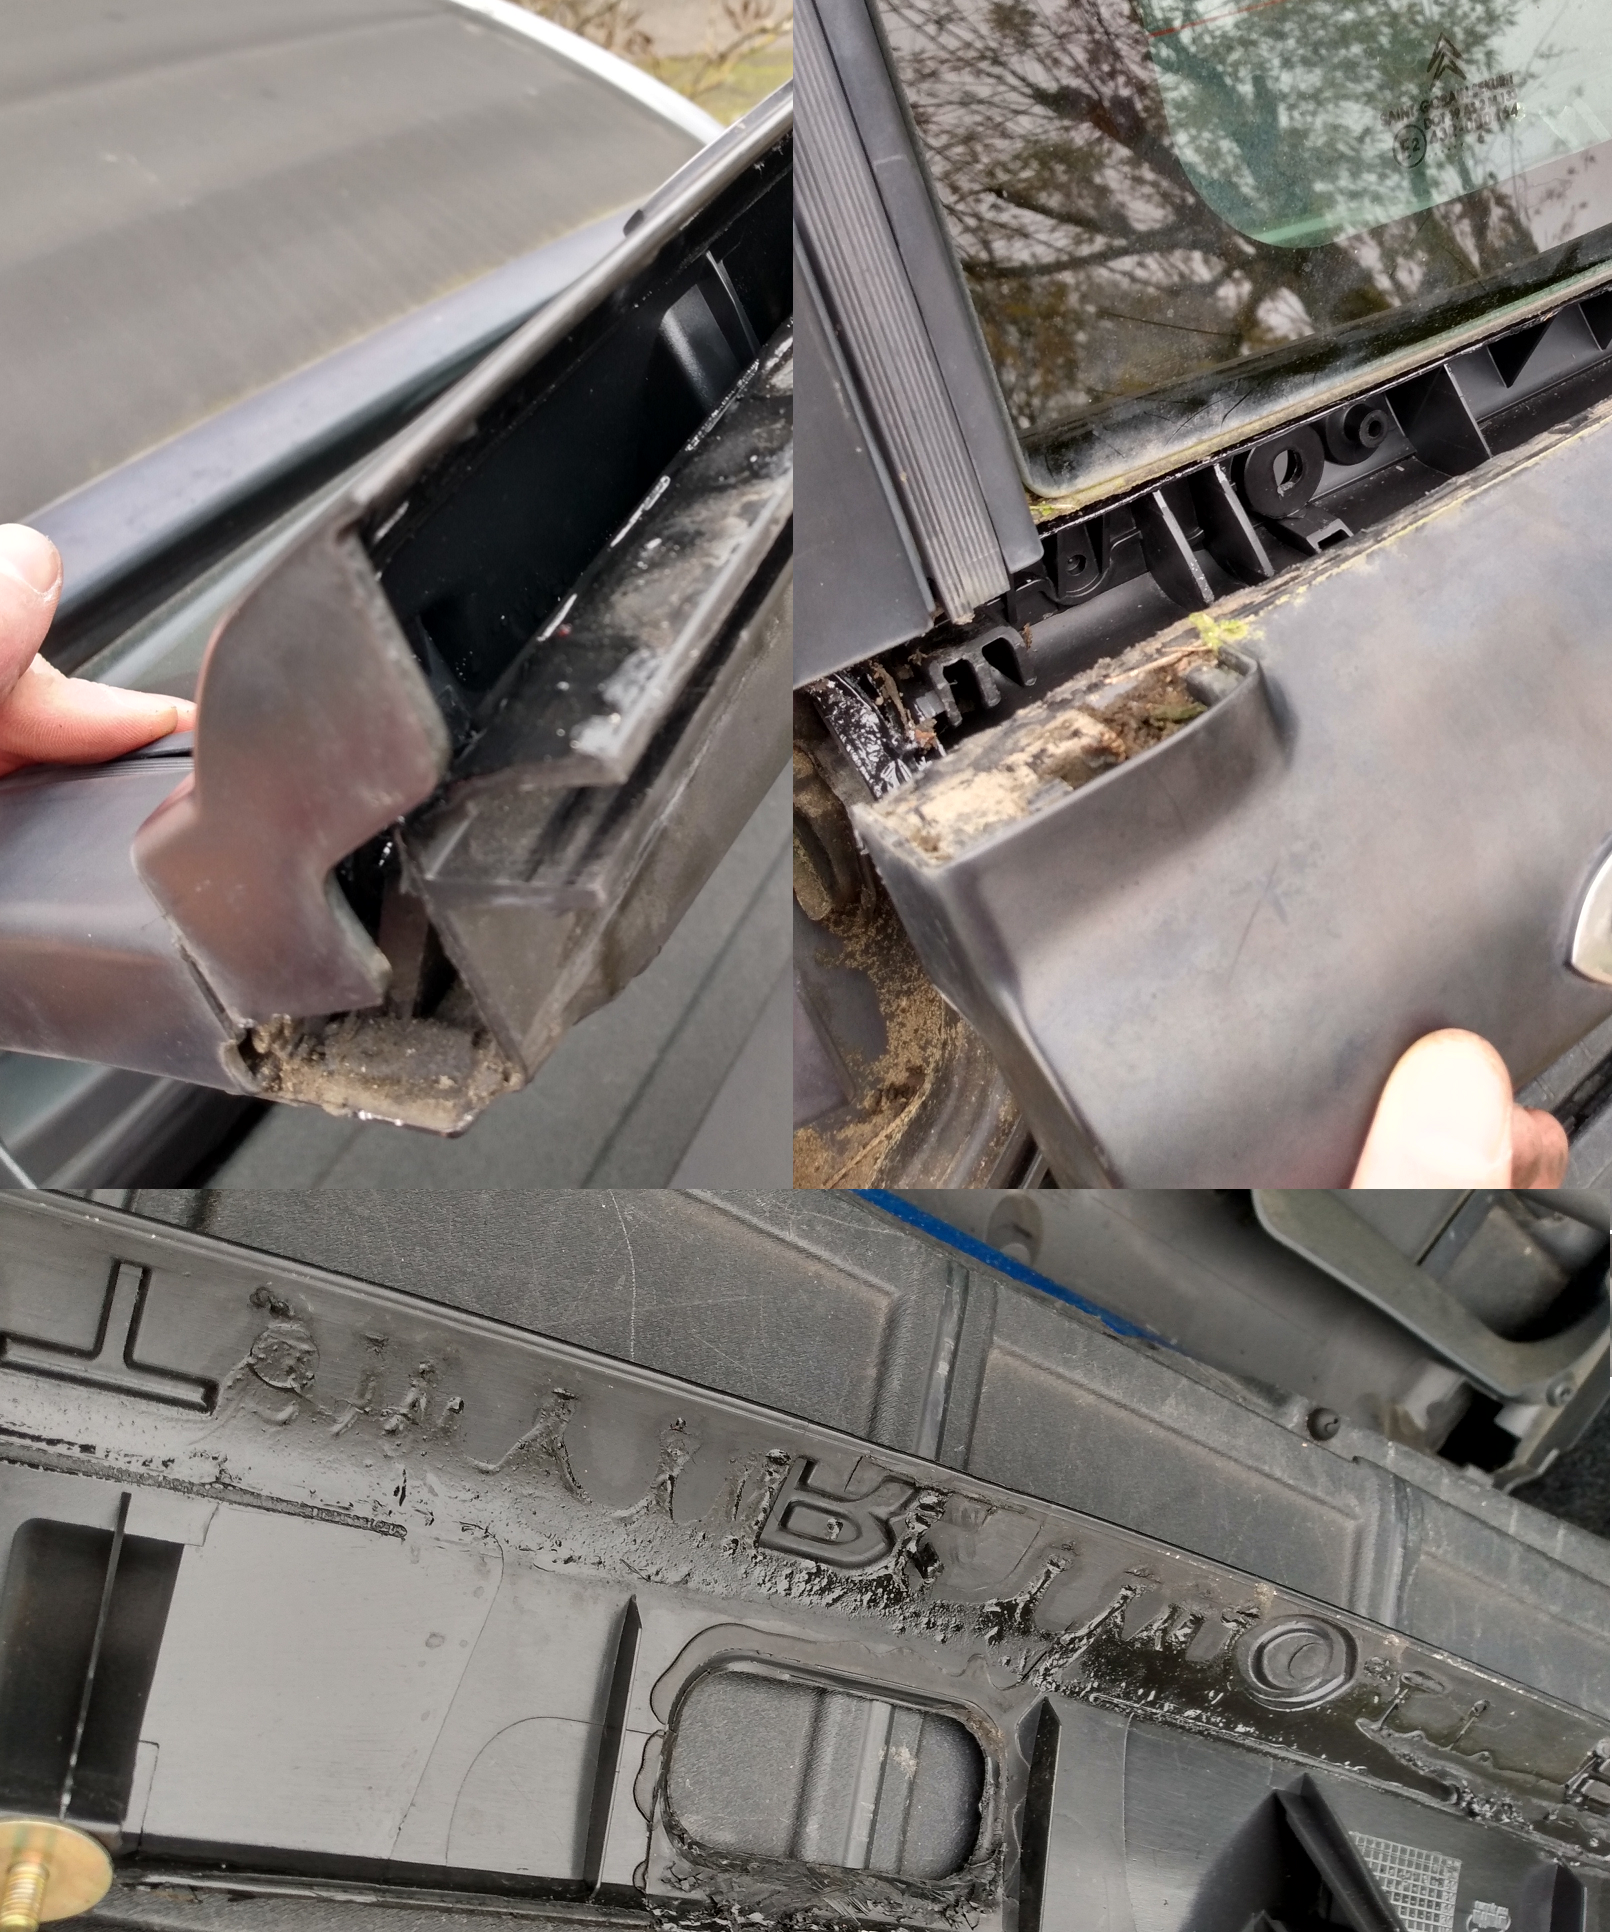
 Apart from that, the result was satisfying: the membrane was flexible enough, yet it looked well glued to the plastic.
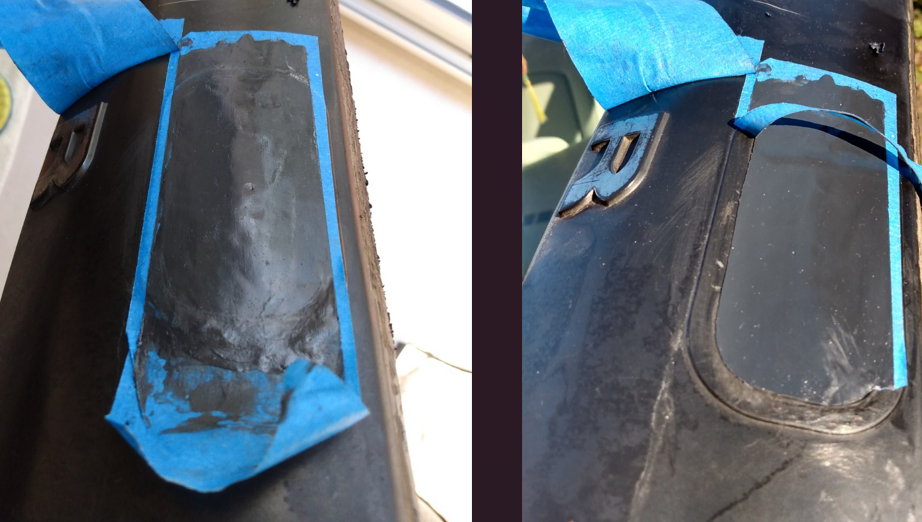
Discussions
Become a Hackaday.io Member
Create an account to leave a comment. Already have an account? Log In.