-
1Adding animatronic eyes
I believe that the secret to creating truly meaningful human-computer interaction is to create some sort of emotional experience for the user. If we can make the user forget, even for just a few moments, that they are speaking with a computer—if we can inspire them to suspend their disbelief—then they will engage much more deeply with the machine.
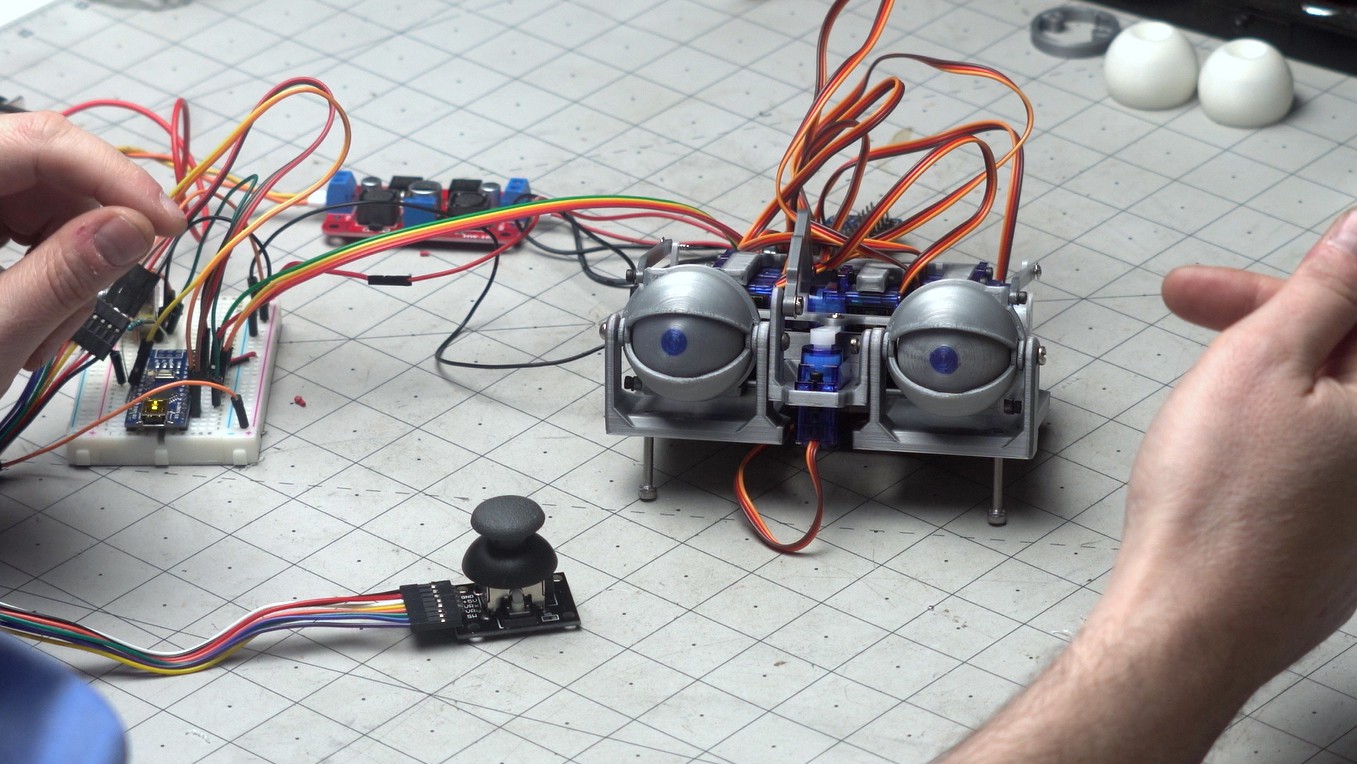
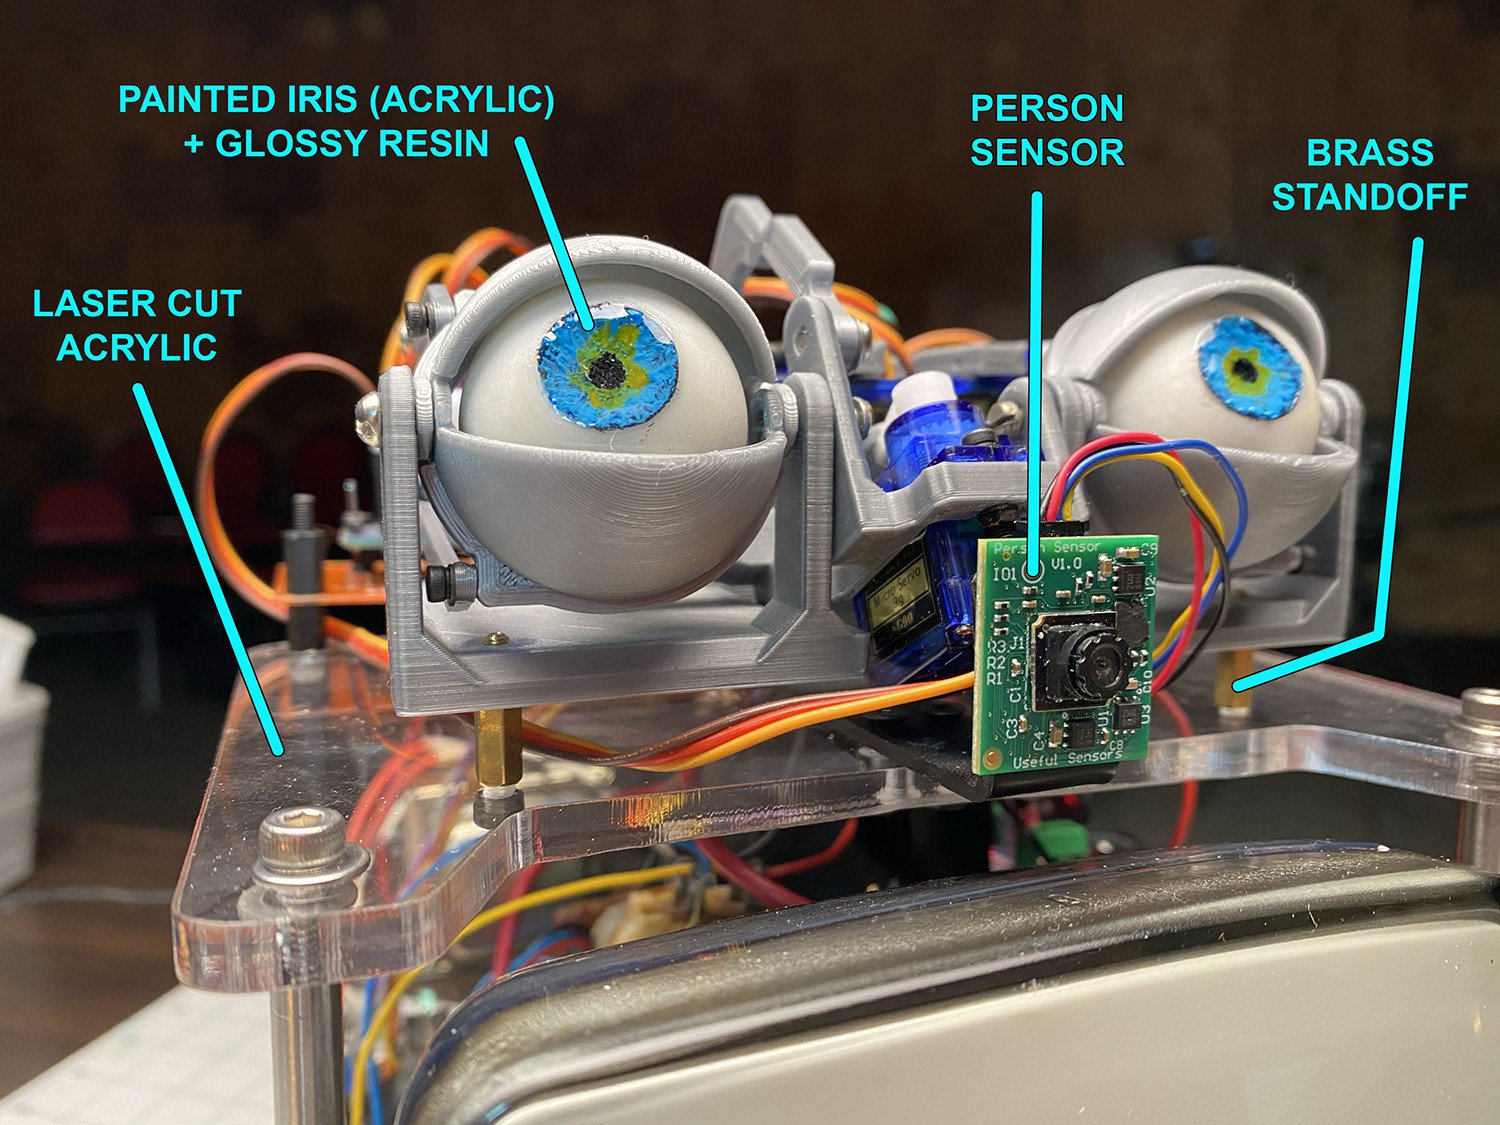
For our creature's eyes I used a 3D-printed animatronic eye mechanism designed by Will Cogley, which is a fast and relatively simple method for getting up and running with just a handful of parts. The eye movement and blinking are controlled by an Arduino via a 16-channel 12-bit PWM/Servo Driver from Adafruit. I originally used an Arduino Nano for this, but I accidentally destroyed it by sending it too much voltage, so I ultimately switched to an Arduino Mega 2560. (An Arduino Mega can analog sense up to 5V per pin, while an Arduino Nano can only handle 3V—more on this later.)
![]()
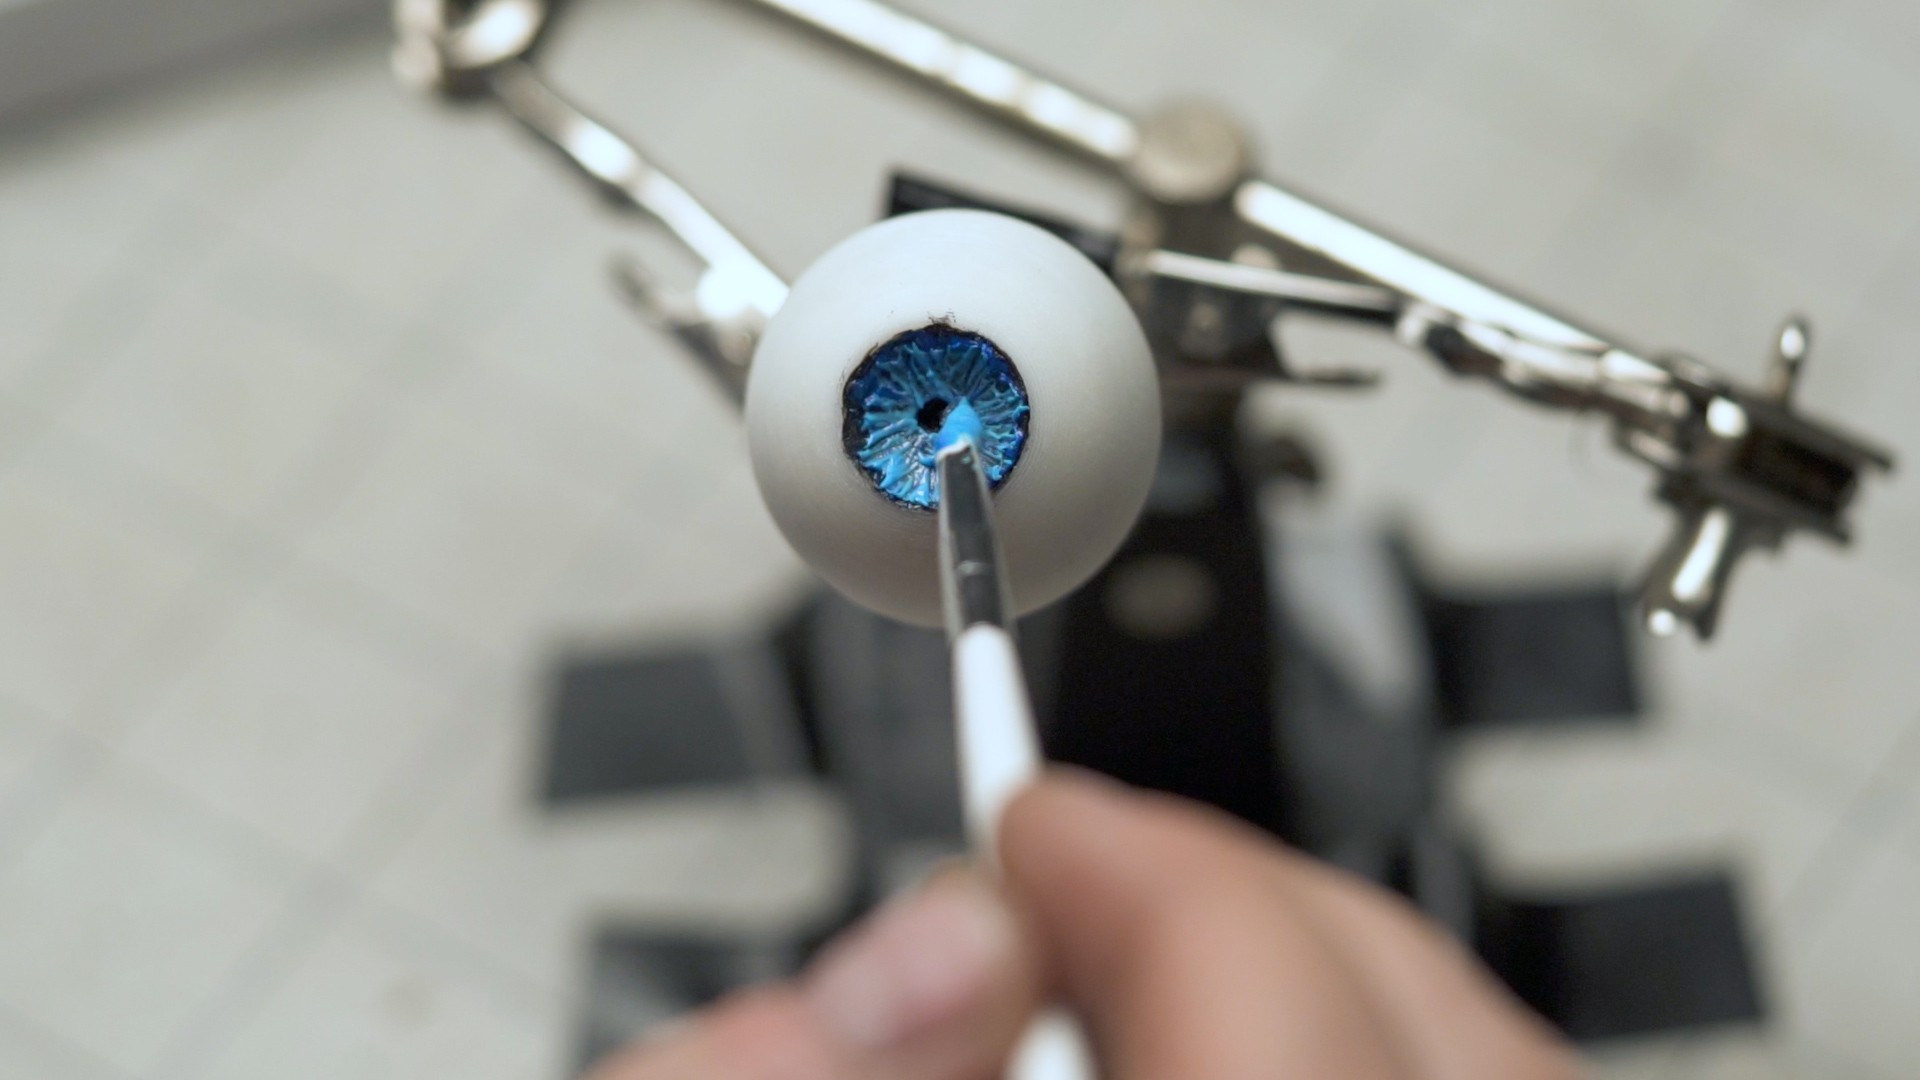
The eyeballs were also 3D printed. I then sanded them and painted the iris pigmentation using acrylic paints. I originally made a silicone mold so that I could coat the eyeballs in a glossy resin (as recommended by this wonderful tutorial), but I had to change plans when I accidentally warped the shape of the eyeballs by applying too much heat (heat is necessary to purge air bubbles from the glossy resin). So instead I settled for applying a few drops of glossy resin only on the irises, which gave them just enough reflectivity to create a realistic effect. This small detail—a glint in the eye—is so important to give the illusion of life.
![]()
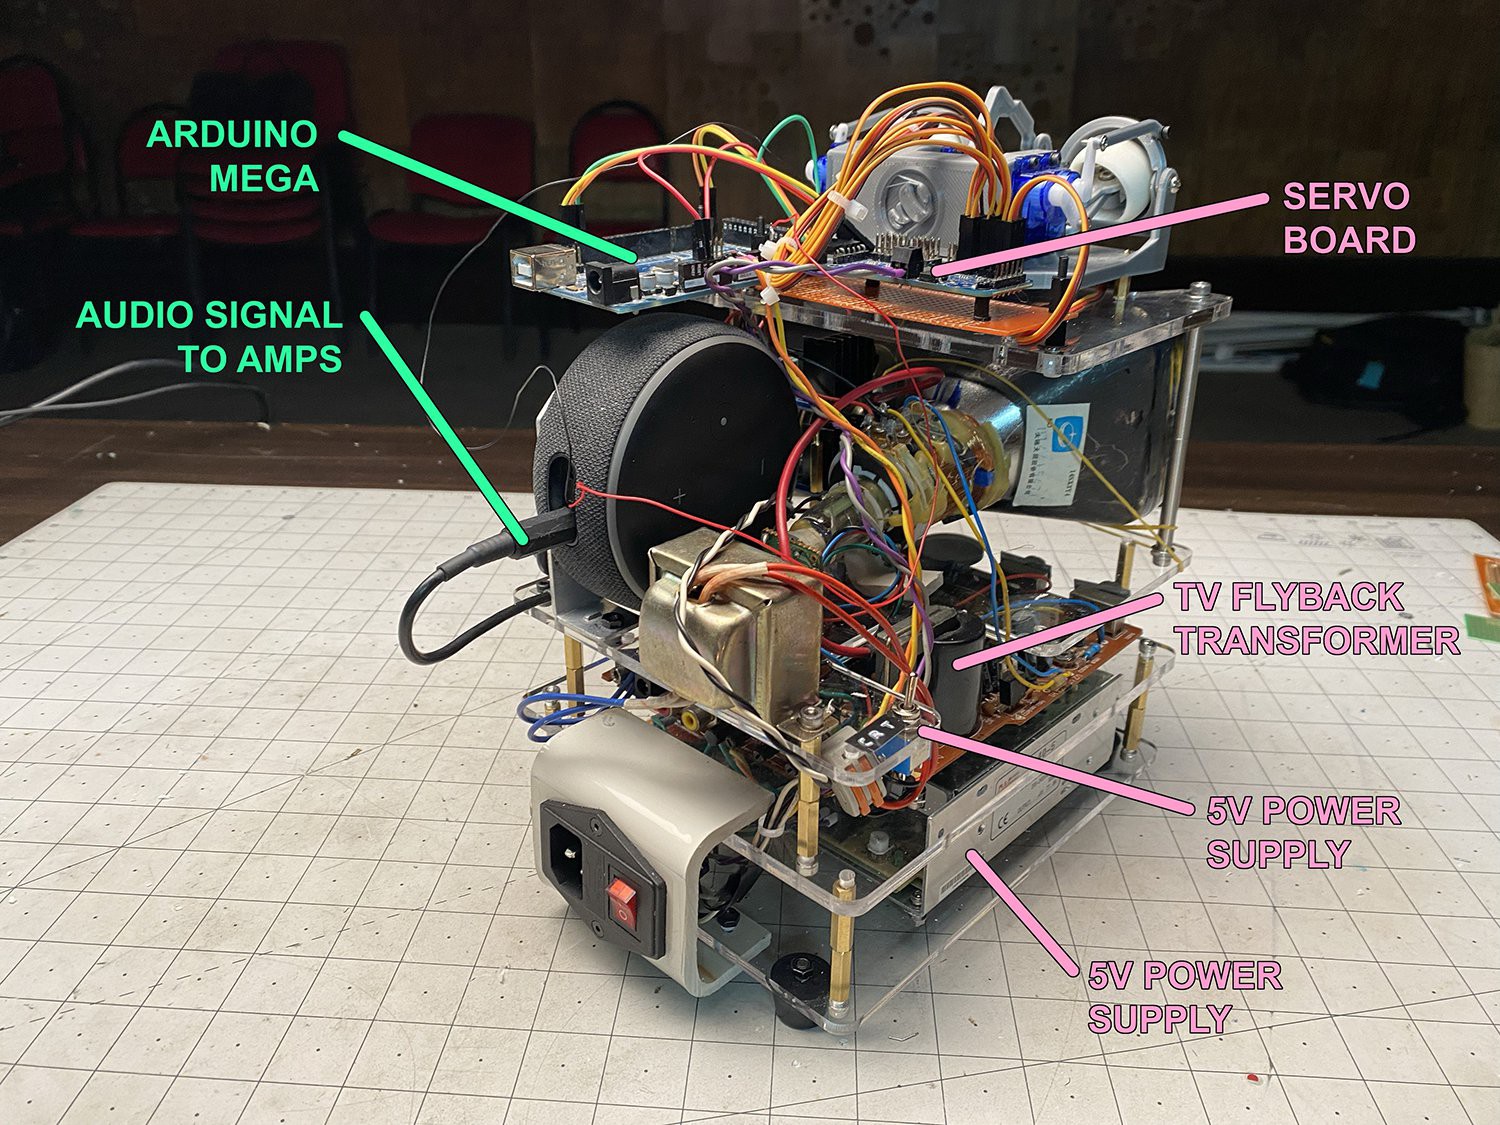
I used a dedicated 5V, 8A power supply to power most of the components of this build: the Arduino, the six SG90 servos for the animatronics, the person sensor, and the amplifiers, but not the CRT or the Echo device itself (the Echo wouldn't operate without its own power supply, for some reason). The servos consume by far the most current, and this required a robust power supply. I originally tried to use a 3A power supply, but it just wasn't powerful enough and let to a lot of servo jitter. After I changed power supplies, allocating 1A per servo, the jitters went away. I used a boost converter attached to the same 5V power supply to generate 8V for the Arduino, and a 12V boost converter to power the two amplifiers.
![]()
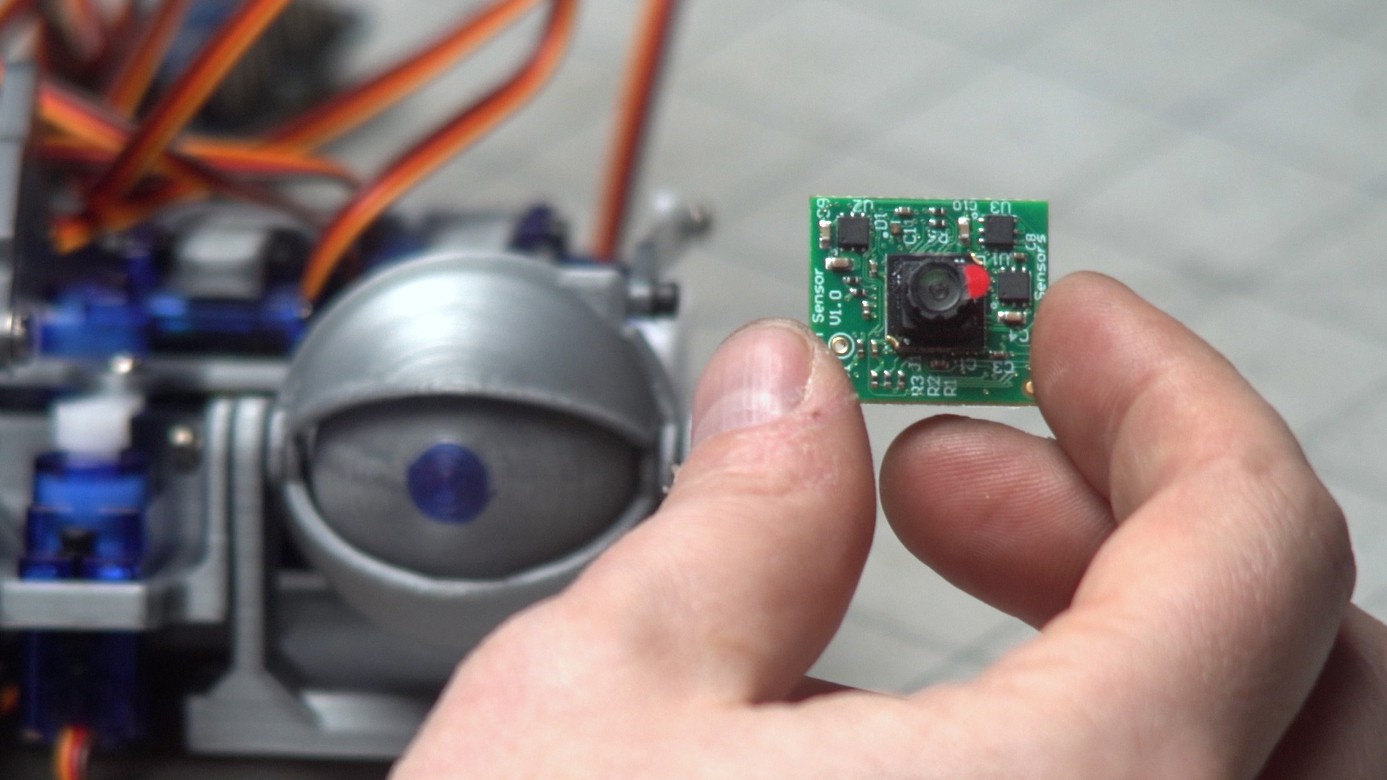
I wanted the eyes to always maintain eye contact with the user, and to do this I used a Person Sensor to track the user's face. This was a very convenient solution that was almost "plug-and-play." This sensor requires SparkFun's Qwiic cabling system to connect, and I ended up buying a Qwiic cable pack that includes a Qwiic-to-Dupont breakout cable so I could more easily integrate it with the Arduino. The Person Sensor works remarkably well for a $10 piece of kit, but its small design unfortunately didn't include any pin holes or screw holes to mount it to your build (pin holes have been added to more recent versions of the Person Sensor ). I ended up using a blob of Blu-Tack to stick it to the front of the animatronic eye module, which is fine for a prototype but not reliable in the longterm. A 3D printed mount that the sensor module could slide into would have been a better solution.
I've been asked several times why I didn't just use a digital set of eyes on an LCD screen instead of the clunky, noisy animatronic mechanism. The answer is simple: I'm trying to inspire the user to forget that they are talking to a computer. Digital eyes on a screen would have been much simpler to build, but a real, moving, tangible set of 3D eyes does so much more to create the illusion of sentient life.
-
2Hacking the Amazon Echo device
The first few seconds of contact between user and machine are so important for establishing the relationship, so I really wanted this to be a very powerful moment. To do this I programmed a "wake" sequence that would initiate when the user calls the creature's name: from a dormant state with closed eyes, the creature blinks to life, looks around, and then immediately engages the user with eye contact. The Alexa platform allows you to choose from a short list of "wake words," so I changed the wake word from "Alexa" to "computer." I would have liked to customize this name, but that's just not possible yet with the Alexa platform.
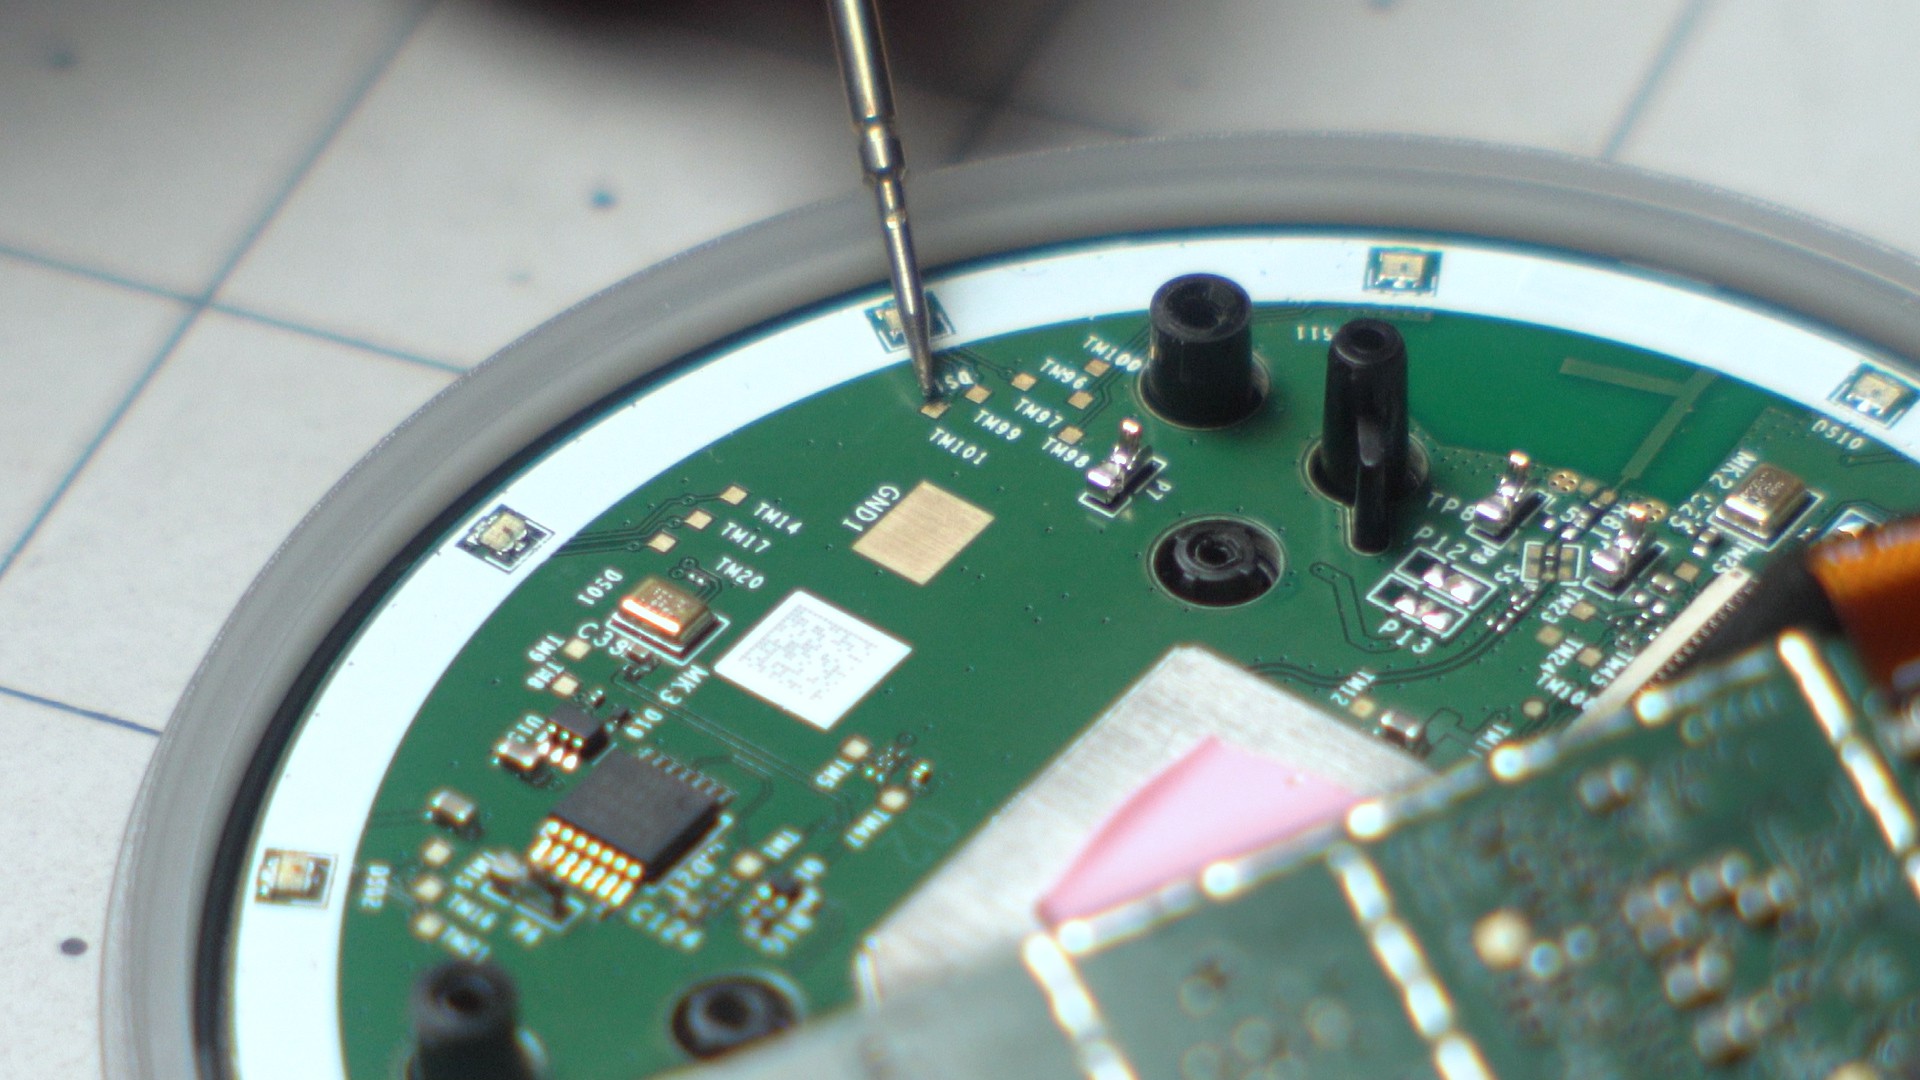
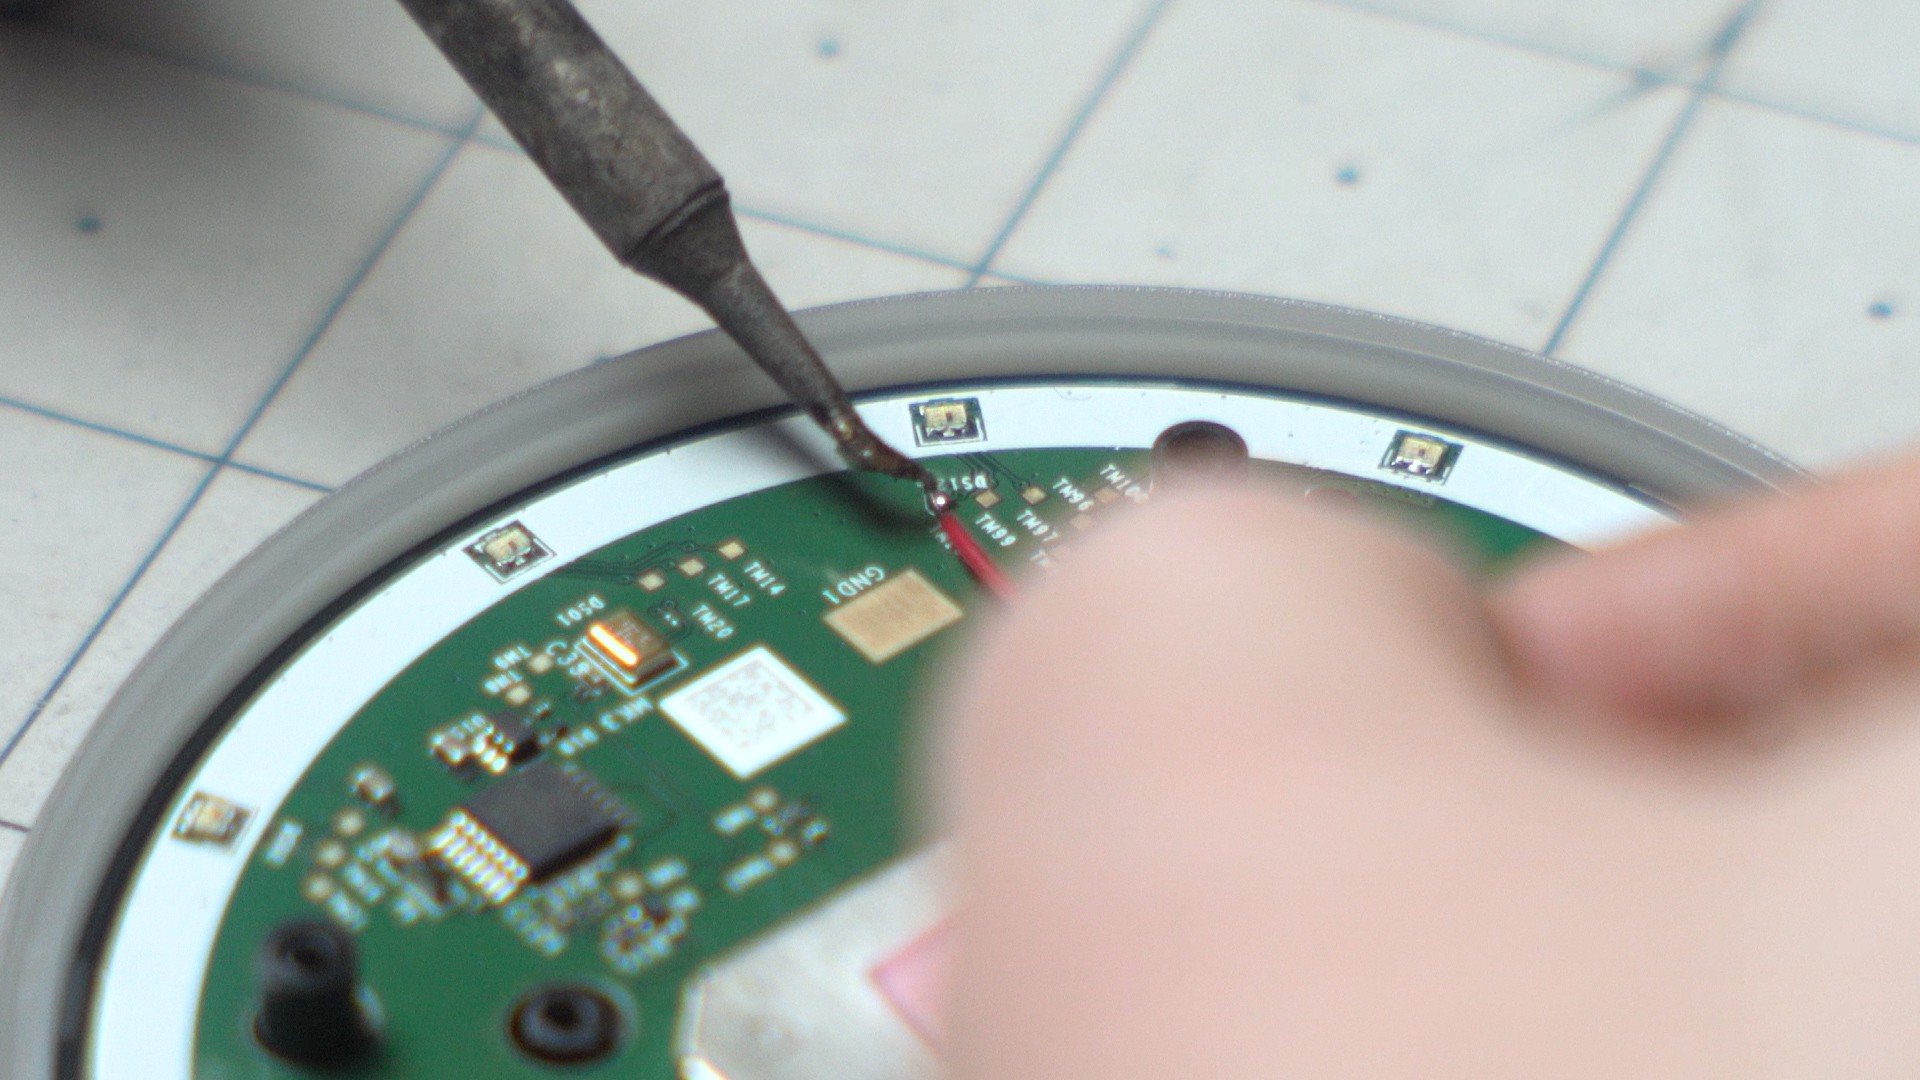
Another major limitation of the Alexa platform was how it uses the wake word: you must first say the wake word and then give it a command. This is annoying, as I wanted the creature to wake up as soon as it hears its name, as any living creature would (I didn't want to have to say, "Computer, wake up!", but rather just "Computer!"). After some investigating, however, I realized that the LEDs on the Echo device light up as soon as it hears the wake word. After probing around inside, I found a point on one of the Echo's boards where the voltage drops from 2.5V to 1.1V when the LEDs illuminate.
![]()
I soldered a thin jumper wire to this point and connected it to one of the analog pins on the Arduino, and also connected the Echo's ground to the Arduino's ground. I then added a few lines of code to the Arduino script so that it constantly monitors that voltage signal: if the voltage on that line drops below 2V, the Arduino then initiates the wake sequence for the eyes (if the eyes were in a dormant state). With this little soldering hack we were able to get our creature to respond to its name in a more organic way.
![]()
This hack worked well during testing with my Arduino Mega 2560, but when I was putting it all together for the final build I used a smaller Arduino Nano, and this posed problems. I couldn't figure out why the Arduino had stopped working. The reason was that when the Echo device is first powered on, it sends an inrush voltage on that same jumper line that is around 5V. An Arduino Nano can only handle 3V, so it fried the Nano completely. I thought about making a voltage divider circuit to reduce the voltage so I could continue using an Arduino Nano, but I was so eager to get our creature up and running that I just slapped in my Arduino Mega 2560 instead. This solved the problem, but visually wasn't quite as elegant.
-
3Modifying the CRT to visualize the robot's voice
![]()
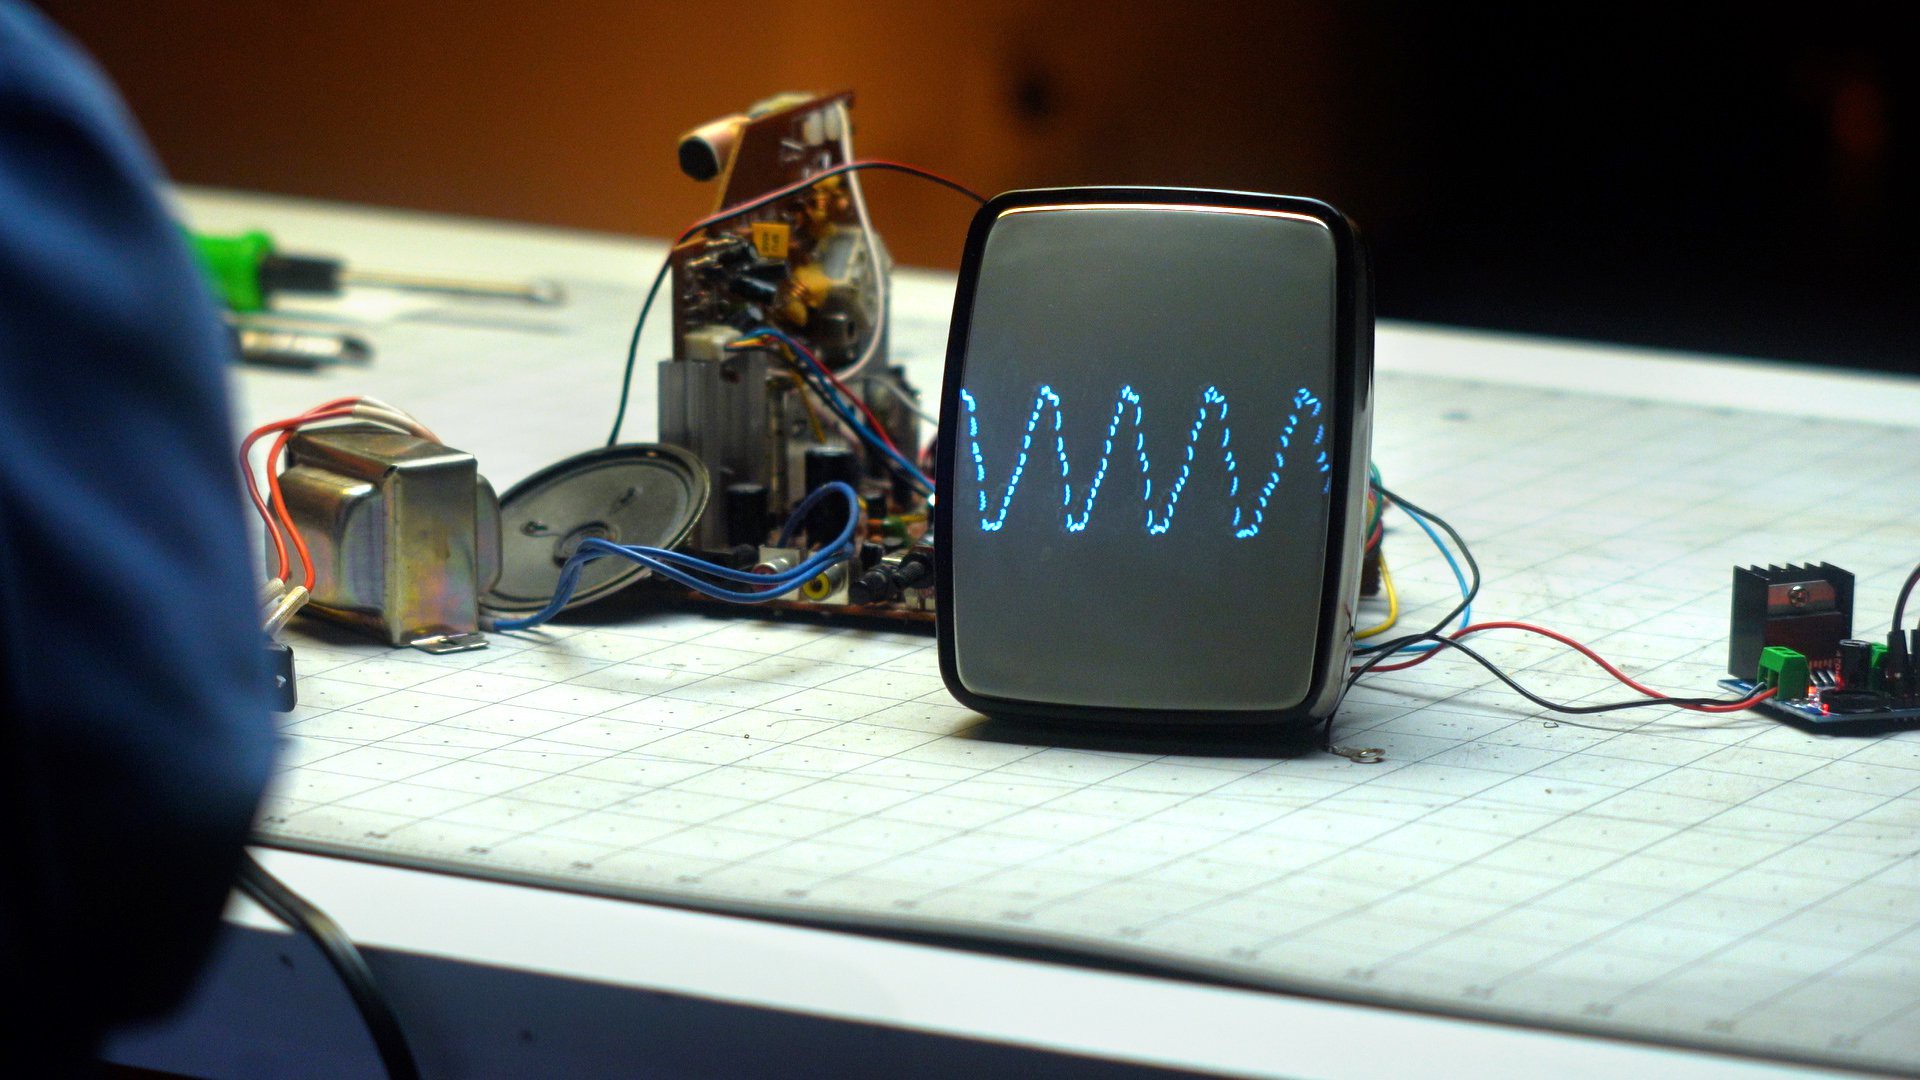
Another key element to making this device seem more "alive" is giving it a mouth that moves when it speaks. I'm a huge fan of CRT of televisions (you can check out some of my CRT restorations here and here), so for this project I converted a small 5" B&W CRT television into an audio waveform visualizer. If you want to learn how to do this, be sure to check out my separate tutorial on building a CRT audio waveform visualizer.
To get our creature's voice into the CRT, I plugged a 3.5mm splitter into the audio output port of the Echo device: one line connects to an amplifier and speaker, the other line connects to an amplifier and the CRT. To power these amplifiers I used a 12V boost converter attached to the 5V power supply. Each of the amplifiers has a potentiometer to adjust the output: for this project, one controls the volume of the sound coming out of the speaker, the other controls the amplitude of the waveform that we see on the CRT screen.
I completely removed the television board and CRT from its chassis. To conserve space, I also desoldered the turner module and the radio board from the main board of the television. These were both mounted vertically, so removing them allowed me to significantly reduce the size of the board. This would become very important later in the build.
-
4Putting it all together
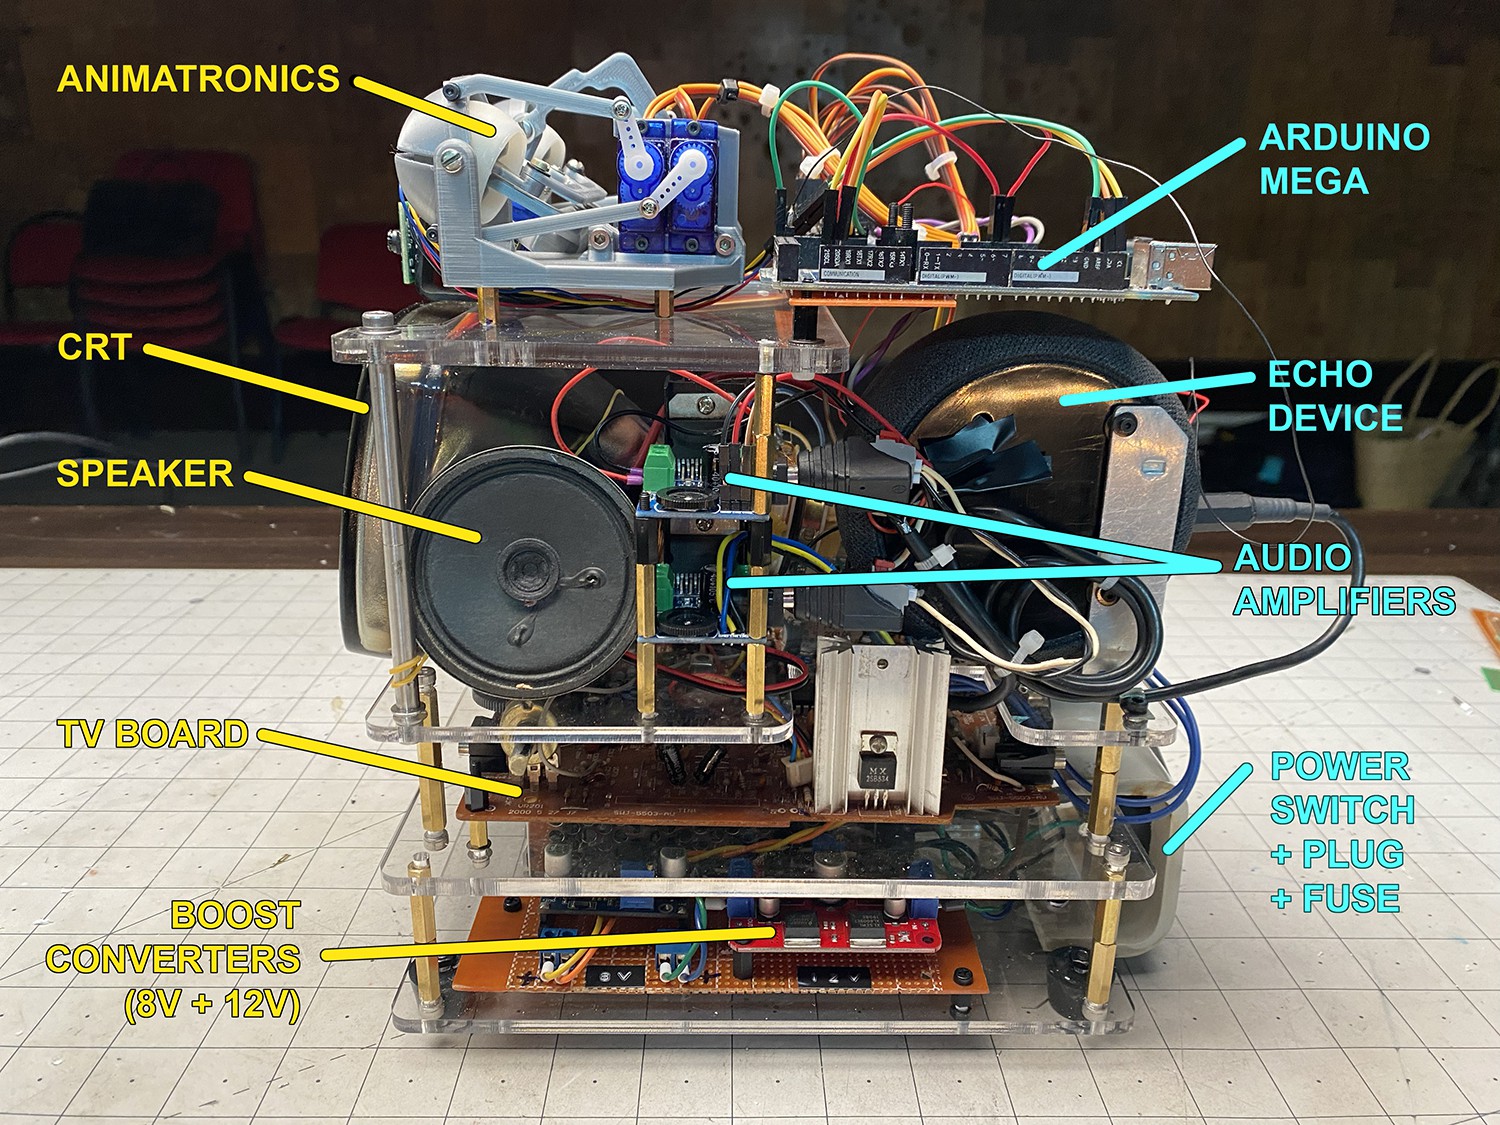
I struggled for a long time with finding a concept I liked for putting all of these disparate parts together:
- 5V power supply + boost converters
- TV board + transformer
- CRT screen
- 2x audio amplifiers + speaker
- animatronic eye mechanism
- Arduino + servo board
- Amazon Echo device
- power plug + switch + fuse
![]()
I ultimately decided to stack the build vertically, which would allow me to keep its countertop footprint to a minimum. But how to put it all together? I didn't want to hide it all inside an ugly, opaque enclosure, and I also wanted easy access to all the components for troubleshooting and repair. I decided to use a series of clear acrylic sheets, laser cut to designs that I created in Fusion 360, that could support the different layers of the build. I included screw holes in the designs so that I could then use an assortment of M3 and M4 brass standoffs as column structure between the layers. This worked well, though I made the mistake when ordering the acrylic sheets where some were 4.5mm thick, and others 5.5mm. This is important, because 4.5mm is just thin enough for the screw threads of the standoffs to poke out the other side, allowing me to continue the column structure across the sheets. 5.5mm was too thick for this, so for these I had to drill additional holes and use screws to anchor some of the standoffs. This was a good lesson—if you plan to use standoffs, use 4.5mm (or thinner) acrylic. I had bought an assortment of rubber feet some time back, so I used some of these on the bottom layer to get it up off the table surface.
![]()
I had originally wanted to remove the boards from the Amazon Echo device and use them without the outer case in order to save space, but I had trouble getting them to work correctly outside the Echo chassis for some reason (a grounding issue, perhaps?). I eventually lost patience and mounted the entire Echo device into my Alexatron chassis. This doesn't look very good, but since I already knew that I'll be moving to a GPT "brain" for future versions, we won't have to look at it for very long. I had also planned originally to power the 12V Echo device from the build's own 5V power supply (via 12V boost converter), but this also proved problematic for some reason, so I stuck with the Echo's native 220V-to-12V power supply.
![]()
In addition to the main power switch on the back, I added a separate switch that controls power for only the TV board and CRT. I did this so that I could work on Alexatron's other components without having to worry about the high voltage from the CRT (CRTs operate using thousands of volts). This also allows the user to disable the CRT if they want to listen to music from the Echo device for long periods.
-
5Where do we go from here?
The obvious upgrade for MkII will be to get rid of the Alexa platform and instead adopt an AI platform such as ChatGPT. The trick will be keeping the voice interactivity as responsive as it is, which is something Alexa actually does very well. I want to keep the animatronic eyes, but they are quite fragile, so I'll look for a more stable mechanism for that, as well as better servos. If we can somehow reduce power consumption, we'll be able to eliminate most of the first layer of the chassis, which is taken up primarily by a huge 5V power supply and various boost converters to produce the different voltages.
From an interactivity standpoint, I'd like to add eyebrows. In the current configuration, the only way to project non-vocal emotion is through the eyelids (how wide or narrow they are), which is very limited. Adding eyebrows will open up a lot of new possibilities vis-a-vis non-verbal response.
I personally like the CRT "mouth"—it adds an element of nostalgia charm, which has resonated well with users. It would simplify the build considerably to replace it with an LCD solution, of course, but I just don't think it would be the same effect. I might try a smaller CRT (3" instead of 5"), which would also allow a smaller TV board.
Drop a comment below to tell me what you'd like to see in the next version!
A Workbench Companion, from an Amazon Echo Dot
Amazon's Echo device is a boring workbench accessory, so we gave it some animatronic eyes and a CRT mouth. Now my kids won't leave it alone!
 Thomas
Discussions
Become a Hackaday.io Member
Create an account to leave a comment. Already have an account? Log In.
really nice project! do u have the coding part?
Are you sure? yes | no
Can you tell me how long it took you to do these things, how much did it cost, or could you give me your creative product directly to make the product? I plan to make a geek toy that can be turned into modules and assembled by some enthusiasts themselves, and the first phase of the product will be made in 100 pieces. Then make an agent that can be used for communication. Can we cooperate?
Are you sure? yes | no
I'm thinking of building one of these after seeing your amazing video. Thanks for putting all this together.
Got a question about your future idea of using a 3" CRT - do these exist? The smallest portable TVs I can see anywhere in marketplaces near me is 5"
Are you sure? yes | no