 Camilo Parra Palacio
-
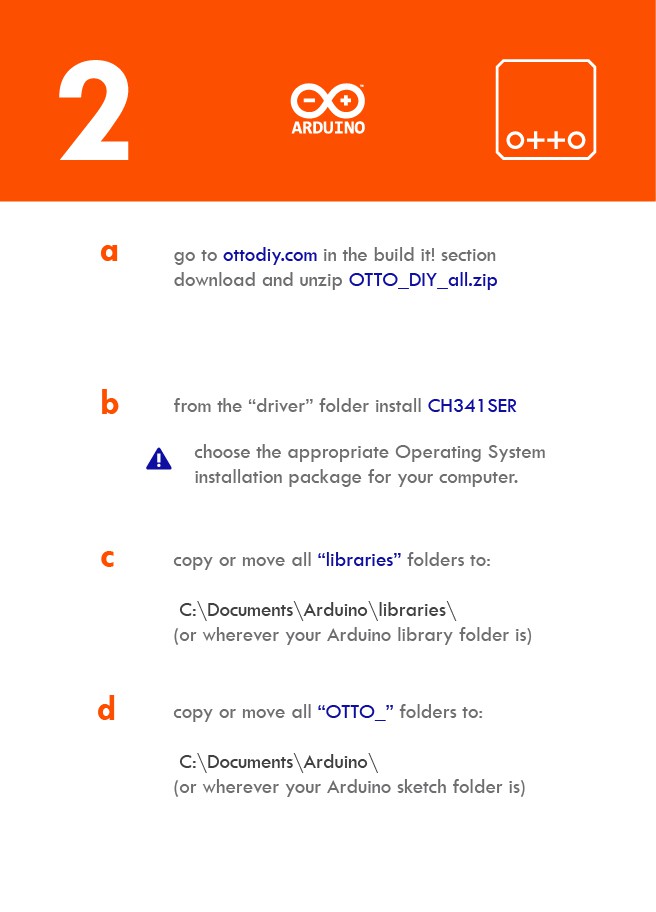
1First gather all parts and tools
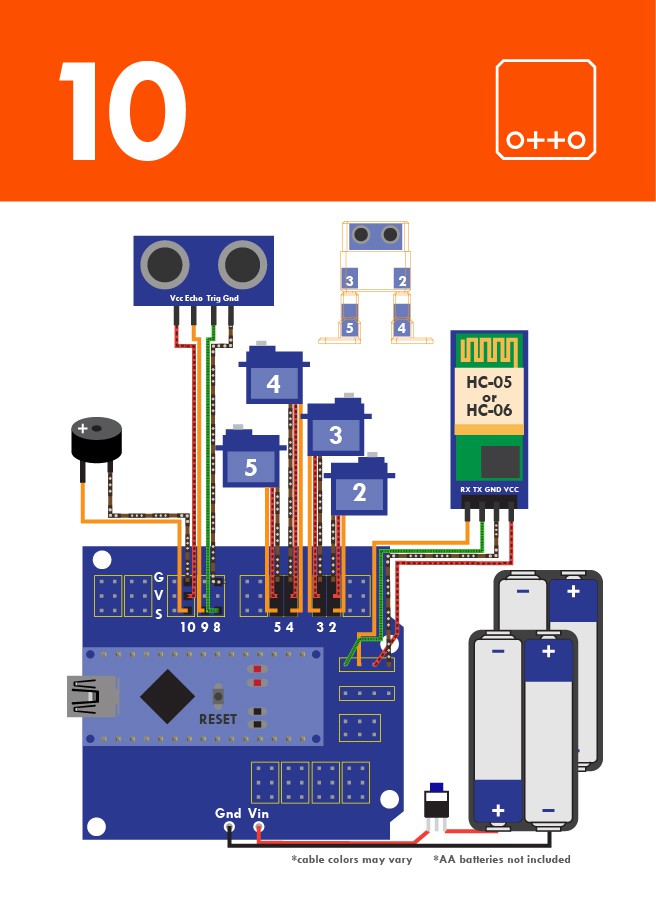
1 × Arduino Nano
1 × HC-06 or HC-05 Bluetooth module
1 × Arduino Nano Shield I/O You can use a mini breadboard but much more cable work
1 × USB-A to Mini-USB Cable
4 × Micro servo
1 × Buzzer
10 × Female/Female Jumper Wires
1 × 3.7 V LiPo Battery
1 × Touch sensor
1 × RGB Led
1 × Dot matrix display MAX7219optional for the mouth
1 × 8x8mm Micro Switch Self lock On/Off
-
23D print settings
- Recommended to use a FDM 3D printer with PLA material.
- No need supports or rafts at all.
- Resolution: 0.15mm
- Fill density 20%
-
3Rechargeable Battery
"lipo battery, 500 mAh, with step up converter it danced continuously for 40 minutes before battery run out"
Arduino Nano with micro USB connector - i removed diode from it and soldered a wire from it to lipo charger so it only charges from usb and can be programmed via usb but can't be powered from it. But programming is a problem since BT is connected so maybe i will remove connector, plug the hole and use the connector from lipo charger for charging and BT for programming
- Metal gear servos
- 2 switches - had to add 2 pull down resistors 10 kohm
- Mic
- 5V buzzer
- MAX7219 Dot matrix display - having some memory problems when using it so arduino resets by itself
- HC-05 bluetooth module - had to add 10 microF capacitor on reset line so i can program it over BT
- 500 mAh lipo battery
- Lipo charger board
- Step up converter
With 4x AA 1.5V Energizer can only run about 1 hour and then HC-06 not running
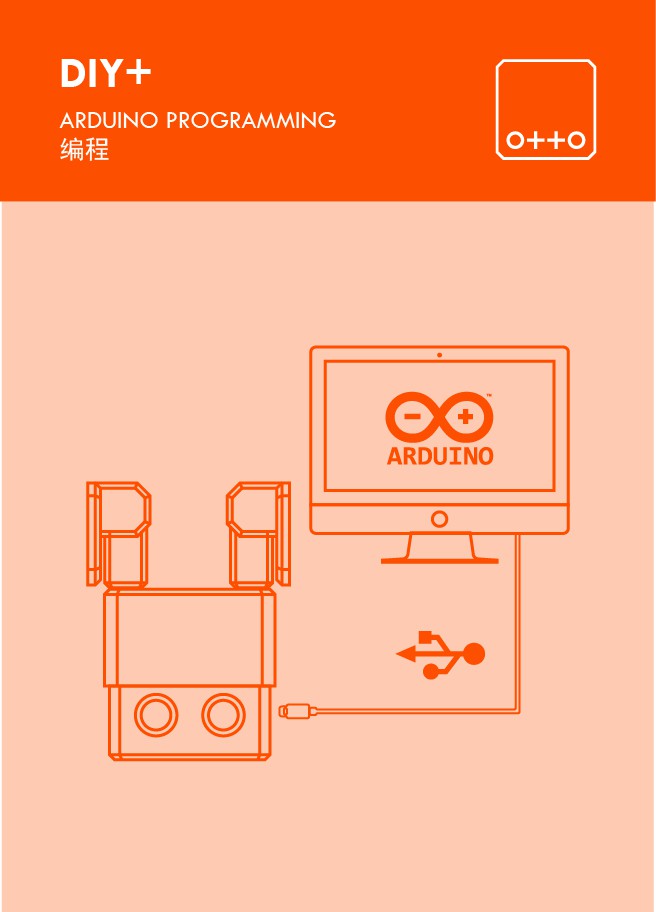
Programming
- An easier way for programming faster and less drivers or software trouble some like Arduino IDE
- Still can be something like Scratch or Bitbloq graphical coding
- Something tangible like Google bloks
- App like cousin Zowi trough Bluetooth
- Anything to control the robot in and more fund and friendly way, up to you.
Electronic design
- Custom made PCB for Otto, (now we use 2 boards that could be replaced by one with more functions like battery, integrated buzzer and microphone)
- More sensors interactions like poking, tilting or clapping.
- Emotional aspect how can be more than just a robot?
-
4Assembly all components
Follow the instruction manual very similar to Otto DIY
![]()
-
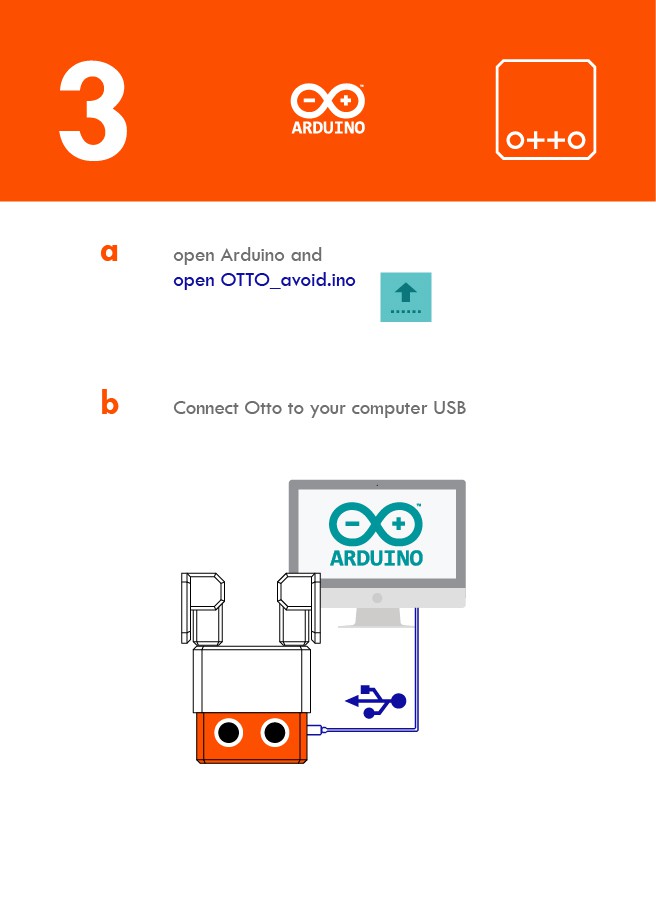
5Bluetooth (BT) setup:
![]()
Baud-rate for programming module is 9600 or 19200 or 38400, depends on a module.
For programming Arduino nano has 57600 baud-rate for boot loader so BTmodule must match that speed to be able to program it
Here you can find sketch and wiring diagram for programming your BT module with Arduino Nano:
1. Upload the sketch HC05_BT_config.ino to your Nano first, then disconnect Nano from USB.
2. Now connect BT to Nano as shown in diagram but do not connect VCC.
3. Plug in the USB to Nano and then connect VCC so BT enters AT mode. LED on BT should start to blink slower, about once every 2 seconds. (If this doesn't work, try holding the button on BT module while connecting VCC).
Open serial monitor in IDE, set baud-rate to 9600 and line ending to Both NL & CR.
Type AT then press enter; (if everything is right, BT should respond with OK and then enter following commands:
AT+NAME=Zowi "setting the name"
AT+PSWD=1234 "pairing password"
AT+UART=57600,1,0 "baud rate"
AT+POLAR=1,0 "enabling STATE pin to be used as reset for programming arduino over BT"
Now go to the APP step
If any problem check this instructable of how to Modify the HC-05 Bluetooth Module Defaults Using AT Commands
For HC-06: (9600?) 115200
For HC-06 BT module things are a little simpler because module is always in AT command mode when not connected to anything. But the downside is that HC-06 module cannot be used to upload sketches to Arduino because it doesn't have reset. For configuring the module
1. upload this sketch HC06_BT_config.ino to your Nano
1. disconnect USB
2. connect BT module to Nano like this:
TX - RX
RX - TX
VCC - 5V
GND - GND
3. Power on your Nano and after about 10-15 seconds everything should be finished and your BT should be configured (LED13 should start blinking).
If any problem check this instructable
Main Code:
After setup the bluetooth, disconnect again the module and upload this code:
After successful upload connect the module again and will be ready for pairing
Android APP:
Thanks to Juan Felix Mateos we have a Beta android APP that you can test
![OTTO APP]() OTTO APP Or because Otto is also compatible with Zowi you can use BQ APP Download the official "Zowi App" from bq Install and open Zowi app for android, pair the device and ignore the warning message that says the code is modified or something.
OTTO APP Or because Otto is also compatible with Zowi you can use BQ APP Download the official "Zowi App" from bq Install and open Zowi app for android, pair the device and ignore the warning message that says the code is modified or something. -
6Adding the Matrix (optional)
Many #ottobuilders like to imitate Zowi as much as possible so jarsoftelectrical, modified the libraries and added new codes to make this possible using a MAX 7219 LED MATRIX and represent emotions and gestures
This Repository have all open source files for my version of the popular Otto DIY The Arduino code is modified from the Zowi robot, it has modified to wotk with a MAX 7219 LED MATRIX as as mouth as well as other adjustments.
Please copy all the files in the OTTO_Library folder to the Arduino IDE Library folder
The code is based on the Zowi code, modified for OTTO
Please NOTE: i have moved the BUZZER to pin D13............
Please NOTE: you need pull-down resistors on the button pins............10K ohm
Please NOTE: you will need a link between A7 and +5 volt to fool low battery warnings
The modified OTTO main program is inside the OTTO_LEDMATRIX folder, ensure you are using the latest version of the Arduino IDE. The modifed ZOWI main program is inside the ZOWI_BASE_v2_MATRIX folder, Also ensure you use all the modified libraries in the ZOWI folder here.
![This version requires some extra space for the matrix module]() This version requires some extra space for the matrix module
This version requires some extra space for the matrix moduleMAX 7219 LED MATRIX
extra PCB for buttons
more patience with the cables
extra buttons for modes
-
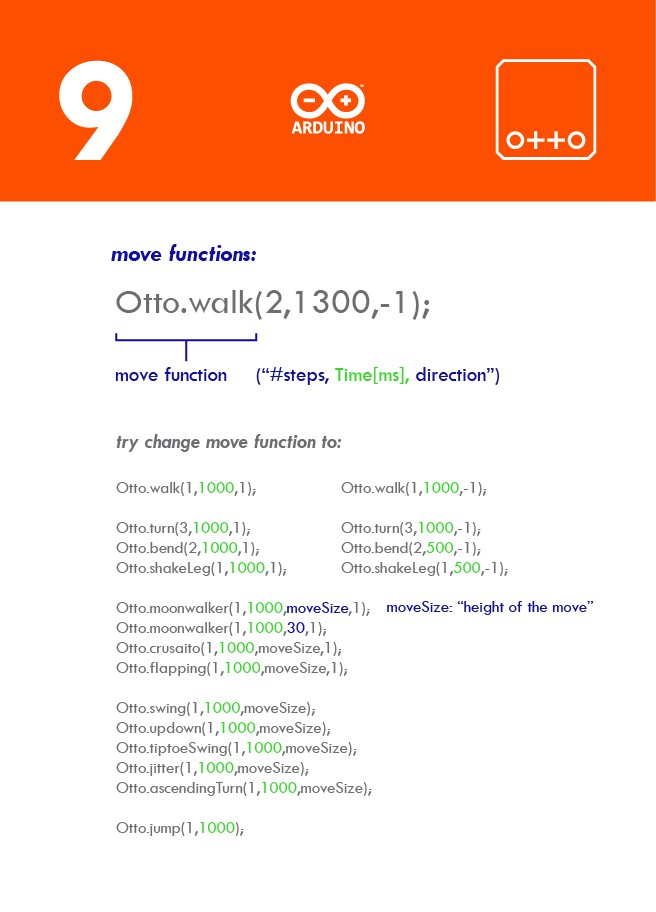
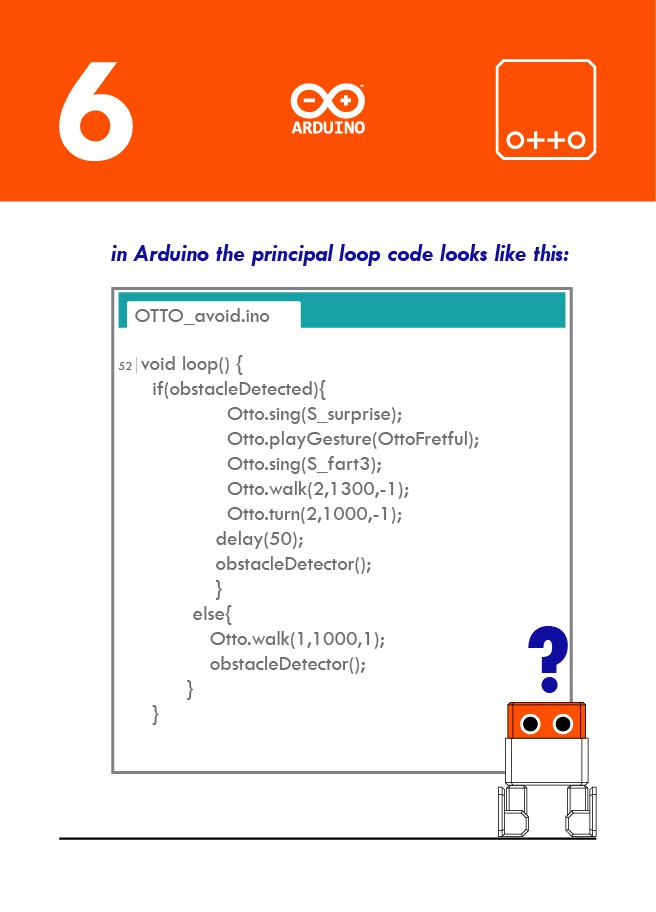
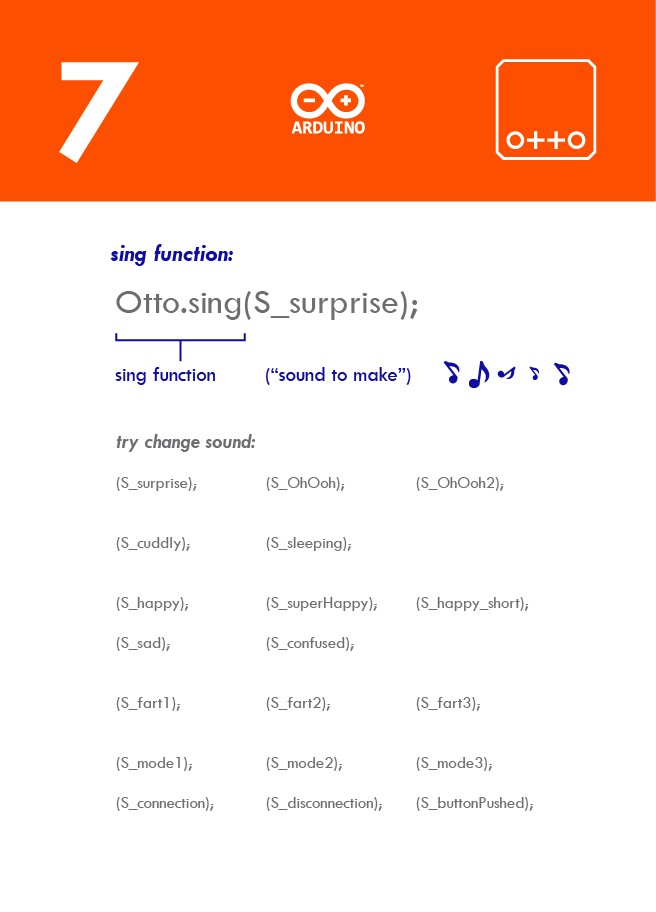
7Learn to code
![]()
![]()
![]()
![]()
![]()
![]()
![]()
![]()
![]()
![]()
![]()
![]()
Otto DIY+
"Otto DIY with steroids" Arduino powered bot - the ultimate tool for STEAM education
 OTTO APP Or because Otto is also compatible with Zowi you can use BQ APP Download the official "Zowi App" from bq Install and open Zowi app for android, pair the device and ignore the warning message that says the code is modified or something.


Discussions
Become a Hackaday.io Member
Create an account to leave a comment. Already have an account? Log In.