paul
paul-
Upgrades......
07/16/2015 at 16:32 • 0 commentsI have decided to switch the RosBot over to Magnetic Carriages, Rods, and Effector as well as replace the J-Head with an E3D V6 All Metal hotend. So I will be designing a new effector, carriages, rod ends, and E3d mount in Autodesk Inventor 2015, my preferred 3D modeling software.
I also picked up the JohnSL FSR Endstop Controller board for greater repeatability with the automatic calibration function.
Once this is all done, printed, and installed I will upload some new pictures of the machine and some sample prints.
-
Oops!..........
08/21/2014 at 02:19 • 0 commentsWell, it looks like I overlooked something or was just trying to speed through it when I calculated my rod length but as it stands my rods are a little too short to reach the outer perimeter of the Onyx heated bed!! As it stands right now my rods are 290mm from the center of the screw hole to the screw hole on the other side, this only allows me a printing diameter of 220mm and not the full 280mm the Onyx provides! Face palm! I need to get new rods that are about 30 to 40mm longer, which I know is going to dip into my Z height a little bit but right now I have a little over 13 inches from the tip of my J-Head to the glass so even with longer rods I will still be over a foot in Z height which is enough for me. I want to be able to use the full 280mm diameter print area the Onyx allows me! Not too big of a deal, it will still work until I get longer CF tubes and new Traxxas joints. Expect a new log when I get the rod materials in, I'll document well and take plenty of pictures!
-
Print Surveillance......?
08/20/2014 at 23:38 • 0 commentsI have been toying with the idea of integrating a camera into the RosBot design to allow you to be able to check in on a long print from anywhere with an internet connection. At the moment I am using an Arduino and the RAMPS board for my printers control and I do not see myself upgrading to a Rasberry Pi or anything, not anytime real soon anyway......maybe a future upgrade?? IDK, maybe the best and easiest way for me to get this functionality without overhauling my whole setup would be to simply grab one of those IP cameras and attach it to the RosBots frame, then I could build a quick little page for viewing a specific prints progress. I like the idea of being able to view my prints progress remotely and make sure everything is running fine, but I don't want to complicate the build too much, so I think I will probably go with an IP camera.
-
The RosBot needs an FSR!!!
08/20/2014 at 21:58 • 0 commentsI am still without a third FSR for my auto calibration Z Probe system! I need 3 because 3 points define a plane and also that is what my heated bed rests on, I have the FSRs installed with a quarter inch rubber foot on top of it as an insulater and it also acts to direct pressure to the correct area of the FSR.
At the moment money is tight and I cant afford to order a new one..... hopefully soon so things can progress on the RosBot-Kossel!
-
Mega Troubles Turns to PSU Trouble
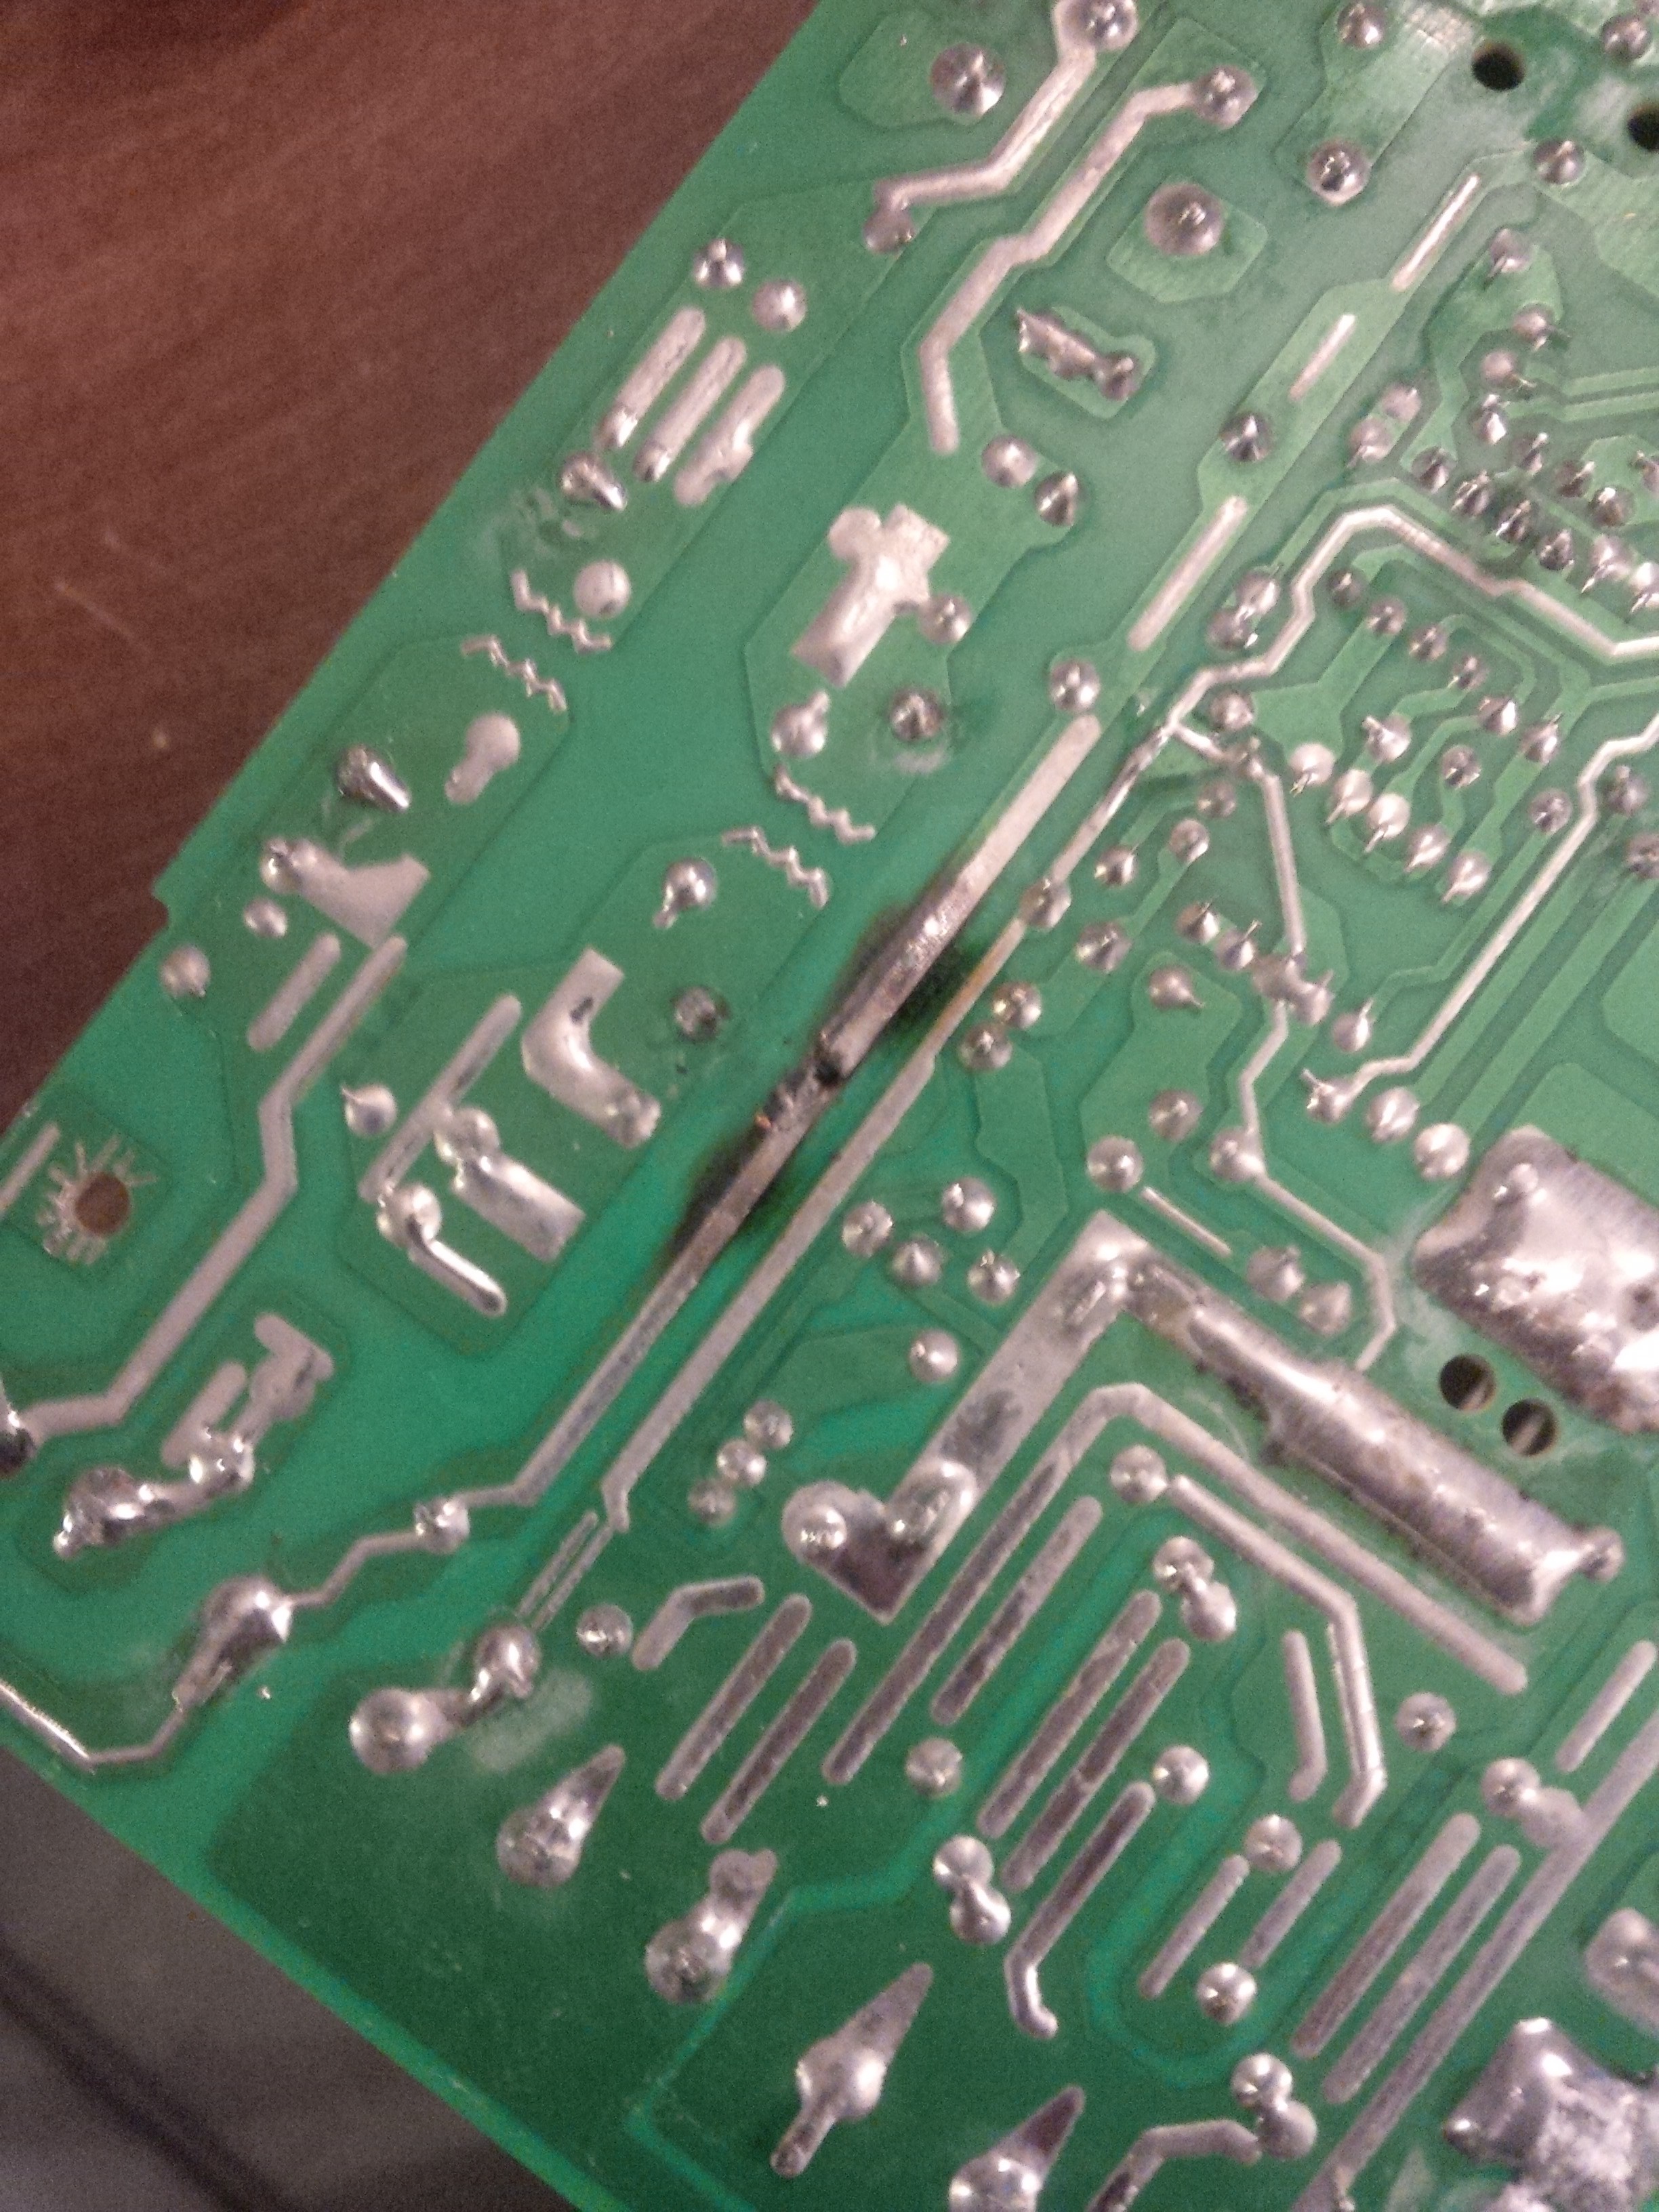
08/20/2014 at 21:51 • 0 commentsSo, third times the charm, right? Well I didn't want to chance it and it was now starting to look like there was something with my power supply causing the power surge which was frying the Arduino. My RAMPS board did have D1 and D2 connected so I could run it stand alone from the LCD / SD Card controller, and I know from my other Delta, my Rostock Max V1, that you should be able to power from your PSU as well as have the USB hooked up. I took out my multimeter and started testing all power connections searching for an issue. After much testing and searching Google I decided to switch my multimeter to continuity and started testing the power supply itself. Ah ha, I found an issue, one lead on Earth Ground and one on 12V+ and my multimeter starts beeping at me!? Earth Ground and V+ connected somehow, that's an issue, that's why the Arduino"s keep burning up, RAMPS is at 12 volts and Arduino is at 5 volts, but once I connect the USB cable to the Arduino since the computer its coming from is earth grounded the 12 volts is finding it way to Earth Ground through the USB which fries the Arduino! Time to void the warranty on the PSU and figure out what is going on!
![]()
There's a problem right off, thats the Earth Ground trace that is burnt out. Let's go ahead and fix that with some solder and my iron.
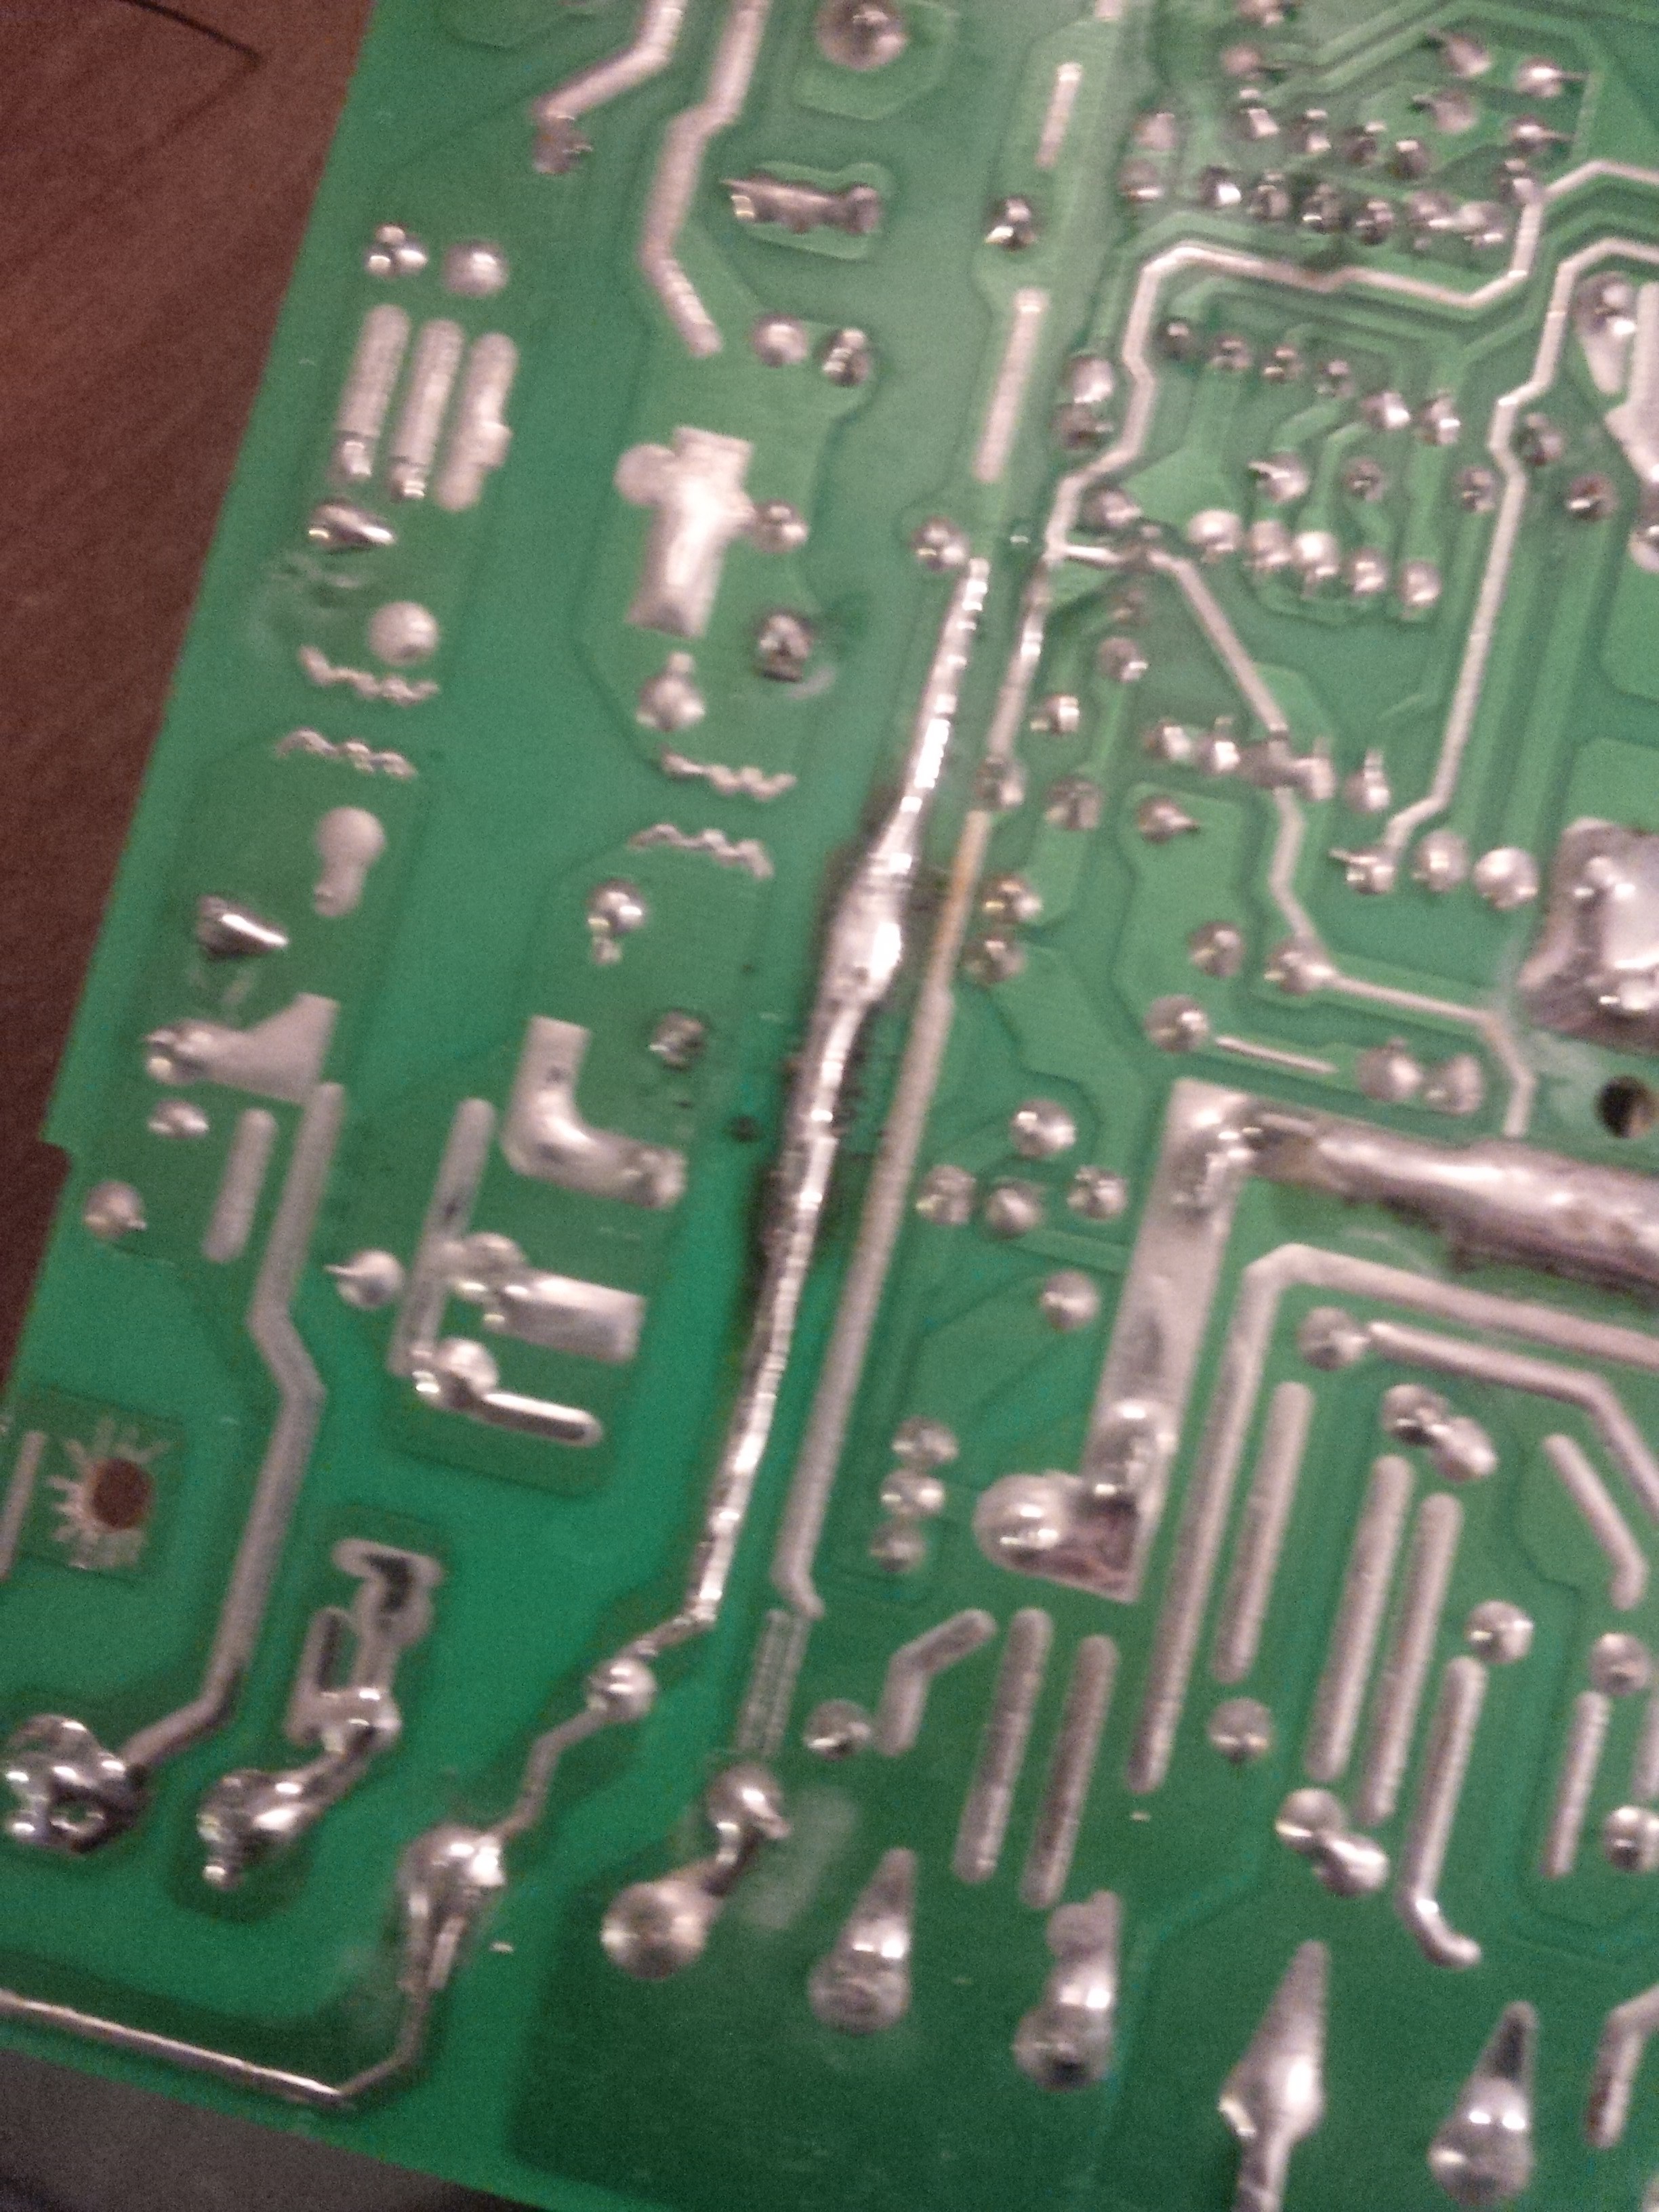
![]()
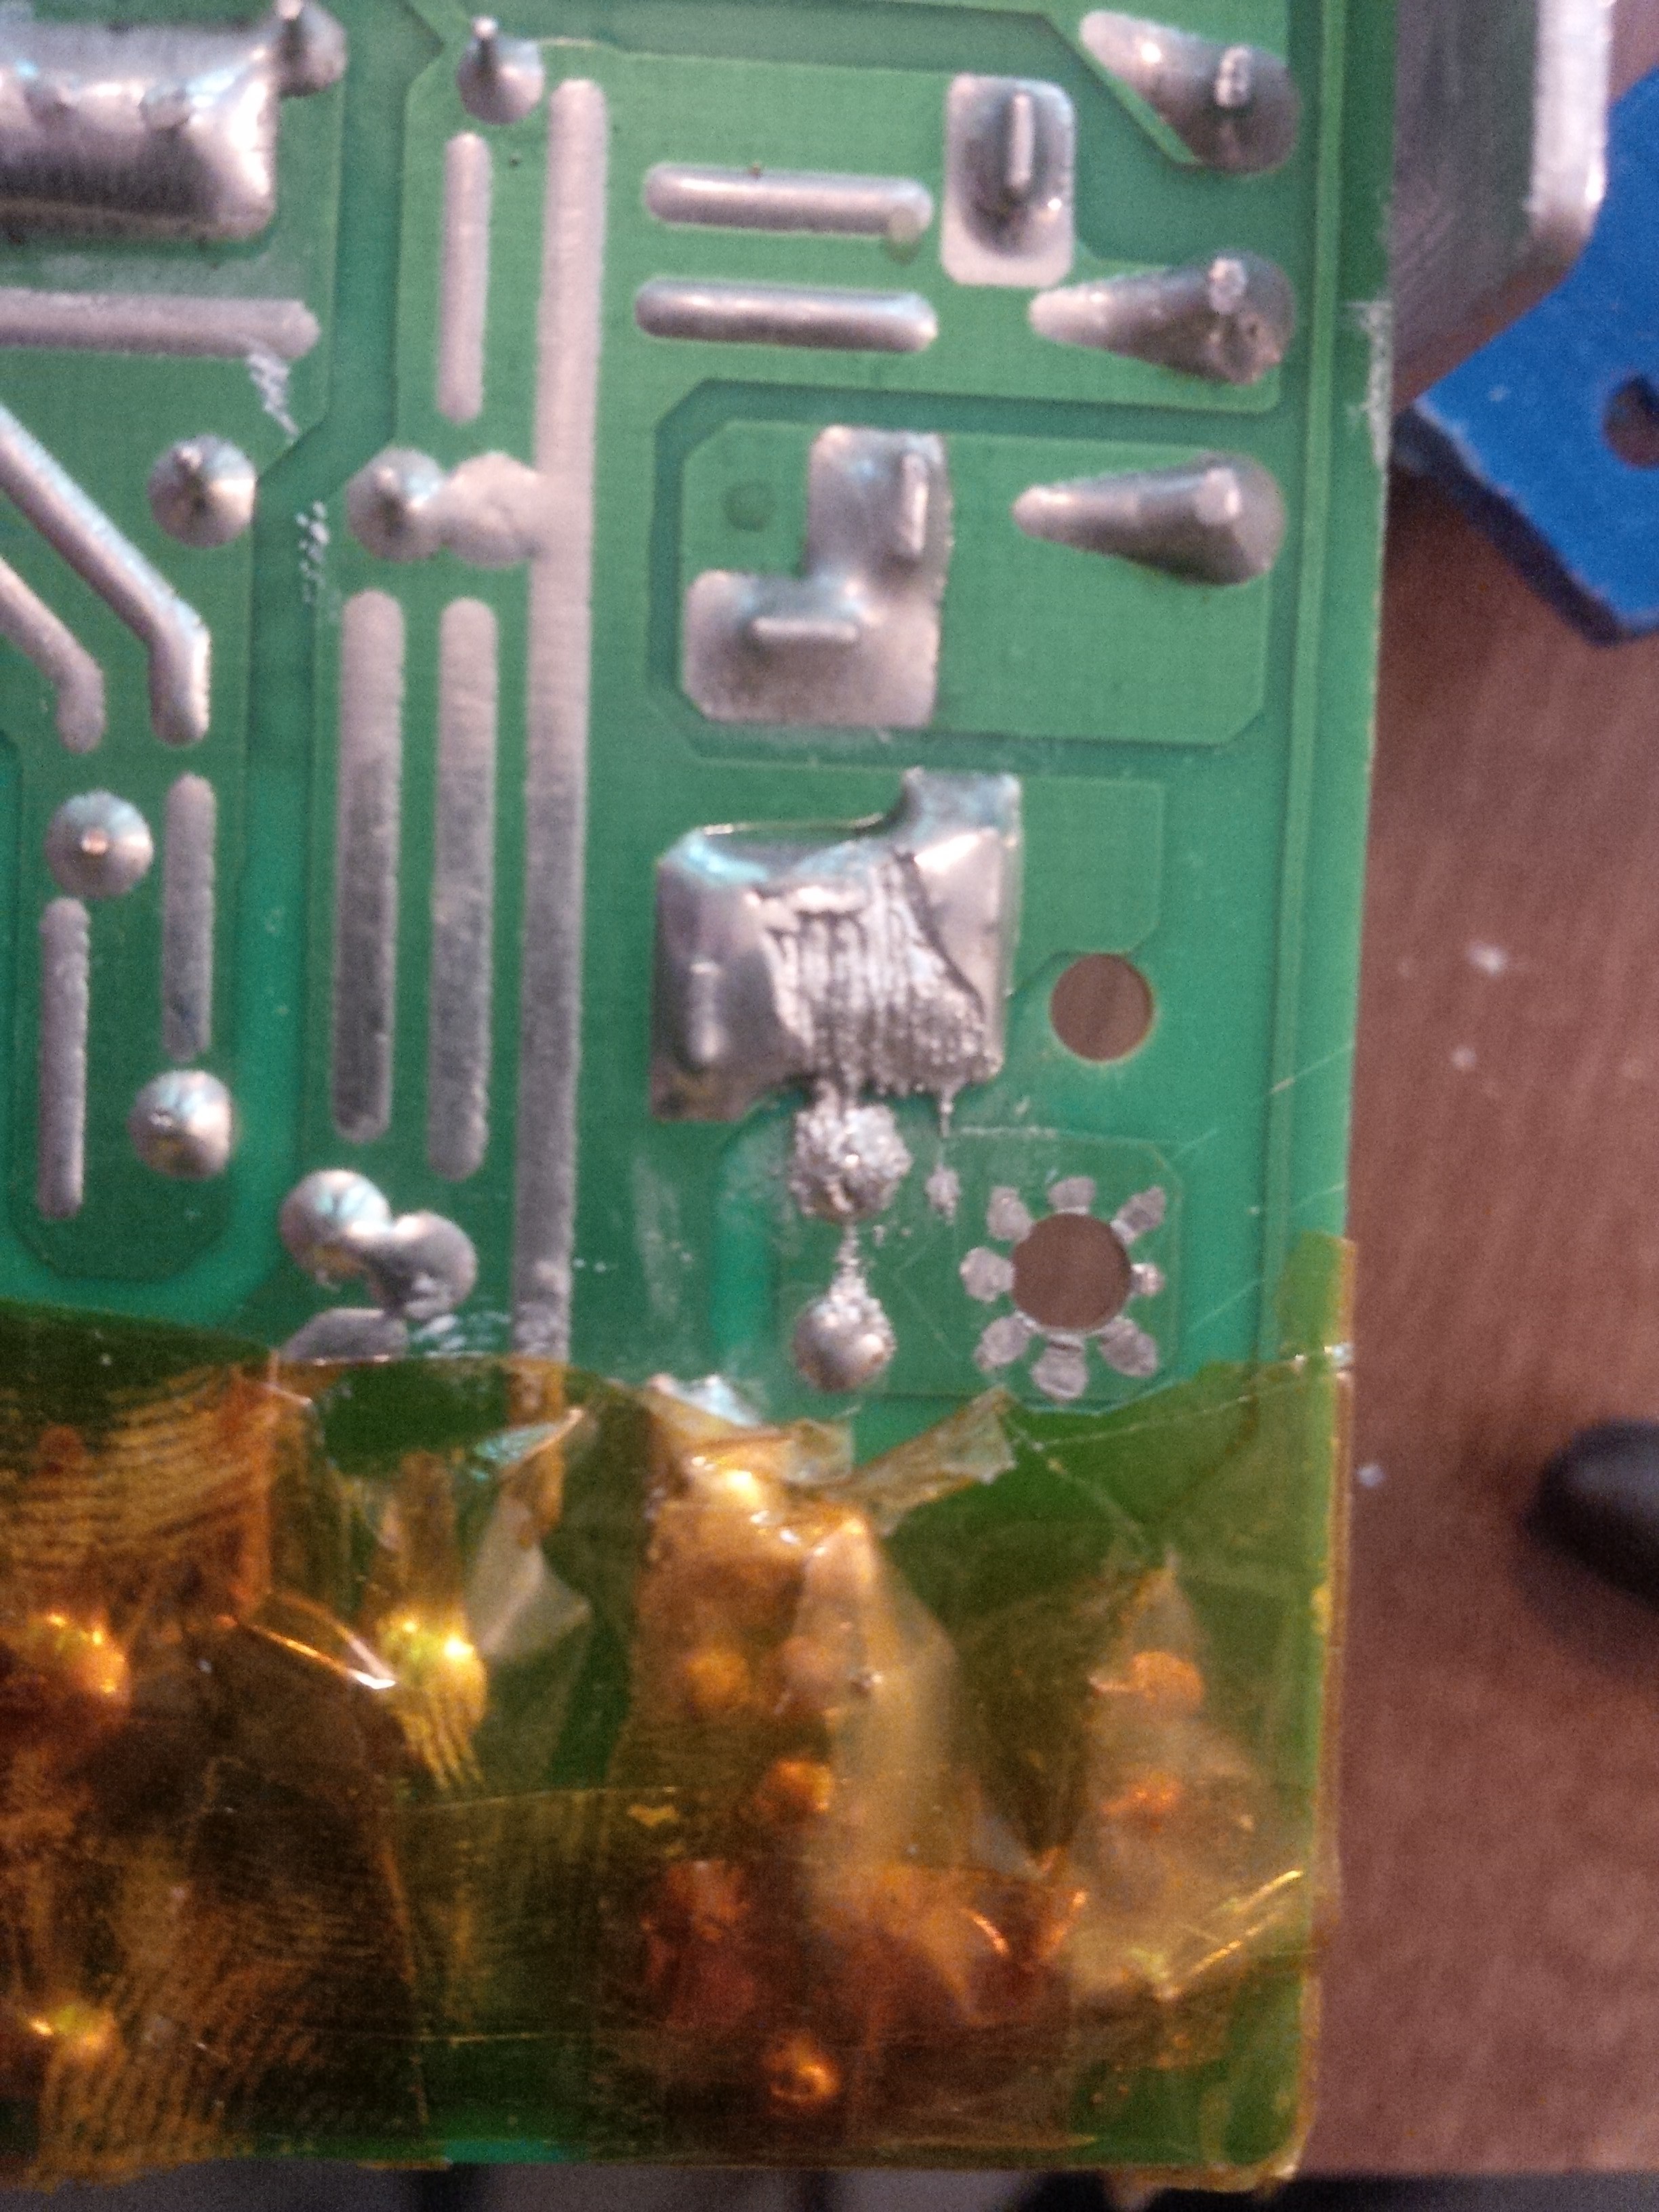
There we go, all fixed! So I put everything back together thinking that must have been the problem, check with my multimeter, and of course that was not the only issue I should have checked before I put it back together! Oh well, lesson learned, lets take it apart again and search the board for a problem. It took quite a while of searching but eventually I did find the main problem which I suspect caused the earth ground trace to burn up in the first place. It was caused by some sloppy soldering.......
![]()
Once I had cleaned up the bad solder job everything was working fine and there was no more connection between earth ground and V+. Still I did not trust it so I ended up making a custom power free USB cord with just the 2 data lines connected! lol. So that's what I will use from now on just in case! :-)
-
Mega 2560 Troubles
08/20/2014 at 01:15 • 0 commentsI had everything hooked up and ready to test, I flipped the power switch on the RosBot, all went well and it turned on. Next I went to plug in the USB cord and connect the printer to my computer in order to load the firmware and commence with the testing. As soon as I plugged the cord into the Mega, befor eit was all the way in the Mega started smoking and caught fire right to the left of the USB port if you are looking straight into the port. It was the little protection component next to the USB, burned a hole straight through the board!
I assumed it must have been a factory defect of some sort and promptly contacted the supplier, told them the story and had a replacement on its way the next day. When I received the second Mega, I hooked everything up, plugged in the USB before turning on the power, all was well, no smoke! OK, I said, and flipped the power switch...... MAN NOT AGAIN!!! Yep it toasted the second board! I contacted the supplier and luckily they were nice enough to send a 2nd replacement! I couldnt afford to buy another Mega 2560, I already spent my budget.
More to come.....
RosBot Kossel
A new Delta style 3D Printer incorporating many new developments and ideas. Brought to you by InoTech3D