Cameron
-
A custom PCB and a body to match
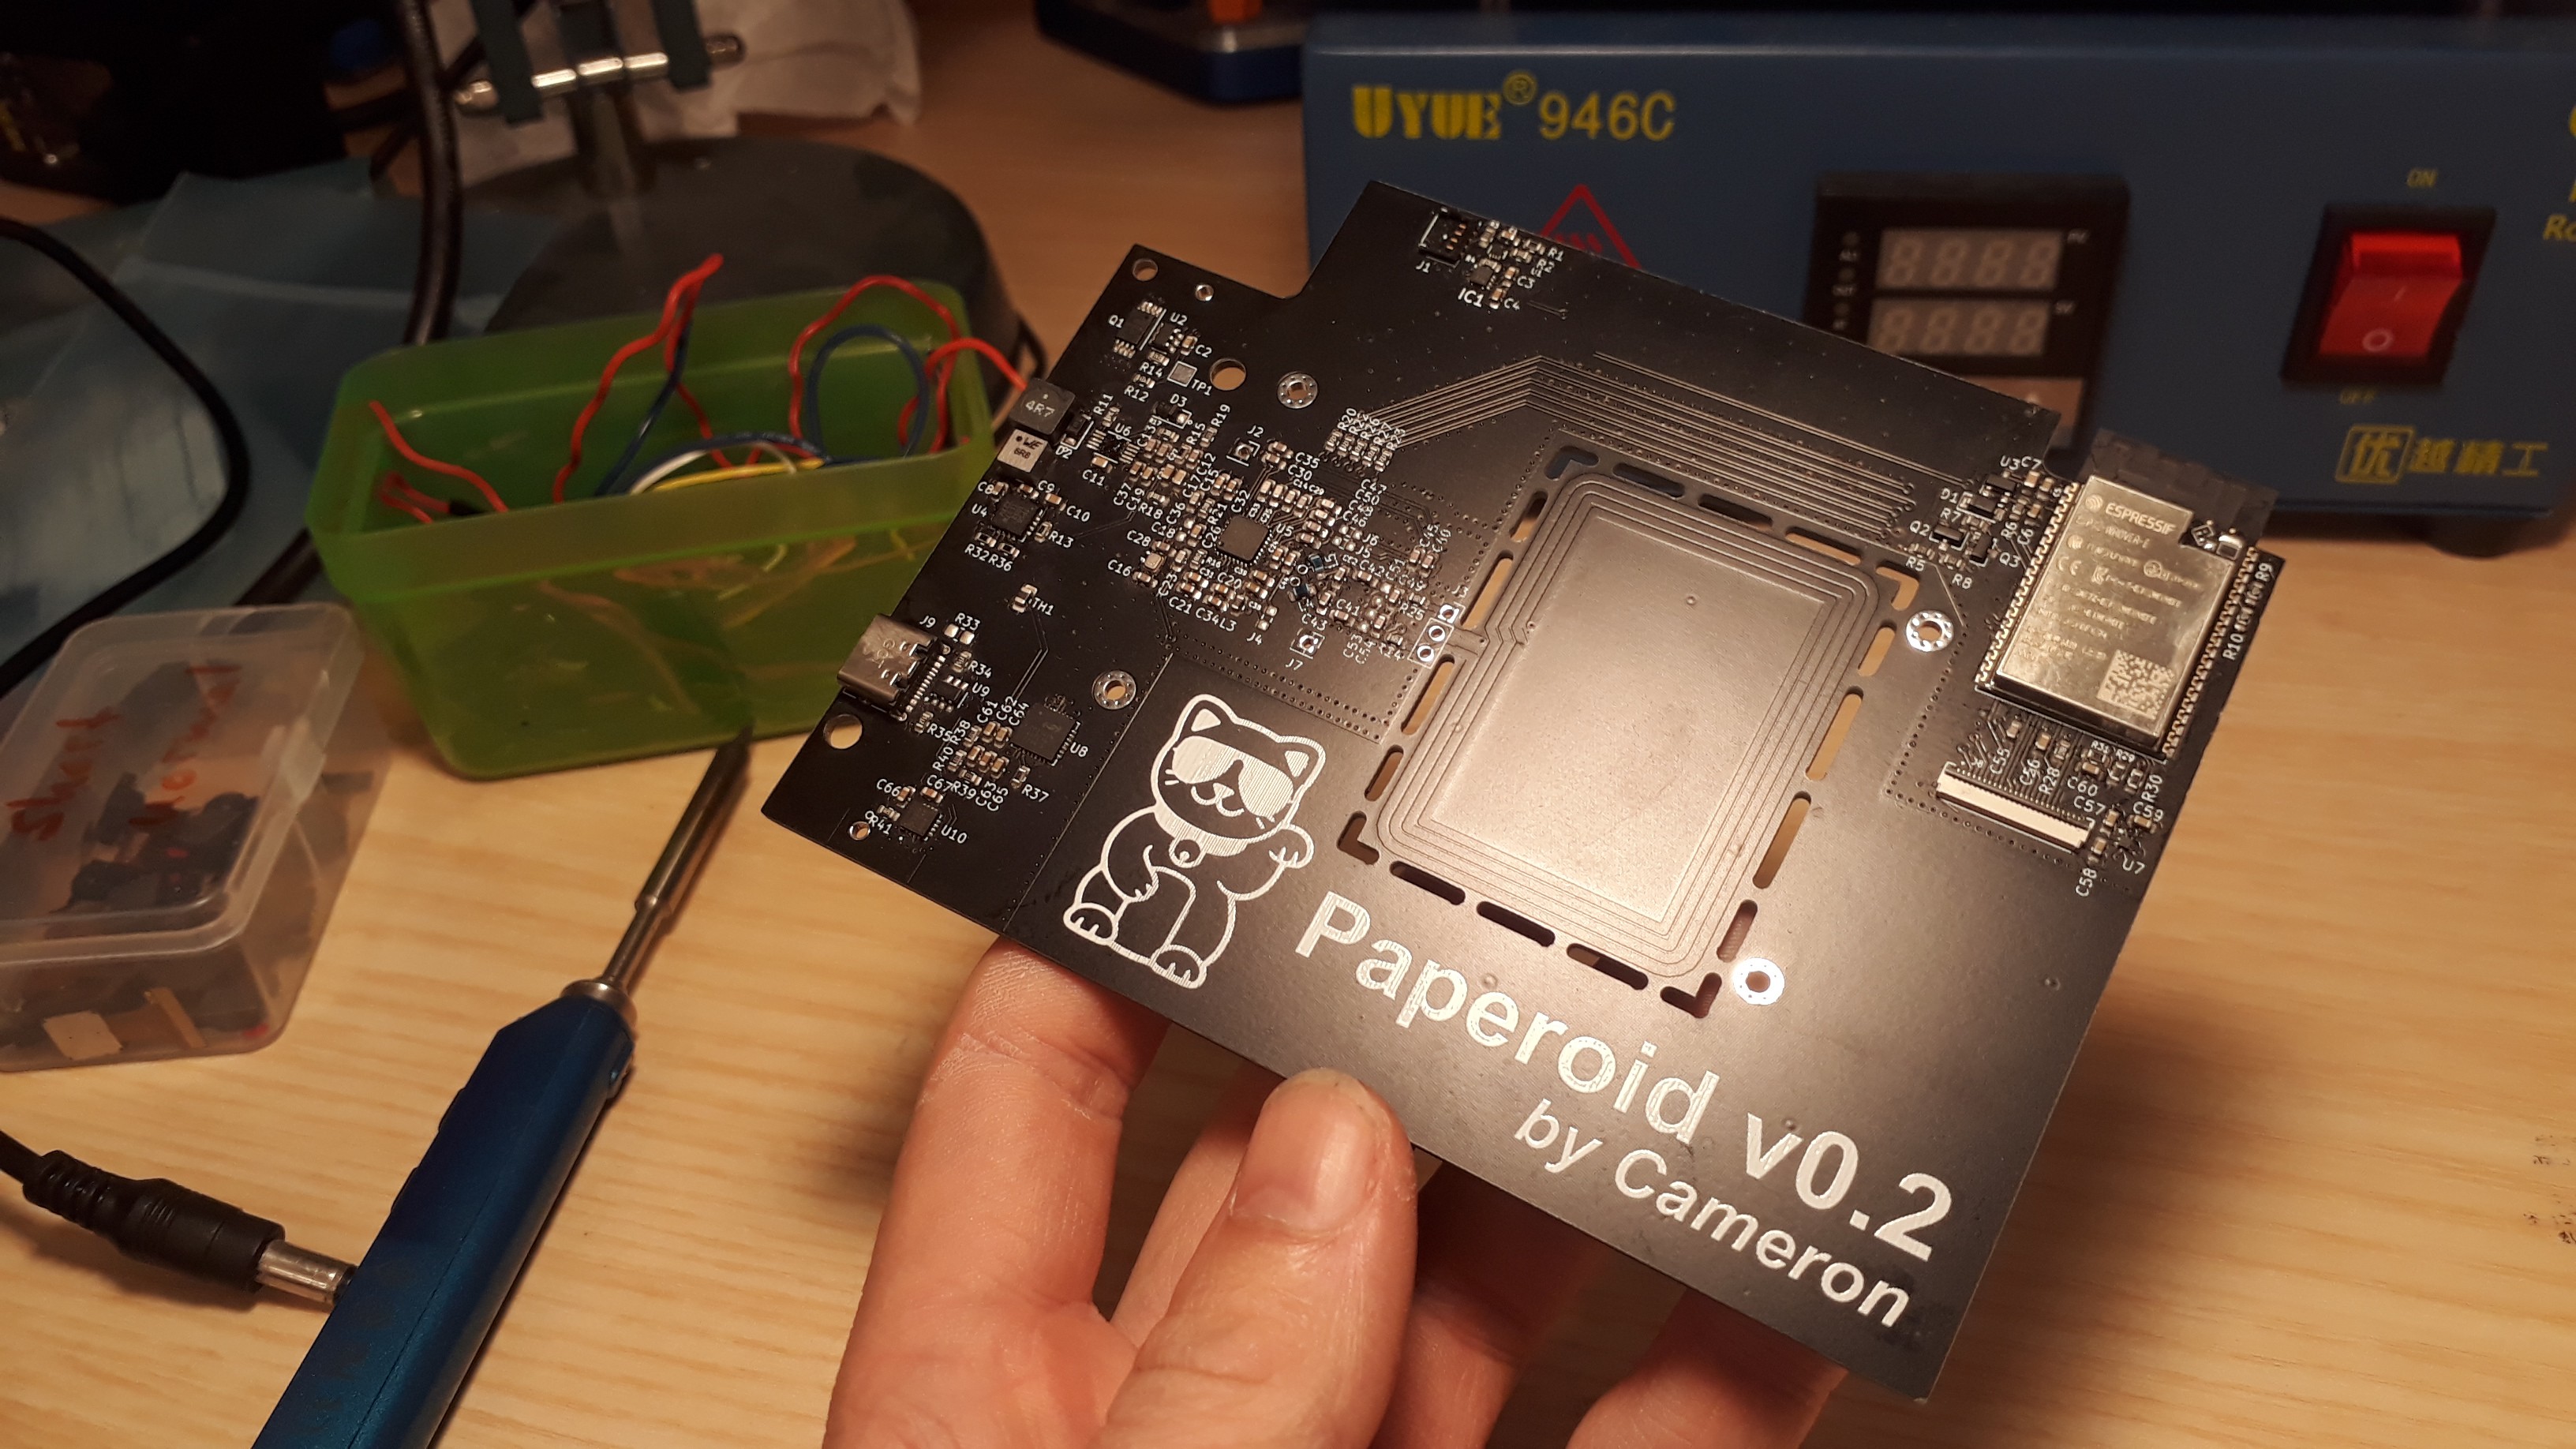
02/09/2023 at 22:26 • 0 commentsIt was clear after the protoboard approach that if I wanted to do a decent job of the thing, I would need a custom PCB. The fact that I would need to design a PCB antenna for the NFC part, combined with never having made a PCB in my life before, really slowed down this step. It was not until 2 years later, in 2022, that I had finally practiced with PCB design (for my Postcard Frame project) and felt ready to give this another shot.
As I was basically recreating my prototype that used the ST development board, I pretty much copy and pasted the design for this bit from their reference files. I watched a lot of videos about antenna design and tuning, and my main take away was that I really didn't want to design my own antenna if copying someone else's would do the job.
I became quite worried about the various impacts of a radio antenna on my board though, and tried to follow as many best practices as I could to limit its effects, especially considering I had an ESP32 with wifi and bluetooth on the board, and communication with a camera too. I haven't used the wifi or bluetooth yet, but I thought they eventually could be interesting in the future. I think I am still getting some kind of noise into the camera signal, as sometimes I see line artefacts in the camera image, but I am not quite sure where this is coming from, or if it's just a soldering issue.
![]()
Of course it needed a little waving cat on it as well.
But overall the PCB design was fine, definitely much to improve and hopefully the design could be further simplified, but importantly I was able to stencil up the solder paste, solder on the components, and it all worked first time. Or mostly. Right now there is a slight issue that the device can shutdown on holding the capture button, but it doesn't turn back on without disconnecting the batteries. Still need to debug this.
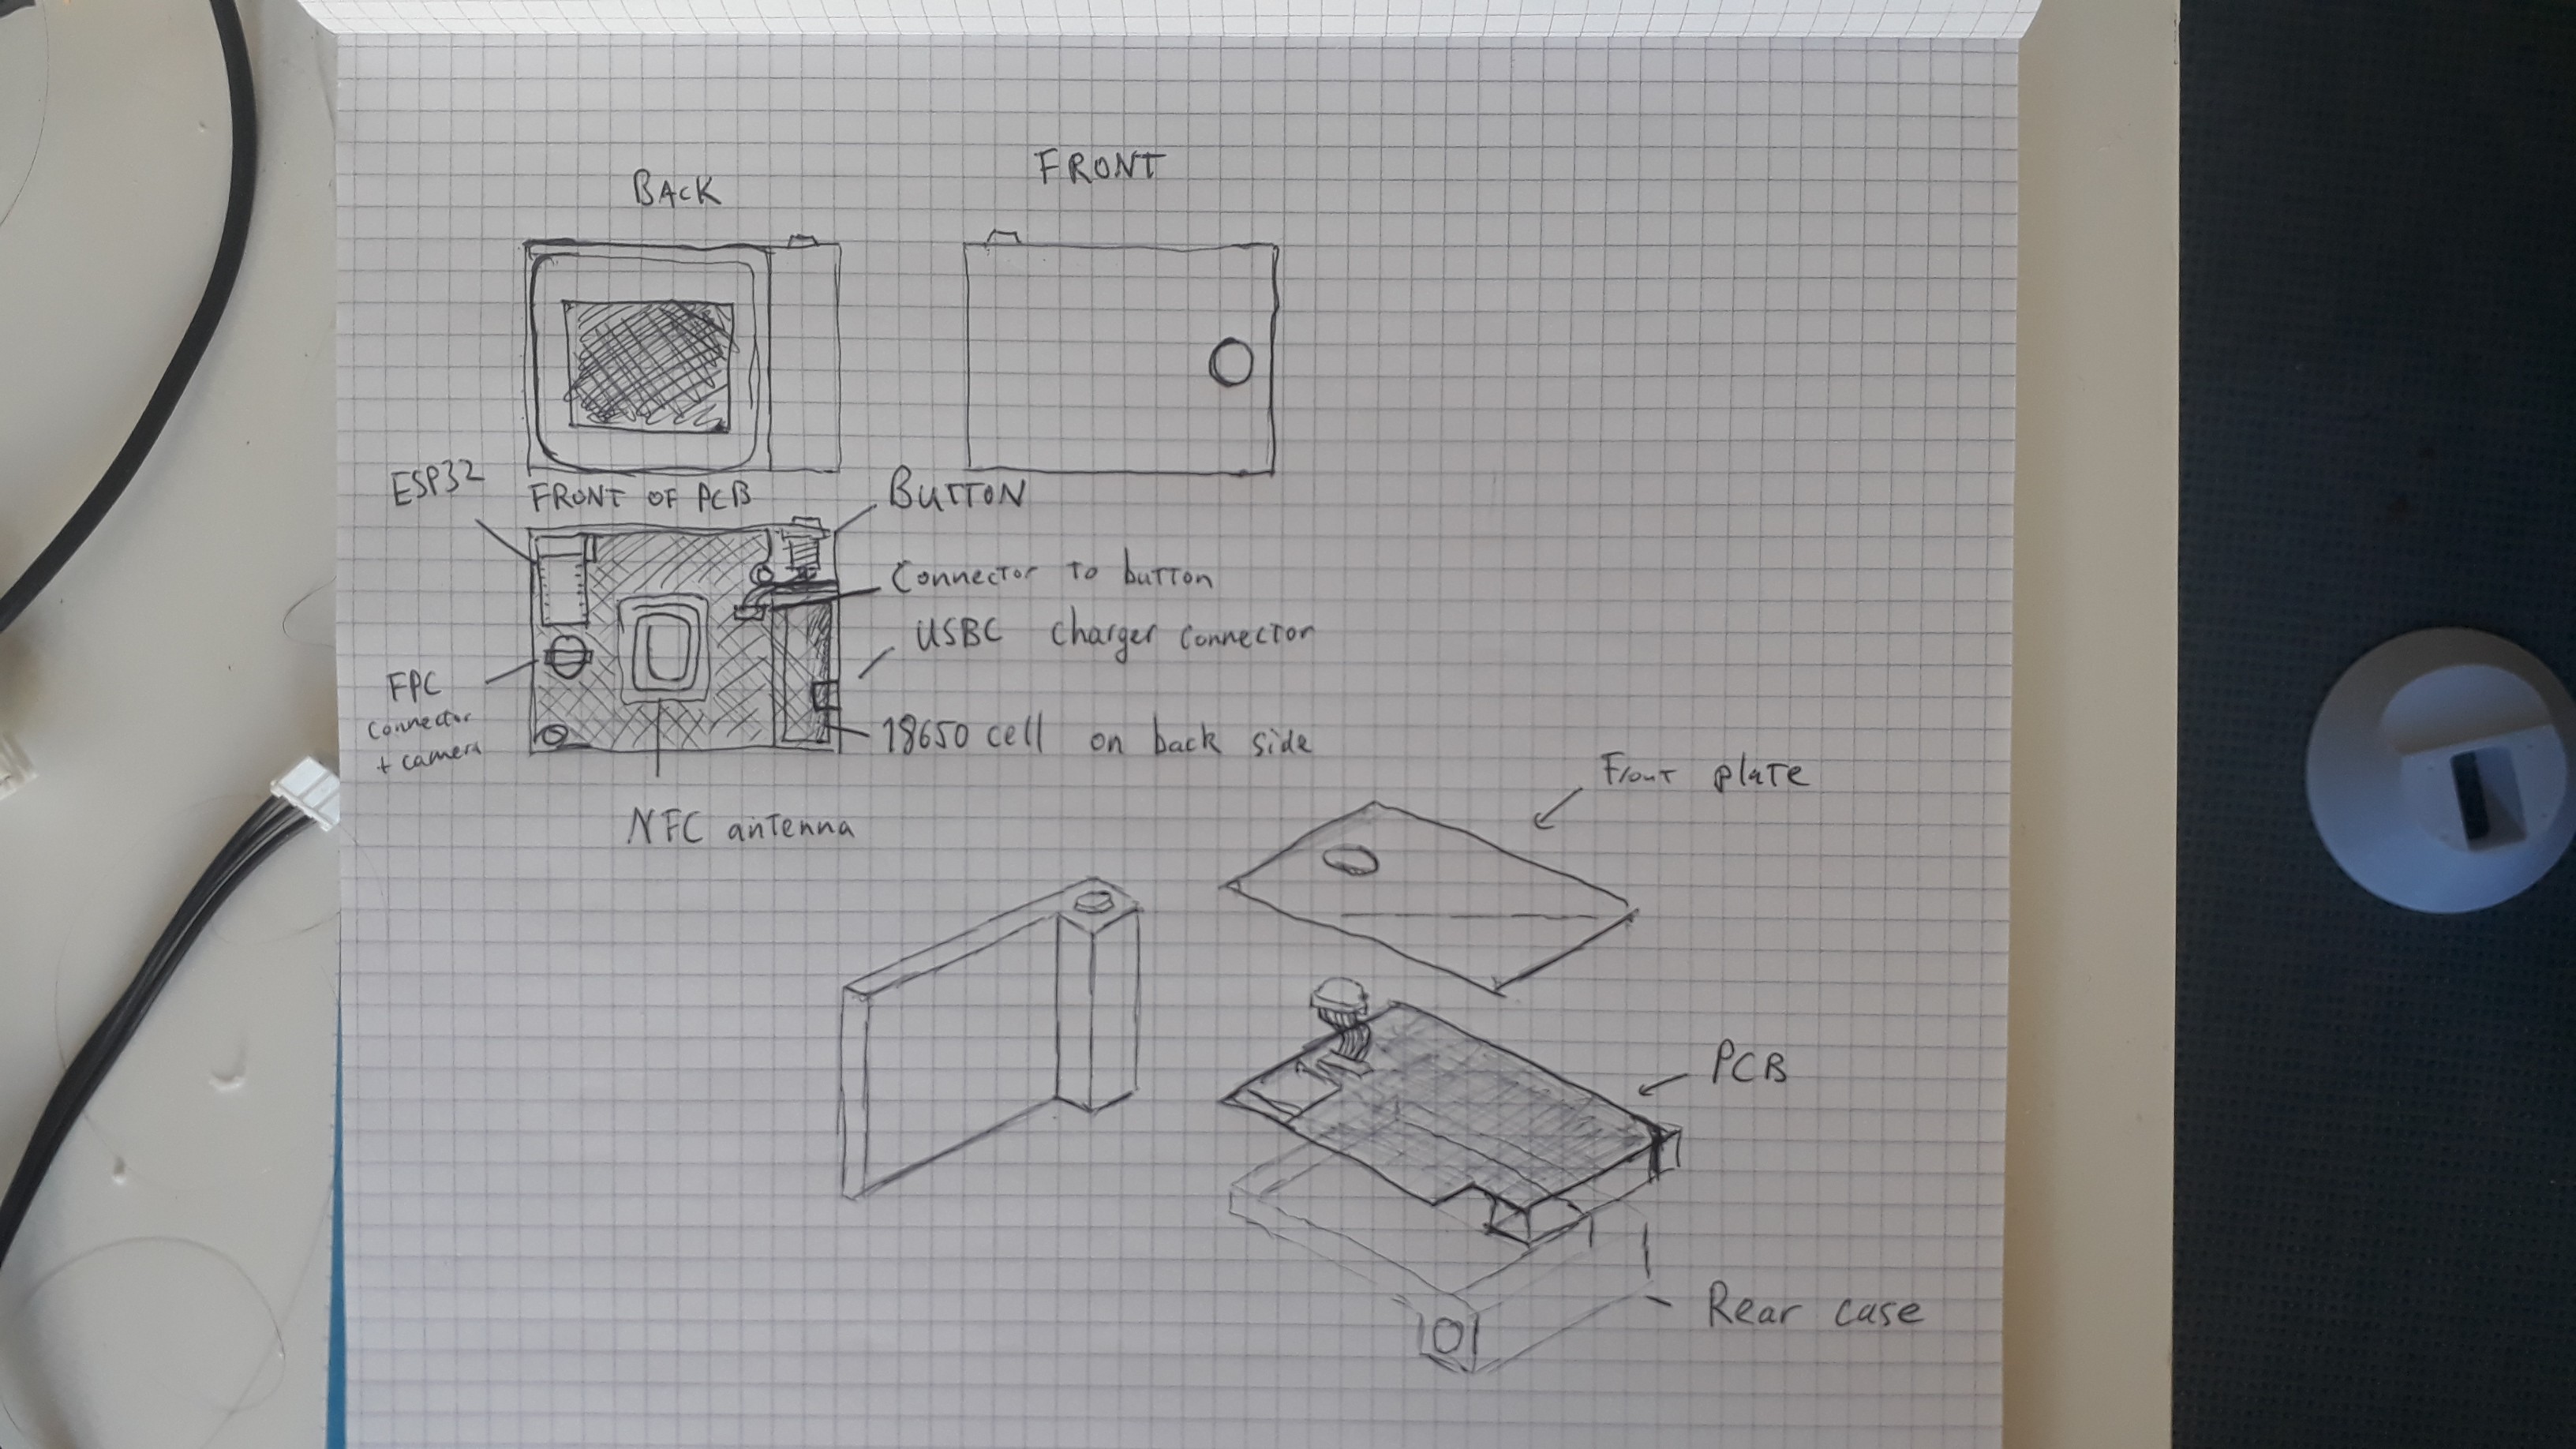
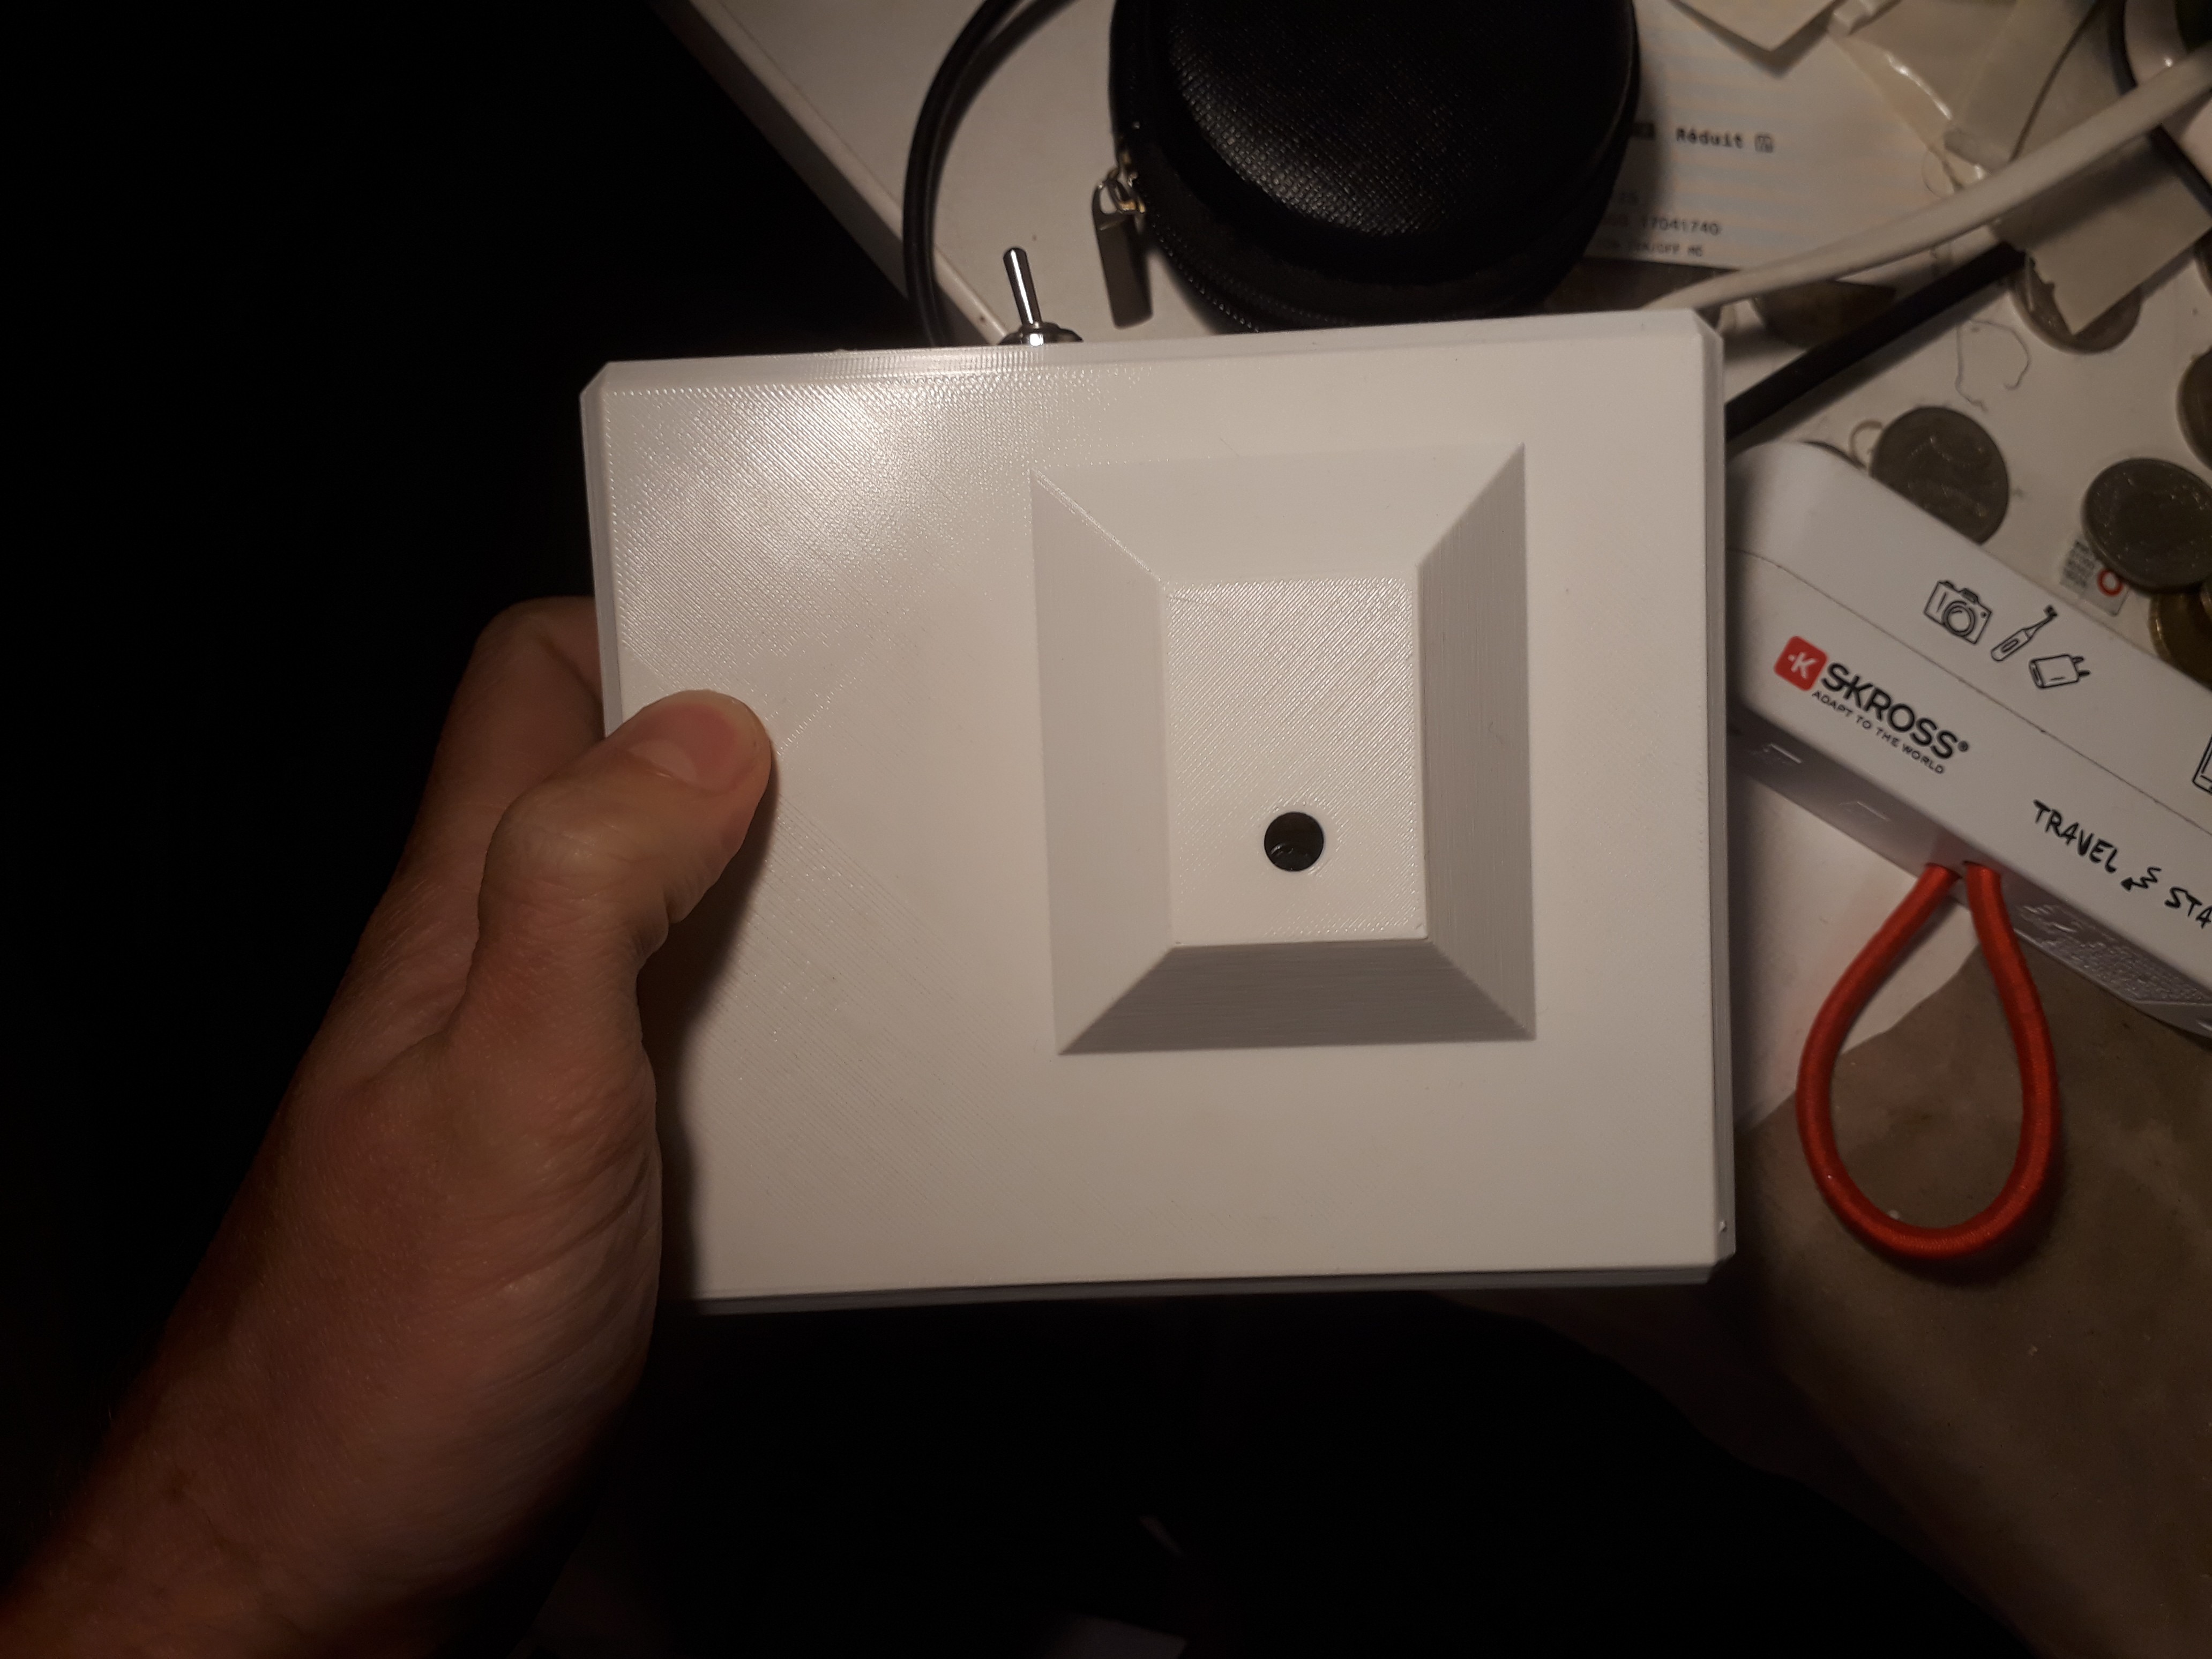
Almost as important as the PCB design was the design of the body itself. I wanted to make something that looked like a camera, maybe like one of those cool 80s style ones, and was simple to use. I settled on the final shape, essentially a more compact version of my intial concepts, but added magnets inside the Waveshare NFC screens to hold the screens in place on the camera. This allows the screens to be orientated correctly, and also allows them to be fixed to a fridge.
![]()
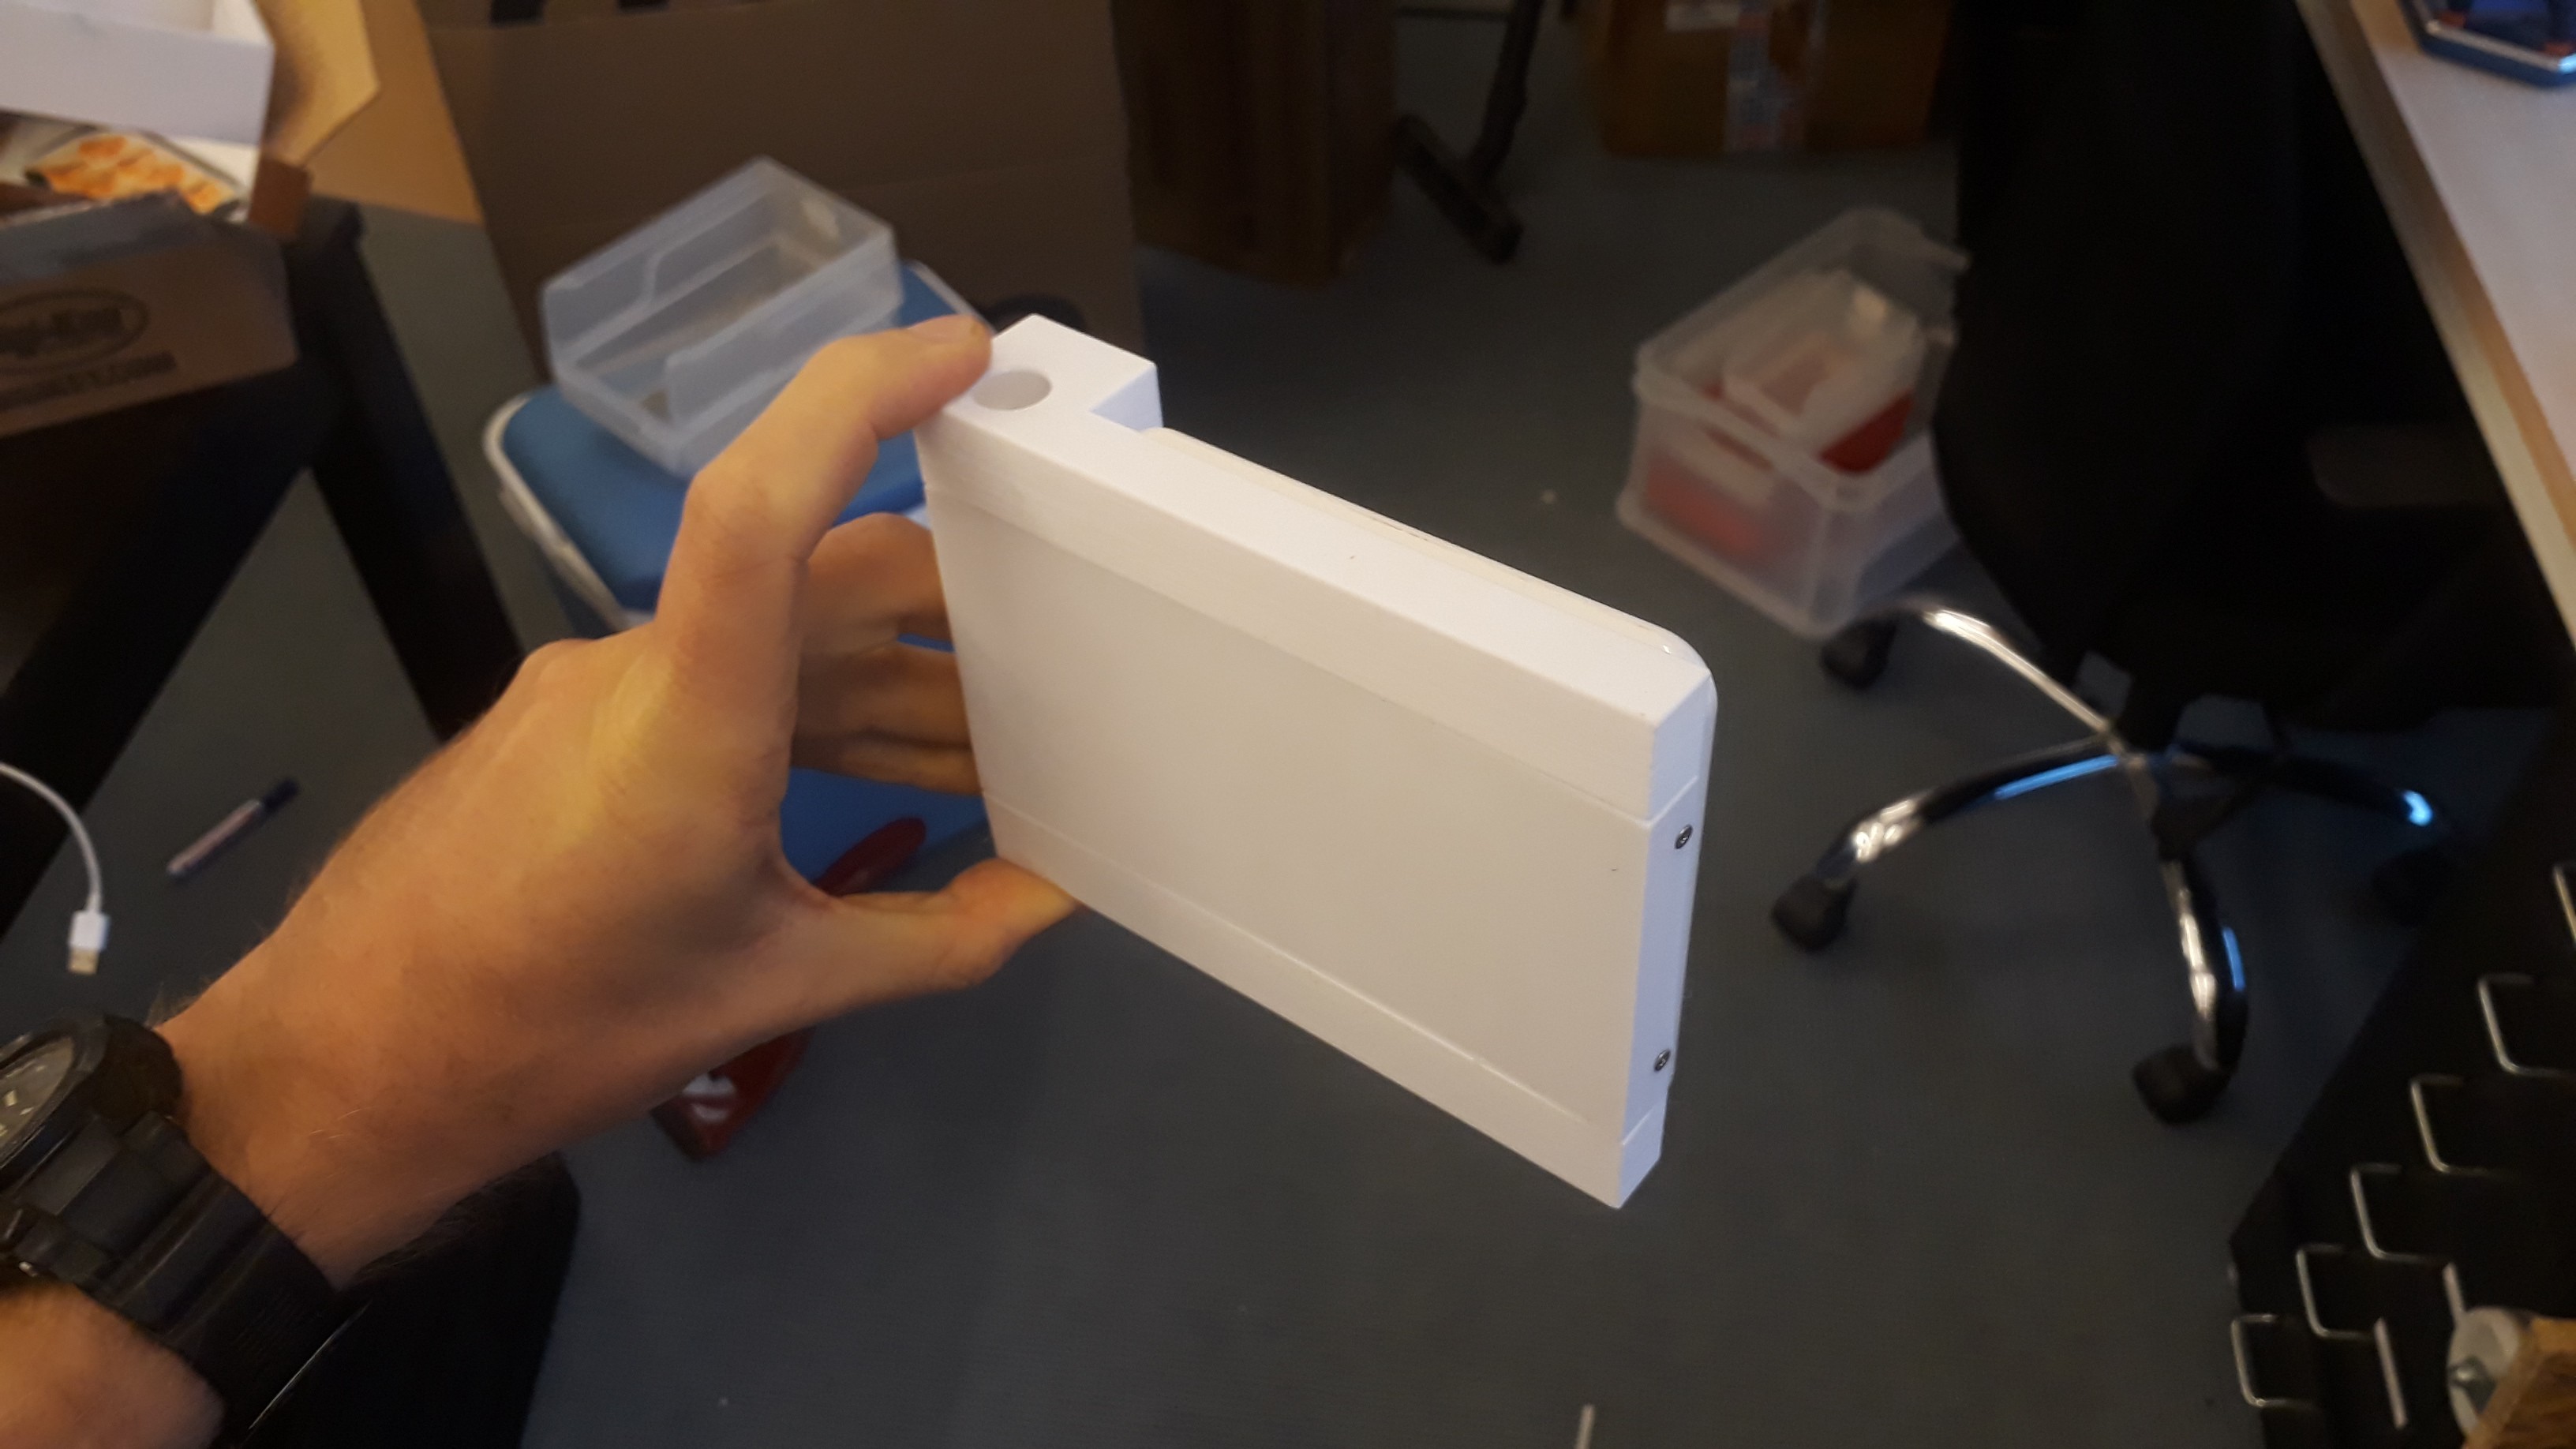
The case was 3d printed using an FDM printer, but it is very thin and has small holes so resin or powder based printer would probably be better.
![]()
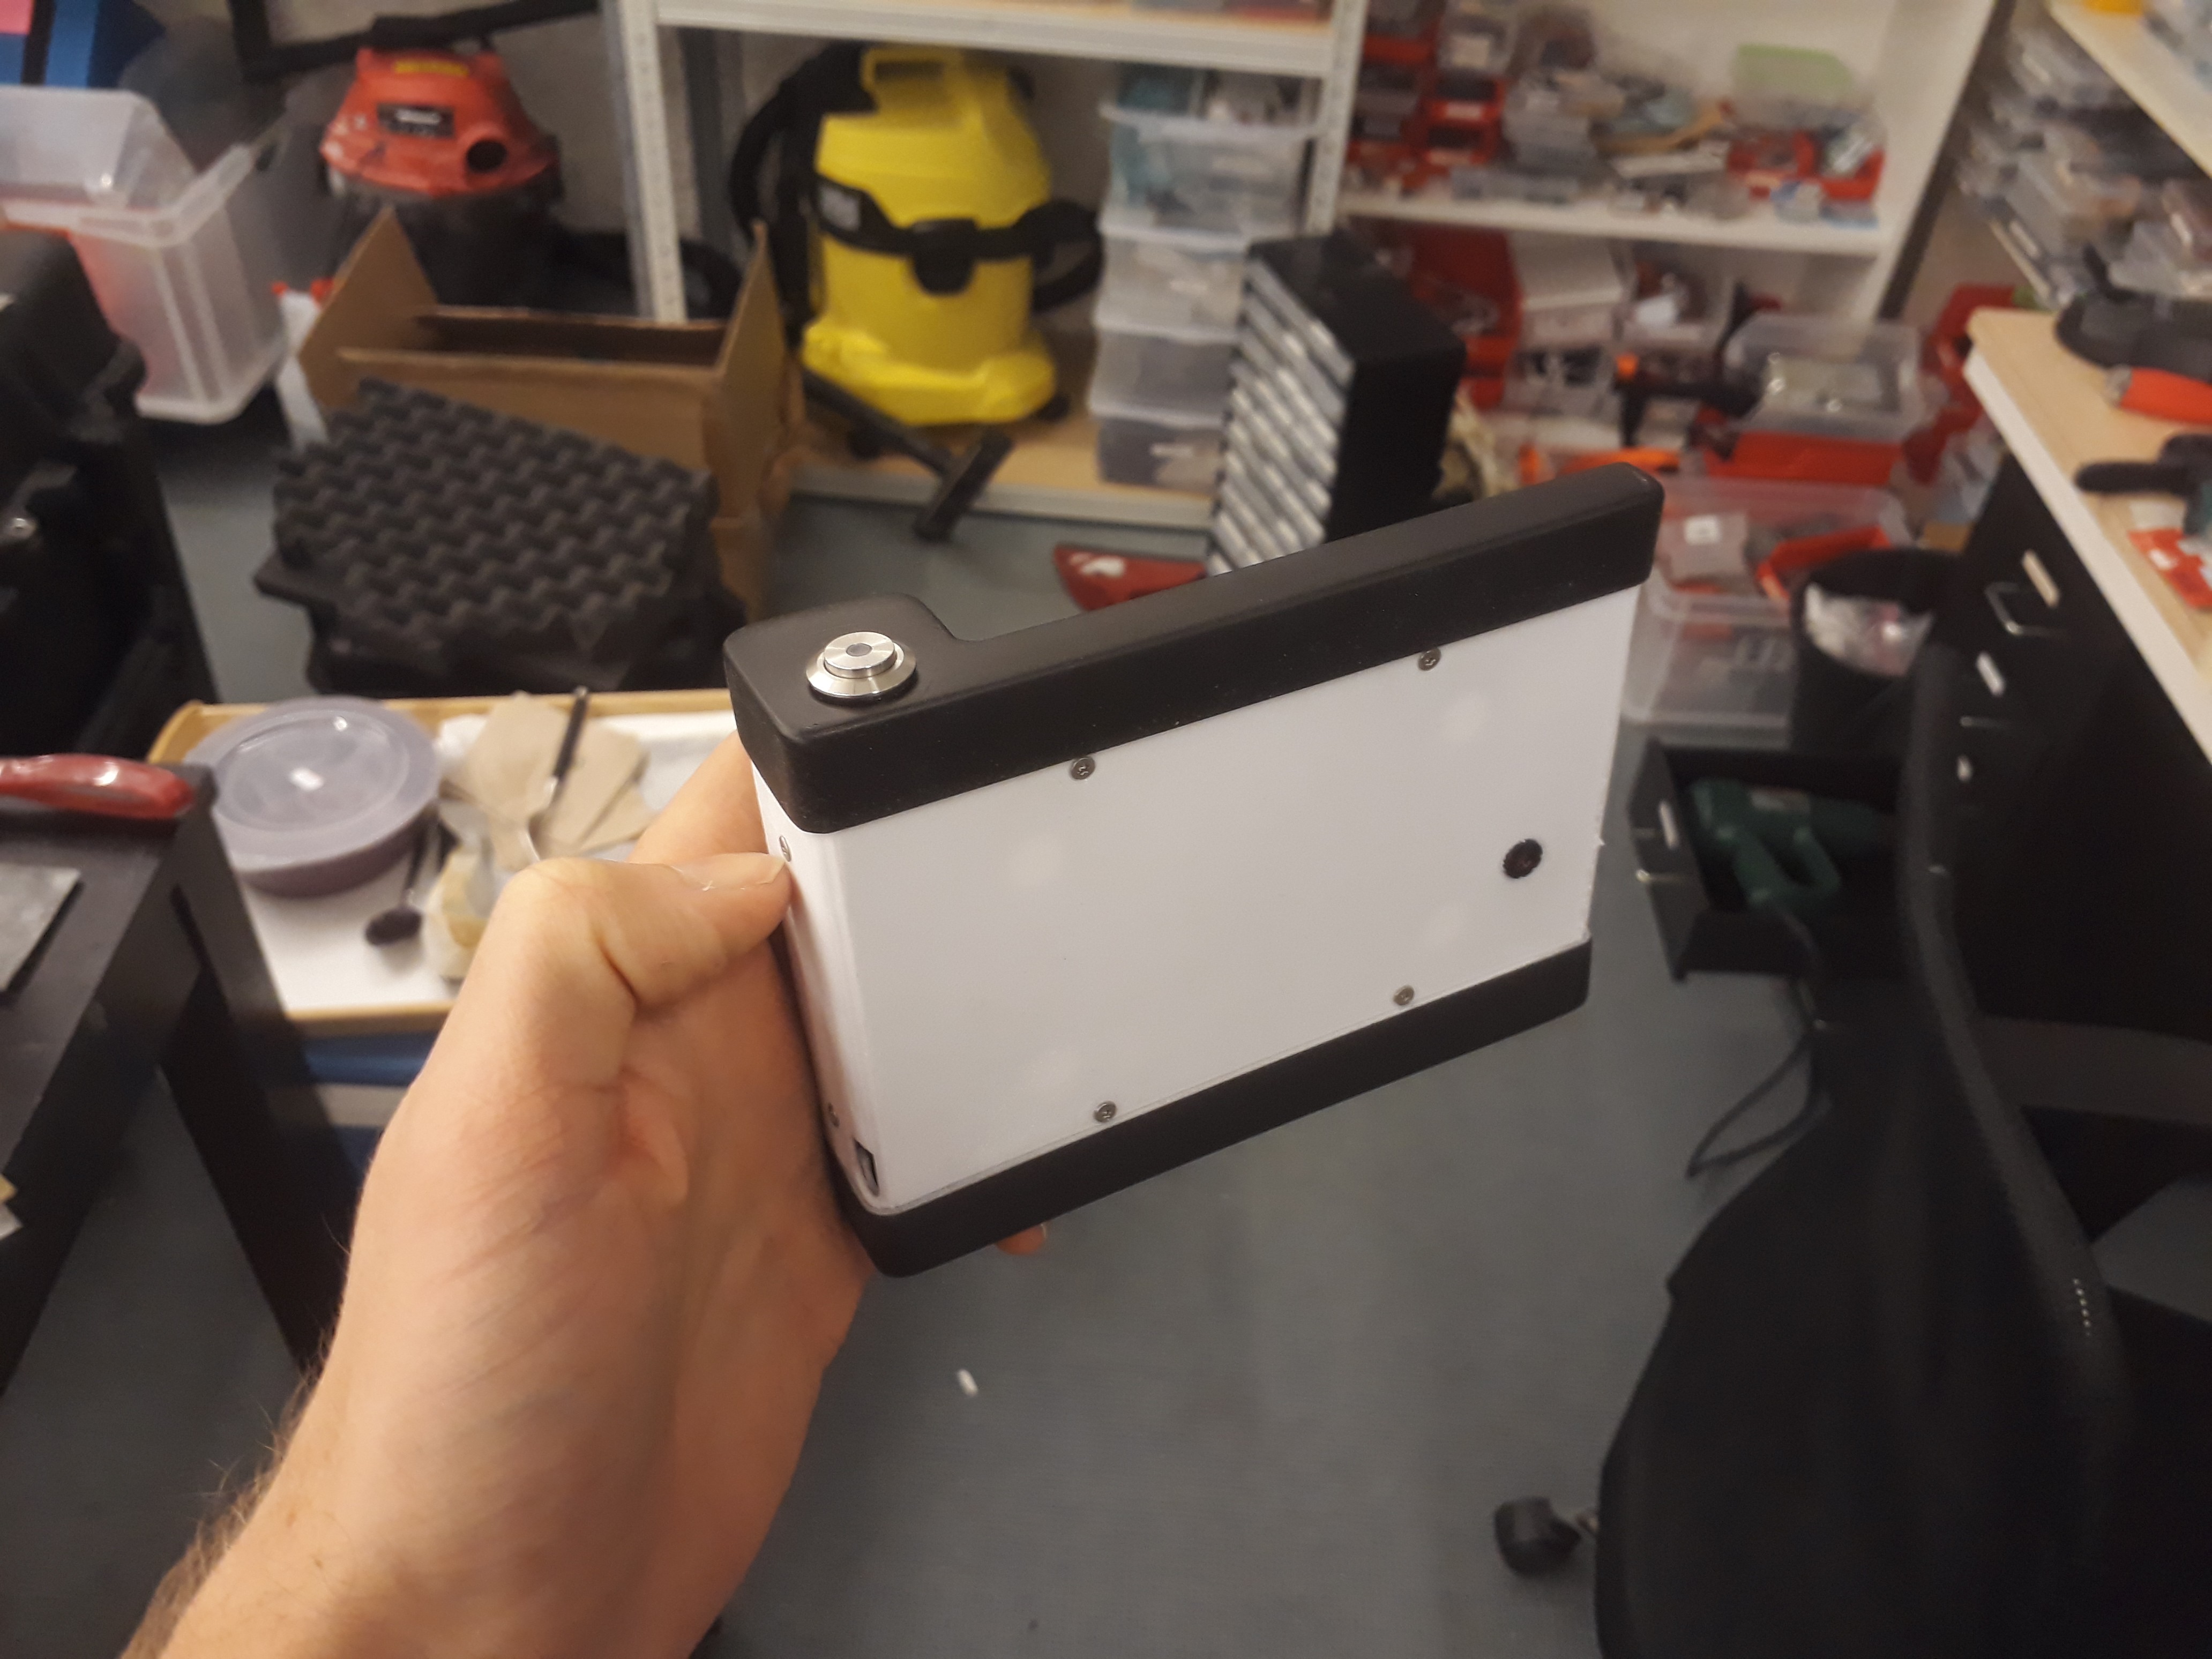
To make it actually look a little less "garage" I primed, filled, sanded and painted the parts to get an okayish finish.
![]()
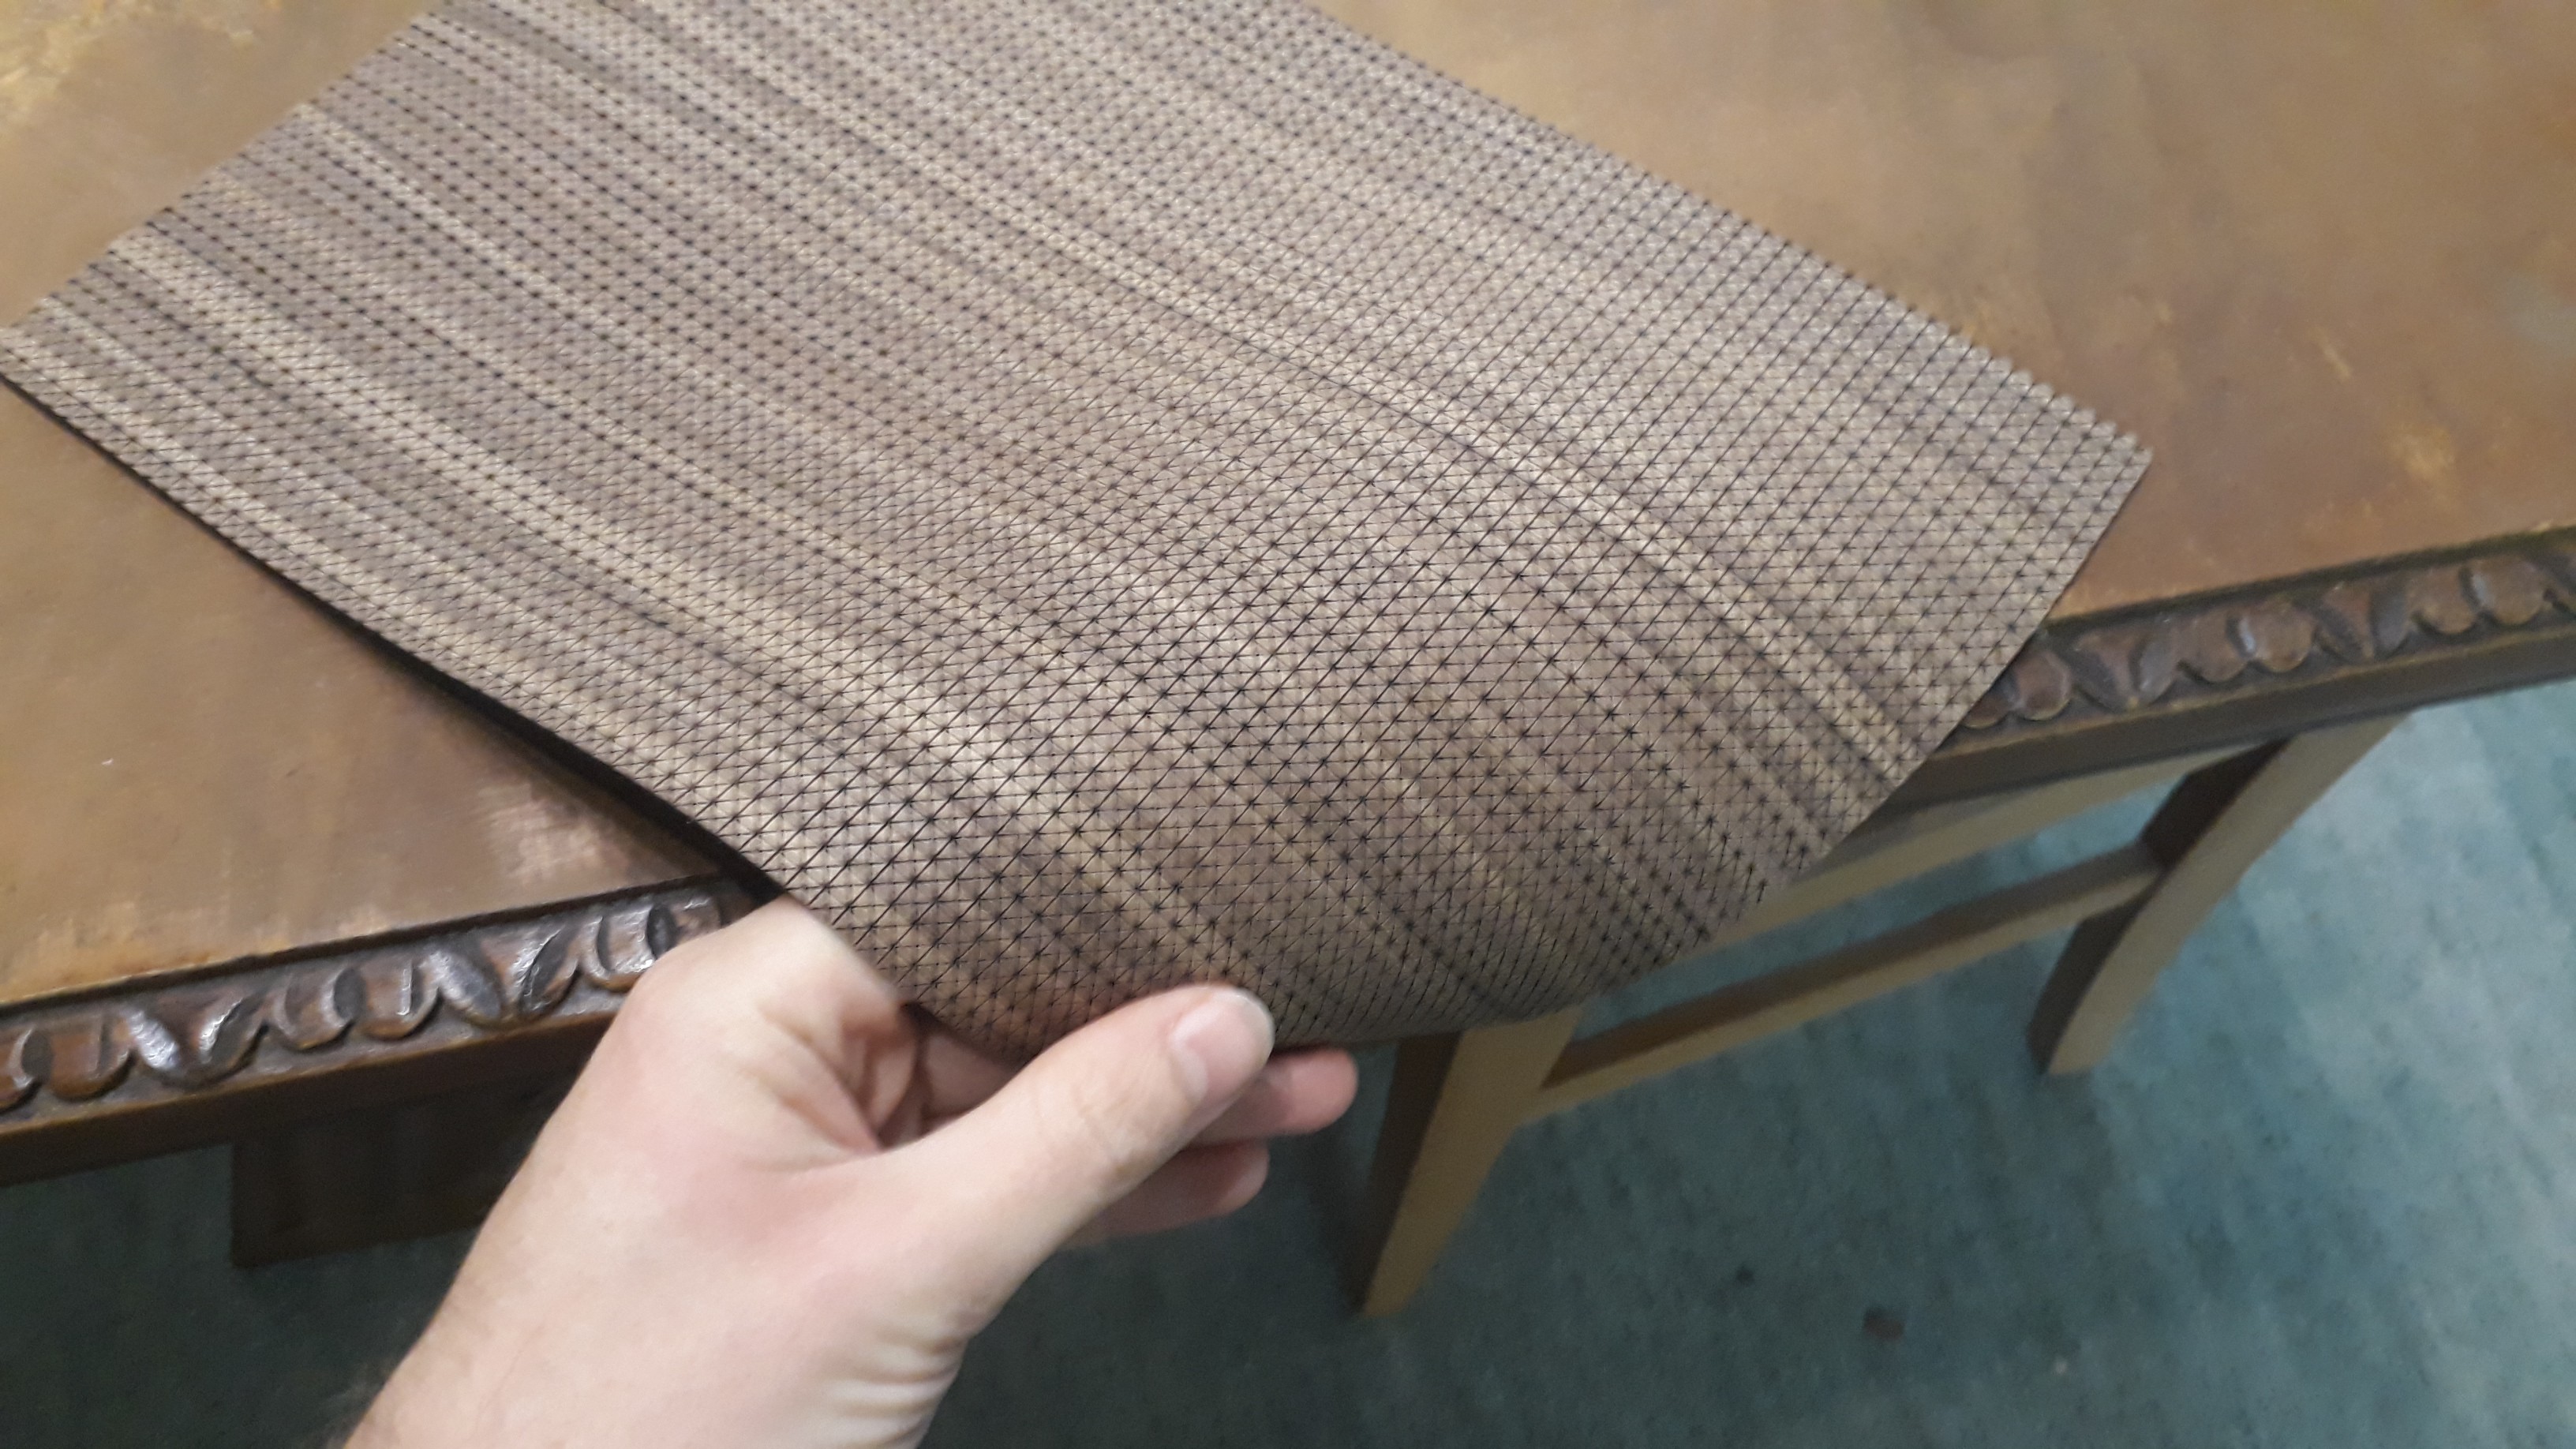
The band in the middle as a grip also had to look good. Leather was one idea, but almost too ordinary. I had played around with mushroom based mycelium leather in the past, and thought that could be a potential option, but the suppliers i had samples from didn't look much more impressive than leather themselves. I was looking for different sources of wood veneer for a kind of natural look when I came across this very nice flexible wood veneer with engraved patterns called NUO. It came in a variety of different wood types and looked amazing in pictures. So I ordered a sample and it was exactly what I wanted.
![]()
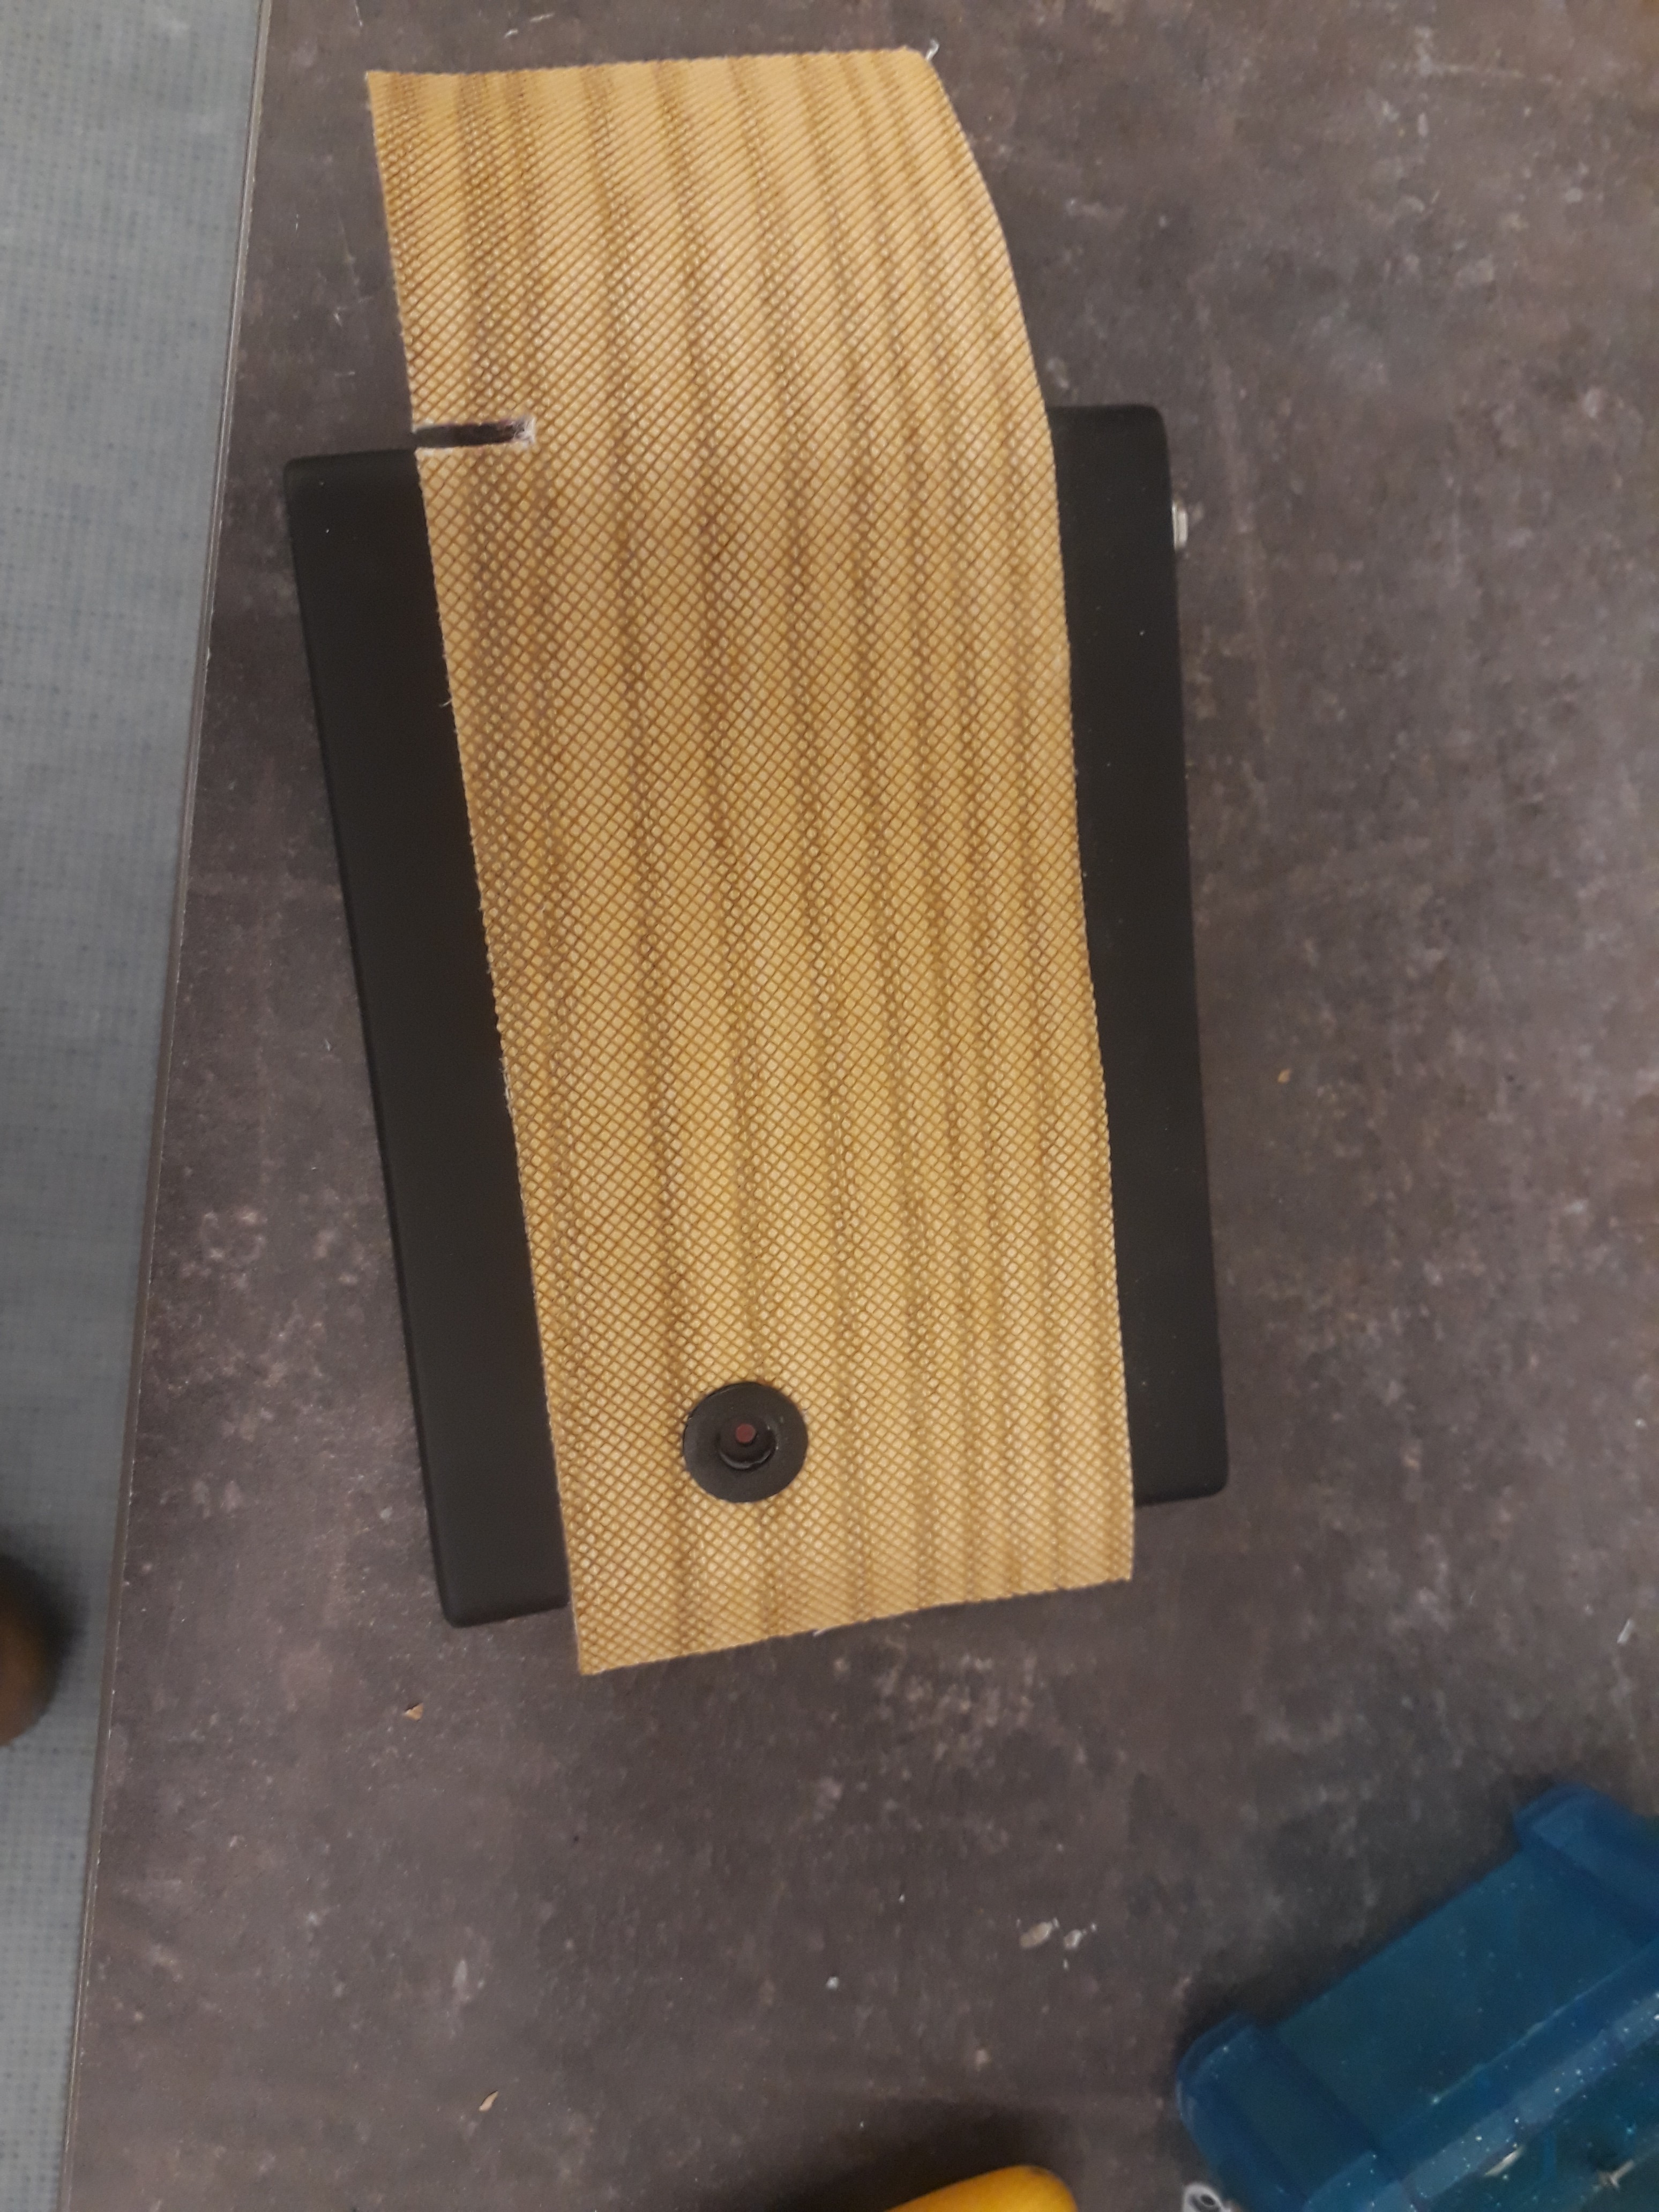
Cutting this was not so trivial though, at least neatly. I think you can probably laser cut it, I was in a rush though and just used a printed out template and a stanley knife. To hide the edges I added little edging pieces around the camera hole and the USB charging hole.
![]()
-
Packing it together
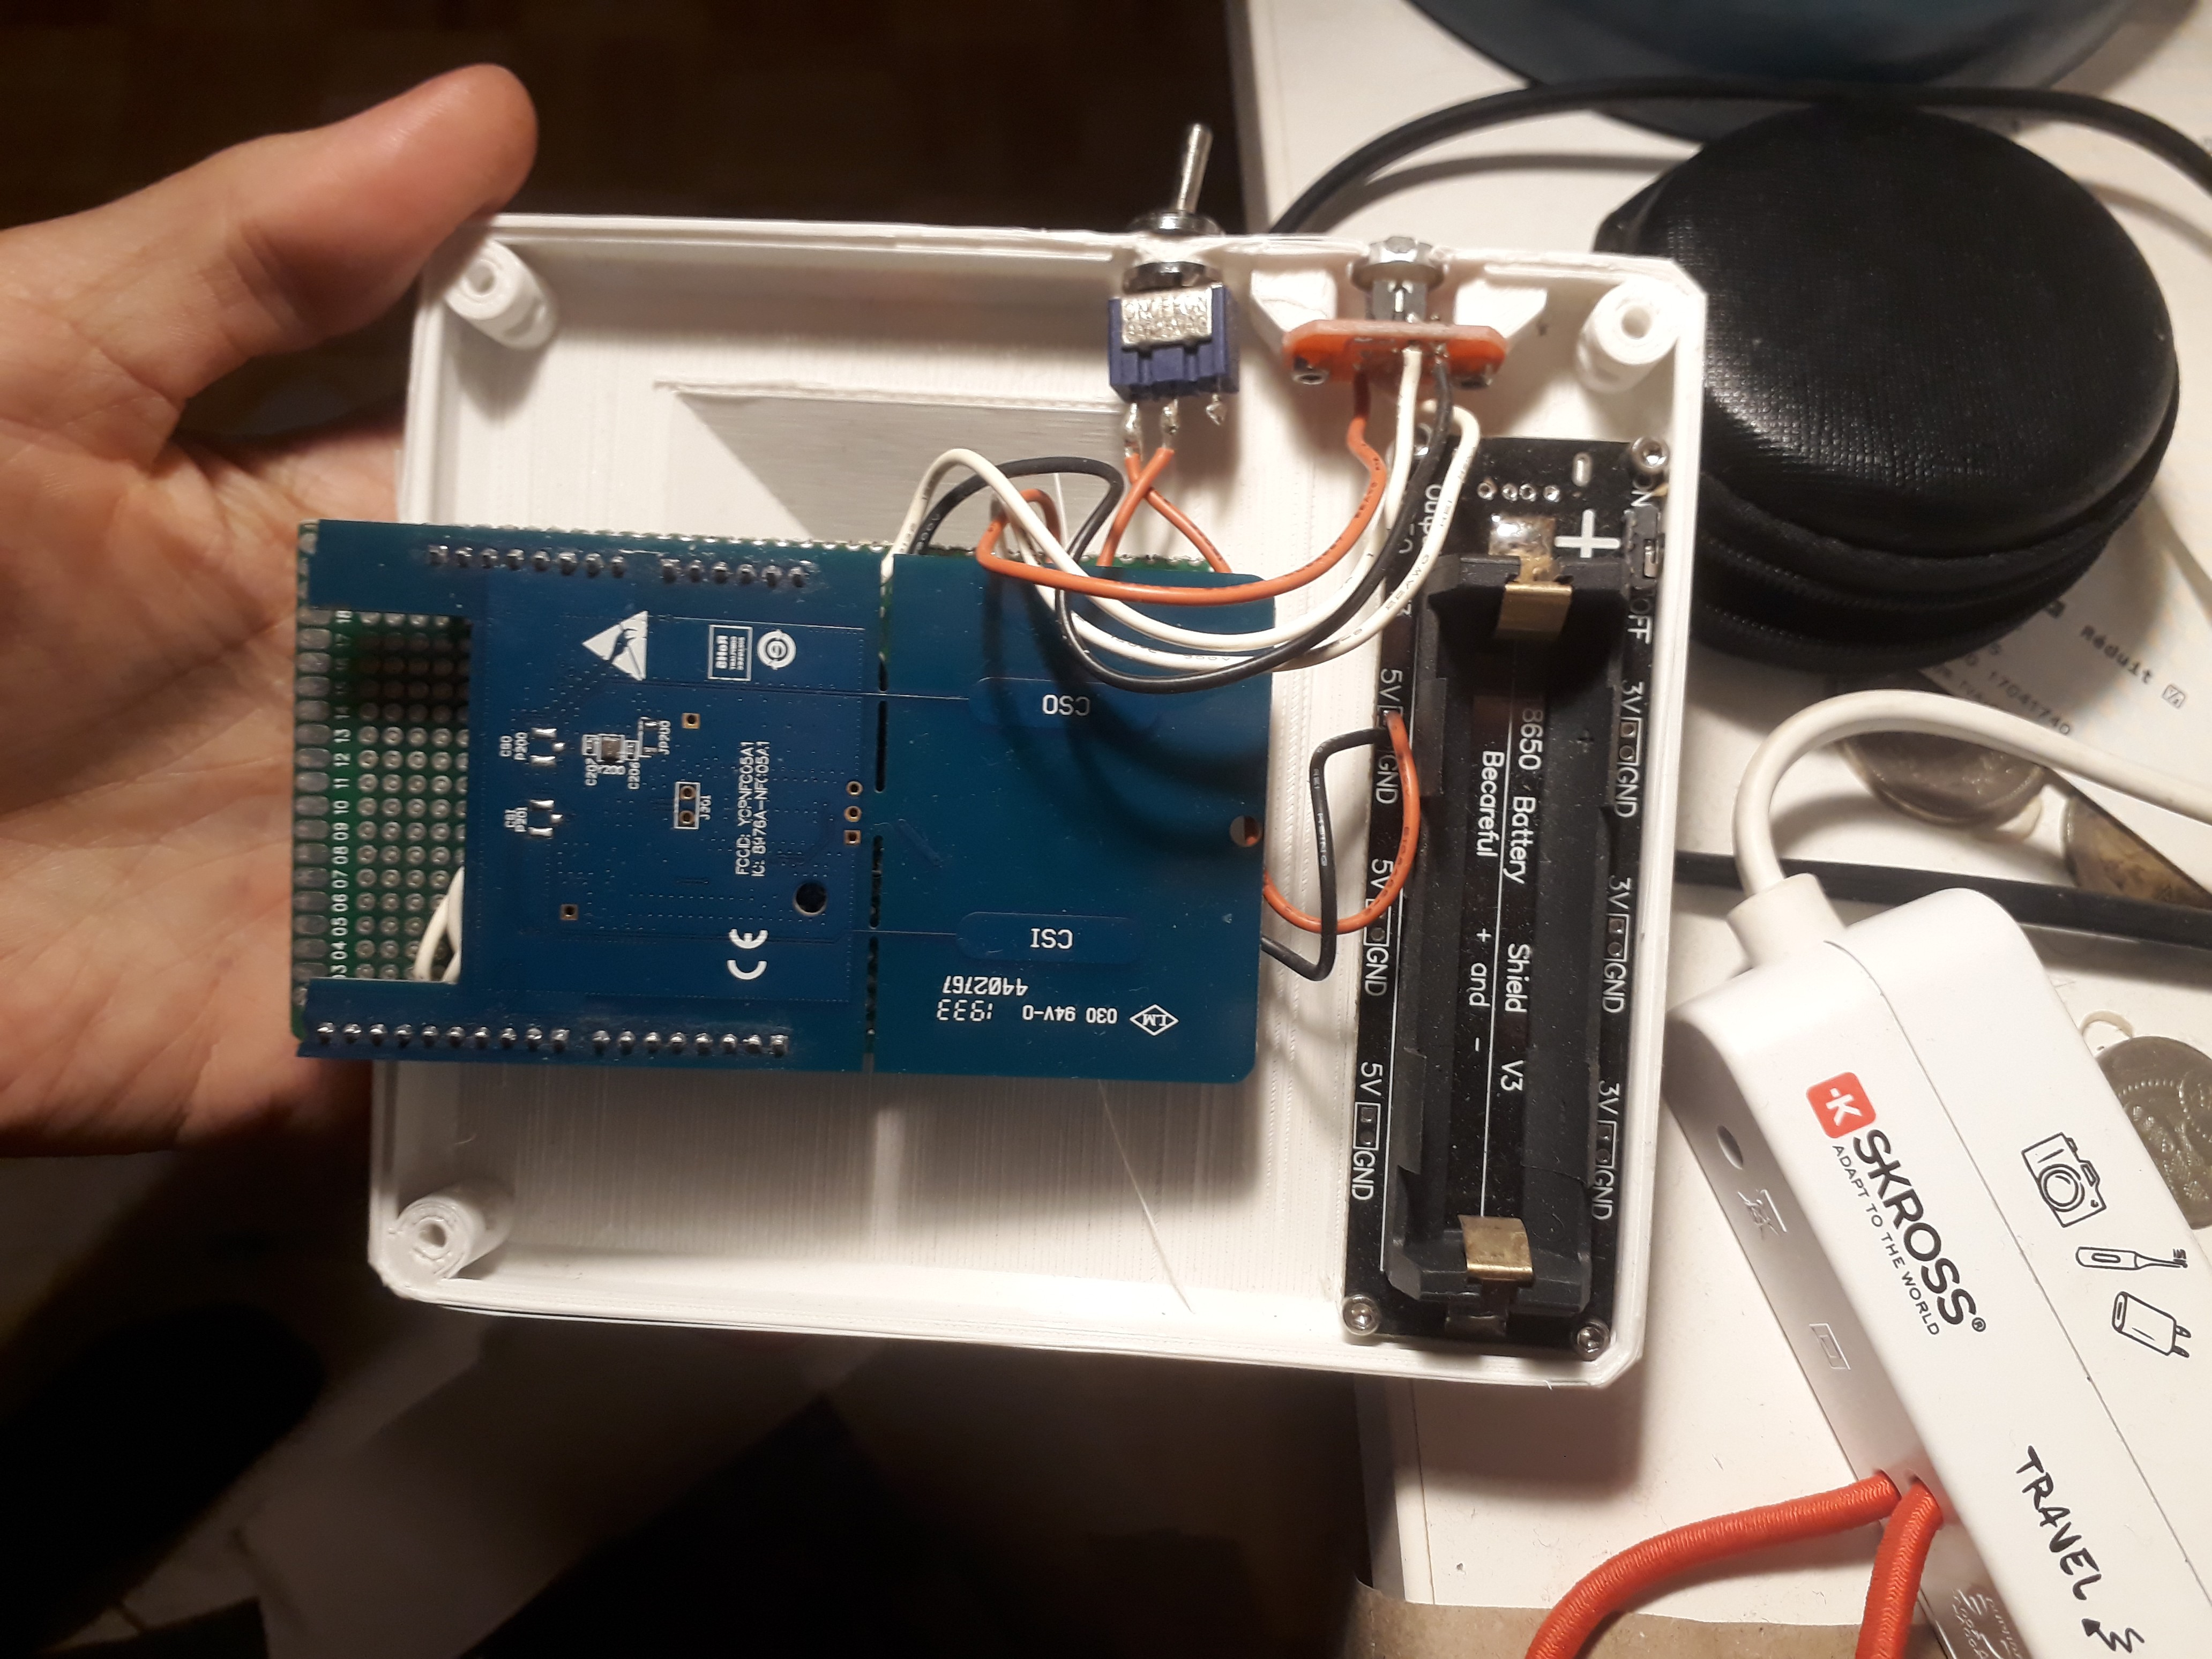
02/09/2023 at 22:02 • 0 commentsSo I had a mess of cables and some code that could get a picture on to these damn NFC screens. The project was in principle finished, at least so I thought. I just needed to solder up a protoboard, print a body for it, and it would be done. Unfortunately I cant find the photos from when I did this in 2020, but the parts are still floating around in my many junk piles.
![]()
To get the ST demoboard to fit I had to saw off some parts and trim the longer header pins, but it worked well enough. I realised from this that the form factor of the ST board was really awkward if I wanted to do an actually nice looking body.
![]()
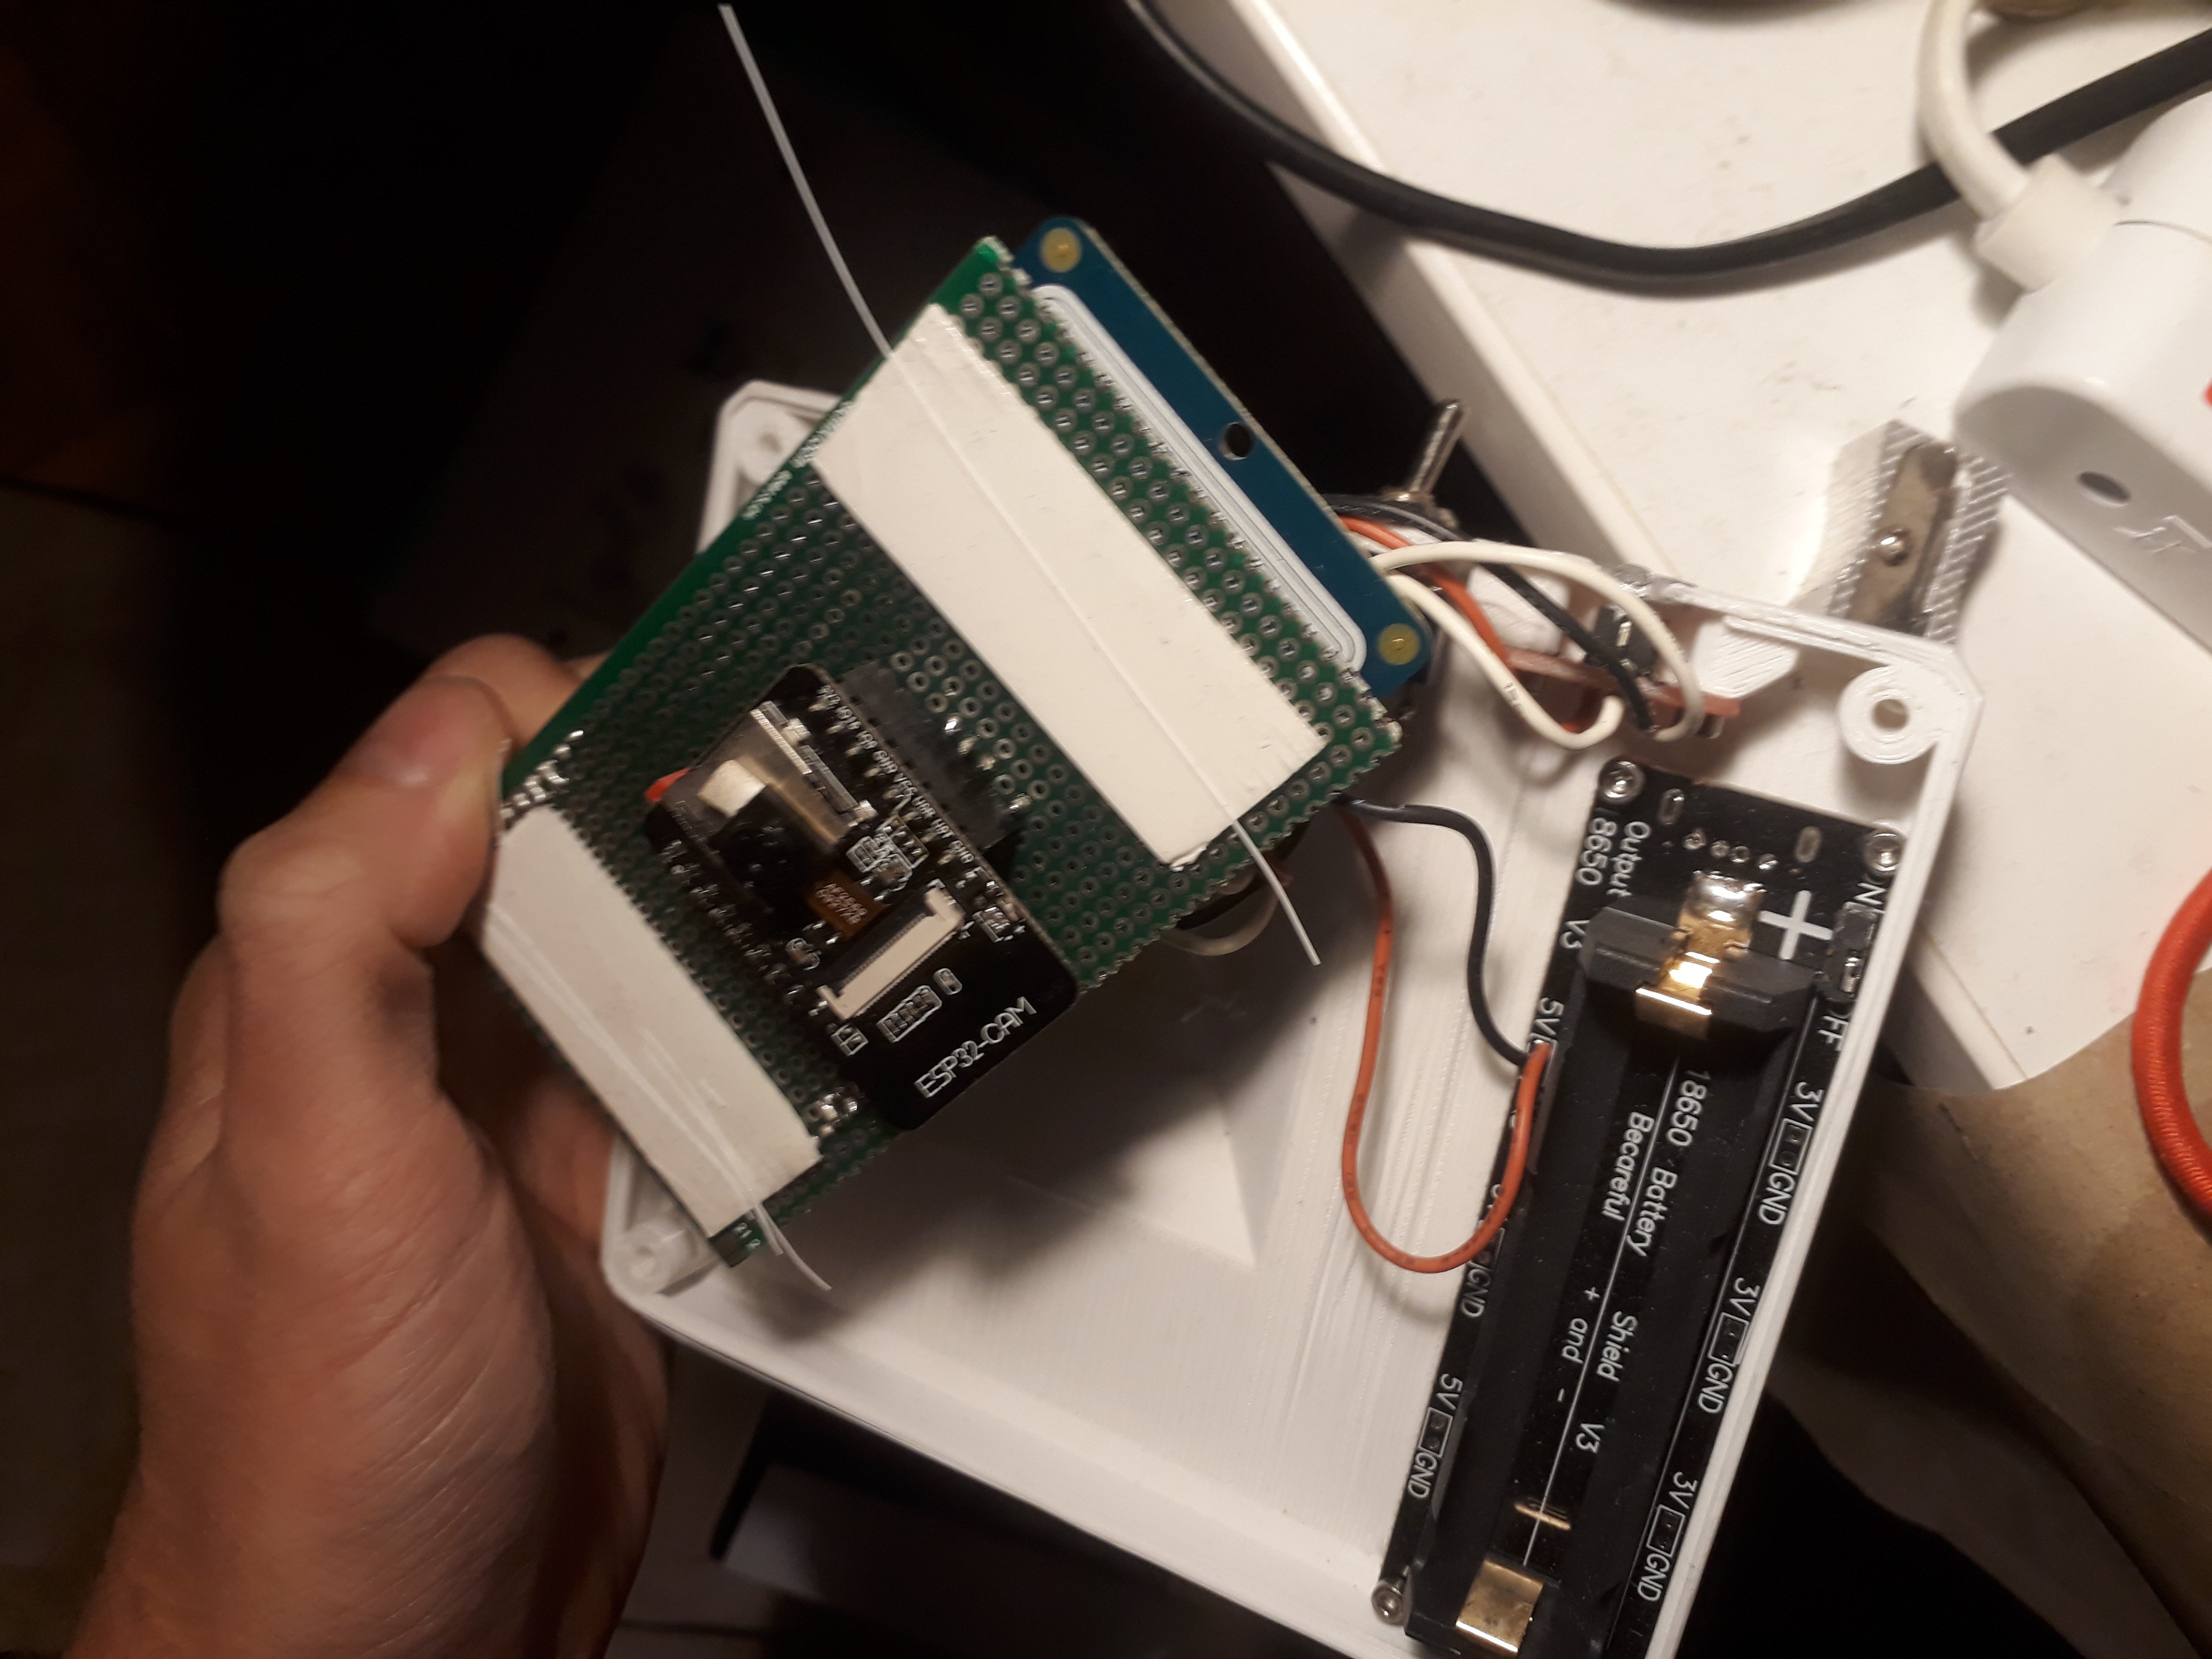
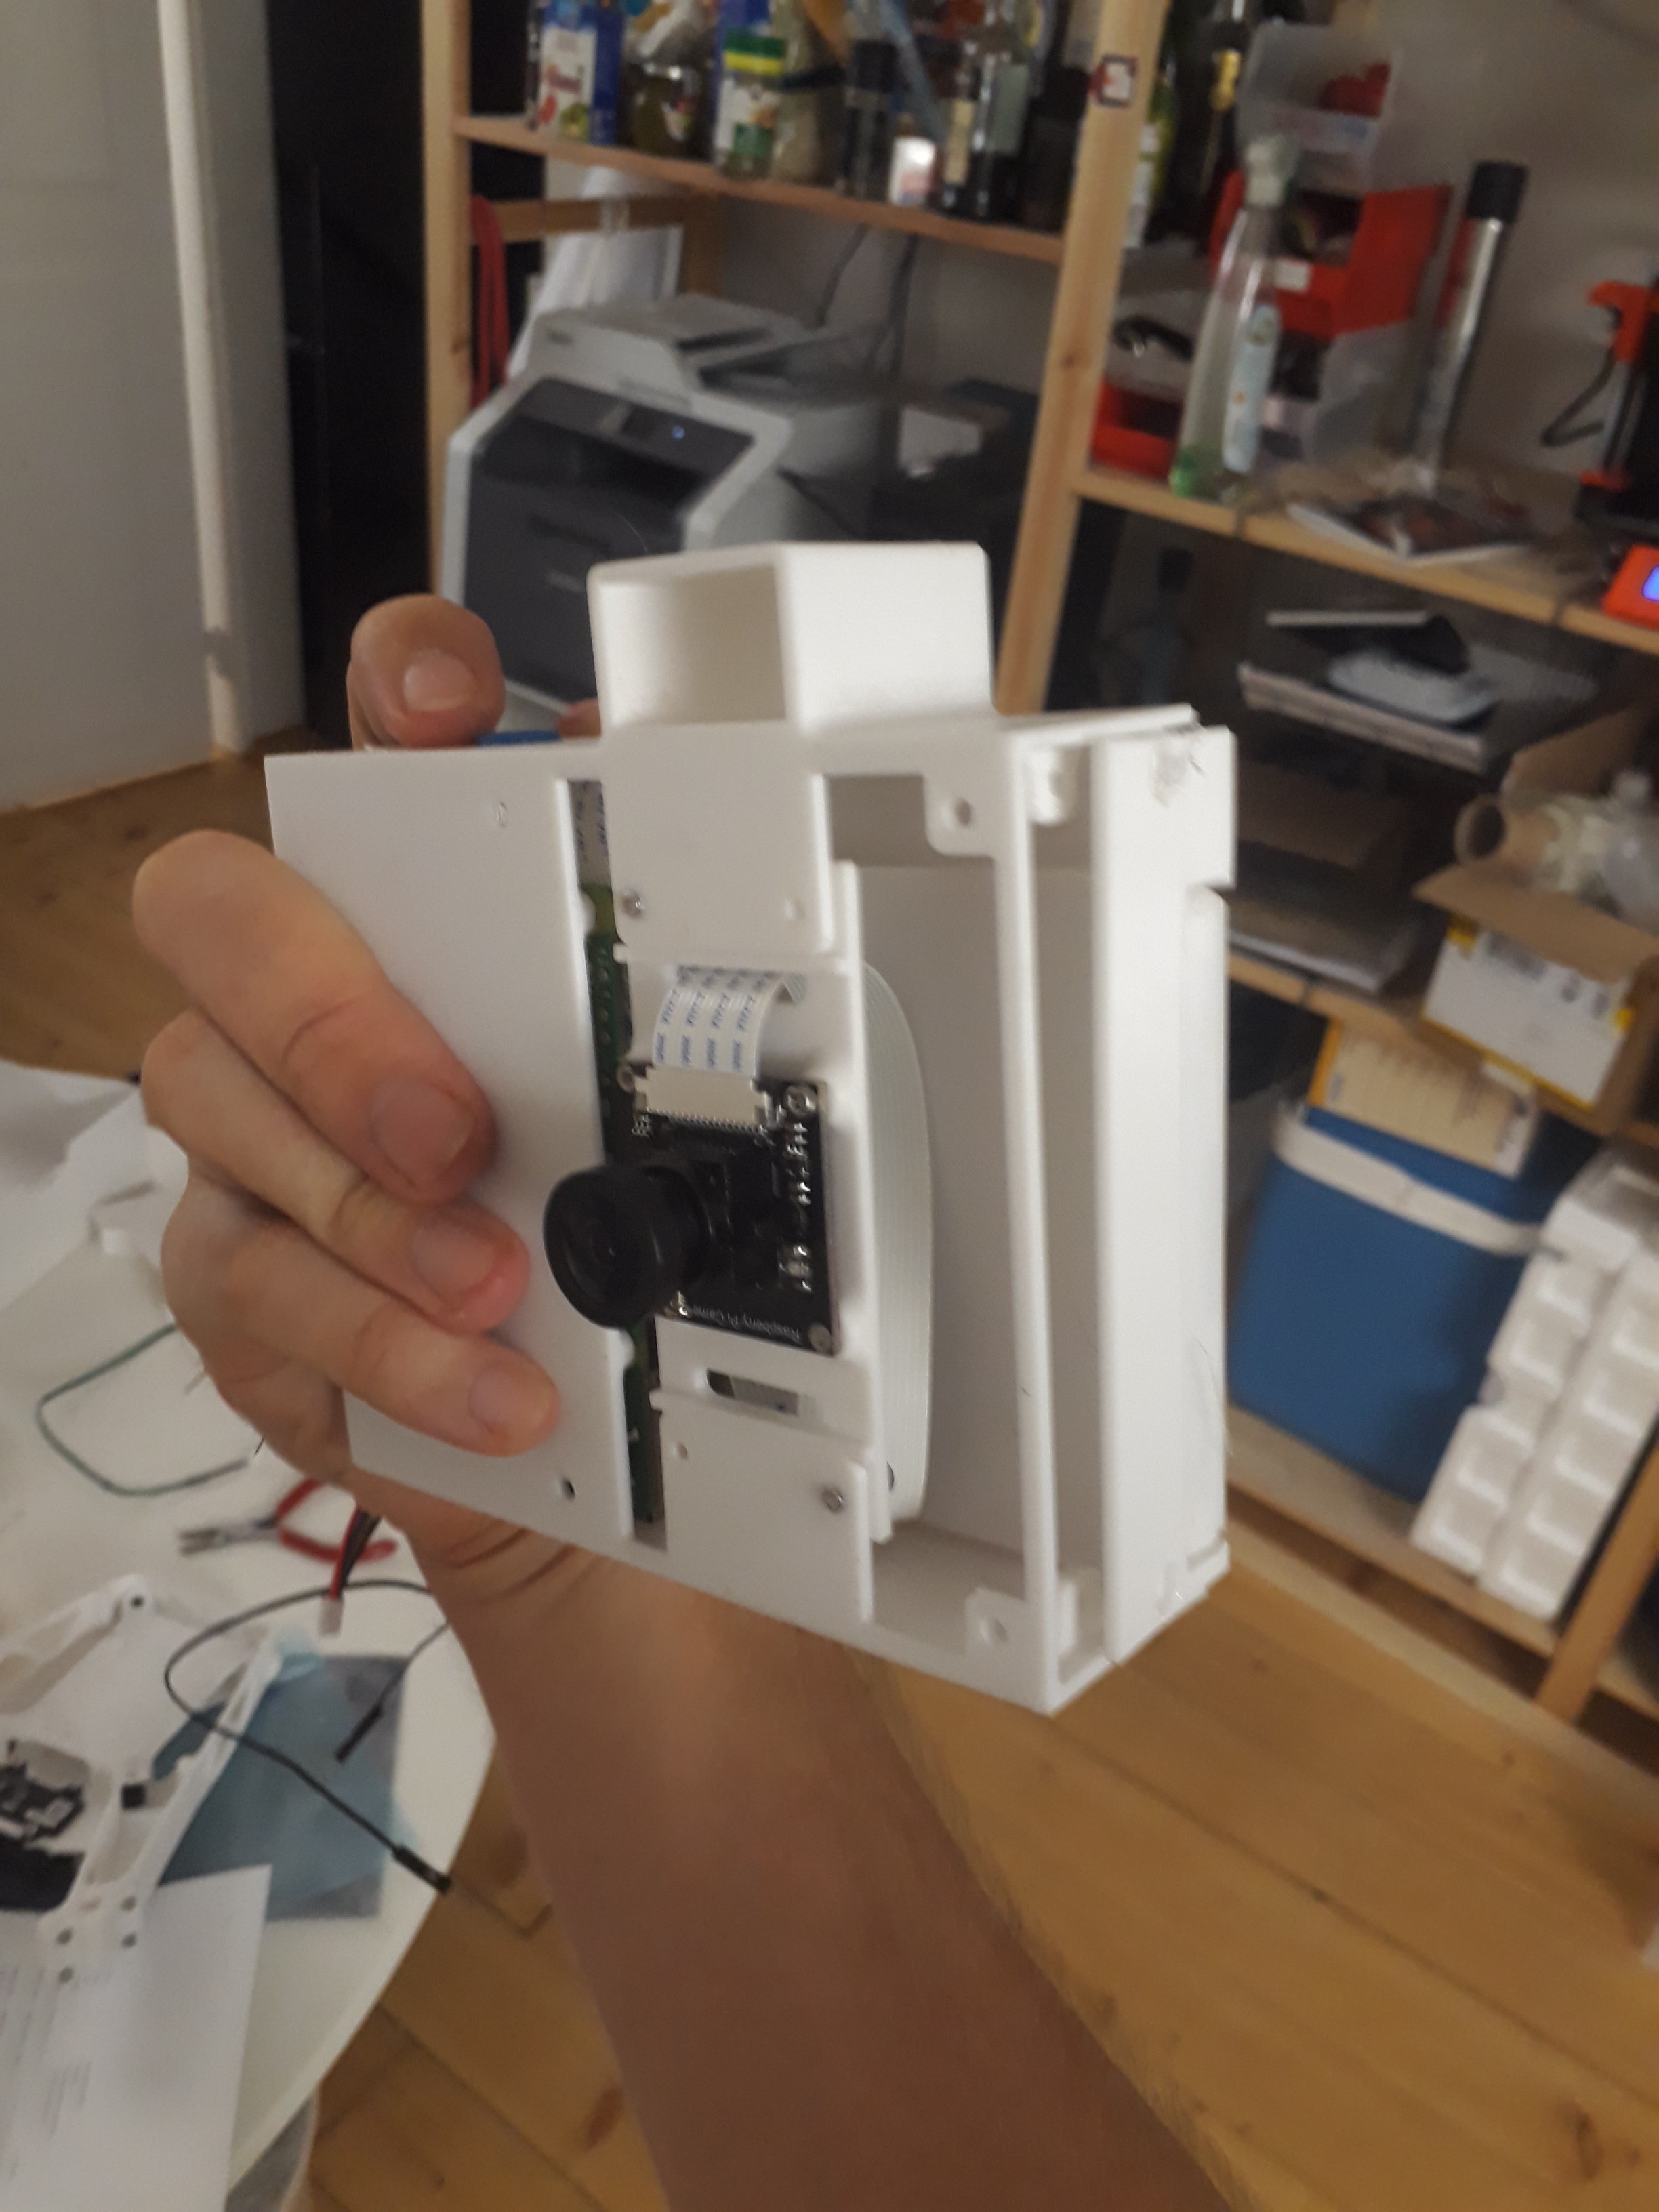
The ESP32 cam board was also awkward to fit, and headers made the whole thing much thicker than it needed to be. The 18650 battery fit nice on the handle side though.
![]()
The front of the camera was... underwhelming. The small lens on the ESP32 cam was definitely good enough for the job, but it really didn't look "camera like". My initial ideas of building something vaguely polaroid like in shape would be hard to realise.
![]()
The screen was held in physically, by sliding it into the back. On this crappy 3d print this was not so nice, and I realised another problem was then actually holding up the screen once you had a photo on it. The hefty switch on top would connect the battery power, and turn it off as well, which was not so great for the look either. The capture button on top had an LED though, and I was able to get the LED to light up to indicate if a picture was taken or when the camera was ready.
-
Fighting with NFC
02/09/2023 at 21:41 • 1 commentSo after the first proof of concept with the Raspberry Pi and direct SPI connection for the screen I was fairly satisfied. At least for a few weeks. It bothered me that I needed to use a connector at all. I started to look up about wireless charging, thinking that potentially I could power the screen wirelessly and send the photo to it over bluetooth or wifi or something. This would make the device much more user friendly.
It was also clear that the Raspberry Pi was a dead end for this kind of thing. It was overkill, and made everything bigger and more complicated. I would ideally do the next version on a microcontroller.
This was around 2020, and I was checking the waveshare website to see if there were any new cool e-ink screens I could play with (I was also working a little bit on my Postcard Frame idea around this time too). And incredibly, they had just started selling wireless screens, with no battery, powered by NFC. This was everything I was looking for, already in a relatively neat product. No need for me to even print a case! Of course I bought a couple to play with straight away. That's how I began my long mission to communicate with these NFC e-paper screens with an ESP32.
https://www.waveshare.com/wiki/4.2inch_NFC-Powered_e-Paper
Unfortunately, the documentation for the screens themselves was not amazing. There was an android app (no source code available of course) to control them, but my phone can't do NFC and I wasn't going to build a phone into my camera idea. There was also a big, bulky, STM32 based demonstration board from Waveshare which could be used with it. This was also far from ideal, and the code was hard to understand, and ultimately I wanted to do this on something like an arduino or ESP (as I only knew the arduino environment at that time). So I needed to find another way to communicate with these neat NFC e-paper screens.
At first I bought a random NFC reader kit and connected it to an ESP32 to see if I could get it to read anything from the screen. Nothing at all. I knew nothing about NFC so there could have been 100 reasons, but I figured maybe I needed to use exactly the same chip as in the Waveshare demo board. Upon further research the Waveshare board seemed to be basically an X-Nucleo NFC05A1 demo board from ST, running basically the example code. I couldn't find anywhere the exact commands used for communicating with the screen itself, so emailed Waveshare directly to ask. No response at this point. But I bought the ST demo board and figured, even if I couldn't find any examples online to follow, it communicated over SPI so I should be able to get it to talk with an ESP32.
So the SPI communication turned out to be a relatively straightforward. Now I needed to communicate with the ST25R3911B NFC chip itself. Fortunately there is an amazing hardware abstraction library from ST for precisely this, but built around their STM32. As I was basically googling and reading forums to try and work out how to do this stuff, moving to a less popular ecosystem was going to hurt a lot. So I started trying to get the ST RFAL library working on an ESP32. After a much longer time than it should have taken (I am definitely not an embedded programmer), I found that the only issue preventing the code running on an ESP32 was the Interrupt calls, which could be very easily replaced in the library. I don't know if I did this properly or even did a good job, but I managed to get it running and reading the Waveshare e-paper screens.
Then of course came the question of how to talk with these e-paper screens. The demo code from Waveshare had no information on this. Luckily, in the mean time, I received a reply from Waveshare with a strange excel with the screen commands, and from that I was able to work out how to upload an image. I finally managed to take a photo with an ESP32CAM board and display it on an NFC e-paper screen, using the X-Nucleo NFC05A1 board.
-
V0.1
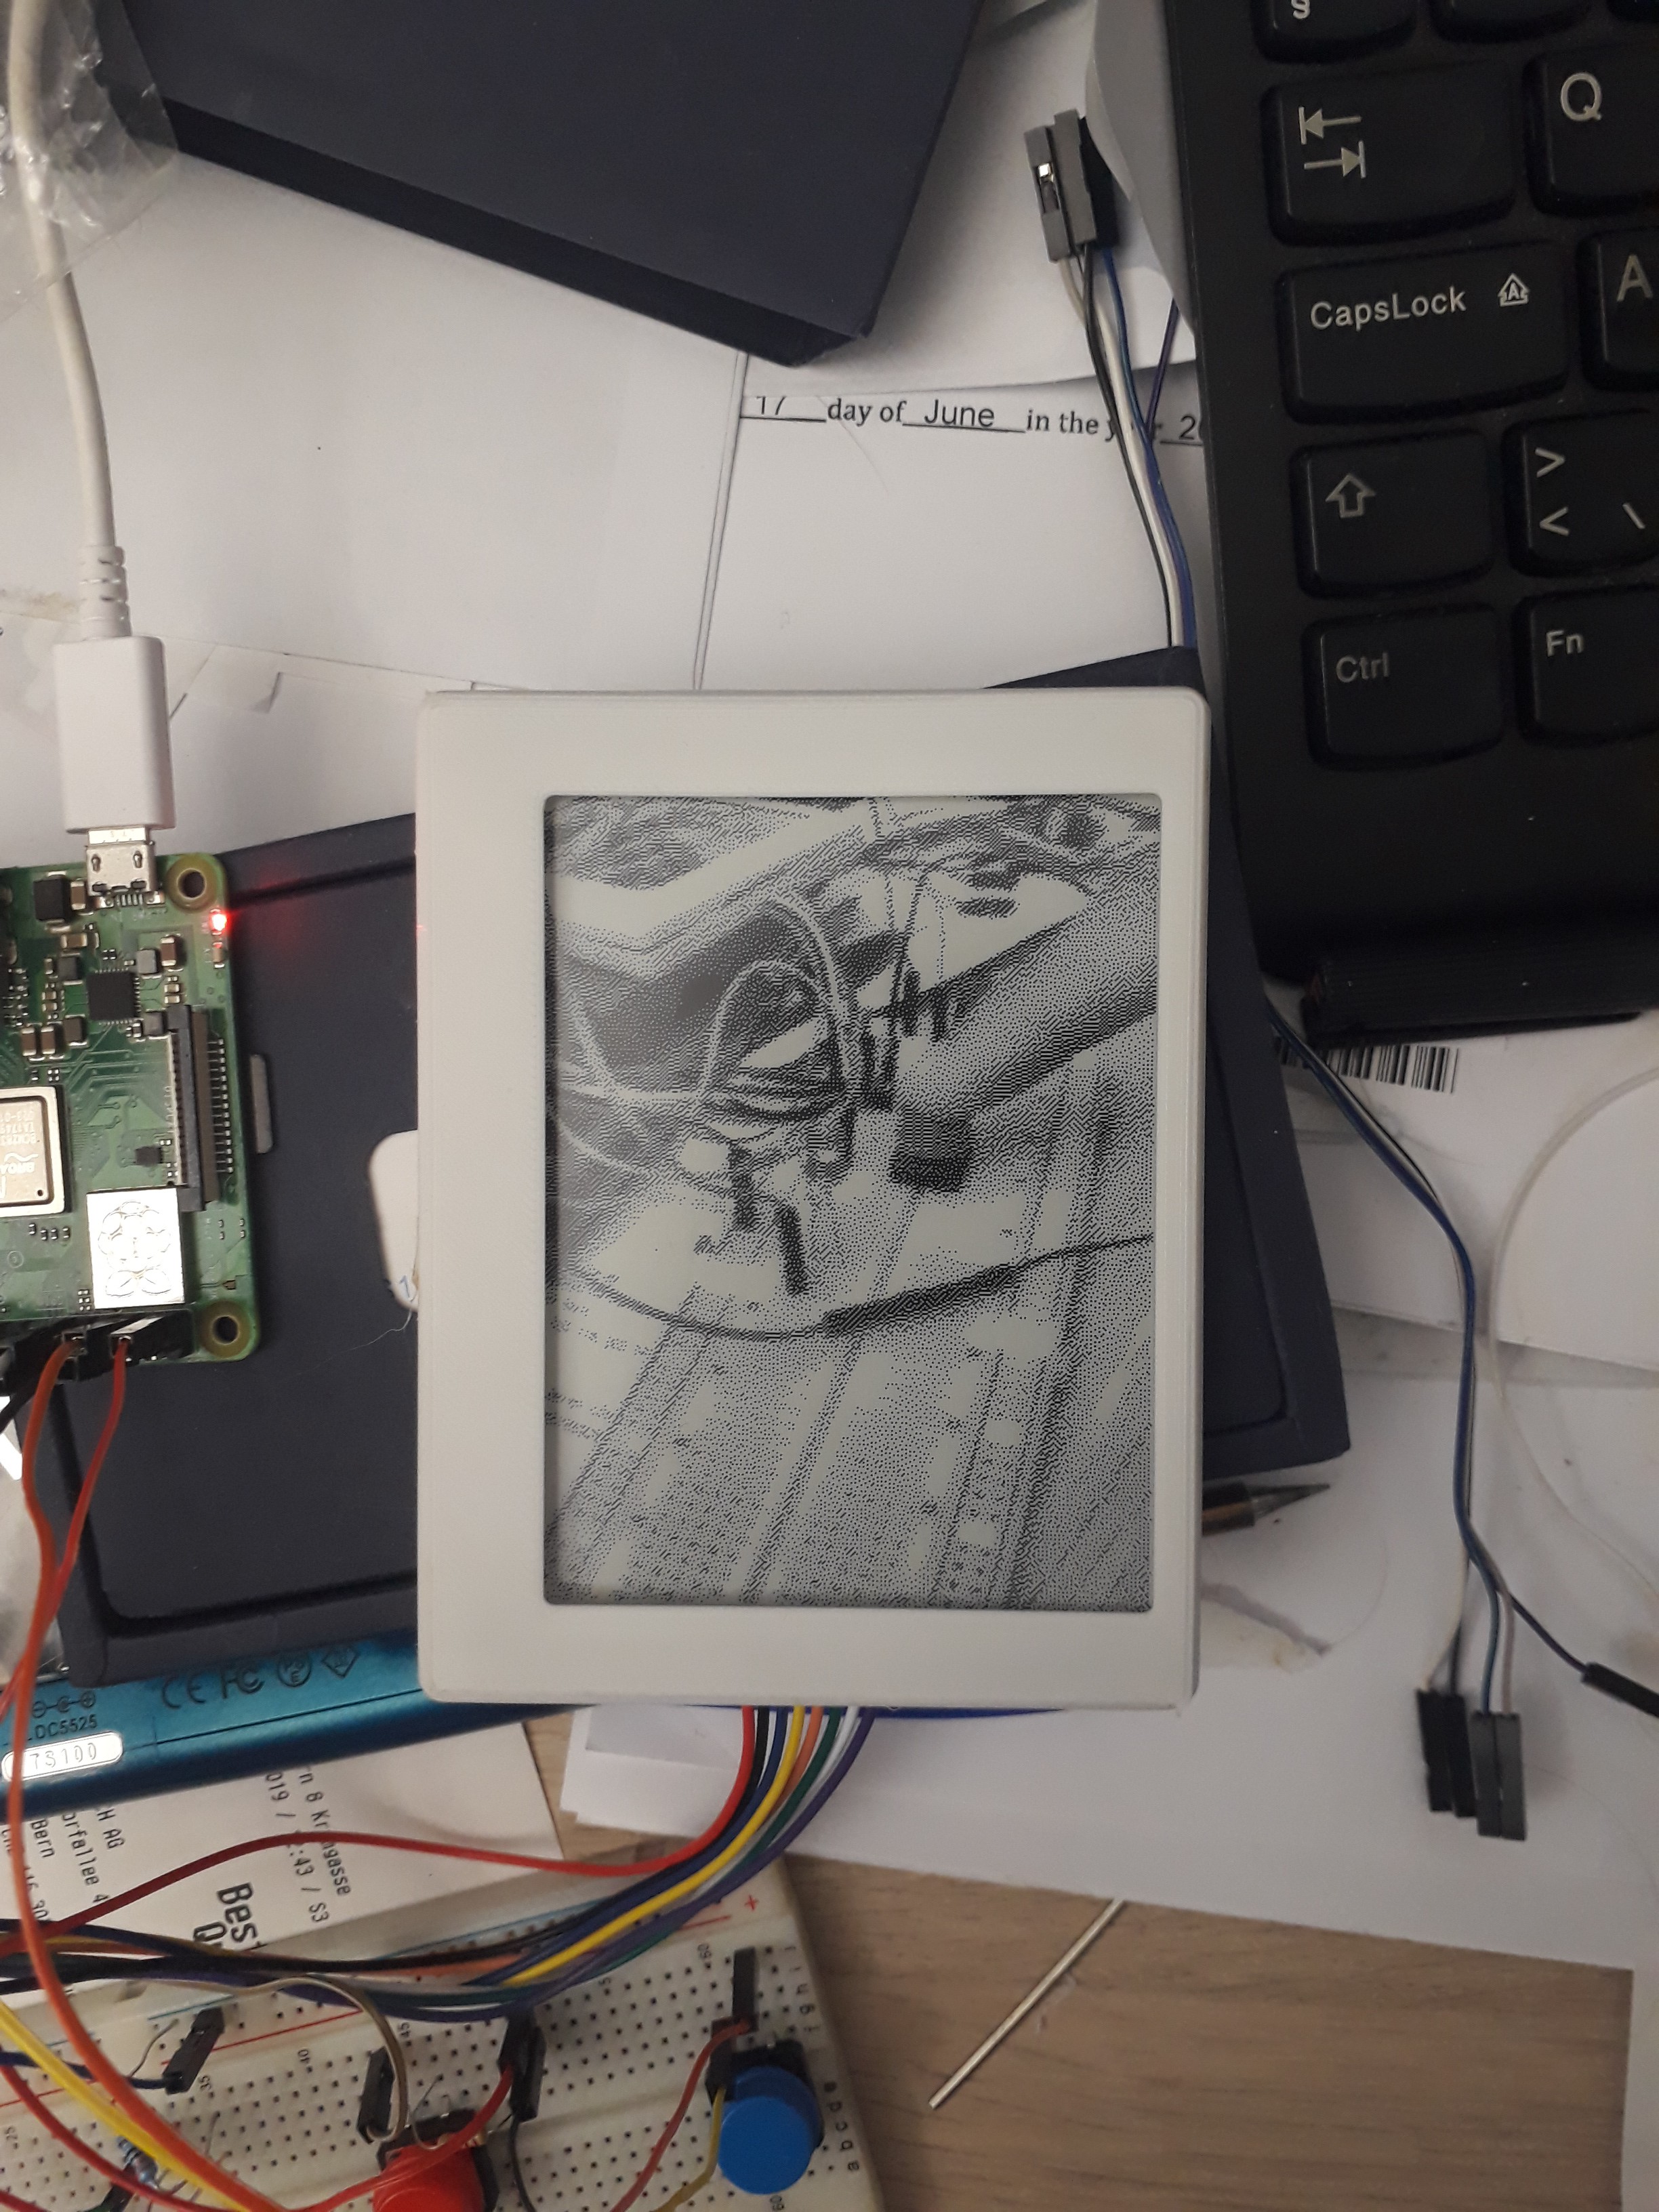
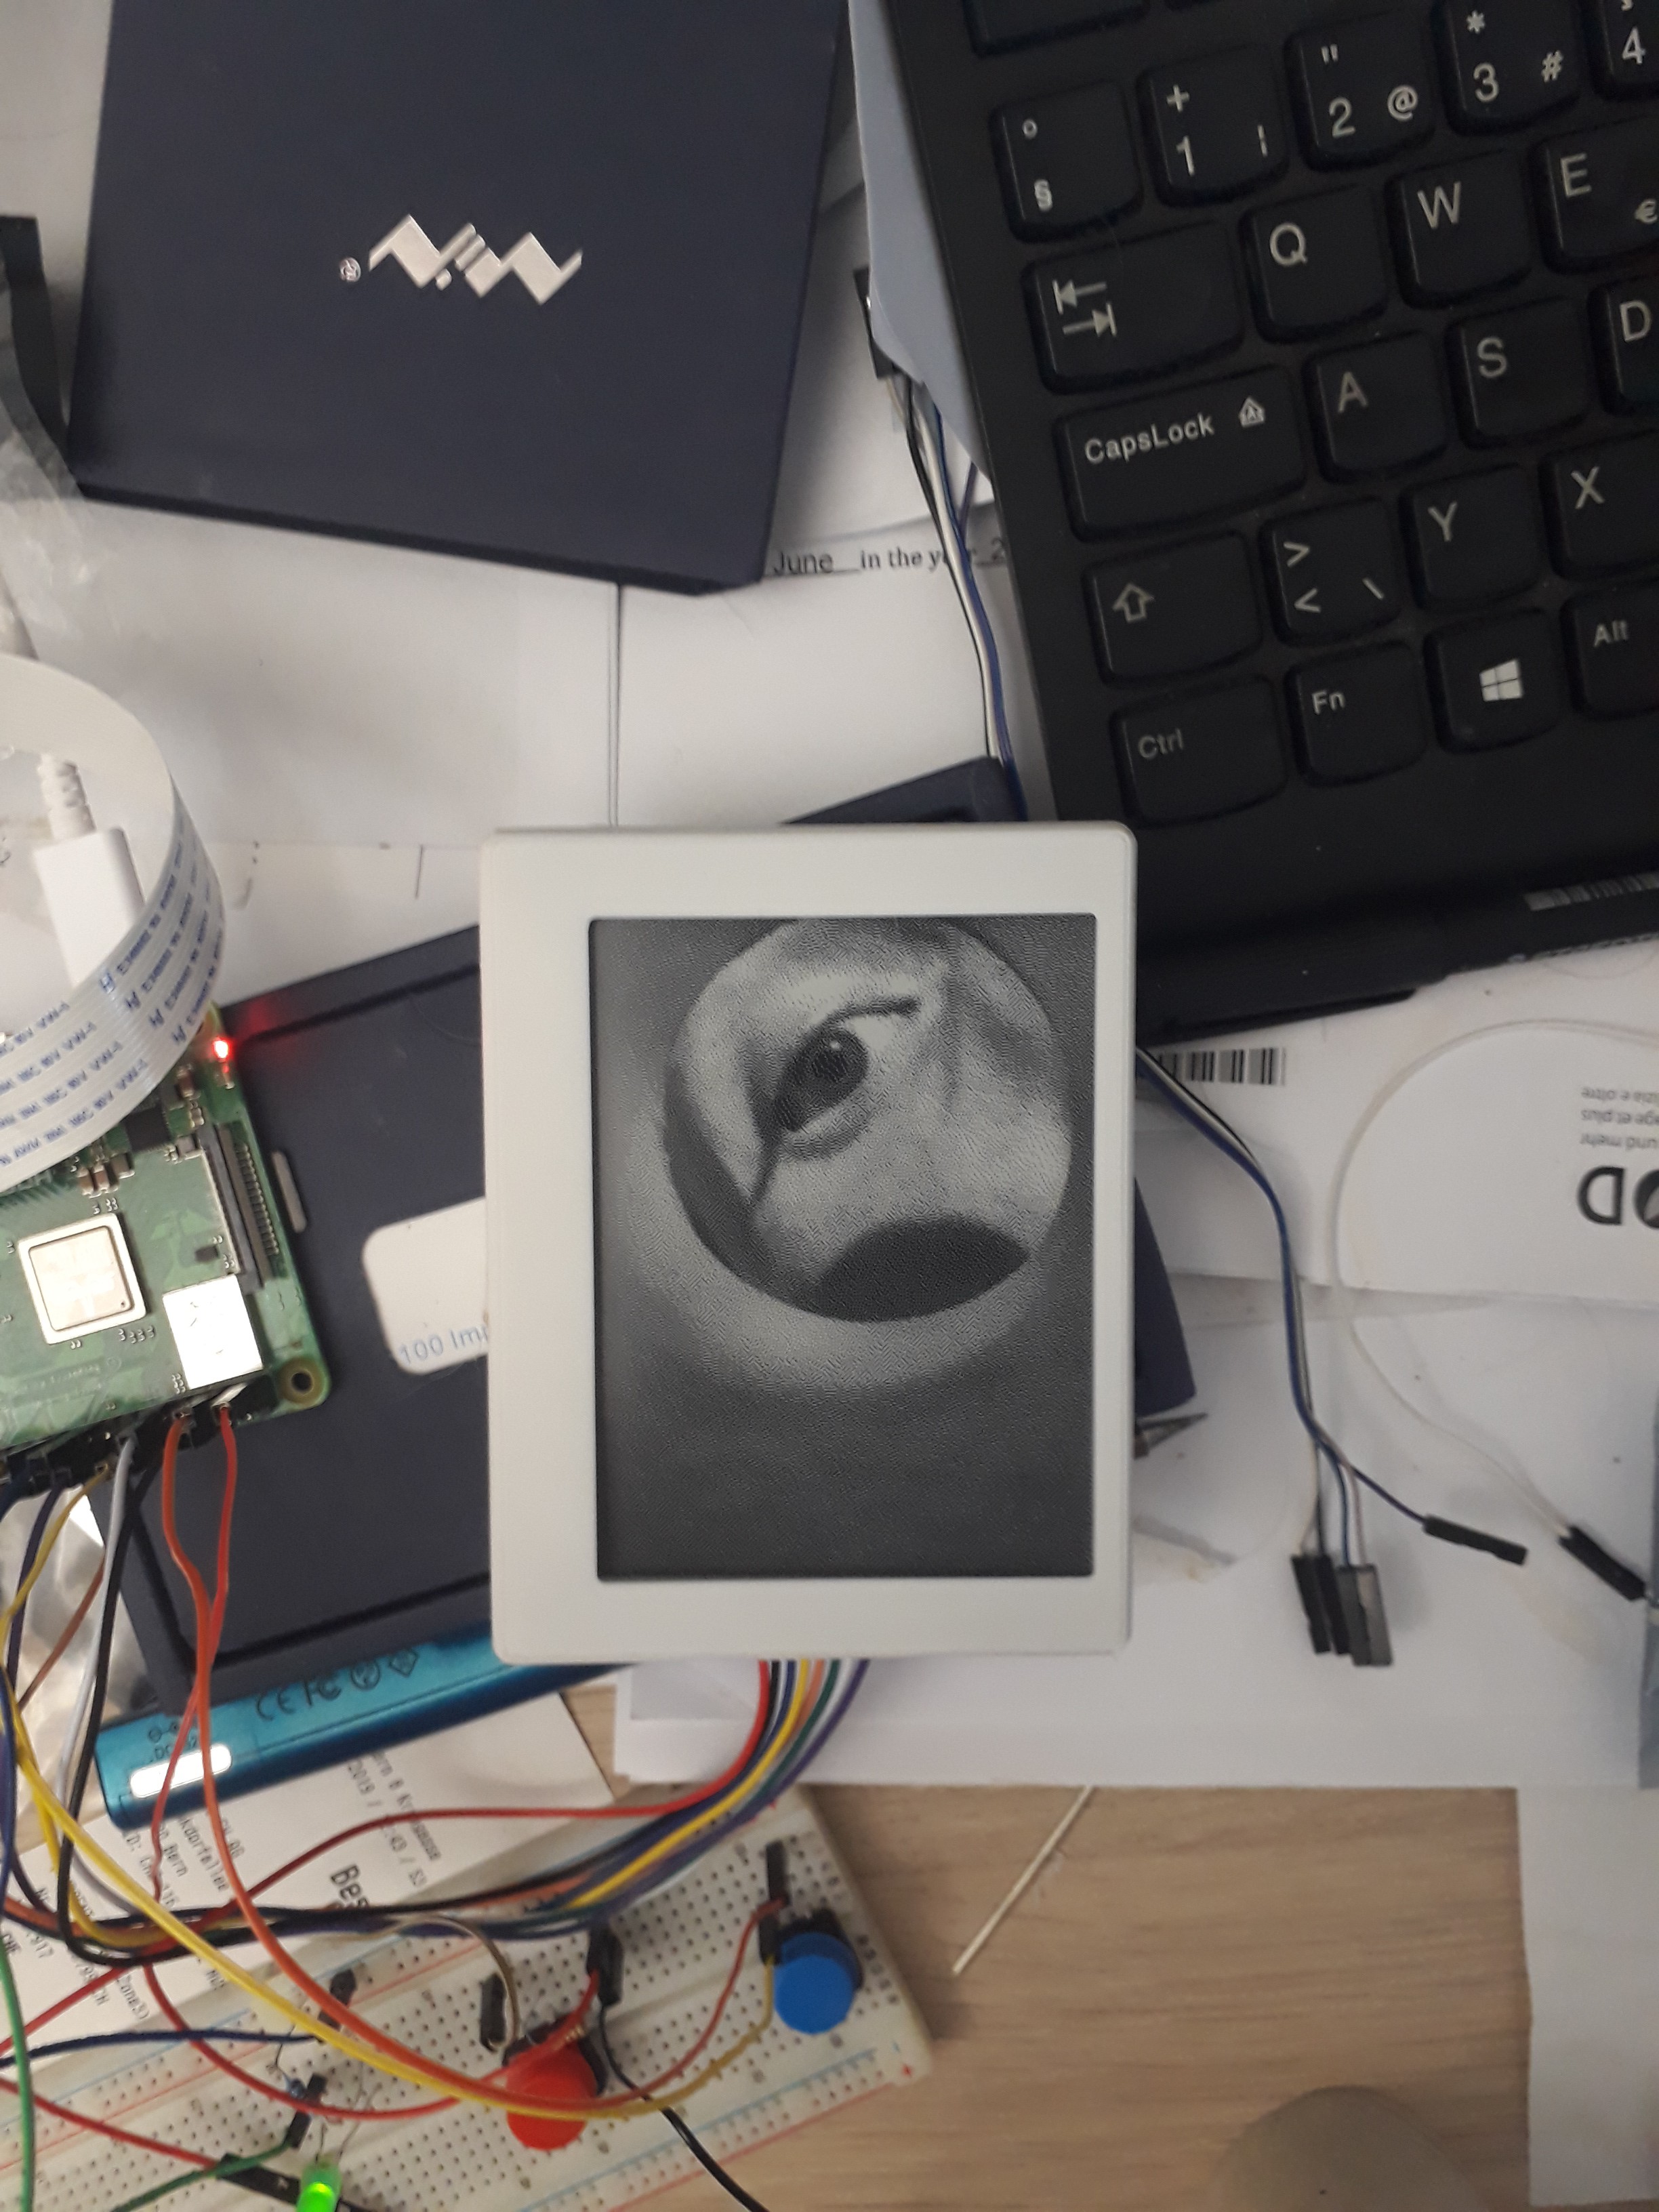
02/09/2023 at 21:02 • 0 commentsSo when I first had the idea for an e-paper polaroid in 2019 I bought a basic SPI e-ink screen (actually a couple because they looked fun) and played around with an RPi and RPi camera to put images on it. It worked, almost too easily.
![]()
I was immediately struck by the images, there was definitely some kind of style to them with the low resolution, binary black and white display. I don't know if other people find the style so attractive, but it inspired me to keep going.
![]()
So I did a slightly more polished version in a 3d printed case with buttons. I also printed a case for the screen itself. Issues were however is the connections for the e-paper screen were just whatever kind of plastic connector came with it, which was not so great for easily swapping the screen. I had ideas to replace it with potentially a blade connector or maybe pogo pins eventually. The 3d printed case also looked like crap, but it got the idea of a "camera" across. And using an RPi for this was complete overkill, and the issues with safe shutdowns and start-ups on battery power and all that were basically a big distraction.
![]()
A very basic solution for the viewfinder.
![]()
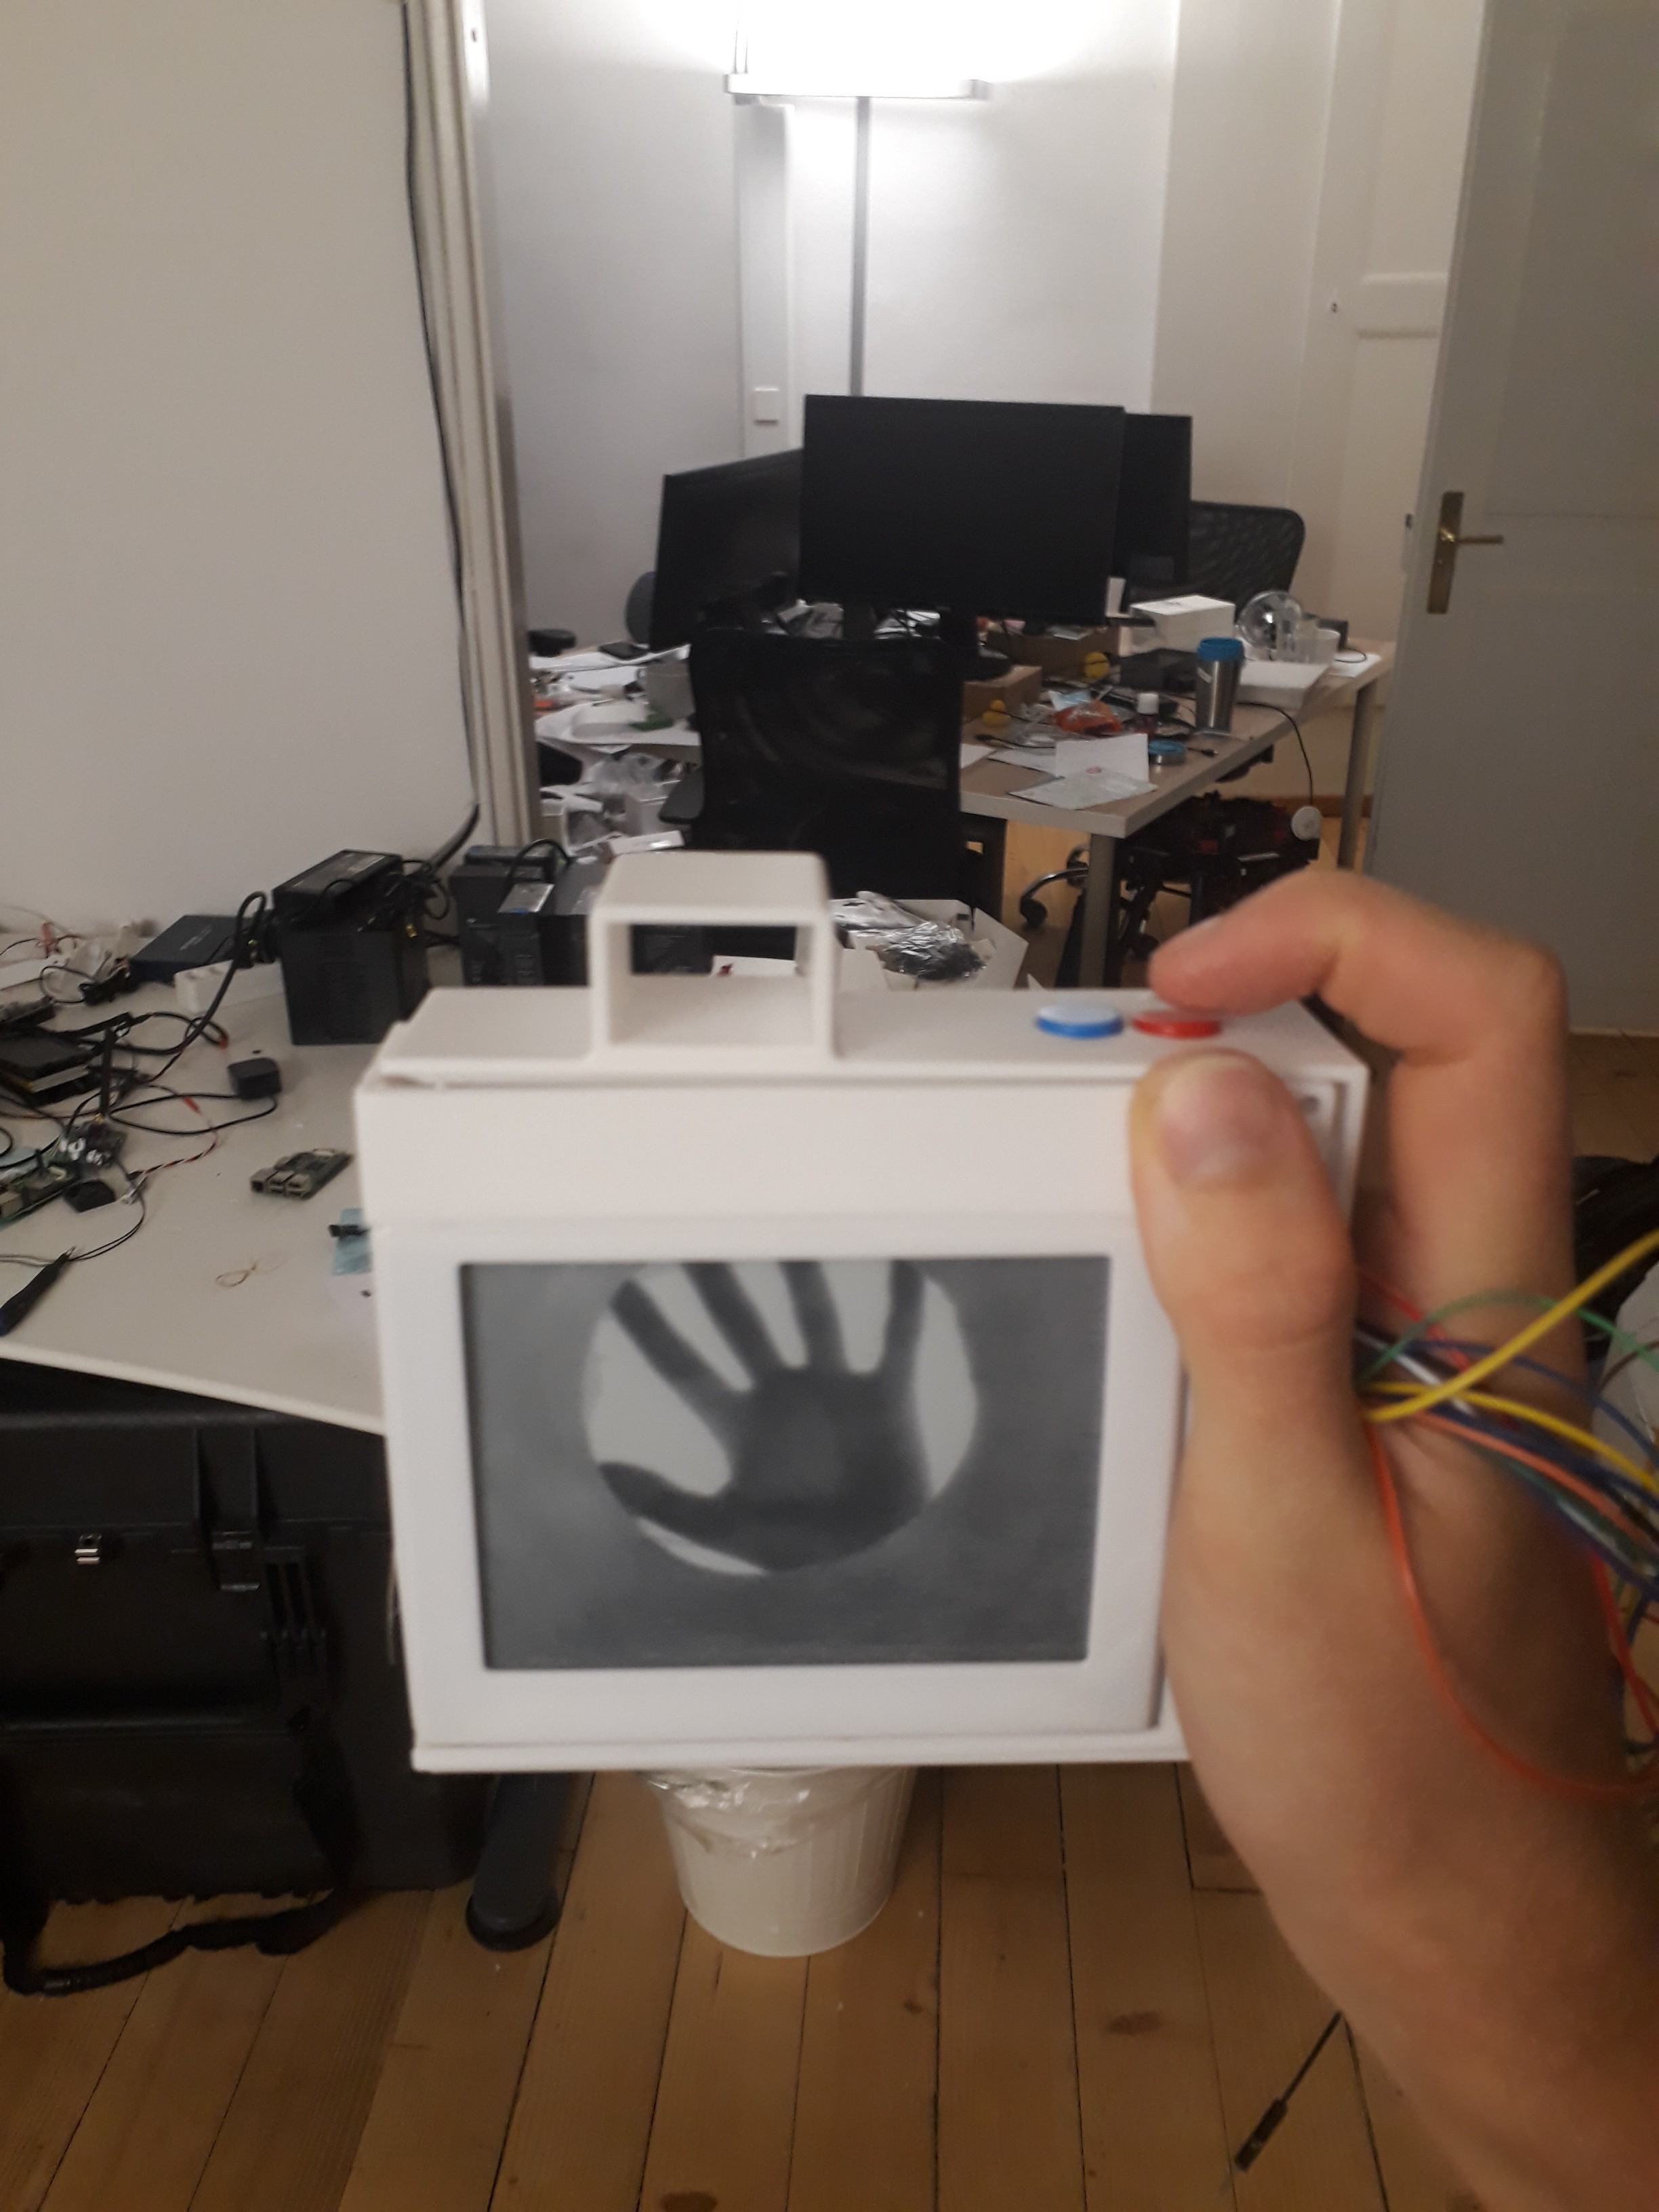
It might not be the best camera in the world, but as the output is a 300x400 pixel binary display it was already massive overkill.
E-paper instant camera
An instant camera where the "film" can be used again and again.