Please check out the instructions below and the Github files.
I made this with one main .py file, and included a simple html page and image that you can store on your raspberry pi pico w.
A super simple webserver written in MicroPython that serves up simple webpages and files from a pico w
Already have an account? Log in.
To make the experience fit your profile, pick a username and tell us what interests you.
Please check out the instructions below and the Github files.
I made this with one main .py file, and included a simple html page and image that you can store on your raspberry pi pico w.
I updated the code on github so that it will give separate error messages. Now, it will give an error if the filename is bad, and it will give a separate error if the pico can't open and send the file (usually caused when the file is too large).
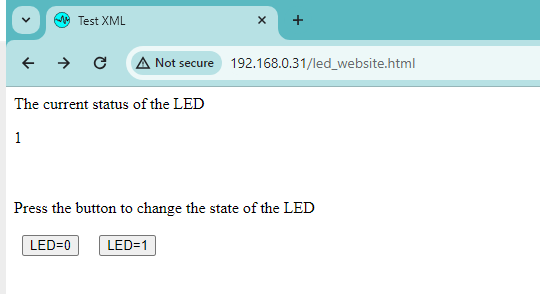
I also added "led_website.html". This demonstrates how to use XMLHttpRequest to set the LED on the raspberry pi pico, and has a timer that automatically queries the status of the LED to display on the website without having to refresh the page.
There are lots of good tutorials on the web, but here are the concise steps.
Download the latest "uf2" file from MicroPython for raspberry pi pico w
Download the "nuke" uf2 file from Adafruit, because if something goes wrong, you load this uf2 to restore the pico w and wipe any weird state (I'm looking at you, watchdog timer...).
Connect your raspberry pi pico w to your computer while pressing the reset button.
Drag and drop this file on the drive on the pico, and wait for it to reset.
Install Thonny so you have an environment.
Run Thonny, then use Run->Configure Interpreter, select MicroPython (Raspberry Pi Pico), and then select the correct Port for your pico w.
Make sure you can see the local computer files, and the pico w files by going to View->Files.
Now, you can place your HTML, images files, etc., in the "/" directory of the pico w.
Head on over to github and download serve_file.py
You can run this, or if you want it to run all the time, rename it main.py so it can run without Thonny.
You will need to create your own wifi_info.py which has two variables, ssid - a string for the ssid name, and wifi_password, your password.
 AlfredC

 facelessloser