 Aaron Christophel
-
13D Printing the case
Print both the Cap and Case without support and 0.2mm height
The Cap should snap into the Case without much force.
The needed files are in the uploaded .zip file
The Battery, PCB and E-Paper display can be slit into the side of the Case
-
2Build the PCB
User a PCB manufacturer by your choice and get some PCBs and a stencil.
The parts needed are mentioned in the BOM file of the uploaded .zip as well as the Gerber file. -
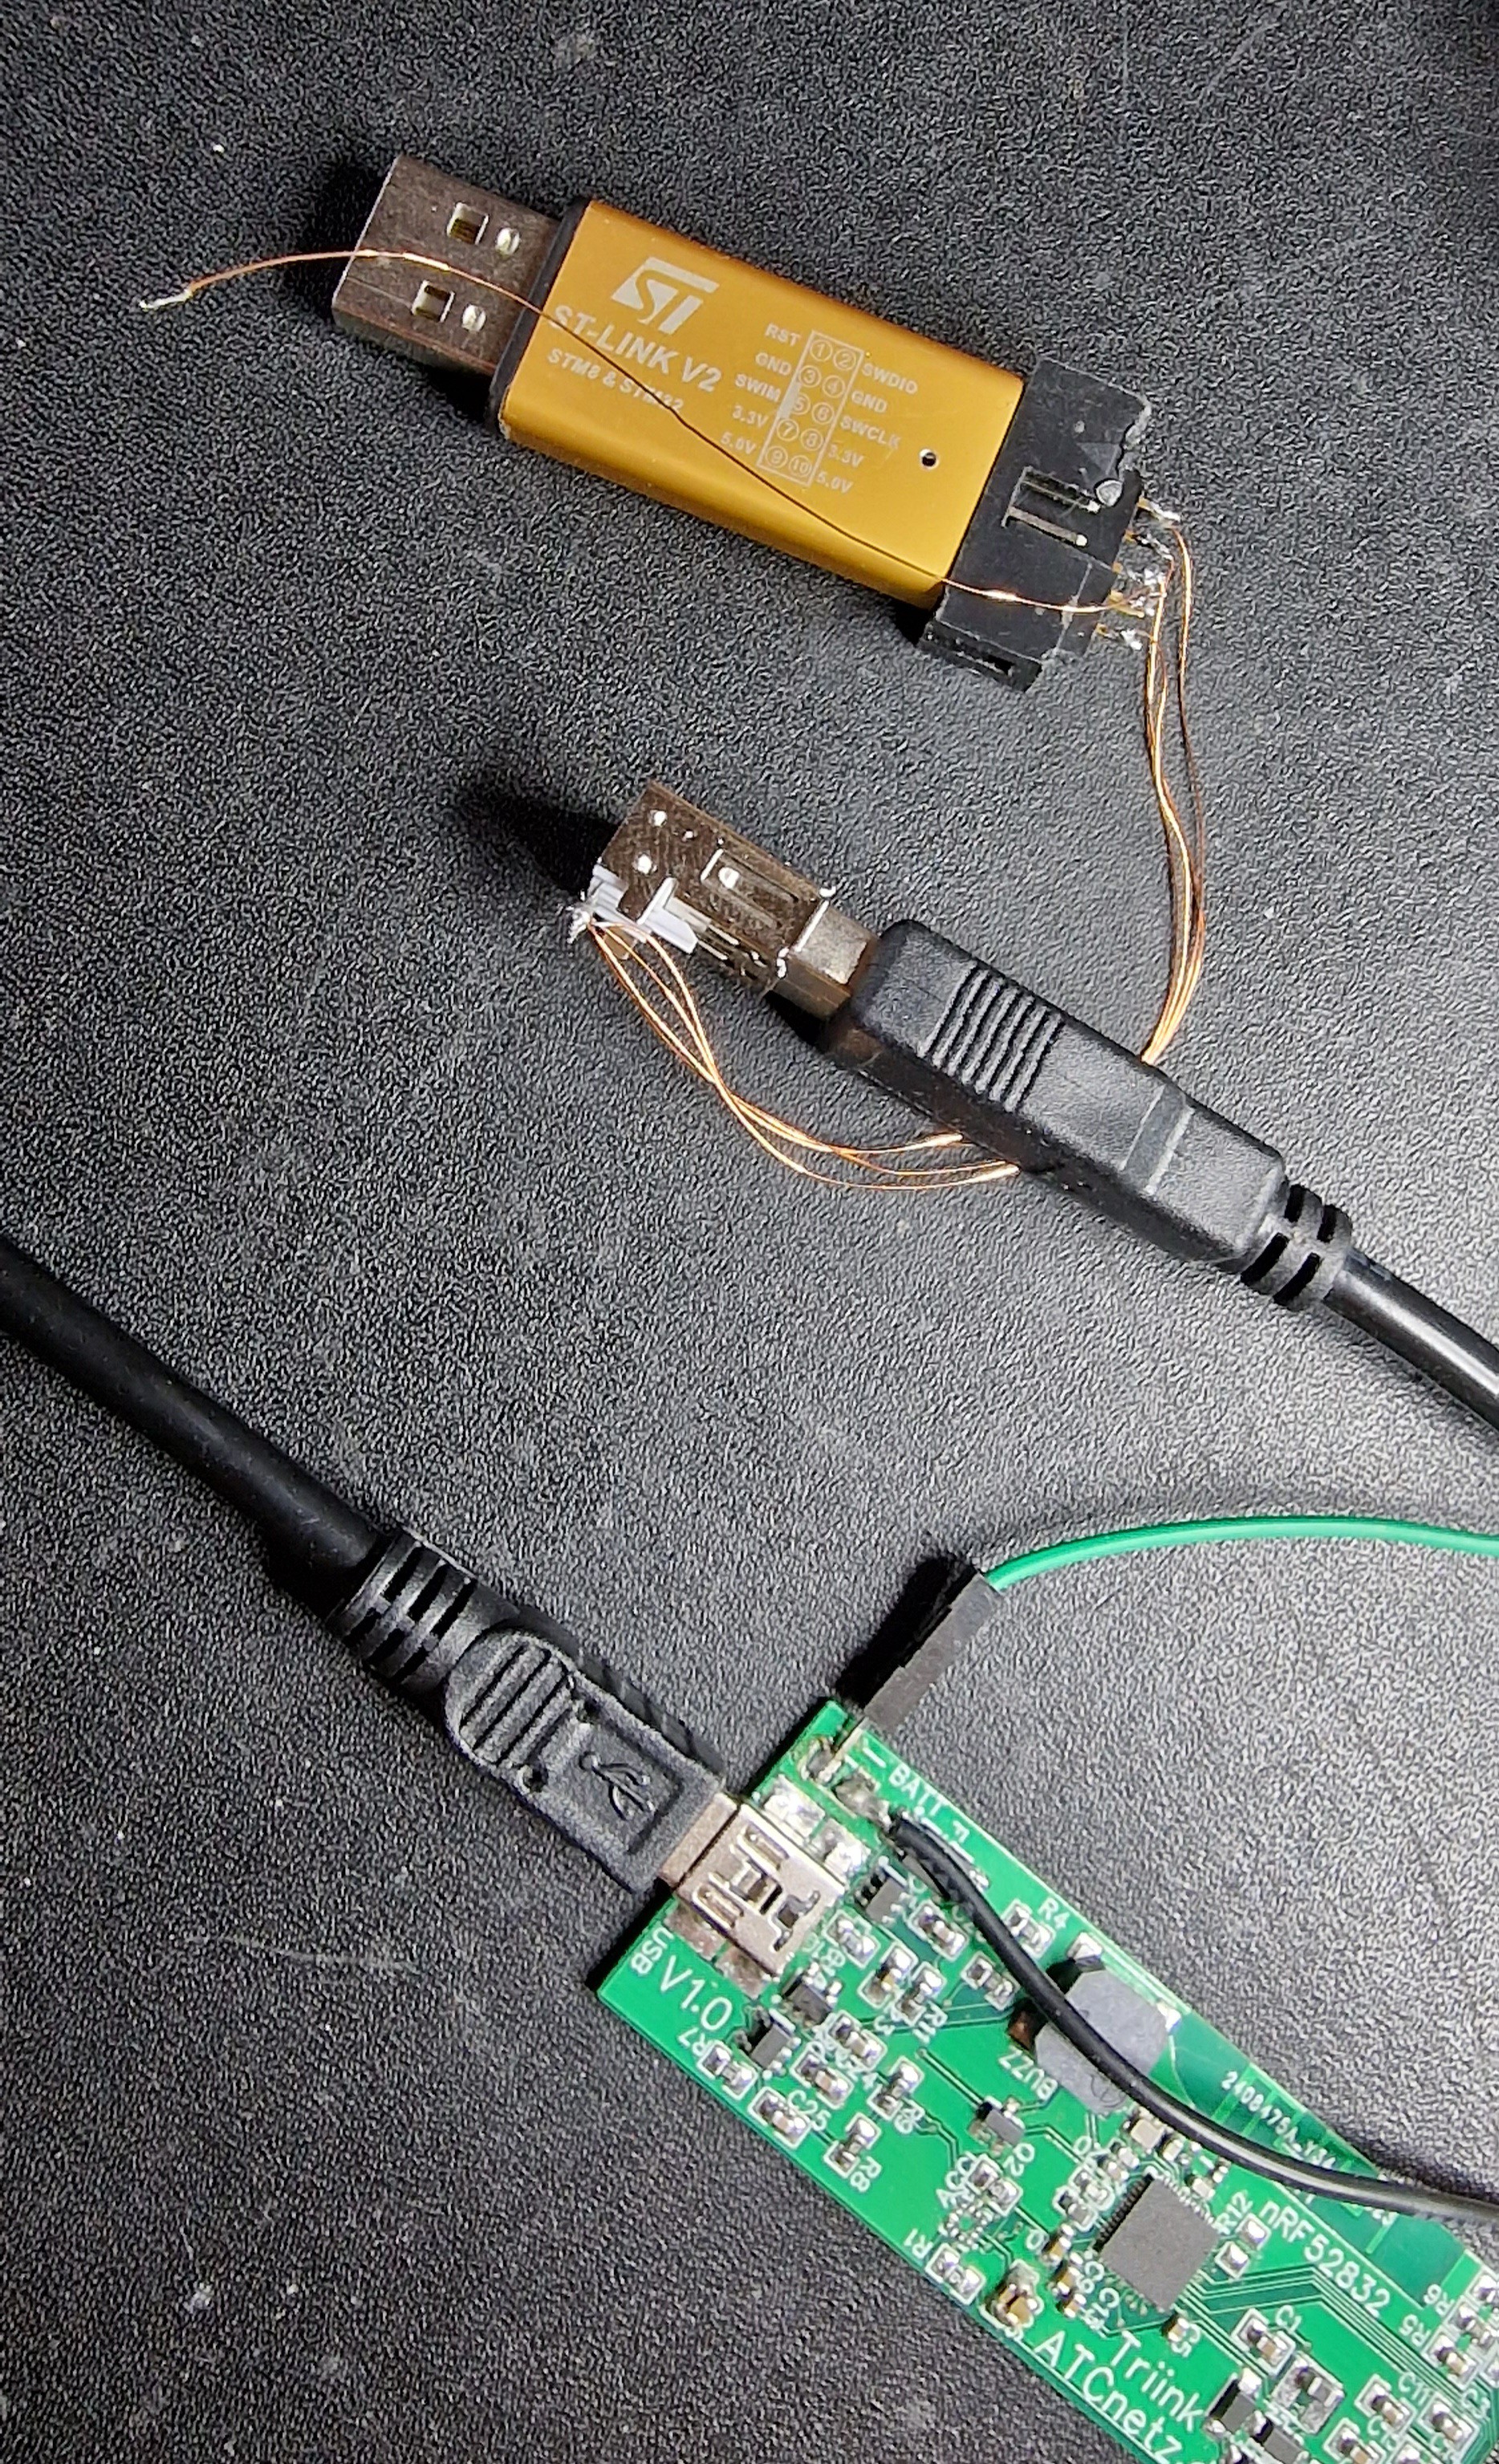
3Flashing via Arduino
The SWD connection of the nRF52832 is accessible via the USB data lines in the USB Connector.
The best is to use a Female USB connector to pass power to the PCB and connect to an St-Link at that point
![]()
To add the Triink to Arduino it is best to use this Portable version: http://atcnetz.de/downloads/D6Arduino.rar
From the uploaded .zip copy the Triink folder into: "\portable\packages\sandeepmistry\hardware\nRF5\0.6.0\variants"
Copy the boards.txt content in some area between #### into the file: "\portable\packages\sandeepmistry\hardware\nRF5\0.6.0\boards.txt"
You can then open the Sketch and compile and upload the files via an St-Link, by also uploading the bootloader you can, after the first flashing, upload newer versions via BLE the needed files are created in the Base folder of D6Arduino and will be created on each compiling.
After a flash via the St-Link the nRF52832 should be repowered as it will otherwise stay in "debug" mode and the current consumption is increased by about 3mA in that mode
Triink - low power BLE E-Paper Clock
A fully custom Arduino E-Paper BLE clock in a 3D Printed case using nRF52832 with one year run time one a single 18650
Discussions
Become a Hackaday.io Member
Create an account to leave a comment. Already have an account? Log In.