-
Breadboard explosion
01/20/2017 at 21:02 • 0 commentsWorking on a flow sensor test setup the breadboard suddenly exploded! And I though blue smoke was the worst that could occur..
![]()
Yesterday I made a great step forward testing the flow sensor. I made a simple breadboard setup to run the pump when pushing a button, and stop it when the flow sensor read a set value (330ml for a normal Norwegian beer bottle). This worked, but I wanted to see the flow sensor readings so I added a 8 digit display to show the total milliliters going through the sensor. The display didn't work properly at first, showing strange outputs on the display, but after a while tweaking things it suddenly did what I wanted and I went to bed with a big smile knowing I made it work.
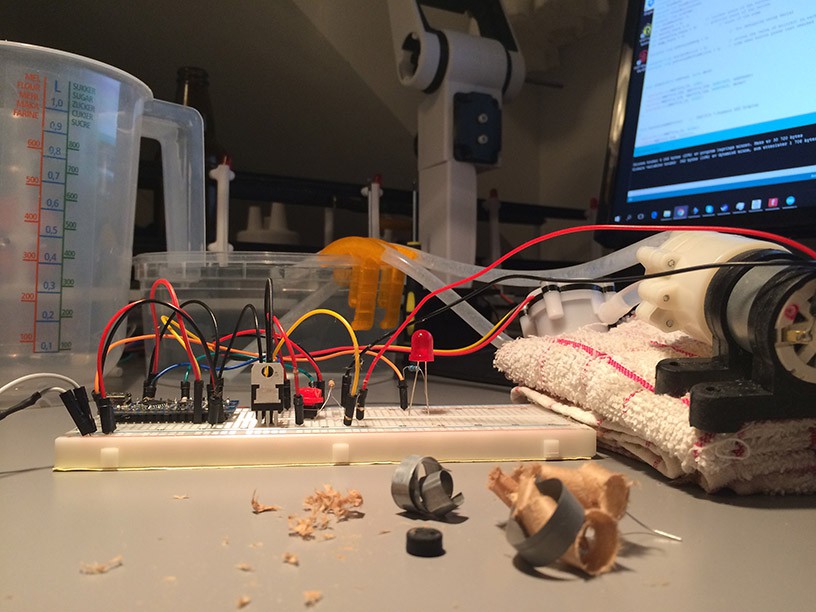
Today, the display suddenly didn't work, and after some tests using different codes and sketches I thought something had to be wrong on the breadboard. I also noted the pump motor was warm. So I did some quick reading about noise, de-coupling and capacitors. I have soldered a 0.1uF capacitor onto the pump and got an idea this was wrong, and added a 470 uF capacitor on the breadboard after the TIP120 transistor controlling the pump.
BOOM!
Apparently this was a big mistake. As it blew up in my face it was unsuspected and scary, but I sure learned something about using capacitors today. First of all being more careful, and I need to learn more about them.
I still don't know why the display doesn't work. And the circuit for the flow measurement doesn't seem 100% yet.
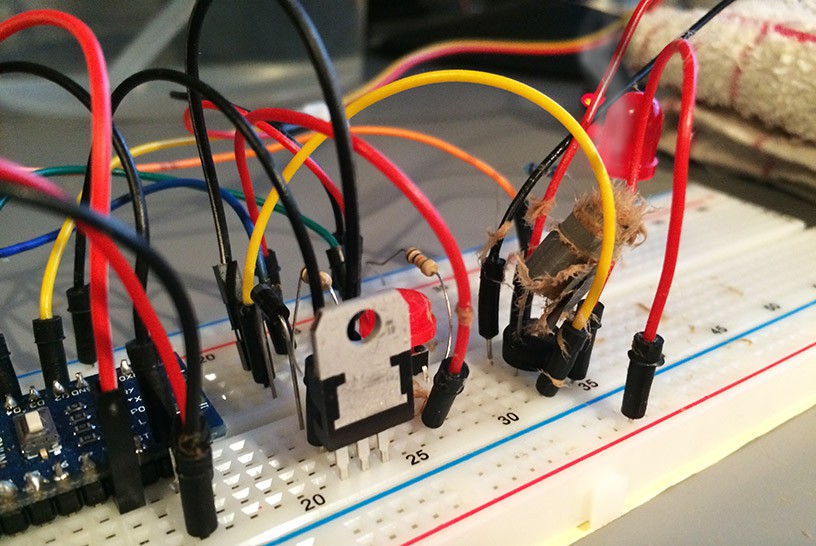
First tests using the flow sensor worked great. I could push the button and the pump filled a perfect 330 mL bottle. But after adding the display everything got more complicated.![]()
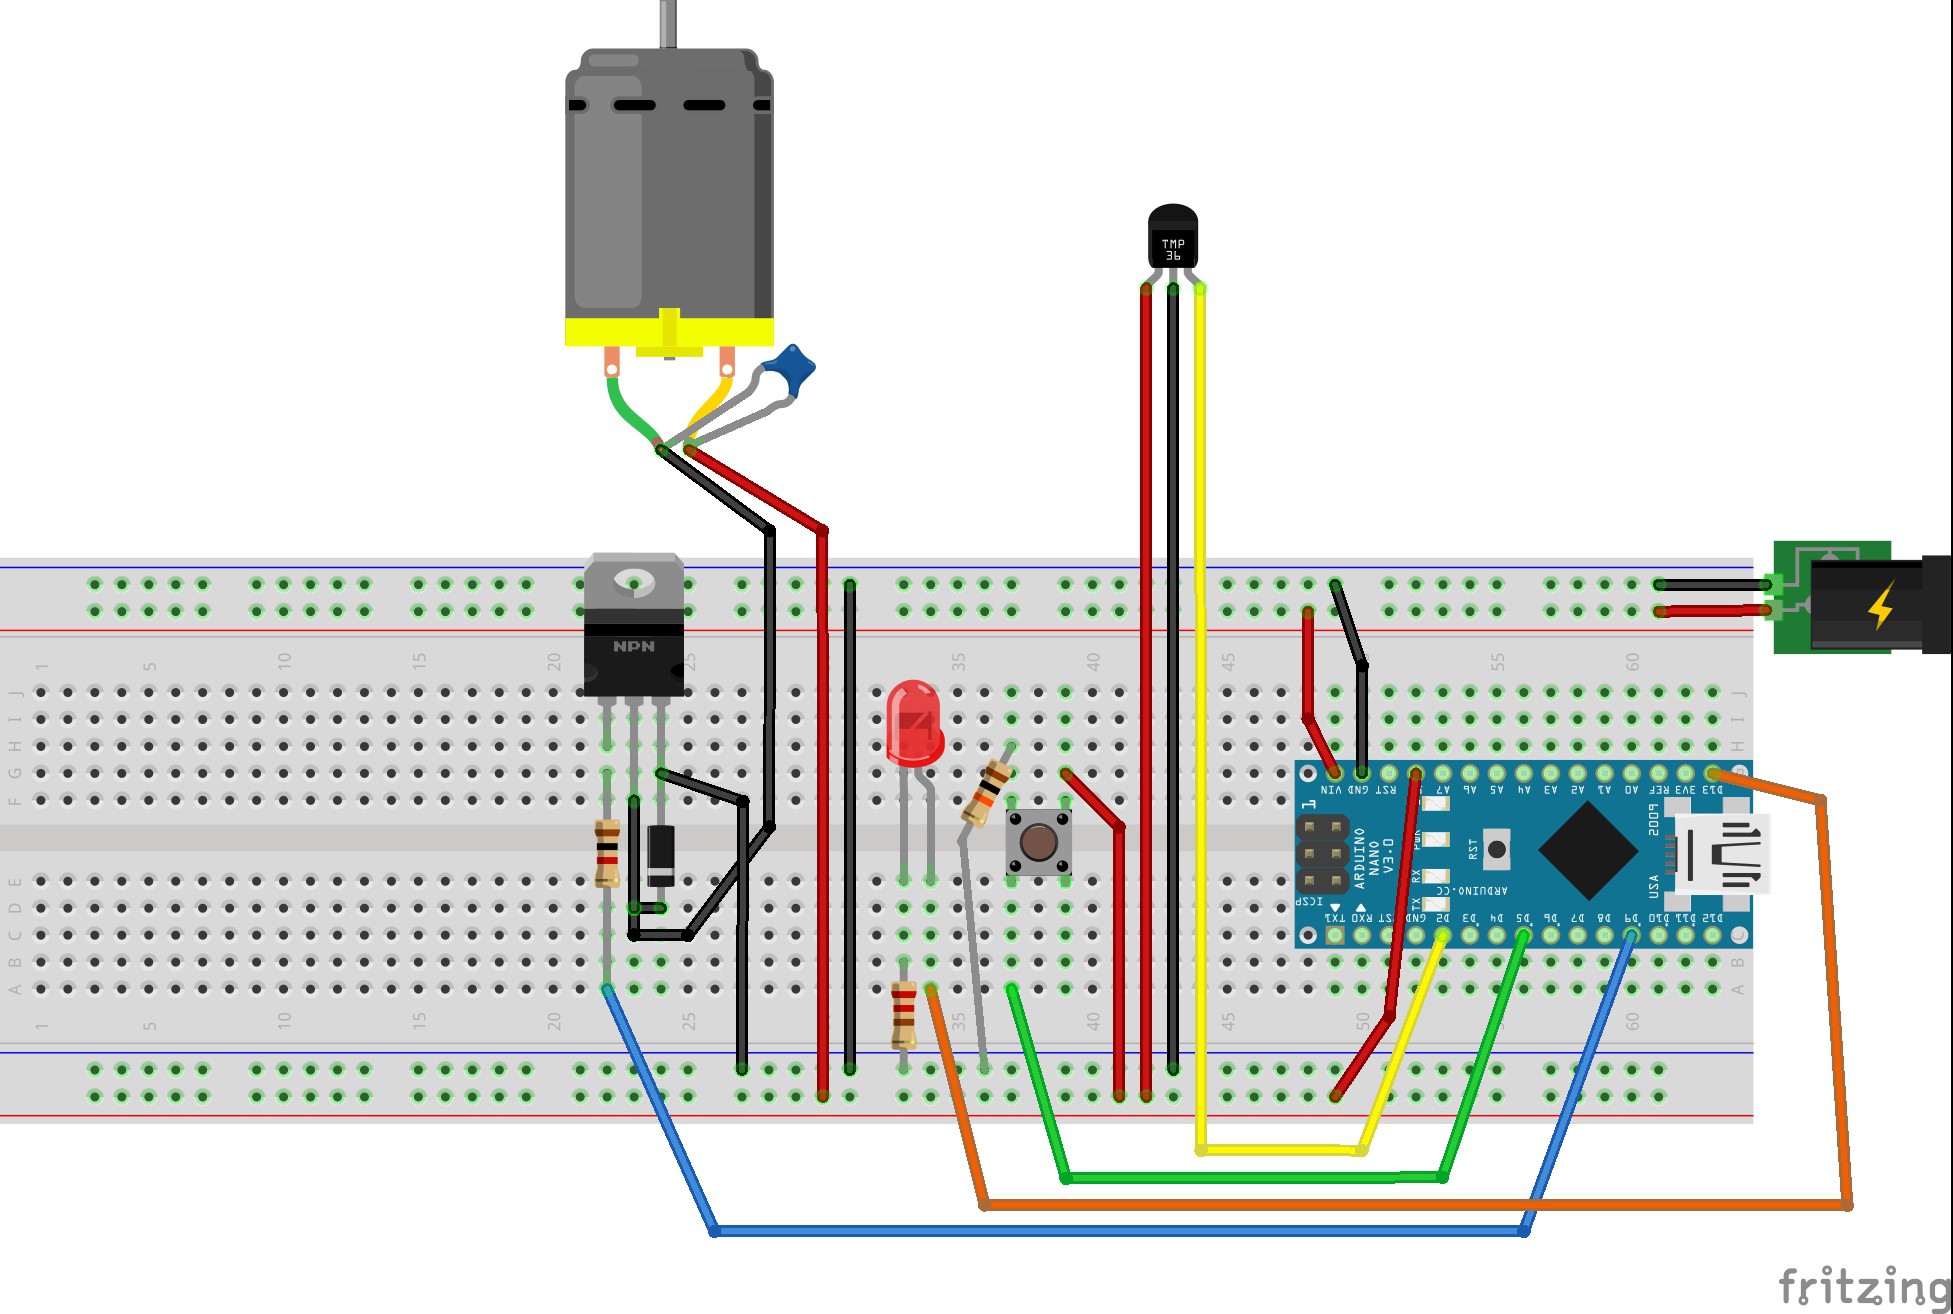
The breadboard diagram shows how I have connected the pump and the flow sensor (black little thing with red-black-yellow wires). A 104 capacitor is soldered onto the motor (blue little thing). I have found an explanation on the adafruit site about using three capacitors on the motor, but I still don't have the knowledge to understand why and what it means.![]()
-
Bottle Positioning
01/15/2017 at 18:36 • 0 commentsThe main functions in the Arduino program is working! I have spent the last month programming the various functions while parts for the BottleBot are printing. Functions like moving the conveyor belt, positioning of bottles, as well as filling them seems to work now. At least in theory, using the serial monitor.
![]()
The conveyor belt is now assembled and working. I have run the motor and the belt is capable of transporting full bottles all the way through. And the robot is coming together. At the moment the lower part of the robot and the "bottle positioning arm" design needs more work. The servo I'm currently using to push two bottles into position, a Futaba S3003, doesn't have enough torque. I'm using a MG995 servo to control the "heavy" robot arm with the solenoids and that servo model works fine and will also be used for positioning the bottles.
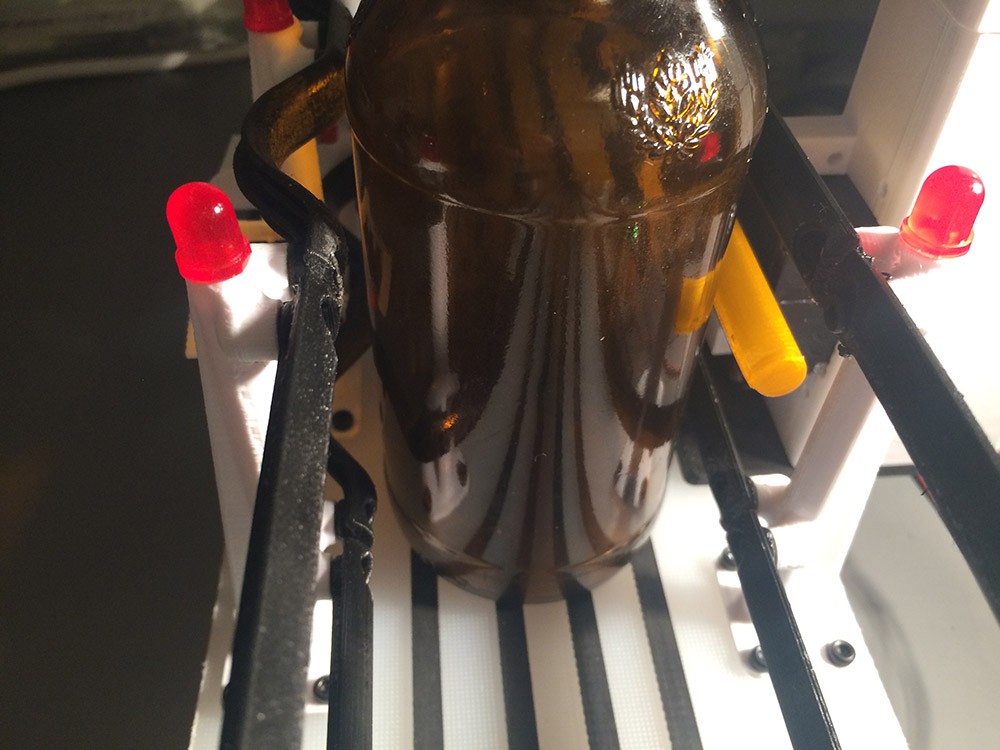
The above picture shows a bottle just as the conveyor belt stops. The yellow push bar will now push the bottle into the bent rail on the other side, and the bottle is in the correct position for the filling arm to hit the bottle opening and open the valve.![]()
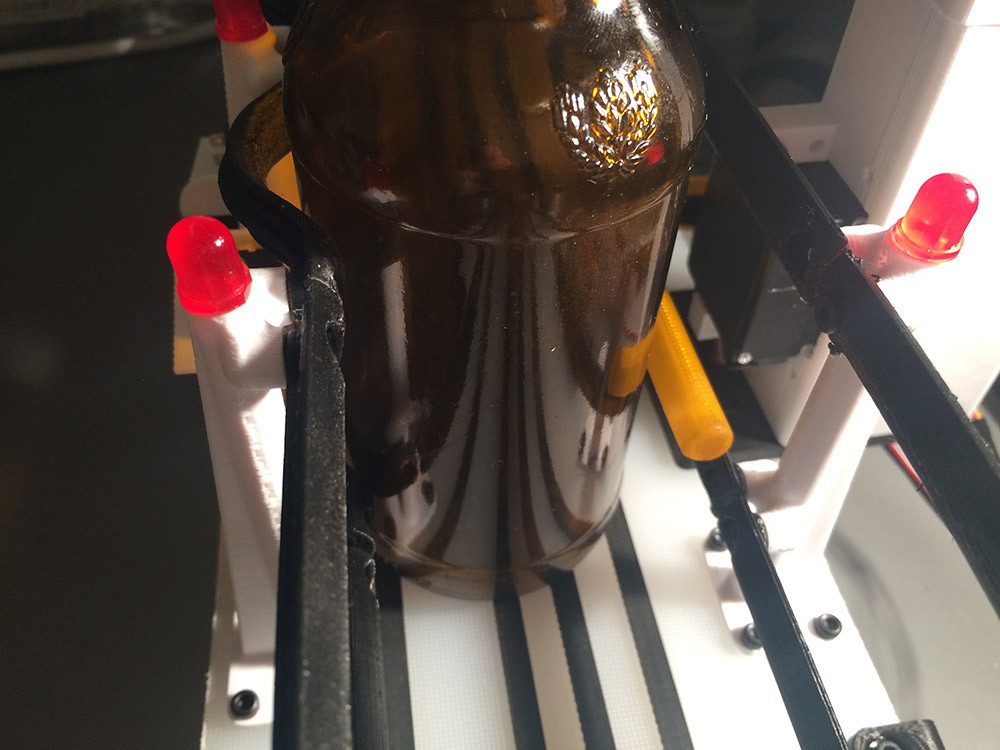
Here the yellow push bar have pushed the bottle into position. When the push bar is released the bottles are free to continue down the belt.![]()
I'm still not satisfied with the push force and need to order a better servo.
-
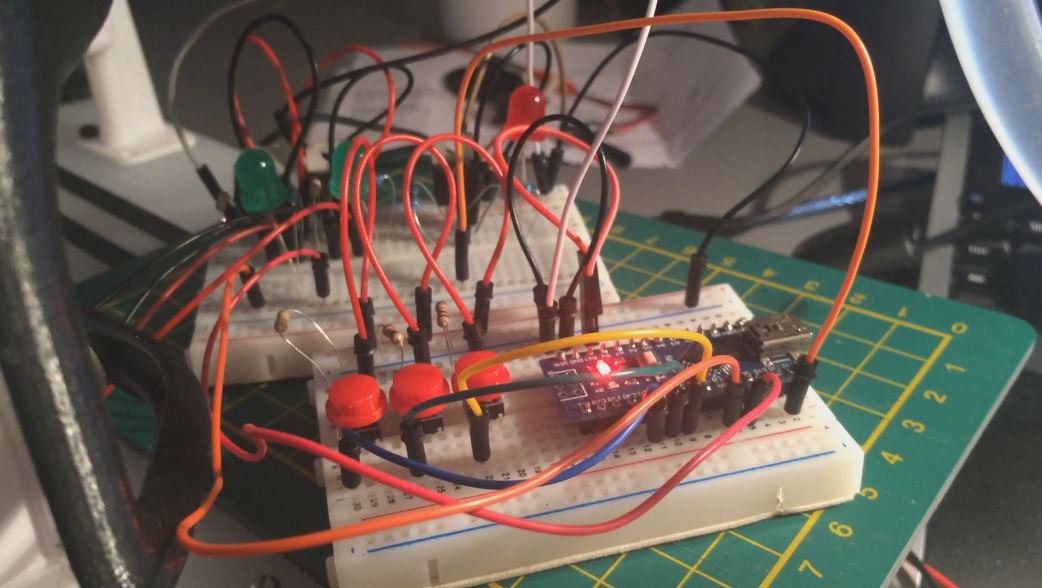
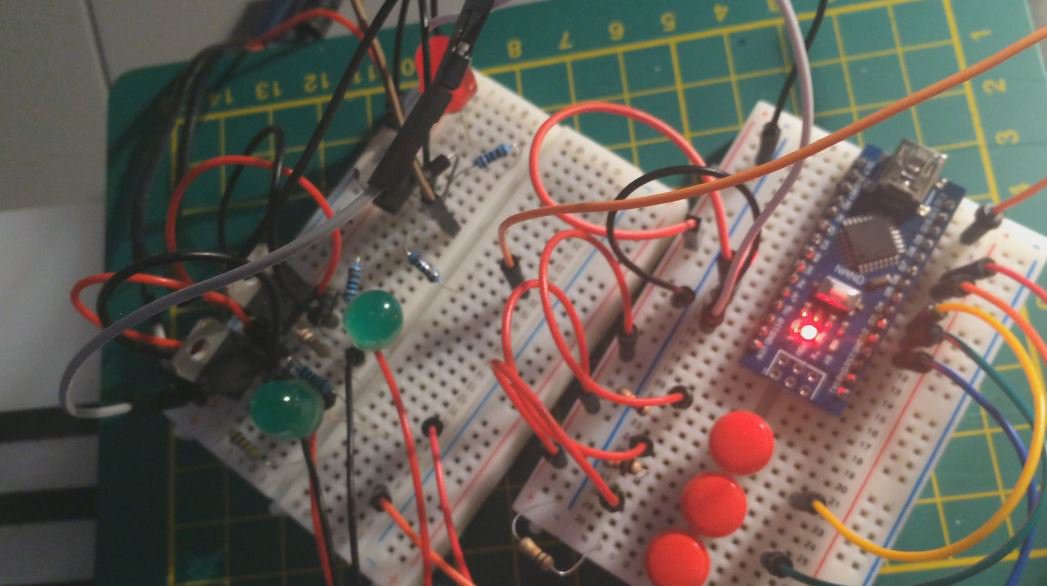
Solenoid and pump test
12/18/2016 at 19:05 • 0 commentsOn the road to a fully automated bottle line there will be lots of testing and errors. I have now tested the pump and solenoid and measured the time needed to fill bottles with the current setup. I have ordered flow meters that I will incorporate into the design, but right now I need to understand how the pump and solenoids affect the flow, and how I can control it.
![]()
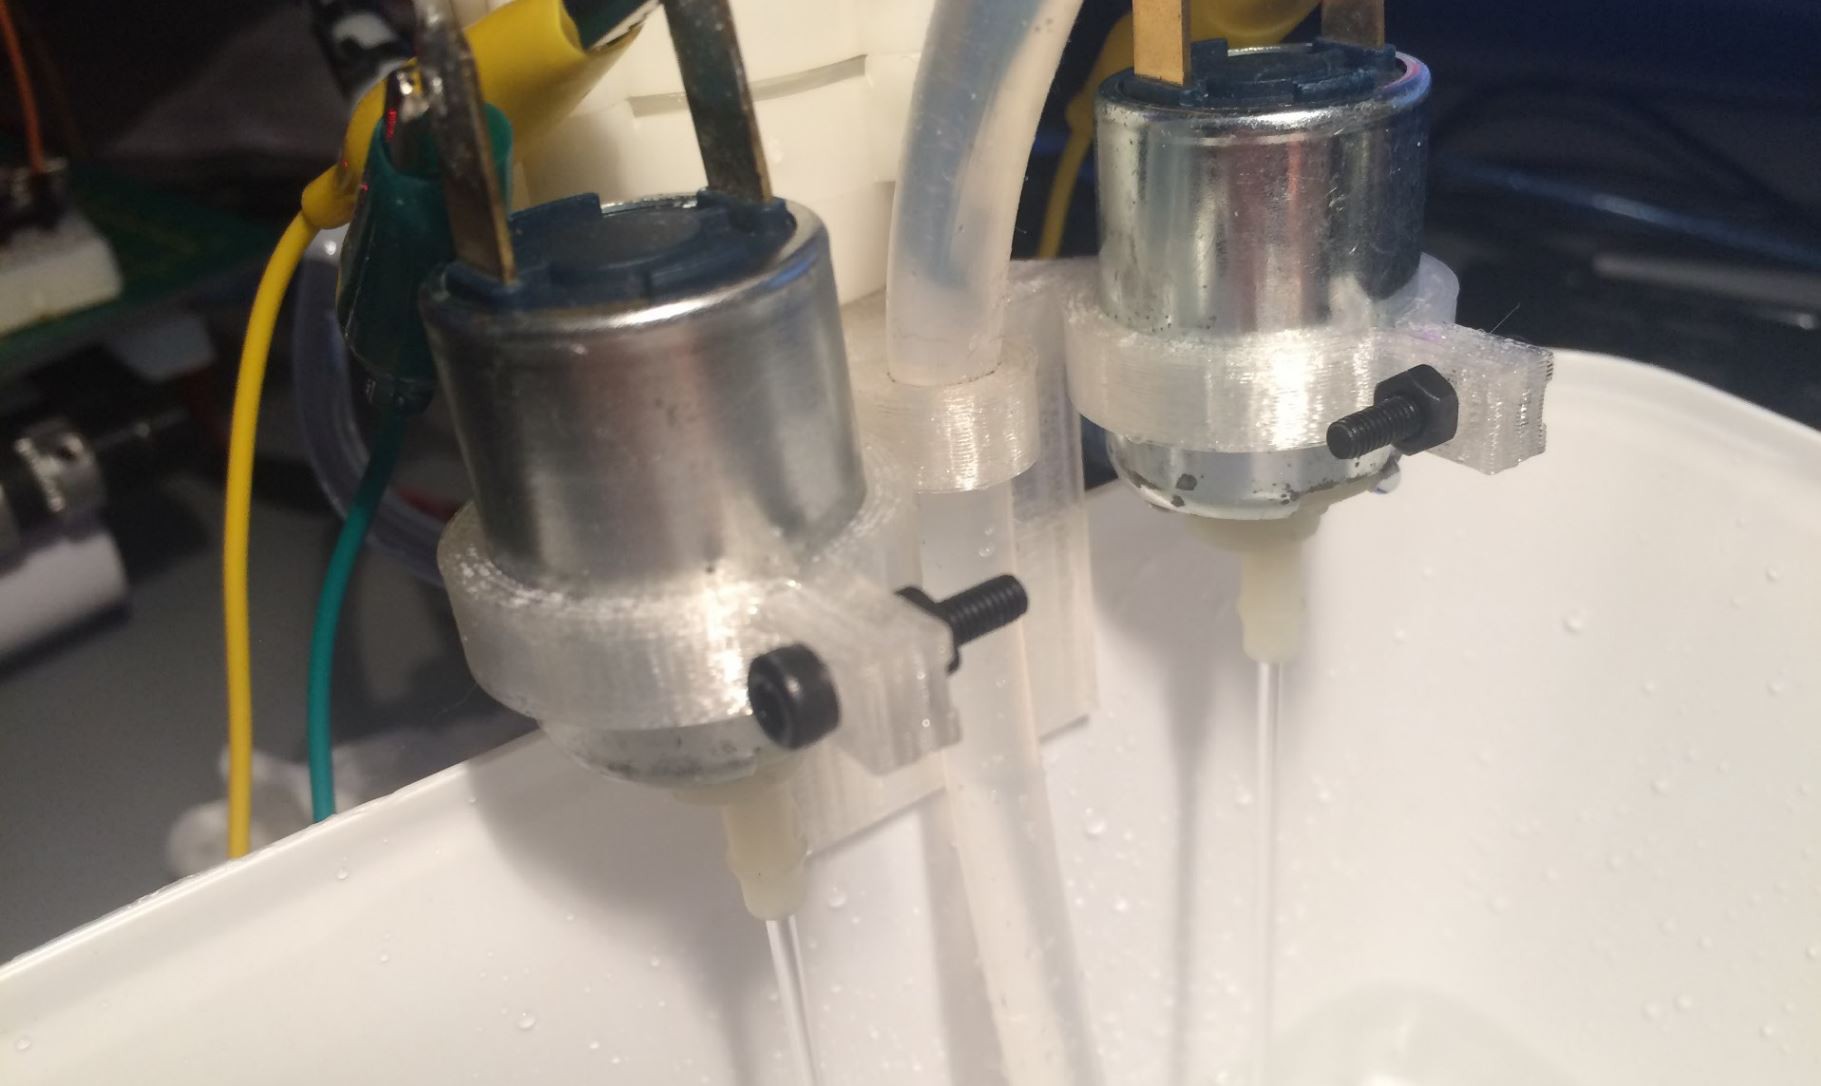
I have designed a rough holder for the solenoids and the pump that can hang on a plastic container with water. A tube goes from the water to the pump, and from the pump to a (leaking) Y-connector that splits into two tubes for each solenoid valve. I have set up a circuit nearby (on the BottleBot conveyor belt) and use arduino nano to control everything.
This basic setup works OK. Below are the results after test filling a beer bottle (0,33L). The tube from the pump is approx. 6 mm ID and the tubes for the solenoids are approx. 4 mm. So for curiosity I also checked the time for filling a bottle from the pump itself.
Filling 1 bottle (one solenoids open, one closed) Filling 2 bottles (both solenoids open) Filling a bottle directly from the pump tube test 1 33,20 seconds 44,4 seconds 13,25 seconds test 2 33,12 seconds 43,23 seconds 12,74 seconds test 3 33,41 seconds 44,18 seconds 12,87 seconds Filling two bottles at the same time is about 22 seconds for each bottle. It basically mean I have 22 seconds to grab the bottle, put a cap on it manually and put it into the crate. Considering this is a tabletop bottle line assisting me with my home brew I think it's acceptable.
Filling the bottles with two pumps with 6 mm tubes would be effective. The drawback is that the size of flow into the bottle makes the liquid splash a lot, which can be bad for some beer types. The flow from the 4 mm tubes, or out of the solenoids itself, are straight and clean and makes no splashing or bubbles in the bottle.
![]()
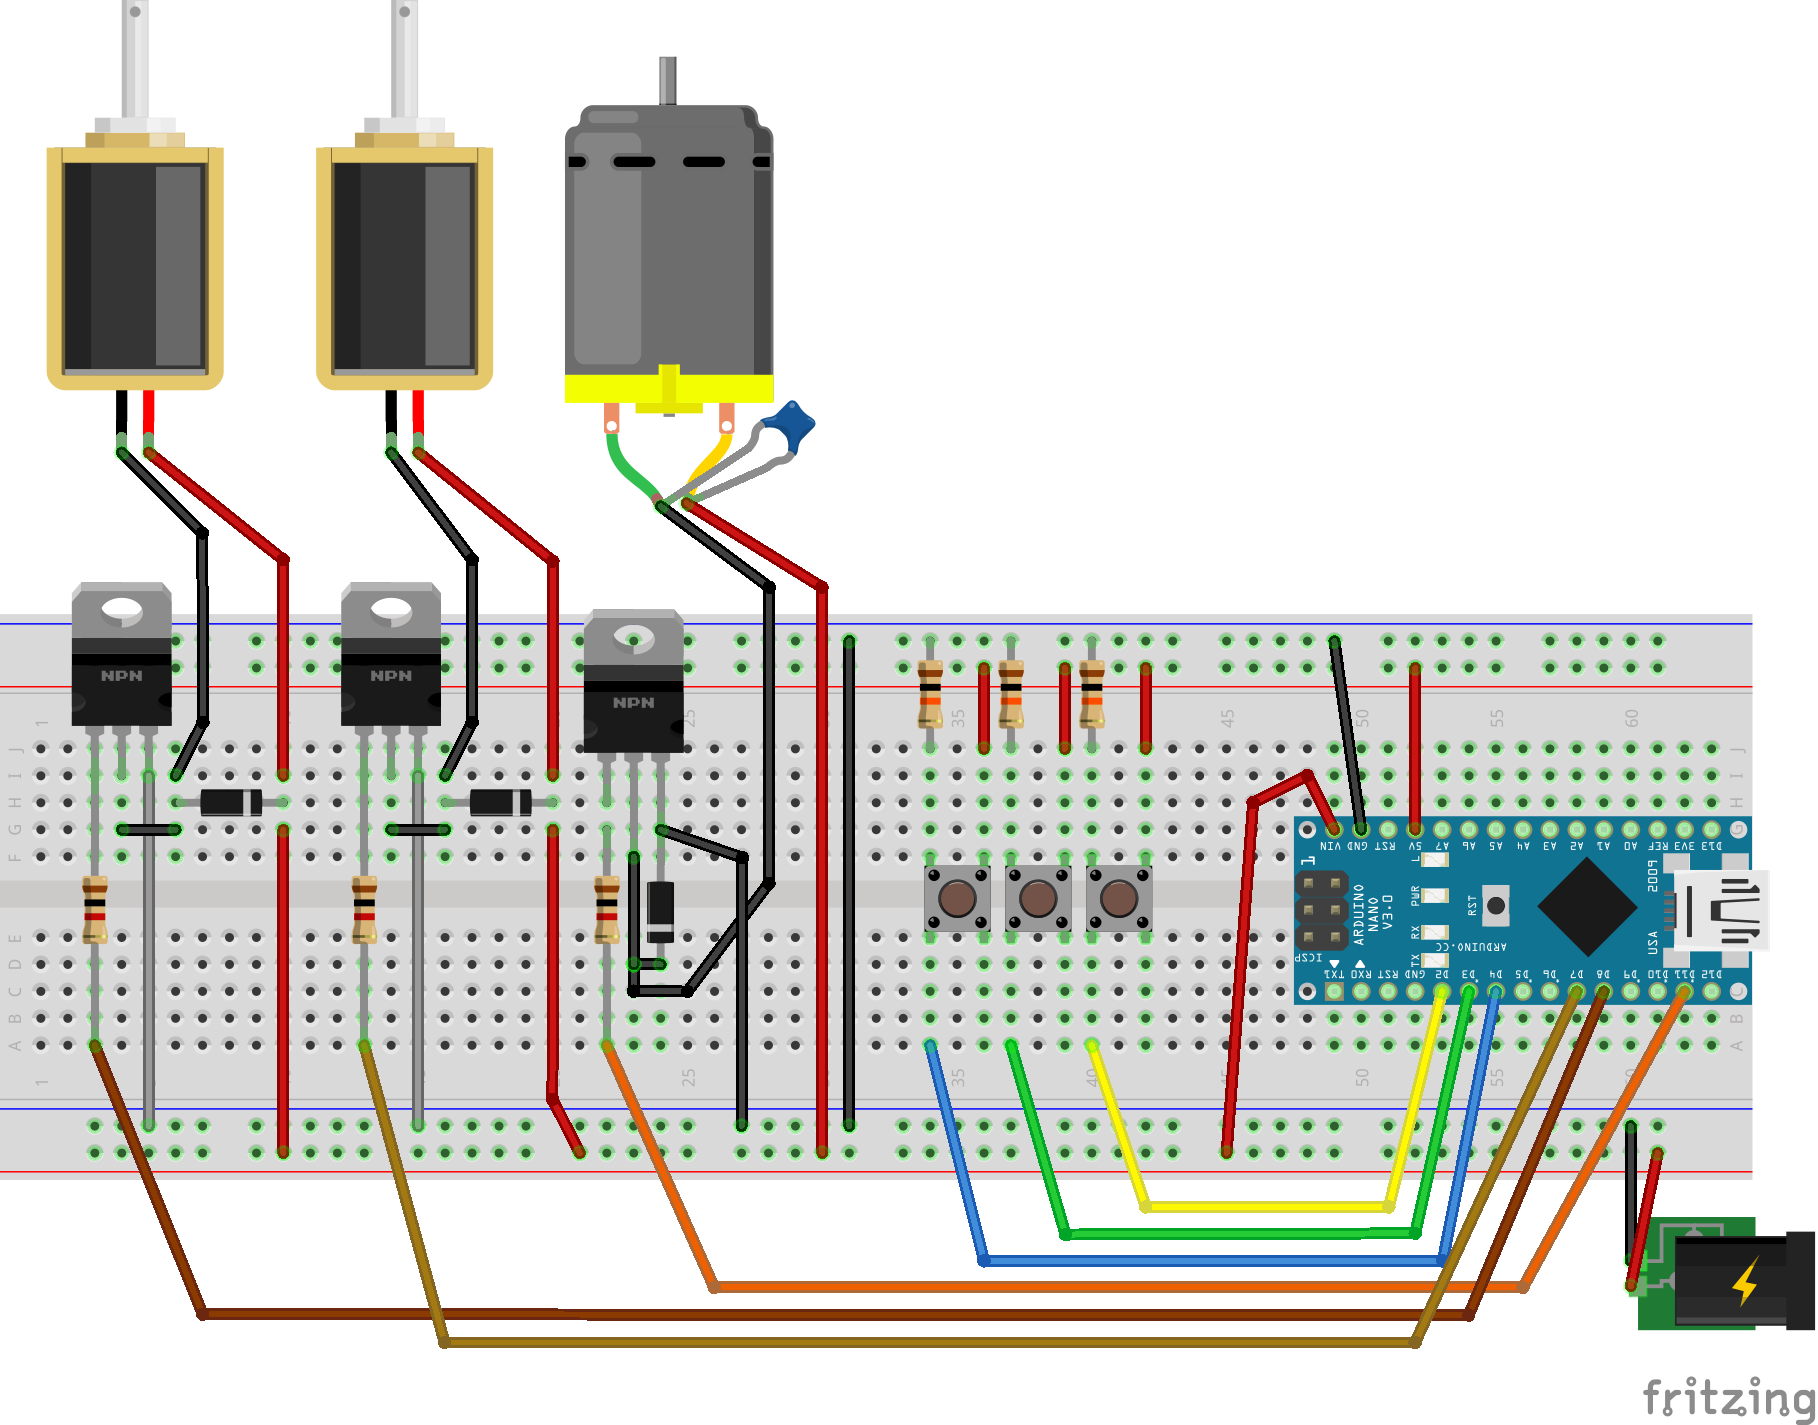
Circuit designed in Fritzing. Pressing button 1 turns on the pump, pressing button 2 turns on solenoid 1, pressing button 3 turns on solenoid 2.
Sources and inspiration for using TIP120 transistors and controlling motors and solenoids:
- http://www.instructables.com/id/Use-Arduino-with-TIP120-transistor-to-control-moto/
- http://www.martyncurrey.com/controlling-a-solenoid-valve-from-an-arduino/
- http://www.instructables.com/id/Controling-a-solenoid-valve-with-an-Arduino/
- http://playground.arduino.cc/Learning/SolenoidTutorial
- http://bildr.org/2011/03/high-power-control-with-arduino-and-tip120/
![]()
![]()
I have struggled with bugs in either the code or the circuit itself and added LED's for each function to get a visual feedback when things should be on or off.
Problem is that a solenoid may suddenly turn on by itself (also turning the green LED on). This can also happen when I press another button. For example, turning off one solenoid may turn on the other one at the same time, even though only one button was pressed.
/* Anders Holm 18.dec 2016 - FunctionalDesign https://fdproj.wordpress.com/

Controlling 2pcs 12V Solenoids and 1pcs 12V Pump with Arduino
This demonstrates how to control solenoids and a pump using pushbuttons with debounce
and TIP120 Transistor with Arduino.
 The circuit:
 button1 for pump - Digital Pin 2
 button2 for solenoid- Digital Pin 3
 button3 for solenoidmp- Digital Pin 4
 TIP120 Transistor for solenoid 1 - Digital Pin 07
 TIP120 Transistor for solenoid 2 - Digital Pin 08
 TIP120 Transistor for 12V pump - Digital Pin 11
 Based on http://www.arduino.cc/en/Tutorial/Debounce
*/
// constants won't change. They're used here to set pin numbers:
const int button1Pin = 2;     // the number of the pushbutton1 pin - pump
const int button2Pin = 3;     // the number of the pushbutton2 pin - solenoid 1
const int button3Pin = 4;     // the number of the pushbutton3 pin - solenoid 1
const int Solenoid1pin =  7;  // the number of the solenoid1 pin
const int Solenoid2pin =  8;  // the number of the solenoid2 pin
const int pumpPin =  11;      // the number of the pump pin
// variables will change:
int button1State = 0;         // variable for reading the button status
int button2State = 0;         // variable for reading the button status
int button3State = 0;         // variable for reading the button status
int lastButton1State = LOW;   // the previous reading from the input pin
int lastButton2State = LOW;   // the previous reading from the input pin
int lastButton3State = LOW;   // the previous reading from the input pin
long button1_lastDebounceTime = 0;  // the last time the output pin was toggled
long button2_lastDebounceTime = 0;  // the last time the output pin was toggled
long button3_lastDebounceTime = 0;  // the last time the output pin was toggled
long debounceDelay = 50;    // the debounce time; increase if the output flickers
int PumpState = LOW;
int Solenoid1State = LOW;
int Solenoid2State = LOW;
void setup() {
      // initialize the pushbutton pin as an input:
      pinMode(button1Pin, INPUT);
      pinMode(button2Pin, INPUT);
      pinMode(button3Pin, INPUT);
      // initialize the relay pin as an output:
      pinMode(Solenoid1pin, OUTPUT);
      pinMode(Solenoid2pin, OUTPUT);
      pinMode(pumpPin, OUTPUT);
      // set initial state for pump and solenoids
      digitalWrite(Solenoid1pin, Solenoid1State);
      digitalWrite(Solenoid2pin, Solenoid2State);
      digitalWrite(pumpPin, PumpState);
}  //end setup

void loop(){
check_button1();
check_button2();
check_button3();
} //end loop

void check_button1()
{
   int readingButton1 = digitalRead(button1Pin);
    if (readingButton1 != lastButton1State) {
    button1_lastDebounceTime = millis();    // reset the debouncing timer
    }
    if ((millis() - button1_lastDebounceTime) > debounceDelay) {
    if (readingButton1 != button1State) {
      button1State = readingButton1;
      if (button1State == HIGH) {
        PumpState = !PumpState;
       }
     }
    }
    digitalWrite(pumpPin, PumpState);
    lastButton1State = readingButton1;
} //end check_button1
void check_button2()
{
   int readingButton2 = digitalRead(button2Pin);
    if (readingButton2 != lastButton2State) {
    button2_lastDebounceTime = millis();    // reset the debouncing timer
    }
    if ((millis() - button2_lastDebounceTime) > debounceDelay) {
    if (readingButton2 != button2State) {
      button2State = readingButton2;
      if (button2State == HIGH) {
        Solenoid1State = !Solenoid1State;
       }
     }
    }
    digitalWrite(Solenoid1pin, Solenoid1State);
    lastButton2State = readingButton2;
} //end check_button2
void check_button3()
{
   int readingButton3 = digitalRead(button3Pin);
    if (readingButton3 != lastButton3State) {
    button3_lastDebounceTime = millis();    // reset the debouncing timer
    }
    if ((millis() - button3_lastDebounceTime) > debounceDelay) {
    if (readingButton3 != button3State) {
      button3State = readingButton3;
      if (button3State == HIGH) {
        Solenoid2State = !Solenoid2State;
       }
     }
    }
    digitalWrite(Solenoid2pin, Solenoid2State);
    lastButton3State = readingButton3;
} //end check_button3
Any ideas on how to get full control of the solenoids when using buttons are welcome.
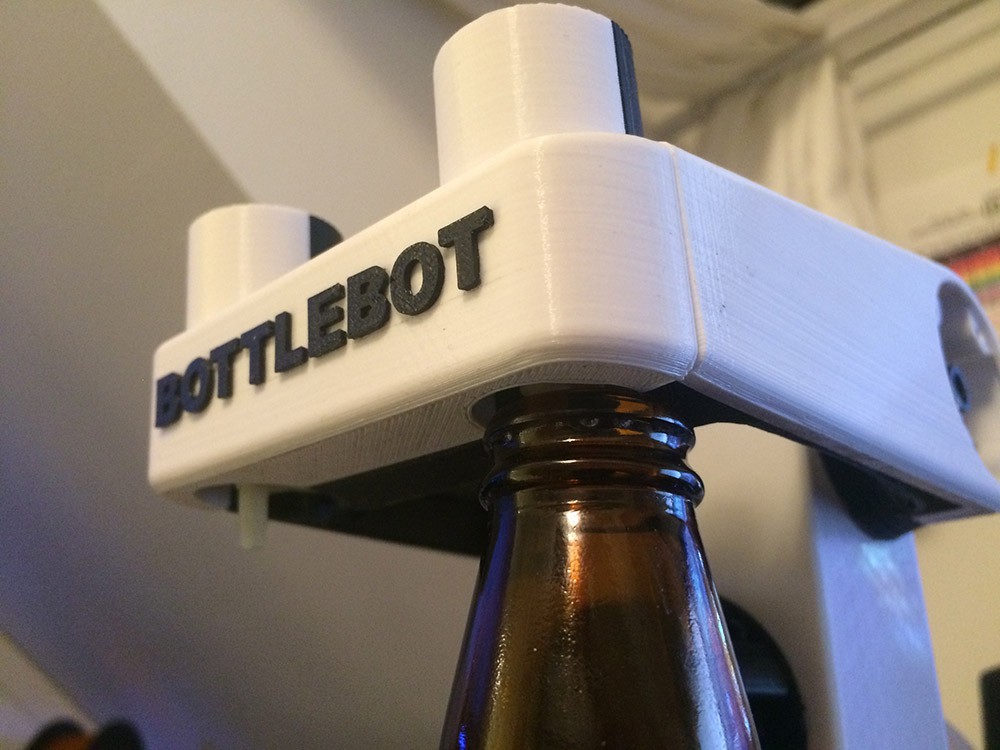
BottleBot - Bottle Filling Machine
Conveyor belt and a filling station using arduino- bottling my home brew beer!