Update: Flip-disc displays will be available soon on Kickstarter.
The design of the 1x3 flip-disc display is based on the project describing a single module (1 disc). The principle of control is the same with the difference that in order to minimize the number of Arduino control lines, a 595D shift register was used.
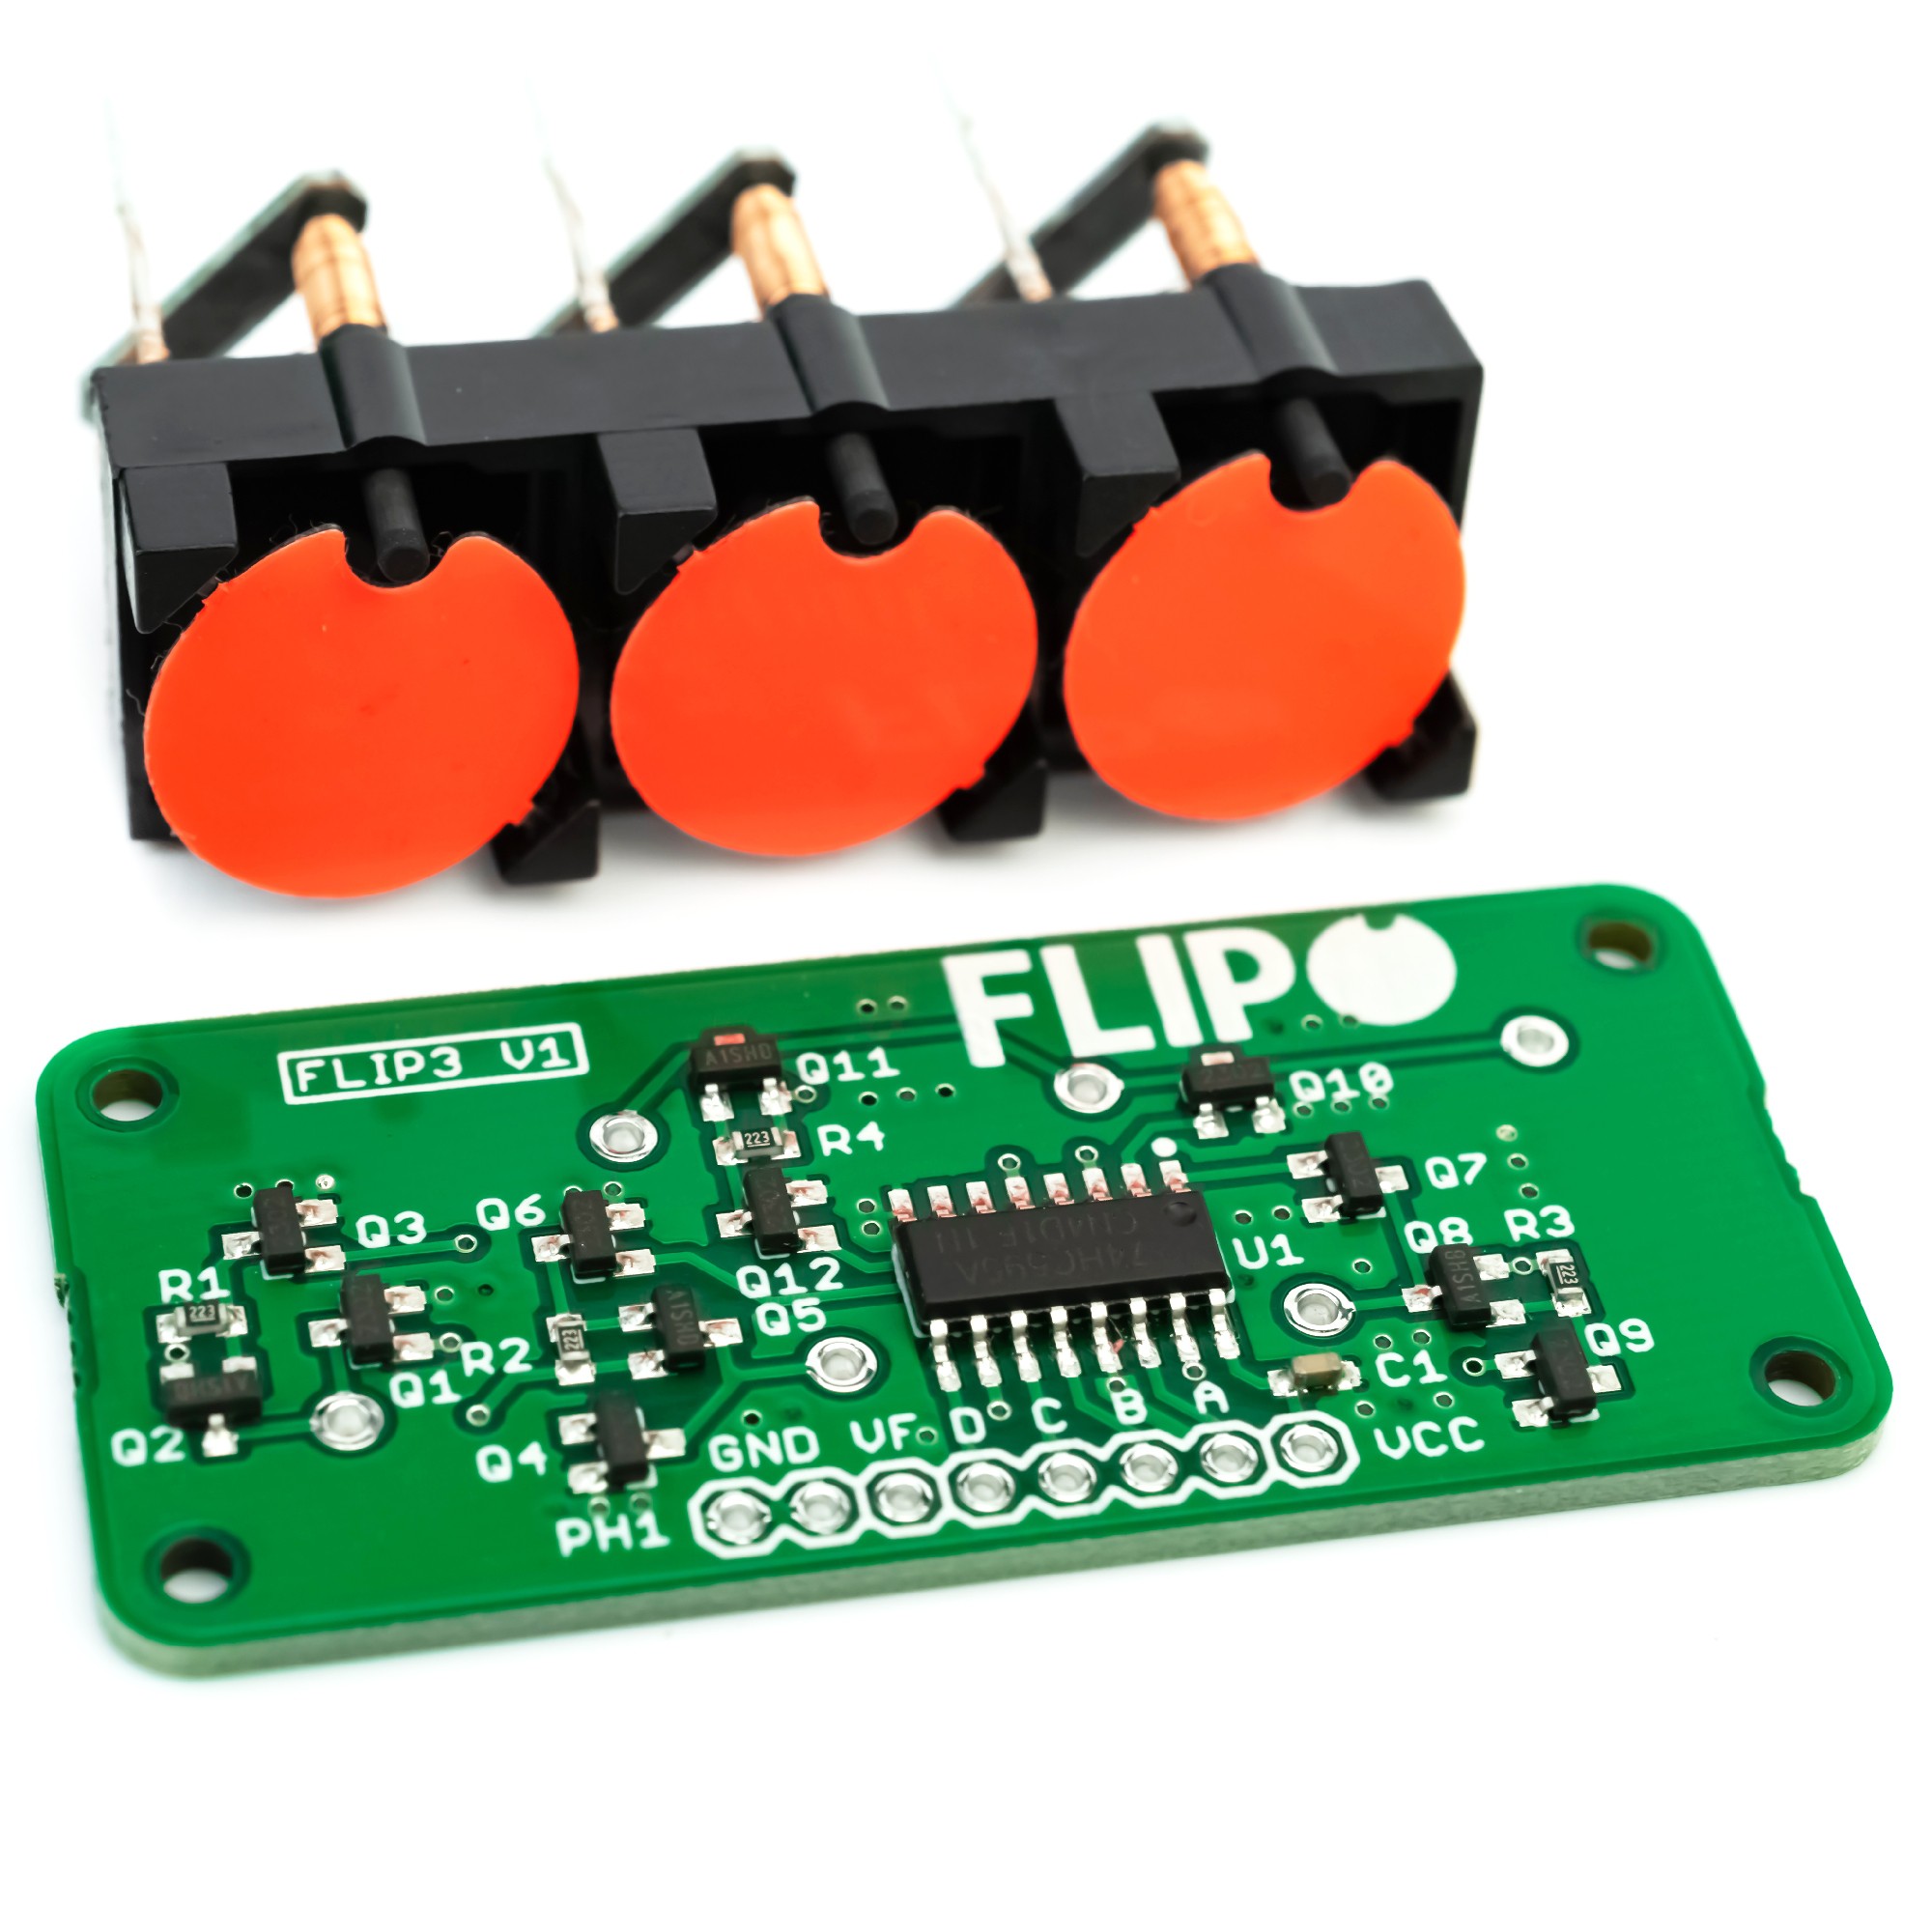
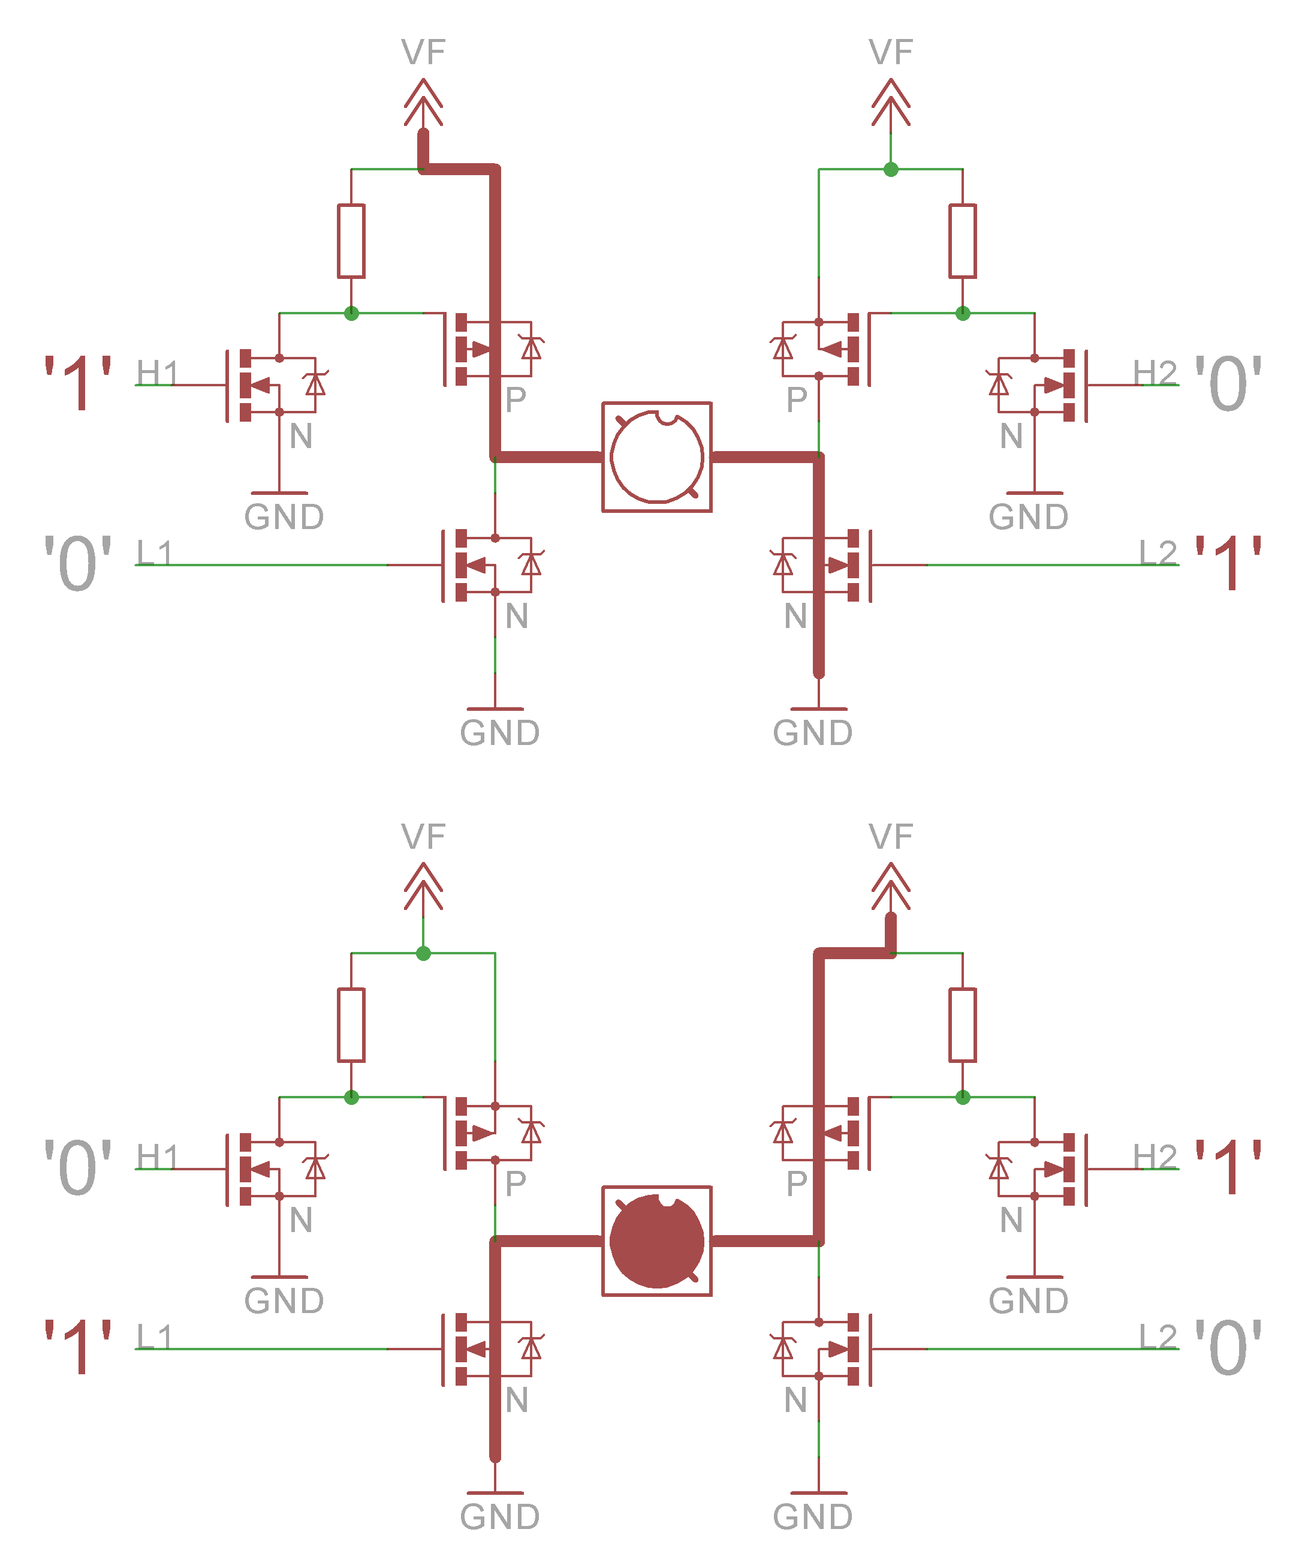
Flip-disc displays require a specific power supply, in order to flip the disc we need to supply the disc with a current pulse of about 0.5A with a precise length of about 1ms (see flip-disc datasheet) and with correct polarity.
The basics of controlling flip-disc displays and the principle of operation are described on the Flipo.io website dedicated to flip-disc displays and here.
Assuming that we have a power module, we can focus on the display design. To control each of the disc, we will use the old tried-and-true method, the H-Bridge.
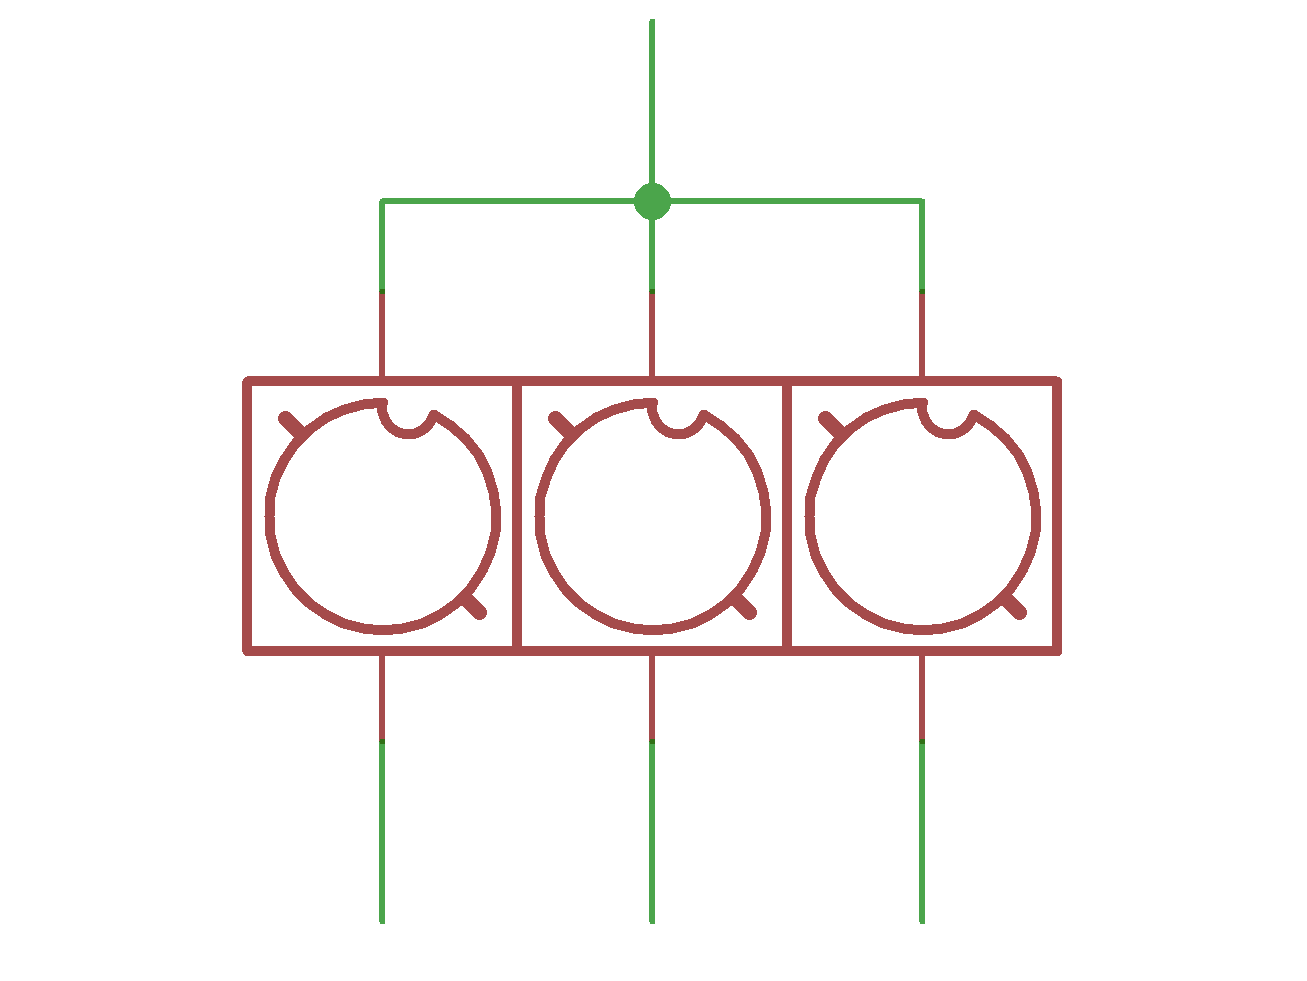
We only need to duplicate this solution for each disc, but for simplicity we can connect all the leads of the discs on one side to each other. Such simplification forces the control of single discs at a time, but remembering that the current pulse has a length of 1ms this limitation to one disc does not matter.
From 6 control lines we went down to 4 and thus the number of control transistors was reduced by 6. If we wanted to use only one display, then this solution would be satisfactory. However, assuming that we want to be able to use multiple displays and do not want to increase the number of control lines, then the simplest way to maximize simplification is to use shift registers 595D.
An example scheme could look like this:
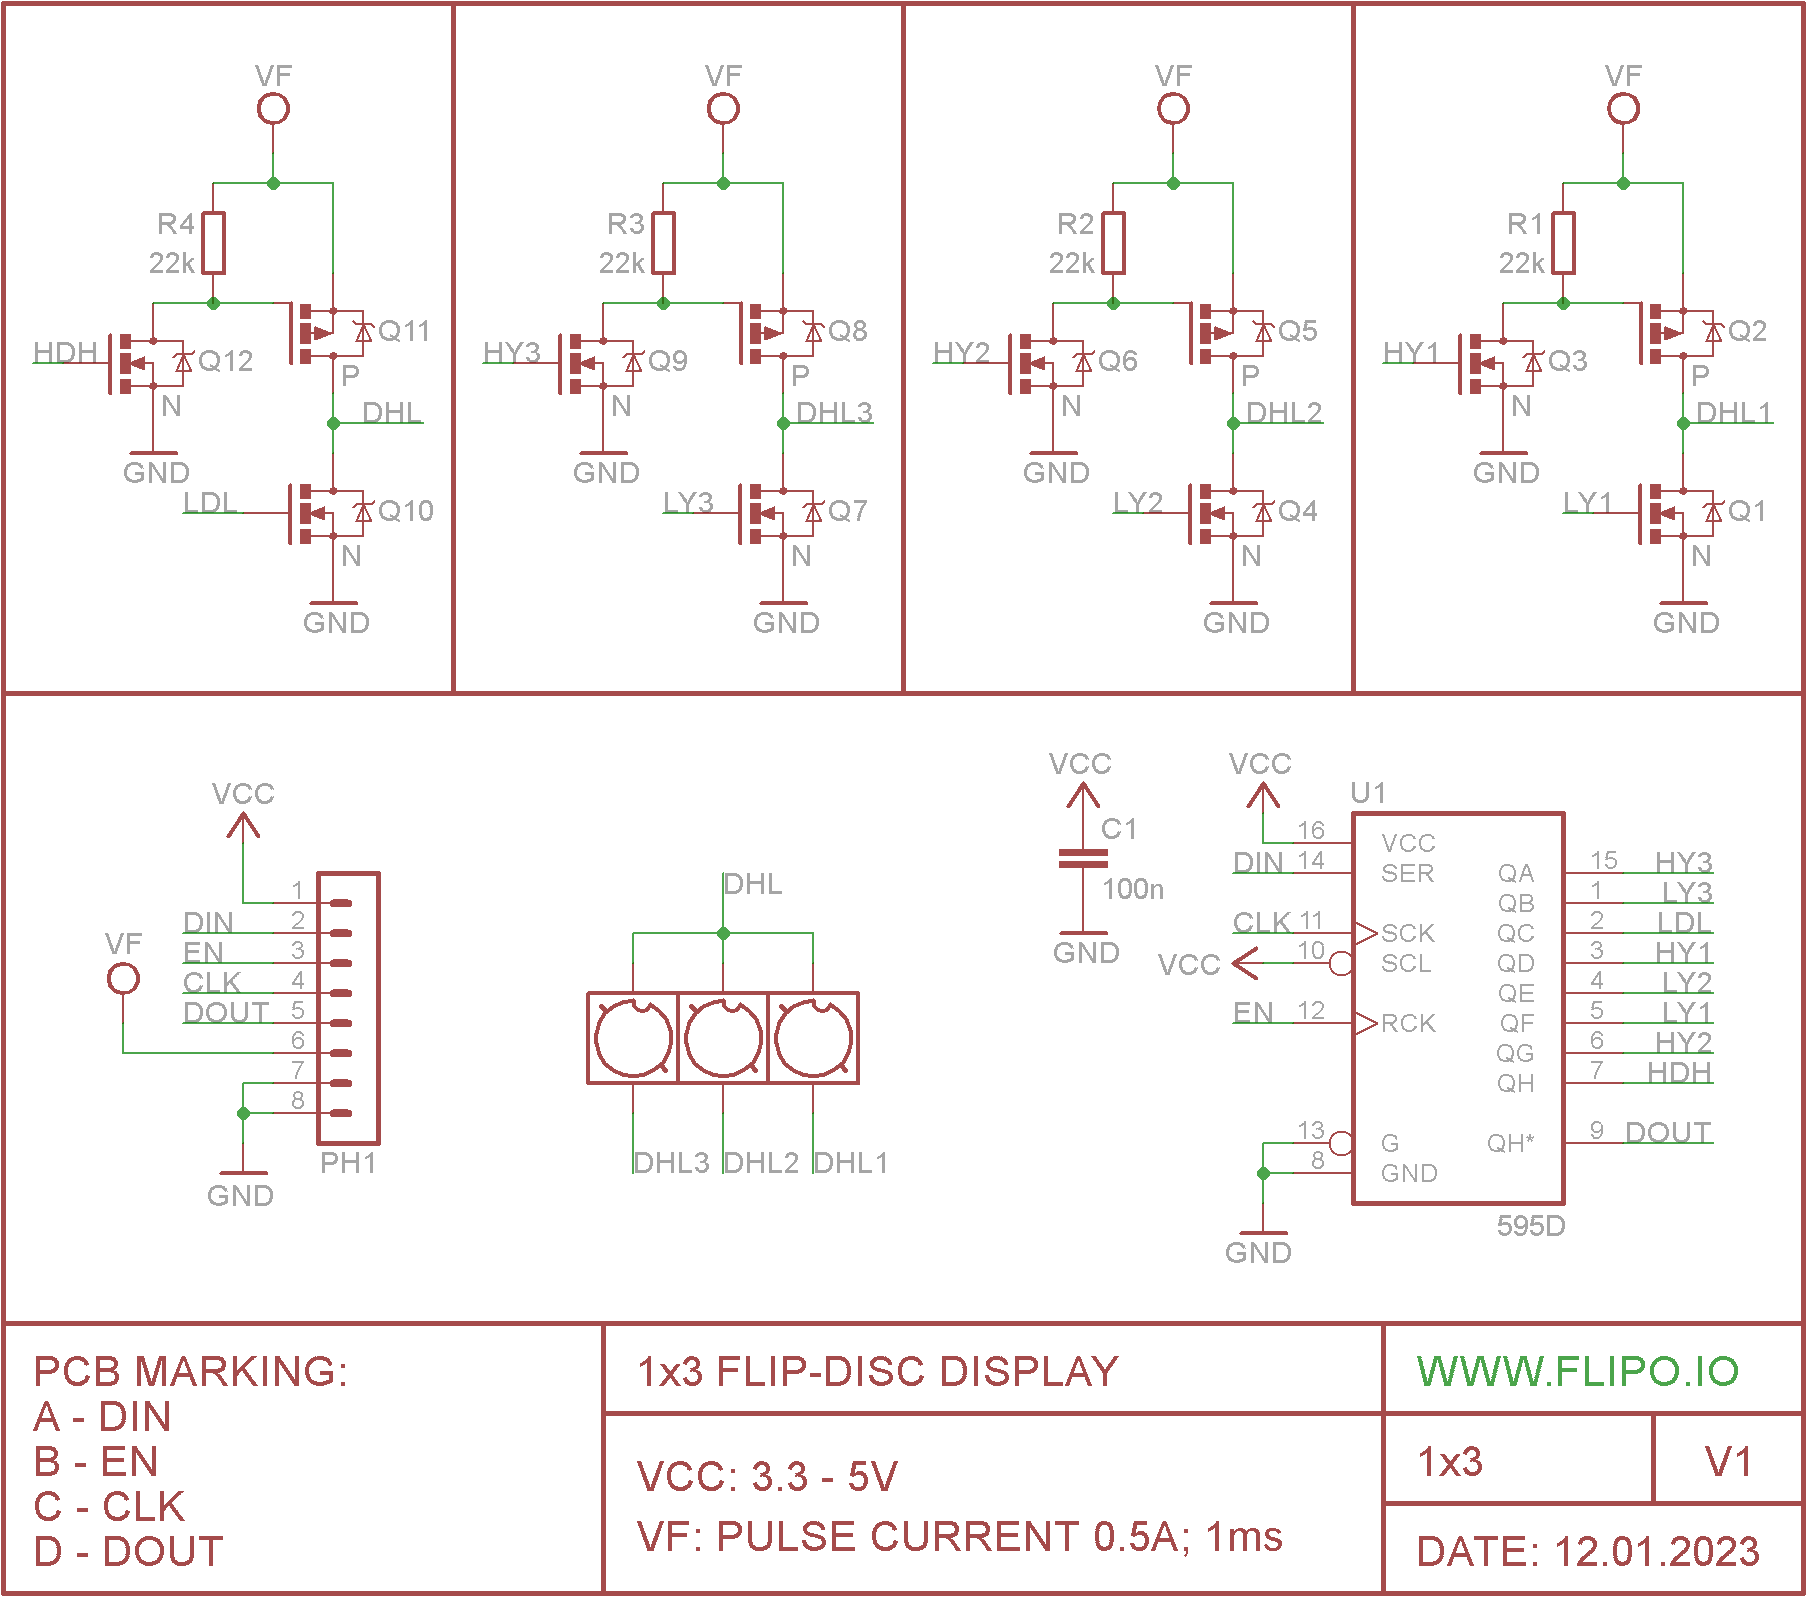
Only 3 control lines DIN, EN, CLK. For control, we can use standard libraries for 595D shift registers or use a dedicated Arduino library for Flip-disc displays. The library for display control uses SPI and requires connection of lines: DIN -> MOSI, CLK -> SCK, EN - to any digital pin.
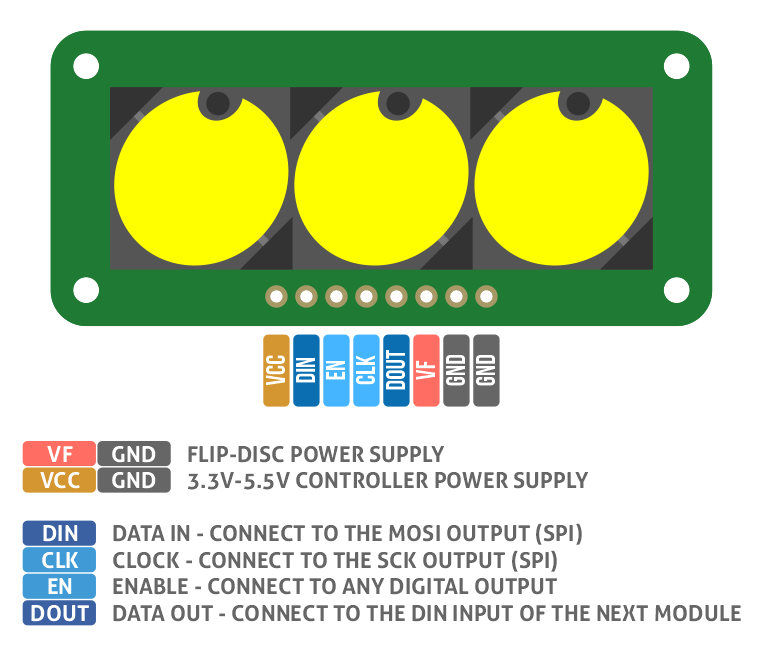
Note:
For proper operation of the display as mentioned above, a dedicated power module is required - a description of how it works can be found on the project page.
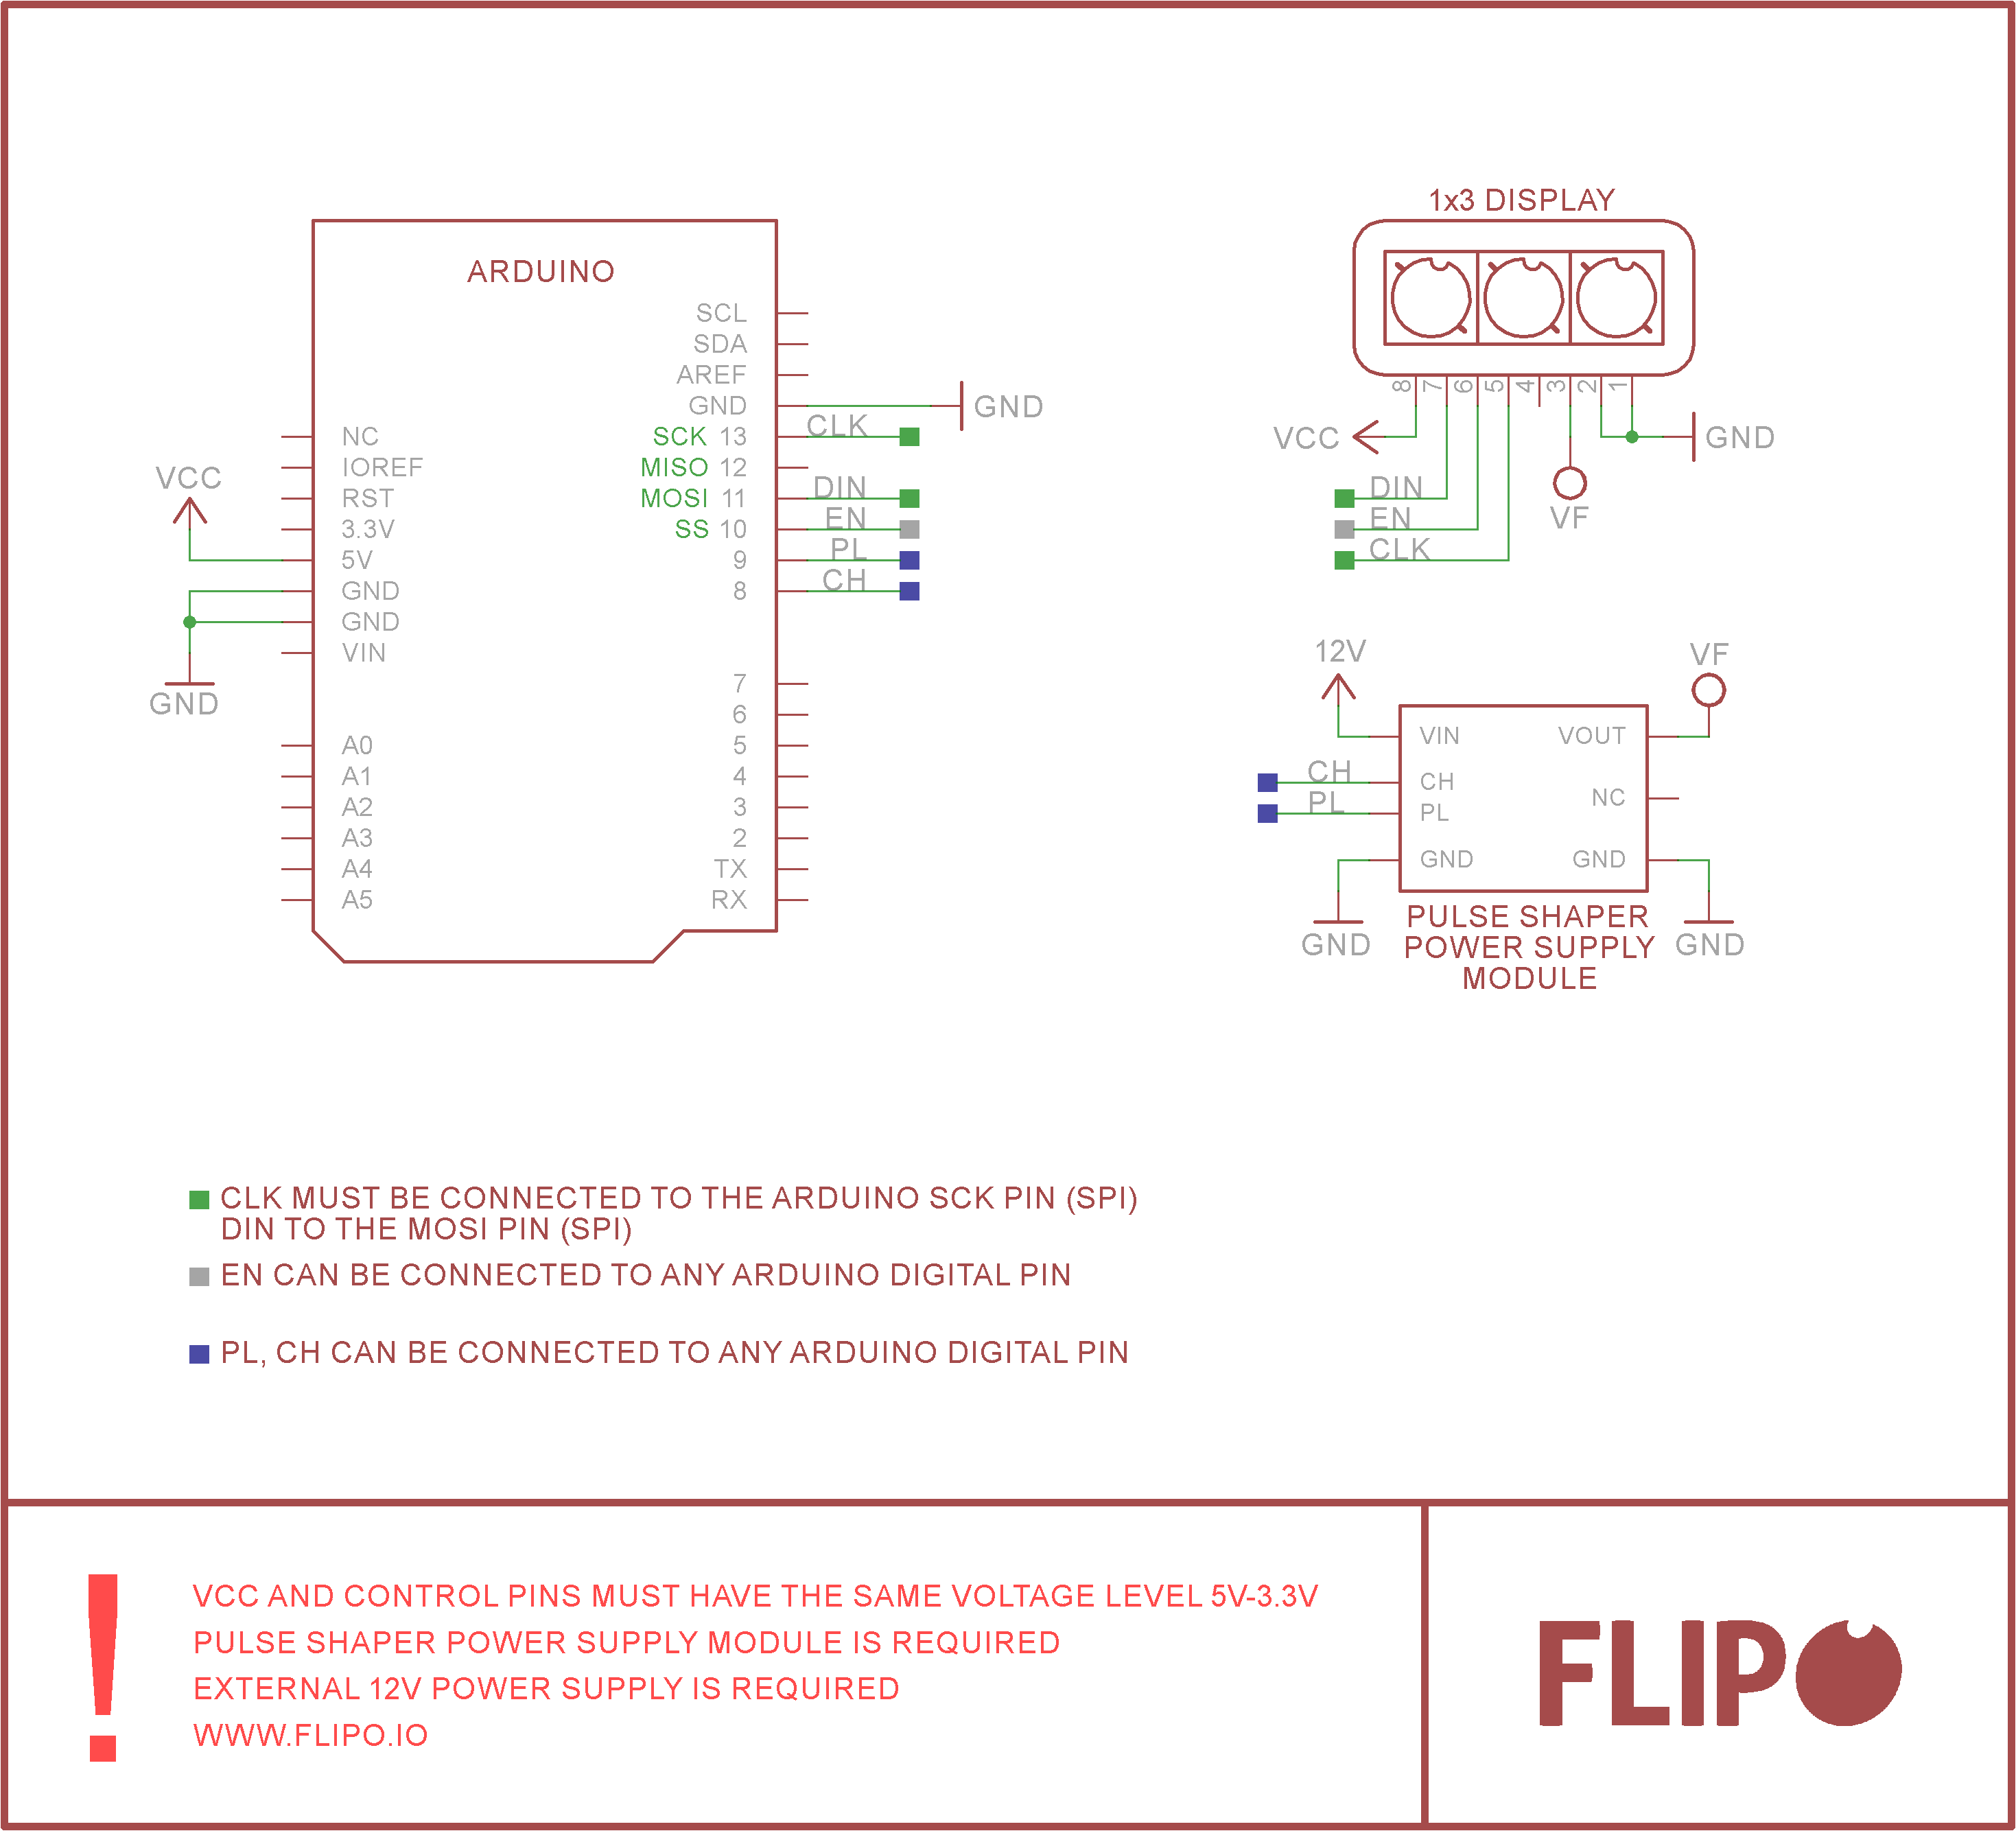
For such connection of modules as above, the display control code will look like this:
#include <FlipDisc.h> // https://github.com/marcinsaj/FlipDisc

// Pin declaration for Arduino Uno and PSPS module
#define EN_PIN 10      // Start & End SPI transfer data
#define CH_PIN 8       // Charging PSPS module - turn ON/OFF
#define PL_PIN 9       // Release the current pulse - turn ON/OFF

void setup()
{
    /* Assignment of control pins */
    Flip.Pin(EN_PIN, CH_PIN, PL_PIN);
    /* Display initialization */
    Flip.Init(D1X3);
    delay(3000);
}
void loop()
{
    /* The function allows you to control up to three discs of the selected display.
    Flip.Display_1x3(module_number, disc1,disc2,disc3);
    - module_number - relative number of the D1X3 display
    - disc1, disc2, disc3 - counting from left to right 1-3
    For a detailed description of all display control functions,
    see the library description: https://github.com/marcinsaj/FlipDisc */

    /* Set all discs */
    Flip.Display_1x3(1,1,1,1);
    delay(1000);

    /* Reset one selected disc */
    Flip.Display_1x3(1,1,0,1);
    delay(1000);
}
More detailed code, along with many other functions that control the flip-disc display, can be found here and in the description of the Arduino FlipDisc.h library.
The schematic of the 1x3 flip-disc display contains one small detail, it is the DOUT output of the shift register. This output is used to connect another flip-disc display - DOUT output needs to be...
Read more » Marcin Saj