-
1Build the Game Board
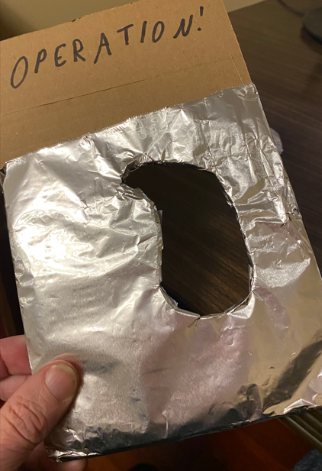
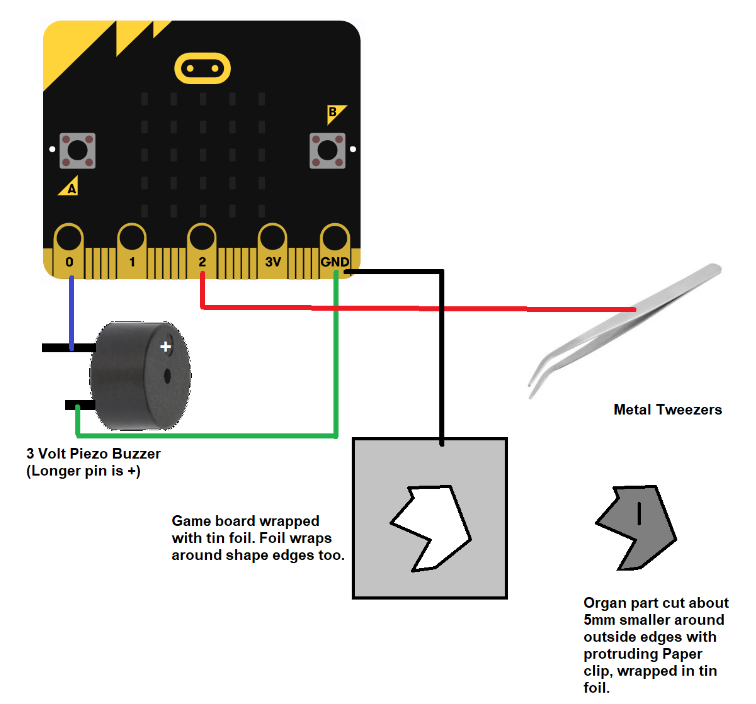
This game can be anatomy-themed, home-themed, any kind of theme you like. Build your game board and organ parts as you wish. Overall, the game board is covered with conducting aluminum foil and the 'body parts' are wrapped in conductive aluminum foil.
You can put the foil for the board underneath and then cut the foil so it reaches up through the holes. Tape the flaps to the lid so they are secure. The holes should be ‘lined’ by the foil. (the pictures are just for demonstration purposes).
Reduce the size of the organs so that they will fit in the holes with some play so that they don’t contact the sides of the holes when wrapped in foil.
Bend up a paper clip end so it makes a T with the wire pointing upwards when the clip is flat on the table. Tape a paper clip to each organ with the wire pointing upwards.
Pierce foil over the paper clip and then neatly wrap the organ with foil and secure with tape underneath. Repeat for all the organ pieces. The foil MUST be in contact with the paper clip.
Test your organ parts to make sure they can fit in the holes without any of the foil touching. Trim more if needed.
Set these parts aside.
-
2Build the micro:bit Circuit
1. Connect Pin 0 on the microBit to the LONGER pin on the piezo buzzer using an alligator clip cable.(blue in diagram, colour doesn’t matter).
(if it’s an Active buzzer, there will be a ‘+’ sign on the top of the buzzer over the pin)
2. Connect the shorter pin on the piezo buzzer to the GND (ground) pin on the microBit (green in diagram).
3. Connect Pin 2 on the microBit to the tweezers (red in diagram).
4. Connect the GND pin of the microBit to the foil of the game board. (“Grounding the board”).
-
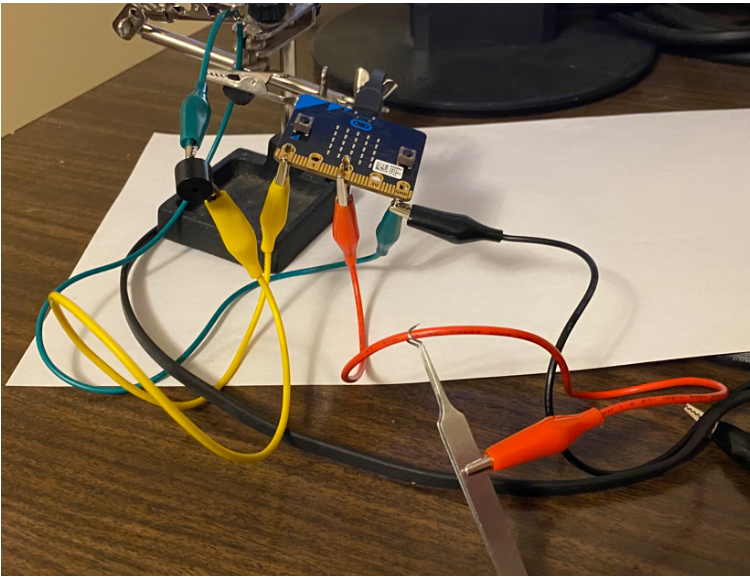
3The finished circuit looks like this:
The black clip in the lower right would be attached to the game board foil - the GROUND WIRE.
-
4Coding your Game on the micro:bit - Part 1
Go to https://makecode.microbit.org/. Create a new project. Your teacher will guide you through making the program.
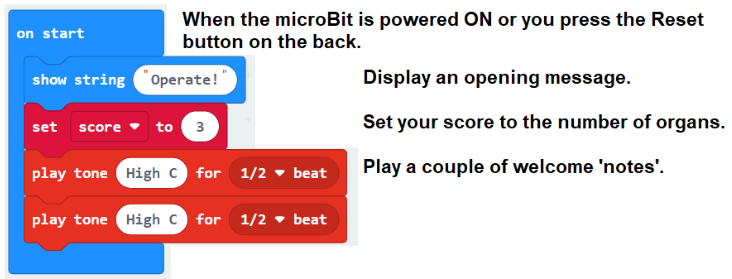
Enter this set of code blocks.
This section runs once, when the micro:bit is powered ON or if you press the reset button.
This section runs whenever you touch the tweezers to an organ and the organ touches the hole in the game board. (“Closing the tweezer circuit”)
-
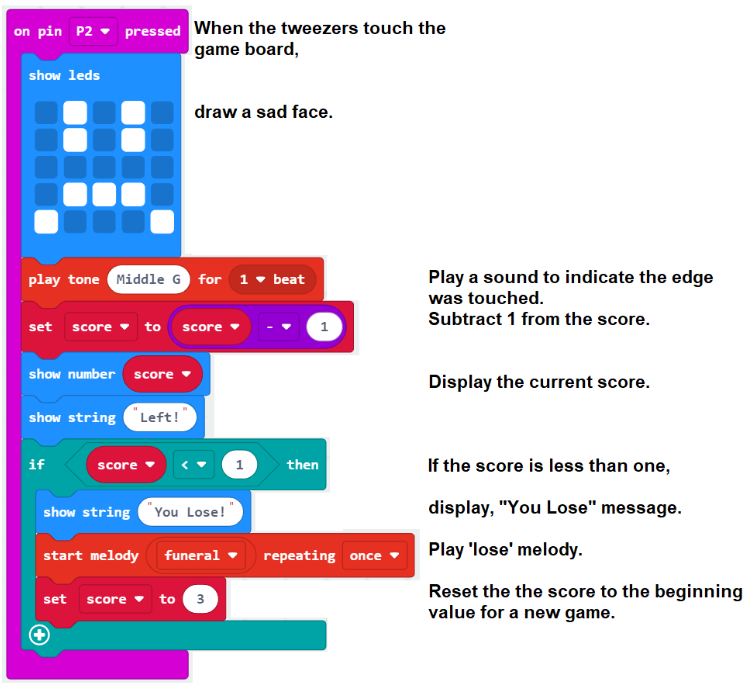
5Coding Part 2
This section runs whenever you touch the tweezers to an organ and the organ touches the hole in the game board. (“Closing the tweezer circuit”)
Upload this program to your microBit and try the game!
Play around with the start melody block and the show leds block.
-
6It doesn't work! AAAAHHH!!
1. Check your wiring. Is the piezo buzzer correctly connected? (longer pin to Pin 0, shorter pin to GND)
(If there’s no “+” on the top of the buzzer, the direction of pins does not matter.)
2. Did any of your clips come off? Reattach them carefully.
3. Does your program look exactly like the diagrams above?
4. Did you copy the latest version of your program to the microBit?
Experiment! Have fun!
Now Go and
Make Something
Wonderful!
Operation Game - micro:bit Style
Students make their own Operation game with inexpensive parts and easy code!
 Gord Payne

Discussions
Become a Hackaday.io Member
Create an account to leave a comment. Already have an account? Log In.