Keith Cruz
Overview
This is a project of a robot called Awesom-O projecting a circle of red and blond balls into the laptop screen. It has both hardware and software components. The hardware involves several materials, including an ESP32, a joystick, and a button. While the Arduino IDE and Processing are used in the software portion.
Artistic vision
I decided to work on creating the Awesom-O robot that originally came from the animated series called South Park. To provide context, Awesom-O is not necessarily a robot, but he is a robot suit used by the character named Eric Cartman to play a prank on his friend Butters. I wanted to create Awesom-O as a real robot capable of communicating with a computer and projecting a circle of red and blond balls. The idea came from Megaman when he is shot and disappears as a circle of yellow balls. However, the color of the balls is red because Eric Cartman is always wearing his signature red sweater. The blond color is actually hidden and can only be used if you aim at the leftmost top corner and click the button. I wanted this hidden to encourage the user to keep pressing around the box. Hopefully, it would be surprising for them to see the color change from red to blond. The background, which is colored “milk chocolate,” and the balls are “desire,” are both directly taken online as these are his signature colors. All the colors on the screen are taken from Eric Cartman’s signature color scheme. It also provides a context of the real identity of Awesom-O.
Creating Awesom-O
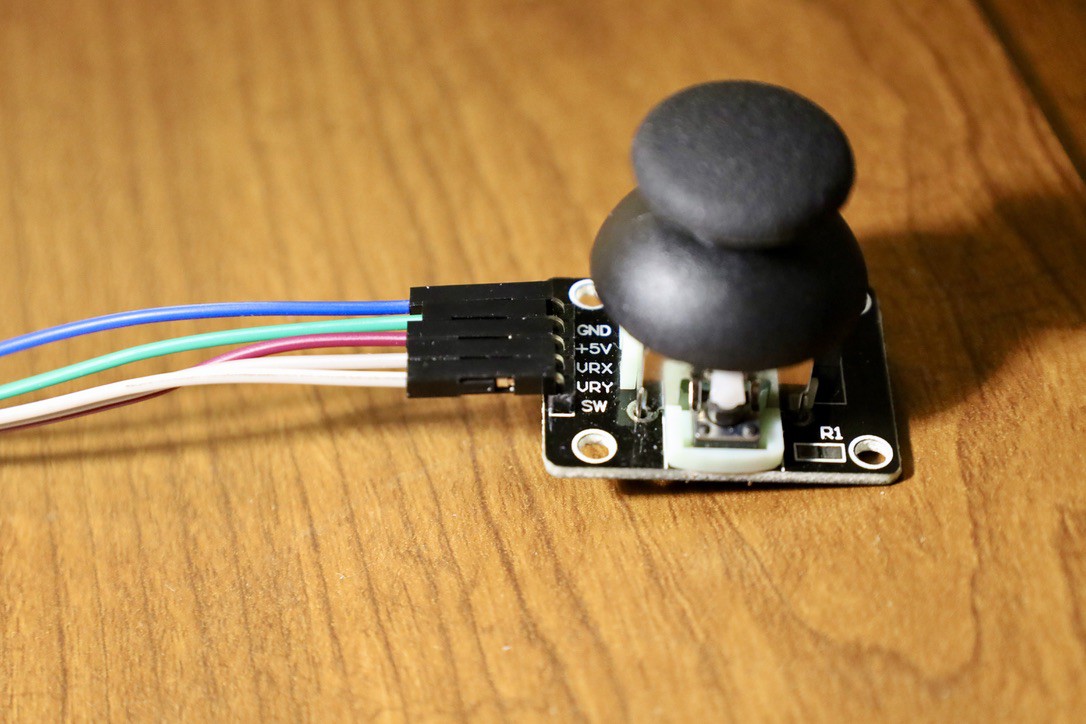
I created Awesom-O, a robot suit made of cardboard by an 8-year-old kid named Eric Cartman. The robot suit came from an episode of South Park. However, I decided to make it a miniature version wherein it acts like a real robot instead. I decided to have a button in his right hand and a joystick in his left hand. The button is what he uses to project a circle of red balls at the screen, and the joystick is used for aiming at the screen. Making him an actual robot this time instead of just a kid pretending to be a robot. Of course, there are many more modifications that I can do with Awesom-O, but for now, I wanted it to be relatively simple to stay true to the fact that the robot was created by an 8-year-old.
Technical Specifications
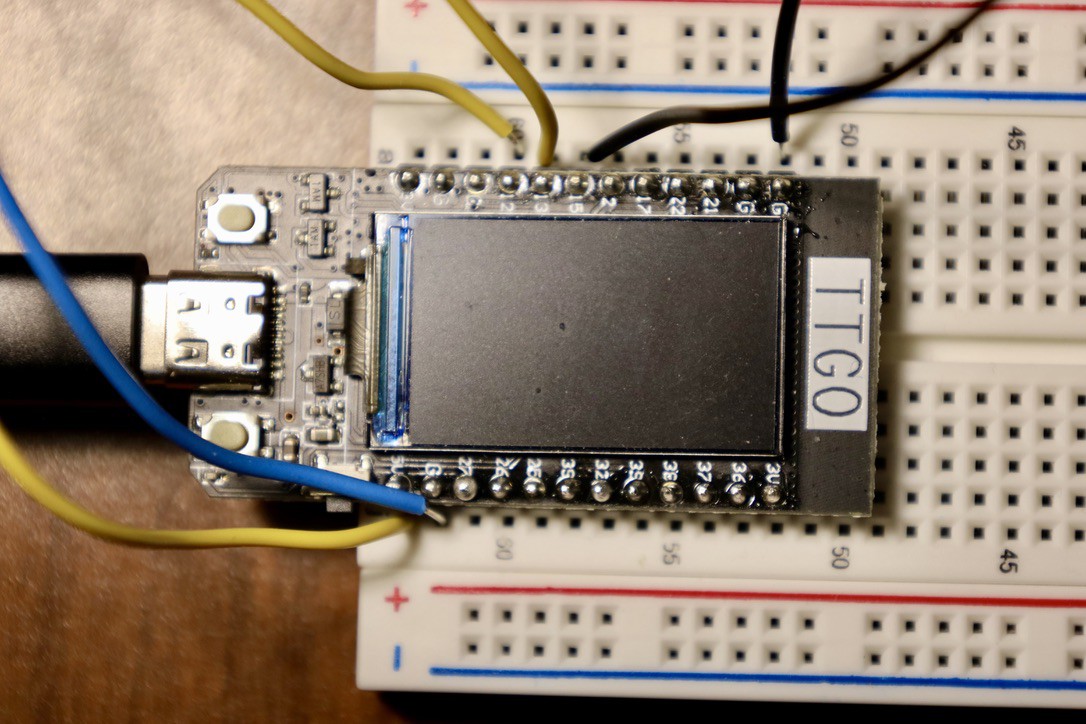
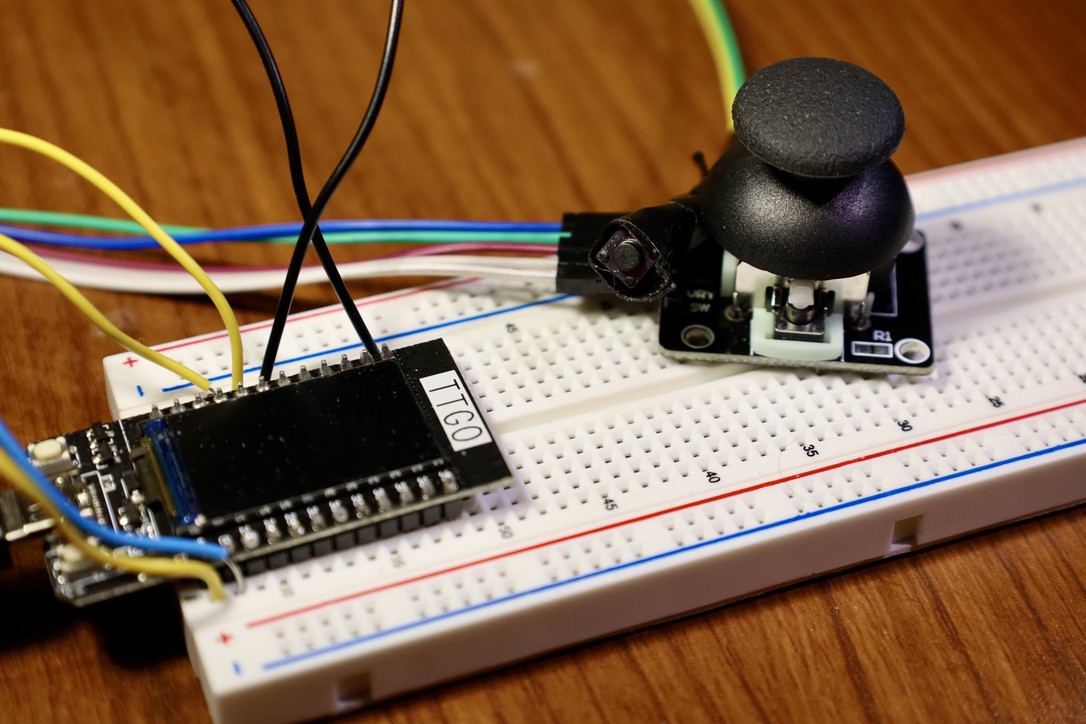
Inside Awesom-O is a breadboard wherein certain pins of the ESP32 TTGO T-Display are used to connect the button and the joystick to the robot’s arms. The wires are inside the body and come out of the two hands with the button and joystick at each end. The pin used for the button is number 15, the pins used for the joystick VRy is number 12, and VRx is number 13.
How to re-create
To recreate this project, you need an ESP32 TTGO T-Display, Breadboard (optional), wires, a joystick, a button, and a USB-C cable. You also need Arduino IDE and Processing installed on your laptop. To begin, connect the wires and pins of the button and joystick into the ESP32 to their corresponding places. Images are attached for reference. Next, connect your ESP32 to your laptop using the USB-C port of the ESP32. After this, the Arduino IDE and Processing IDE code are in the GitHub repository. Once the code is loaded in Arduino IDE, use the ESP32 Wrover Module and use whichever port the ESP32 is connected to. After that, click on “Upload” to upload the code into your ESP32. You might also need to check the serial monitor and ensure that the baud rate matches; in my case, it was 115200. Then once it’s successfully uploaded. Go to your Processing IDE and load the code there. Next, click on “Run,” and you should have a box that is colored brown with a yellow circle with a blue...
Read more »