 Jackson Miller
-
13d Printing
3d print these 3d models using Onshape:https://osd.onshape.com/documents/bce763c140e0d1f4b60caca3/w/d3b92d8cee05361d7e29aa4c/e/132df27706402643b5f49f92
-
2Arduino
Plug in arduino to a windows computer via usb for coding in C++
-
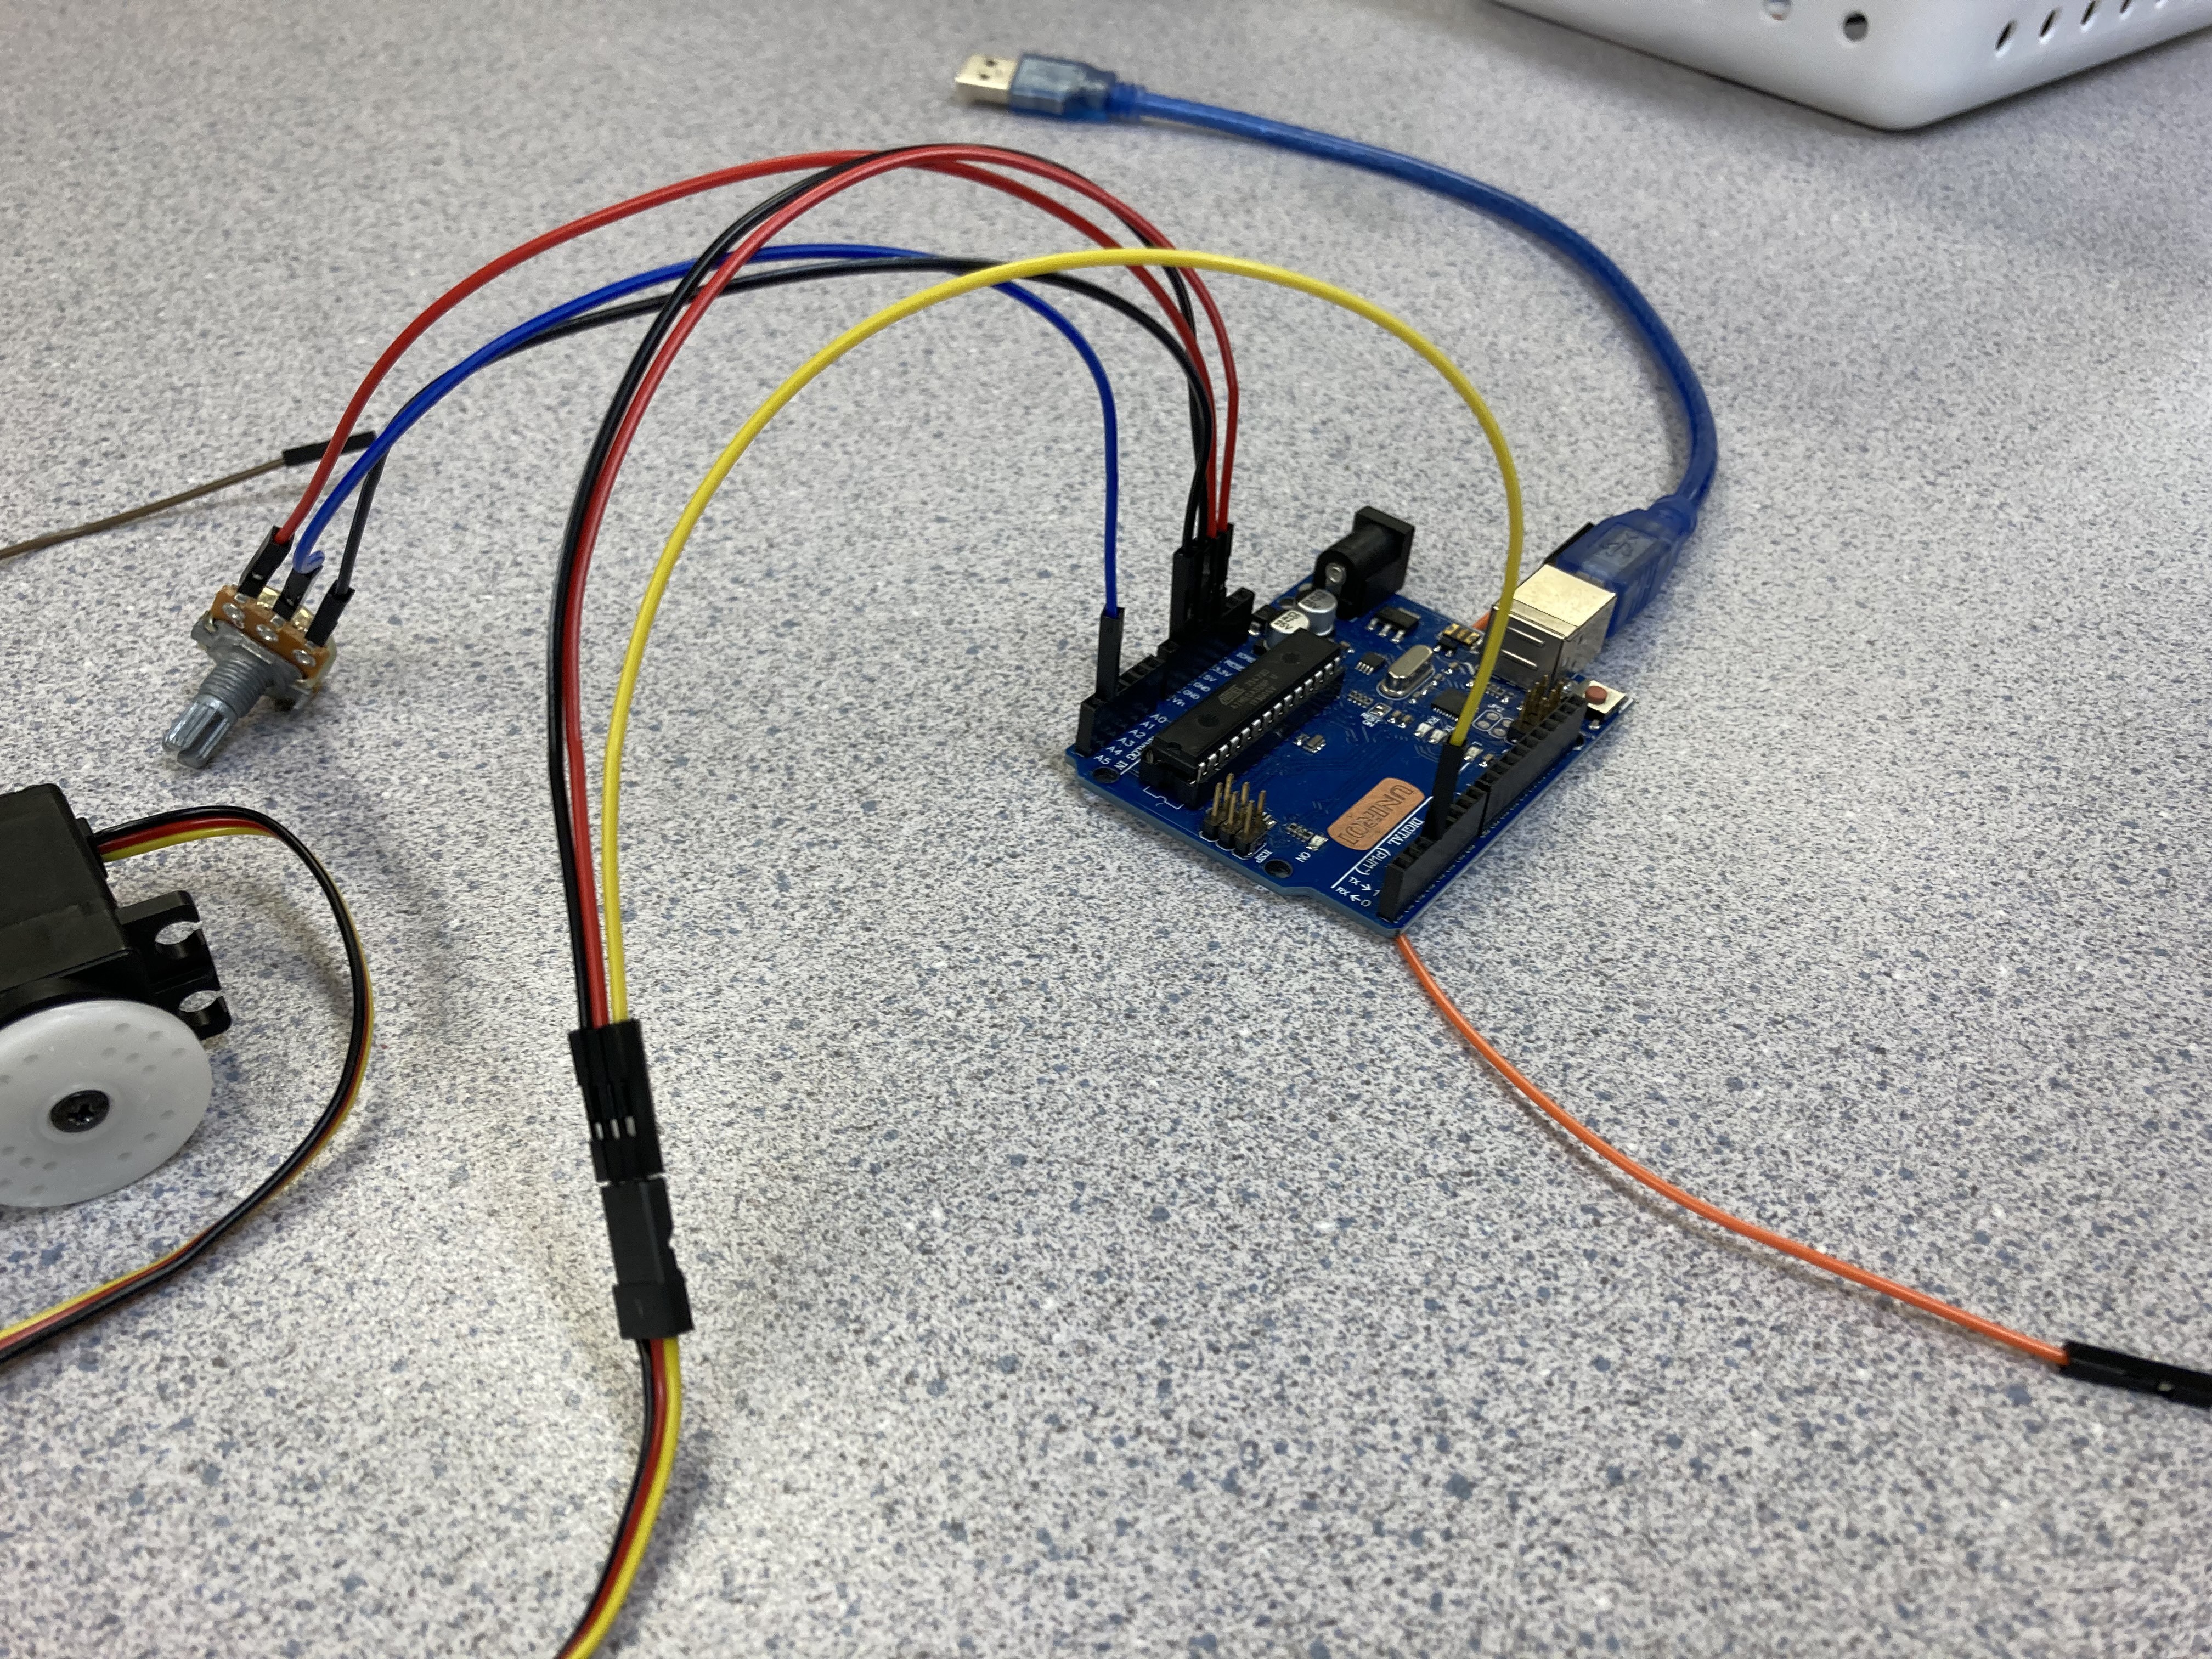
3Potentiometer and Servo
Plug potentiometer and servo into Arduino(Servo:Gnd to black, 5v to red, ~3 to yellow) (Pot: Gnd to rightermost pin, A3 to middle pin, 3v to leftmost pin) using breadboard wires.
![]()
-
4Download Code
- Download our code in c++:
- #include <Servo.h>
- Servo myServo;
- int potPin = A4;
- int potValue = 0;
- void setup() {
- myServo.attach(3);
- pinMode(potPin, INPUT);
- myServo.write(0);
- Serial.begin(9600);
- }
- void loop() {
- potValue = analogRead(A4);
- Serial.println(potValue);
- if((potValue < 679) && (potValue > 452)){
- myServo.write(180);
- }
- else if((potValue < 452) && (potValue > 225)){
- myServo.writeMicroseconds(1500);
- }
- else if((potValue < 225) && (potValue > 0)){
- myServo.write(-180);
- }
- }
-
5Attach 3d Printed Gears
Glue gears to servo
-
6Attach 3d Printed Parts
Glue the two 3d printed parts together
-
7Apply Spectrum
Apply (tape) spectrum to the 3d printed parts
-
8Attach Servo to 3d Parts
Slide the back end of the servo onto the bracket
-
9Slide Servo Into Place
Slide bracket onto the lip of the spectrum
Discussions
Become a Hackaday.io Member
Create an account to leave a comment. Already have an account? Log In.