This project is for a class project from the Computer Science class of Olympia High School on Assistive Technology.
Accessible Mouse - OHS Project
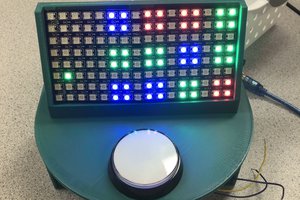
A button that can be triggered with proximity or by simply hitting it.
A button that can be triggered with proximity or by simply hitting it.
To make the experience fit your profile, pick a username and tell us what interests you.
We found and based on your interests.
This project is for a class project from the Computer Science class of Olympia High School on Assistive Technology.
Lid.pdfAdobe Portable Document Format - 23.13 kB - 05/19/2023 at 18:50 |
|
|
joystick riser.stlStandard Tesselated Geometry - 1.45 kB - 05/18/2023 at 18:30 |
|
|
ABox.svgThis is the box. You have to use 3mm ply wood.svg+xml - 51.72 kB - 05/18/2023 at 18:16 |
|
|
Code Doc.pdfThis has all of our code.Adobe Portable Document Format - 48.06 kB - 04/17/2023 at 18:27 |
|
|
Delivery day has come and gone and we did quite well among the people we got to talk to. There are definitely some improvements to be made but I think we should think positively for this log so let's go over that first.
1. People liked the idea of our project. I originally thought that this would only be a project for people that did not have good motor but as it turns out a lot of people besides our target audience thought it would be nice to have.
2. Another thing that I heard was good was we seemed to have a project that was more "working" than others. that is to say we had a somewhat decent demo even though that demo was broken into 2 parts.
3. People had amazing questions! I think that people being able to ask a ton of questions is a good sign. It shows that they have a decent amount of interest in our project (more than oh that is cool).
The bad
1. I believe that we should have printed our parts a bit sooner. one of our prints failed so we had to use an old prototype. People did not seem to mind that bad but it definitely docked some points.
2. I also believed that we should have shown more things for our demo. Our demo was mainly just a blank screen with the joystick to show how it would move on the screen. We should have also hooked the button up so we could have shown more of our project especially after 6 weeks of working one.
I tried to keep this rap up brief but I believe we did a very good job on this project and maybe over summer I could spruce up the code for the joystick and our button. But for now this Oak Punch signing off.
This is our last week and we only had 2 days to work so we didn't really make any progress. We did make a model of the lid for our box, making holes for the button and joystick but our teacher wasn't here for the last workday so we were unable to print anything and unable to drill holes in our box for the USB to connect it to devices.
This week we cut out a prototype box out of wood and put it together to see how the parts fit inside the box. We made the box bigger to see how much space we need for the parts and the cords. But, we are still figuring out how to get the button to work and since we can't figure out what's going wrong we downloaded a ton of libraries just in case that's the issue.
This week we got the code working so the joystick does move the mouse around on the screen, we got our button so now our next problem is getting the button to work as the left-click mouse input. Once the button works we can get measurements to design the box for all the parts to fit in.
This week we are down a teammate and still having issues with the libraries unable to figure it out, we tried watching videos but none are helping.
Never mind, we got into the console with our teacher's help and were able to upgrade pip. We also found out the major problem... we downloaded the wrong Adafruit UF2 file for our raspberry pi pico.
This week we made little progress as we can't figure out how to get the libraries onto circuit python and the raspberry pi Pico.
This week we are figuring out how to use our Raspberry Pi Pico so we can get the joystick to work, but we need to find out how to fix and install the analogio module onto it.
First buy the pico and a bread board connect them together.
Next connect the joystick and button to the pico
Plug the pico into the computer while holding the button on the pico. Then copy the correct UF2 file into the pico storage.
Create an account to leave a comment. Already have an account? Log In.
Become a member to follow this project and never miss any updates

 Fischer Ryan
 Tommy Callaway
 Brandon
 Lorin Briand