Purpose : to describe how is input and how is output
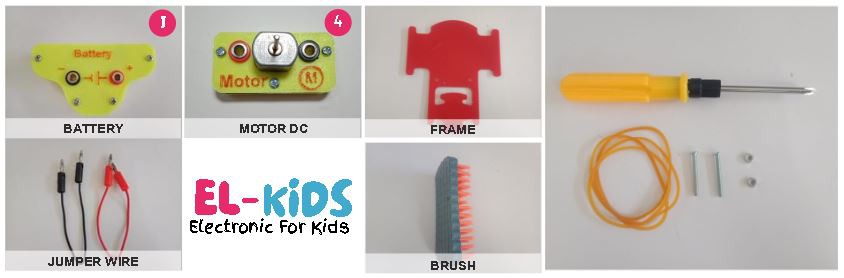
Material :
Input : Switch and Push button, Output : Led, Buzzer and Motor DC
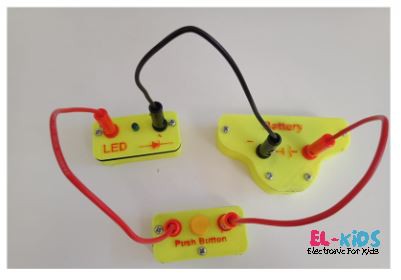
LED PROJECT
The Led will turn on. Unplug one of the jumper cables then the led will turn off. In this experiment, the led will turn on if the jumper cable is connected positive to positive and negative to negative.
What if it's behind : Positive to negative and Negative to positive (please do it)
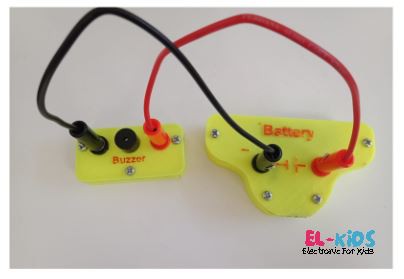
BUZZER PROJECT
Buzzer is active when the jumper cable is connected positive to positive and negative to negative.
What if it's behind : Positive to negative and Negative to positive (please do it)
SWITCH and PUSH BUTTON PROJECT
Observe what happens when the push button switch is pressed/released. What if replaced with a switch, what's the difference
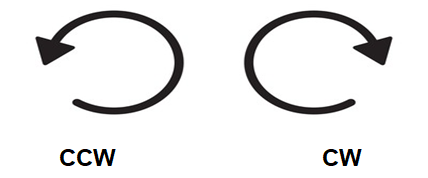
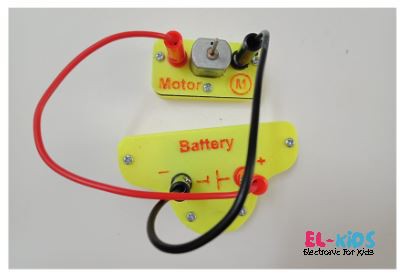
MOTOR DC PROJECT
DC Motor Direction CW (Clockwise) and CCW (Counter Clock Wise)
Try to observe the rotation of the motor, the motor rotates in which direction. What if the rotation is made the other way around.
2
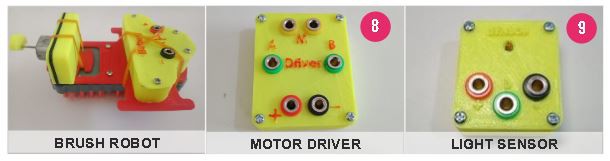
Simple Brush Robot
Purpose : to built brush robot
Material :
How to Build :
Attach rubber for the motor
Then attach the rubber for the battery to the frame that has been prepared
Attach the frame on the brush using nuts and bolts
Make sure it's tight for the joints
Connect the motor and battery using jumper cables
and observe the robot's movements
3
Simple Mobile Robot
Purpose : to built mobile robot
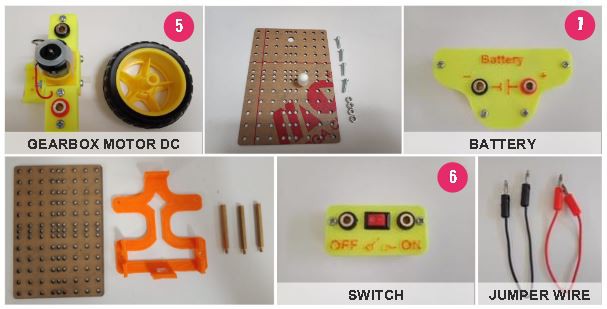
Material :
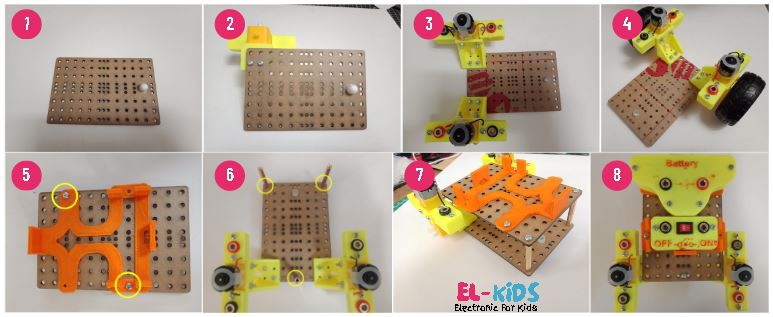
How to Build :
Attach the free wheel in bottom frame
Attach the motor bracket using the 2 screws
Attach for another one
Attach Wheels
Attach 3d print to top frame
Attach spacer
Attach top frame with bottom frame
Attach battery and switch then use jumper wire to running mobile Robot
4
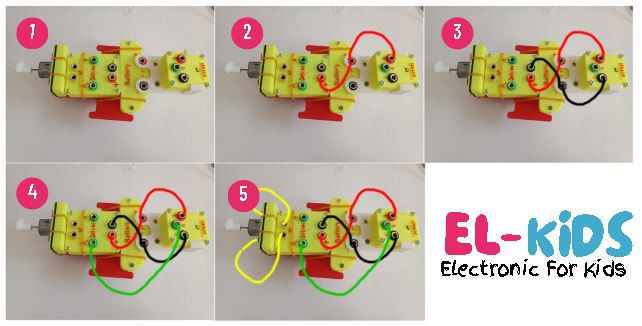
Light Follower Brushed Robot
Purpose : to built autonomous brush robot with light sensor
Material :
How to Build :
Add a light sensor on the back and driver motor on the middle basic brush robot
Attach the positive cable (red)
Attach the negative cable (black)
Attach the Data cable
(green)
Attach the Motor cable
(Yellow)
Run using the light sensor, attention to the direction of the robot's motion
5
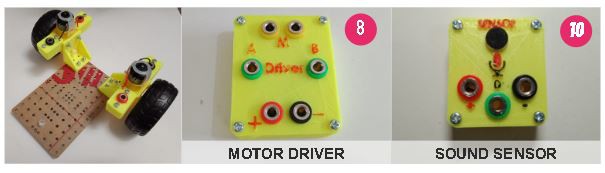
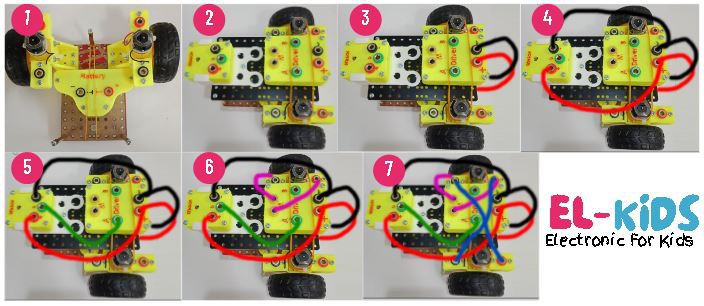
Clap Mobile Robot
Purpose : to built autonomous mobile robot with sound sensor
Material :
How to Build :
Attach the battery at the bottom frame with rubber
Attach Drivers and Sensors on the top frame
Don't forget the bolts and rubber
Attach wire from battery (positive and negative) to the driver (black and red)
Attach wire power Sensor Cable to the driver (black and red)
Attach sensor data cable to driver A (green)
Attach the Motor Cable to the motor driver (pink)
Attach one Motor Cable to the other motor in a cross wise (blue)
Try running it by giving a clap to the sensor, and the motor will move forward.
6
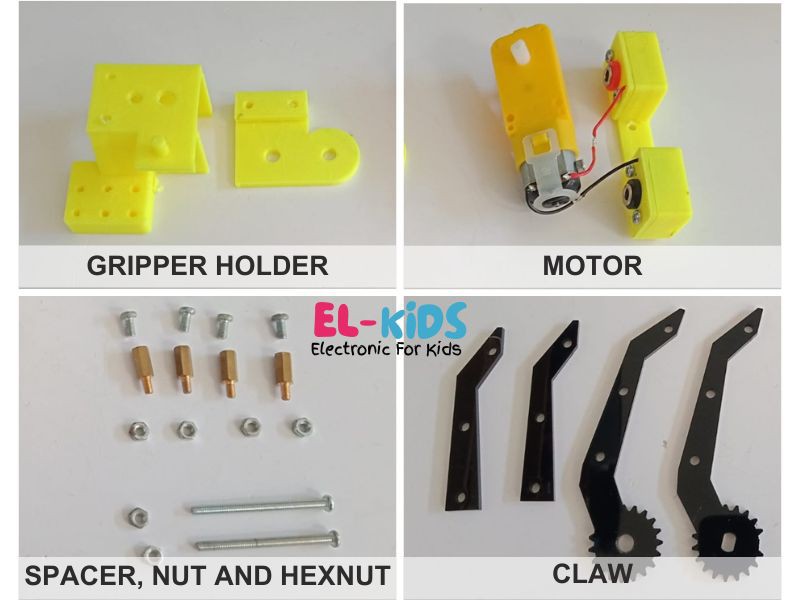
Actuator Project - Gripper Robot ( Mechanical
Purpose : to built mechanic gripper robot
Material :
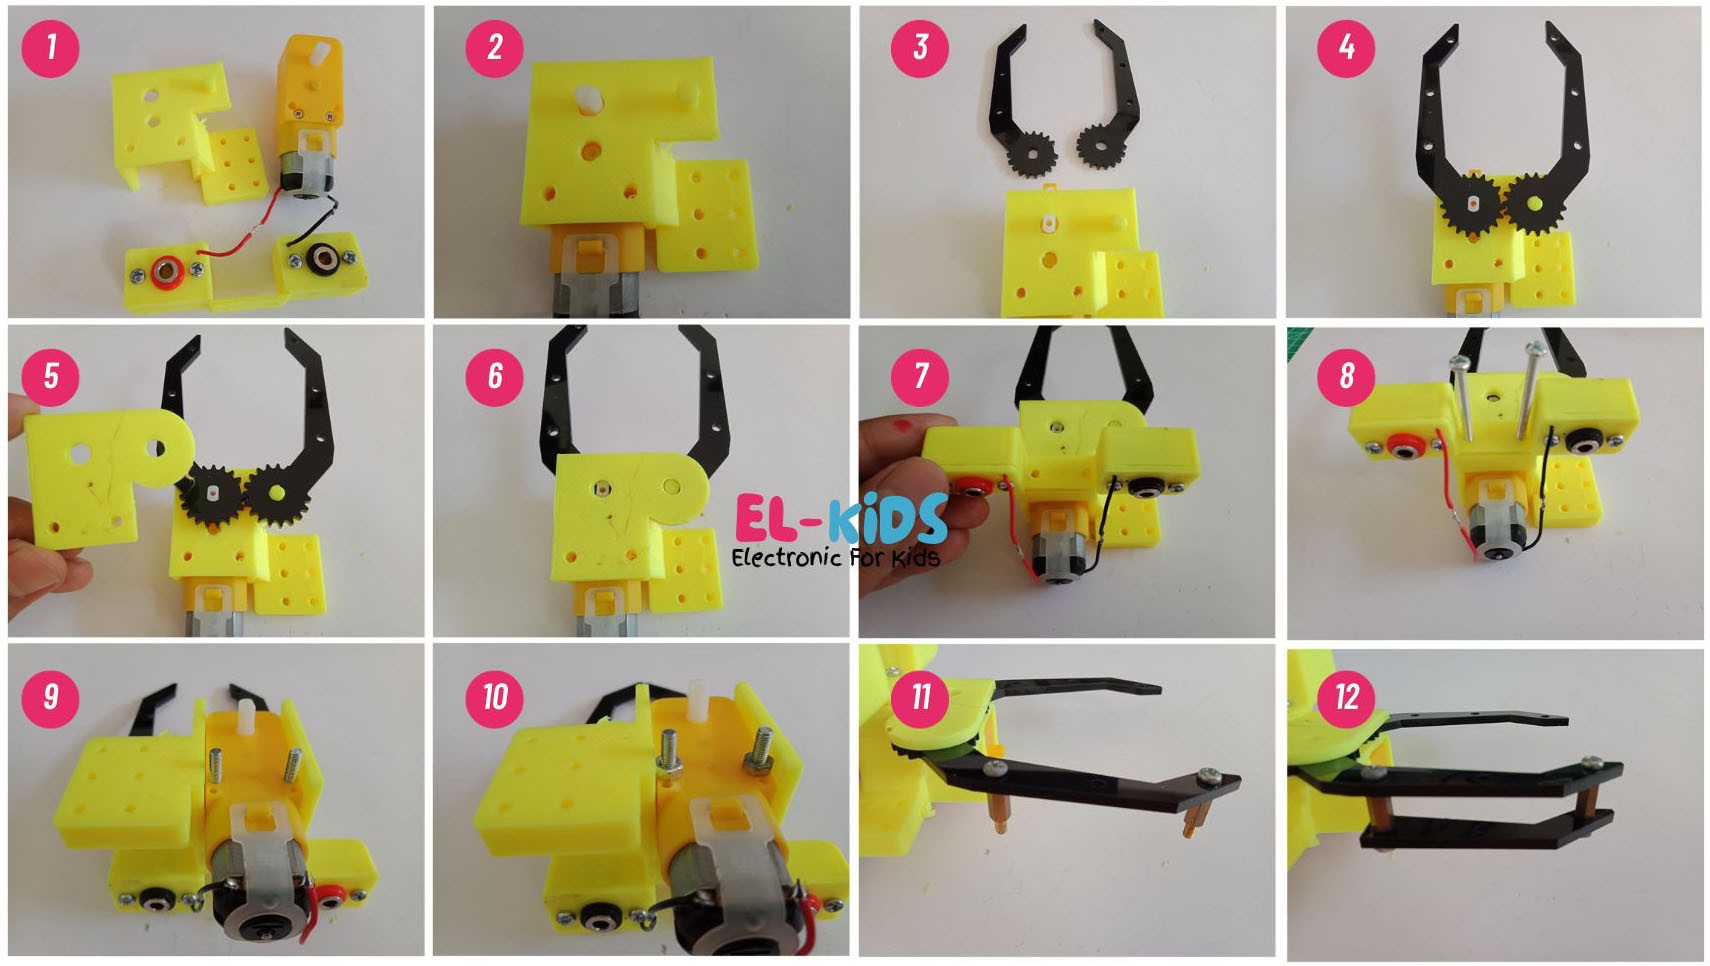
How to Build :
Prepare the Motor DC and Bracket Holder,
Install the motor mount into Bracket Holder,
According to the hole
Prepare the grip set,
Install the grip set into the end of the motor,
The tip of the Holder matches the hole
Place the lid on the Holder
Install Cover the lid holder
Attach the motor connector end
Attach with long bolts
Flip the girpper
Install the round bolt (hexnut)
Install 2 short spacers
Install the grip set and bolts
7
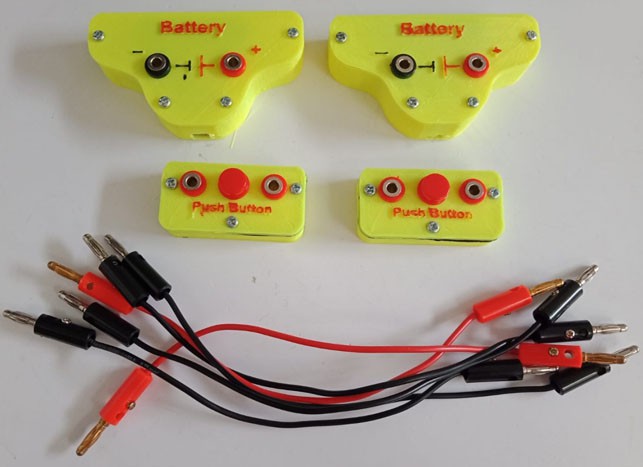
Actuator Project - Remote Control Gripper Robot
Purpose : to built control for mechanic gripper robot
Material :
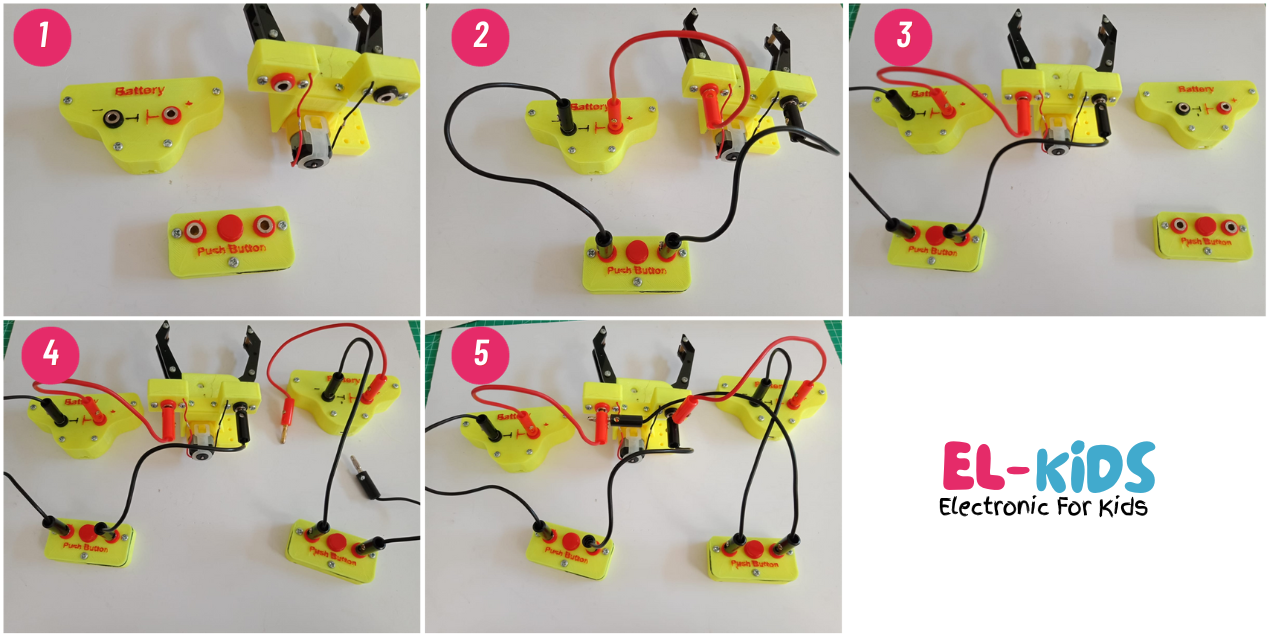
How to Build :
Prepare 1 battery and 1 push button
Attach the cable positive from the battery to the gripperpositive , Attach the cable negative to the push button, Attach the cable negative pushbutton to the gripper negative
Prepare battery 1 again and push button 1 again
Install battery 2 with jumper cables, Connect the battery negative to the push button
Connect the battery positive to the gripper negative,
Connect the push button negative to the gripper postive
8
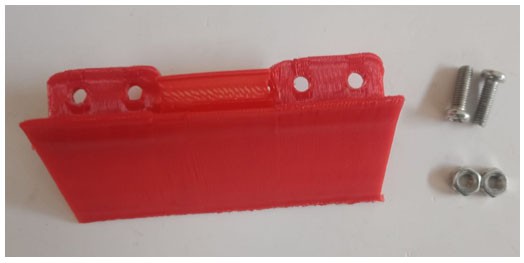
Build Sumo Robot
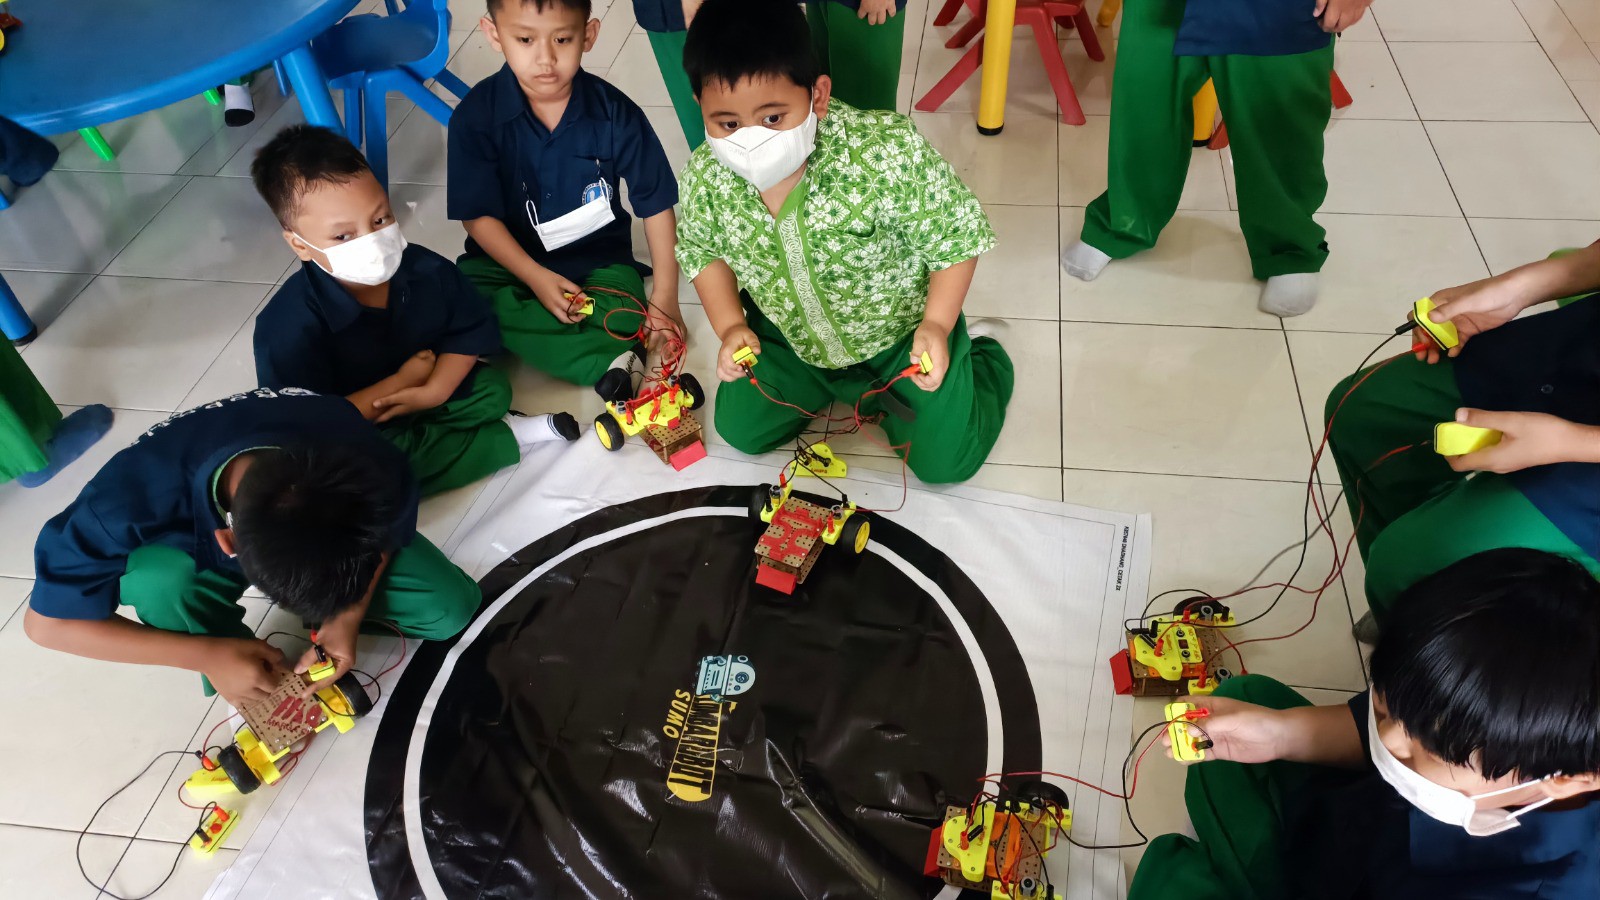
Sumo Robot is a game in robotics for sumo matches. In this robot sumo game, there are 2 teams competing in the sumo arena Within a certain time, the team that leaves the arena first is deemed to have lost
Material :
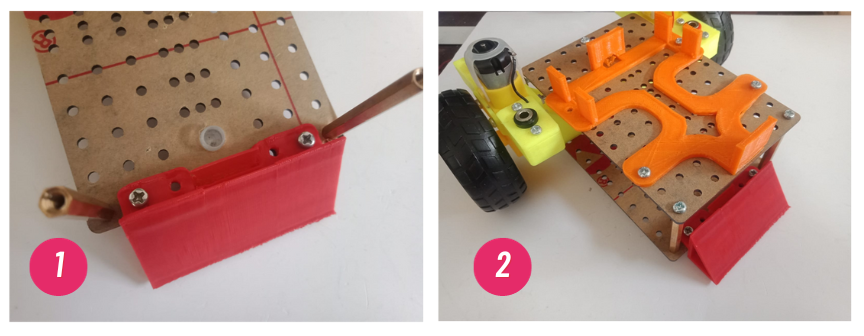
Add the following parts to the front frame
How to Build :
install it on the front of the frame,
then install the top frame
kids playing sumo robot
9
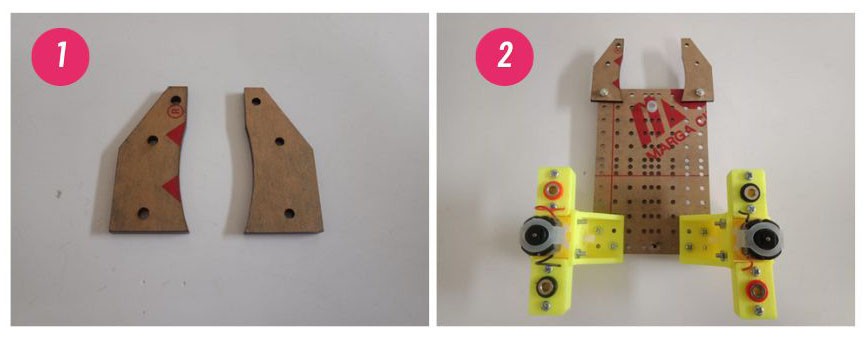
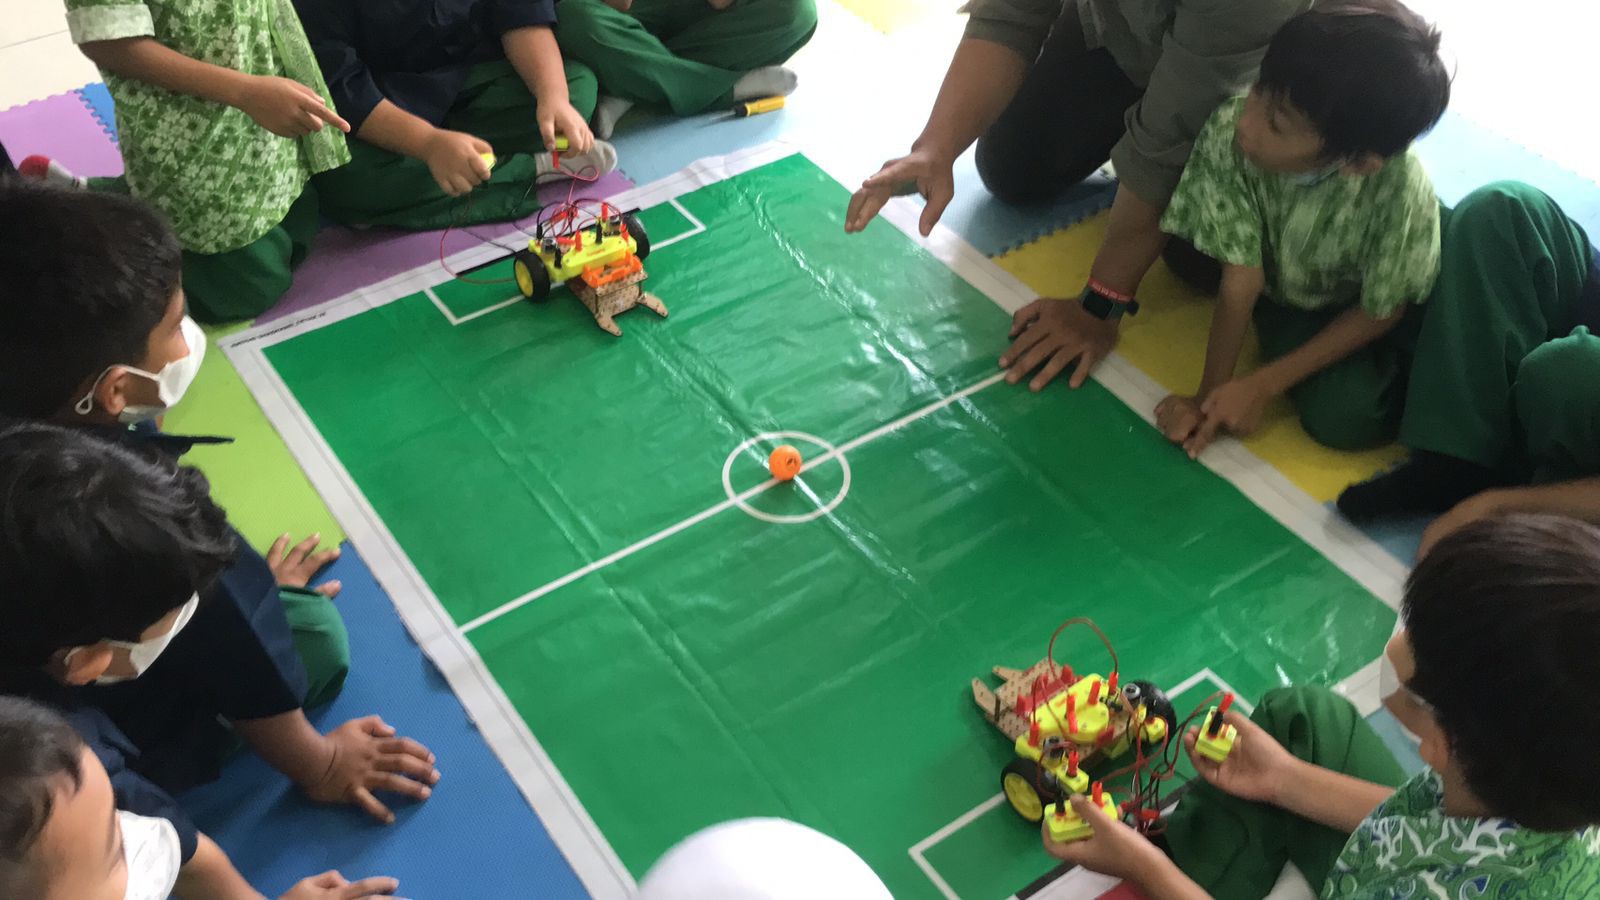
Build Soccer Robot
Robot soccer, also known as robosoccer, is a game in robotics for competing with dexterity and strategies for getting goals in the opponent's goal. This robosoccer game has 2 teams competing in a soccer arena In a certain time, the team that gets the highest score is the winning team.
How to Build :
Add 2 parts, install them on the front of the frame,
Then install the top frame
kids playing soccer robot
10
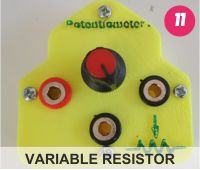
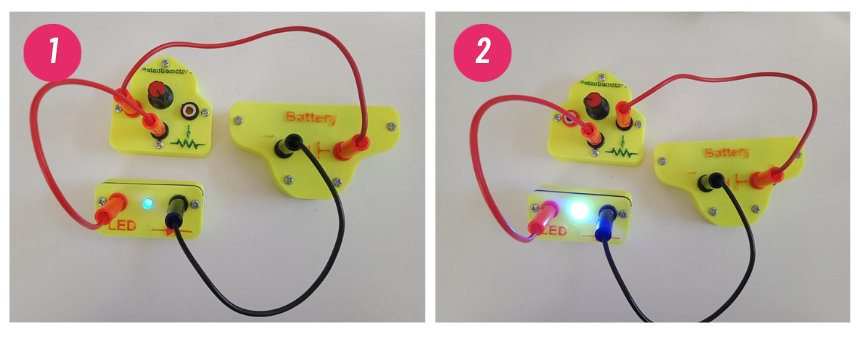
Project Analog Input - Potentiometer
Material :
How to Build :
Turn the knob on the potentiometer and observe the changes that occur, compare between fig 1 and fig 2
 Sekolah Robot Indonesia
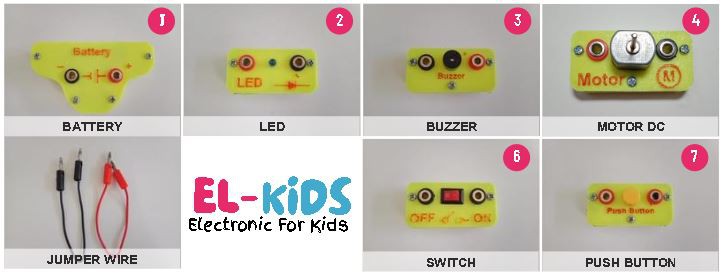


Discussions
Become a Hackaday.io Member
Create an account to leave a comment. Already have an account? Log In.