 mrpendent
After quite some thinking, some sleeping, some gaming, and some more thinking, I have figured out a few things.
I think I have the final PCB. It looks like this:
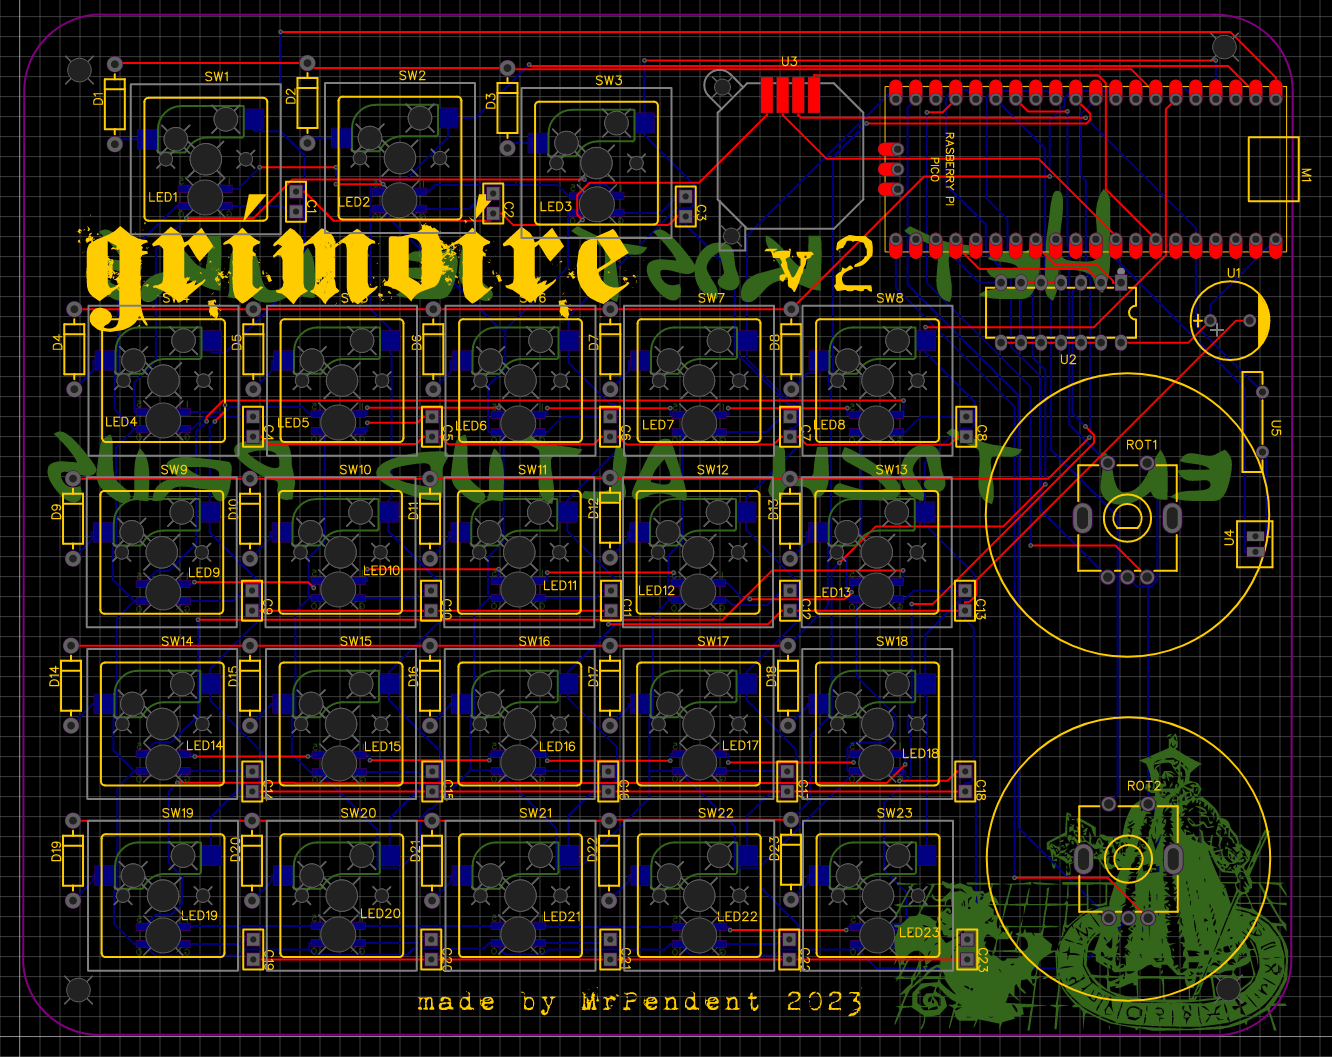
I know with the decorations it's a bit difficult to read. But remember that "customizing to within an inch of its life"? There you go. Here's one with some of the fanciness stripped back:
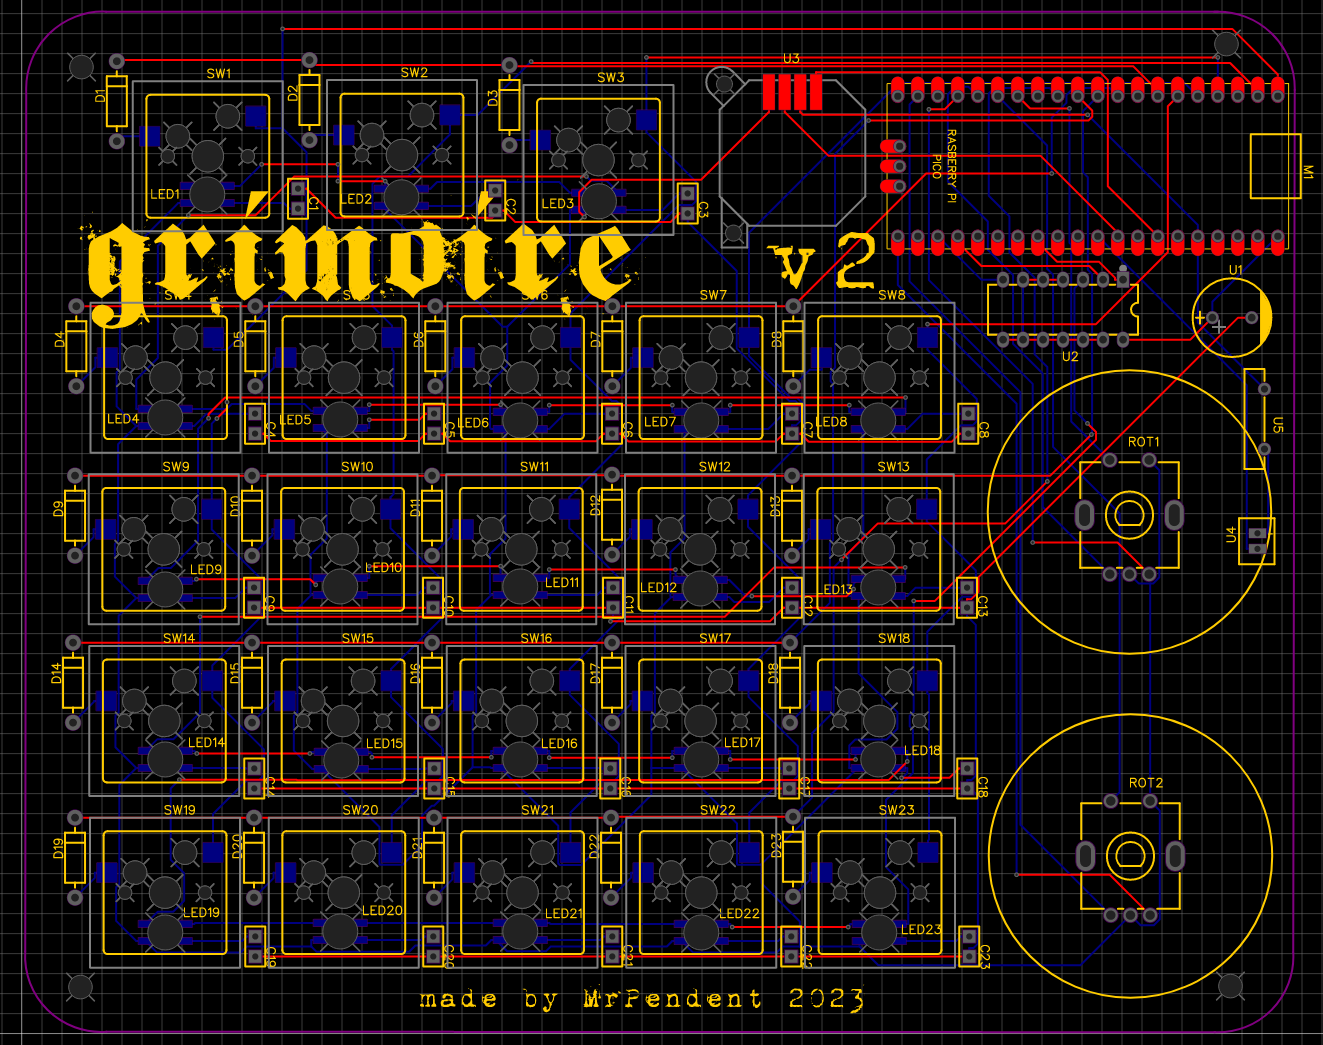
What has changed:
- The encoder wheels are a little different. I wanted big, weighted wheels that felt super good to spin. These are not that big, but they are pretty good at about 36mm (about 1.5").
- Over on the right, I have added a power header (marked U4). This is to allow a cable to connect to the nOOd that will go around the sigil (it will be wrapped around the sigil disk to light it up!)
- The 3 buttons at the top have been pushed to the left to make room for the joystick. I'm still concerned that the joystick is a mistake, but that's something that we can only discover through experience.
- Everything has been made surface mount on the PCB so that we can anchor the PCB to the base of the shell. The only bit on the top will be the nOOd, which can be connected by a cable. I am still considering a magnetic attachment, but that's something to consider.
- Sadly, I have to use a Pi Pico and so have to connect it through a micro-USB instead of USB-C. I'm not super happy about it, but that's life. the Banana Pi Pico has a USB-C, but it's not the same size, and it's not in EasyEDA (or at least I can't find it). I would do something about that but using micro-USB is hardly the worst thing in the world.
I'll probably look at having JLCPCB put the LED caps on, but not the other bits. I think I'm pretty close to the final version (until I test it) but I'm going to leave it to rest while I think about a few last things (like the magnetic power connector).
Discussions
Become a Hackaday.io Member
Create an account to leave a comment. Already have an account? Log In.