mrpendent
-
Get back, Jack...do it again...
06/01/2023 at 23:18 • 0 comments![]()
The time grows near, friends. I have the buttons. I have the micros. I have the wires. I have the cord. I have the tin, the printer, and the design. All that is left now:
- (Successfully) print the insert
- Put in the buttons
- Solder them to the micro
- connect the cable
- put it together
And if I get wacky I can make a vinyl label to stick on top (with the Cricut Maker that someone gave us).
I tried to print the insert yesterday, but this damned filament always seems to slip in my extruder. I think it might be like a micron smaller than other filament. Or maybe I need to adjust the spring on my extruder. Anyway, I'll get it printed and see how it works.
-
Living List: Shortcuts
05/11/2023 at 01:59 • 0 commentsThis is the list of shortcuts. There will be 8 keys, so we'll need 8 shortcuts. They should be usable in a wide variety of situations so that it can be plugged in and be useful.
1. Ctrl-C - Copy
2. Ctrl-X - Cut
3. Ctrl-V - Paste
4. Win-Shift-S - Launch snip tool
5.
6.
7.
8.
-
Lovecat
05/07/2023 at 20:15 • 0 commentsWhile the Grimoire is left to ferment, I can work on the CAT. I'm going to rename it to the "Porta-CAT". Just sounds better.
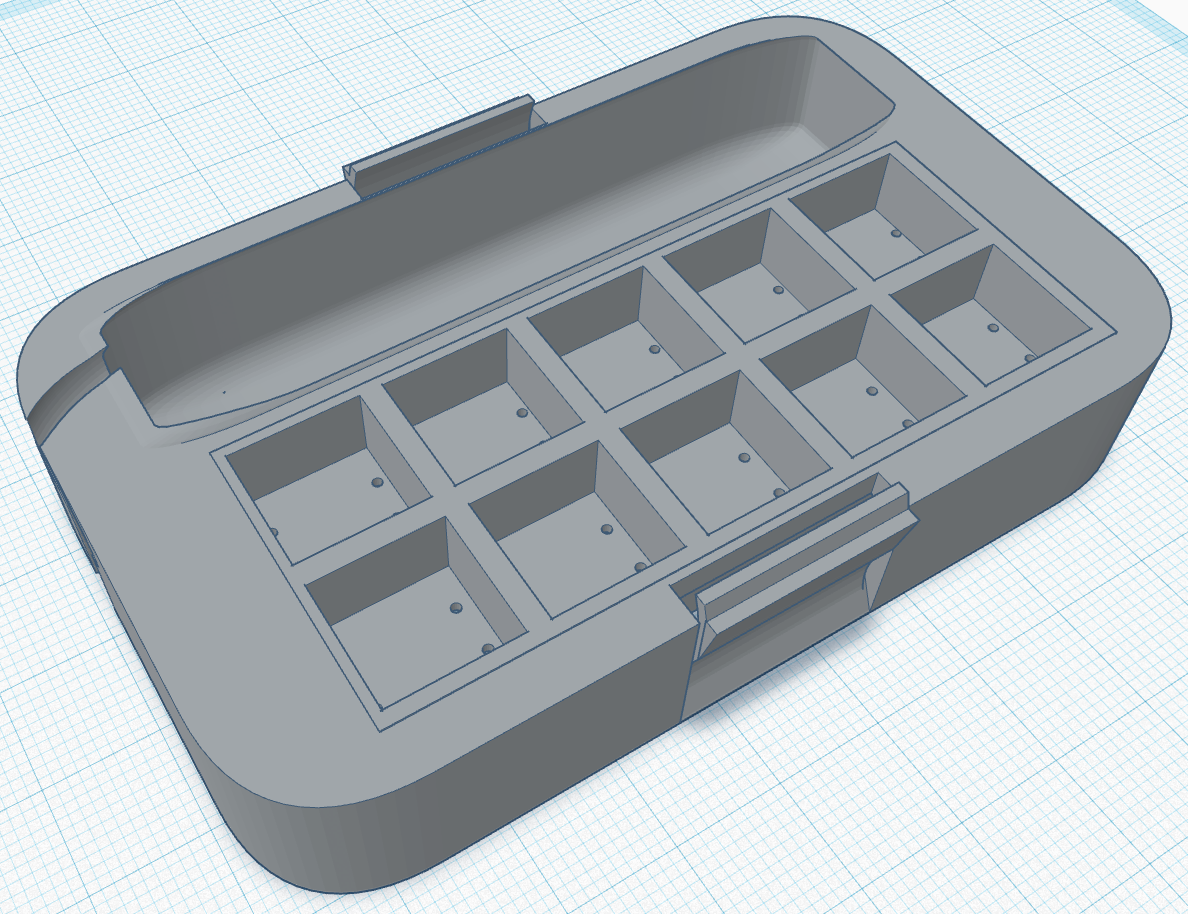
Currently, the low profile switches fit perfectly into the 14mm holes, but they make the whole thing too tall. I want to be able to close this up in an Altoid(ish) tin for protection. So it needs to be shorter.
I've modeled a version that is shorter (about 18mm). I also squeezed the sides in a tiny bit, then added some spring tabs to allow it to be inserted and removed (for possible repairs in the future).
![]()
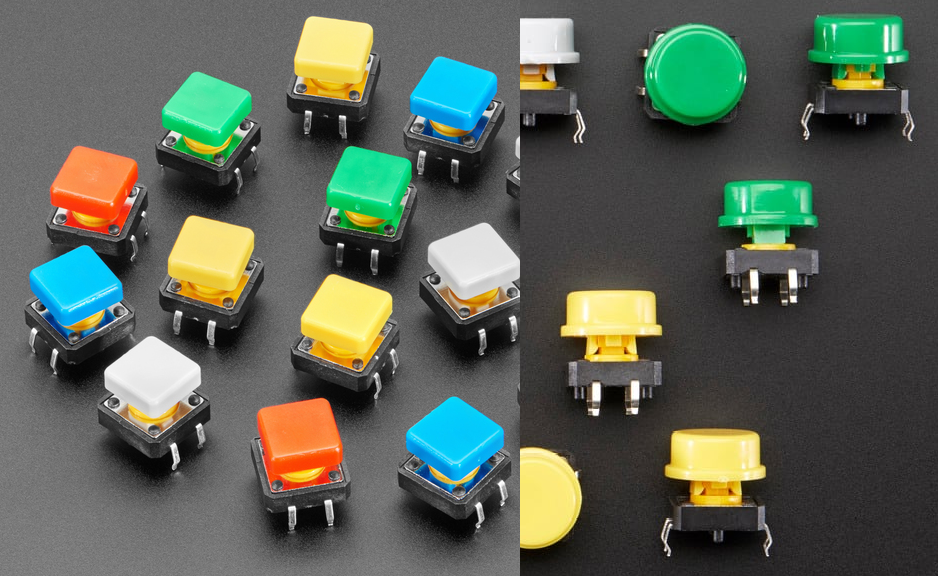
You can see the tabs there. What you can't see is that I changed the holes from 14x14mm to 12x12mm. Which means we can't use regular keyswitches. Luckily, I found some nifty 12x12x7.5mm buttons at Adafruit. They also have some round ones, but I think those will be too tall (12mm).
![]()
The holes in the bottom of the wells there are for the prongs on the buttons. I have made the bottom panel of those wells 1mm thick. I think the prongs will fit through that, and can be soldered on the other side. From that point, it's just a matter of some short wires to the Pro Micro, then the USB cable, and we're golden.
The next step is to print this insert to test the size and the tabs. Then we can order the buttons and test fit them. I'd rather have the buttons so I can measure the prongs before printing, but I'll see if I can finagle it. I have some ideas...
-
On the Other Side of the World
05/04/2023 at 03:37 • 0 commentsThe project is much slower than the Grimoire, but still handy. Likely I'll be able to work on this more while waiting for the PCB s for the other project.
Right now, here is where we are at:
![]()
Not all cats are grey These keyswitches are an off-brand, low-profile type. Unfortunately, they are too close for normal keycaps, so I'll probably have to print some. And with those enclosed posts, it won't be easy. But one problem at a time.
On the close corner there, you can see a channel. My idea here is to wire the keys directly to the Pro Micro controller, then plug a USB-A to USB-C into the Pro Micro. The cable will snake through that channel and get folded into the compartment. Once this is pushed down into an Altoids tin, it should be (permanently) wedged down and keep everything in. Unfortunately, at the moment the switches are too tall to allow closing of the lid. I might be able to cut down on the insert to buy the room, but I don't think so. The printed keycaps will probably be too tall, and we need room under it for the controller.
I think we would be better served by focusing on keeping the cost down so that we don't have to worry so much about it getting damaged. I will probably also work on the insert to see if I can devise some release mechanism to it isn't stuck in the tin forever--a broken USB cable is a real issue.
Now that I think about it, there should probably be some way to tame the cable if there isn't going to be a lid.
Things to do:- Create some keycaps that are sturdy enough to last but easy to print
- Create a way to get the insert out of the tin
- Create a way to keep the cable in the pocket
- Maybe see about a printed lid? Hell, if we're going to do that, we can just print the whole damned box