After some field tests, I have made some changes.
1. The Post-It Whiteboard & System Capacitance
I discovered that the Post-It Whiteboard cover over the copper pads (i.e., over the Touch Electrodes) had a couple of disadvantages:
- Its thickness allows for less than desired capacitance from the touch electrodes, requiring a very high value in charge and time to the capacitive sensors which in turn generates more capacitance noise.
- The idea of just erasing a keyboard layout and drawing a new one sounded (and still does) very good: lots of flexibility depending on each user’s need. The problem is that a touch keyboard means touching erasable ink, which means letters survive very little before requiring redrawing.
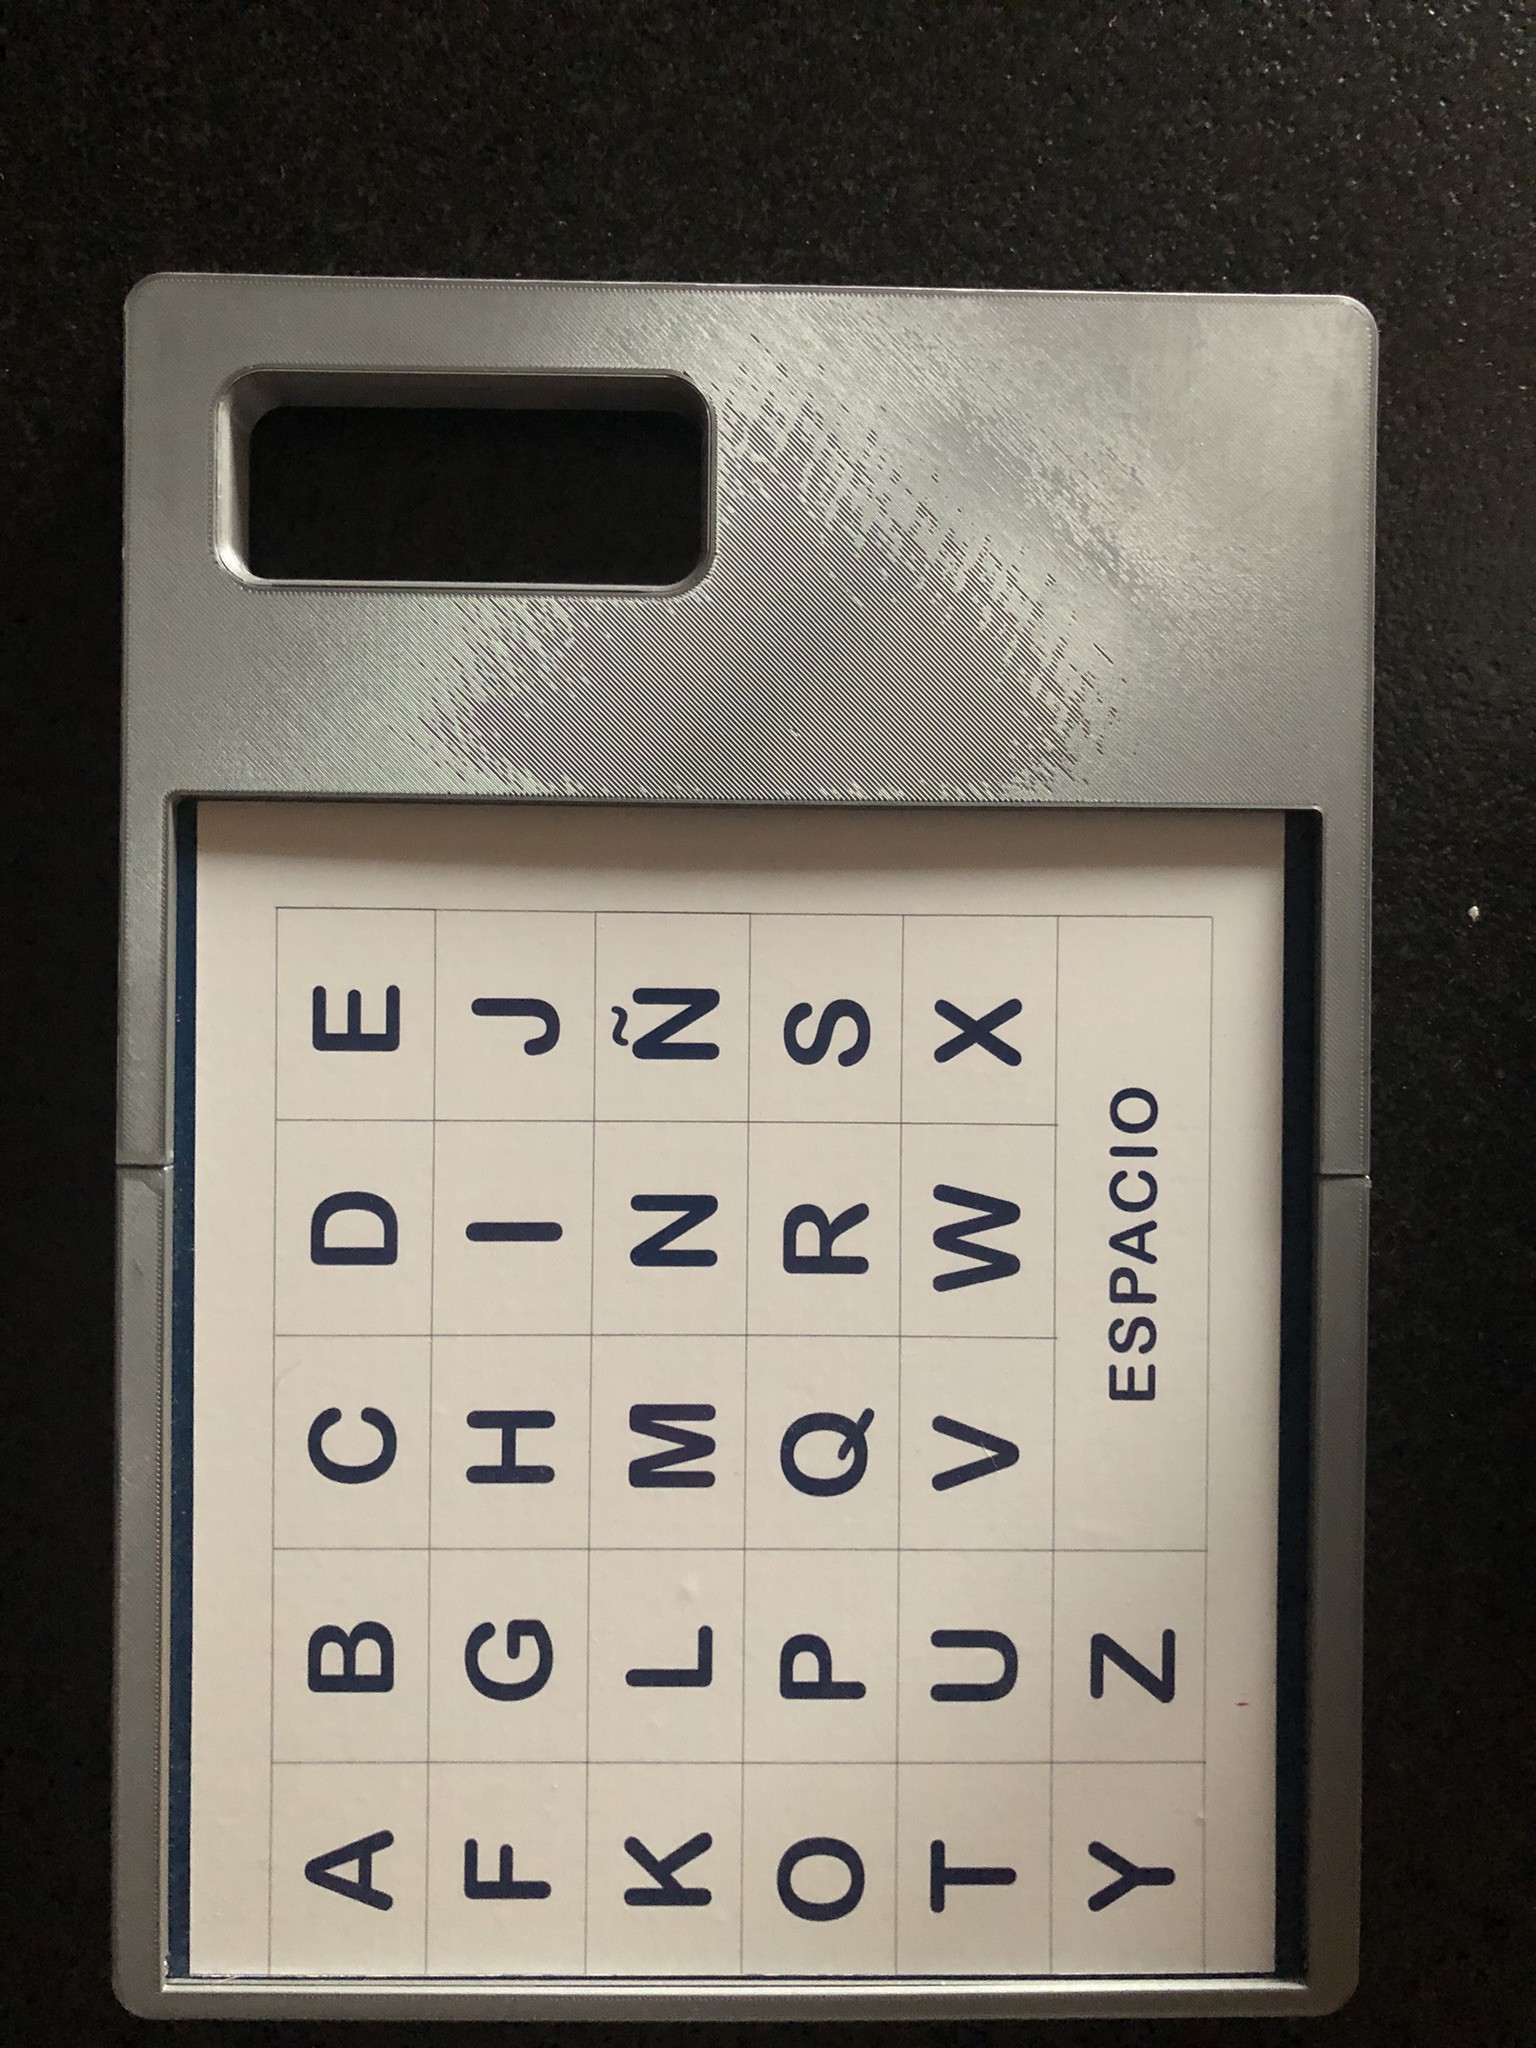
Because of these two effects, I decided to, for now at least, go for a single (i.e., fixed) keyboard layout printed in self-adhesive vinyl (which has less thickness and thus allows for better capacitance performance).
It is self-evident that a 2D matrix of copper pads is unnecessary if there is a fixed number of symbols of the touch keyboard (i.e., I could use instead a large copper square per letter instead of a matrix of copper pads). But for now, I´ll continue using the existing matrix until I come up with a way to allow for multiple layouts.
The fixed layout I chose was Large ABC, so the Function Switches also changed: the Phrase ON/OFF Text-to-Speech switch is no longer applicable. Instead, I’m using that switch to turn ON/OFF the Easter Egg songs (see below).
2. Ground Bounce
Because of the ground bounce effect on the Function Switches (mentioned in the previous log entry), using interrupts meant having to trap false positives in code. So, in this iteration, I’m using digital reads instead. The main program loops fast enough to make it unnoticeable.
3. Non-blocking Code in Tunes Playback & Easter Eggs
Playing of short tunes for startup and layout configuration is a direct use of Robson Couto's program, which uses a delay() statement to play each note. This forced me to play only short excerpts of the songs. I also wanted to add Easter Eggs: when the user types the keyword of one of the songs, playback begins. The songs are (keyword in parenthesis):
- Super Mario (mario)
- Darth Vader (galaxia)
- Pink Panther (pantera)
- Happy Birthday (cumple)
- Ode to Joy (alegria)
- The Lion Sleeps Tonight (leon)
- Brahms Lullaby (dormir)
For these two reasons I changed Robson Couto's code to be non-blocking (identifying during the whole program when a note is being played as well as if a tune is in progress).
Now at startup a random short song is played (Super Mario, Darth Vader or Pink Panther) and 7 songs are ready to be played if discovered! Playback can be halted by typing "zz" at any time.
4. Persistent Capacitive Noise
Even with the new self-adhesive vinyl cover and the new config values for the capacitive sensors, there is still noise that can generate false touch positives.
I added a routine to trap this noise (or most of it). There are (rare) cases when these false positive capacitive sensor touch registers enter some kind of loop, in which case after trapping this condition based in a determined number of iterations, I now reset the three cap sensors breakouts.
The origin of this noise remains a mystery to me. Ground bounce? EMI? Voodoo?
5. Bluetooth Reconnect in iOS
iOS has some limitations, perhaps by design, when it comes to Bluetooth reconnect: if the user turns off the BLE radio in the letterboard (by turning off all Function Switches) after it had been connected (paired) to iOS, it won’t reconnect again when turned on.
To fix this, I added an ESP.restart() statement when this happens to force a reconnect, identifying the reason for reboot to avoid regular startup songs and other regular startup functions.
6. Cap Sensors Calibration
I changed the cap sensors configuration values after several calibration exercises with the vinyl cover, getting better response (true positives) and less noise (false positives).
7. Code Optimizations
Several routines saw improvements in readability and performance. As before, the code is generously commented.
All files are included in the files section in the RPM GEN3 ABC.zip file to differentiate them from the original posting. All file names and structure remain the same.
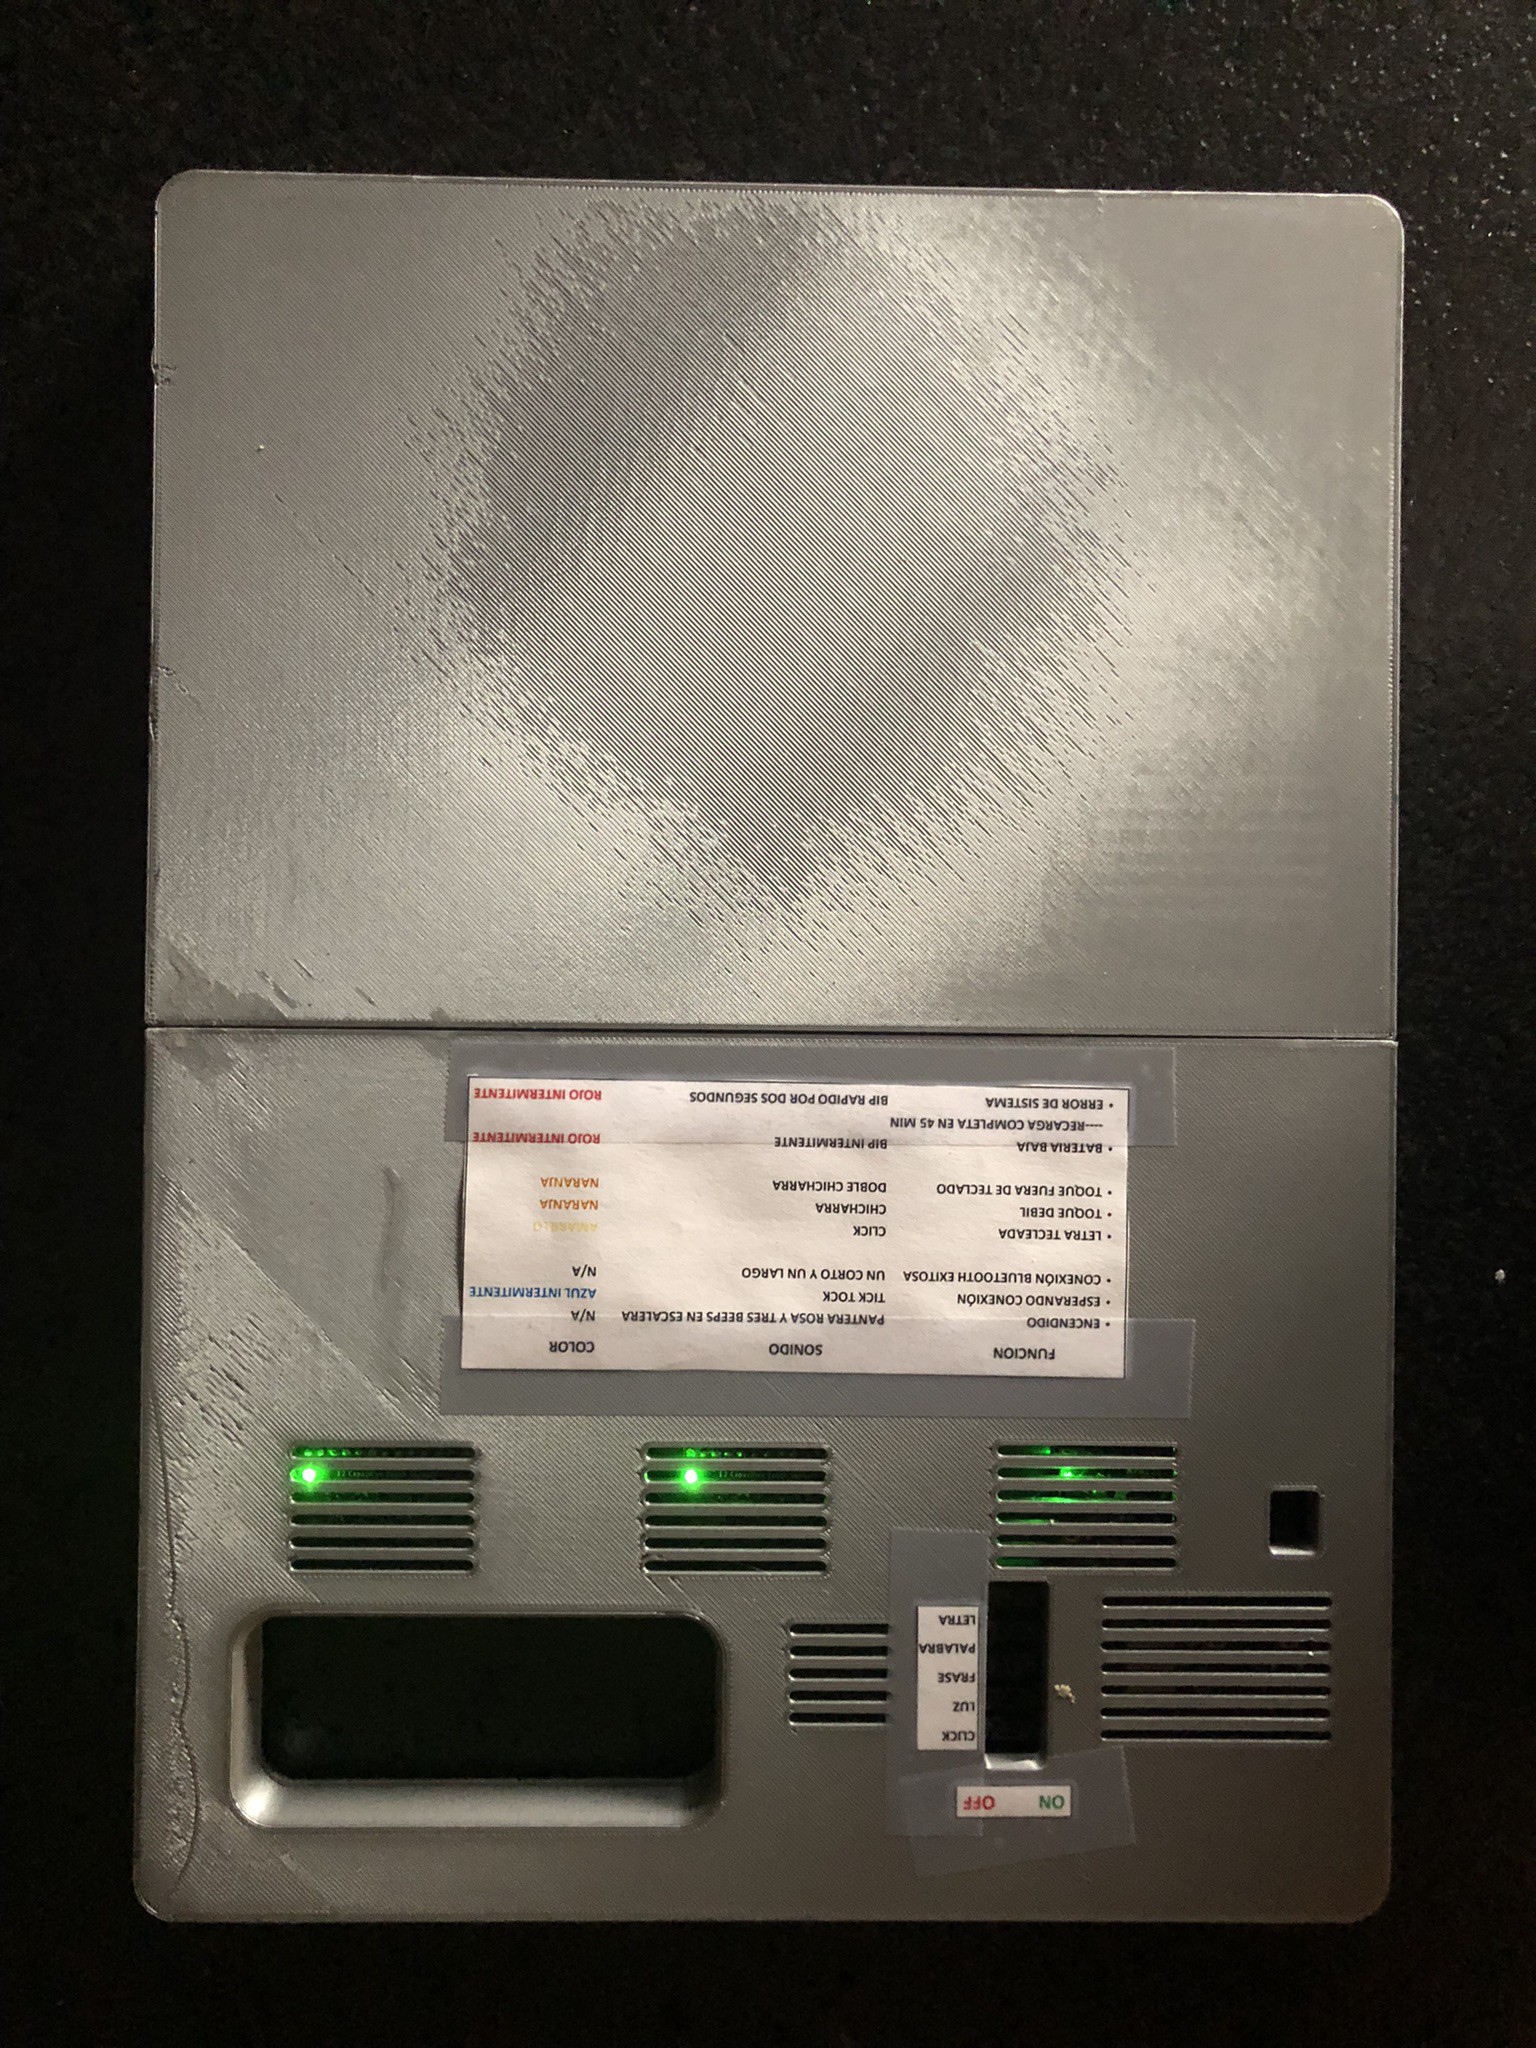
8: New Enclosure
Last but not least: my own 3D printer finally arrived! I couldn't miss the opportunity to make a new enclosure:
Discussions
Become a Hackaday.io Member
Create an account to leave a comment. Already have an account? Log In.