-
Making it faster...
06/17/2023 at 09:10 • 0 commentsI was trying to use TL431 regulators as much as possible on this design so they're used for the regulator, the integrator and the voltage amplifier. The only thing that I didn't use one for is the buffer. Unfortunately, that set the frequency response as the GBW is only around 1 to 2 MHz so the amplifier stage limits us. What happens if we modify it?
I snuck a sneaky option into the amplifier design. You'll notice a 0R and a not fit resistor. What's the point of that? Well if you remove R111 and replace R112 with an 0R then you get something that looks a bit like a classic common emitter amplifier.
Change the values of the surrounding resistors (R118=20R, R117=1k5, R107=9k1k) and bodge an mmbt3904 in place of the TL431 and you've got a nice high speed amplifier with twice the gain of the original. You may need to tweak these values if you make one due to part to part variability. I'm probably pushing it a bit hard asking for 40x (~32dB) gain.
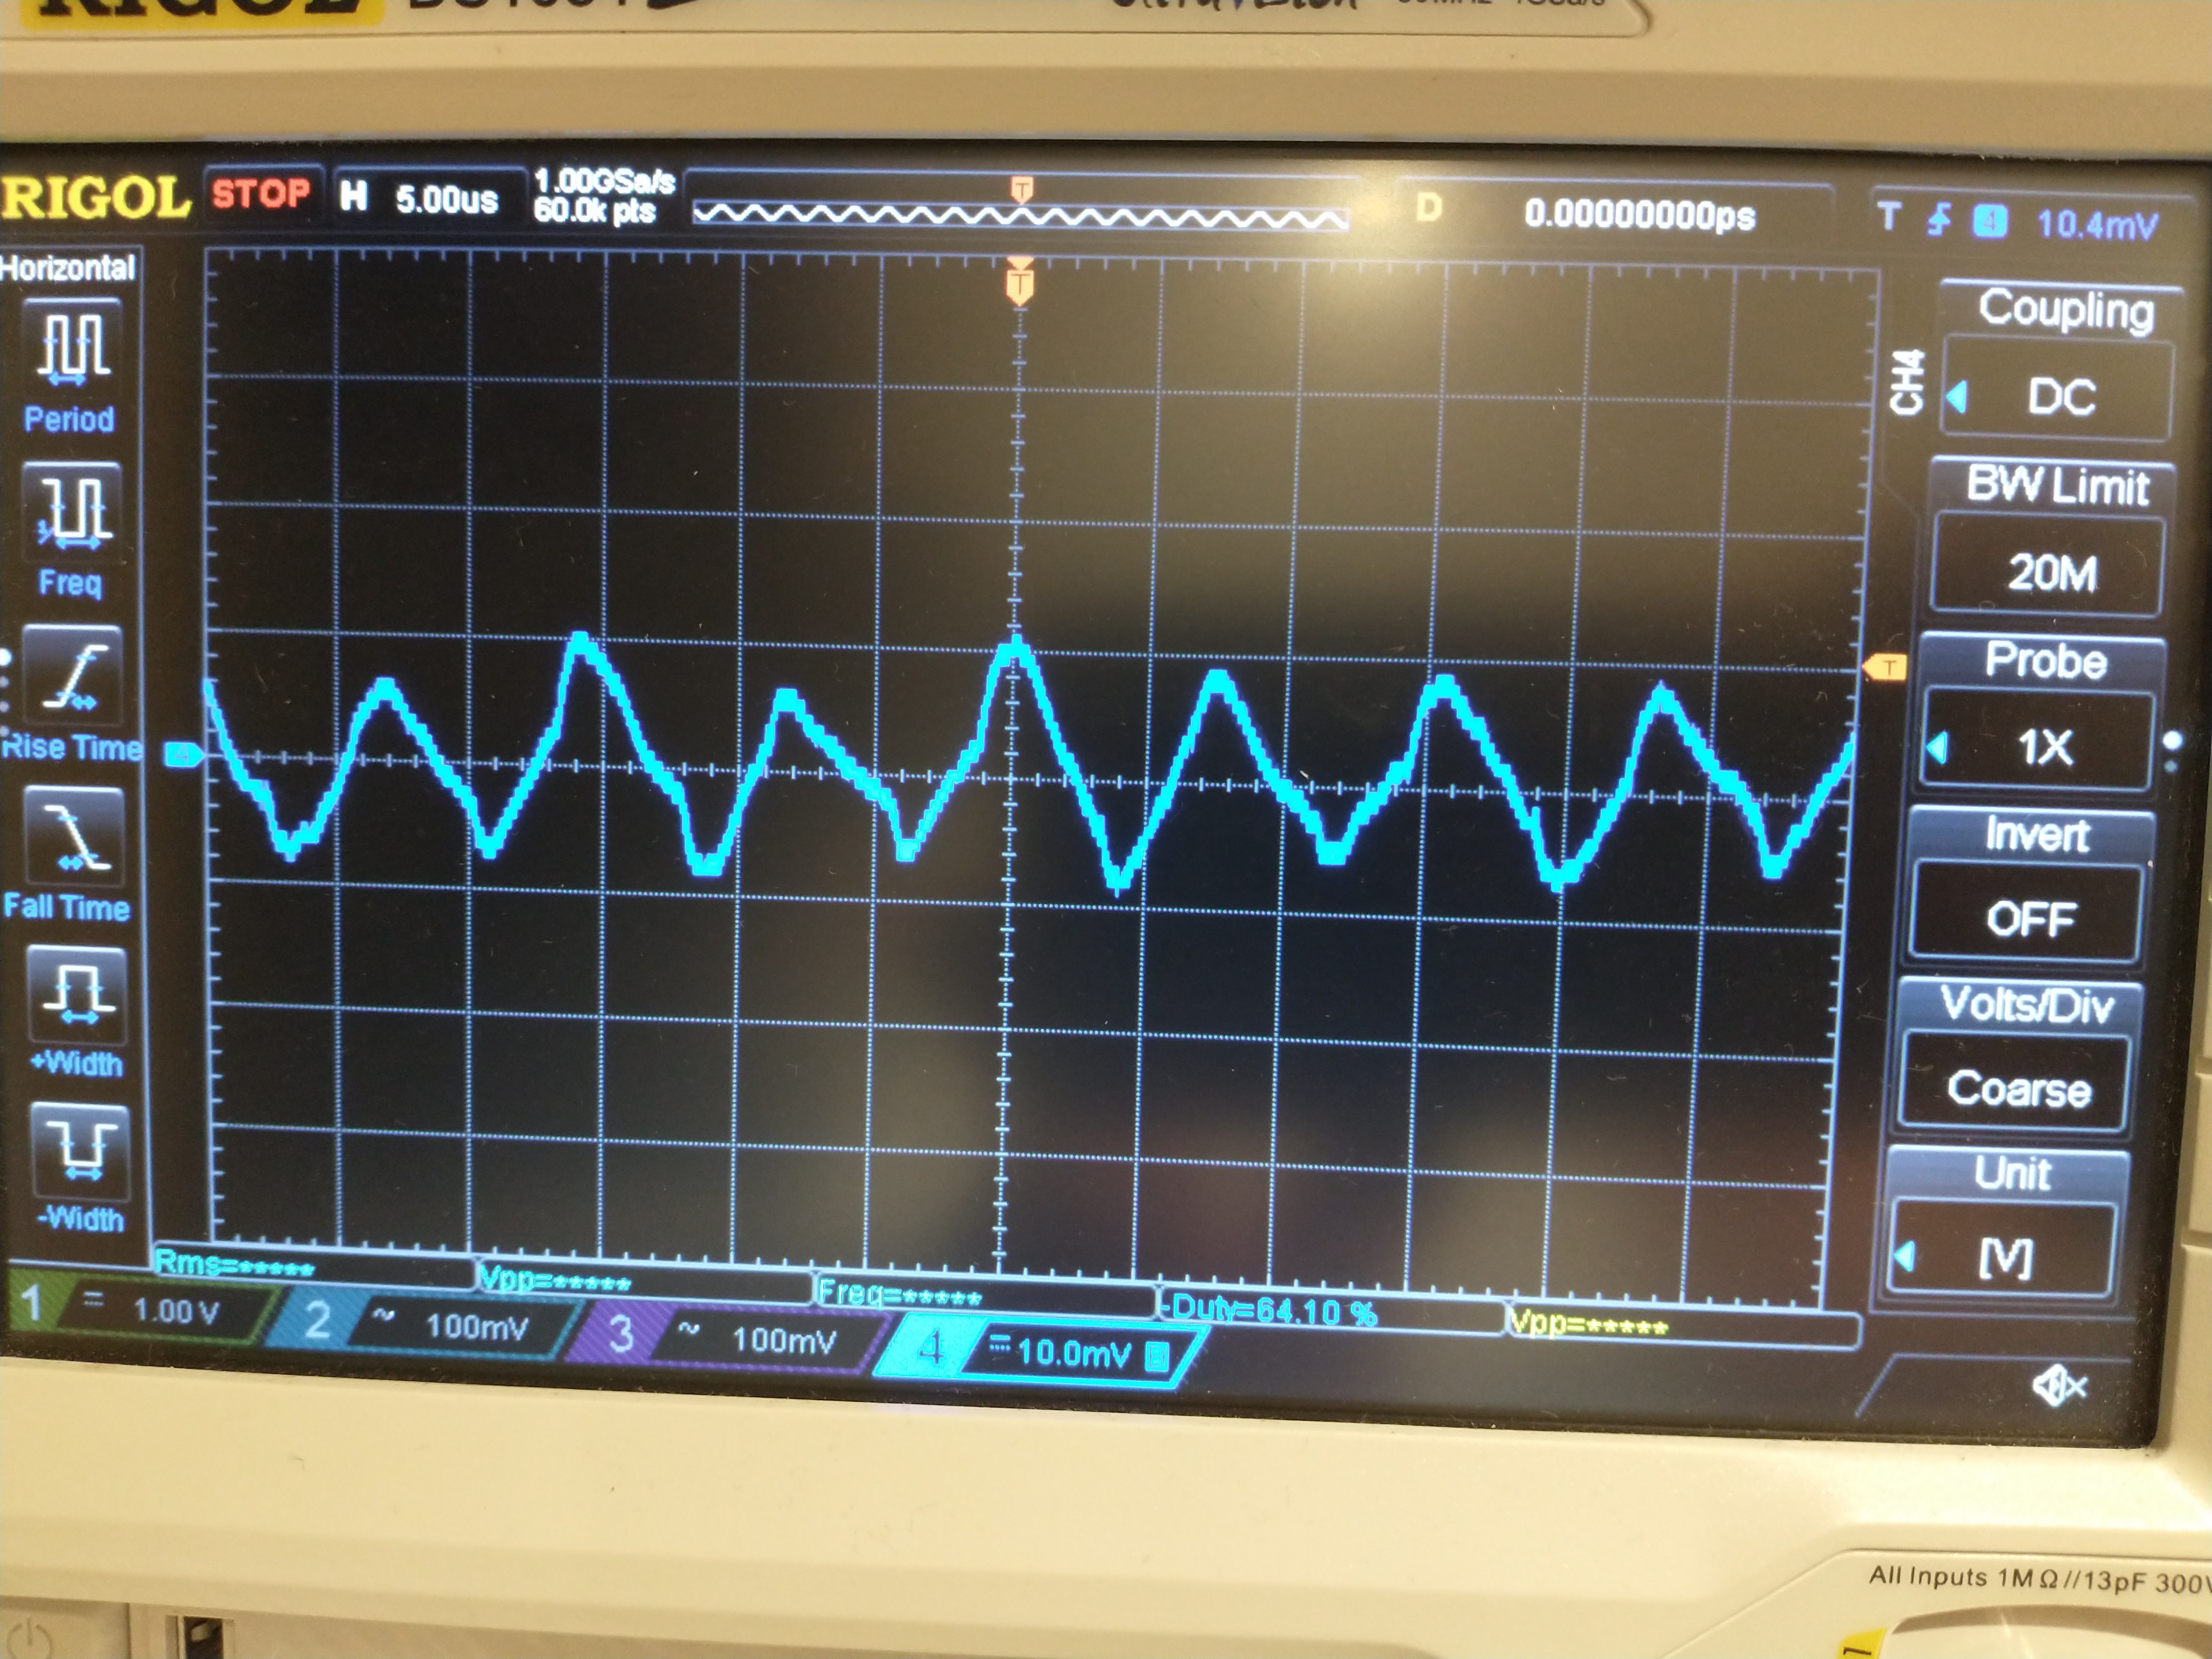
Before:
![]()
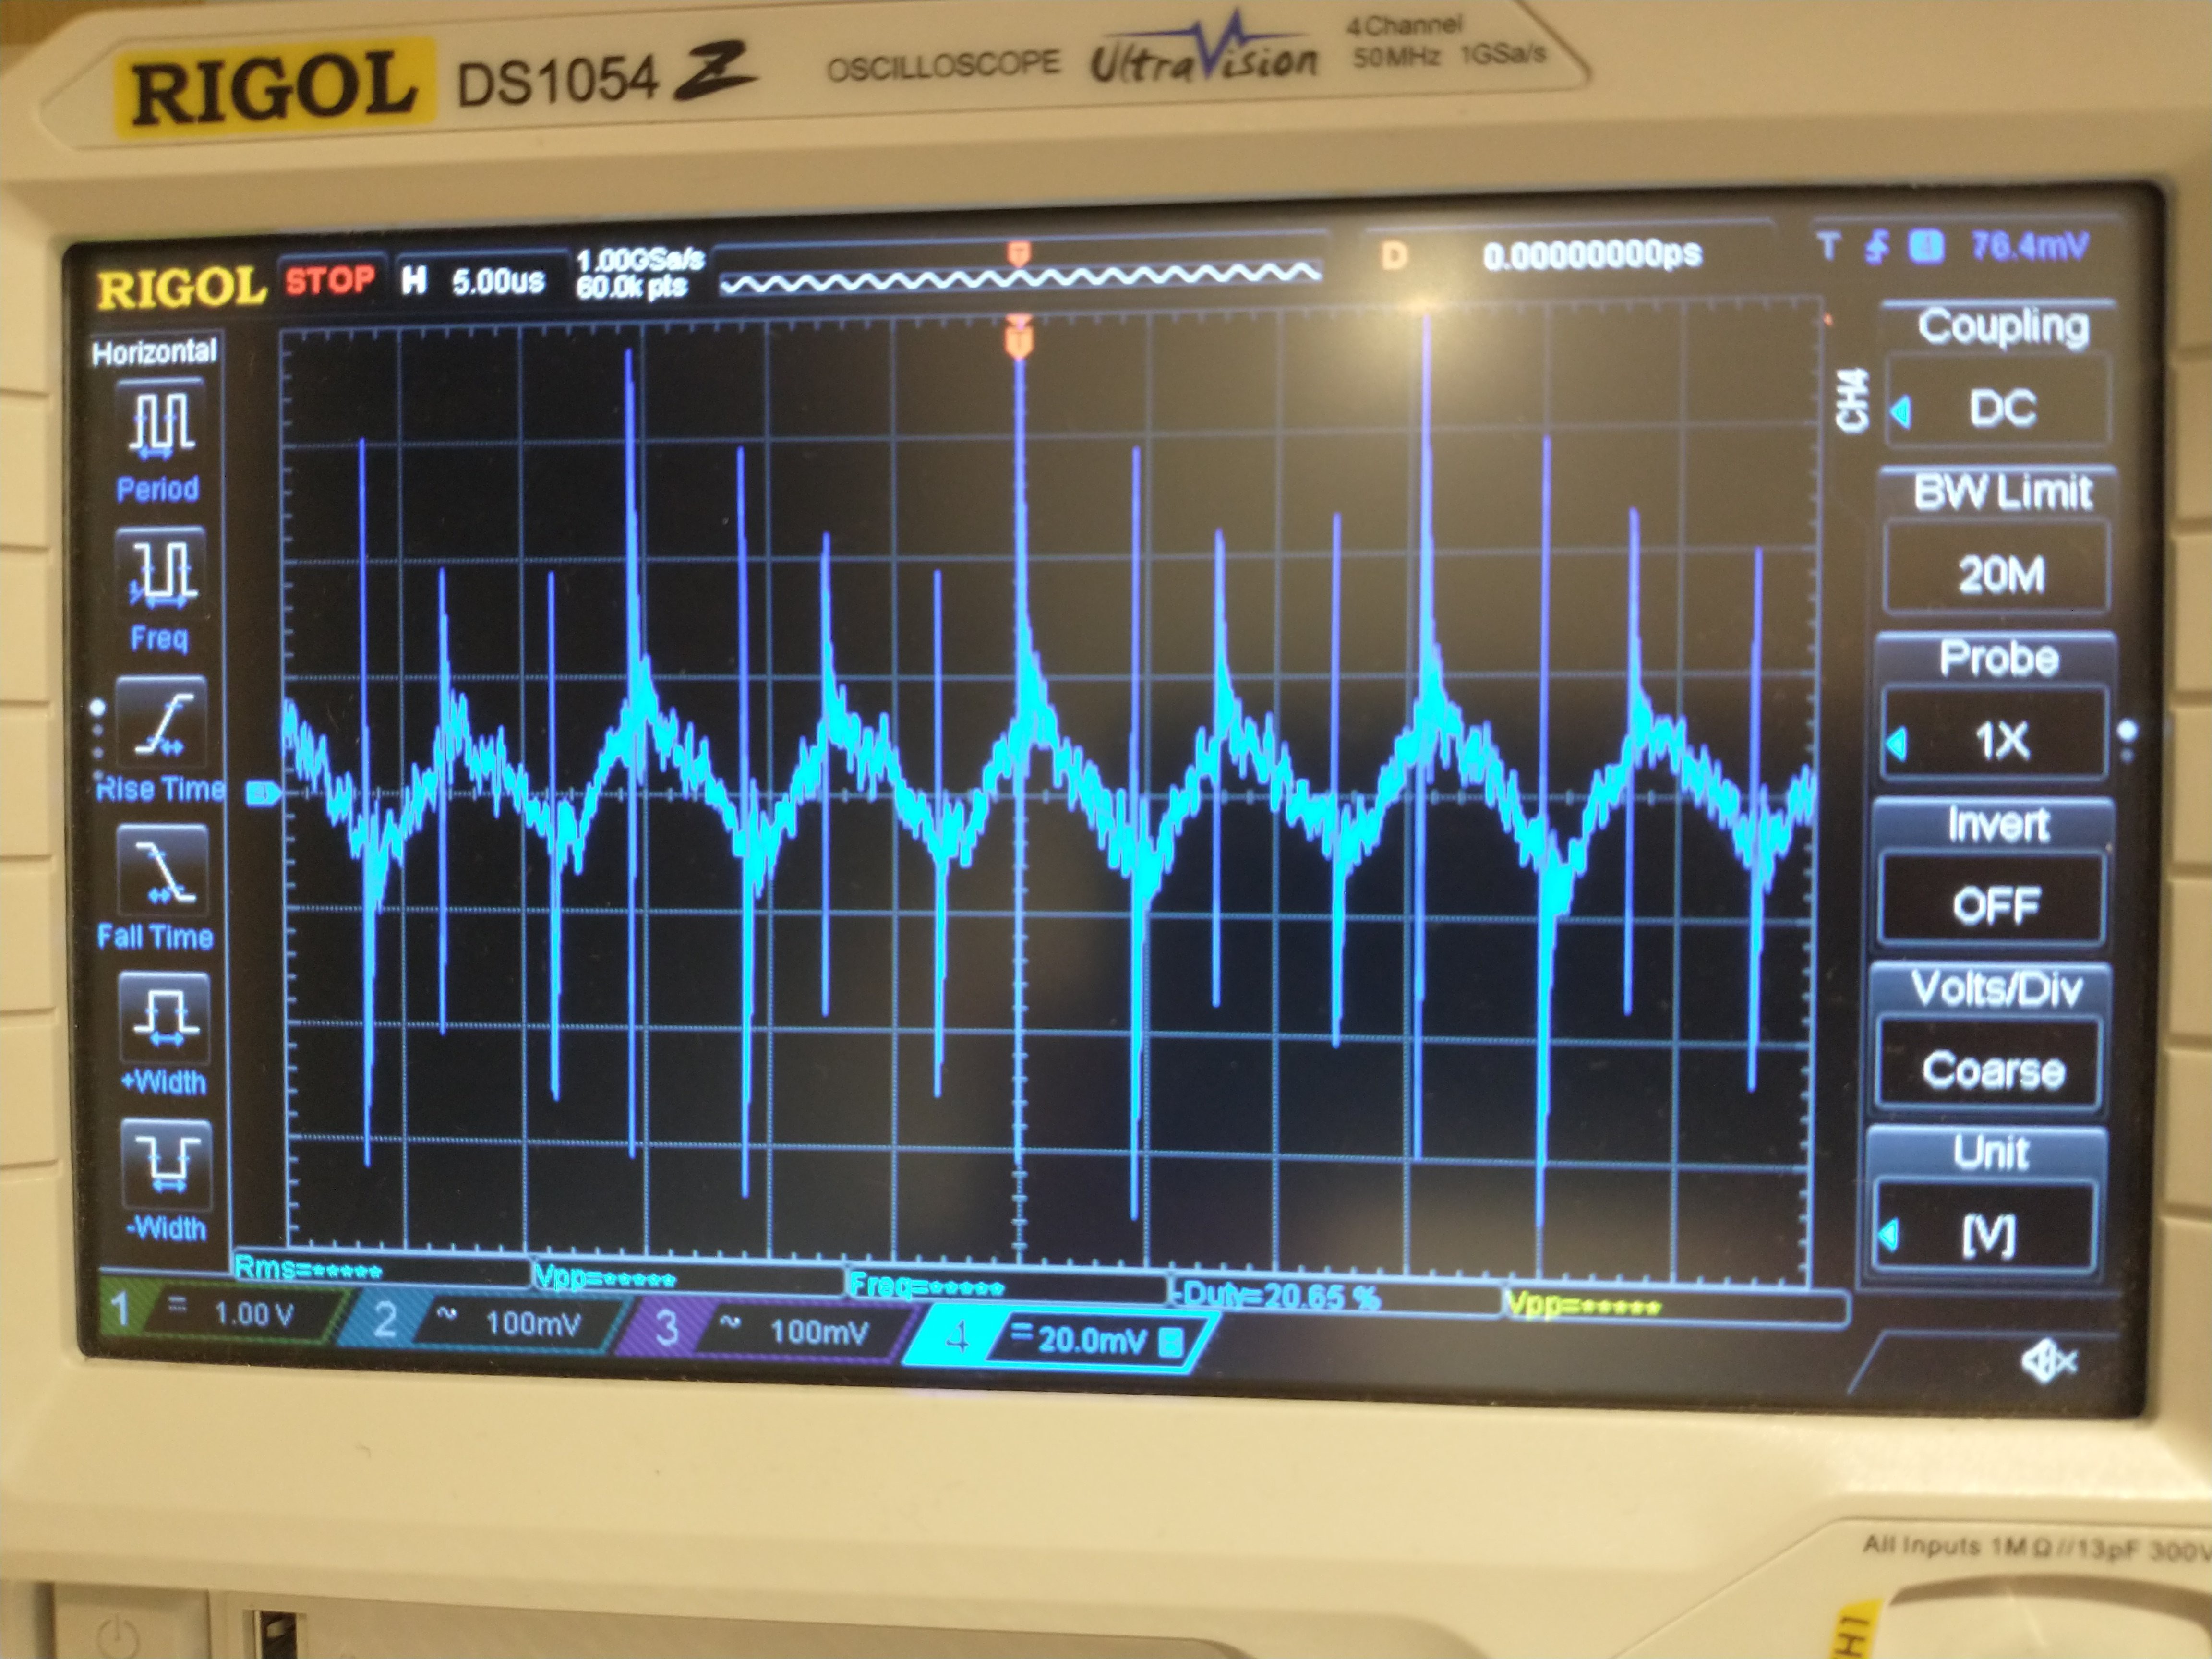
After:
![]()
Now the 100kHz triangle is sharper. It's also got a lot more noise as the amplifier isn't filtering it out any more. I know that the circuit being tested is poorly laid out so most of the noise is probably genuine.
-
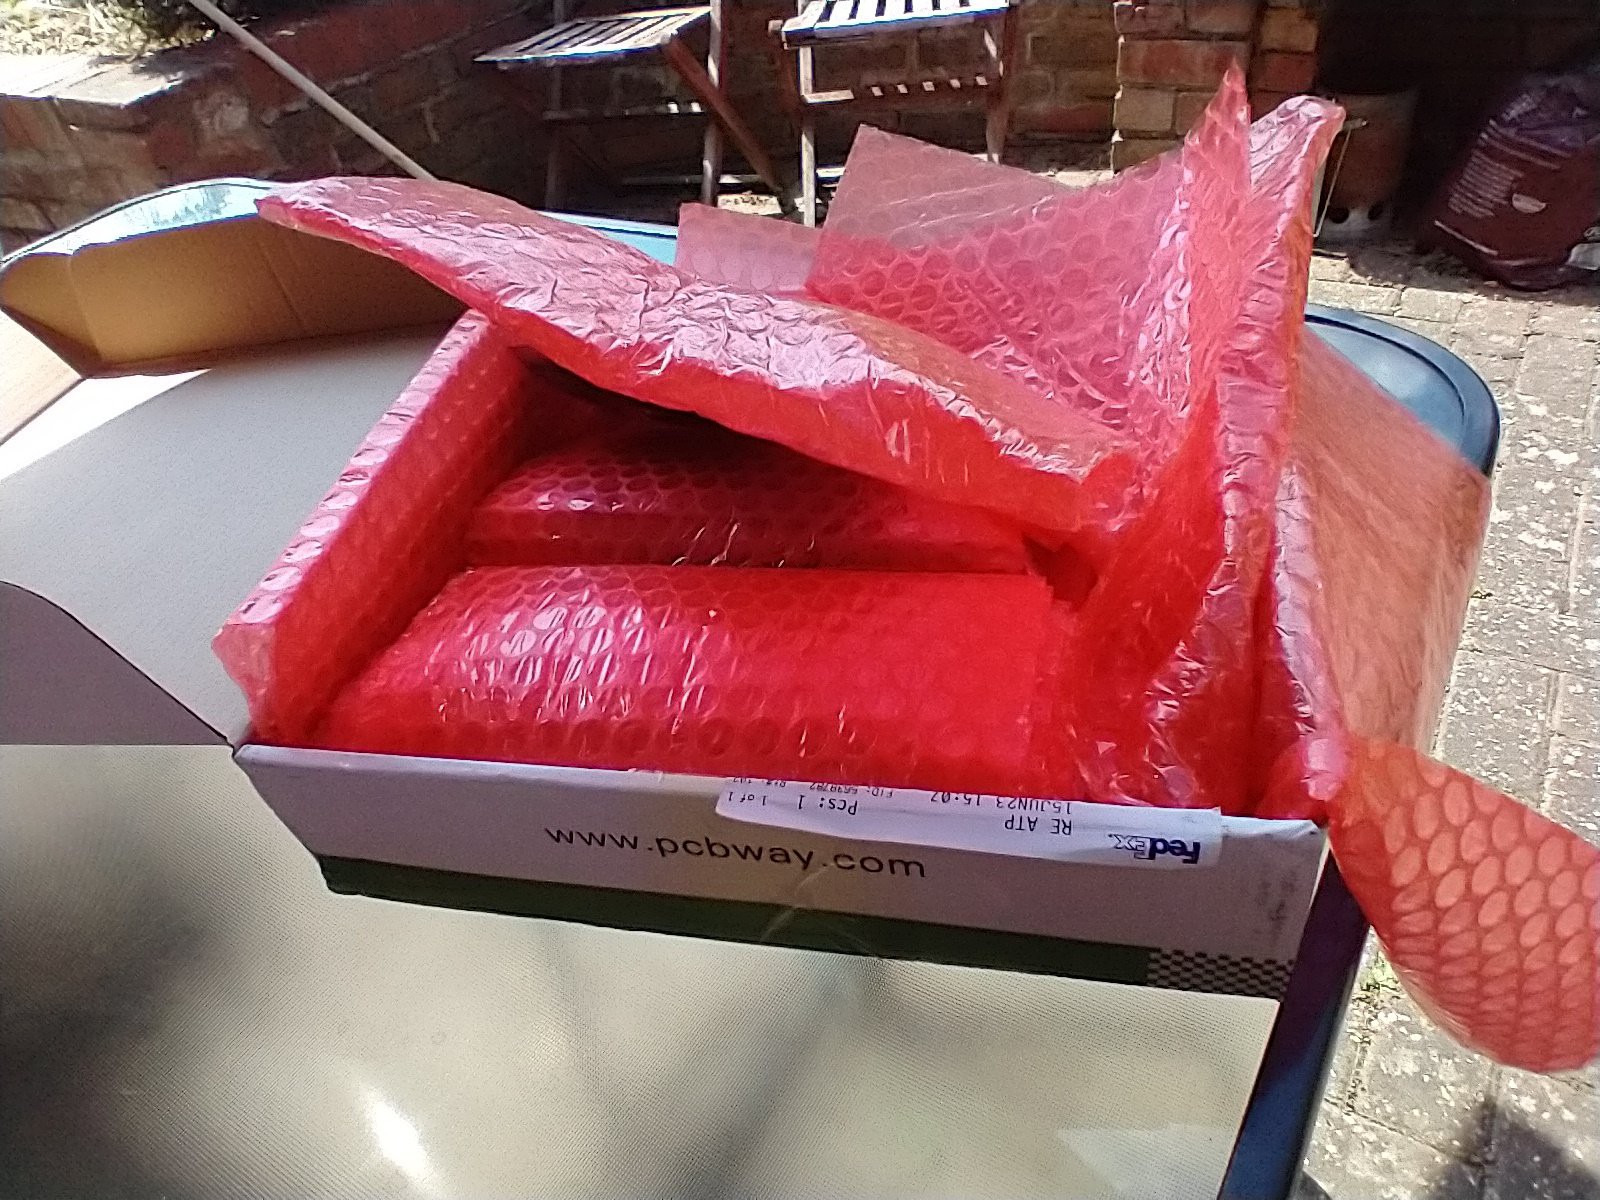
Top marks PCBway.com! The PCBs have landed!
06/16/2023 at 16:25 • 0 comments![]()
They all look great. No issues with the build found so far.
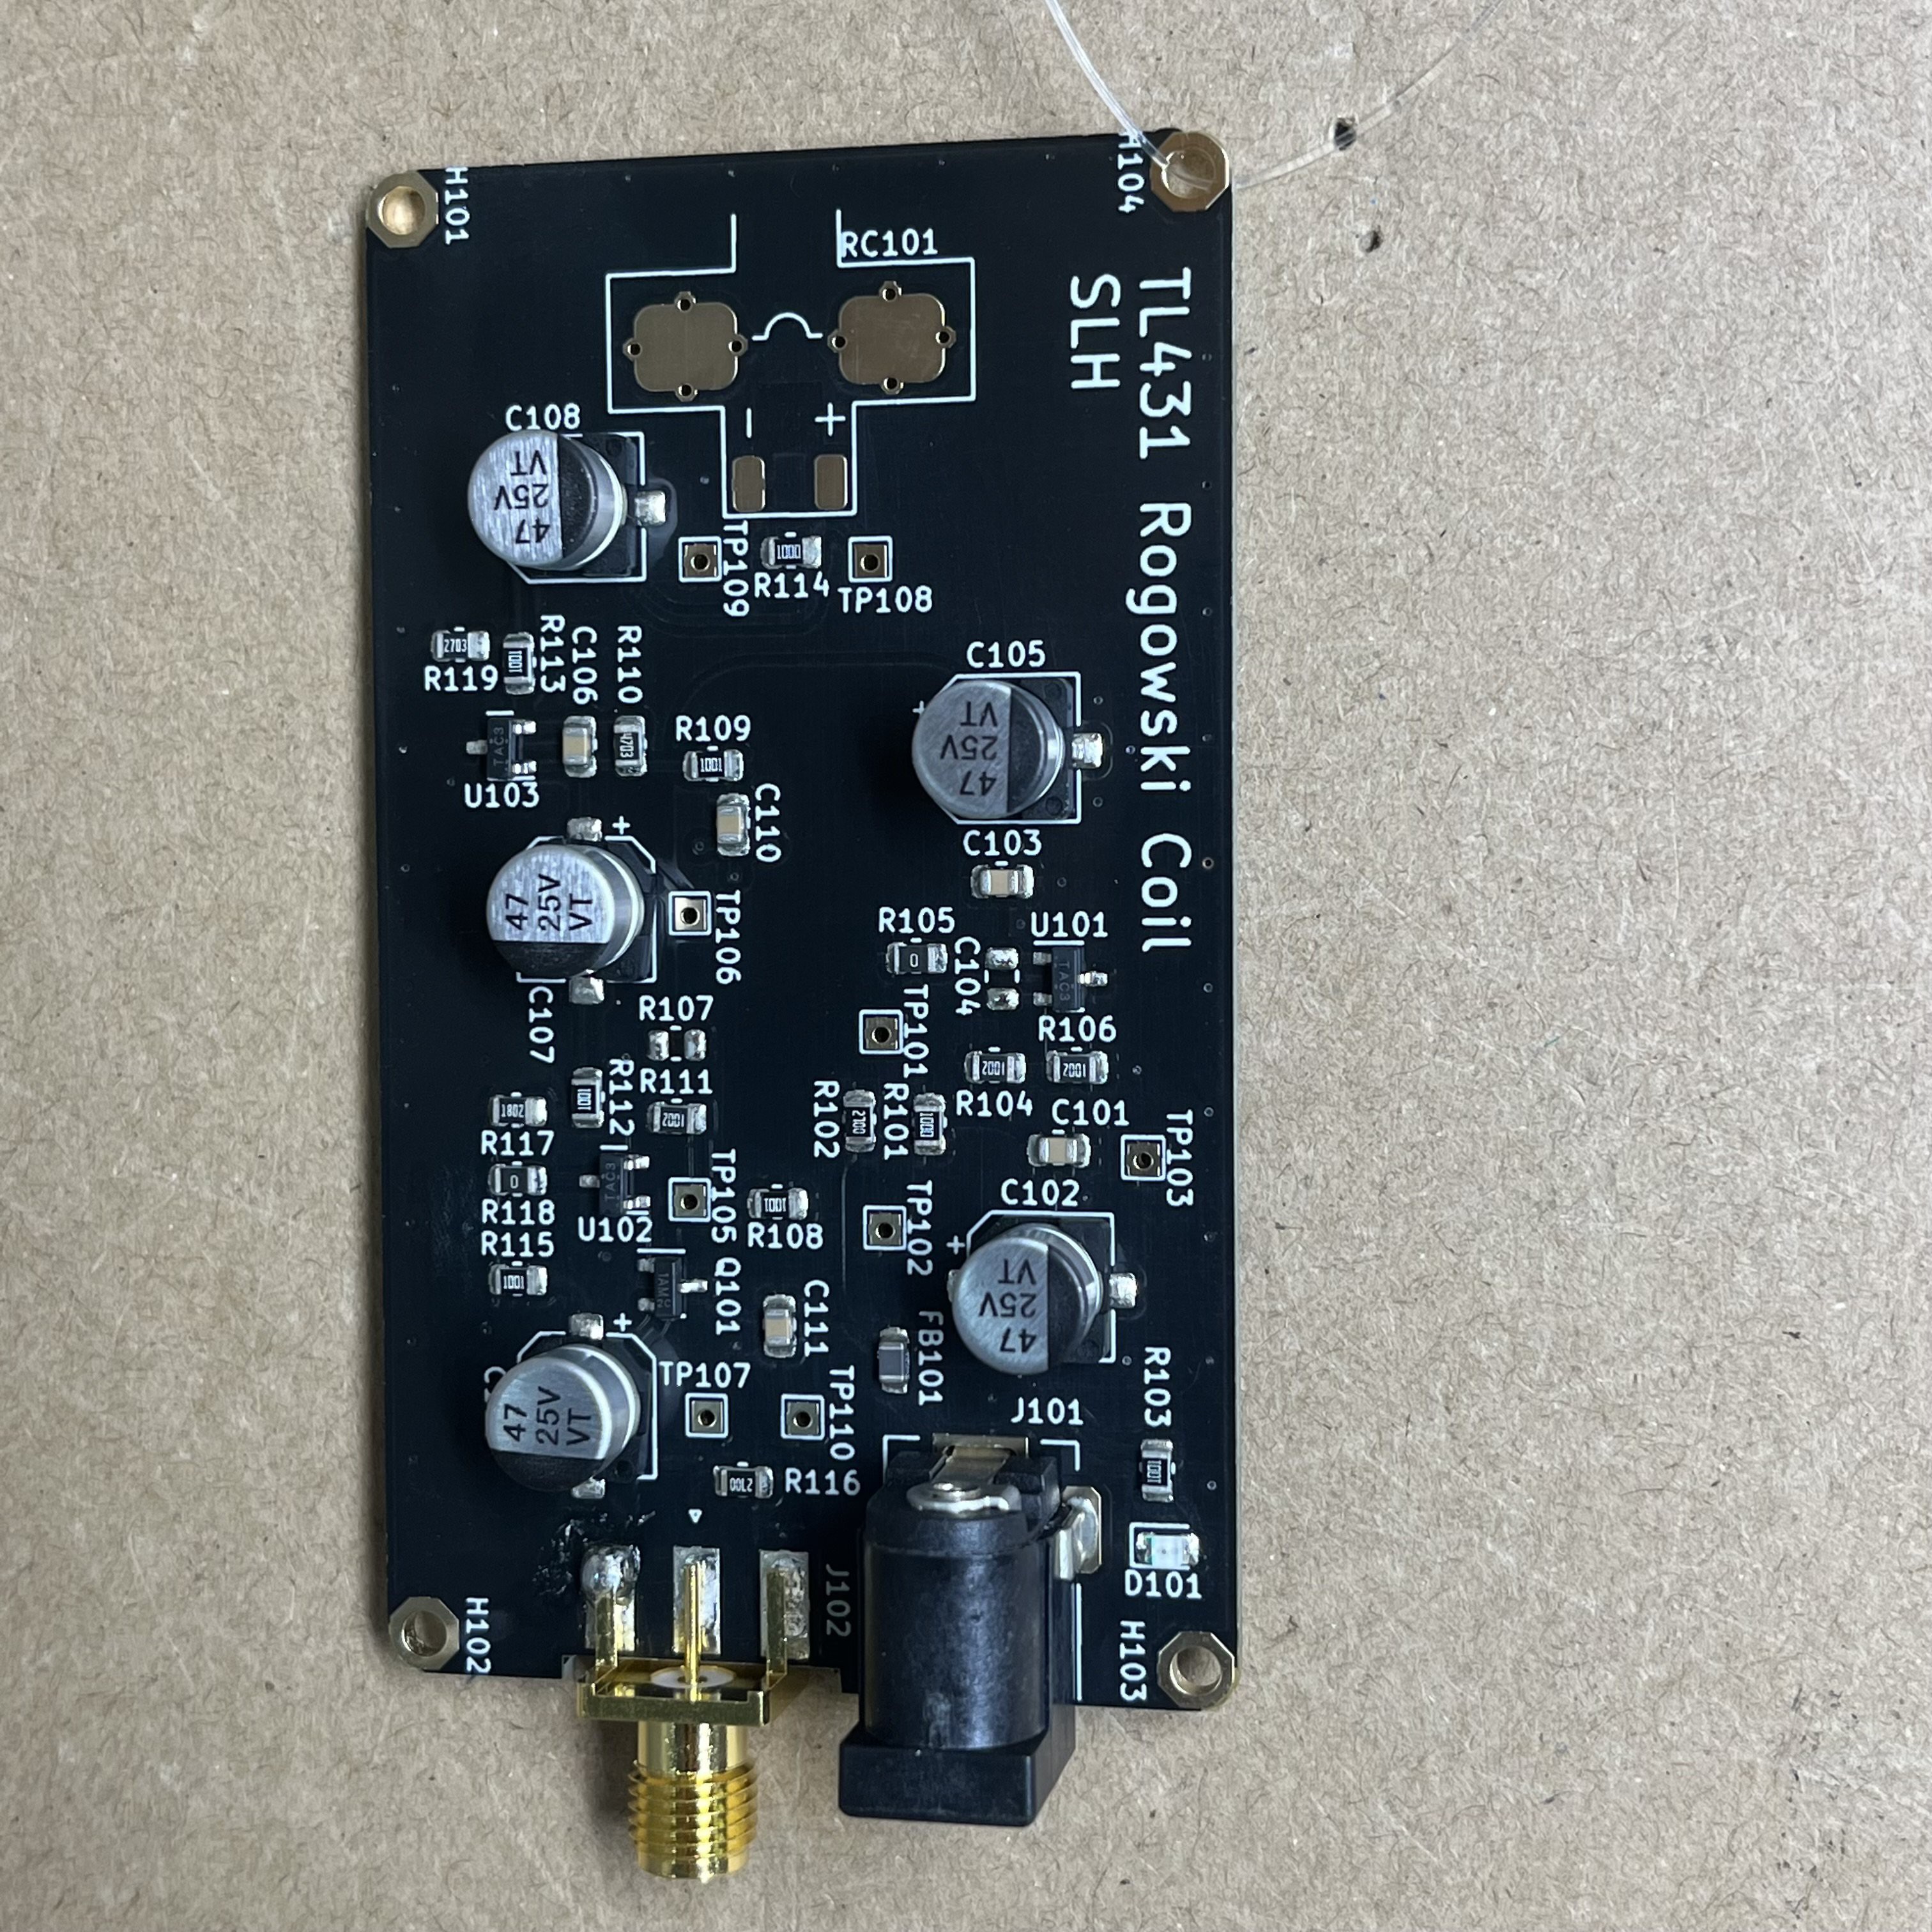
Two issues with the design however... If you want to make one then R101 needs to be removed. Probably best to replace R101 and R102 with a pair of 680R but just leaving R102 at 270R seems to work. If you don't then that area gets hot and you'll probably lose U101. Apart from that, I expect everything will continue to work but it might be noisier.
A bigger issue is R119 and R110. They need to be swapped.
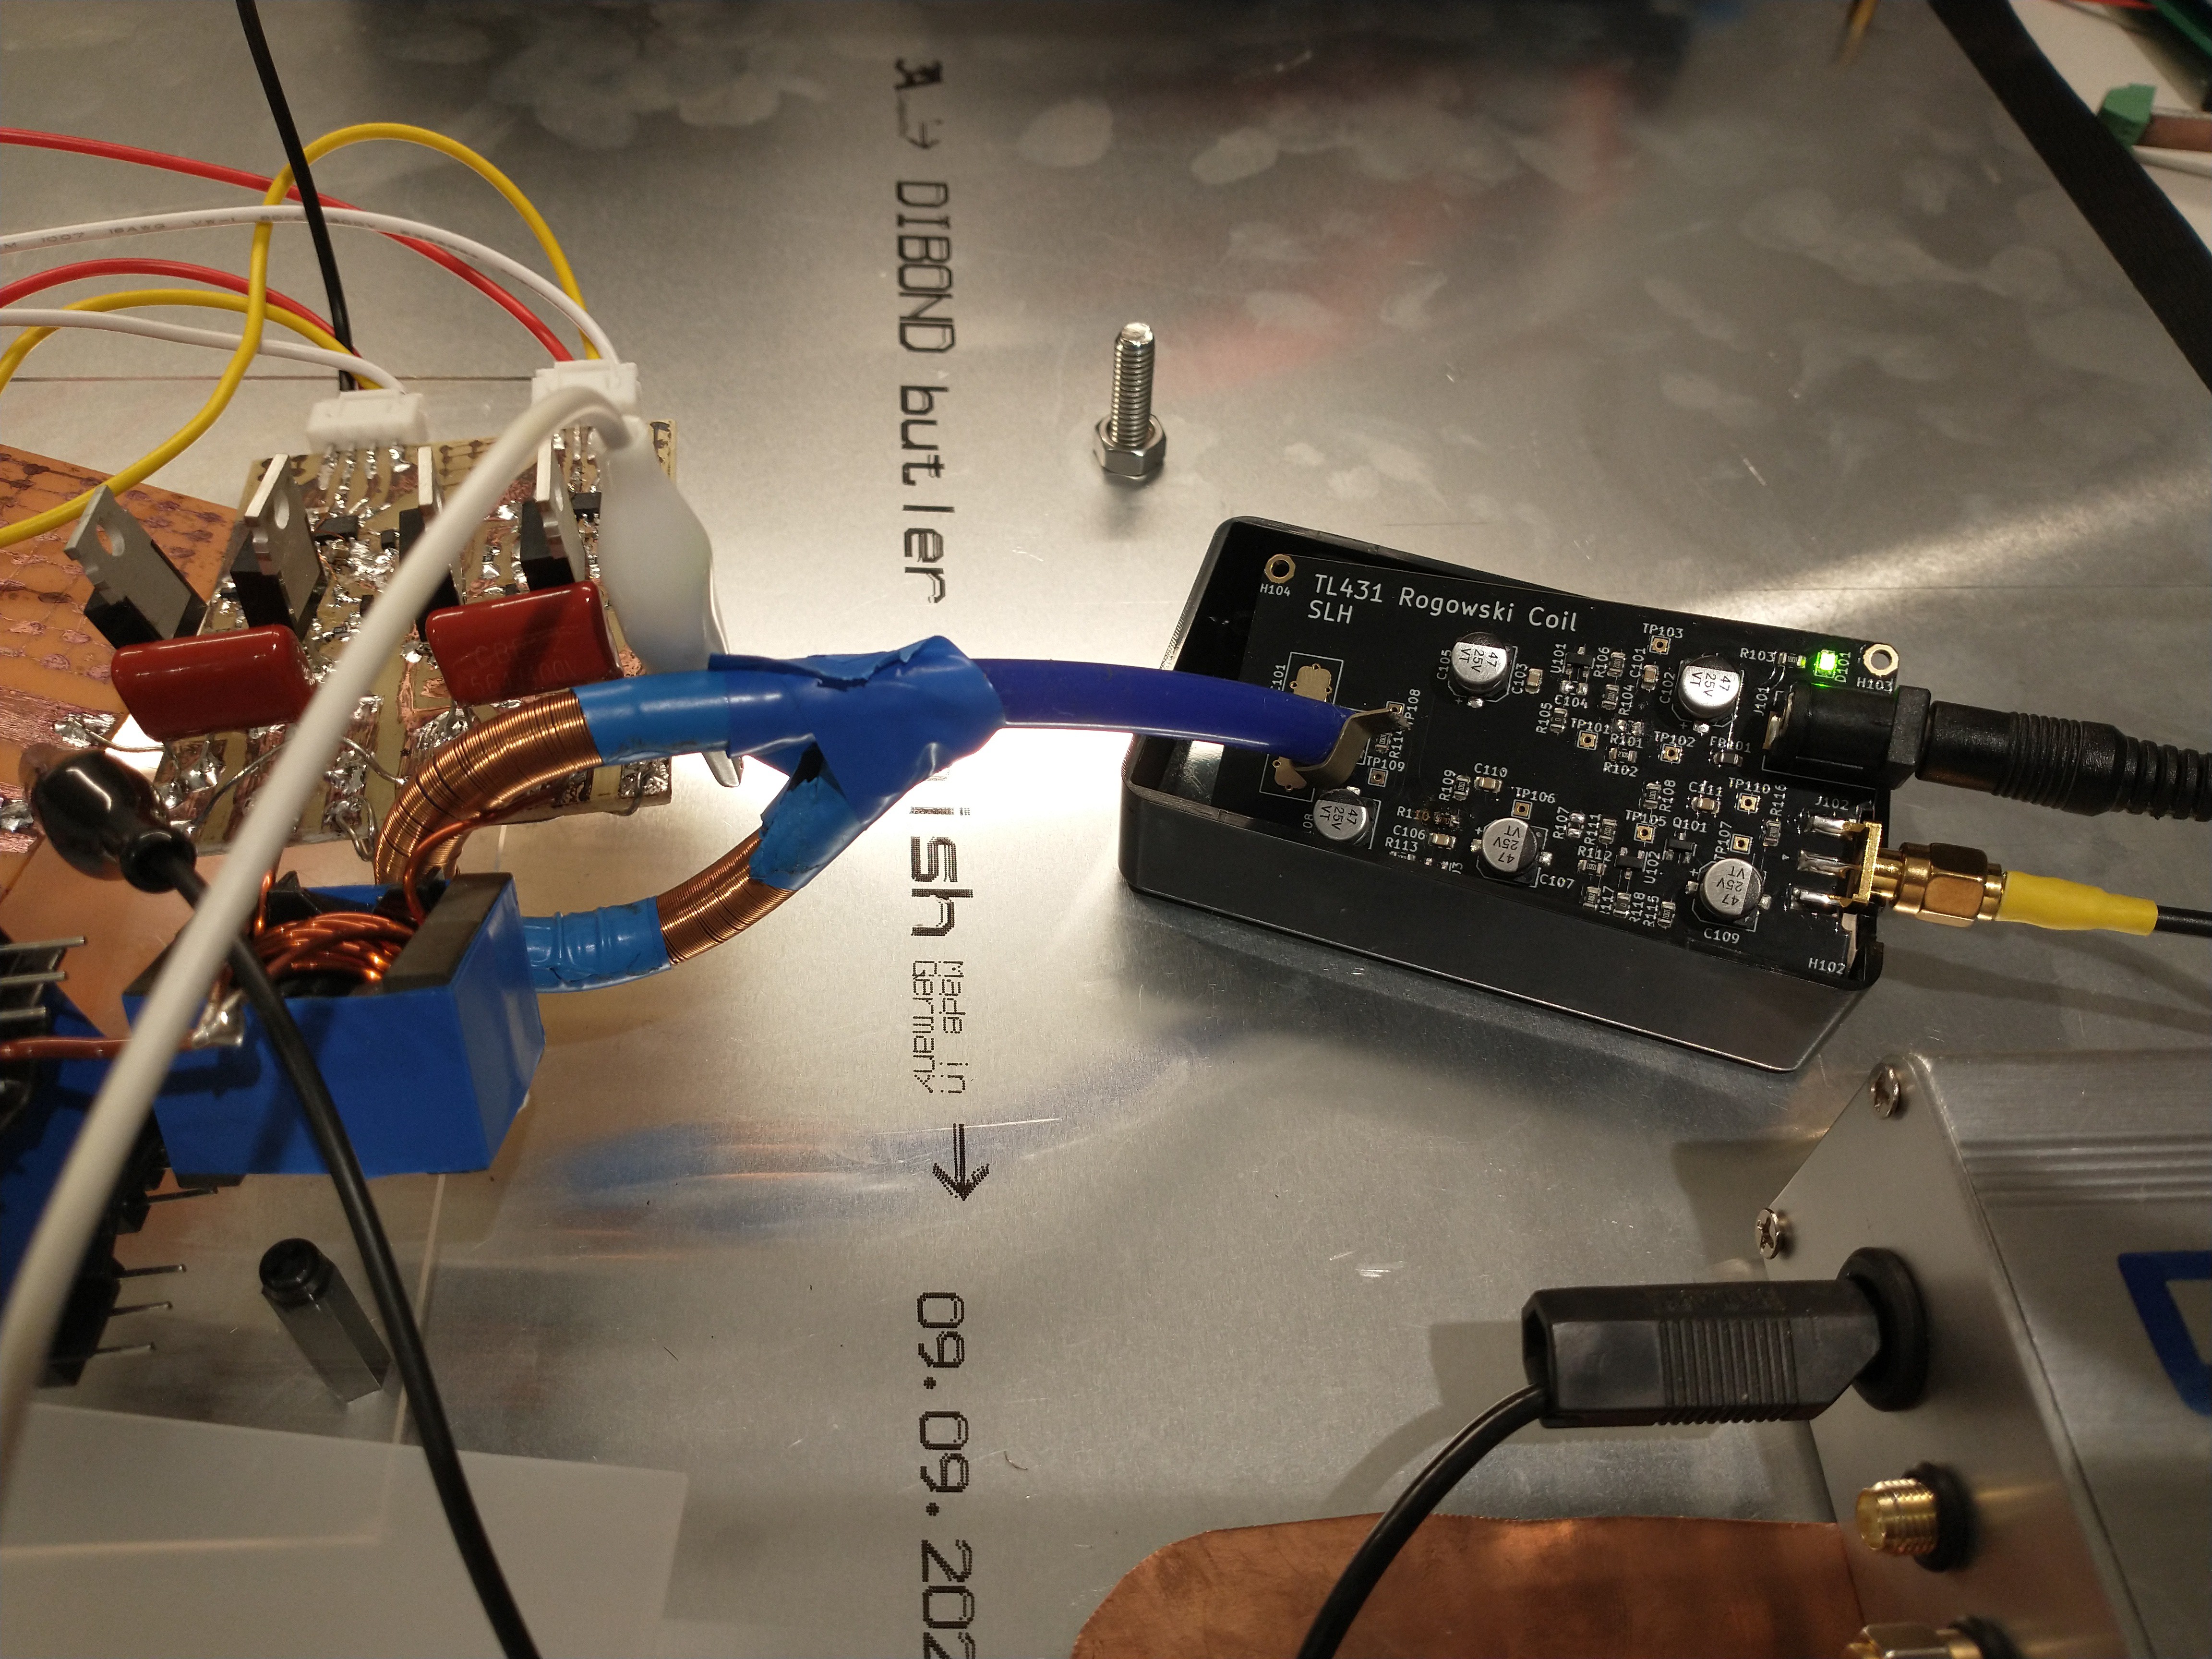
Mods made, here it is resting in the box that I'll be fitting it into later.
![]()
Thank you Liam, Sylvia (who's been emailing me regularly when there's stuff to confirm) and PCBway.com! Really easy process and really nice result. Surprisingly fast as well. It's been less than a month since Liam first contacted me.
Ps, I could be wrong but it looks like the genuine TL431 are faster than the knock offs that I did the original circuit with!
-
Build update
06/12/2023 at 19:19 • 0 commentsGot some build pics to share! PCBway ( www pcbway.com ) wanted to make sure that they'd stuck all the polarised parts on the right way around as standards and silk screens vary.
Good news is they got it spot on! Now to wait for the rest to be populated.
![]()
![]()
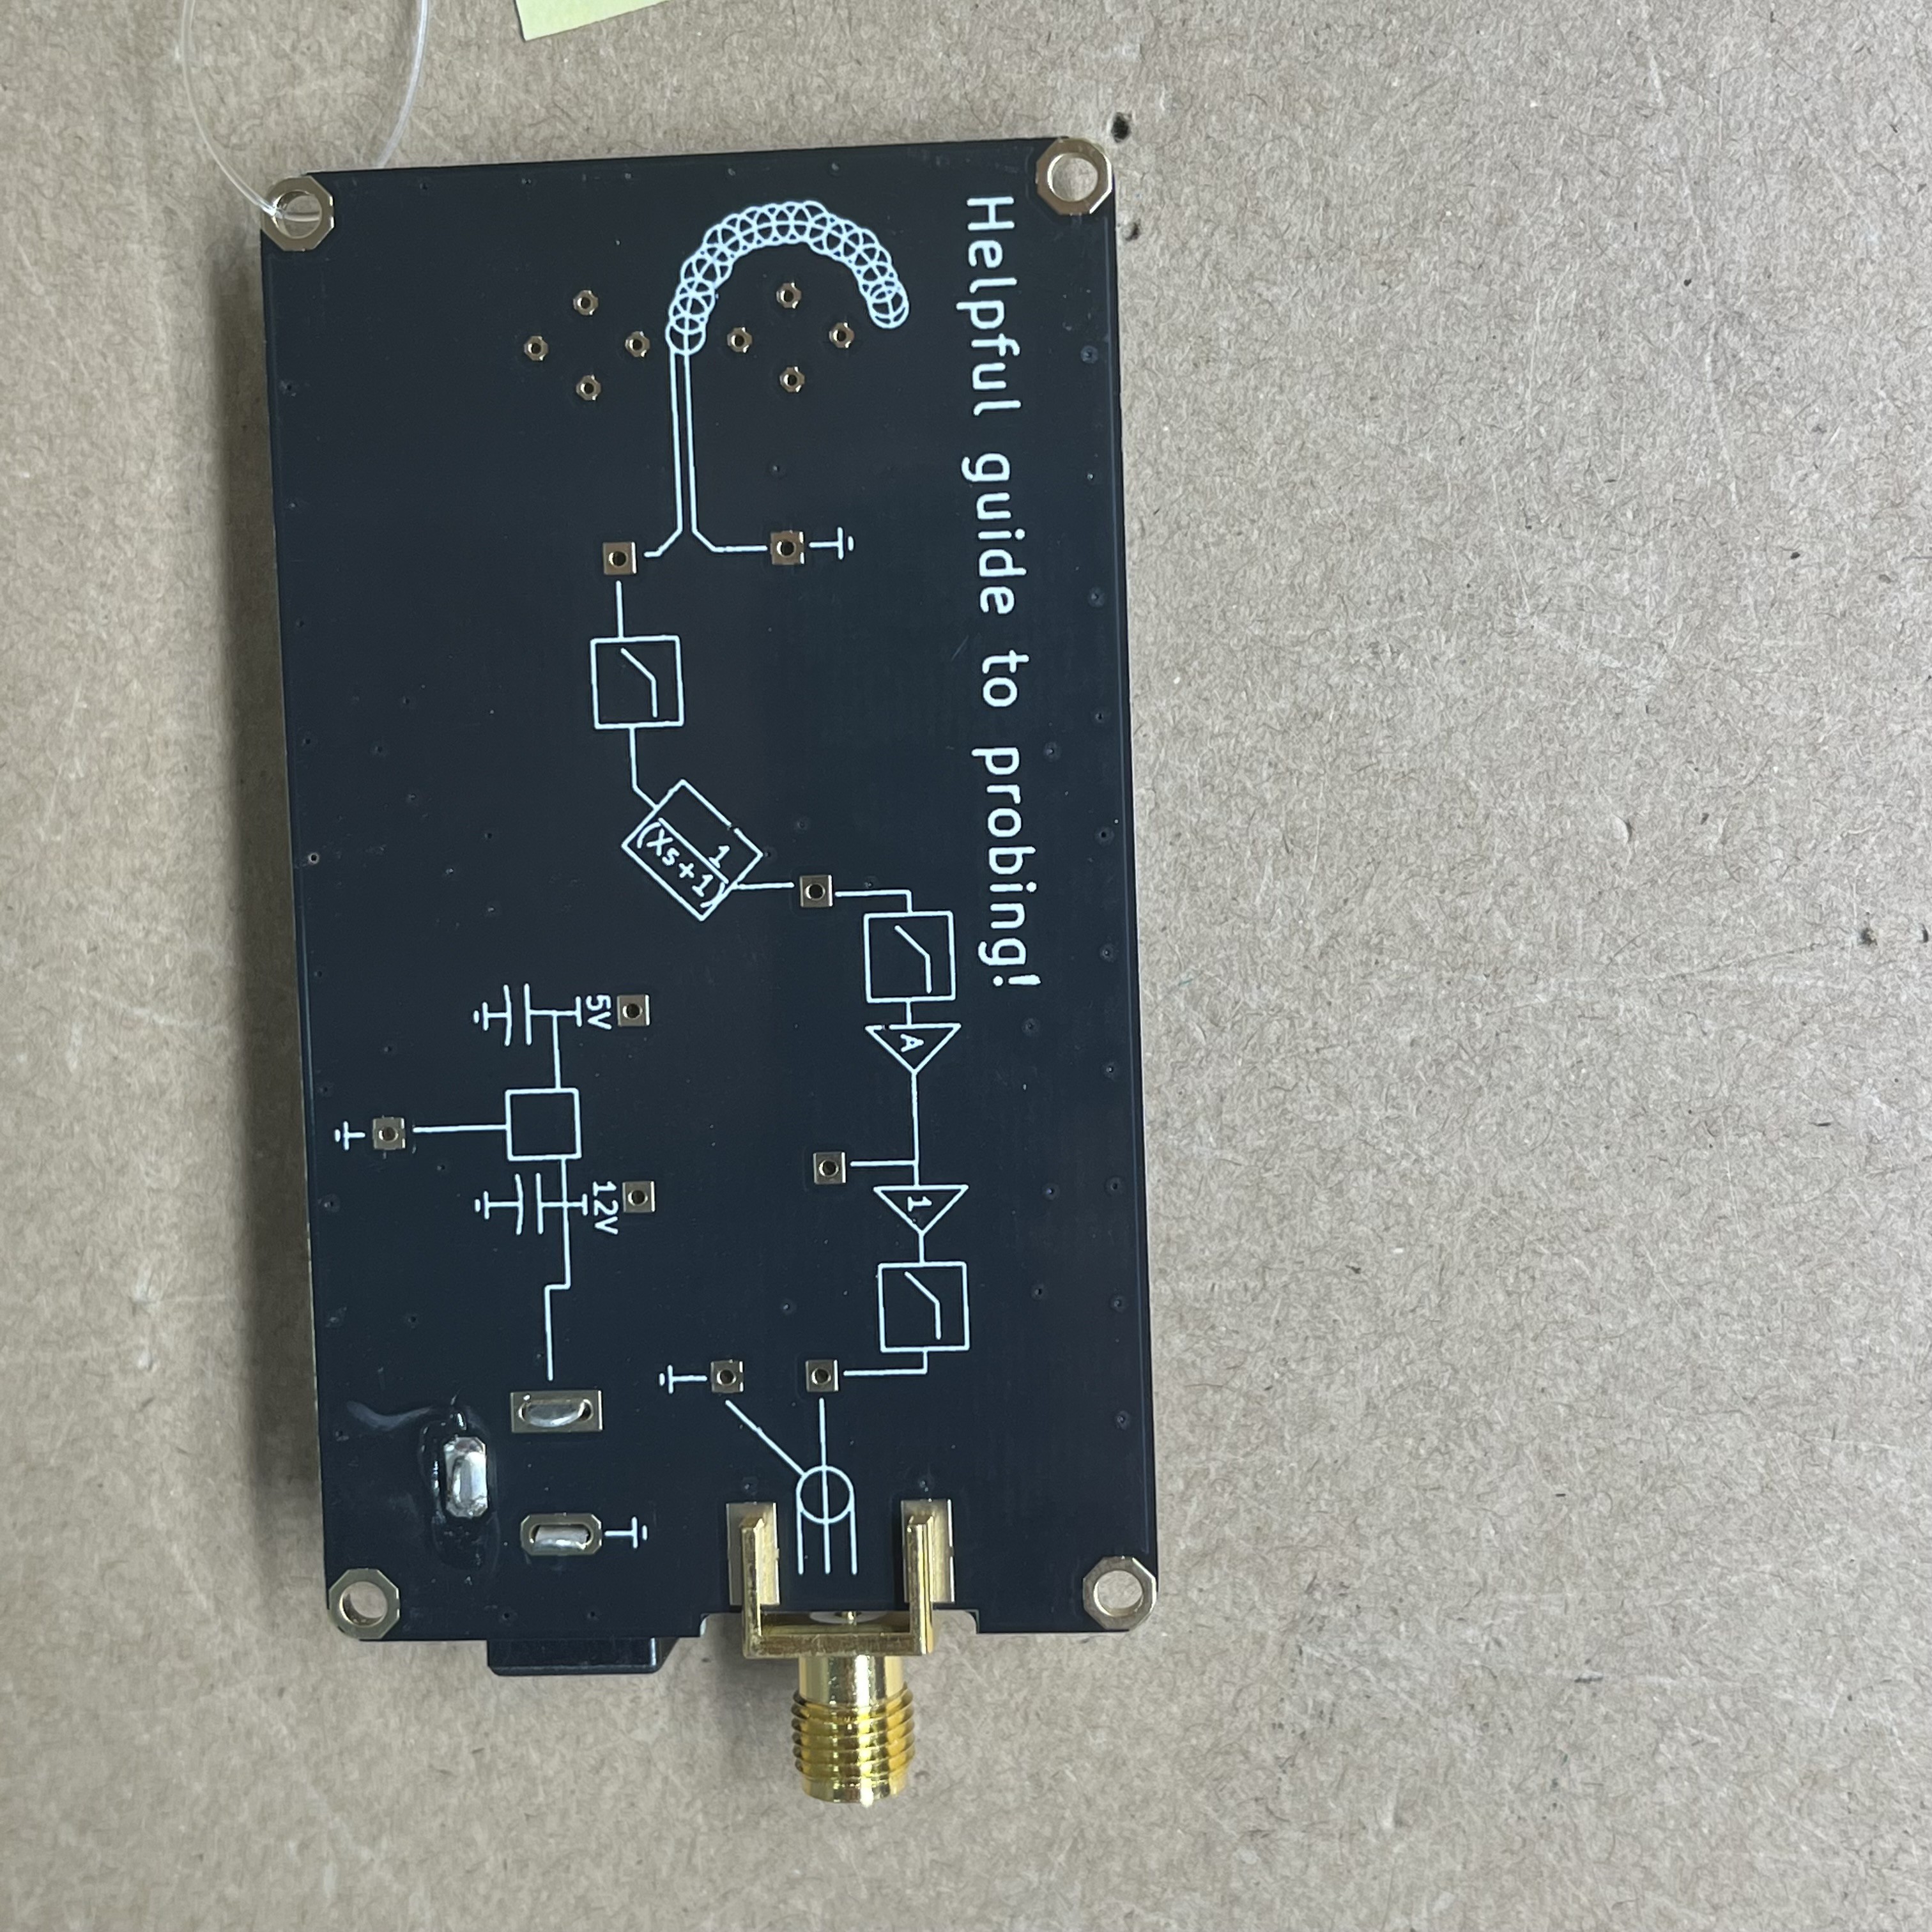
The wife helpfully pointed out that I missed the opportunity to put an alien face next to the helpful guide to probing...
-
Build update
06/03/2023 at 05:37 • 0 commentsSadly the PCBWay PCBs won't be here before the end of the opamp contest. they should be here towards the end of June.
I just got a message from them to confirm some discrepancies between the BOM manufacturer's part number and the description.
A couple were just me being lazy about the description. Eg a 0R resistor is actually 5mR so the description was 0R but the part number says 5mR.
One was a genuine whoopsie on my part. When I put the 470k part number in I appear to have copied and pasted the 10k resistor part number. Oops! Fortunately it's been spotted before build. So thank you PCBWay! As it was my mistake I'll happily fit the right part here if it's a problem.
Lessons for new players - there's a reason for putting the description in the BOM. Even though the part number should be plenty, errors pop up and the description can be useful for spotting them.
-
Professional PCBs
05/20/2023 at 16:04 • 0 commentsLiam from PCBWay ( www.pcbway.com ) kindly offered to sponsor making some proper PCBs so I've designed a proper PCB with Kicad 6.
So far, I'm impressed with the process. There's a plugin for Kicad that uploads the gerbers in one click. The position and BOM takes a bit more work but it's not a big deal.
I've uploaded the schematic in PDF format. I'll upload an iBOM of the PCB and the gerber files as well.Changelog from original:
1) Extra capacitance on regulator
2) Ferrite bead on 12V
3) Test points!
4) AC coupling on output
5) Reduced gain stage to x10 as x20 was severely limiting the bandwidth
6) Physically larger so it hopefully drops into an 85x50mm box, directly onto the mounting holes.
7) Silkscreen!
As the point of this is to be cheap and basic, I ticked the "Allow use of Chinese components" tick box and the only substitution that they made was replacing a Nexperia MMBT3904 with one from Shikues.
-
Testing
05/11/2023 at 21:40 • 0 commentsFirst up, let's have the completed unit with the power supply short circuit test.
![]()
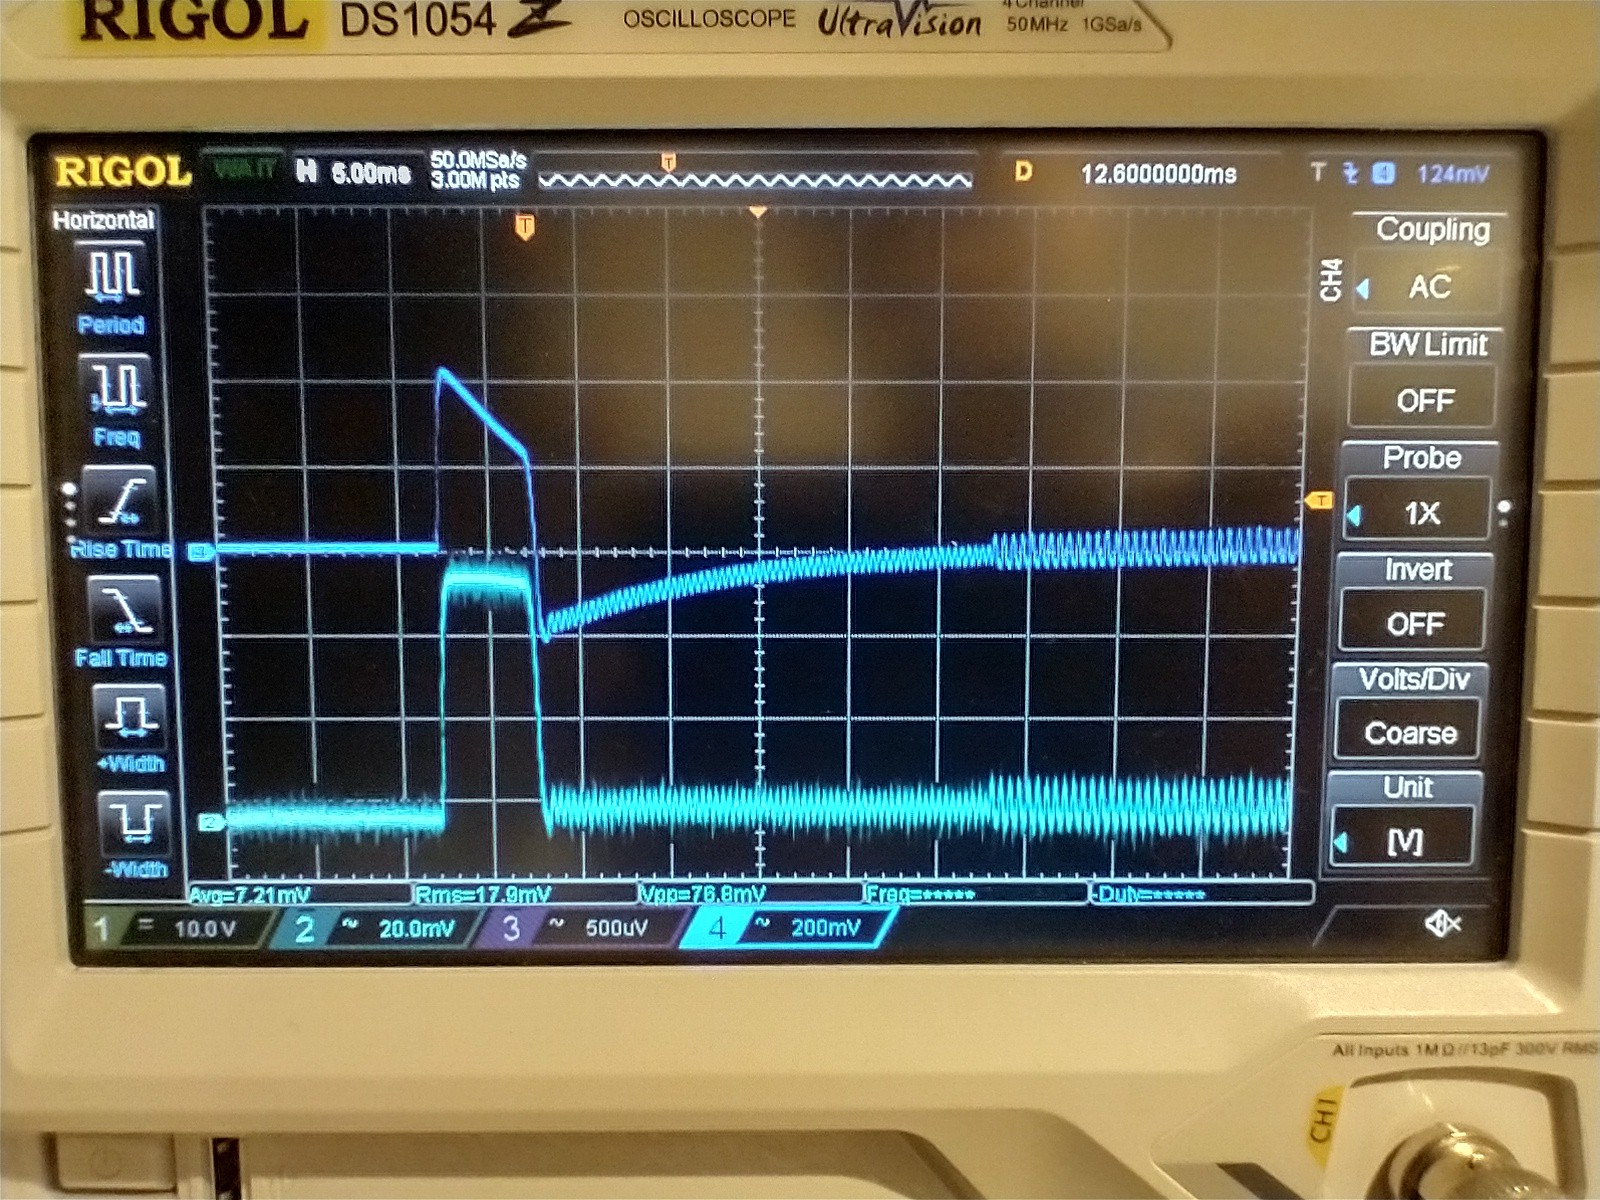
Blue channel 4 is the Rogowski coil, cyan channel 2 is the LEM HAIS 150-P hall effect sensor which is 4.2mV/A. We can see that the current is a short pulse of around 5ms. The Rogowski coil is showing the result of a high pass filter of around 30Hz. What's really satisfying is that it tracks the higher frequency oscillations very well. They're at a few kHz.
![]()
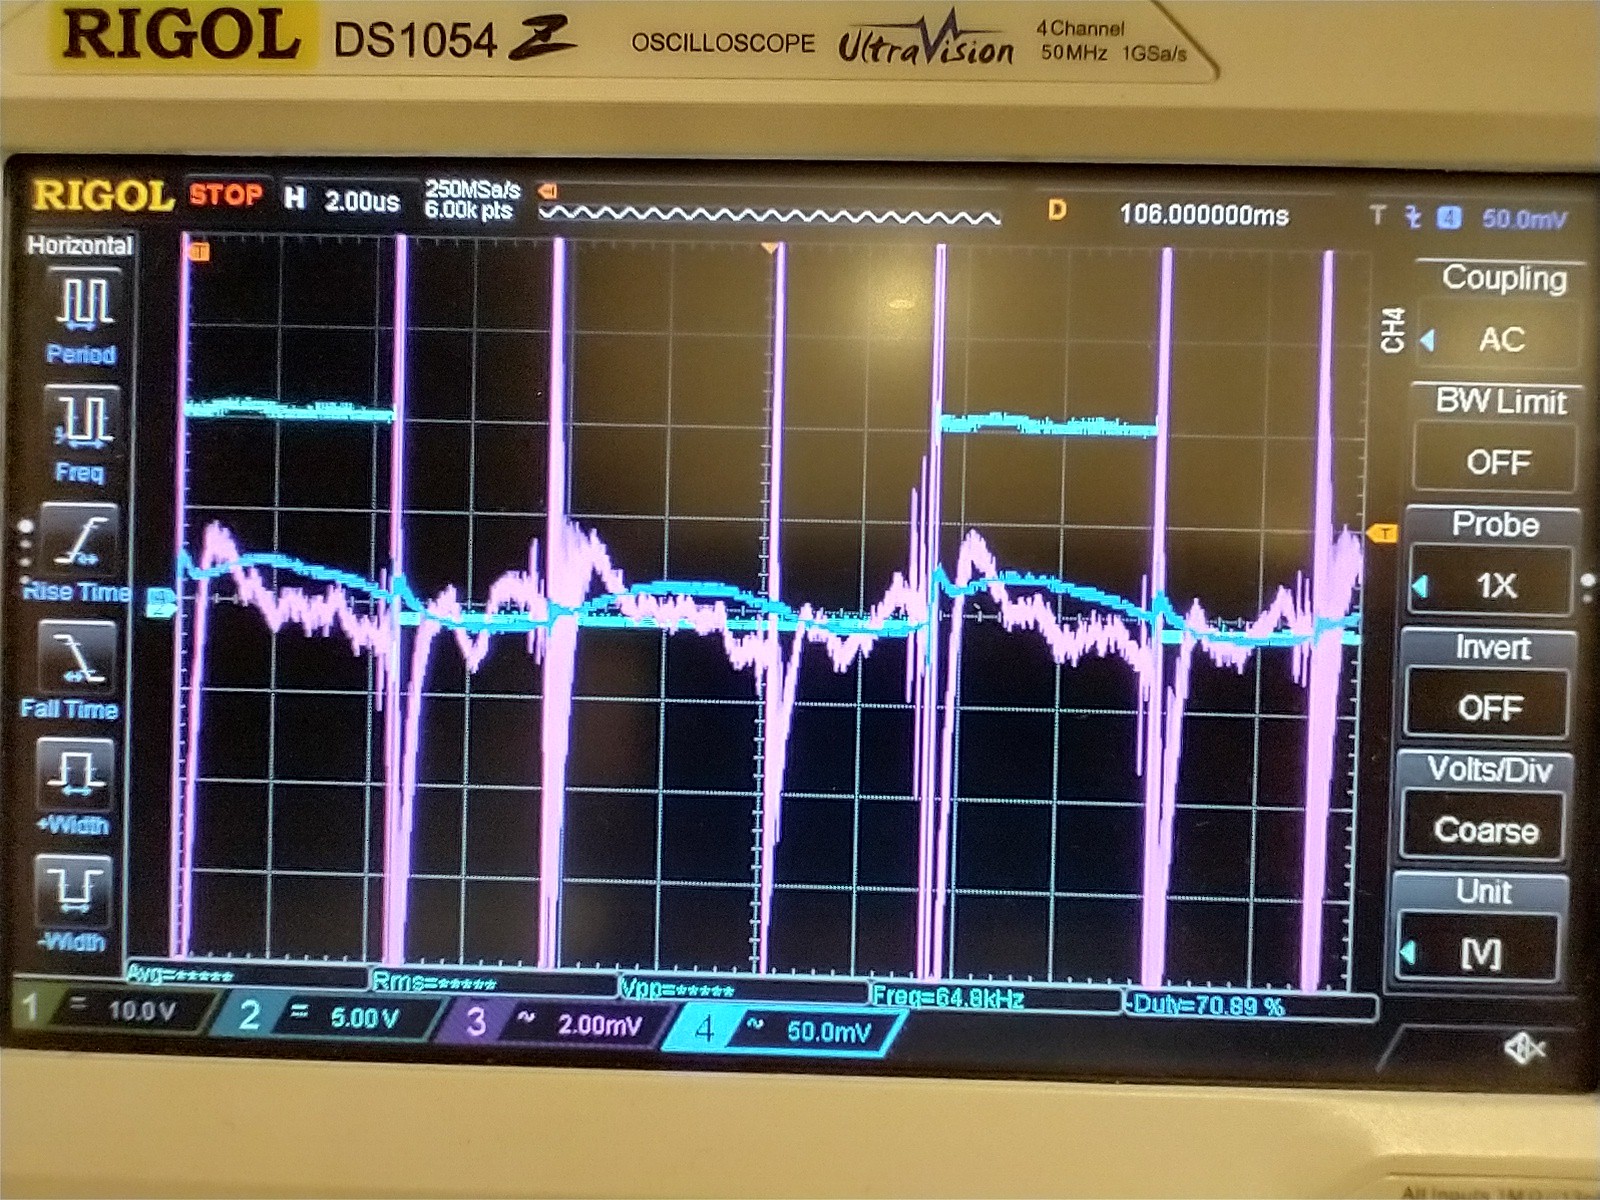
This one isn't so pretty. I've got a messy bodged together multilevel dcdc converter that's got a couple of amps peak to peak of ripple in the inductor at 100kHz.
The square wave on channel 2 is a half bridge output, magenta (channel 3) is the output of the integrator and blue (channel 4) is the output of the amplifier. I suspect a lot of the noise on the integrator is poor probing but not all of it. The amplifier appears to have cleared it up nicely. Clearly we're beyond the -3dB point as it's mostly sinesoidal instead of triangular. A datasheet for the TL431 suggested a bit over 1MHz unit gain bandwidth. This one is running at 20x so we'd expect around 50kHz for the low pass cut off frequency.
What the second plot is showing is that the TL431 makes a great integrator but isn't a great opamp for amplification. If I wanted this for dcdc work then I'd need at least 1MHz bandwidth (probably more like 10MHz) so I should probably use a proper opamp on the next one.
-
The completed unit
05/10/2023 at 18:38 • 0 commentsAs the prototype worked better than expected, clearly I needed to make something more robust and useful.
Ideally mechanically solid, in a case, powered by a 12V wall wart, coax connection to scope and generally a lot nicer.
450A/V is going to be useful for someone, I quite often deal with currents of that magnitude at work however I don't at home and I suspect that few do. Clearly we need some amplification on the output to get it to be useful. X20 would get us to around 22A/V which would be a lot more useful for most people.
I had a useful little box from an old lamp, lots of cheap TL431 ICs of dubious origin (I have no idea who made them but I suspect it's not anyone that i've heard of before, my coil from the prototype amd connectors for 12V and coax. Conveniently I can use a TL431 as a regulator (how dull) to get a stable 5V to run the circuit. Because of how the TL431 works in these circuits I probably didn't need to add the regulator. Oh well, too late now.
Looking through my box of miscellaneous opamps, one thing became clear. I didn't have any suitable opamps for the amplifier. Either too slow, far too fast or too big (box is small). Solution: use a TL431! They've got reasonable bandwidth, I have loads and the three pin package is so easy to use.
I added a common collector amplifier to boost the current/isolate the tl431 circuit from the coax and then called it a day. Sadly I ran out of space to fit the final AC coupling capacitor so it has to be ac coupled on the scope.
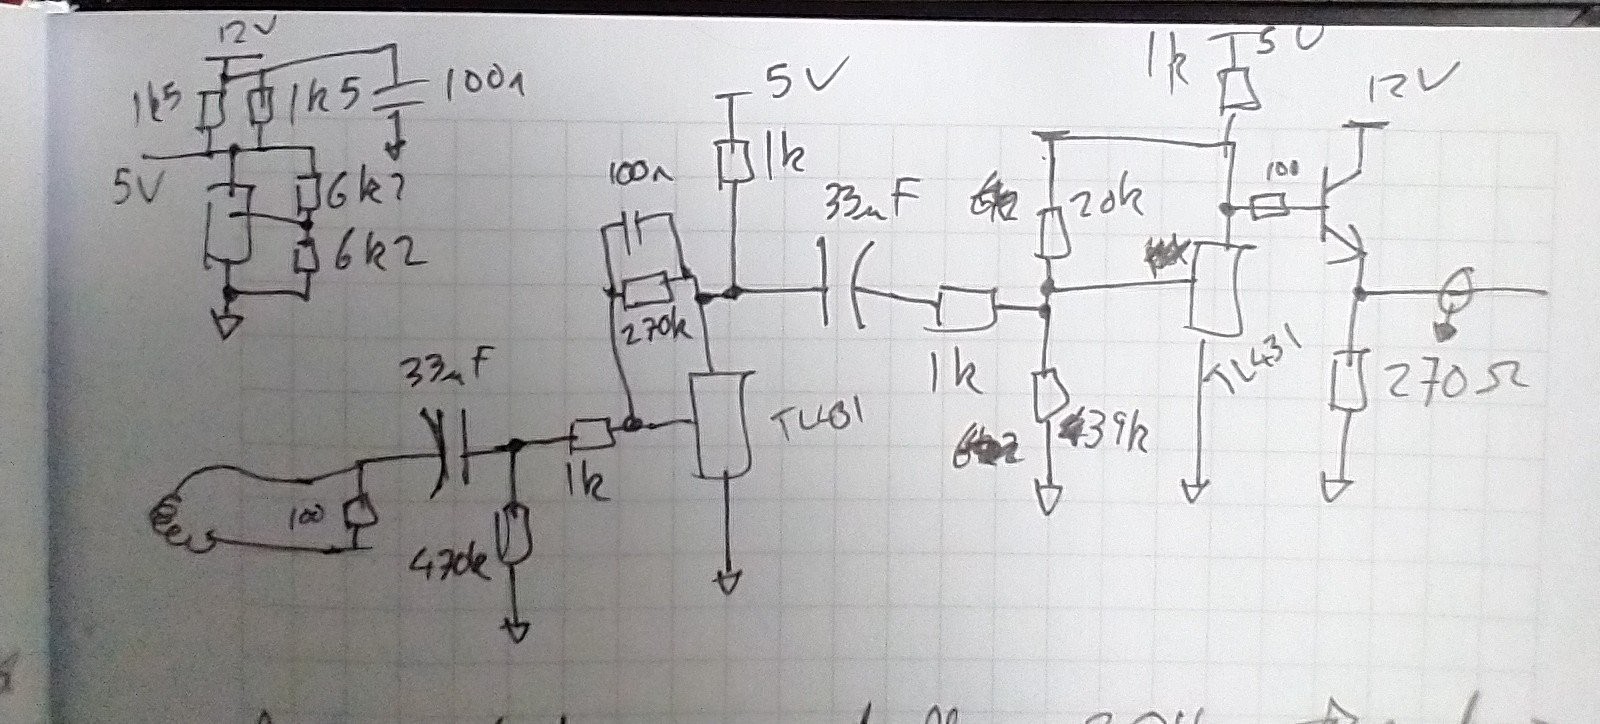
Circuit:
![]()
The regulator is in the top left, basic shunt regulator.
The interesting bit is below, starting with the coil on the left and ending at coax on the right.
After the coil is the AC coupled TL431 integrator. The 470k is there for setting the DC bias point which is roughly 3.8V. The 1k and 270k set the maximum AC gain (270x) and the 100n and 270k set the integrator minimum frequency. The TL431 needs at least 1mA so the 1k sets the quiecent current at just over 1mA.
Again it's AC coupled followed by the 20x gain amplifier. Again the output bias point is around 3.8V.
Finally we have the emitter follower that provides current amplification for driving 50R coax. Since this was never going to be particularly high frequency I didn't bother with 50R matching.
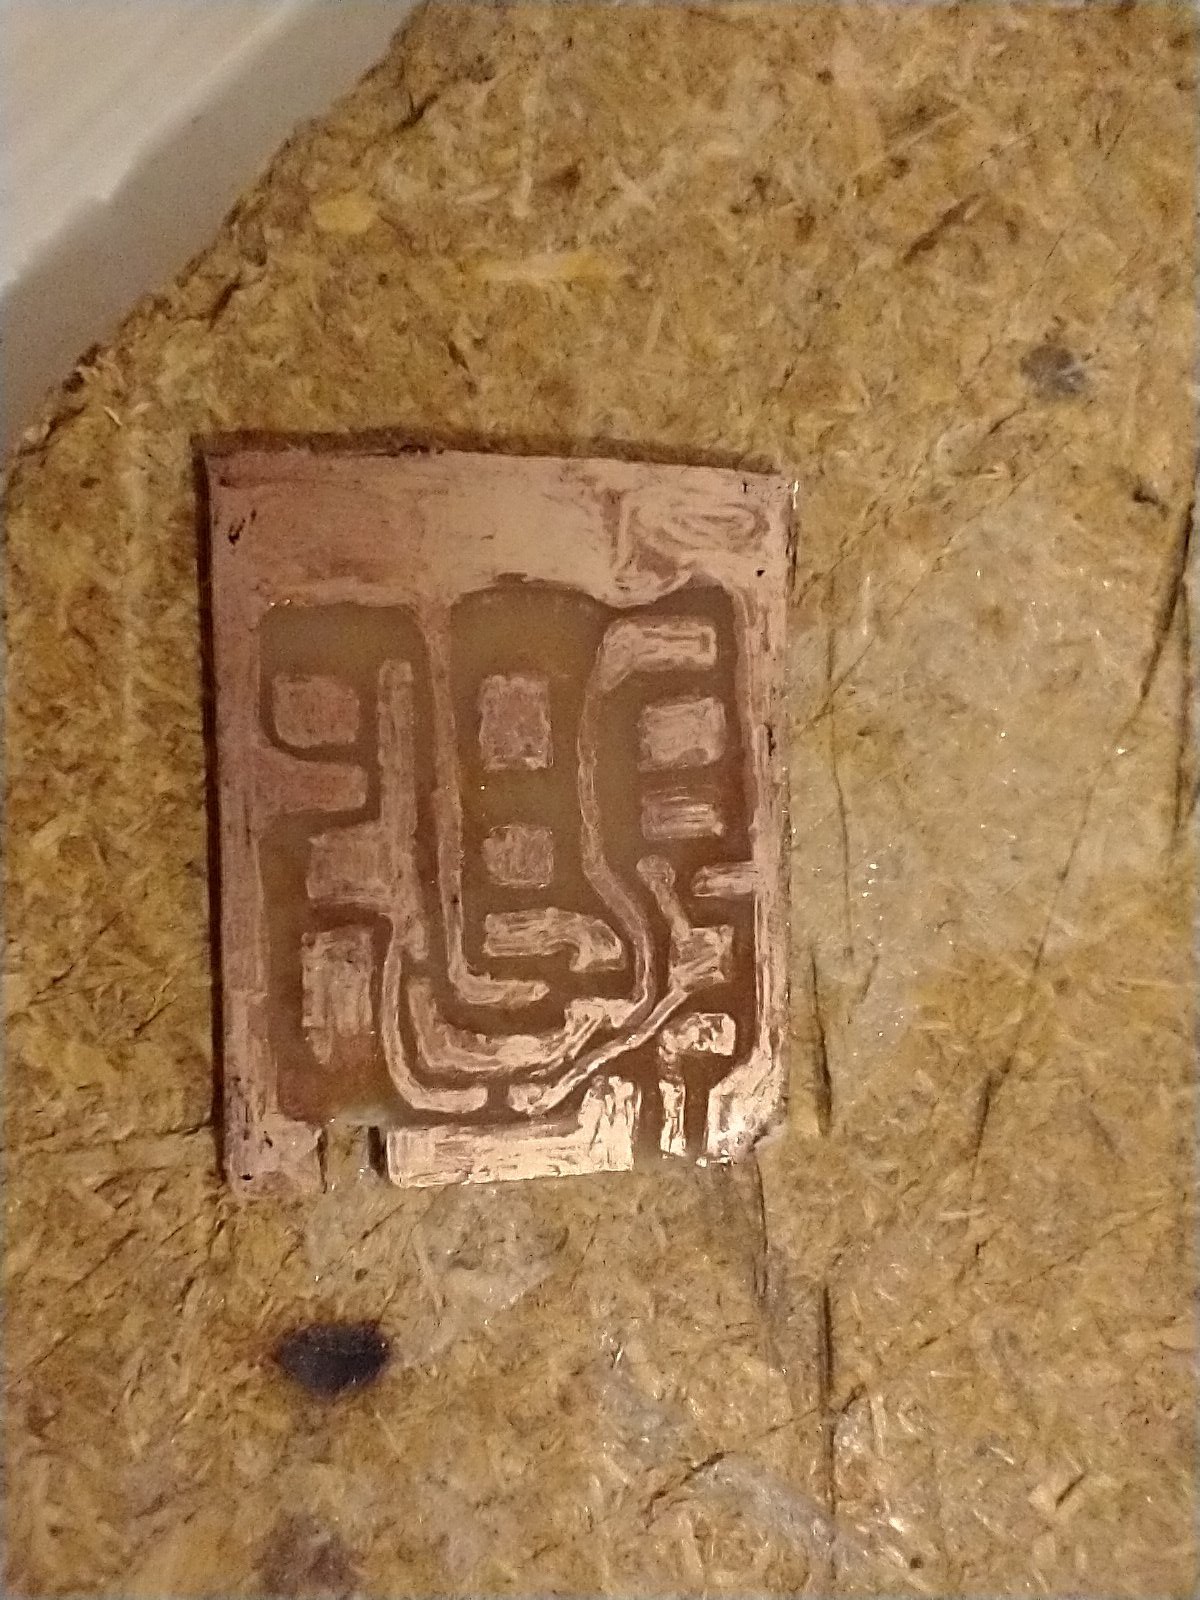
PCB
![]()
Hand drawn with a Sharpie, etched with ferric chloride.
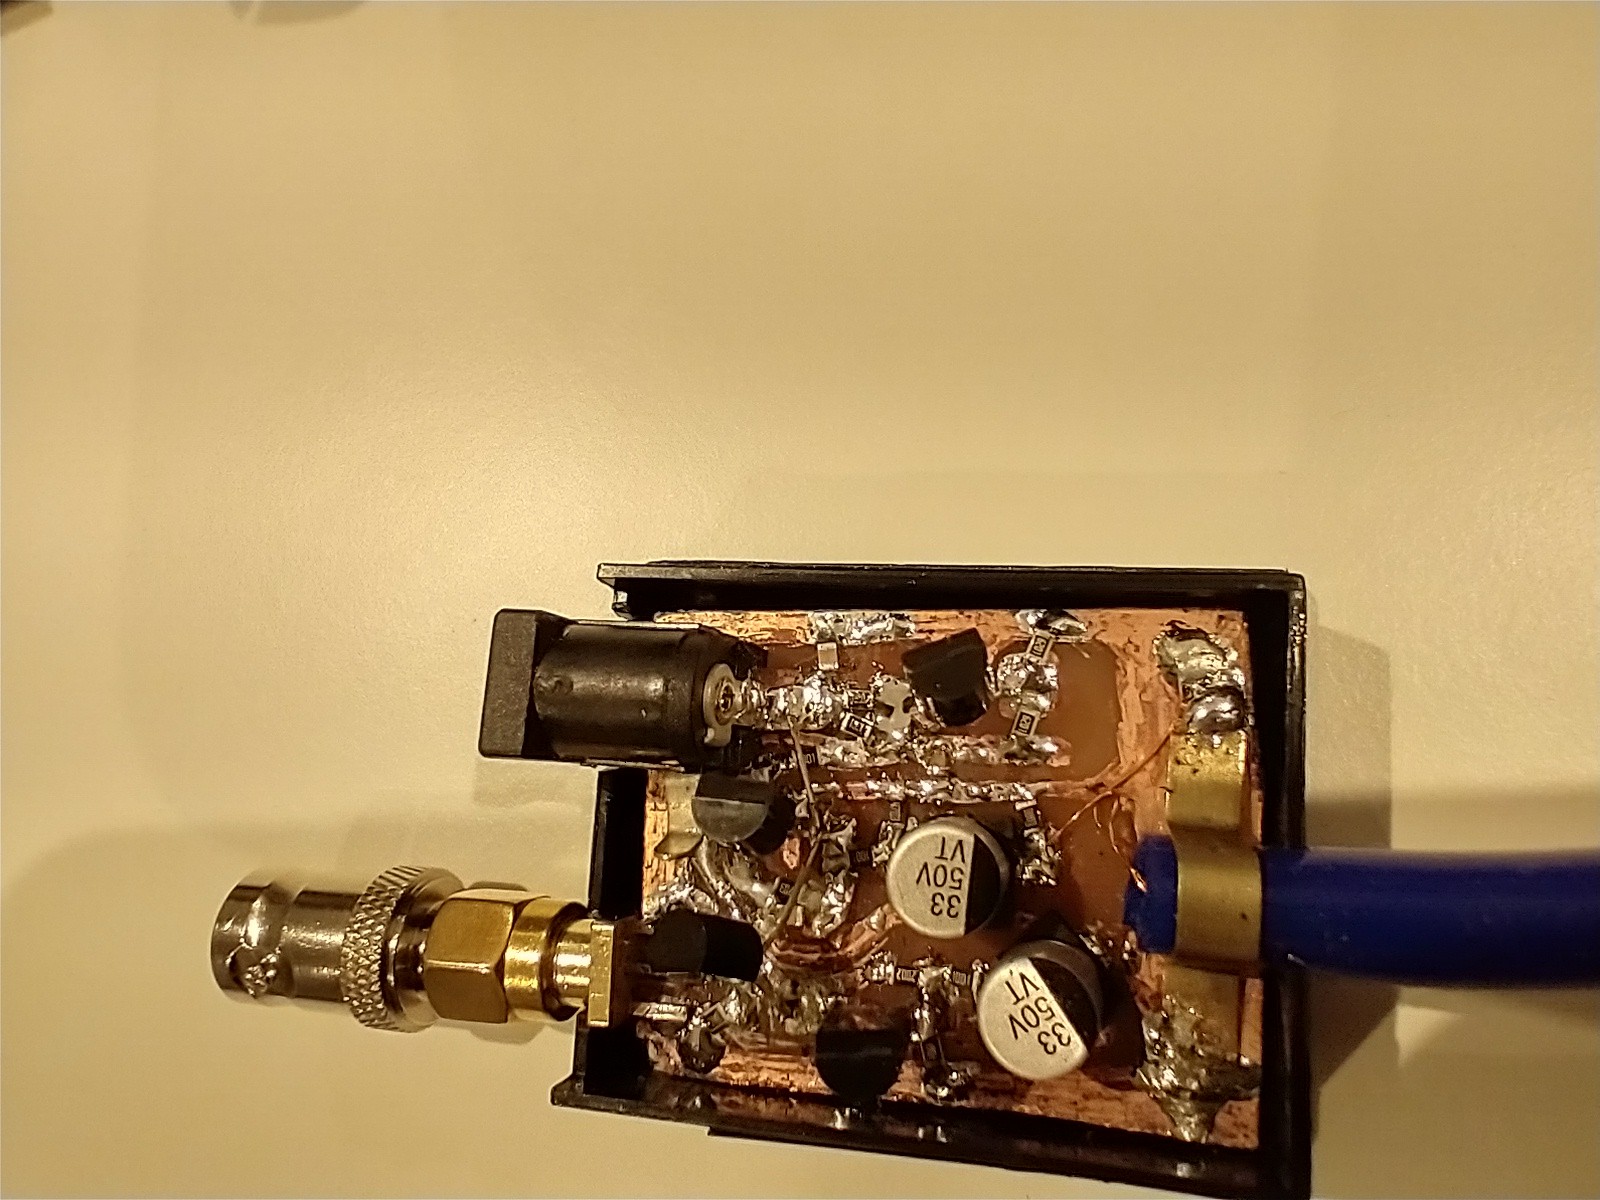
Populated and assembled. Only one bodge as I didn't initially plan to fit the emitter follower.
![]()
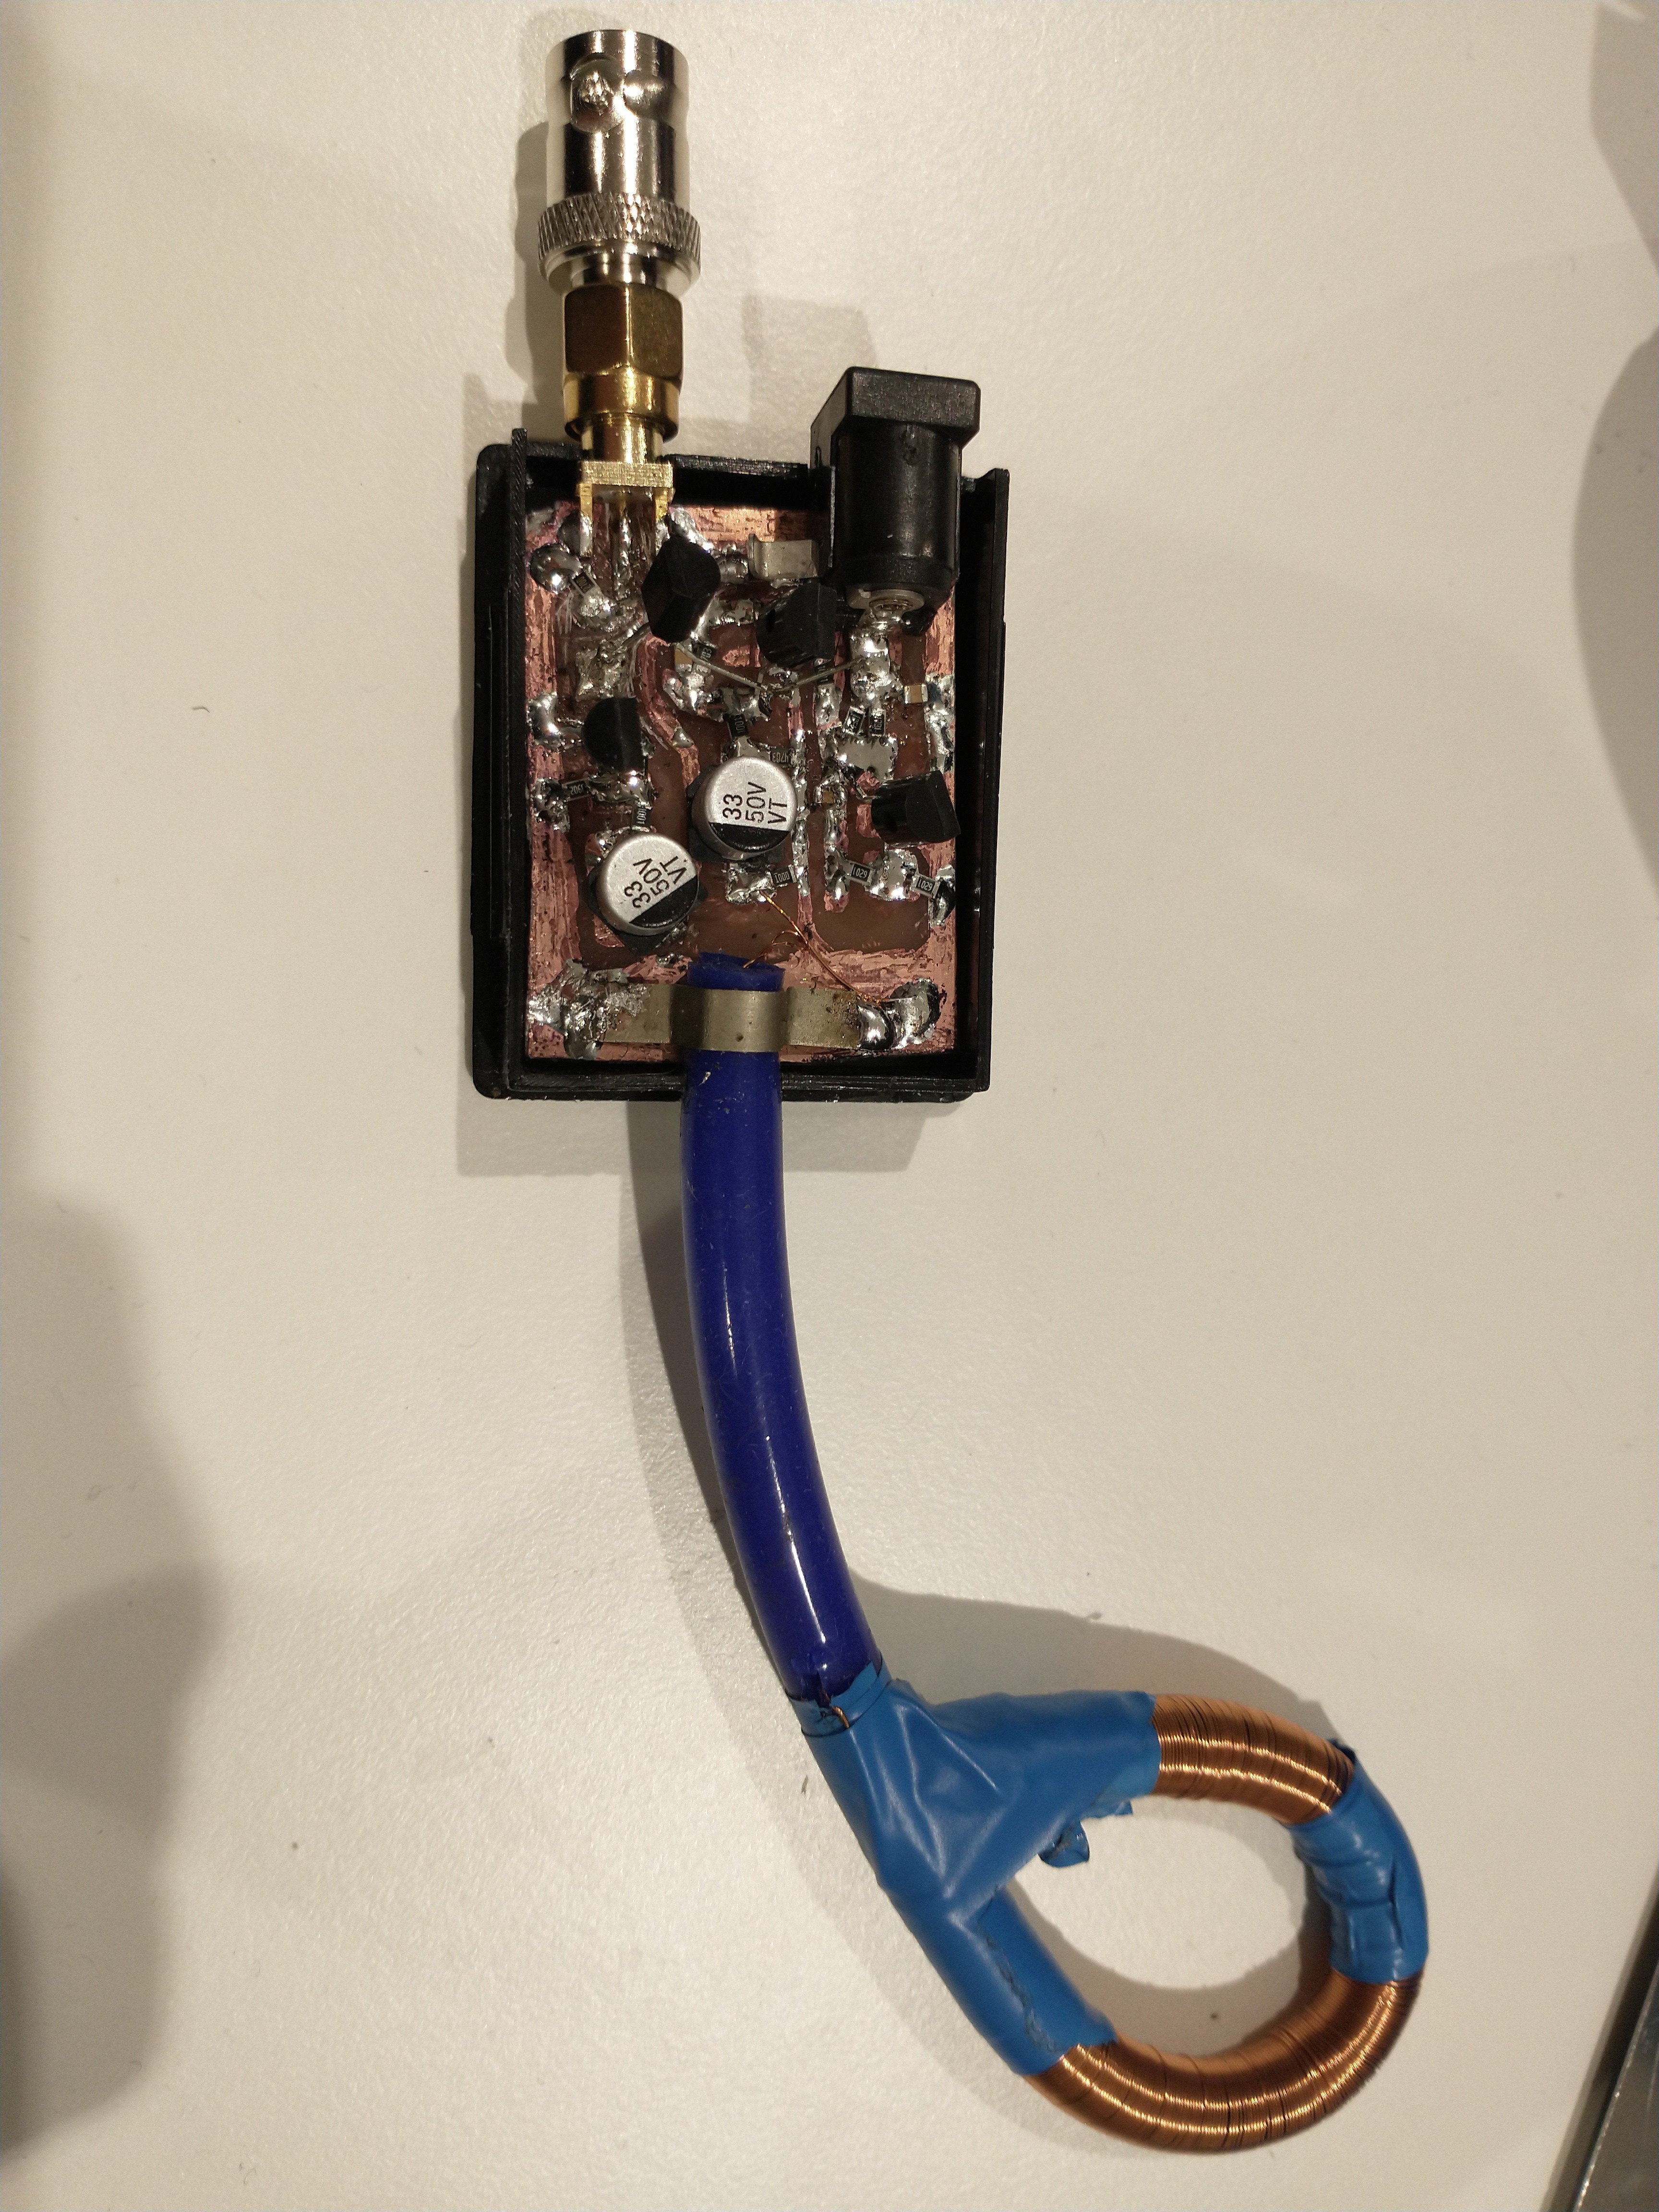
Showing the coil. It's held closed with electrical tape.
![]()
-
The prototype
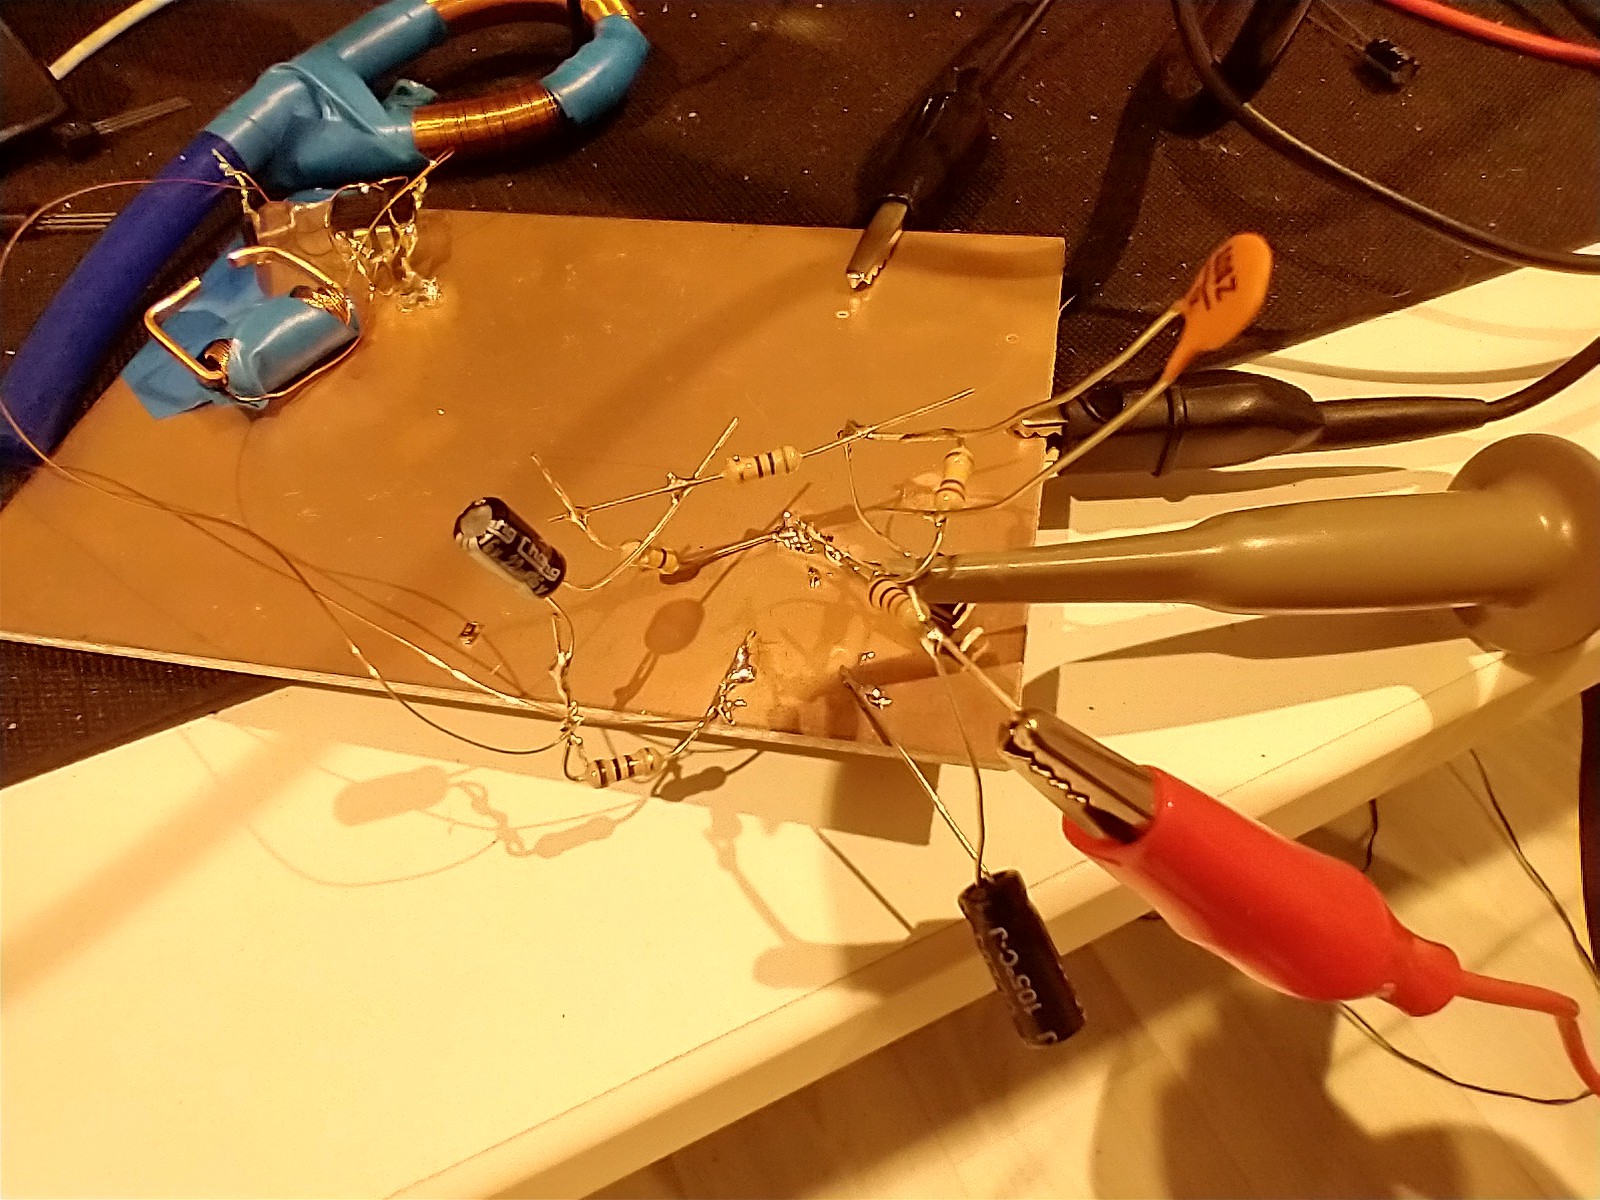
05/10/2023 at 11:31 • 0 commentsI started with a crude prototype bodged together on a piece of copper clad FR4. It could probably have been done easily enough on a bread board but I've got used to jumping straight to solder.
Nothing fancy, a 100mm coil of 0.22mm diameter copper wound on 6mm silicone fuel hose, a TL431 and some passives.
It's a bit of a mess but it works! The dip package in the corner near the coil is a previous project.
![]()
Calculations suggested a 1mV level for a few hundred amps. Add a bit of amplification afterwards and we'll have a useful probe.
First prototype didn't have any amplification so we'll need a decent current to get a useful signal.
Next problem... Finding a high current pulsed or repetitive source...
Maplins to the rescue! I've got a terrible cheap digital power supply from Maplins that has slow short circuit protection and a decent output capacitance. If you short circuit the output and turn it on it gives a reliable, repeatable 5-15ms high current pulse depending on the output range.
A LEM hall effect sensor confirmed around 12A peak.
Result around 20mV for 12A! Roughly 450A/V. Strong signal, clearly something wrong with the maths but a good start and something to build on.
TL431 rogowski coil current sensor
Rogowski coil current sensor using cheap shunt regulators as opamps.
