Zapp
Zapp-
We're rolling
04/15/2017 at 03:57 • 0 commentsIt's been awhile since our last post, if you've been following us on Twitter you'll know that this week our Kickstarter campaign finished (thank you everyone!) and we placed our final order for hardware.
We've done 4 rounds of prototyping up to this point under the code name "MAN BEAR PIG". The MBP4 was our final prototype and validated the design. To keep the turnaround time minimal we had a Chinese company produce the PCBs with next day shipping. We reflowed one PCB and everything worked so it's go time.
A last second issue popped up while placing the final order. Our switching buck regulators were suddenly out of stock. There are plenty of fixed buck regulators out there that meet our specs, but none in at TSOT-25 footprint with matching pin outs. For some reason the pins are non-standard on our regulator. We were either stuck with a 16 week lead time (if it's not discontinued) or a re-design of the power supply. To avoid a MBP5, we bought out all stock from Digikey and Mouser and will consign those to the fab. As of this evening we have tracking information for both packages, catastrophe avoided!
-
CHIP8 & SCHIP Game Emulation
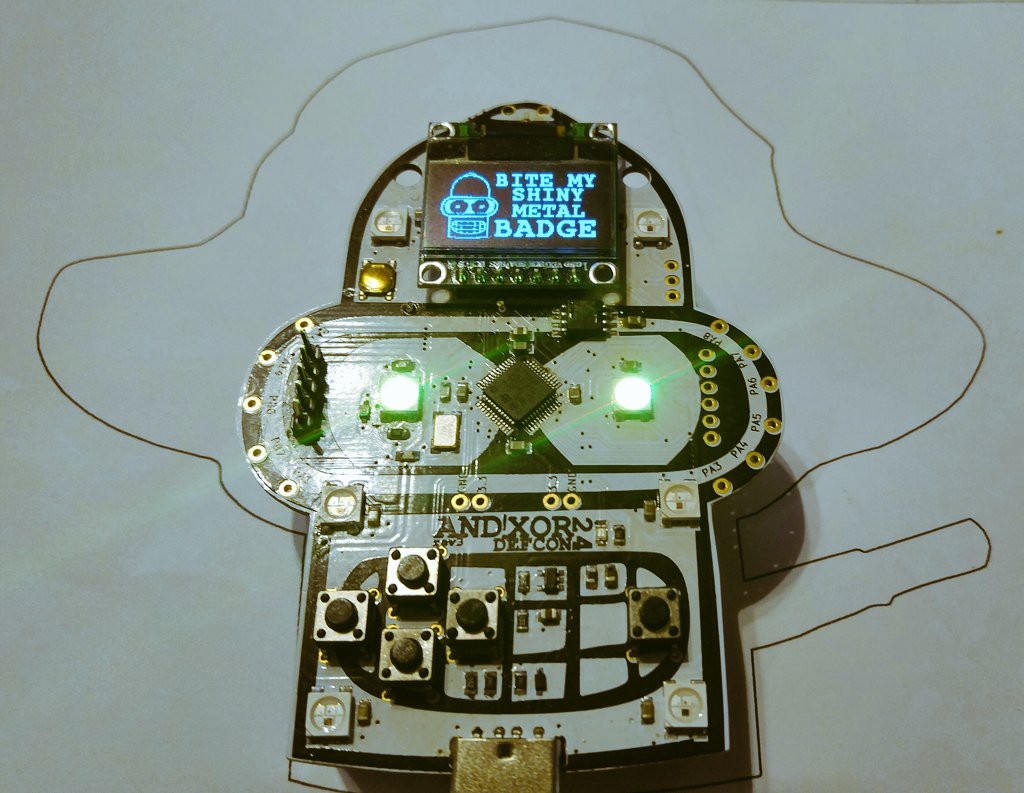
02/12/2017 at 04:25 • 1 comment![]()
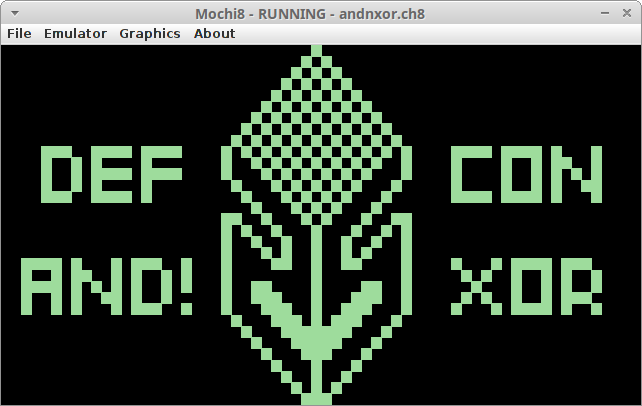
So reveal Numero Uno just got released for the badge: Game System Emulation. There was good thought behind this too. As much as we love making games, its a different kind of challenge. That's logic and procedural coding, which is fun. But hacking hardware, learning, sticking your hand right up there and grabbing it by the OPCODEs and making some obsolete processor your bitch? Yeah, that's what its all about.
![]()
But this served a variety of purposes.
One: Should we spend hours on hours coding, debugging, debugging, debugging, debugging, compiling, running, debugging 5-6 games? Or put that effort into creating emulators for systems which have a strong community backing and rich retro history? The latter obviously. Then you get to play all the awesome homebrew public domain games out there.
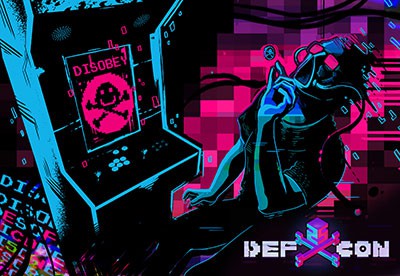
Another important reason, the theme of DEFCON 25. Its retro and throwback to early hacking years. Don't believe me? What better games to include than 8-bit blocky, time sensitive, thumb smashing ROMs that give us so many pleasant member berries. Check out the DC25 retro awesome artwork thus far to put you in the mood:
![]()
And most importantly, the reason we chose the emulator we did, was for you hackers out there. Stackoverflow did a study in February about what coding languages are most looked up on weekdays and weekends. During the week, its the bleh... Sharepoint, VBA, stuff. But on the weekend...Assembly! Woot! So you DO love hardware.
This is where it gets good. No, GREAT. We want to teach you how to fish. Not give you a fish, but point you to the pond, give you some pointers, and if you feel up to it and want to code a game in CHIP8 or SCHIP, we will GLADLY throw it on the badge (I trailed off on the fishing reference, but you get it) There's no point in us re-writing CHIP8 tutorials when there are hundreds of them out there, but we will lead you in the right direction and provide guidance so we can easily integrate it . The best part, there are tons of emulators that run on your Linux, PC, Mac, Android, iOS already. So you can write and test an application without even having the badge yet.
Step 0 - History Lesson
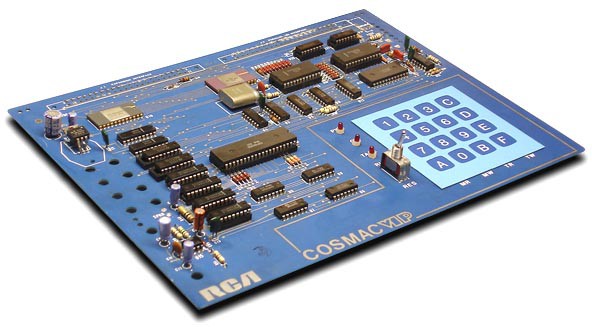
Before you go making a game for a system, learn about it. Most of the documented knowledge on the web about CHIP8 and SCHIP stems from David Winter. It has the history, technical, screen shots, etc. You owe David Winter this if you wish to proceed. He has a beautiful website, I wouldn't change anything.
![]()
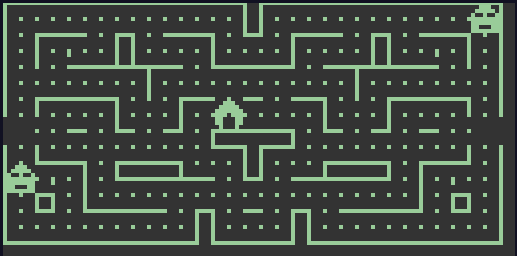
STEP 1 - Play Some Games
Get a feel for the system. Have some 8-bit fun. Look at whats already out there and think about how or what you could add to the community. And you are in for a surprise because the pad layout was a 16 key Hex set.
http://mir3z.github.io/chip8-emu/
![]()
STEP 2 - Learn the OPCODES & Technical Specifications
Dont get scared now, this is where it gets fun. There's only 35 OPCODEs!
http://chip8.sourceforge.net/chip8-1.1.pdf
http://devernay.free.fr/hacks/chip8/C8TECH10.HTM
http://mattmik.com/files/chip8/mastering/chip8.html
(especially pay attention to Matthew Mikolay's details on the PROPER use of 8XYN OPCODES, most people do SHR and SHL wrong. In the vein of hacker jeopardy - DONT F*CK IT UP)
STEP 3 - Get The CHIPPER Assembler & Some Source to Practice
Back to David Winter's page, at the bottom is a download link with the games, assembler, and documentation. Don't fret, there is an .exe and .c file in the CHIPPER directory.. Throw away the .exe, all the best hacking is done under linux anyway.
Try mwales GitHub site he has some excellent homebrew games and ASM files
Once you have a test ASM file, the syntax is pretty easy but first you need to compile CHIPPER.
## Compiling
gcc chipper.c -o chipper
Then grab an assembly ASM file and execute with the following pattern:
## Assembling ROM
./chipper output_file.rom input_assembly_file.asm
Grab your favorite CHIP8 or SCHIP emulator and play that ROM!!!
Also if you just want to try messing around in a browser based environment, try this:
http://adrianton3.github.io/chip8/src/assembler/assembler.html
Main Project: https://github.com/adrianton3/chip8
So at this point, you should be frothing at the mouth to fire up your favorite text editor and start cranking out some assembly :) But first, you need to know the intricacies of our badge.
We also just found a dude who rolled an Android Based CHIP8 IDE with his own pseudo-BASIC language. This is different than the normal assembly that folks use. A lot of it has been abstracted with BASIC style coding, but there is still some assembly-ish register pushing. Take with a grain of salt, because the fact that its a higher level language means you lose efficiency in coding. We haven't mentioned yet, that a CHIP8 ROM is limited to 4096 bytes!!! So if you plan on making an intricate game, stick with assembly. But it doesnt hurt to try out the IDE and see where you can take it.
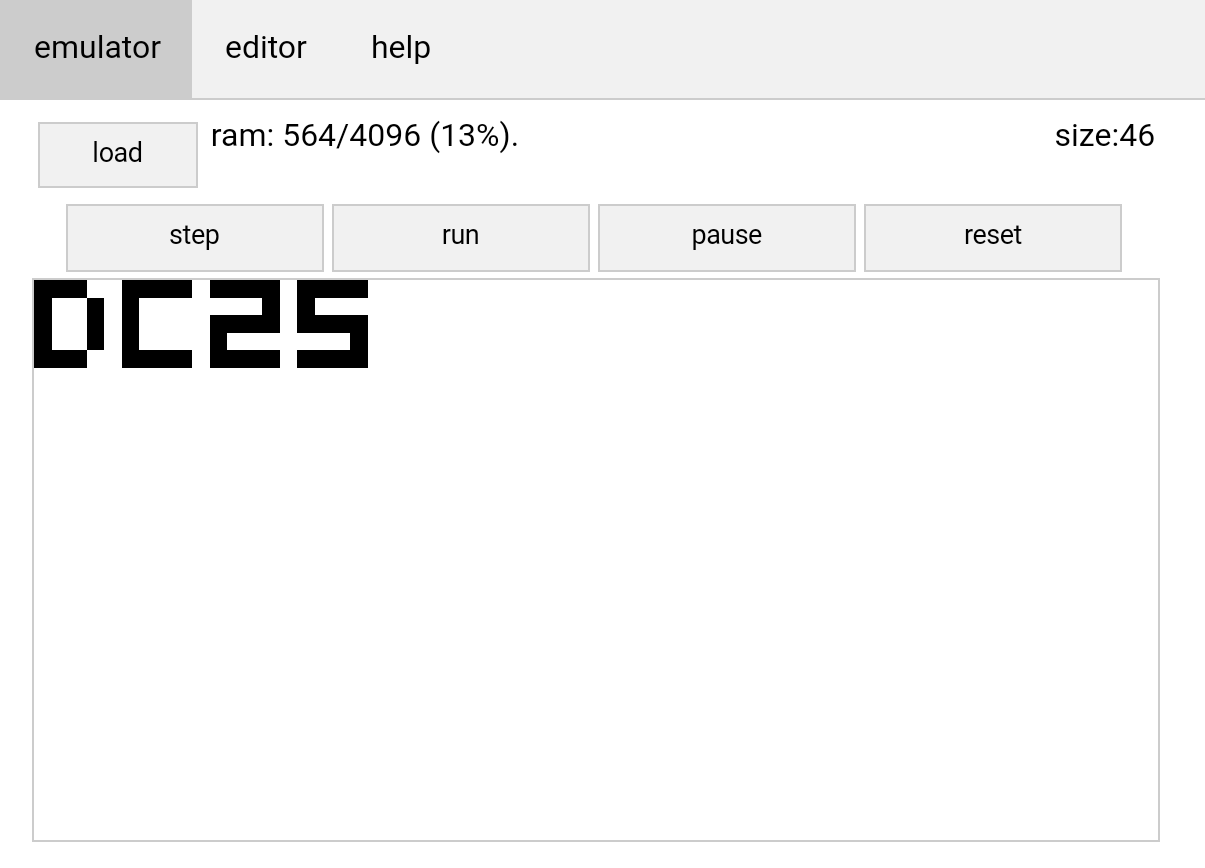
There's also a project over on GitHub for a desktop CHIP8/SCHIP IDE with full debugger available. You can download and compile yourself, he also has put together excellent documentation and precompiled executables for Linux, OSX, and Windows.
Here's an example of what I'm talking about:
CHIP8 Assembly Example
//CHIP8 Assembly Example

//CHIP8 has all HEX characters pre-stored as sprites
LD ST, V1
LD V1, #0D //prestored sprite for D char
LD V2, #0C //prestored sprite for C char
LD V3, #02 //prestored sprite for 2 char
LD V4, #05 //prestored sprite for 5 char
LD V5, 32 //starting X coordinate
LD V6, 16 //starting Y coordinate

; Draw D
LD F, V1 //load the sprite
DRW V5, V6, 5 //draw the sprite
ADD V5, 5 //move 5 pixels to the right

; Draw C
LD F, V2
DRW V5, V6, 5
ADD V5, 5

; Draw 2
LD F, V3
DRW V5, V6, 5
ADD V5, 5

; Draw 5
LD F, V4
DRW V5, V6, 5
ADD V5, 5
Android CHIP8IDE BASIC Example
//CHIP8IDE BASIC Example //CHIP8 has all HEX characters pre-stored as sprites //print them by calling char(HEX#, Xcor, Ycor); char(13,0,0); //print D char(12,5,0); //print C char(2,10,0); //print 2 char(5,15,0); //print 5![]()
STEP 4 - Integrating To Our Badge
There are some limitations to what we are going to support.
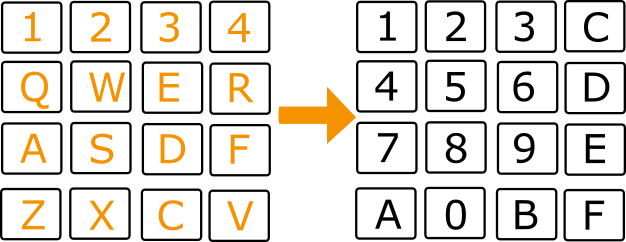
1) We have only 5 buttons on the badge, CHIP8/SCHIP has 16 buttons.
![]()
Above you see a PC keyboard layout on the left used by most emulators, and a CHIP8 keypad on the right. Thats why we only have 64 games included. Now most of these games only used less than 4-5 keys. However there was no standardization among the community as to what common actions should be mapped for the keys. For example, some games like AstroDodge used the 2 key for UP. However, Blinky used the 3 key for up. They both move up dammit! So what we did was play every game and created a mapping file (poor Hyr0n had to drink beer all day and play every CHIP8 and SCHIP game ever made), script, and auto-generate a config file for each game so we know "functionally" how the game works and can map the buttons properly. If games used more than the number of keys we allowed, we dropped it. Yeah we could have put 16 buttons on the badge, but then we'd lose precious GPIO which we need for other functions. Regardless you got at least 64 games to play at the con, unless of course, some of you dedicated assembly hackers want to try and add to the CHIP8/SCHIP community !
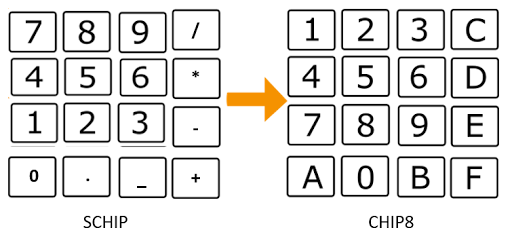
Now here is where it gets interesting. SCHIP has the similar layout, just different special characters and a different order. They flip the order of the numbers and use symbols. Why??? Because SCHIP primarily was played on HP48 Calculators, its a calculator pad layout.![]()
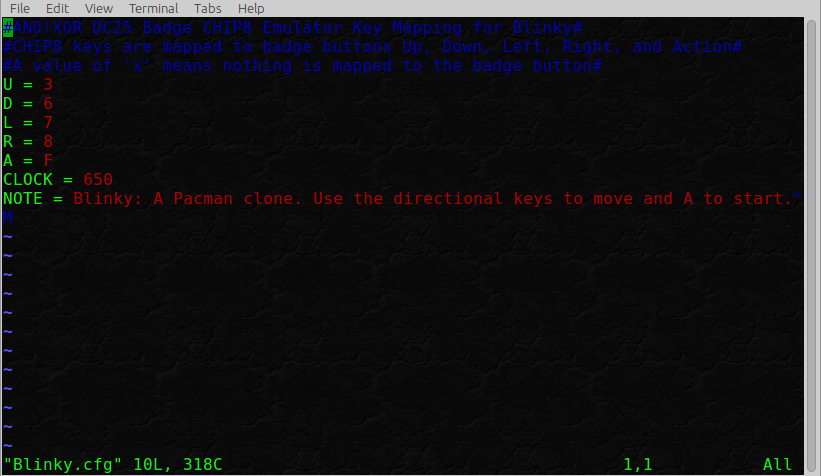
Dont get scared now. Here's where it gets easy. Use WHATEVER damn keys you want, just no more than 5 of them. Because we have a config file layout which you will have to populate and send with the ROM. Its ASCII Text, we parse it (yeah parses are evil and a bane of security, but it was quick and dirty and worked) and tell our emulator to map a badge button to whatever key is being used for your system.
Examples:
![]()
As you can see the (U)p badge button is mapped to CHIP8 key 3, (D)own to CHIP8 key 6, (A)ction button is CHIP8 key "f" and so on.CLOCK is a variable we use for timing correction, default 300Hz and we'll play and tune it from there. NOTE is the description we display for the game before it loads; It must be < 200 chars and terminate with EOF
2) That was a long explanation for the first limitation, you forgot there was another one: Sound
We don't have a speaker on the badge, but that's okay. Casinos are so damn noisy you wont hear any sound anyway. That's why we've mapped the sound to the badge LEDs. So you can use sound, you wont hear anything, but the blinking is much more satisfying anyway.
3) File name must be an 8.3 length, ending with .ch8 or .sc
Not much to explain beyond that. That's how file systems were way back when. If I MUST give an example... "helloWrd.ch8"
STEP 5 - Booze
You should celebrate at this point. Actually you should have been drinking the finest craft beer you can find during this coding endeavor, good beer means good hacking.
![]()
Oh by the way, here's the list of the 64 games we want to include (possibly m0@r):
System Game Title CHIP8 Airplane CHIP8 Astro Dodge CHIP8 Blinky CHIP8 Blitz CHIP8 Breakout CHIP8 Brick CHIP8 Brix CHIP8 Cave CHIP8 Connect 4 (2P) CHIP8 Craps CHIP8 Figures CHIP8 Filter CHIP8 Floppy Bird CHIP8 Guess CHIP8 Guess 2 CHIP8 Hidden CHIP8 Kaleidioscope CHIP8 Landing CHIP8 Lunar Lander CHIP8 Merlin CHIP8 Missile CHIP8 Paddles CHIP8 Pong CHIP8 Pong (2P) CHIP8 Pong II (2P) CHIP8 Puzzle CHIP8 Reversi CHIP8 Rocket CHIP8 Rocket Launch CHIP8 Rush Hour CHIP8 Russian Roulette CHIP8 Sequence Shoot CHIP8 Slide (2P) CHIP8 Soccer CHIP8 Space Flight CHIP8 Space Intercept CHIP8 Space Invaders CHIP8 Spooky CHIP8 Squash CHIP8 Submarine CHIP8 Syzygy CHIP8 Tank CHIP8 Tapeworm CHIP8 Tetris CHIP8 UFO CHIP8 Vertical BRix CHIP8 Wall CHIP8 Wipeoff CHIP8 Worm v4 SCHIP Alien SCHIP Ant SCHIP Blinky (SC) SCHIP Car SCHIP Single Dragon 1 SCHIP Single Dragon 2 SCHIP Joust 23 SCHIP Minesweeper SCHIP Pipedream SCHIP Race
SCHIP Sokoban SCHIP Space Fight SCHIP Square SCHIP UBoat SCHIP Worm v3 -
Software Planning
02/08/2017 at 23:56 • 0 commentsBadge development is in full swing with our first 6 prototypes expected to arrive next week. We're patiently refreshing the order status page hoping something changes.
August through December were spent prototyping various hardware and testing out ideas. The software was developed specifically for those tests and not as badges. In January we started a new Eclipse project that will take us all the way to DEF CON. We ported some of the drivers from prototyping over to the master project and created our backlog in the issue tracker. The backlog continues to grow as we add more detail to our ideas and use the software.
To manage the work, we've setup a series of milestones for the software:
- v0.1.0 - Jan: Initial drivers for all hardware on hand, demonstrate badge basics and UI
- v0.2.0 - Jan: Focus on porting bling and supporting APIs. Explore new bling concepts. Refine UI. Work on Secret Feature 1 and initiate Secret Feature 2.
- v0.3.0 - Feb: Focus on Secret Feature 3 and getting badge software to run on prototypes once they arrive.
- v0.4.0 - Mar: Refinement of Secret Feature 2. Hopefully merge Secret Feature 4. Port some games / major features from DC24.
- v0.5.0 - Mar: Cyphercon release. This will be the software that runs when we take the prototype to Cyphercon. Refine bling, fix bugs, cleanup UI. Any secret feature work will be hidden.
- v0.6.0 - Apr: Complete Secret Feature 2.
- v0.7.0 - May: Possible Layer One release. More cleanup. Complete Bling. Merge Secret Feature 5.
- v0.8.0 - Jun: Feature-complete. Used for test to identify issues.
- v0.9.0 - Jun: Final testing release, no new features, only fixes.
- v1.0.0 - Jul: Final release
-
Prototypes are GO!
01/21/2017 at 02:37 • 0 commentsWell we missed our January 18th target by 2 days, but the prototype design has been ordered. We hope to have them in house by February 15th. This gives us about 2 weeks of slack time in case the fab and assembly takes longer than expected.
We did an initial prototyping round back November but did not map the pins properly. This meant most of the peripherals simply didn't work. We learned a few things but had to revert to our dev kits for development and prototyping.
To avoid issues with today's prototypes we ordered an interim "Risk Reduction" test board from OSH Park. This included most peripherals from the BOM we were concerned with and allows us the flexibility to breadboard some of our assumptions. Two issues were identified:
- We had the wrong connector for our display (we chose a top contact and needed bottom)
- The display connector footprint was missing solder paste layer
We were able to work around both issues and test the display (which works quite nicely) and even found a better, cheaper, and stronger connector. Win win! As a final step, several PCB layers were printed (actual size) to verify footprints and size. A comparison with our DC24 badge is below.
![]()
While we wait impatiently for the prototypes to arrive, we're using the risk reduction board and dev kit to continue software development.
-
Hackability
01/07/2017 at 16:31 • 0 commentsDEF CON 24
One of the basic features of our DC24 badge was design for hackability. Personally, the badge project was a journey into embedded electronics. I got started with an Arduino and a breadboard, this is what I was familiar with. I designed Bender along those lines. The hardware was inspired by the Maple Mini from Leaf Labs and Espruino (both STM32F013) and ran an Arduino framework called stm32duino. We exposed as much IO as possible around Bender's eyes, provided SWD and FTDI interfaces, and USB for UART and DFU.
We know of one user hacking their badge. @mediumrehr added his own cigar PCB and spectrum analyzer to Bender. It was amazing to watch and that his design fit so well.
This approach had some issues, however:
- It required source code to modify the badge - which we didn't release until after DEF CON
- stm32duino is not a straightforward install - it requires many steps and is not managed through the Arduino IDE.
- The SWD interface was not enabled in the firmware - we released an update that enables it but at DEF CON it was not working
All in all we were very happy with the badges, we know of at least two people who have created their own Benders from github so it can't be that hard. If you see anybody with it a Purple Bender, buy them a drink. They made it themselves and it was not easy.
DEF CON 25
Based off our experience at DEF CON 24, our goal remains the same: Make the Badge Hackable but we want to see your hacks in Las Vegas. We want you to share your hacks. So we're changing things up. This year's badge is not based off a development board. It is completely original. There will be no USB but there will be SWD. We will expose as much GPIO as we can. And we will provide physical dimensions where it makes sense. Finally, we want the barrier-to-hacking to be as low as possible. How? We're not sure yet, but last year the goal was nothing more than a laptop, the Arduino IDE, and stm32duino.
-
Badge Art Contest
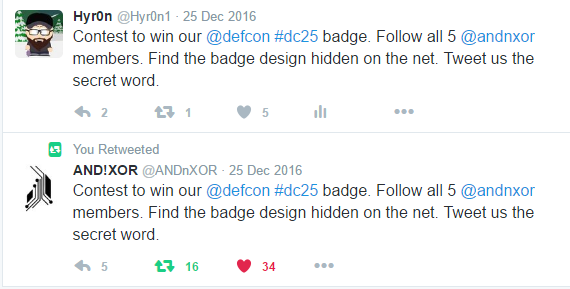
01/04/2017 at 07:34 • 1 comment![]()
So from the public's POV, you saw this on our Twitter feed. We decided to get the hype train going a little early and threw a game together to give the l337 H@x0r community of DEFCON something to do over the holiday break. BEFORE READING ANY FURTHER, KNOW THAT THIS IS AN UBER SPOILER OF THE CONTEST STEPS. IT HAS BEEN WON ALREADY, BUT IF YOU STILL WANT TO GIVE YOUR SKILLS A SHOT, DONT READ FURTHER...or if you're the kind of person who racked out their NES checklist with a Game Genie to skip past the hard parts so you could have lunchtime bragging rights of the final boss details, by all means keep reading ;) And if you're too young to know what a Game Genie is...sigh...
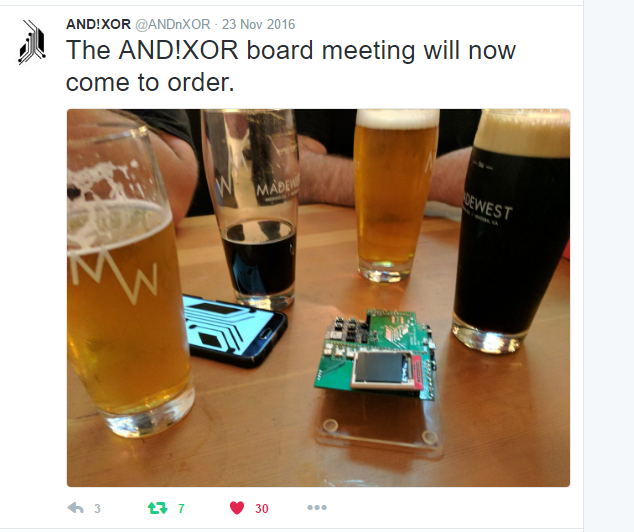
Anyway, about a month ago over a much inebriated brewery board meeting, we locked down a functional baseline of our DC25 badge. At some point, we started thinking of ways to have fun with a contest, and thus this cluster fuck was born. Over a lot of booze.
![]()
We figured, since we were going to give away a free badge, you should f-ing work for it. Instead of going the route of a certain genre of our DC interests, we decided to just layer and sandwich a bunch of stuff together. We knew since mid-October-ish (thats a word right?) we were going to do something, so we started tweeting out easter eggs and hiding stuff in youtube videos we knew we could use later on... It could have been the booze talking too...
![]()
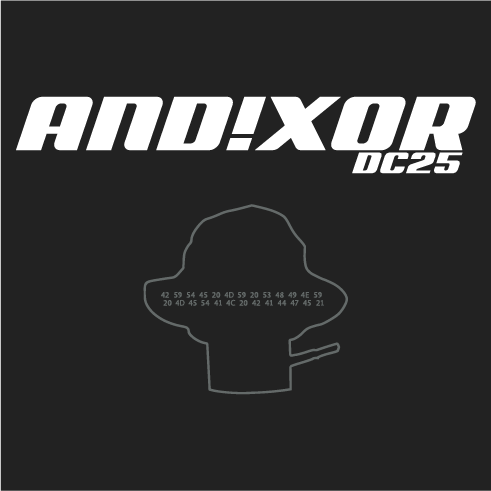
Now at the same time when the contest started, we were running a booster campaign. https://www.booster.com/andnxor Designing and Prototyping badges isn't cheap. It costs us a lot of money. So we we're boosting with shirts that contained a silhouette of the badge design. It had a cryptic message: 42 59 54 45 20 4d 59 20 53 48 49 4e 59 20 4d 45 54 41 4c 20 42 41 44 47 45 21
I wont give that one away, but cmon, find your favorite HEX to ASCII converter. So instantly we got many MANY guesses that, that was the secret phrase. Well our tweet said "badge design" and this is an outline. Doesn't show you much. To be fair, we quickly told everyone it had nothing to do with the Booster site. But that was a good warm-up for things to come.![]()
Okay so, in step by step, lead you by the hand fashion, here's a typical way someone could have gone about winning the contest.
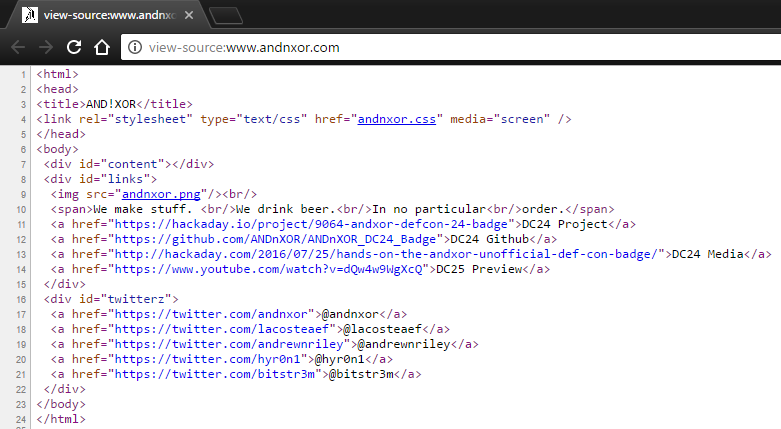
- It was hidden somewhere on the internet....try our web page
![]()
- There's only a couple of images, if one tried to download MANBEARPIG (which we referred to a ridiculous amount of times on Twitter) you would notice you cant. We blocked it out with CSS.
- View Page Source
![]() Well looky here, there's the name of the style sheet "andnxor.css". Lets type that in...
Well looky here, there's the name of the style sheet "andnxor.css". Lets type that in...![]()
- Looks like someone updated the manbearpig.png with a new version "v2" thats odd. Lets download it. Now that we know the file name, you can just type it in the browser address, and save as. Wow that took forever right? Well most people wouldnt notice cuz their interweb speeds are so fast. But look at the file properties. Isn't it a little odd that you have a BLACK AND WHITE PNG image that's 800kb?
- Steganography - the practice of concealing messages or information within other nonsecret text or data. Now this is where paths can diverge on solving the puzzle. You could verify something is hidden the proper way, load it in a hex editor, and notice the regularly unused bits of the image have data in them. Or just hack around. There's many steganography applications out there, even fewer are free and open source
- Load the Image in OpenStego
- Given the shit I've put you through thus far, you should assume its just not that easy. Of course we damn well password protected it. There were many hints thrown out on twitter, youtube and chats...
- I even blurted out "C1E169852F1D95CC2DA7AA791E5F4EFF"
- All signs point to the password being "EXCELSIOR!"
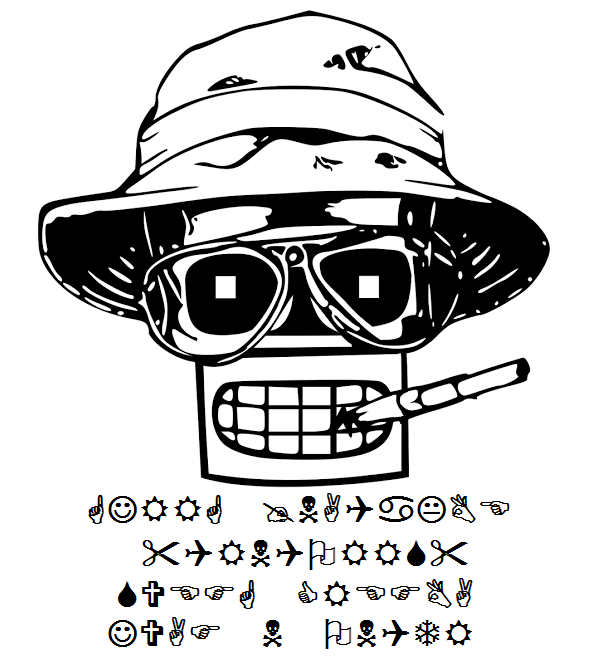
- Cool, so you now have a PNG with something hidden inside of it, OpenStego, and a password. Extract it and what do you get...
![]()
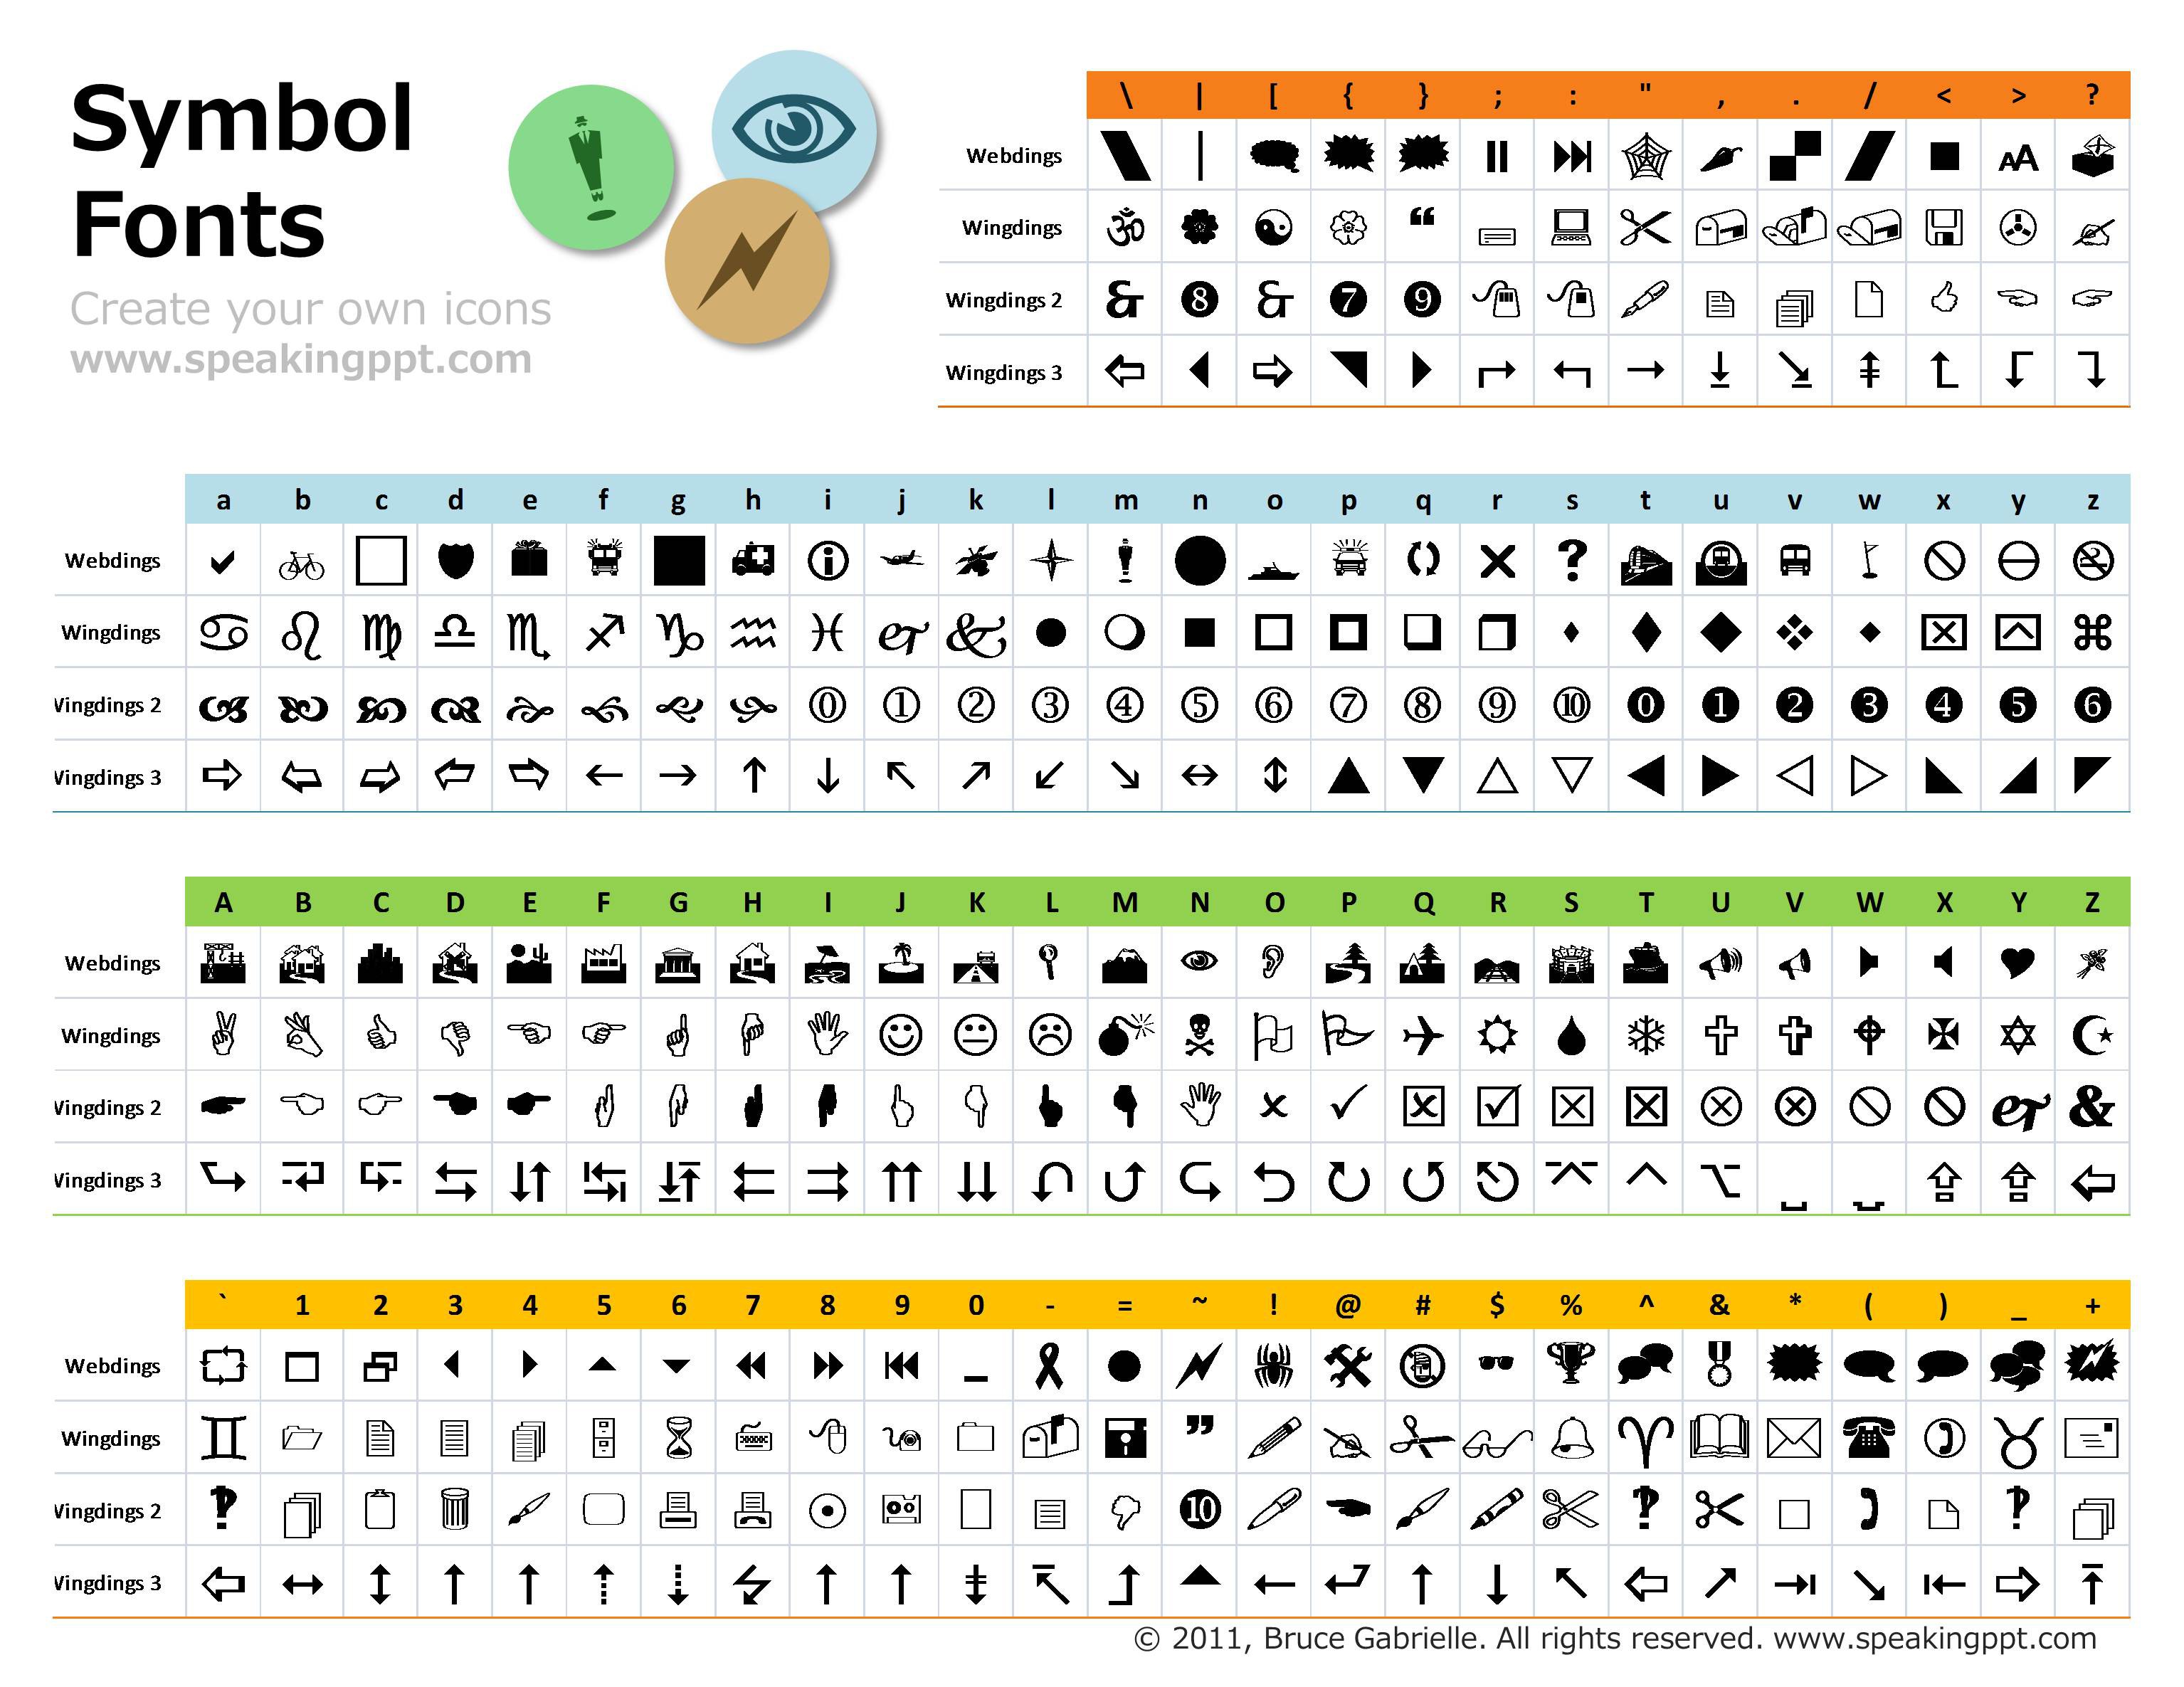
- Well shit there's the badge art which we will be screening on to the PCB. Awesome right? Well, we hope you think its awesome. But this was a contest to win a free badge and you had to tweet the secret word. And we're some god damn assholes that put something in wingdings.
- Translation Time
![]()
- Be careful, its not so easy to visually translate images. You lack the luxury of copy/paste and OCR doesnt work on wingdings.
- GJRRG @NAQaKBE "QRNQORRS" SVEFG CREFBA JVAF N ONQTR
- Cypher Time
- So at this point we didnt really try too hard, we figured who made it past the steganography it would just be a race at this point. So ROT13 it is !
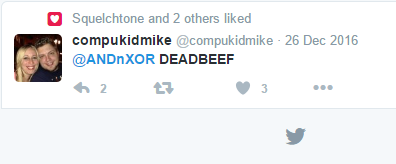
- TWEET @ANDnXOR "DEADBEEF" FIRST PERSON WINS A BADGE
![]() We'll kids, thats it. Give a shout out to @compukidmike. And just as important, let us know what you think in the discussion section below. This was my first attempt at creating a puzzle that literally hundreds of people were competing over and messaging us non stop over the holiday. Even more so, what do you guys think of the badge art? Until further project updates, this is Hyr0n - signing off.
We'll kids, thats it. Give a shout out to @compukidmike. And just as important, let us know what you think in the discussion section below. This was my first attempt at creating a puzzle that literally hundreds of people were competing over and messaging us non stop over the holiday. Even more so, what do you guys think of the badge art? Until further project updates, this is Hyr0n - signing off.
- It was hidden somewhere on the internet....try our web page
-
Optimizing Display Code
12/30/2016 at 18:00 • 0 commentsOver the past few months I have been working on custom drivers for various peripherals for our badge. Most of this is to learn how to build the drivers and the underlying hardware. This would have been an impossible task for me just a year before working on our DC24 badge. At this point I've come up with a custom display driver which I believe is as close to optimized as I can get it. In the process here are the factors that need to be considered:
- Maximize bulk transfer speed - select the highest possible SPI clock rate the MCU and display will safely operate at
- Minimize latency between bulk transfers - utilize DMA to asynchronously transfer chunks while preparing the next chunk for transfer
- Minimize data to be transferred - reduce color depth, pixels, and commands to be sent
During prototyping we've been limited to 8 Mhz on the SPI bus. At 320x240 16-bit, a single frame requires 1.2 Mbits! Over SPI, the render can take seconds. No where close to what we need.
One of my favorite tools as of late is my Saleae 8 channel logic analyzer. It's nice and compact enough to travel with me for work too.
![]()
For displays like the ILI9341 (pictured), the typical command sequence is to set a window (0x2A and 0x2B commands) with the X and Y dimensions followed by raw pixel data. Below is a trace of the window command. Taking 69 usec to transfer 10 bytes (0x2A, start x, end x, 0x2B, start y, end y). The coordinates are 16-bit integers. Also notice the delay between transfers as the MCU is executing other commands.
![]()
To draw a single pixel, the address command above plus a 16-bit color must be sent to the display - 12 bytes total! That's a lot of overhead for one pixel.
Here's what drawing Bender on a 128x128 display at 16-bits looks like. In this case the window is set to 0, 128, 0, 128 then 16-bit colors are streamed to the display.
![]()
Looking at the clock line, notice there are gaps here that we should be able to optimize out. Rendering appears to take 682 msec. Zooming way in we see there is a lot of space between transfers. Toggling the CS line seems to be wasting time. Data is being transferred two bytes at a time because it's being converted from a 24-bit BMP pixel-by-pixel.
![]()
So How Do We Improve This?
An easy way is to remove the BMP overhead by pre-processing the images. The display is in 16-bit 565 mode. By converting the image to 565 big-endian raw data using ffmpeg we can stream the pixels in the display's native format. The following command will convert an image to 565be raw format.
ffmpeg -i RED.BMP -f image2 -s 128x128 -pix_fmt rgb565be RED.rawIn addition we can remove some of the SPI blocking to reduce delays. The image below shows the flash memory and LCD transfers occurring asynchronously.
![]()
The transfer in green is the LCD and red is the flash memory being setup to read the next chunk of the image. Notice the pixel data has fewer gaps. We are simply reading the 565BE data from flash and streaming it to the LCD. At this point we can draw 10.5 FPS.
The flash setup time is wasting quite a bit of time, roughly 800 usec. We're paying this penalty many times per frame. To reduce the number of times occurs we can make a classic tradeoff between memory and performance. Next step is to increase the chunk size from 2 rows to 32 rows per transfer. This uses about 8k of memory and gives us a nice speed boost to 11.7 FPS.
![]()
The transfers are basically blocking each other at this point. Again in the image above LCD is on the top and flash is on the bottom.
Last Step
Now that large chunks of pixel data can be read and streamed to the LCD very quickly, the last step is to send the pixel while the flash is reading the next frame. I can only transfer 254 bytes at a time, but can do so asynchronously. The trick is to setup the next 254 bytes of the chunk soon after the first returns but not interrupt the flash transfer. This allows the flash to be read with very little disruption setting up the next 32 rows of image data while the last are being sent.
![]()
In the image above, the 32 rows are clearly defined. The image is 128 pixels tall so 4 transfers of this size are required to draw a full frame. The flash is a bit slower than the LCD and ends up slowing the LCD down a bit. The green box highlights a full frame. Note the LCD does not start until the first chunk of data is read from the flash. But the flash rarely stops.
At this point we're able to draw 17.5 FPS, excelsior!
Putting it all together
What I learned through this whole process, is allow the hardware to do what it does best. Give it very large chunks of data to transfer and let it do so in the background. Even with a 64 Mhz MCU, my code will slow down the transfer greatly. Once data can be streamed in large chunks, do so in parallel with other operations to maximize efficiency. At the beginning of this process, even with DMA enabled, it took me 685 msec to draw a single frame from flash. I am now down to 57 msec. Although I can go further, with -O3 gcc optimization it's down to 52 msec but this introduces other bugs I need to fix. So for now I'll stick with -O0.
-
We're Back!
12/30/2016 at 17:33 • 0 commentsWe can't say this enough, but we were blown away by the response we got from the DEF CON community last year. DC24 was an amazing experience, we met so many great people. Our experience from the conference can be summed up in this tweet by @wookie_p
"True cost of the @ANDnXOR Bender badge: takes 2x longer to walk con floor. So many questions about badge! #defcon"
The plan for DC25 was to take a few months off and come up with ideas. This didn't exactly happen, we went right into testing and prototyping. We have an initial list of 30+ features to incorporate, a BOM, and design. We aren't ready to release many of those details yet. But here's what we are ready to say:
- It will be bigger - roughly twice the surface area of last year's badge
- There will be more - at least double, this is dependent on how much money we can come up with as a group
- The BOM has doubled in cost - we will try to keep the final cost in check through crowd funding and sponsorships TBD
- We will not be doing production by hand
- The badge will not be running Arduino - sorry Zapp can't handle the IDE any longer
- The badge will be hackable - bring your SWD tools
- There will be a lot more bling
- The RF will work
Stay tuned, we will continue to use Twitter and Hackaday.io to release details.


 Well looky here, there's the name of the style sheet "andnxor.css". Lets type that in...
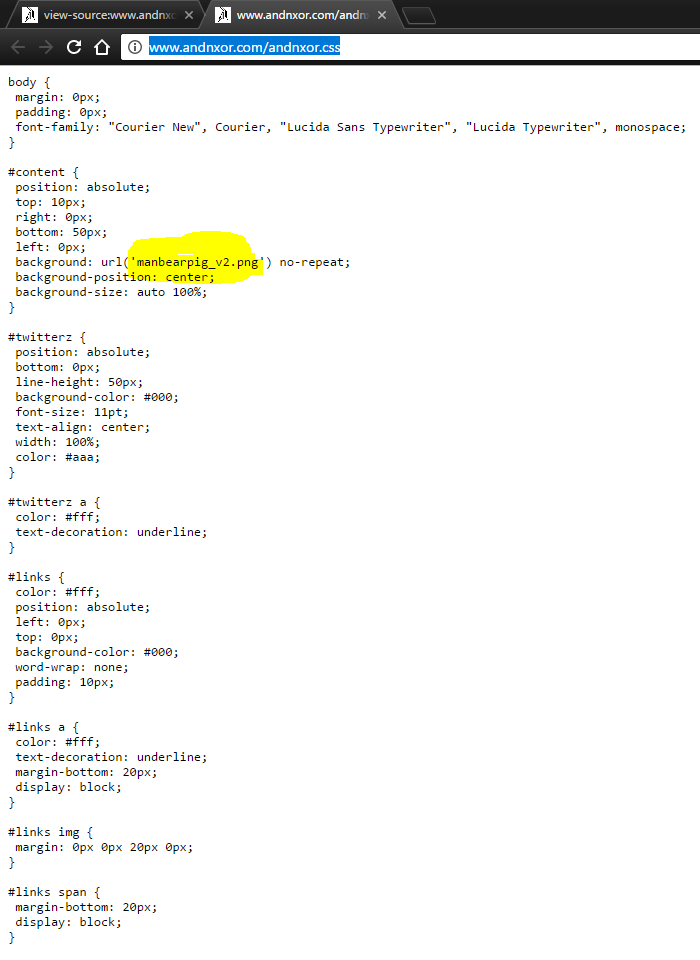
 We'll kids, thats it. Give a shout out to