All the work comes down to this moment, data acquisition. The idea is to get data representing the height of tip as a function of x,y.
Unfortunately, it's not consistent. I go up and down 2000 steps and I see frequency change. I would expect frequency to change at certain height give or take some noise. Well, I see something similar and the noise is of about 200 steps. Than comes the trouble, if I continue doing it say four five times, the threshold frequency changes qnd goes up. Tried with tip and just clean quartz fork. Added tire to remove vibration and turn off all electrical appliances around. Still same result.
I suspect it's the rubber bands in 3D-printed xyz stage.
I've ordered cheap Z-stage on aliexpress. https://www.aliexpress.com/item/3256806481789030.html?src=google
Got this beauty
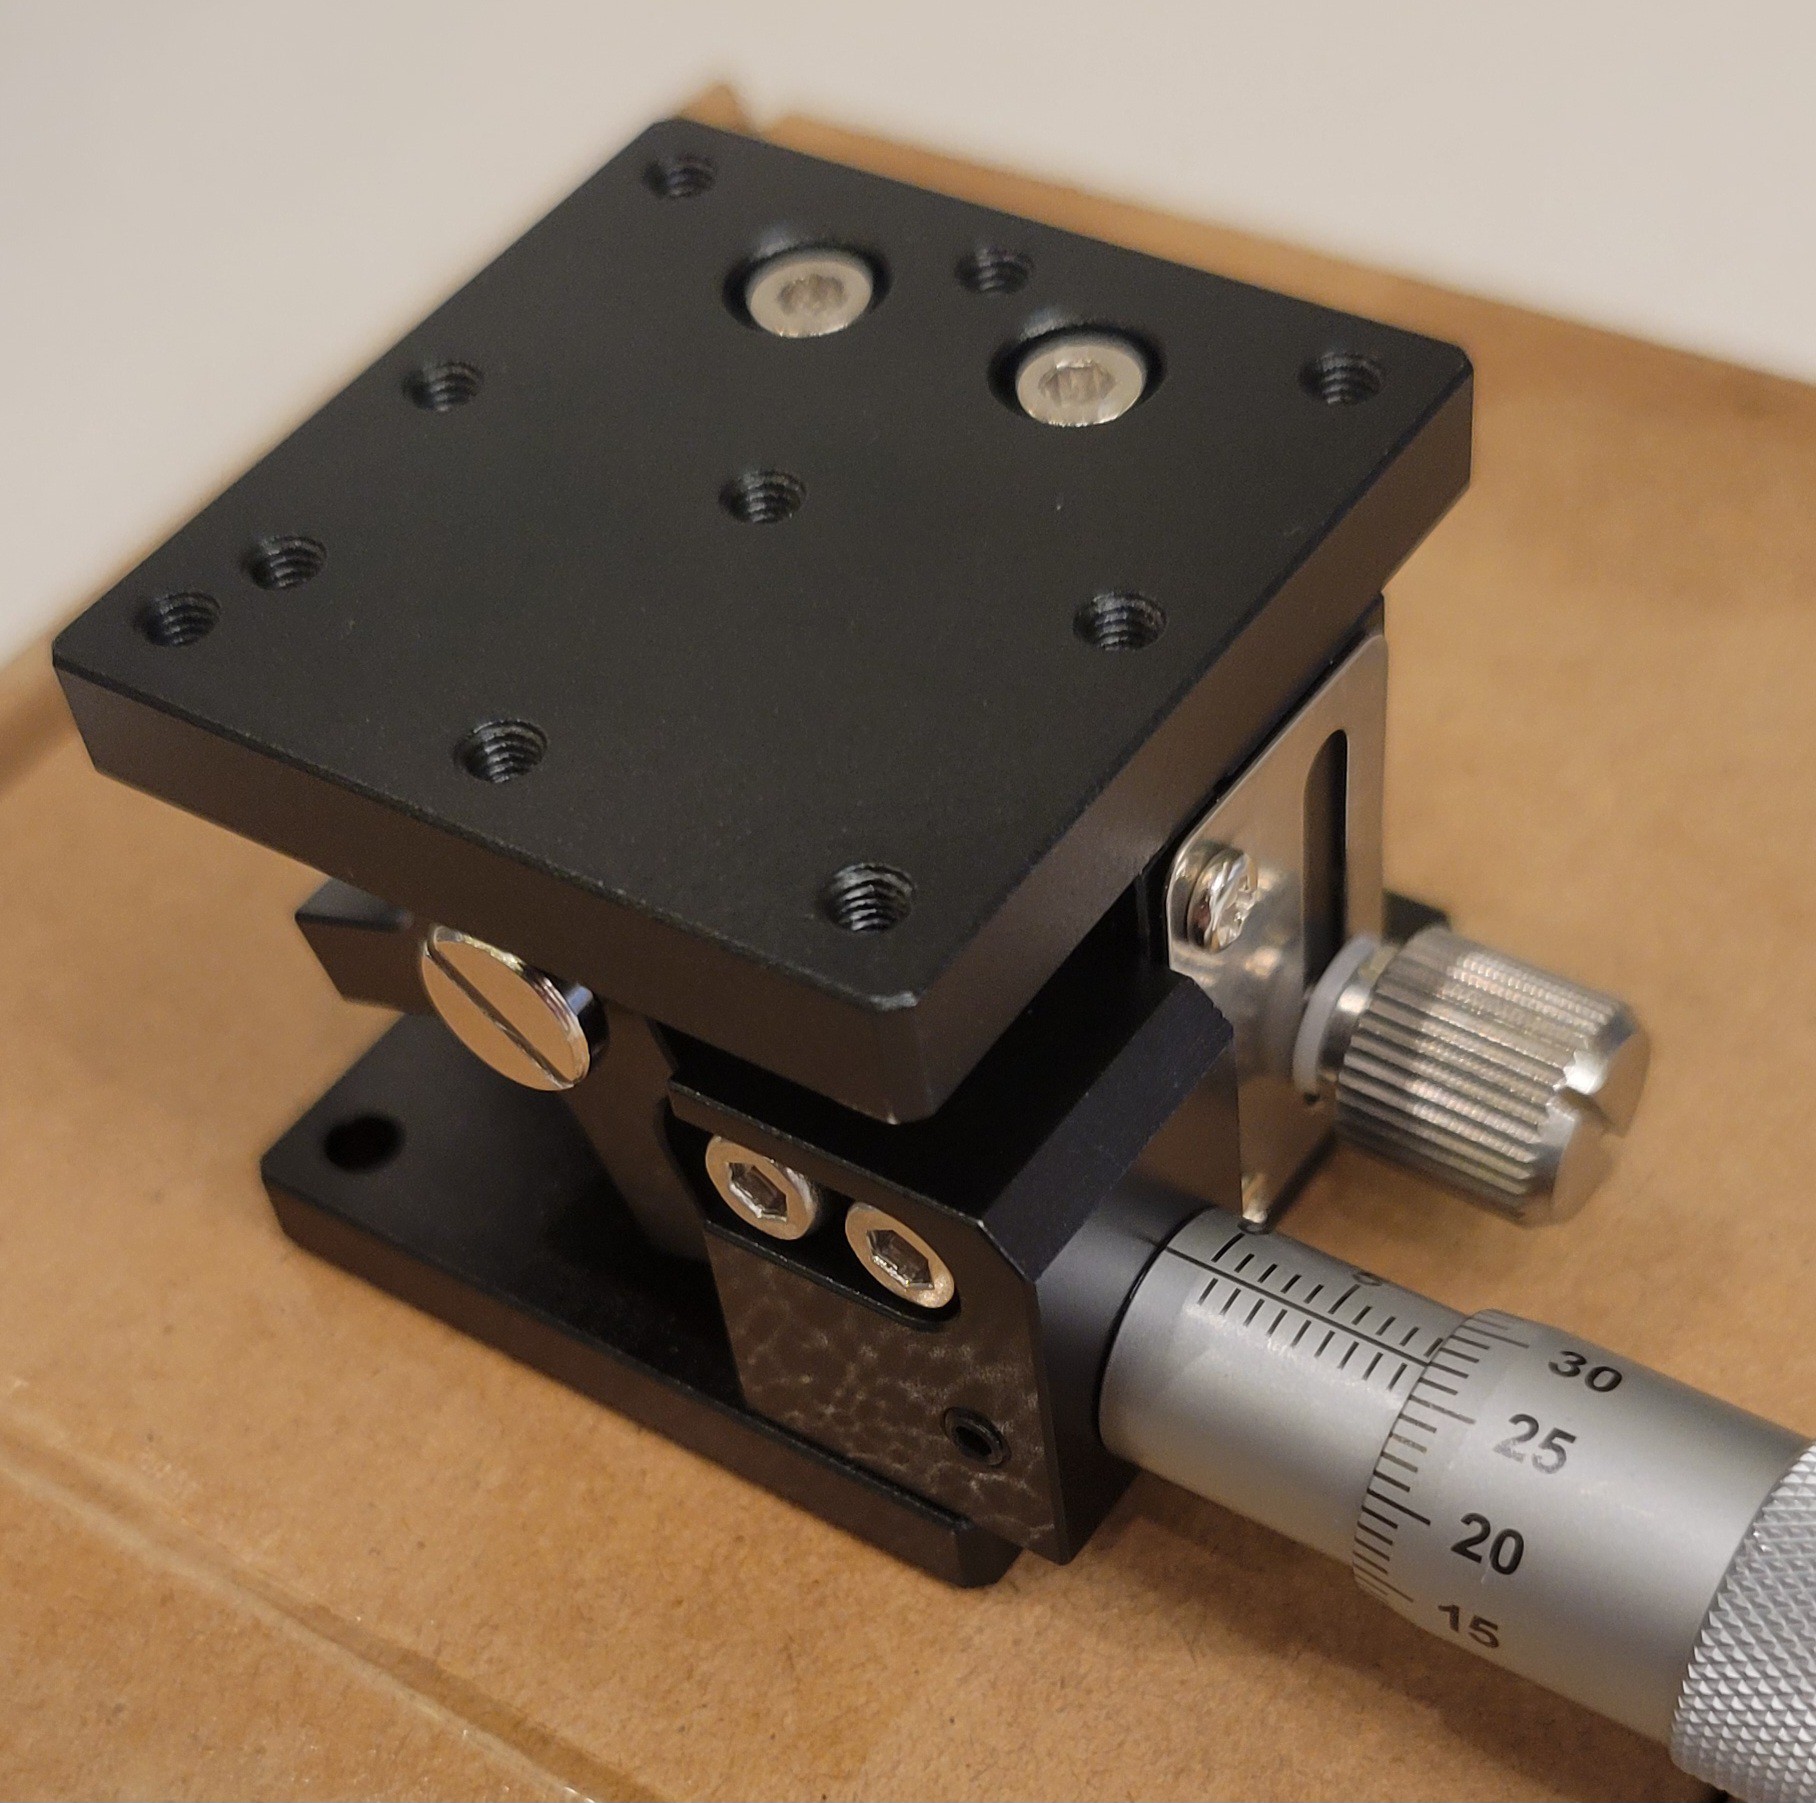
This beauty is really small, so I need to rebuild all the 3D mechanics again for this miniature size. It will be third time I 3D-print this part... 🤕
I really fed up from this project, instead of printing I've just place hard metallic piece. It's ugly hack but hey that's my name 😉
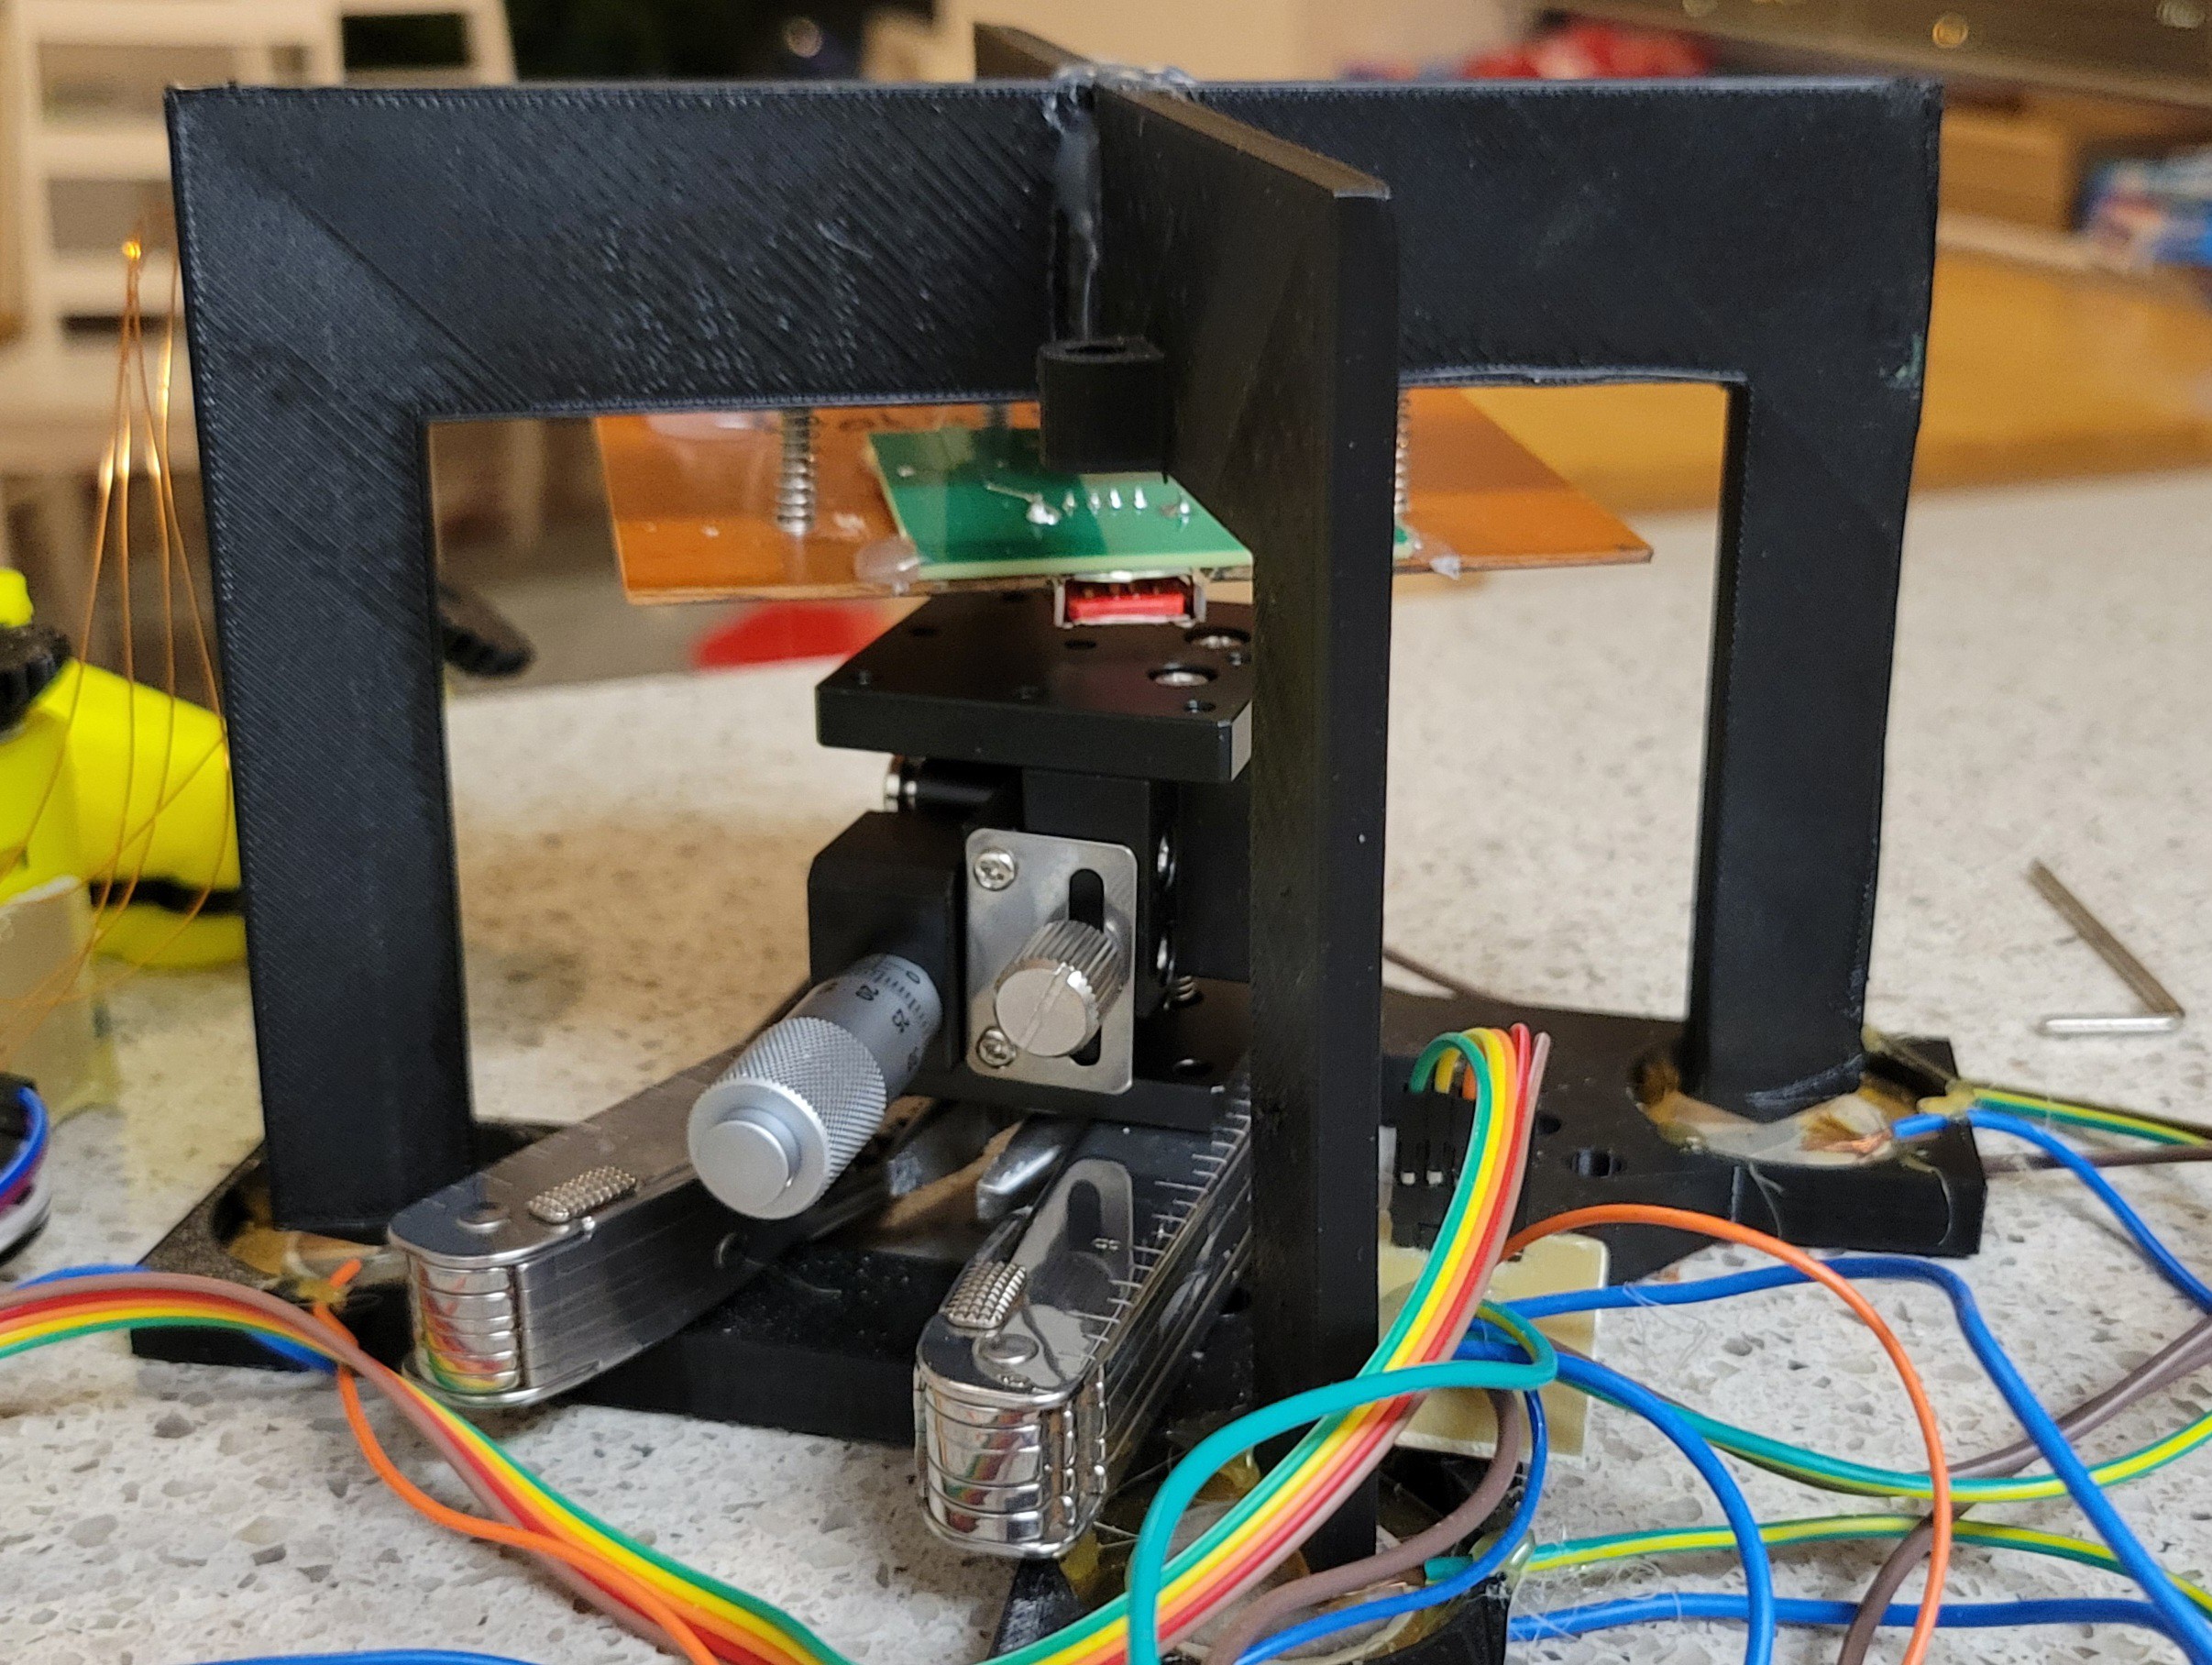
Let's see if the creep comes from all the plastic or 3D printed Delta stage.
Still got the creep, now trying different types of quartz forks, maybe it's because of soft metal the quartz fork connected to the tiny PCB board.
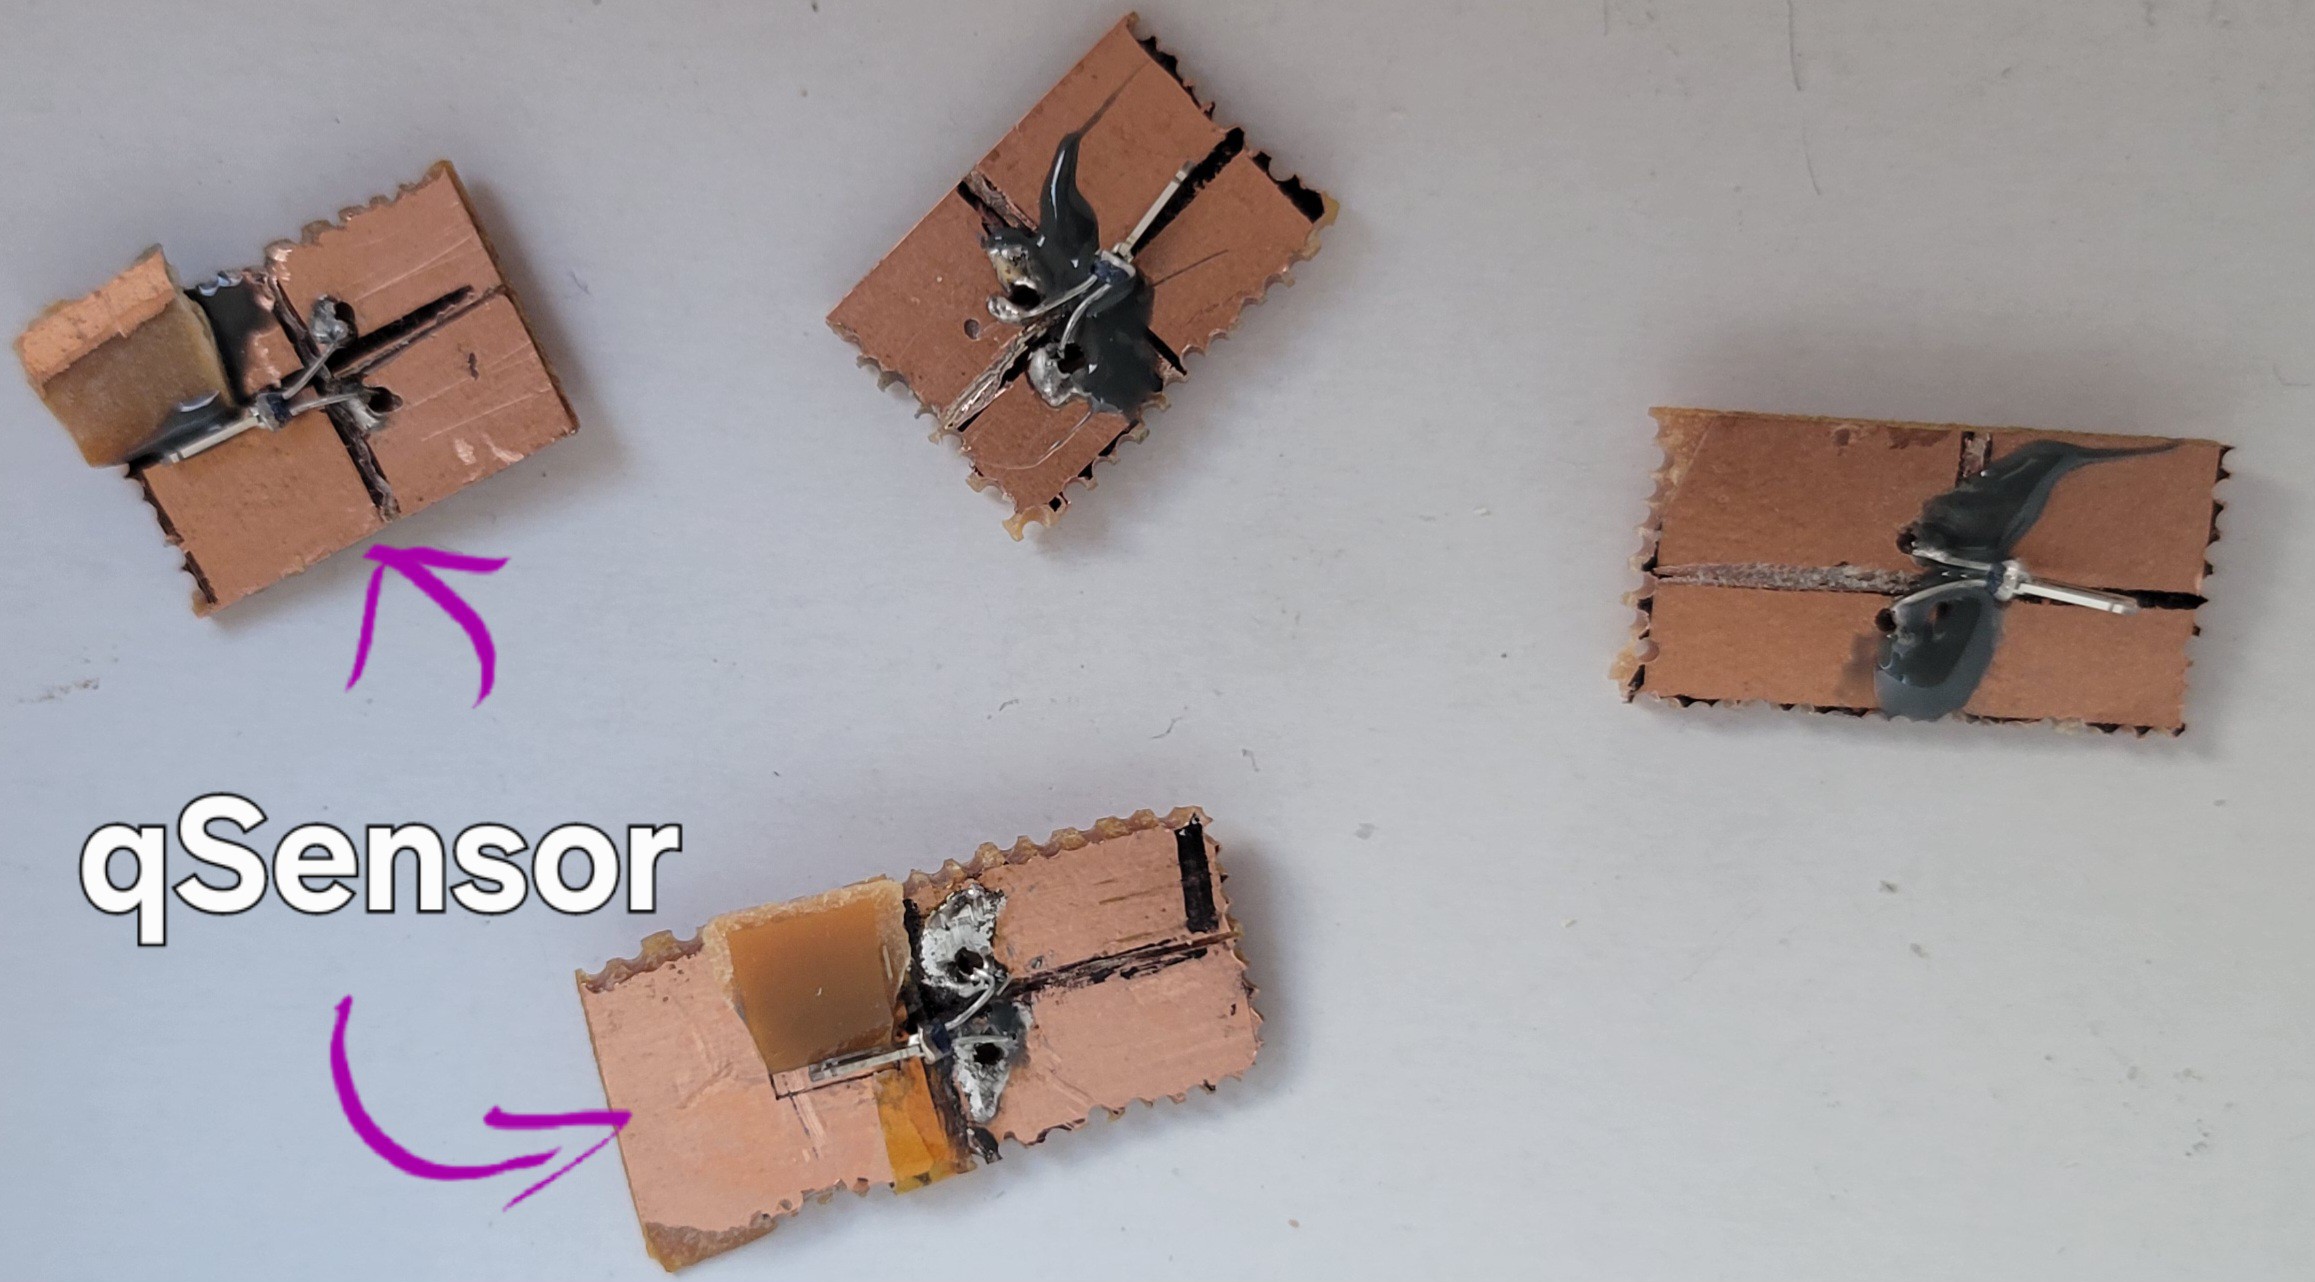
Basically it's same fork now glued to PCB. Other option is one of the fork's prong glued to the tiny PCB. Fingers crossed...
'qSensor' didn't work, one I couldn't find frequency other I could see barely something.
The regular with base glued to PCB one didn't work for some reason ( maybe it got bit of glue on it) other was working and I could find the base frequency. Then I managed to break it.
Ok, made another three quart forks (just to be prepared if anything breaks). Made a few tests, still have the same problem.
It's not the xyz stage, it's not quartz fork (now it's rock solid). What else could it be?
It's not USB connection used little piece of PCB to make it stable. It's not electronic problem rechecked with scope.
What can it be? I have no idea... 😧
Ok, after reading some papers and specs of piezoelectric materials it looks like even the expensive ones have some creep (about 10%) and hysteresis. Moreover, it changes with time...
So I wrote simple piece of code which basically goes up until passes some threshold and then goes down the trick was to make it slow so piezoelectric element will get stable.
Ta-da first time data...
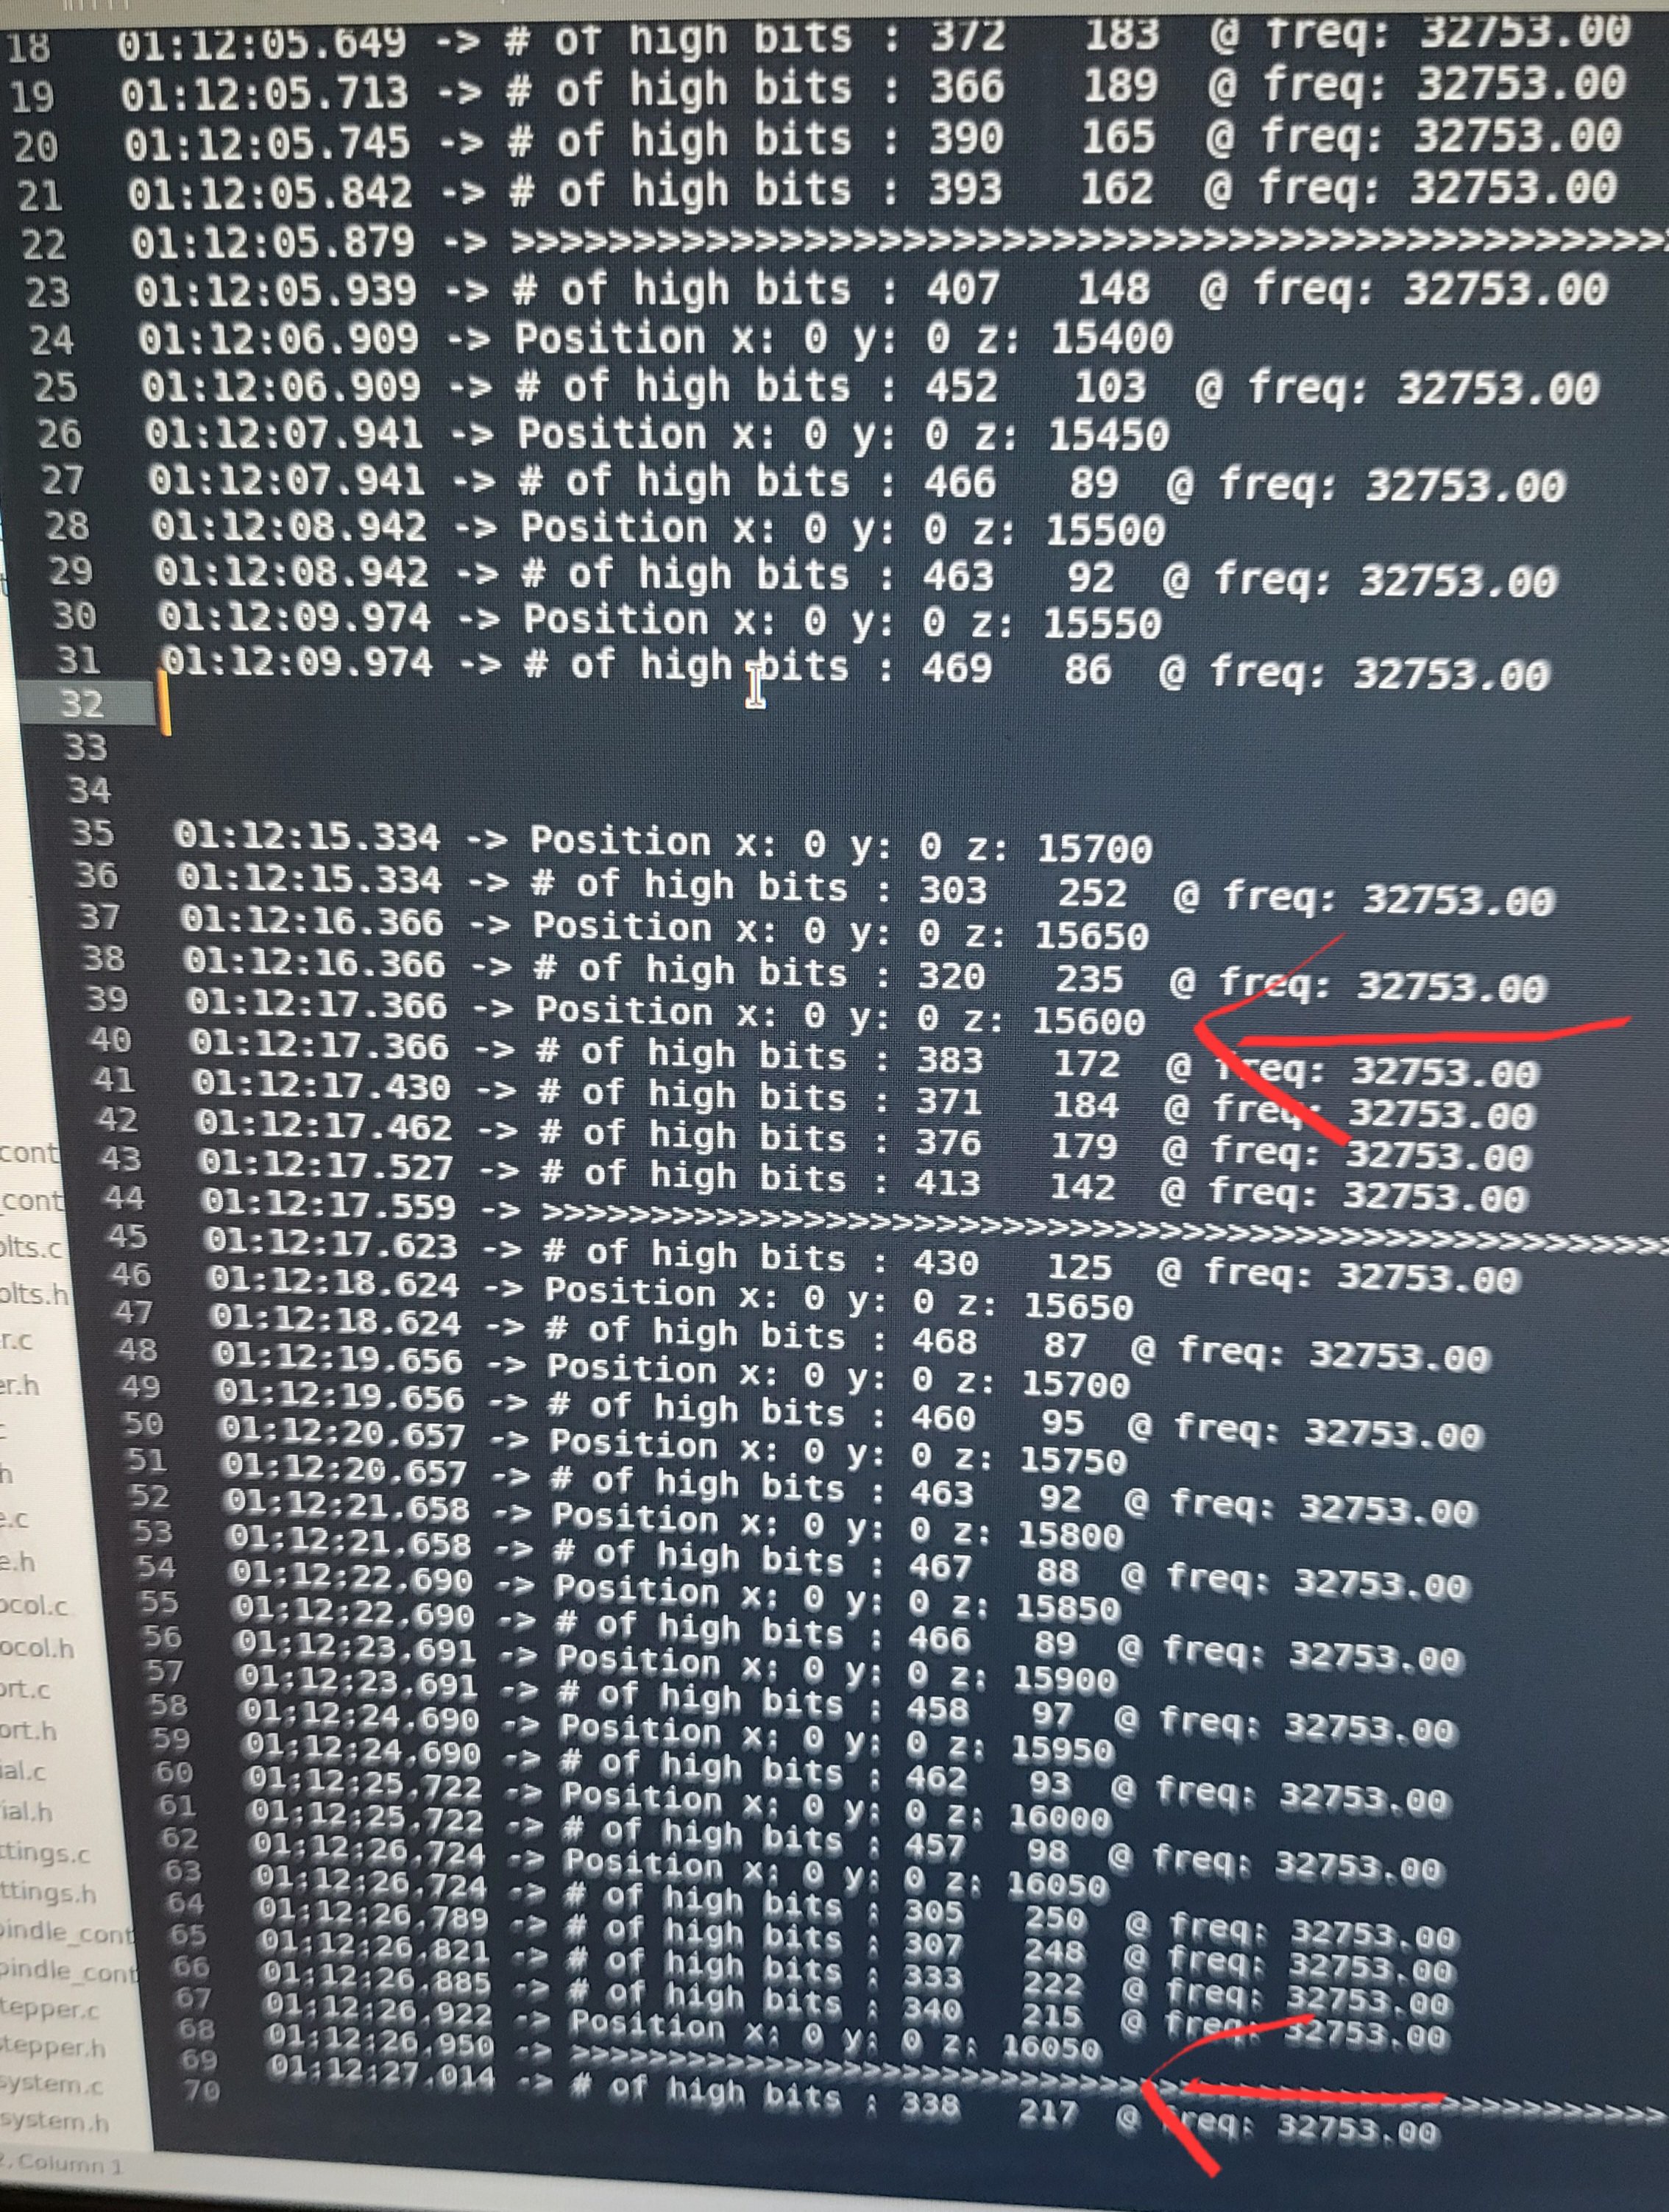
It stable enough for now with 400 steps diff. I will remind that those readings were done in noisy environment, without vibration dumping and without shielding.
Another setback, although I can achieve precision of 400 steps. It's changing with time, in other words if I do two tests one after another I get close results, but of I take a long break between I got results not even close.
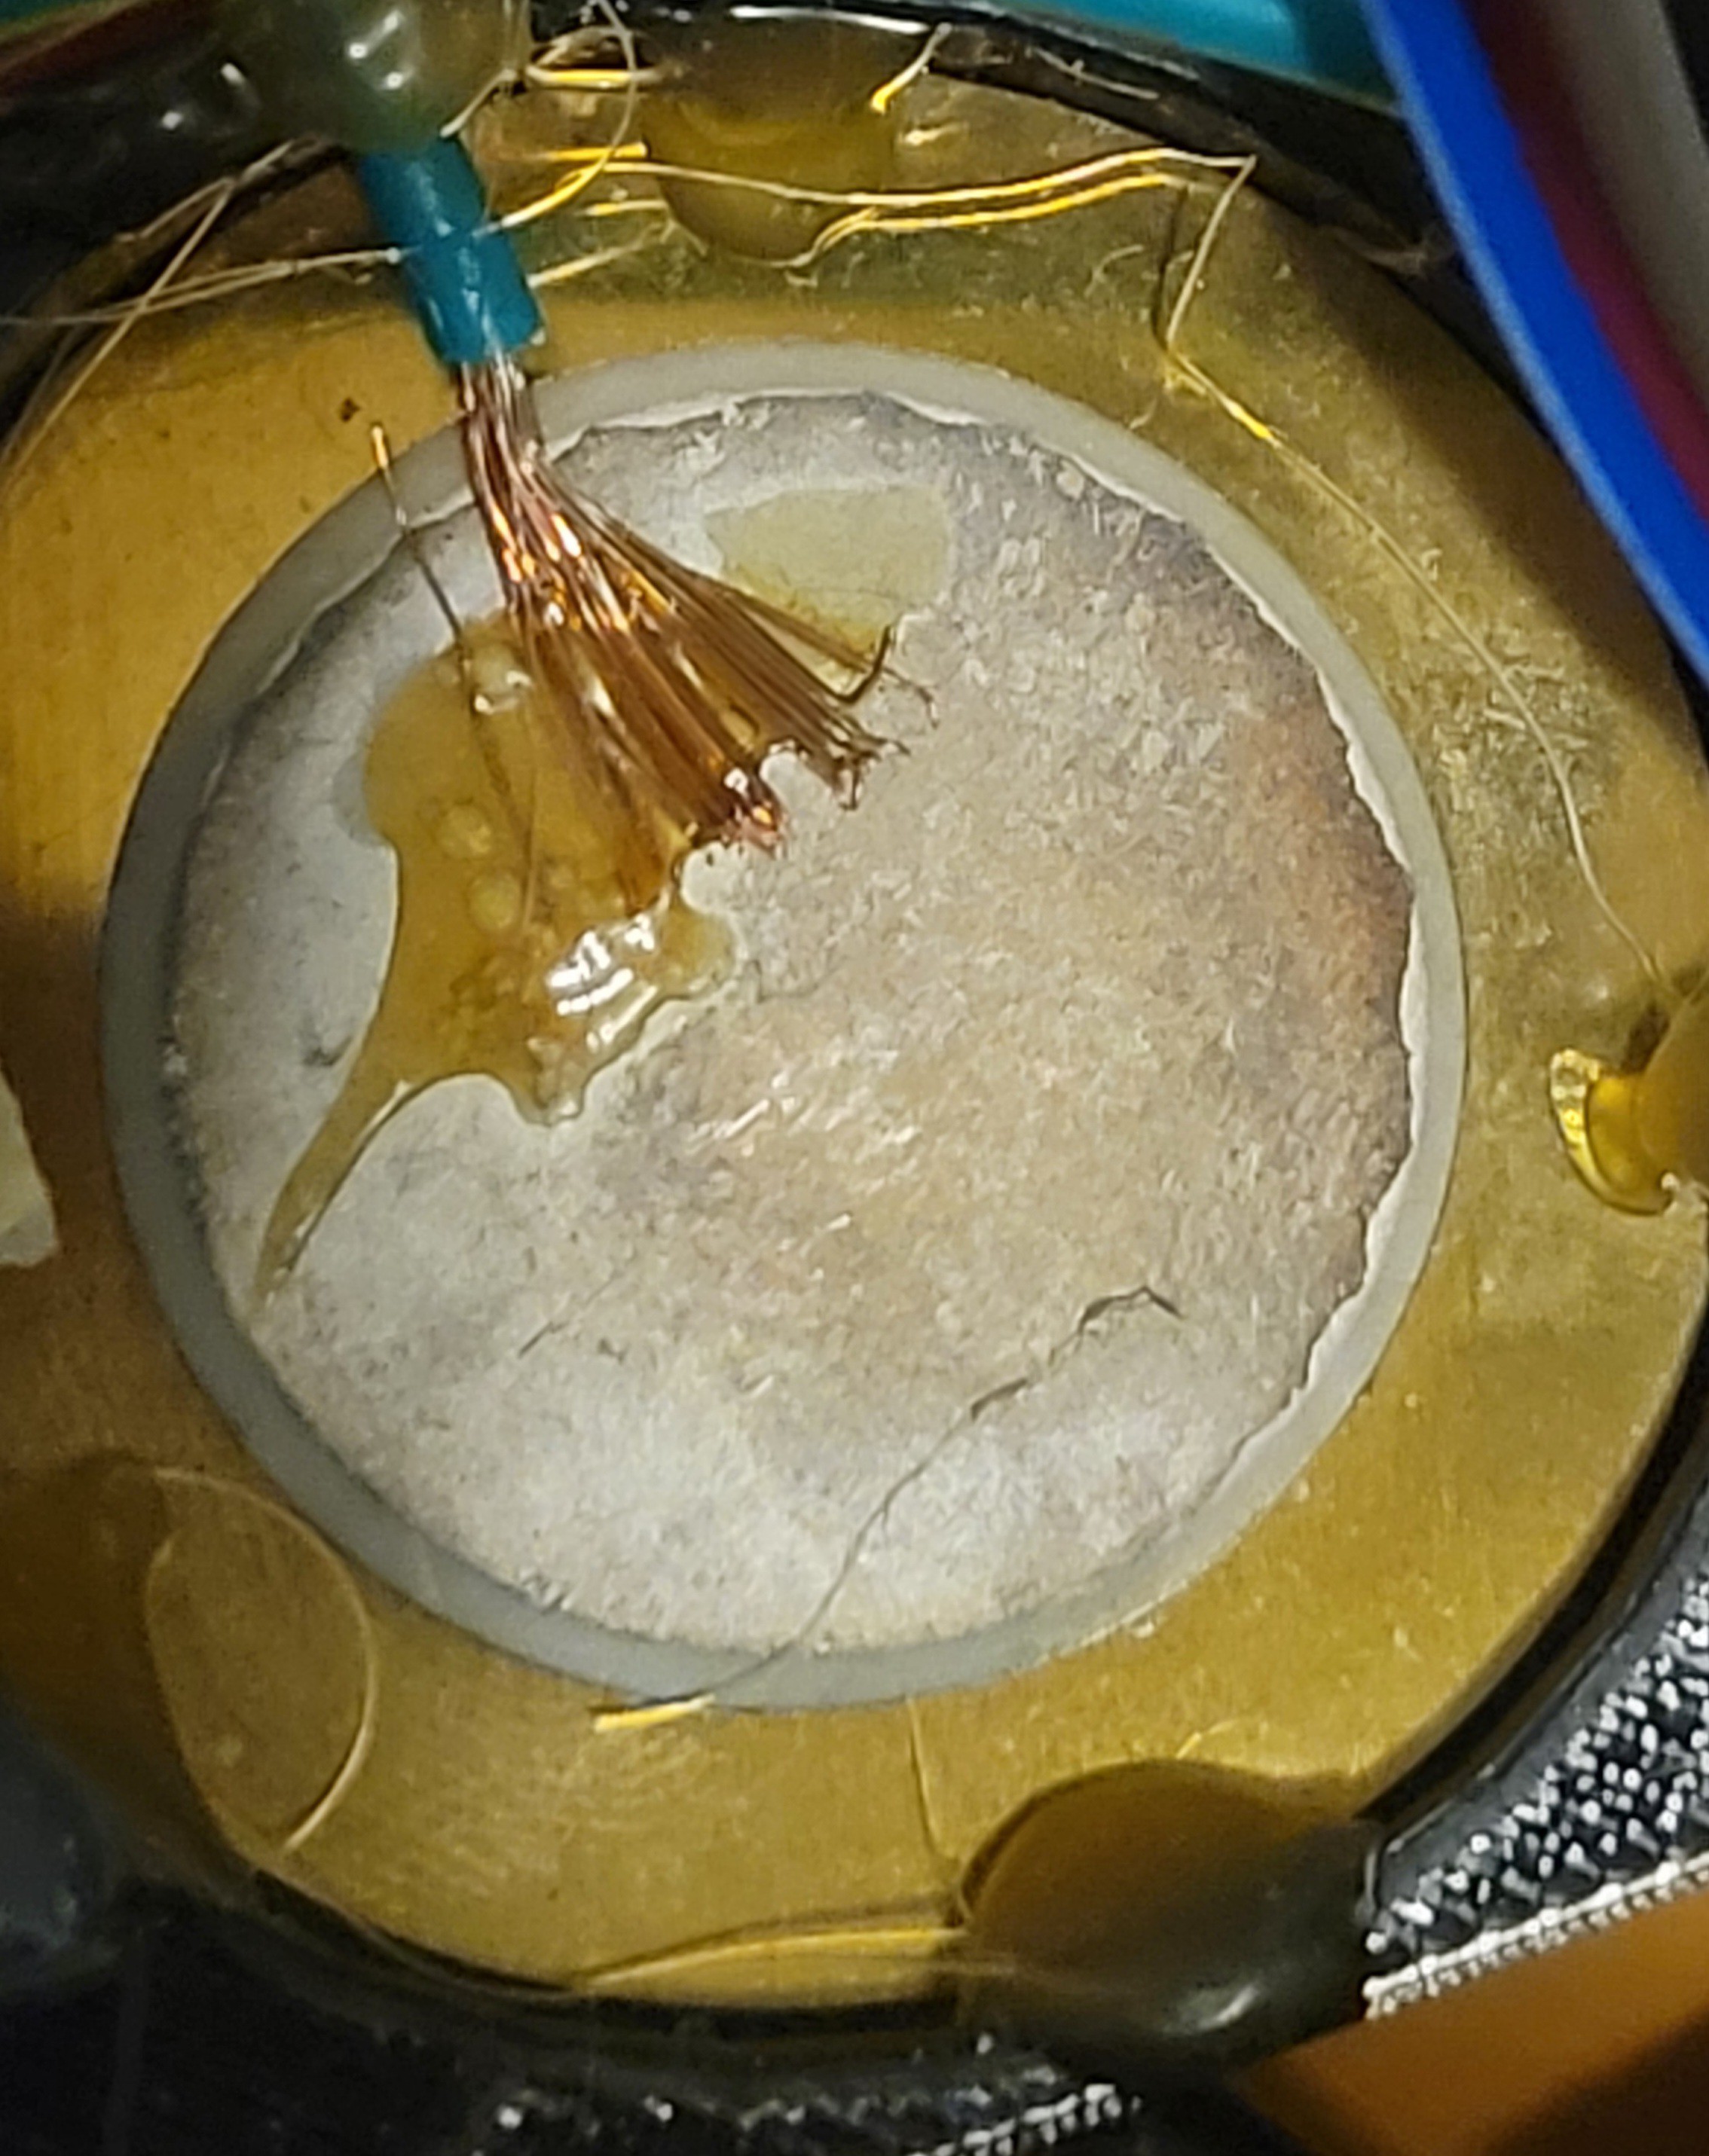
I suspect that this is mechanical, as I've applied too much glue to hold the electric wires when connected piezoelectric elements. Plus used regular electric wire instead of one thin wire
I will try with using tiny wires and soldering paste and see if it's the problem
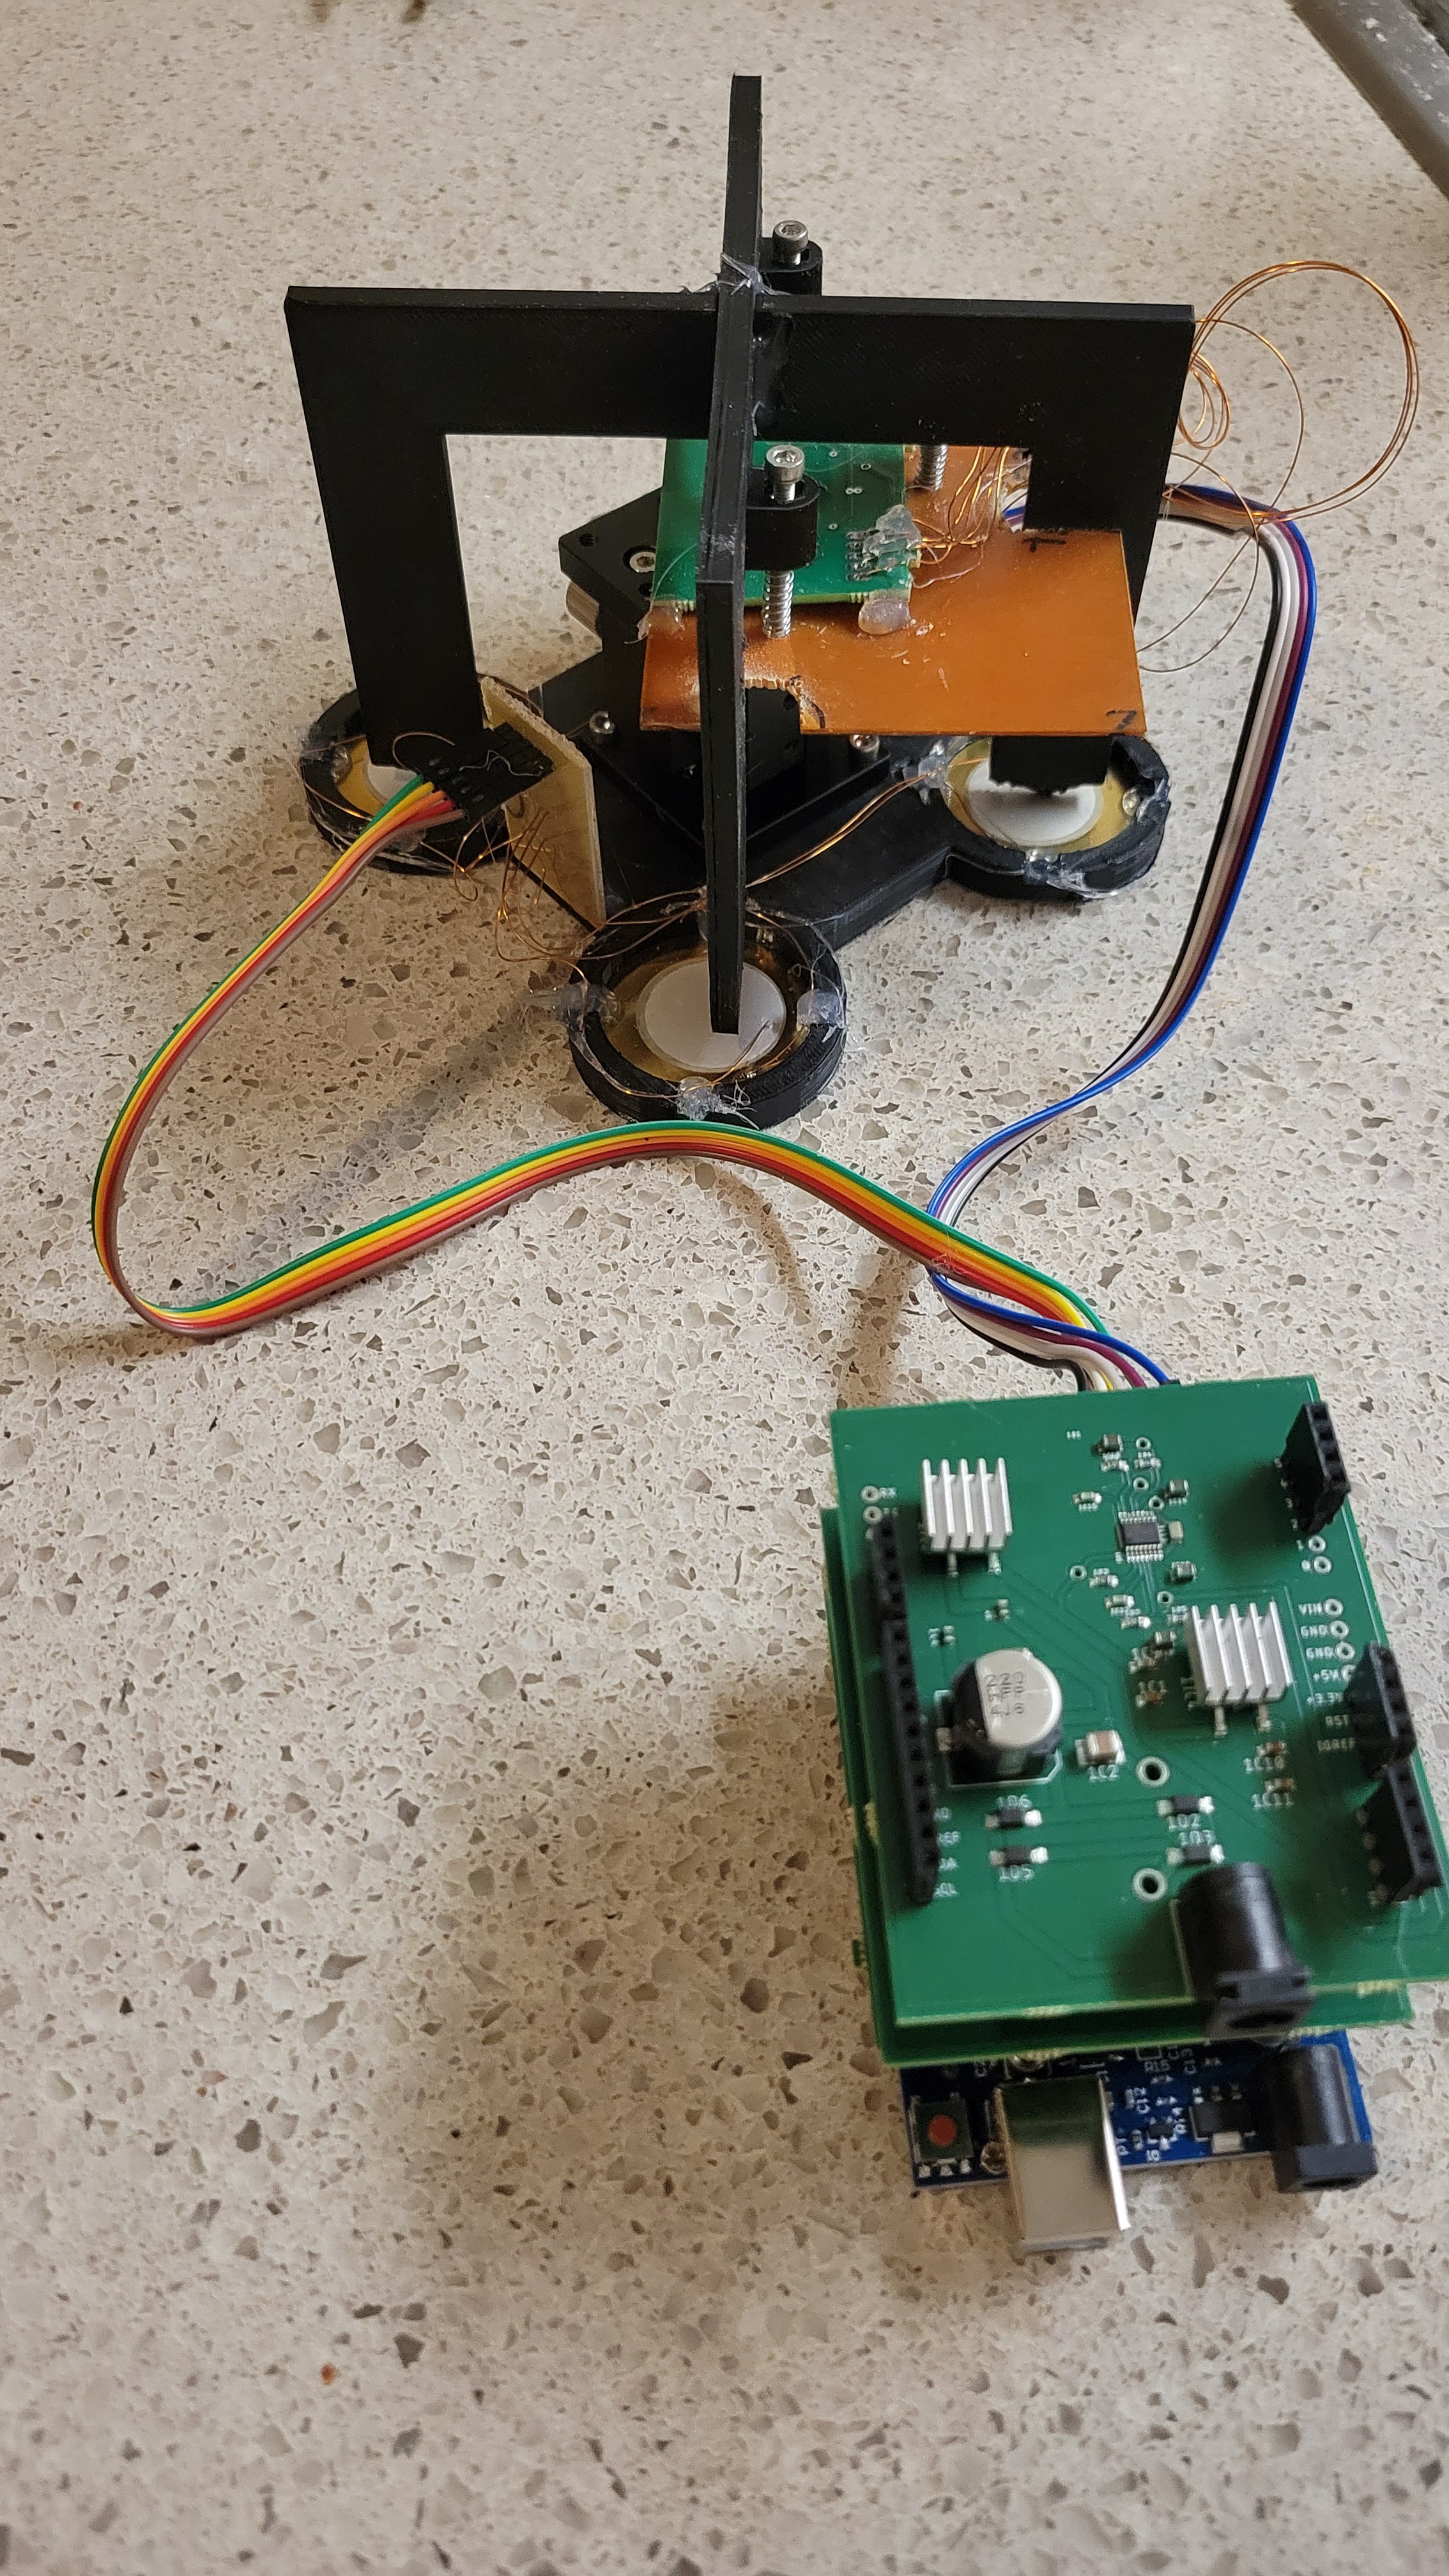
Made another mechanical part version 4.0 I think.
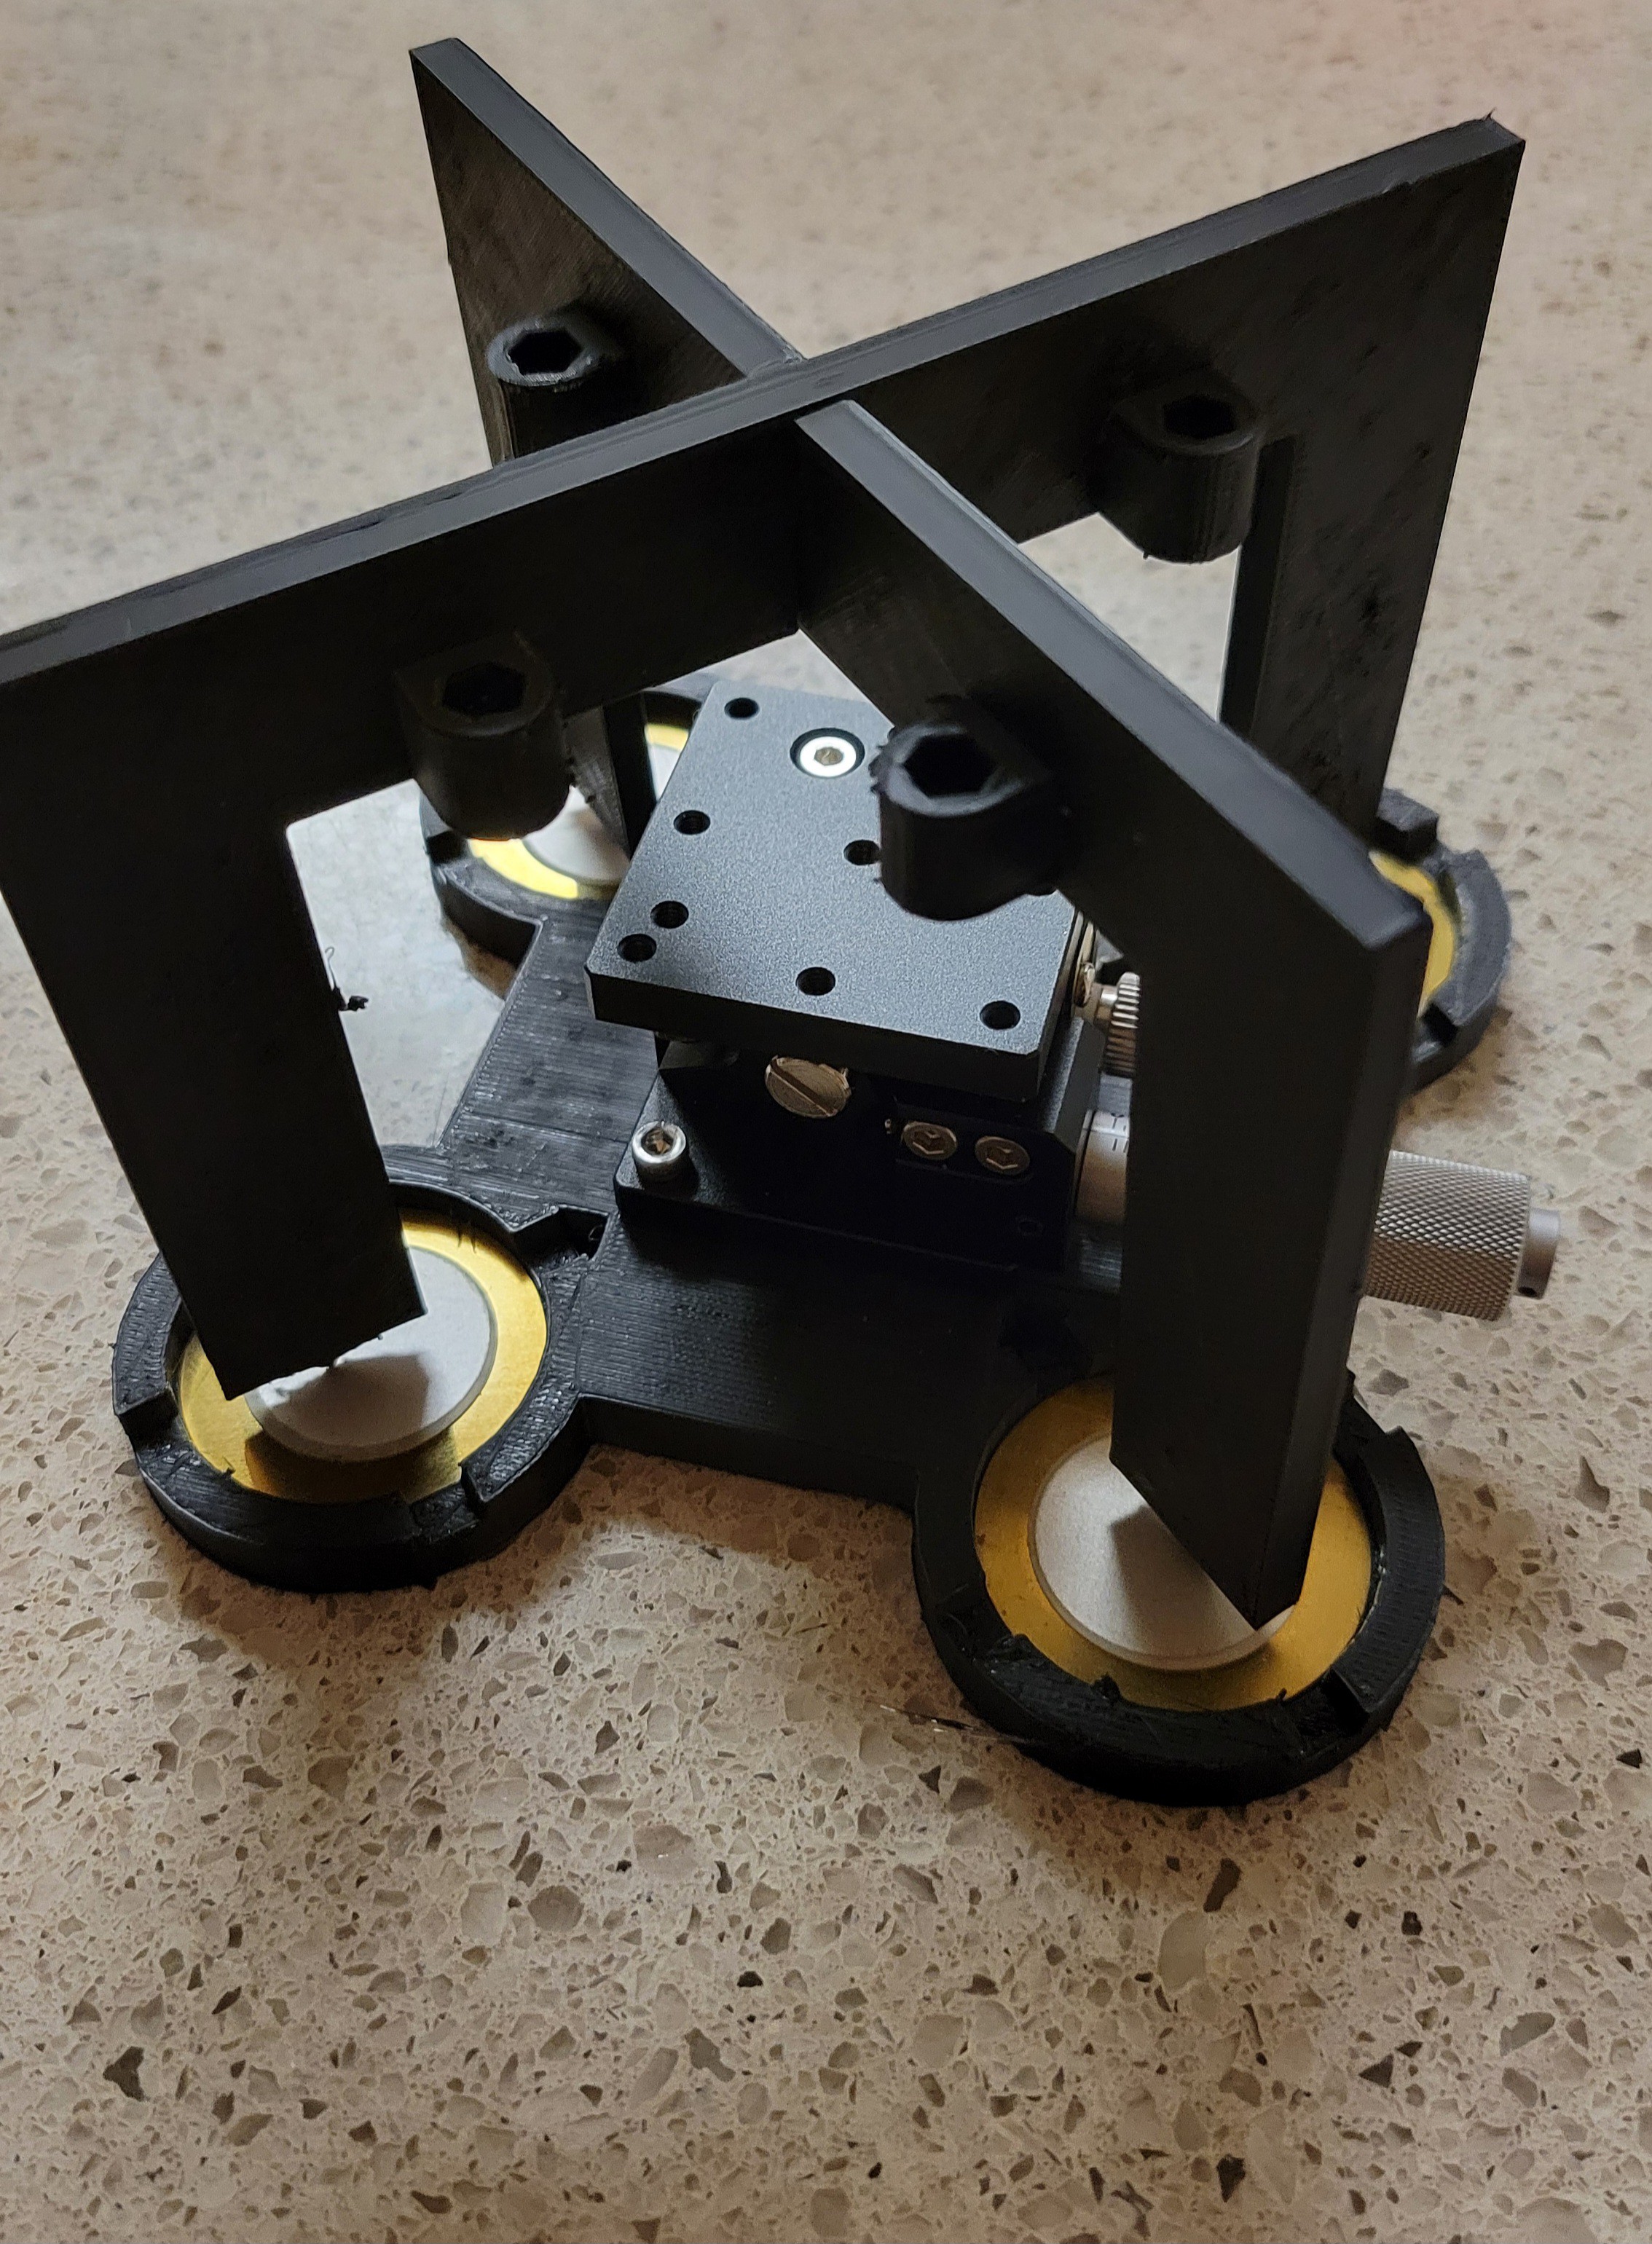
For now I have used AliExpress micro positioner, only because it's smaller and easy to obtain. I should go back to OpenFlexture Delta stage, since it more accurate ( I think, don't know how to measure it) and can be easily motorized.
Used old piezoelectric discs to try to learn soldering. It turns out brass part is easy to solder to quartz almost impossible without ruining it.
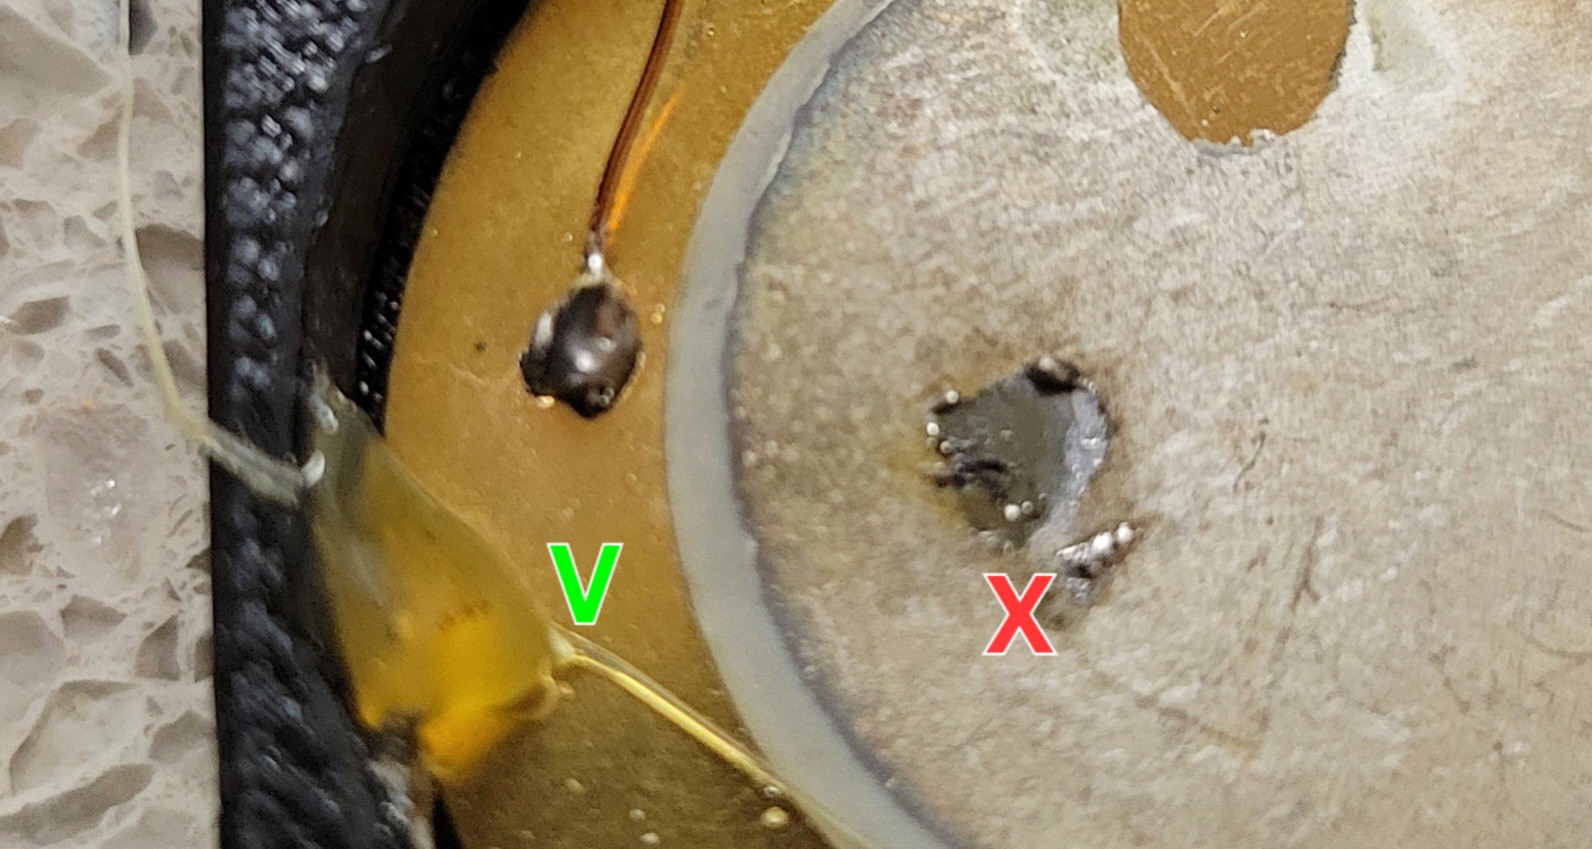
So I will use conducting ink(scribepen)+super glue to connect 0.3mm wires.
The result was quite good and even my kids were unable to break it. Let's connect the real one and hope for the best.
Started adding thin wires (ground) so far so good.
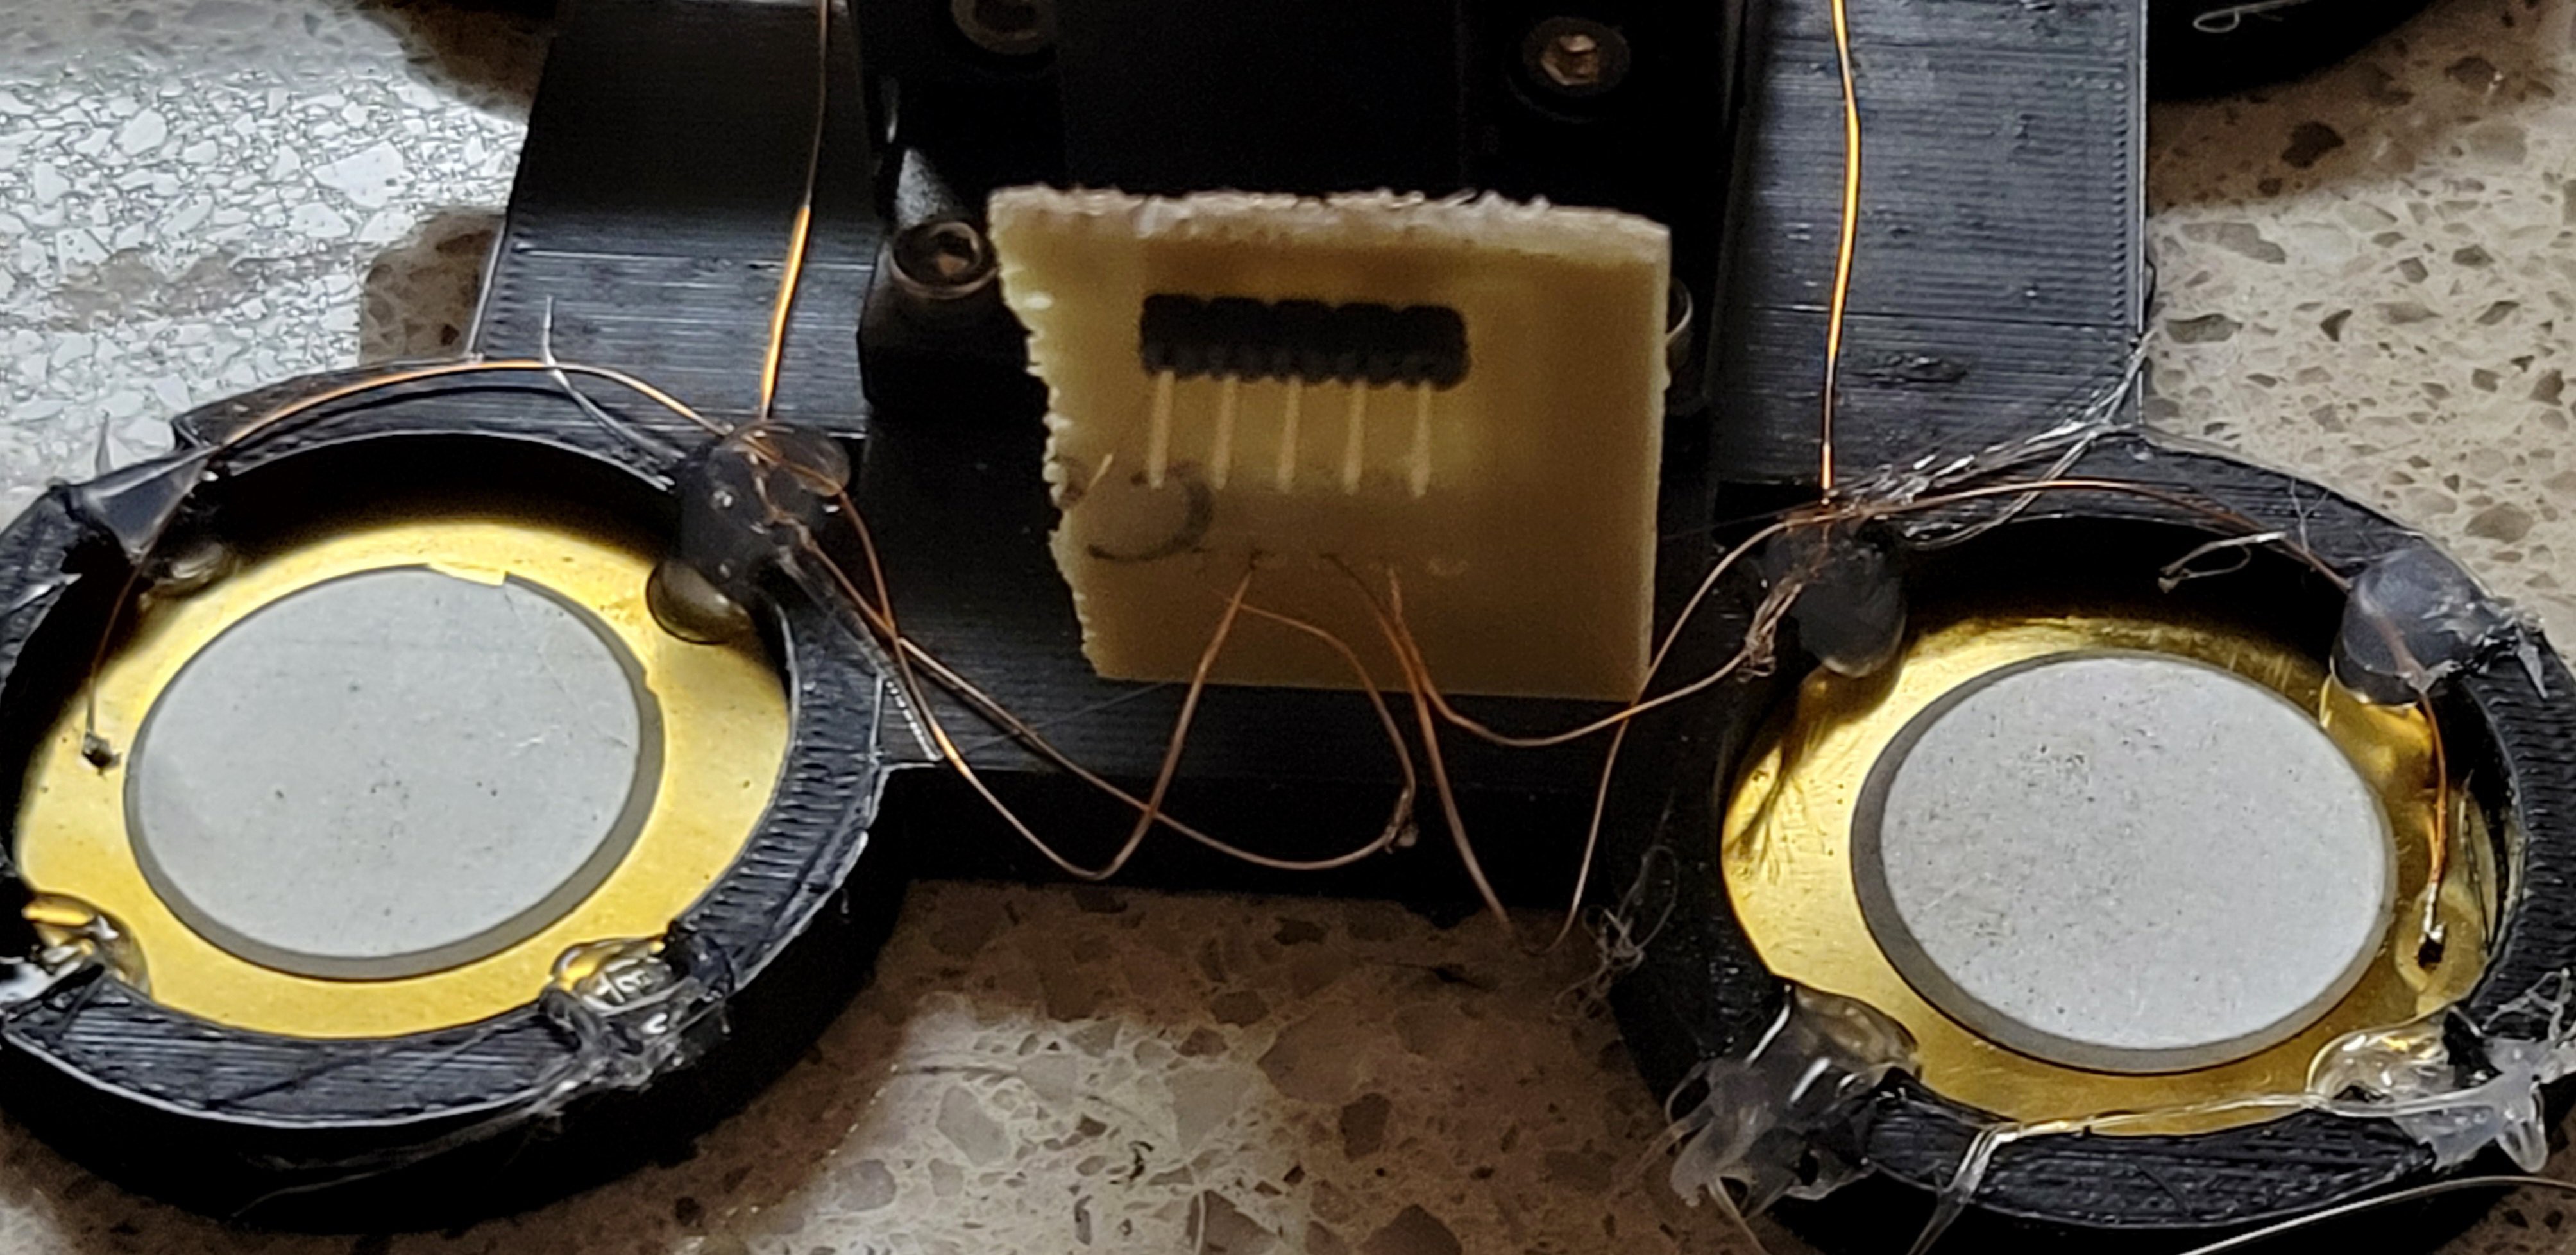
Now added the connections for each piezoelectric disc, the connection is in clock direction. (To ensure X+ and X- are in negative directions) used bit of scribepen and super glue.
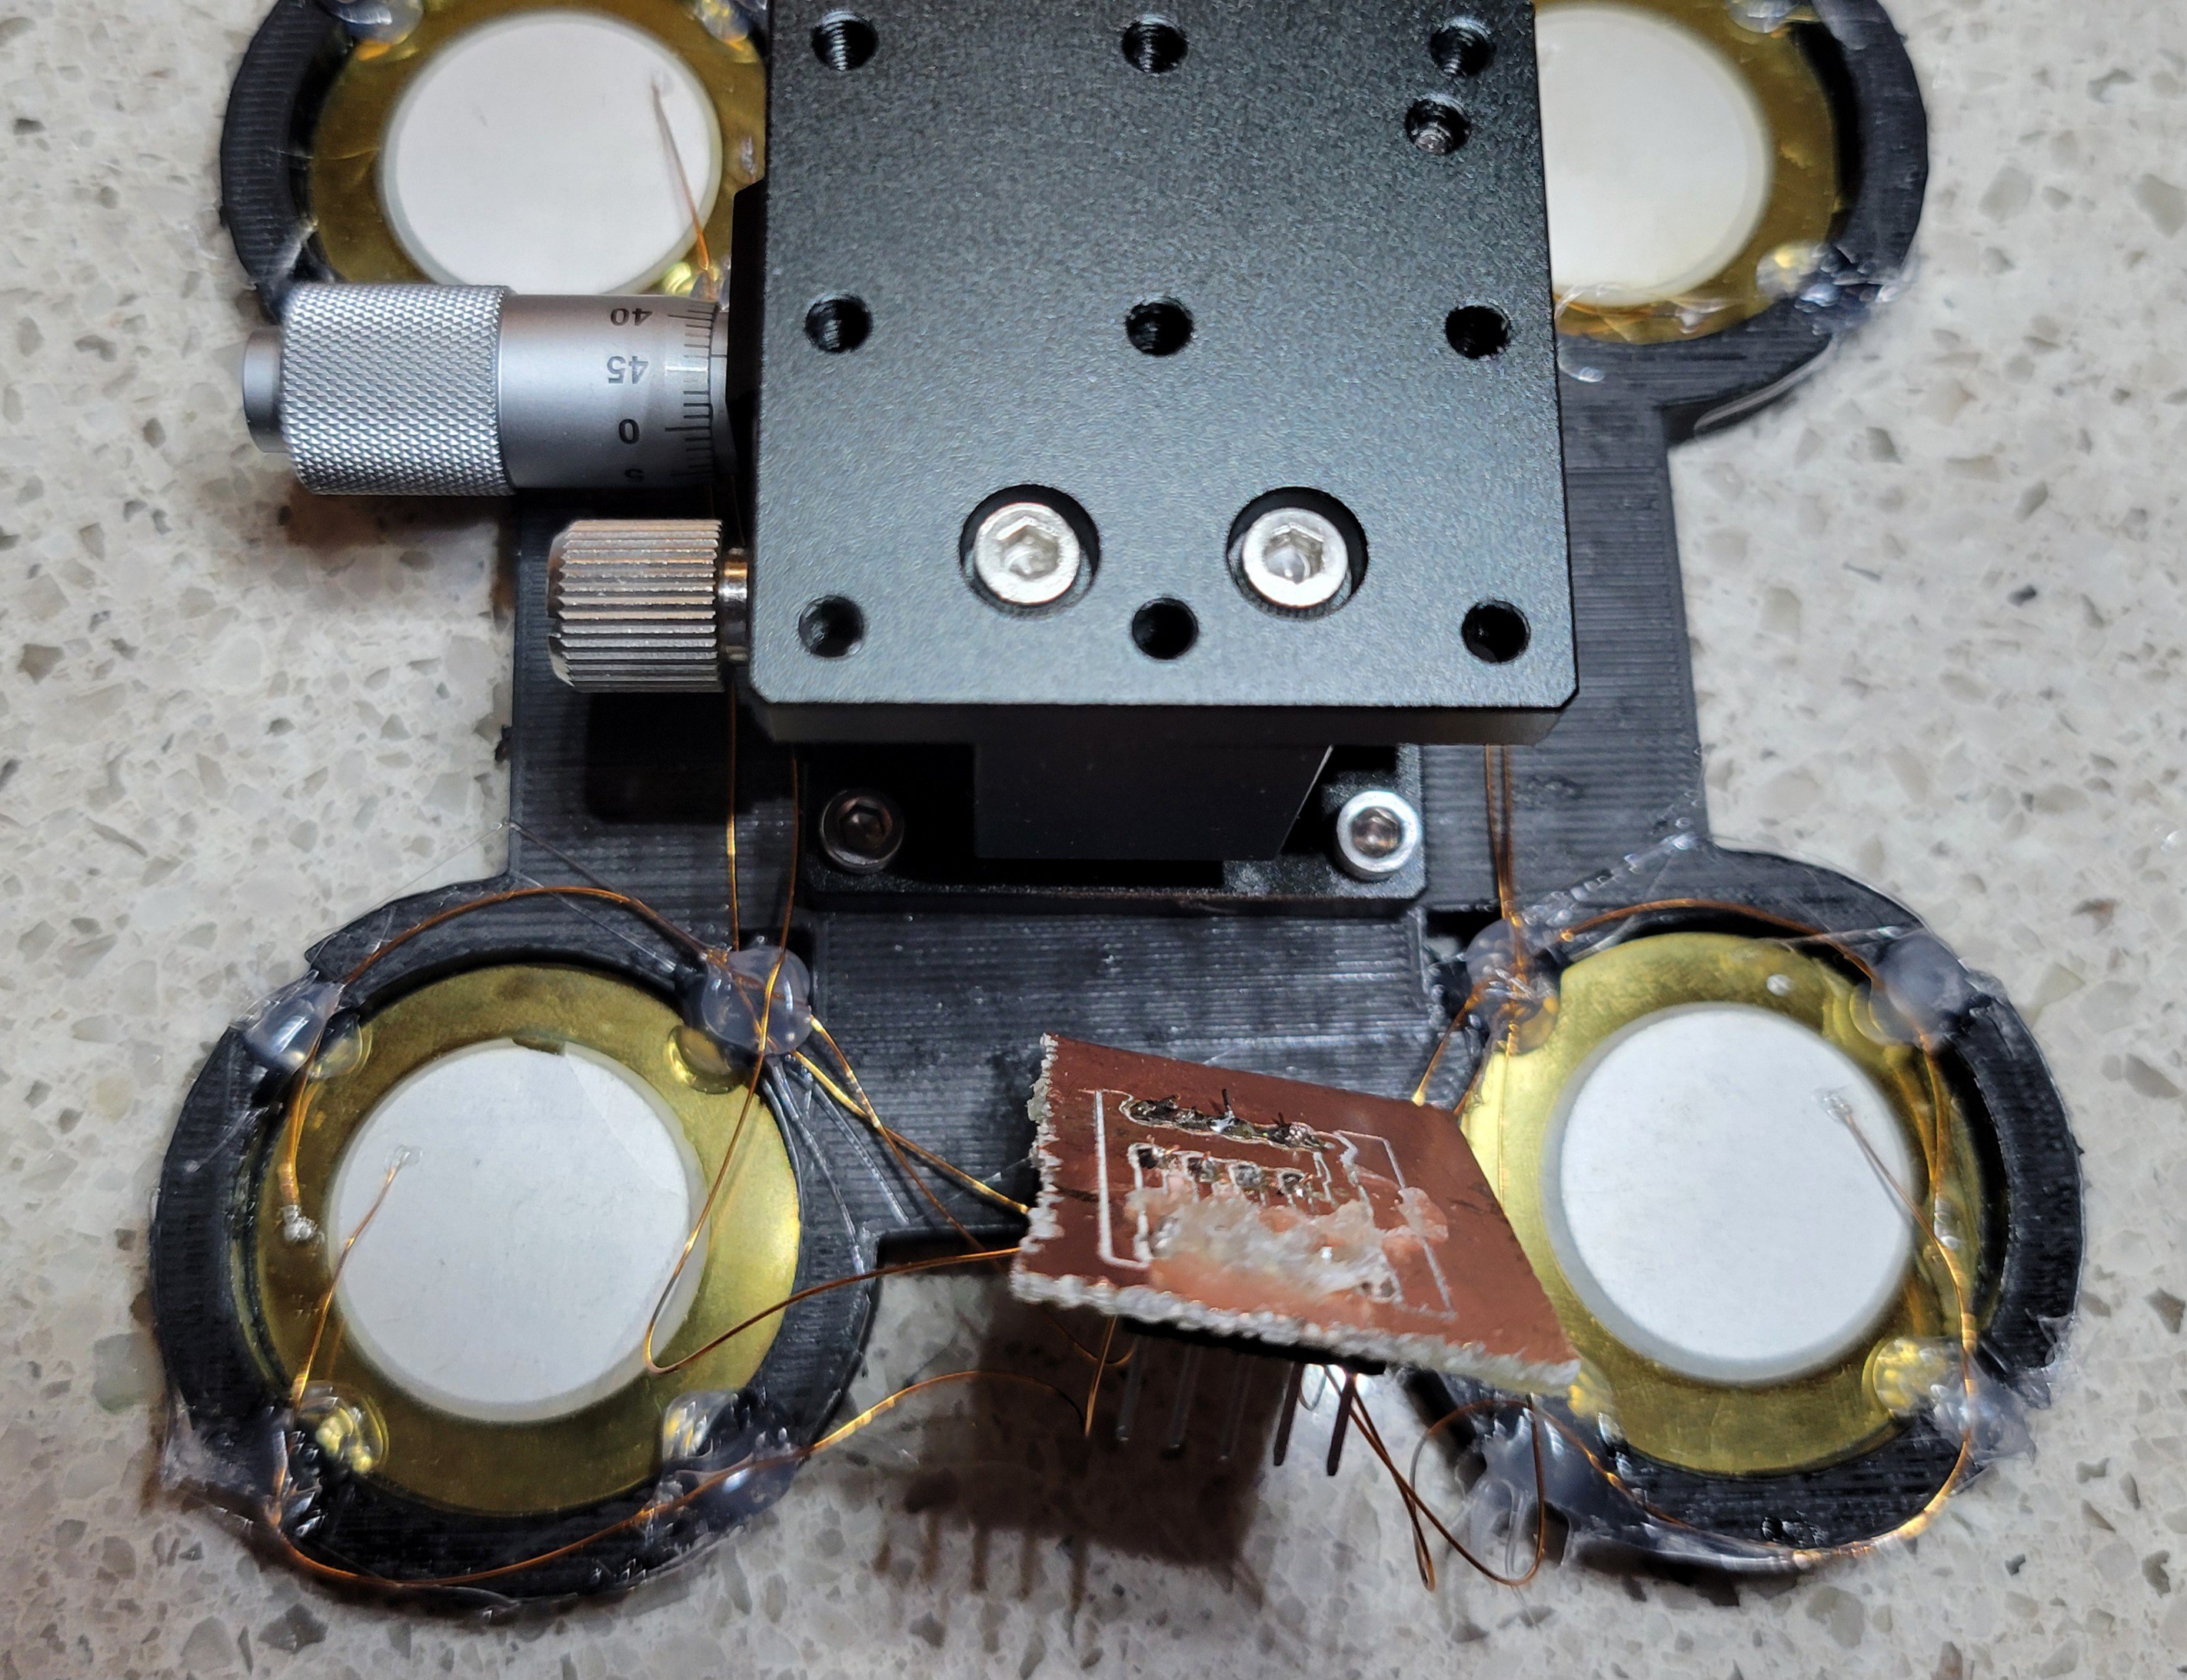
Let's dry it for the night and see if it is working or this project goes to garbage 🗑️
------------------------------------------------------------------
Good news, the new mechanical part seems to work much better.
Was able to get to 25 and 10 steps resolution (less than that, I think, is waist of time since 25steps is 25mv which is my currently noise level of the system)
I mean I was able to set position so I was on the edge between touching (the sample) ~250 and not touching ~80. It was about 200 and minor change of three steps of 25 could take you up or down.
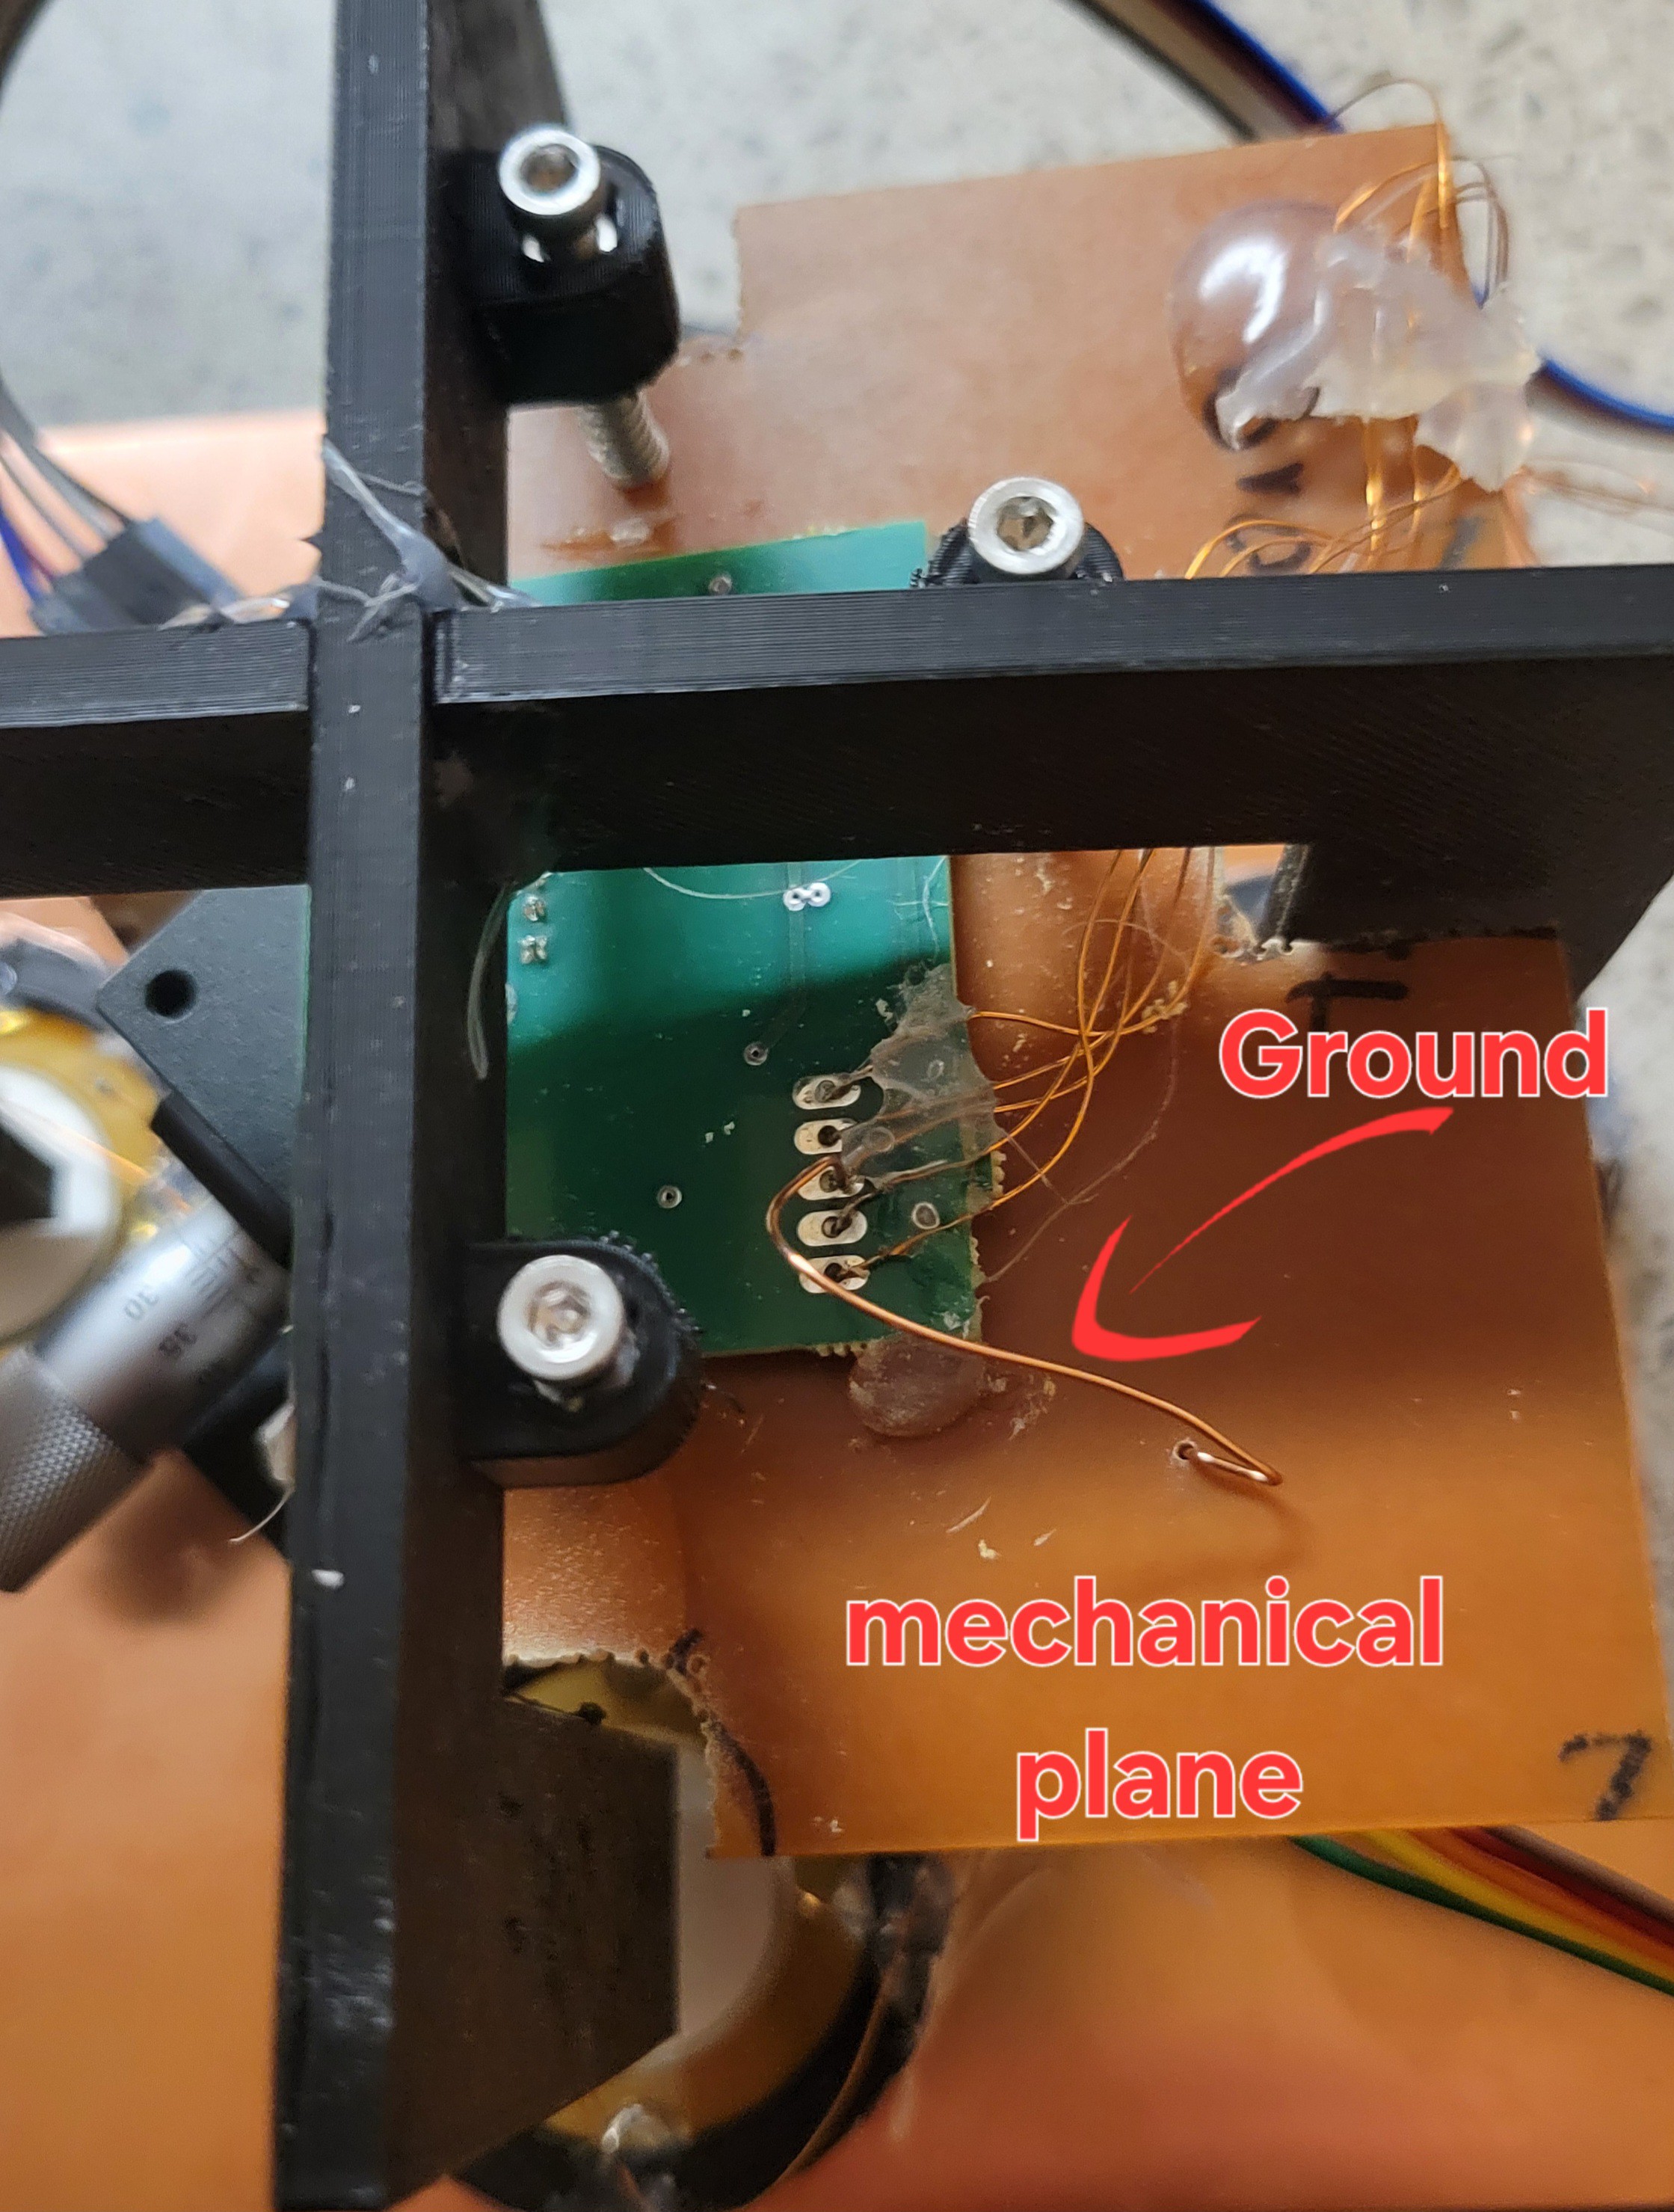
Some important changes: I've connected the plate that holding sensor module (the PCB with USB on it that quartz fork connects to) to ground and got much better SNR. Instead of 180 I got 80.
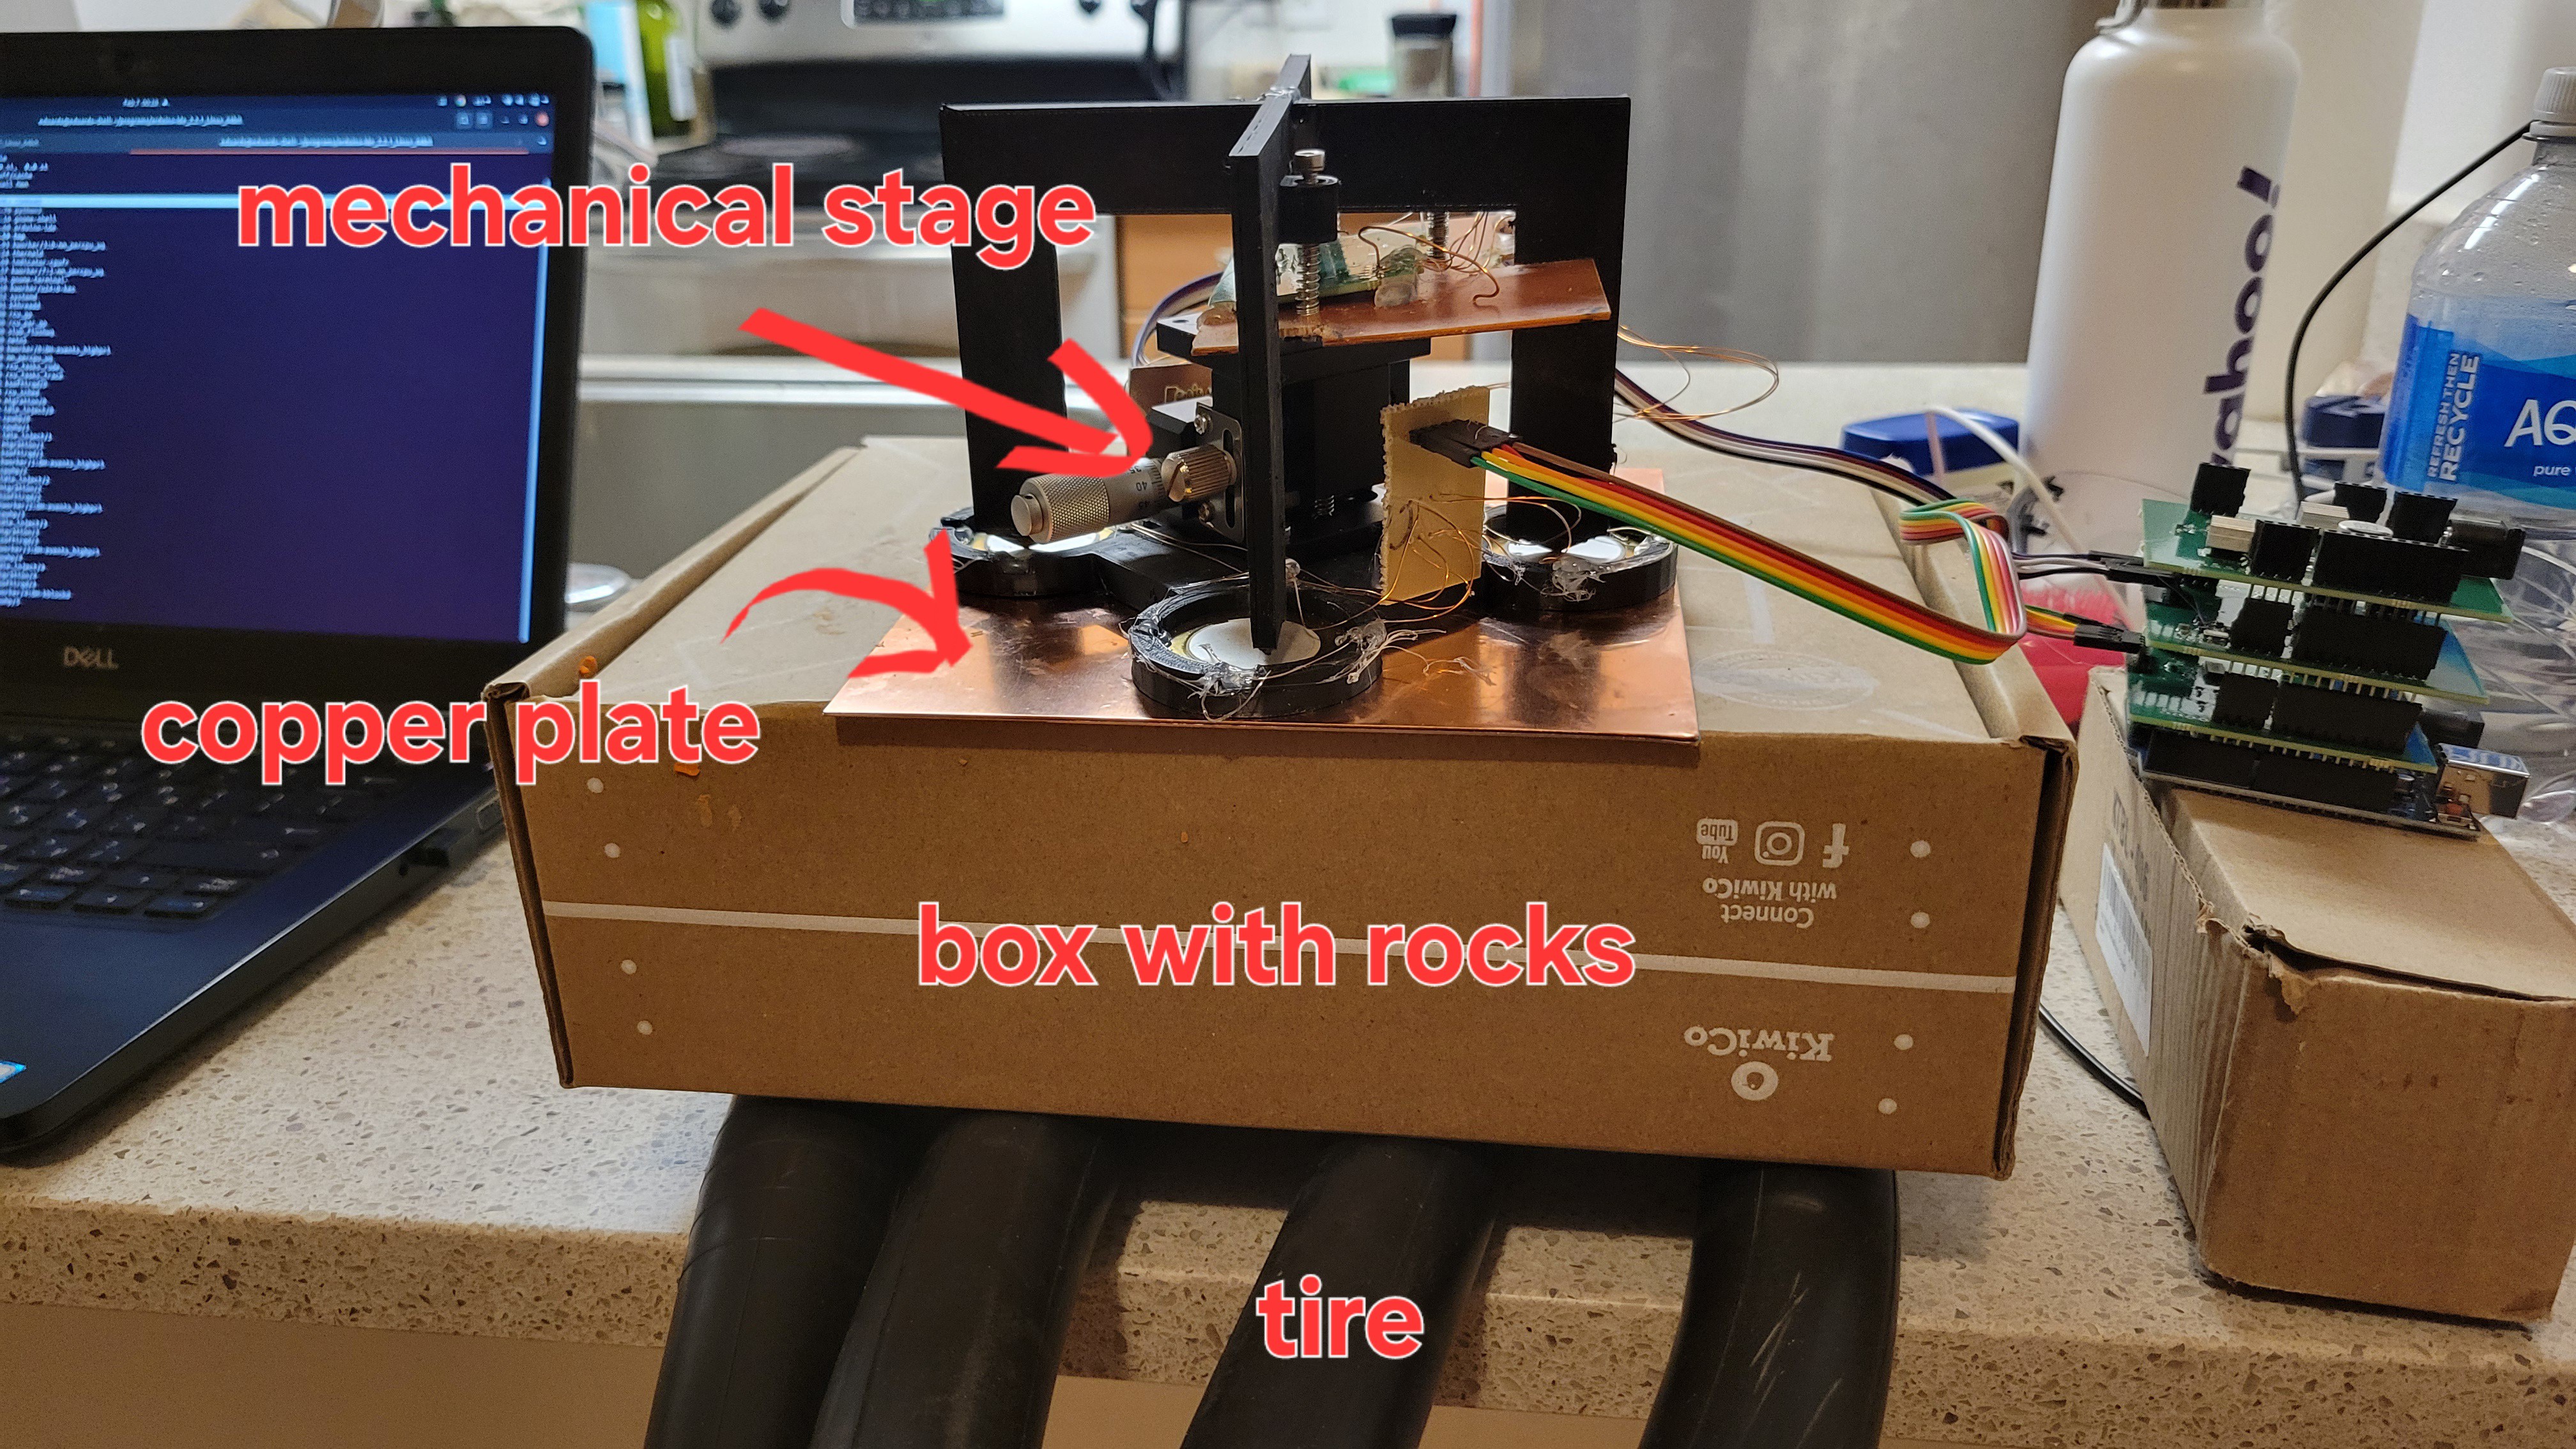
Also, used the vibration reduction system which was a tire above it box with rocks (for weight). On top of the box I've put metallic plate to make sure plastic doesn't get deformed. On top of it all mechanical stage.
Turning off appliances also helps.
And last but not least is to run changes smaller each time. For example I've started with 30k steps just to see if I am in the range. Then reduce to 10k steps, 2k, 100, 50 and final 25.
I don't know what should I do with a real tip as such a big steps would definitely bent/break it.
But this works for now.
Discussions
Become a Hackaday.io Member
Create an account to leave a comment. Already have an account? Log In.