RobsonCouto
-
Entry 0x0C - Handle and started to code the display driver
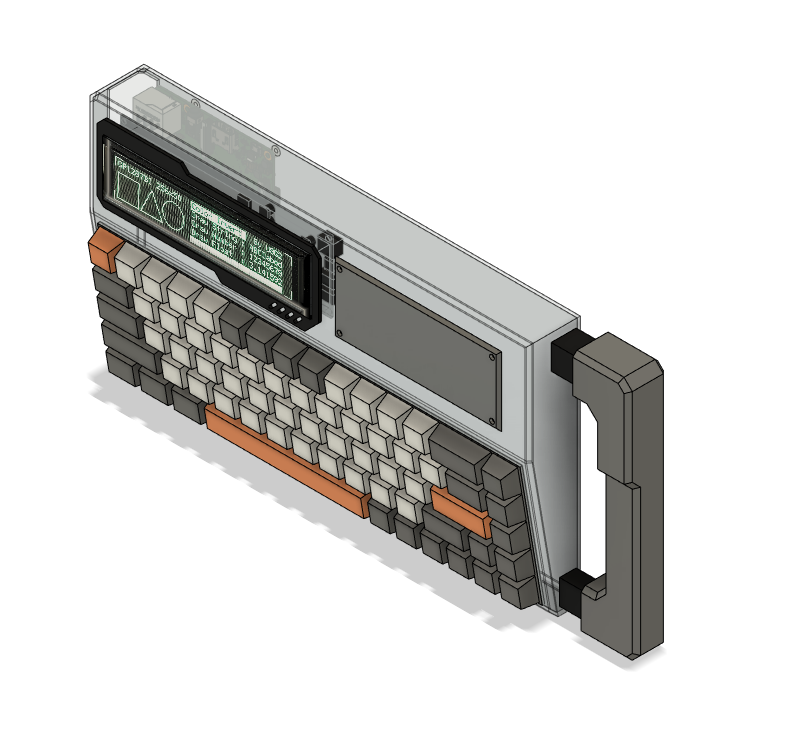
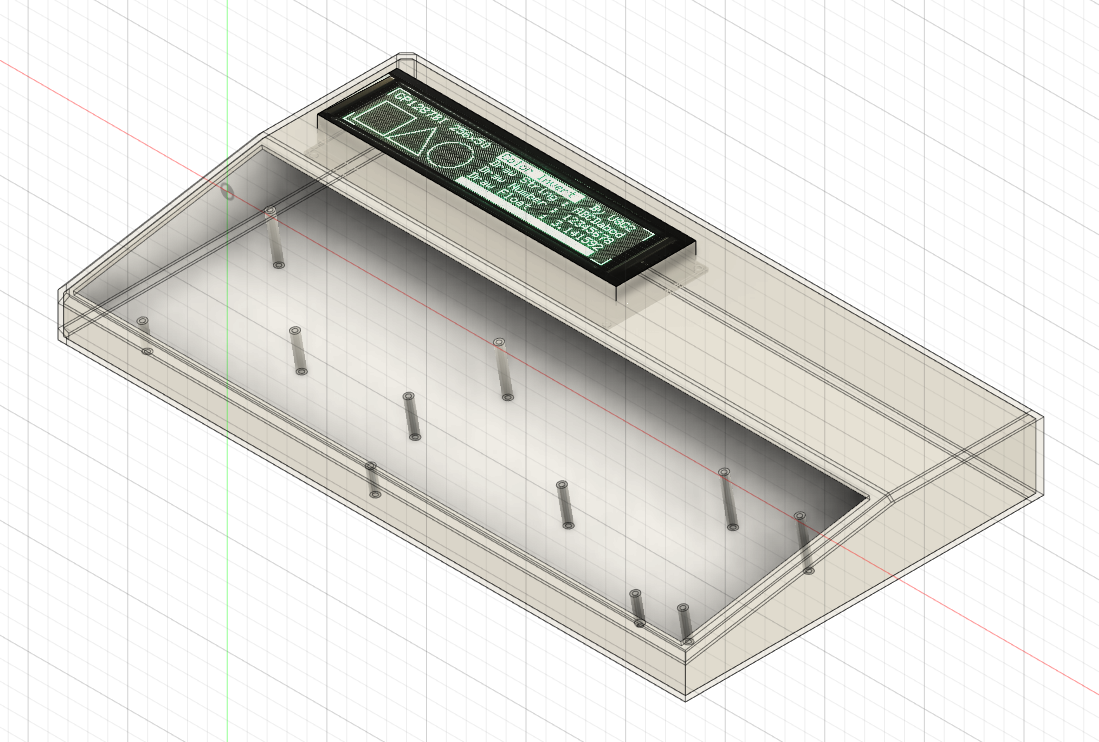
08/04/2023 at 00:49 • 0 commentsThis week's nights I had very little time to work on this project. Still, I got to sketch the handle on the 3d model.
![]()
I'm quite happy with the overall shape. By that I mean the deck's dimensions. I plan to add lots of the details to all the surfaces to give it more convincing and artsy look.
Meanwhile, I have started to work on the display driver. I have never tried to code a driver for Linux before, so I'm having a hard time. I prepared a raspberry pi OS install with the linux headers and enabled SSH and serial so I can program form my regular computer. I'm watching Johannes 4GNU_Linux' tutorials which have been featured on Hackaday recently to help me get started.
-
Entry 0x0B - Added a keyboard to the 3d model.
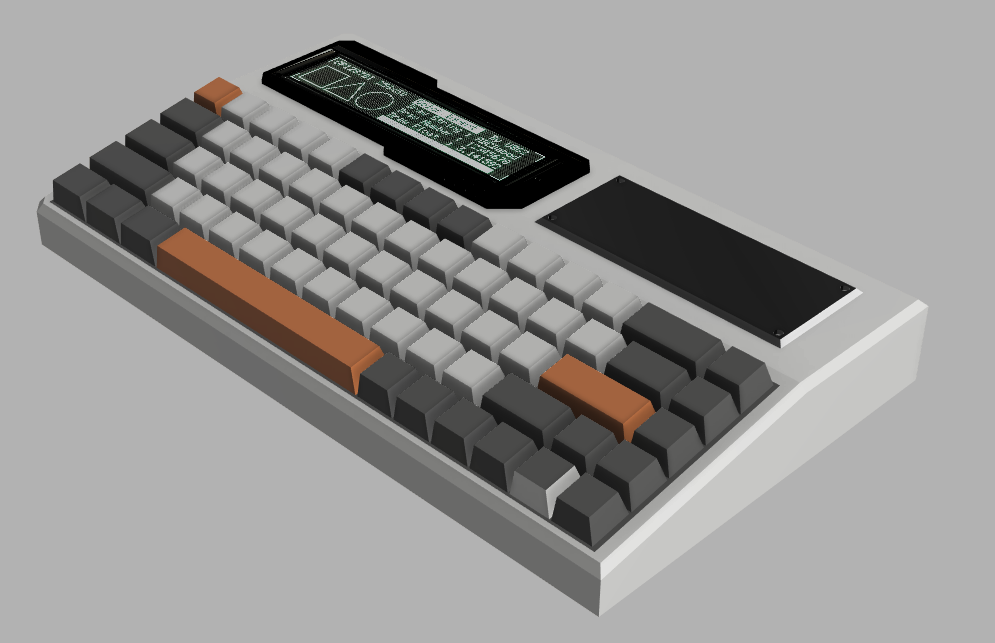
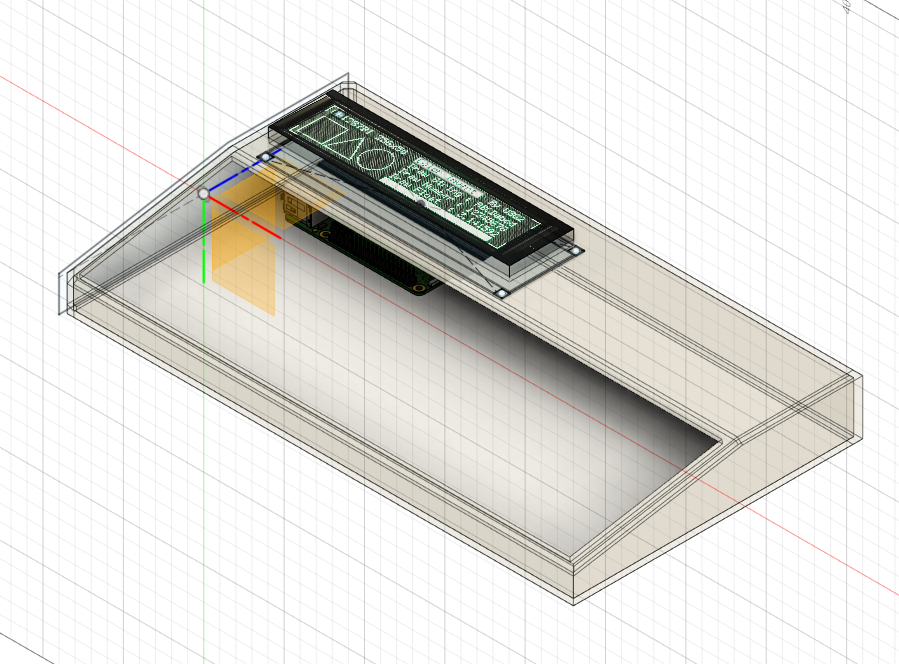
08/01/2023 at 00:22 • 0 commentsThe 3d model was not looking nice on the project picture, so I drew the keyboard as well. That is, a very simple version of it. I also added some details so the deck does not look too much like a retro computer.
![]()
Meanwhile, I also did a few prints to check the raspberry pi fitting. This week I want to work on the framebuffer driver while I update the design and run more tests. I hope to start definitive printing soon.
-
Entry 0x0A - Keyboard mount success
07/30/2023 at 15:45 • 0 commentsThe first test on the 3d printed keyboard mount has been successful. Apart from one of the posts breaking because that part of the print came of the bed, all the posts fit their respective hole on the keyboard PCB.
![]()
Like we say sometimes at work: "Very good fit! Even looks like it was designed."
Now I can reinforce the bottom of the posts with a wider cylinder, which will also support the weight of the keyboard, which seems to have a hefty metal plate on the front.
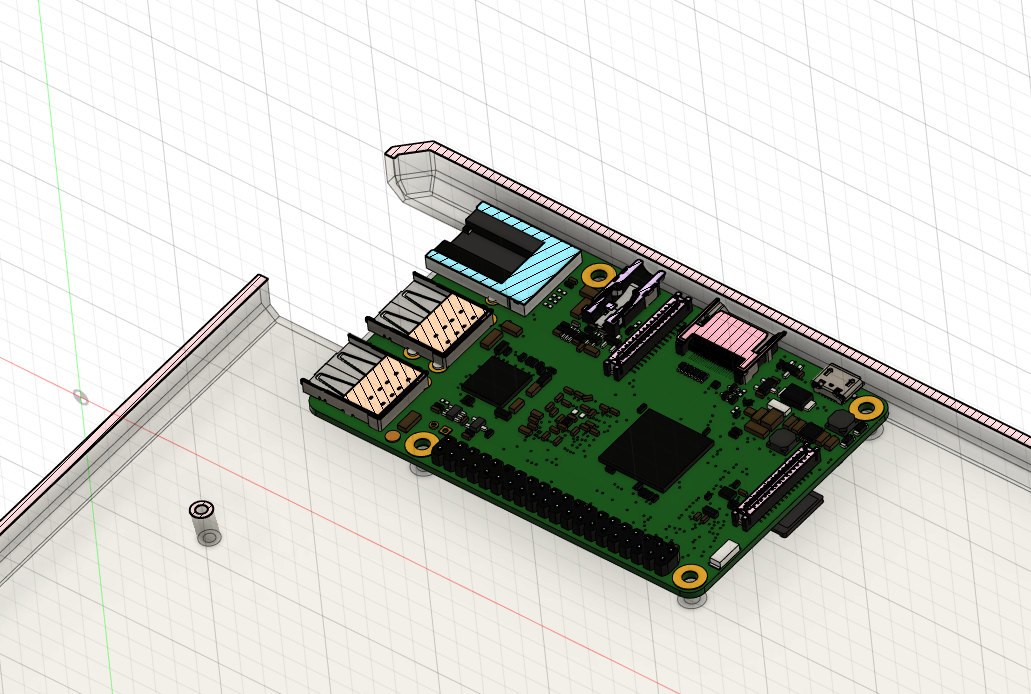
Meanwhile, I started working on the raspberry pi fit was well.
![]()
Two USB ports will be available on the side, while two will be used internally in the deck. Probably I will also have to add a USB hub.
-
Entry 0x09 - Keyboard Screw posts
07/30/2023 at 12:00 • 0 commentsSo, it's Sunday and I get to spend more time on this project, so I hope I can upload more logs today. The 3d printer is busy right now and I get a break to write this log before starting to work on another feature. I'm printing a test for the keyboard mount posts.
Yesterday I measured and drew the posts which will hold the keyboard in place. I got the dimensions for my drawings from the back cover of the keyboard:
![]()
I wrote down the dimensions I measured with callipers directly into the sketches. Which then I modelled into the shell:
![]()
Since I can't just print the posts by themselves or print the hole shell or back, I created a small plane just for testing.
![]()
So I just hope that if fits the holes on the keyboard PCB, then I can reinforce them like in the original back cover. Next, I will probably start to work on the raspberry pi mount. I'm also still pondering how I will split the shell, but I prefer to focus on these details for now. See you later!
-
Entry 0x08 - Started 3d design
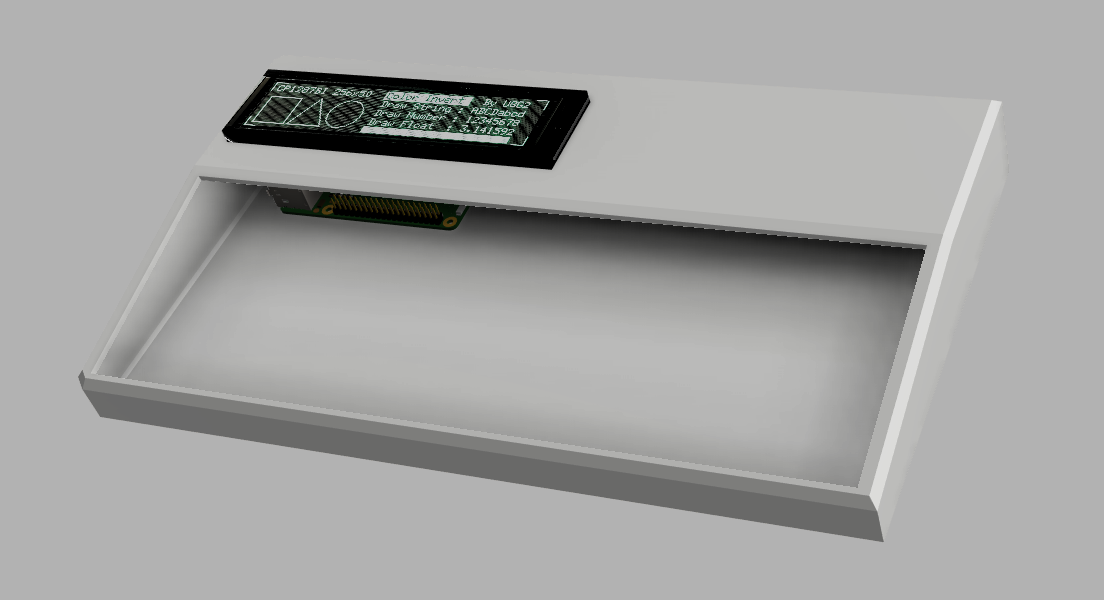
07/29/2023 at 22:31 • 0 commentsThis week wen by flying and unfortunately I had very little time to work on this project. I hope I can use the Sunday to do most of the modelling, printing and testing. At least the critical components and fits.
![]()
This is basically the second time (first project here) I'm modelling something using Fusion, so I'm still learning and looking for videos and tutorials as I go and that takes a lot of time.
I don't want this to look boring at all, so my idea is to print a basic shape with the display, raspberry pi and keyboard in the correct positions. After that I plan to add lots of detailing via panels screwed into the main body. That way I can quickly prototype these panels without having to print the most time consuming parts of the shell.
![]()
The challenge here is to design while having the orientation that everything is going to be printed. That also means that I have to think about how to split the body so that:- It fits in my printer and I can prototype parts of the main shell without having to print the whole shape. For example, the raspberry pi fitting.
- So that some features like screw posts are not printed sideways (and mid-air) and thus have better resistance.
-
Entry 0x07 - Also got the keyboard
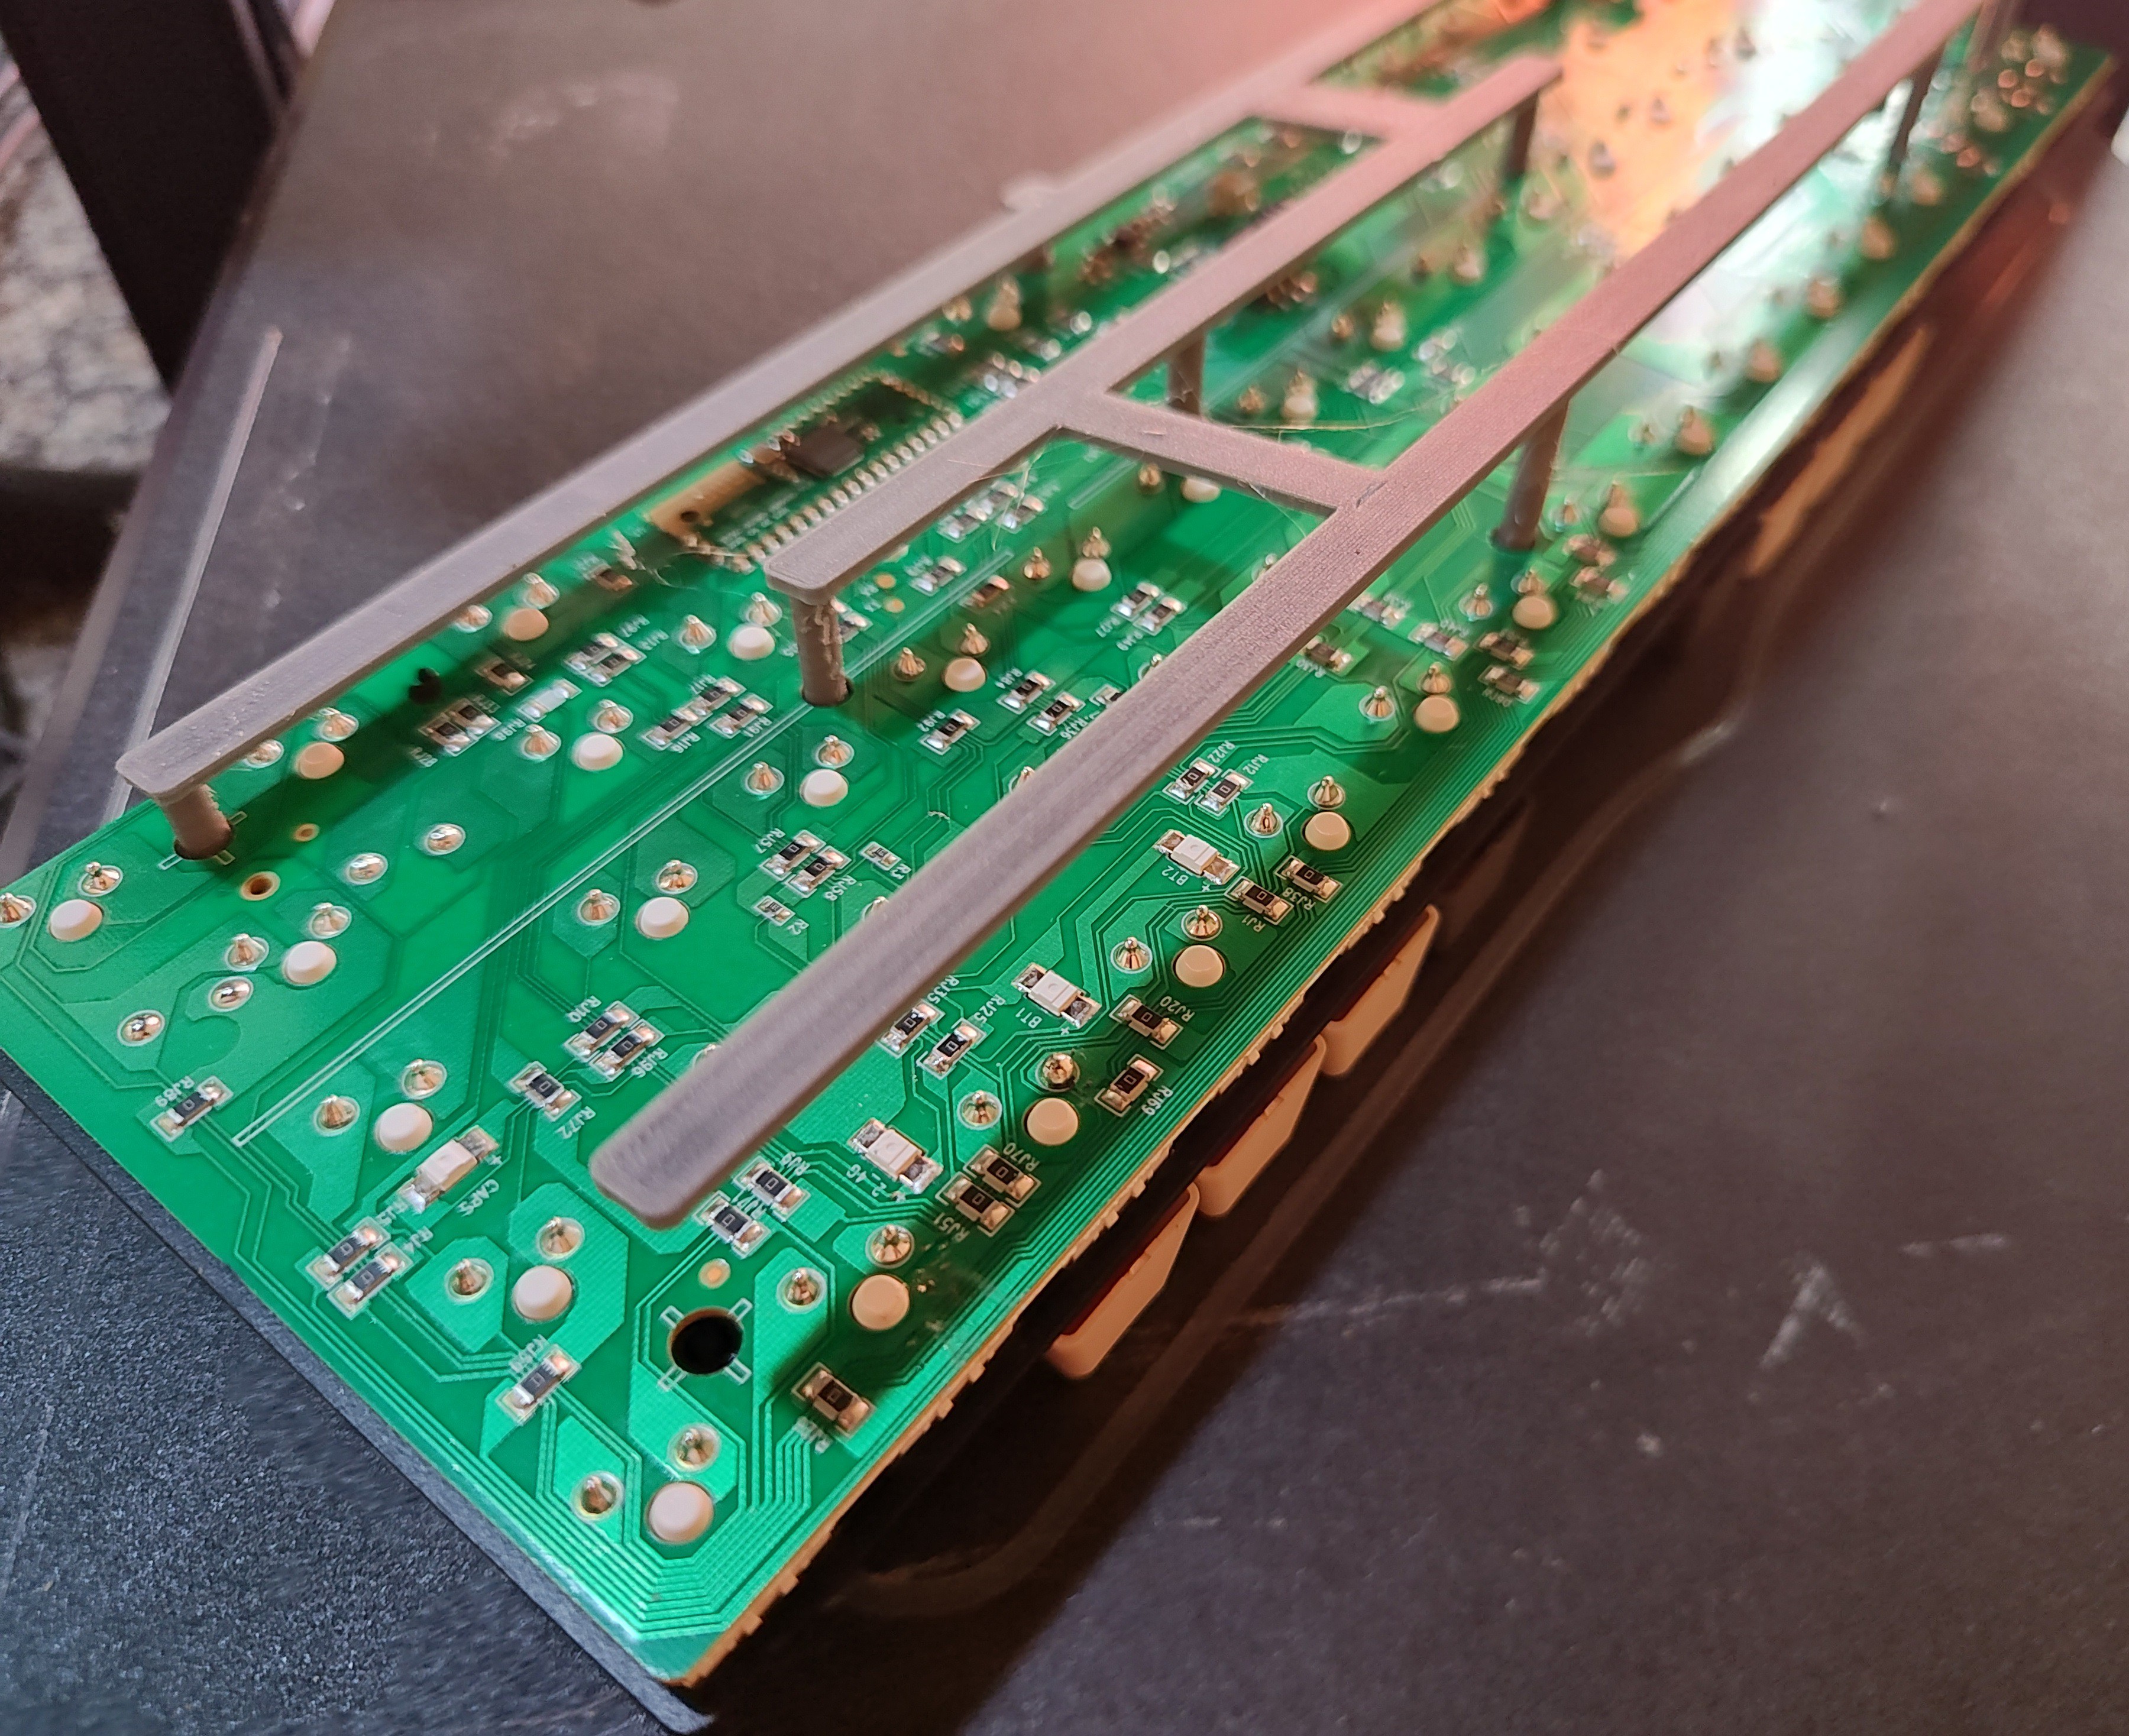
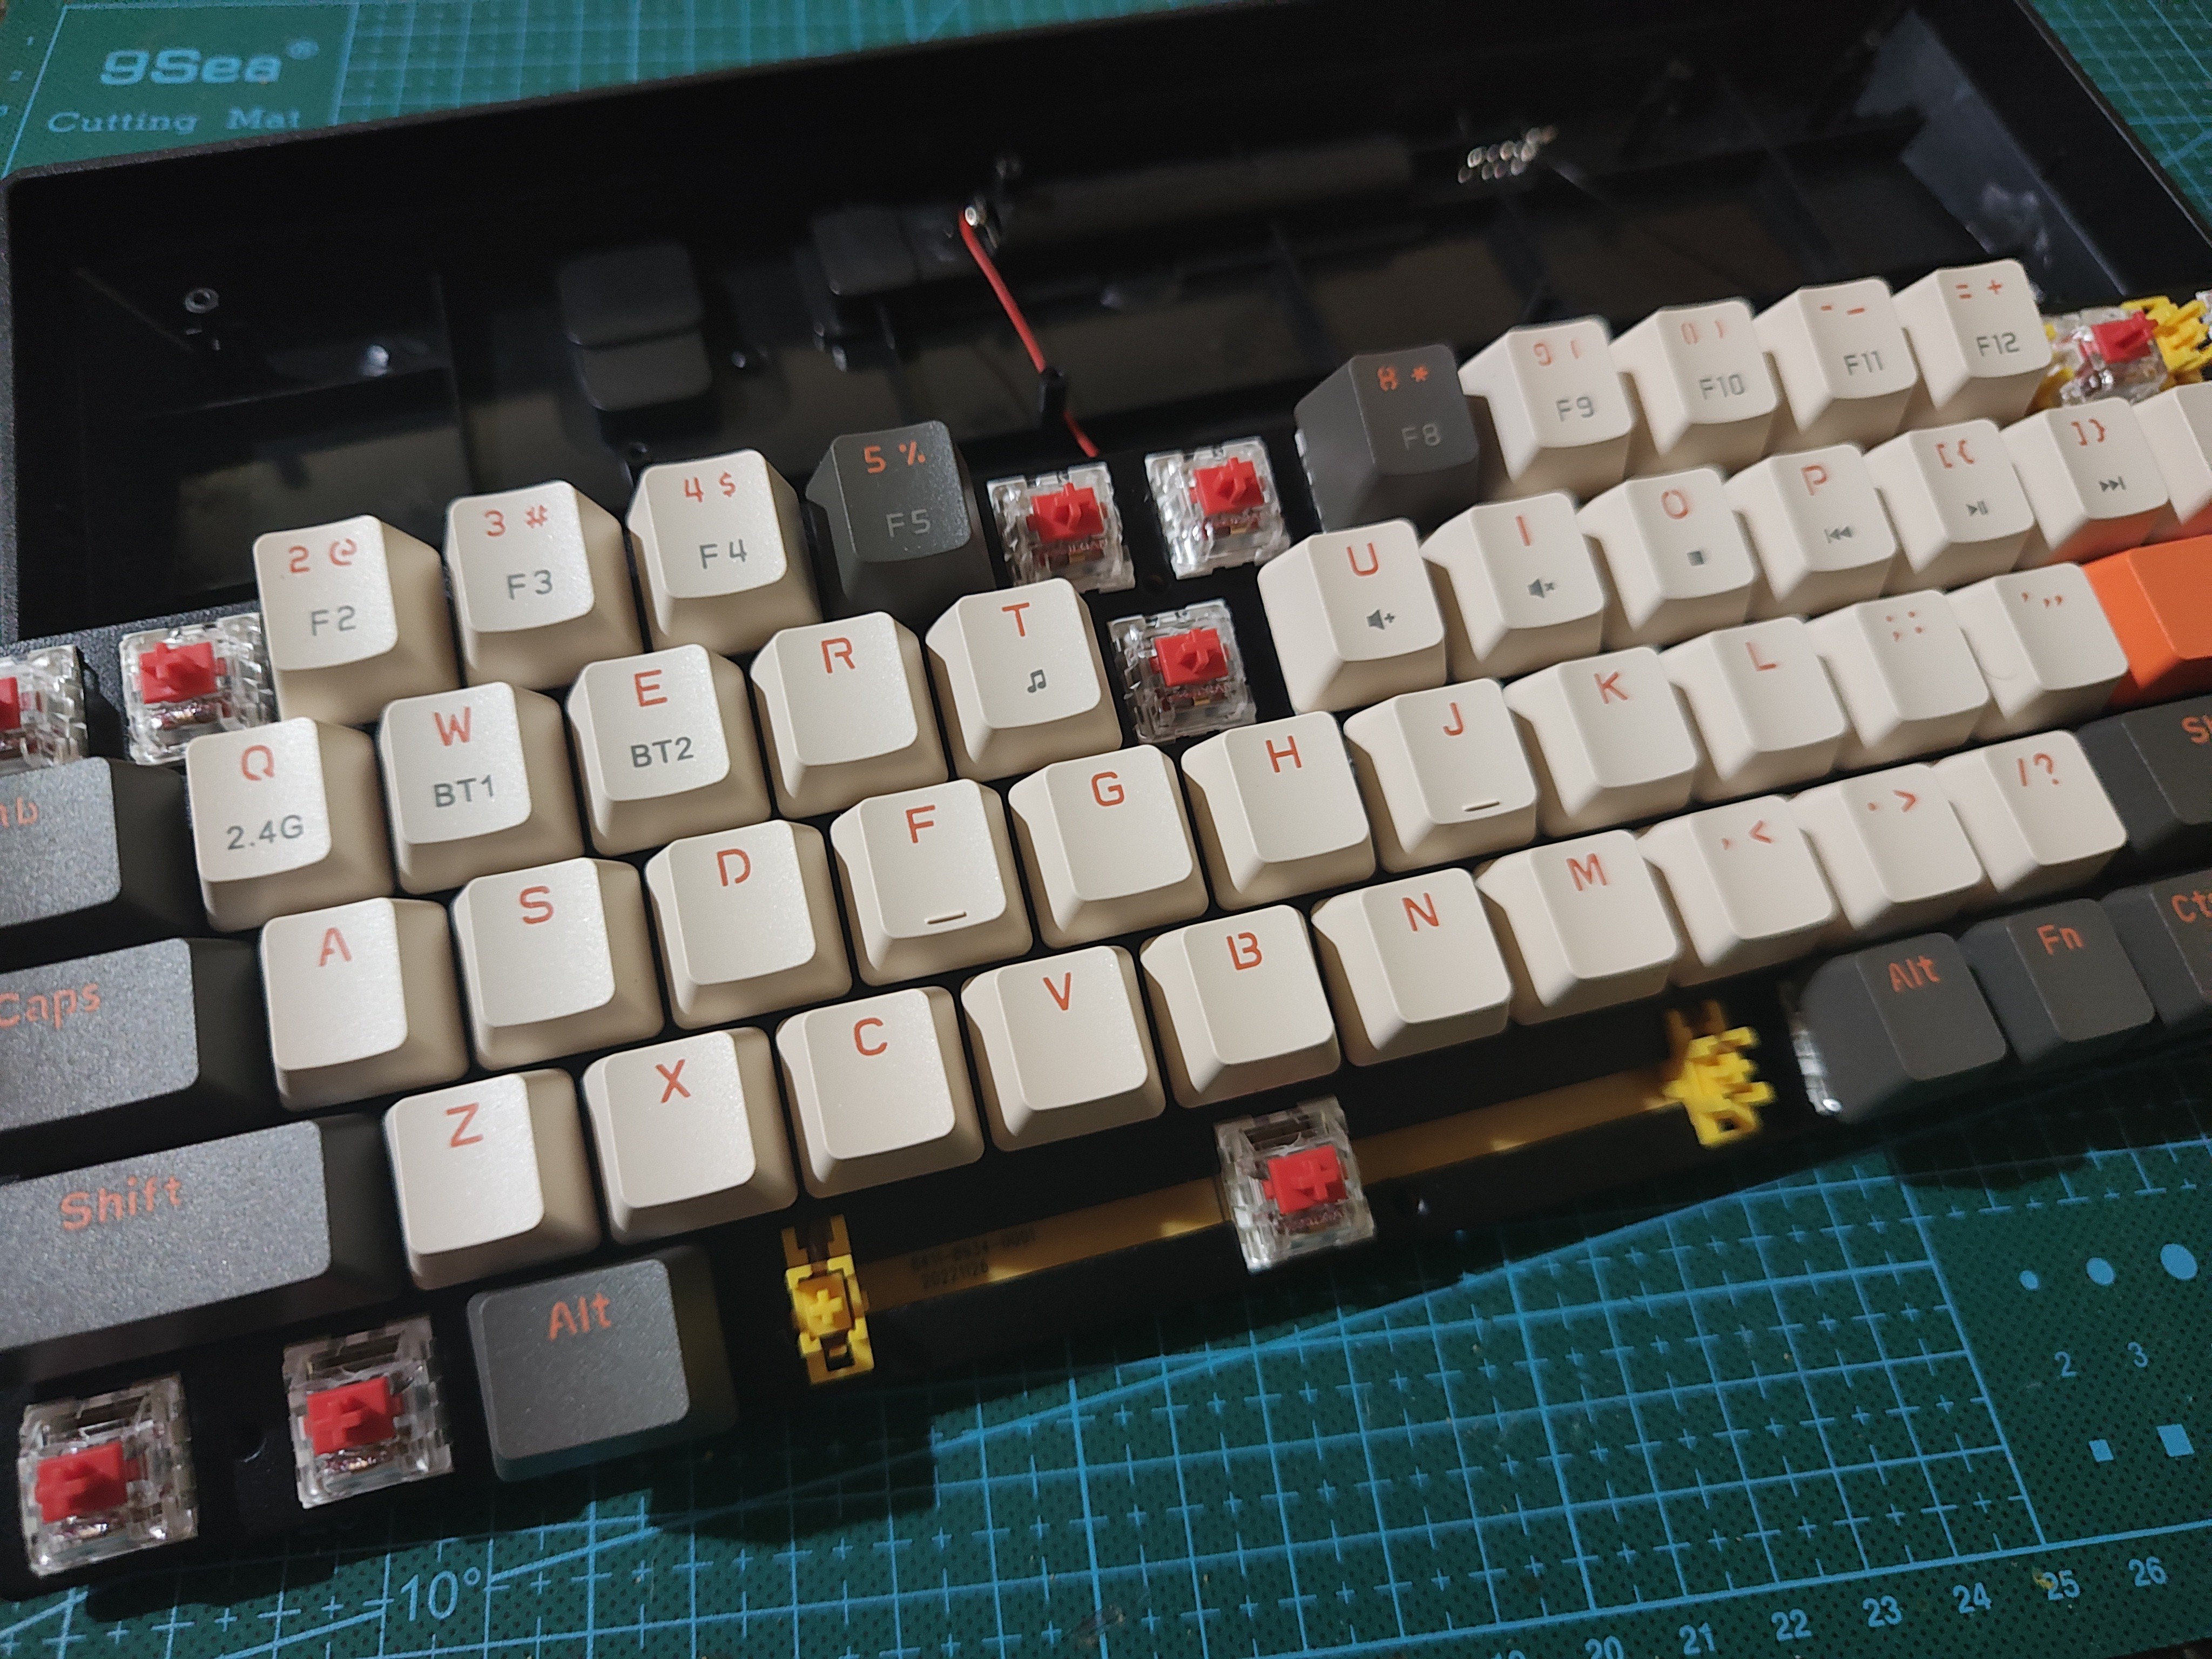
07/26/2023 at 01:48 • 0 commentsReceived the keyboard in the mail today, great! I can also work on another part of the shell, the keyboard cutout. This is the keyboard I got, just for this project.
![]()
There's something I find so cool about the grey, white and orange combination for cyberpunk and futuristic designs. Let me be honest, I only got this model for the looks. Hope I can continue that palette for the shell. I already have these colours with me for 3d printing, just hope that I have enough.
It is a wireless keyboard, so I still have to decide if I gonna hide the receptor inside the shell, or leave it outside so the deck itself can be used as an external keyboard.
I did not even test the keyboard, it went directly from the package to the mat for disassembly, so I could get dimensions.
![]()
Next log it's gonna be on the shell design I get to start work on that or what I content have been consuming for more inspiration.
-
Entry 0x06 - Finally received the display!
07/23/2023 at 18:25 • 0 commentsGot the VFD in the mail! Now I feel more confident to start designing around it. Also, I initially though it was grayscale, but it simply has a dimmer feature for the whole display.
Testing the Display with u8g2
The listing said it was compatible with arduino and u8g2, a popular library for monochrome displays. Thus, to confirm my display was working I tried using that. The display seems quite fragile, since it is made out of glass, and I was afraid it could have been damaged in transport despite being well packaged.
I have not used arduino in many years now. Firstly, I tried uploading a blink sketch to an arduino Nano to confirm my installation was working, but for some reason I could not upload sketches. It was recognised on the PC but the software would hang on upload.
Then I tried with a micro and that also did not work. I was quite surprised since it used to be way easier, but these probably have code misusing the serial port and need to be reset.
Ok, finally I tried with an MKR board I got as a present for translating the documentation to Portuguese. Finally I could upload sketches, but the u8g2 installed with the library manager did not support my display. I thought my display was GP1287 but it seems to be GP1294, which I have yet to confirm.
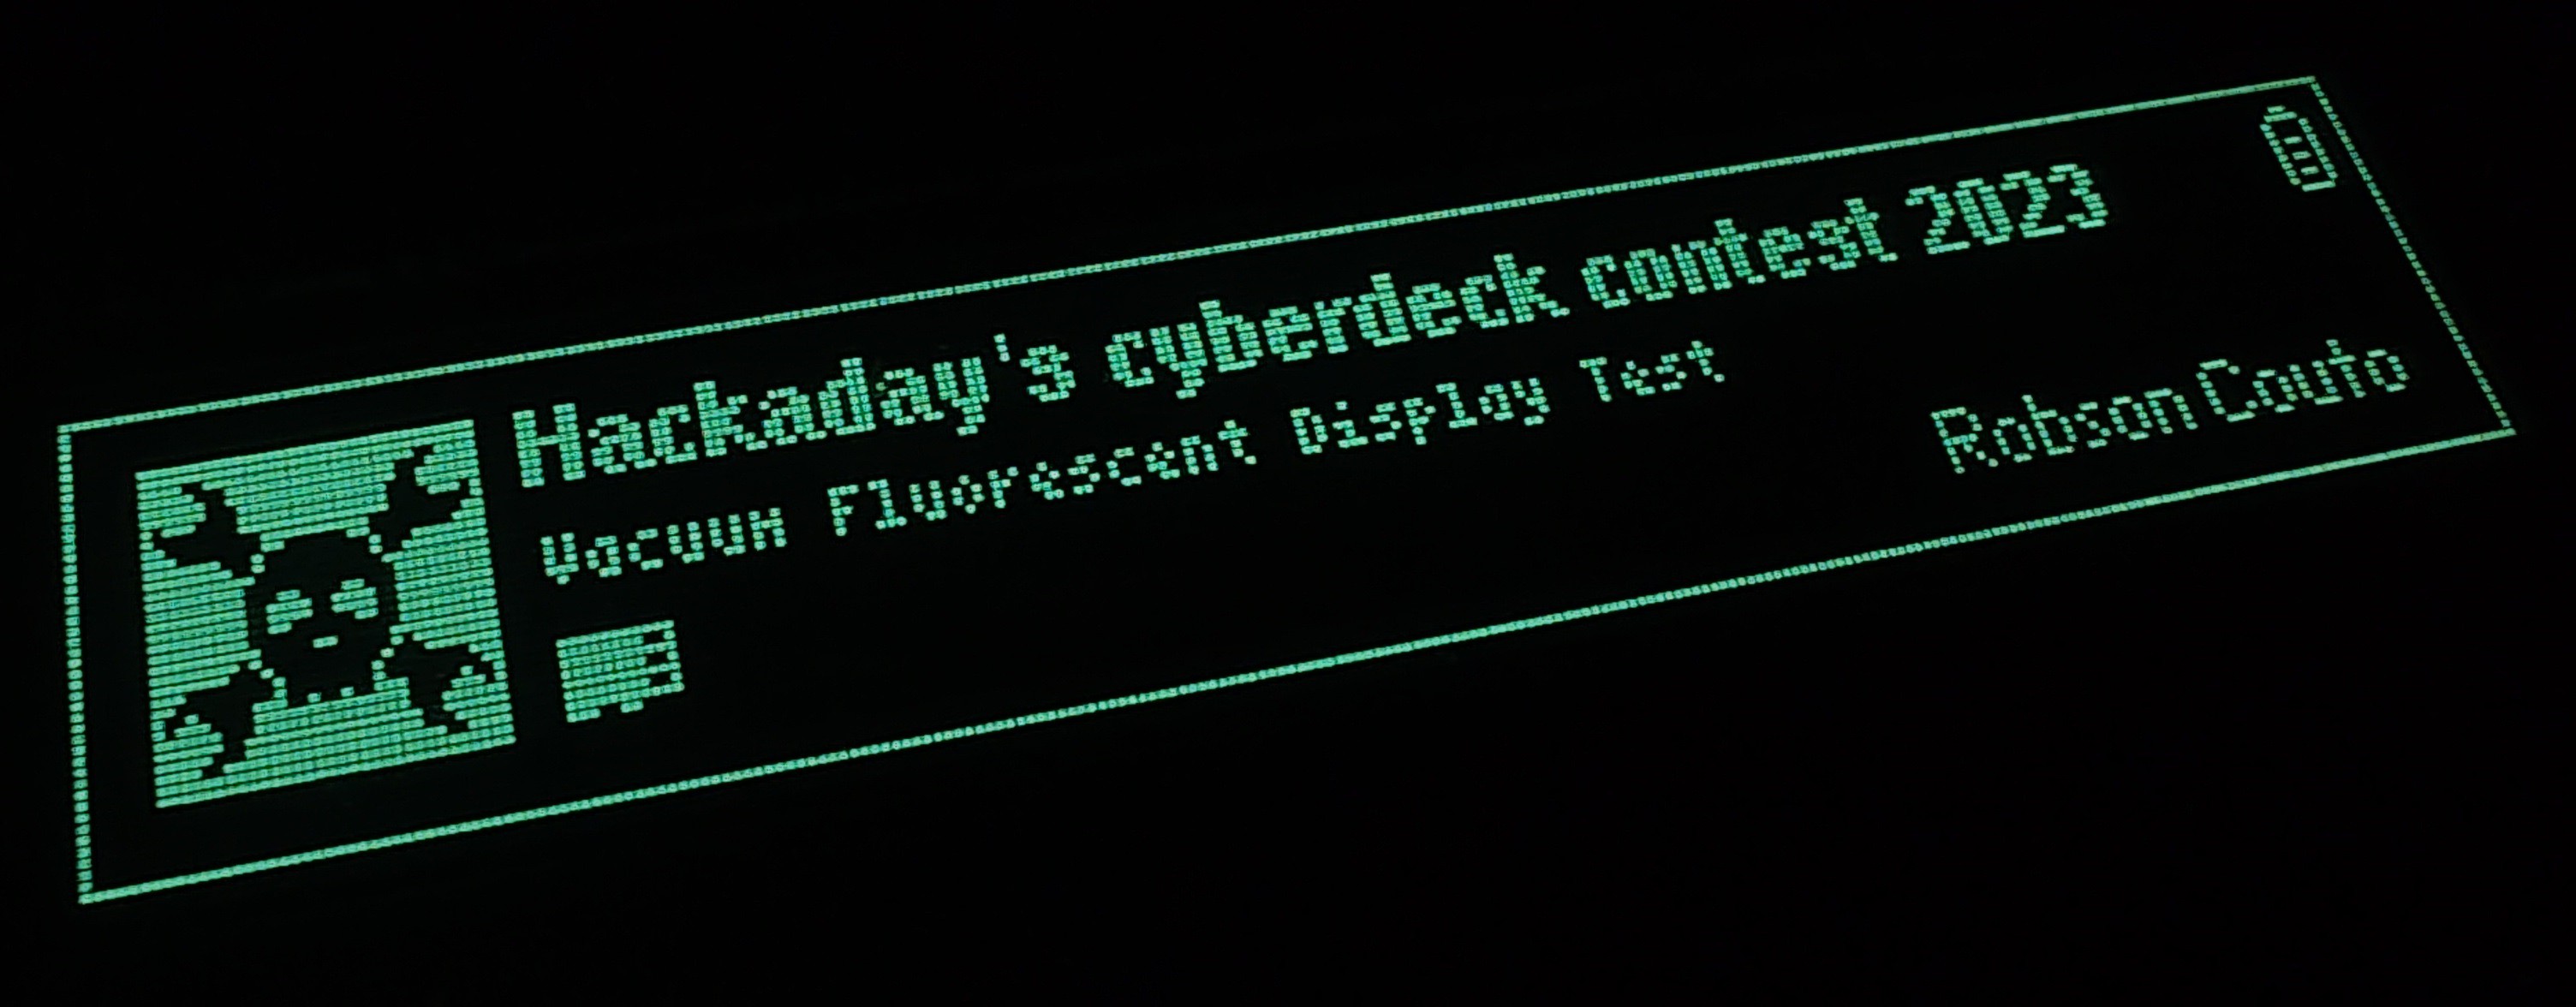
Anyways, I finally got the display to work after downloading and manually installing the library version on one of the issues of the u8g2 repo. The following video shows the display working.
Of course, it is hard to capture how nice the display looks on camera, but I took a picture with lower exposure:
![]()
I got the custom graphics on the display still using u8g2 with Lopaka. The smallest font is 4x6, which I'm am surprised how good it still looks. I'm planning to use a 6x8 font, but now 4x6 seems enticing.
Lopaka
Some time ago I saw a tweet about lopaka, an embedded graphics designer and code generator tool, which seems to have been used to design the screens for flipper zero and was compatible with u8g2, so I tried that with the display too. It is quite simple, I just had to drag and drop what I wanted and then copy the resulting code to the arduino sketch.
For example, the following design in the editor:
![]()
Gives the following code:
static unsigned char icon_Hackaday_Jolly_Wrencher_BBG_bits[] = {0xff,0xff,0xff,0xff,0xff,0xff,0xff,0xff,0xcf,0xff,0xff,0xf3,0x1f,0xff,0xff,0xf8,0x3f,0xff,0xff,0xfc,0x3f,0xfe,0x7f,0xfc,0x1d,0xfe,0x7f,0xb8,0x01,0xfe,0x7f,0x80,0x03,0xf8,0x1f,0xc0,0x07,0x18,0x18,0xe0,0x7f,0x04,0x20,0xfe,0xff,0x04,0x20,0xff,0xff,0x03,0xc0,0xff,0xff,0x01,0x80,0xff,0xff,0x31,0x8c,0xff,0xff,0x79,0x9e,0xff,0xff,0x79,0x9e,0xff,0xff,0x19,0x98,0xff,0xff,0x01,0x80,0xff,0xff,0x83,0xc1,0xff,0xff,0x02,0x40,0xff,0x7f,0x04,0x20,0xfe,0x07,0x08,0x10,0xe0,0x03,0x08,0x10,0xc0,0x09,0x4e,0x72,0x90,0x1d,0xfe,0x7f,0xb8,0x3f,0xfe,0x7f,0xfc,0x3f,0xff,0xff,0xfc,0x1f,0xff,0xff,0xf8,0xcf,0xff,0xff,0xf3,0xff,0xff,0xff,0xff,0xff,0xff,0xff,0xff};
u8g2.drawXBM( 4, 5, 32, 32, icon_Hackaday_Jolly_Wrencher_BBG_bits);
u8g2.drawFrame(1, 2, 254, 60);
u8g2.setFont(u8g2_font_4x6_tr);
u8g2.drawStr(4, 50, "The quick brown fox jumps over the lazy dog");
u8g2.setFont(u8g2_font_helvB08_tr);
u8g2.drawStr(41, 17, "ABCDEFGHIJKLMNOPQRSTUVWXYZ");
u8g2.setFont(u8g2_font_helvB08_tr);
u8g2.drawStr(41, 29, "abcdefghijklmnopqrstvuwxyz");
static unsigned char icon_Lock_8x8_bits[] = {0x3c,0x42,0x42,0xff,0xff,0xe7,0xff,0xff};
u8g2.drawXBM( 209, 47, 8, 8, icon_Lock_8x8_bits);
static unsigned char icon_dir_10px_bits[] = {0x00,0x00,0x3f,0x00,0x41,0x00,0xff,0x03,0x01,0x02,0x01,0x02,0x01,0x02,0x01,0x02,0xfe,0x01,0x00,0x00};
u8g2.drawXBM( 224, 46, 10, 10, icon_dir_10px_bits);
static unsigned char icon_Alert_9x8_bits[] = {0x10,0x00,0x38,0x00,0x28,0x00,0x6c,0x00,0x6c,0x00,0xfe,0x00,0xee,0x00,0xff,0x01};
u8g2.drawXBM( 239, 47, 9, 8, icon_Alert_9x8_bits);
static unsigned char icon_Medium-chip-22x21_bits[] = {0xfc,0x03,0x02,0x00,0xf9,0x03,0x85,0x02,0xc5,0x03,0x25,0x00,0x95,0x03,0x5d,0x00,0x55,0x00,0x1d,0x00};
u8g2.drawXBM( 224, 21, 10, 10, icon_Medium-chip-22x21_bits);
That was enough to test the display, since I plan to make a Linux driver for it, that as far as I can go with u8g2.
-
Entry 0x05 - VFD documents saga.
07/09/2023 at 21:10 • 0 commentsSo in last entry I said I would avoid doing unimportant tasks....
And a few days later I was installing windows on a virtual machine.
I'm still waiting for the display and keyboard to arrive, and can't bring myself to draw without having them. So I'm focused on learning about linux drivers and looking for inspiration and the moment.
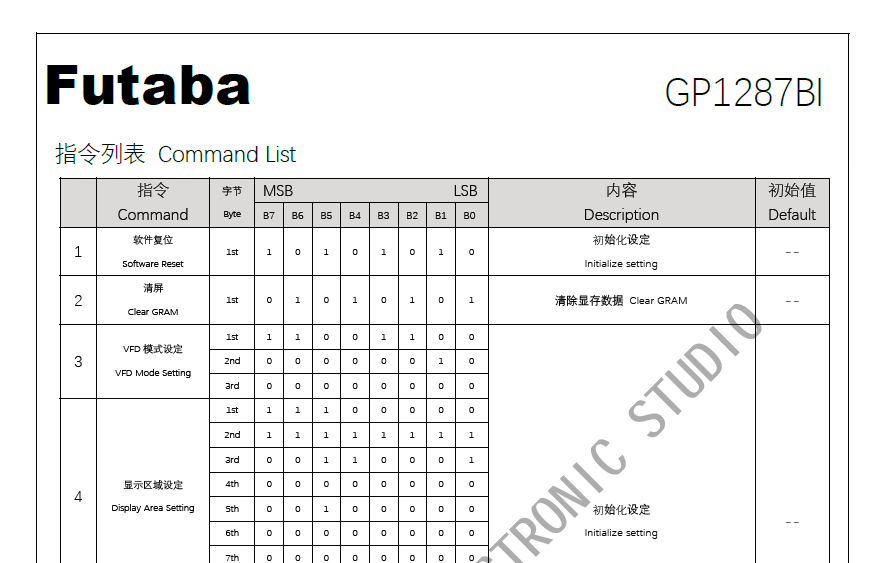
I had the idea of asking the Ali express seller for the documents for the display and they simply gave me a short pdf with a simple algorithm for updating the display. Browsing around I found more documents, but they were hosted on baidu.
I don't speak Chinese, nor I have a baidu account and after a lot of stress trying to download the files I gave up, but later I found a subreddit where the kindest soul downloaded the files and uploaded them on a google drive folder.
![]()
With that I can start working on the driver before receiving the VFD.
-
Entry 0x04 - Avoiding Yak Shaving
07/09/2023 at 19:47 • 0 commentsHackers sometimes are very alike, and probably anyone reading this may have dealt with not knowing what to prioritise in a project. I have started working on projects and then I need some tool, which leads to another subproject on itself and so on. Then I have worked on a lot of stuff but did not finish anything.
I mentioned previously that I started this project specifically for the contest, so I'm working on a tight deadline. Also, I have had very little free time, so every decision must be well thought. For these reasons, I'm avoiding these tasks (for now at least).
- Adding features I can not finish now. I really wanted this to be a tool for debugging industrial communications, like rs485, 232, CAN, 4-20mA, but I can not add these in a little more than a month.
- Working on PCBs. Since I would have to order them from overseas, It would take a long time. This also adds to the "make do with what you have" dystopic sentiment.
- Having a correct power management, with batteries, BMS and probably custom PCS etc.
- I think that the keyboard I bought is too big (310mm wide). But it is either that or making custom PCBs, USB firmware and printing smaller keycaps, so hell NO.
What I plan to have by the contest deadline and working at the moment:
- Design and 3d print a cyberpunk case/shell for the cyberdeck. Thus, I'm looking for cyberpunk references, hand drawing/ watching model making videos.
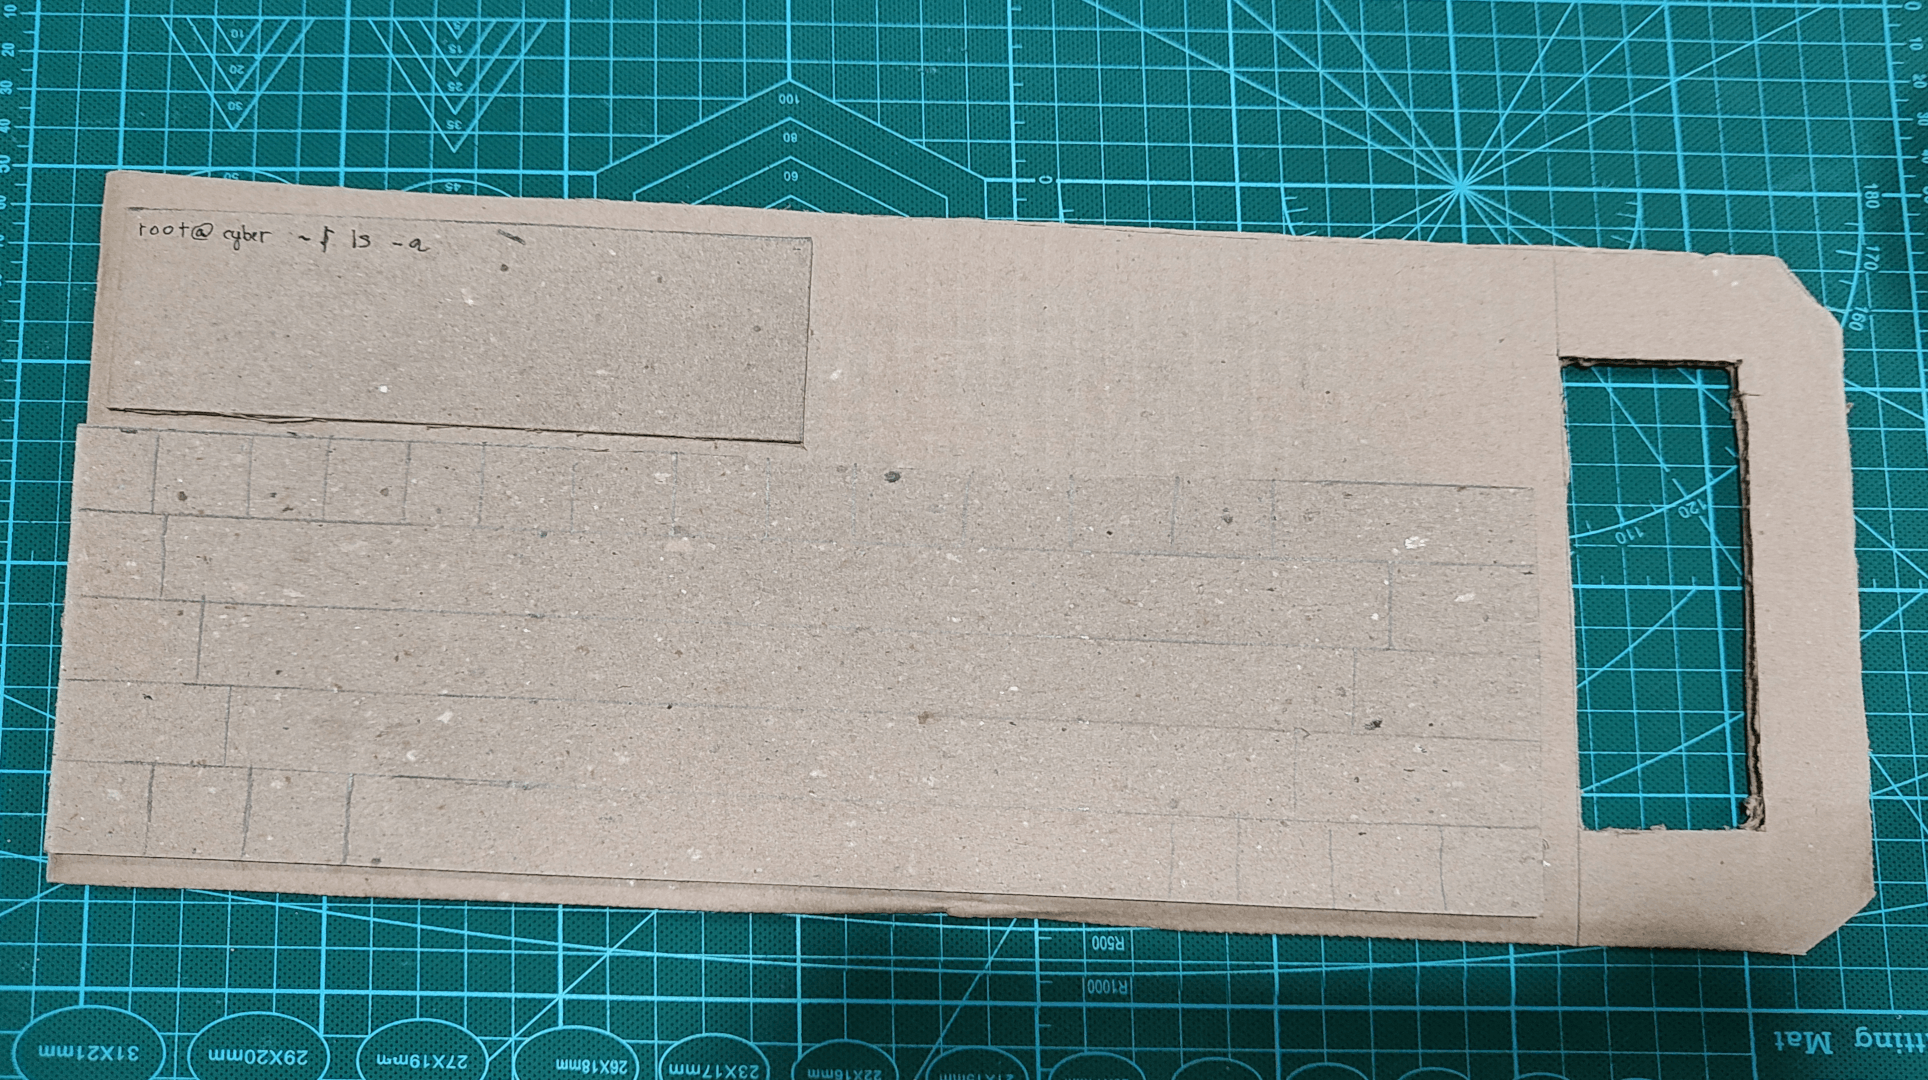
- Studying embedded Linux. This is one of the reasons which lead me to work on this. I'm reading about device drivers and want have a framebuffer drivers working so I can have a shell/curses/graphics on the VFD.
A cardboard mockup so I can test the dimensions I'm planning to use:
![]()
I'm not a 3d designer, nor experience in embedded linux. So let's hope for the best!
-
Entry 0x03 - Feature Selection
07/06/2023 at 23:56 • 0 commentsI'm afraid I won't be able to pack many features to my cyberdeck til the contest deadline. Ideally I would like to have these features:
- Serial connections like RS232 / RS485 an CAN
- Linux (shell scripts, terminal)
- Low end logic analyser, or voltage measurement
- Radio hardware (CC1101)
- NFC / RFID.
I'm still waiting for the display and keyboard to arrive. Meanwhile, I'm sketching up a few ideas for the case. I'm hoping to have at least a custom embedded linux by the contest deadline. That means at least raspberry pi, VFD and keyboard wired up and working and a 3d printed shell designed and complete. The other features I probably will have to postpone or move to a second version.
KOAT0 Portable Terminal
A cyberdeck with a fluorescent display for max cyberpunk looks