 Pablo Zuloaga
-
1POWAR Instructions
-
2Laser Cut Wood
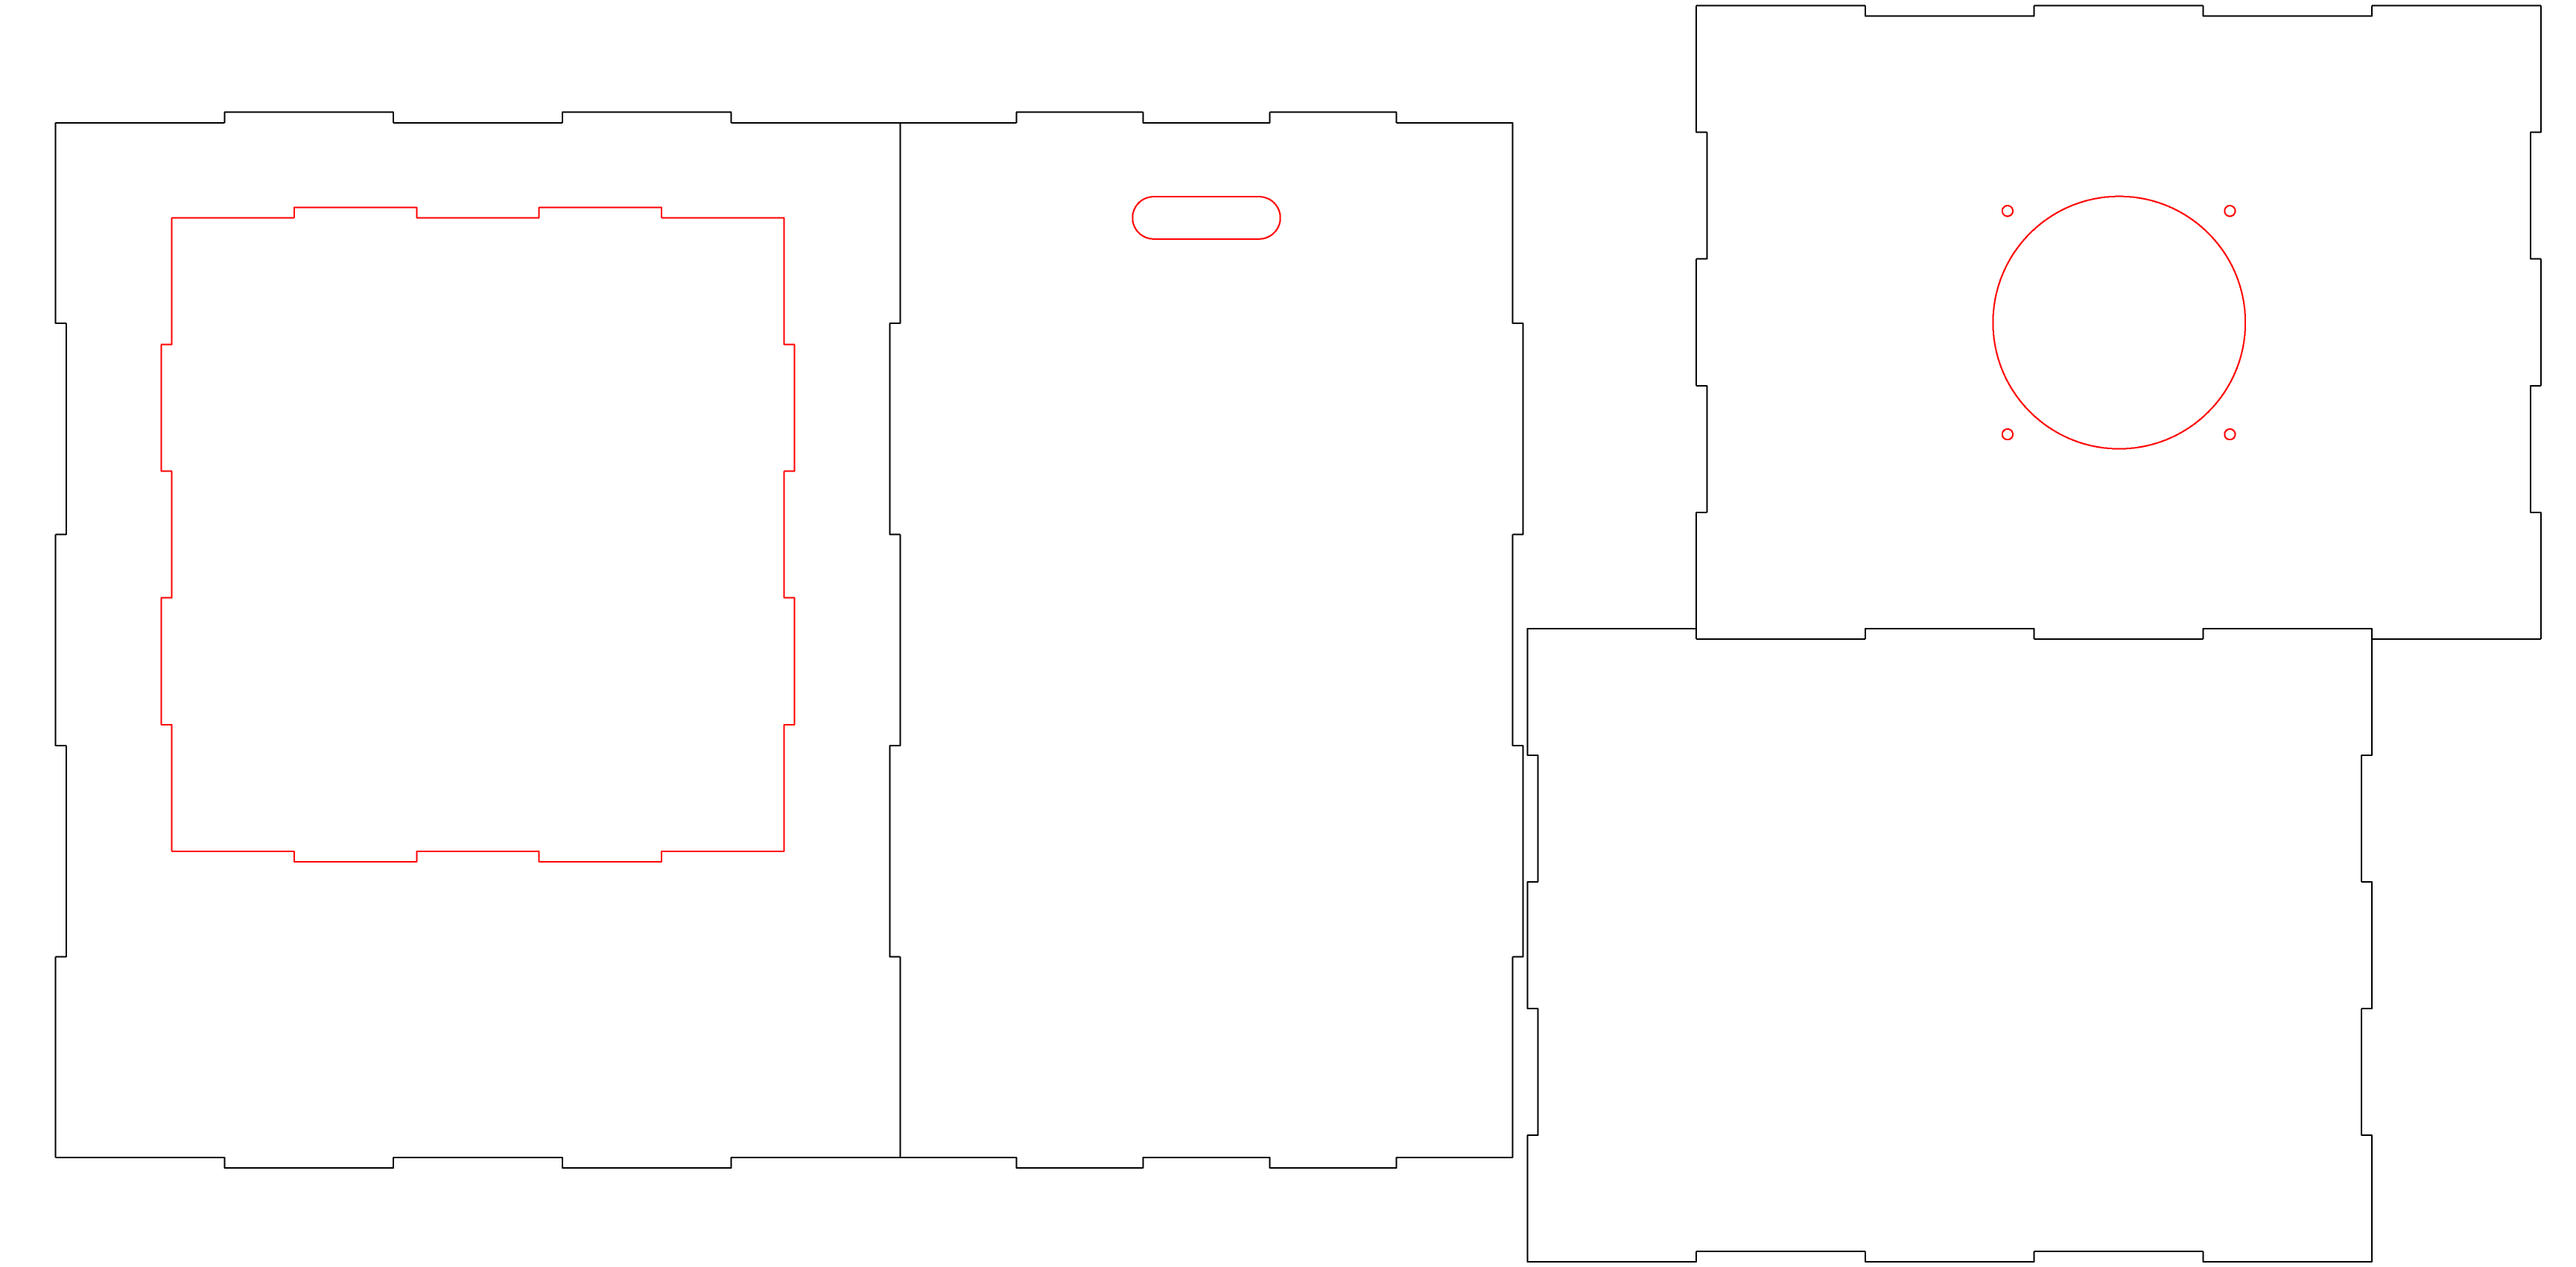
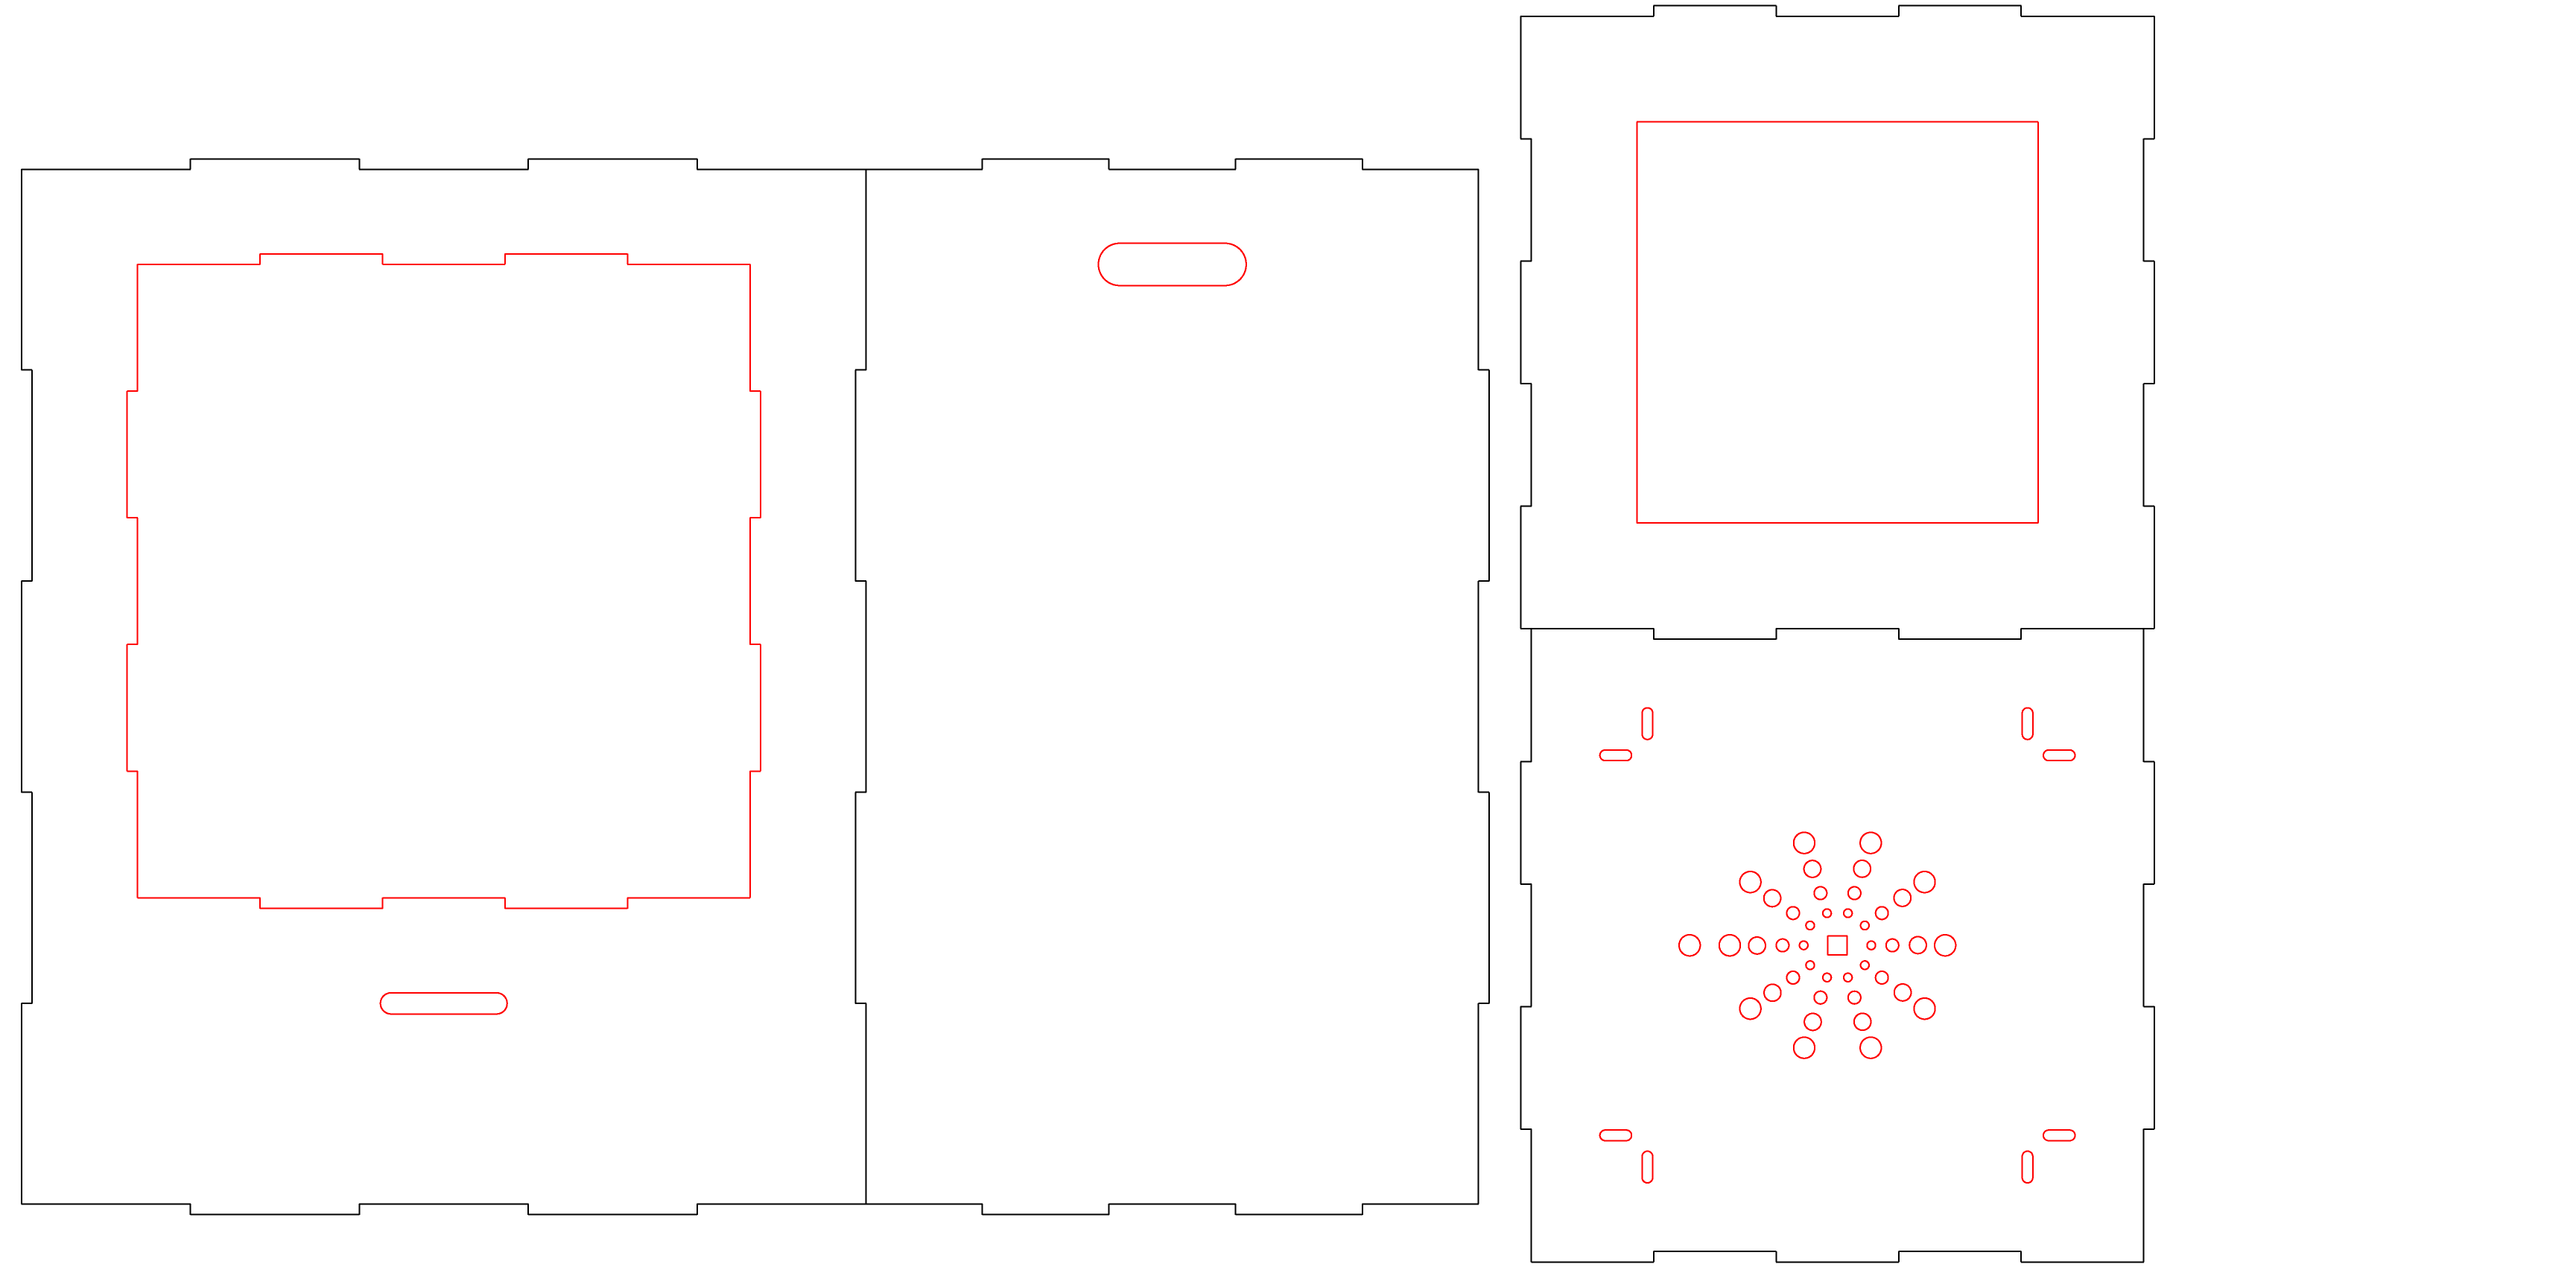
POWAR is made in laser-cut wood and designed with finger joints so that it can easily be assembled by people without the use of nails or glue. This makes it also very easy to disassemble it and transport it.
![]()
This version uses two water-repellent plywood boards of 600x1200mm, but you could nest the design in different ways according to the laser machine you have.
![]()
-
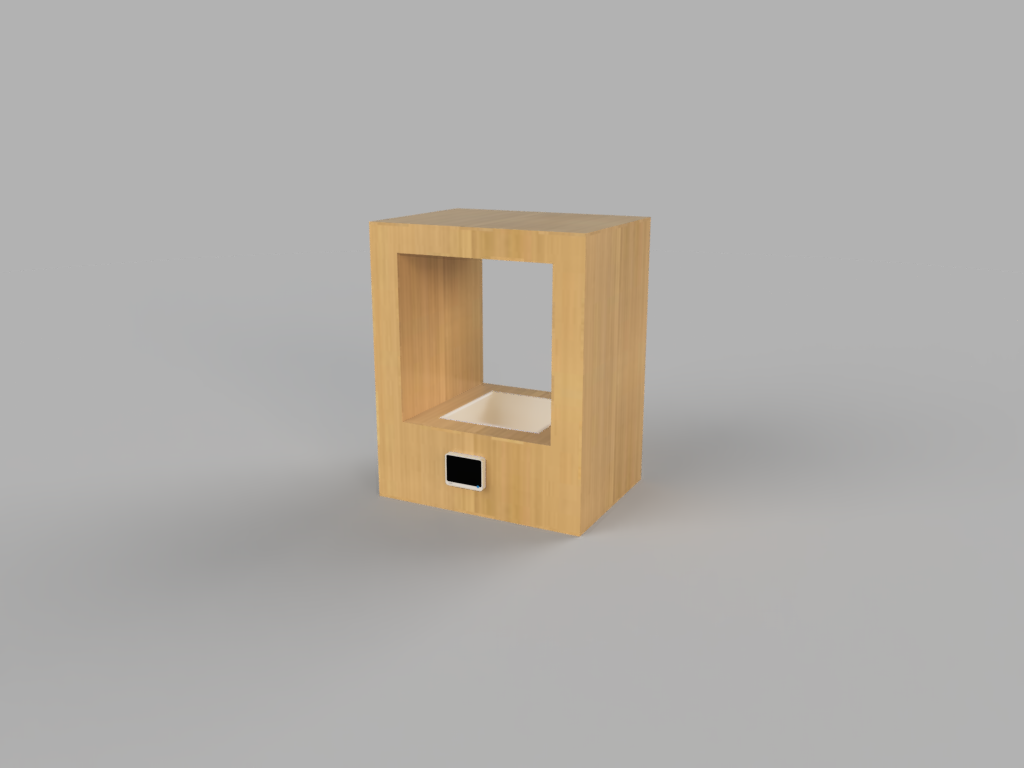
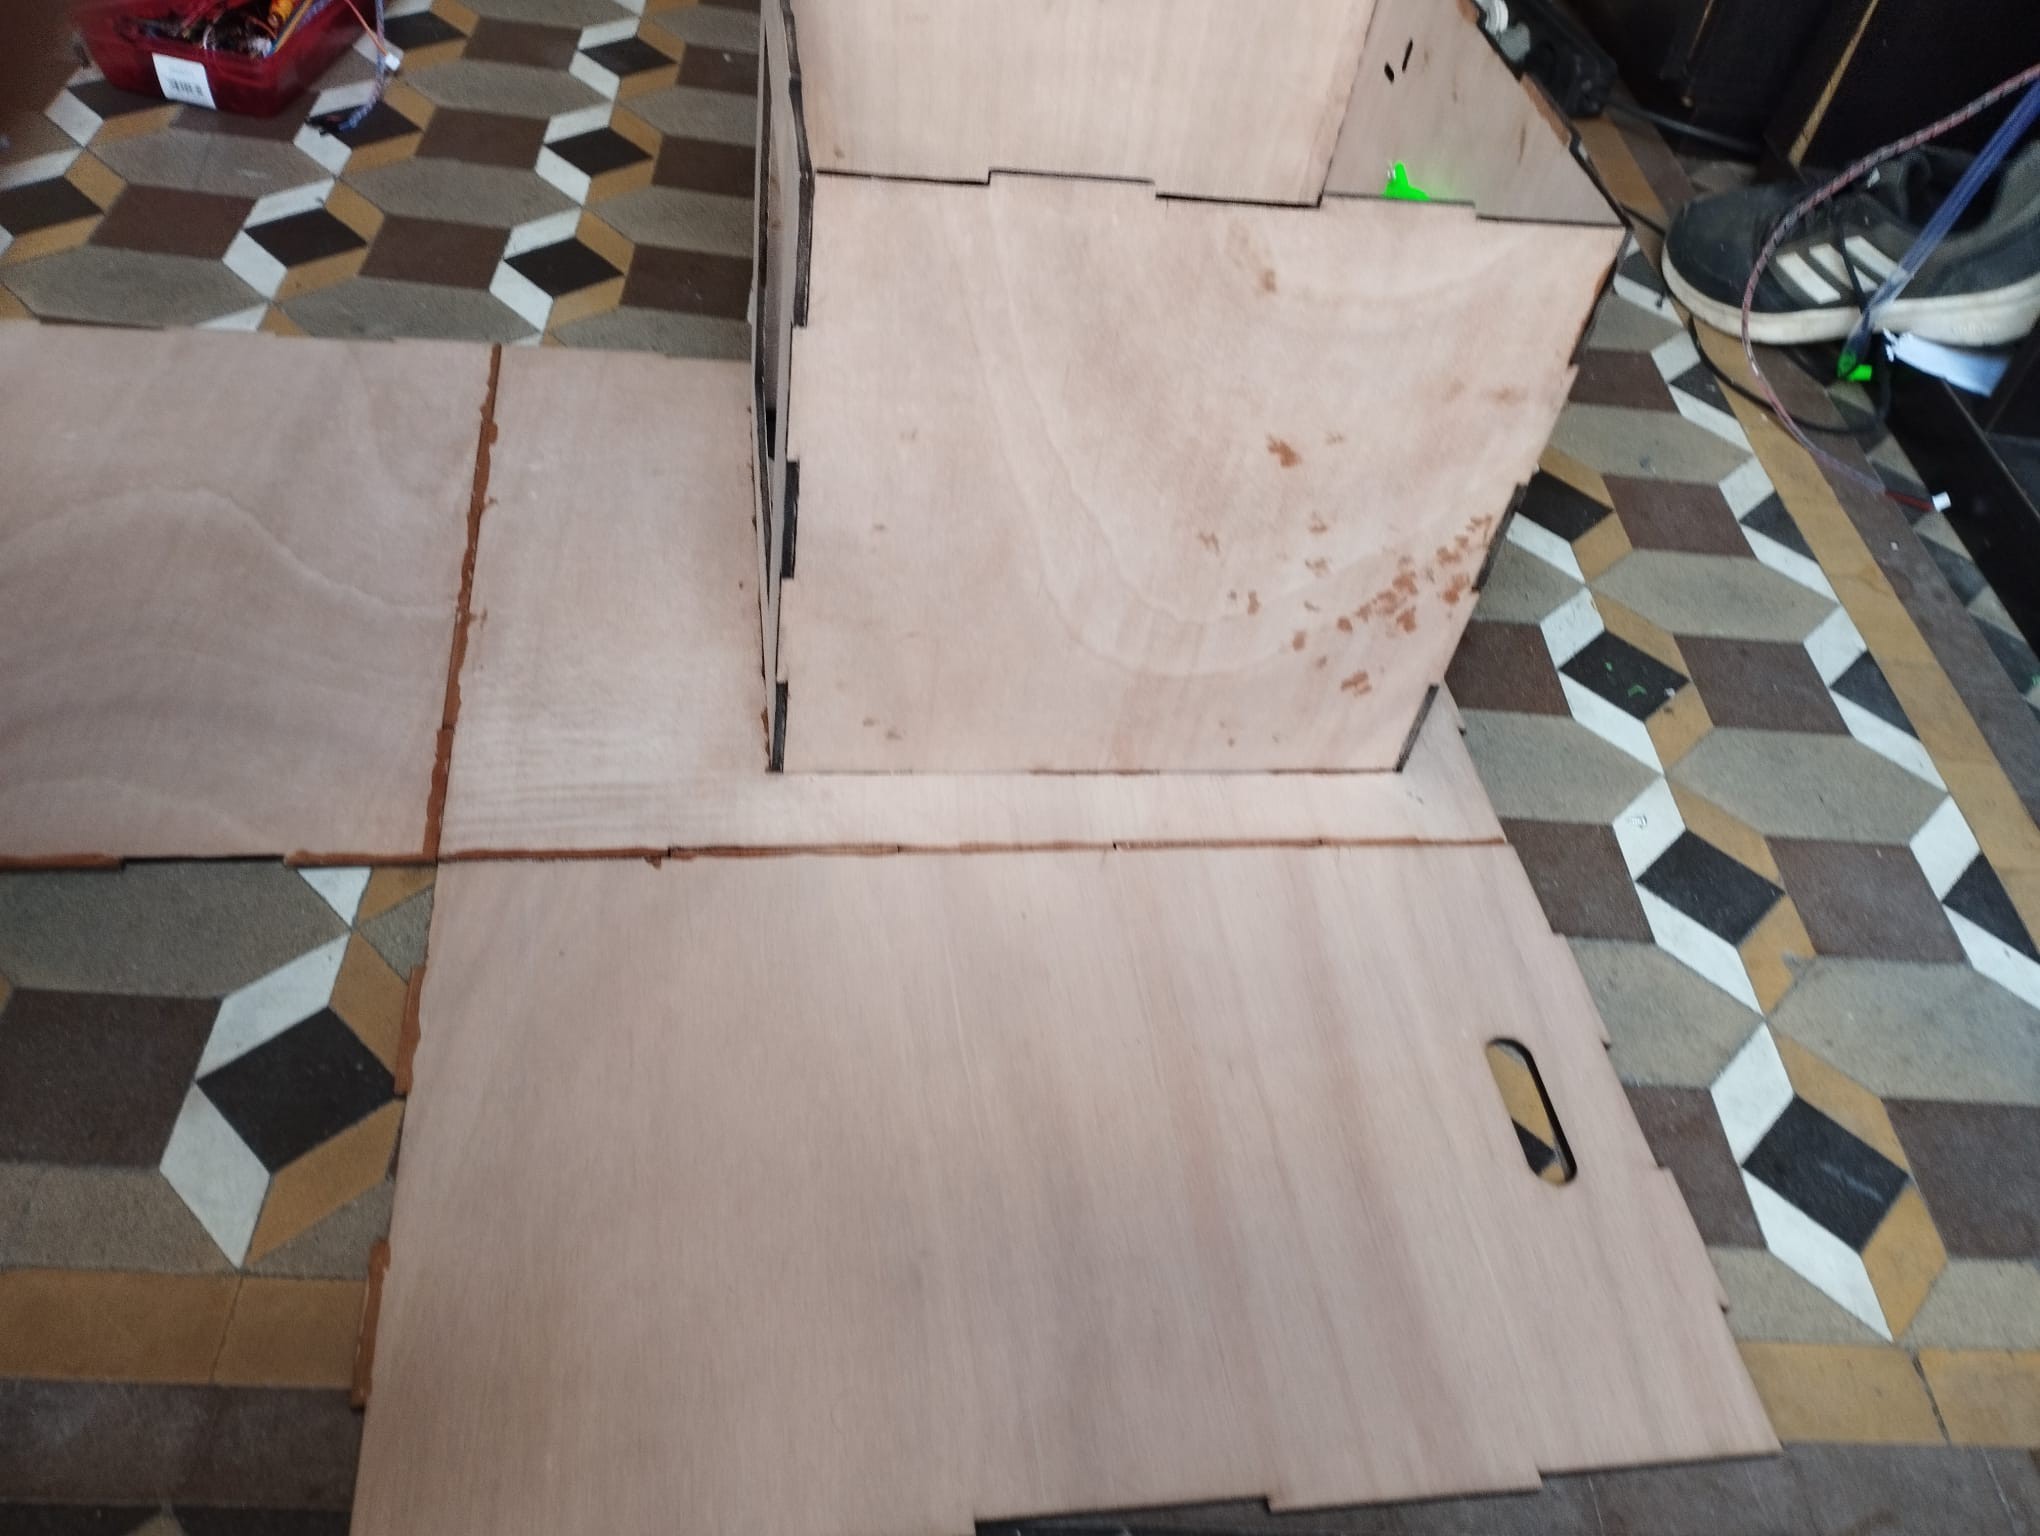
3Assemble the box
![]()
The assembly of the box is pretty straightforward, but we suggest laying down the back side part and start adding the pieces of the interior, so that way you give some structure to the box.
![]()
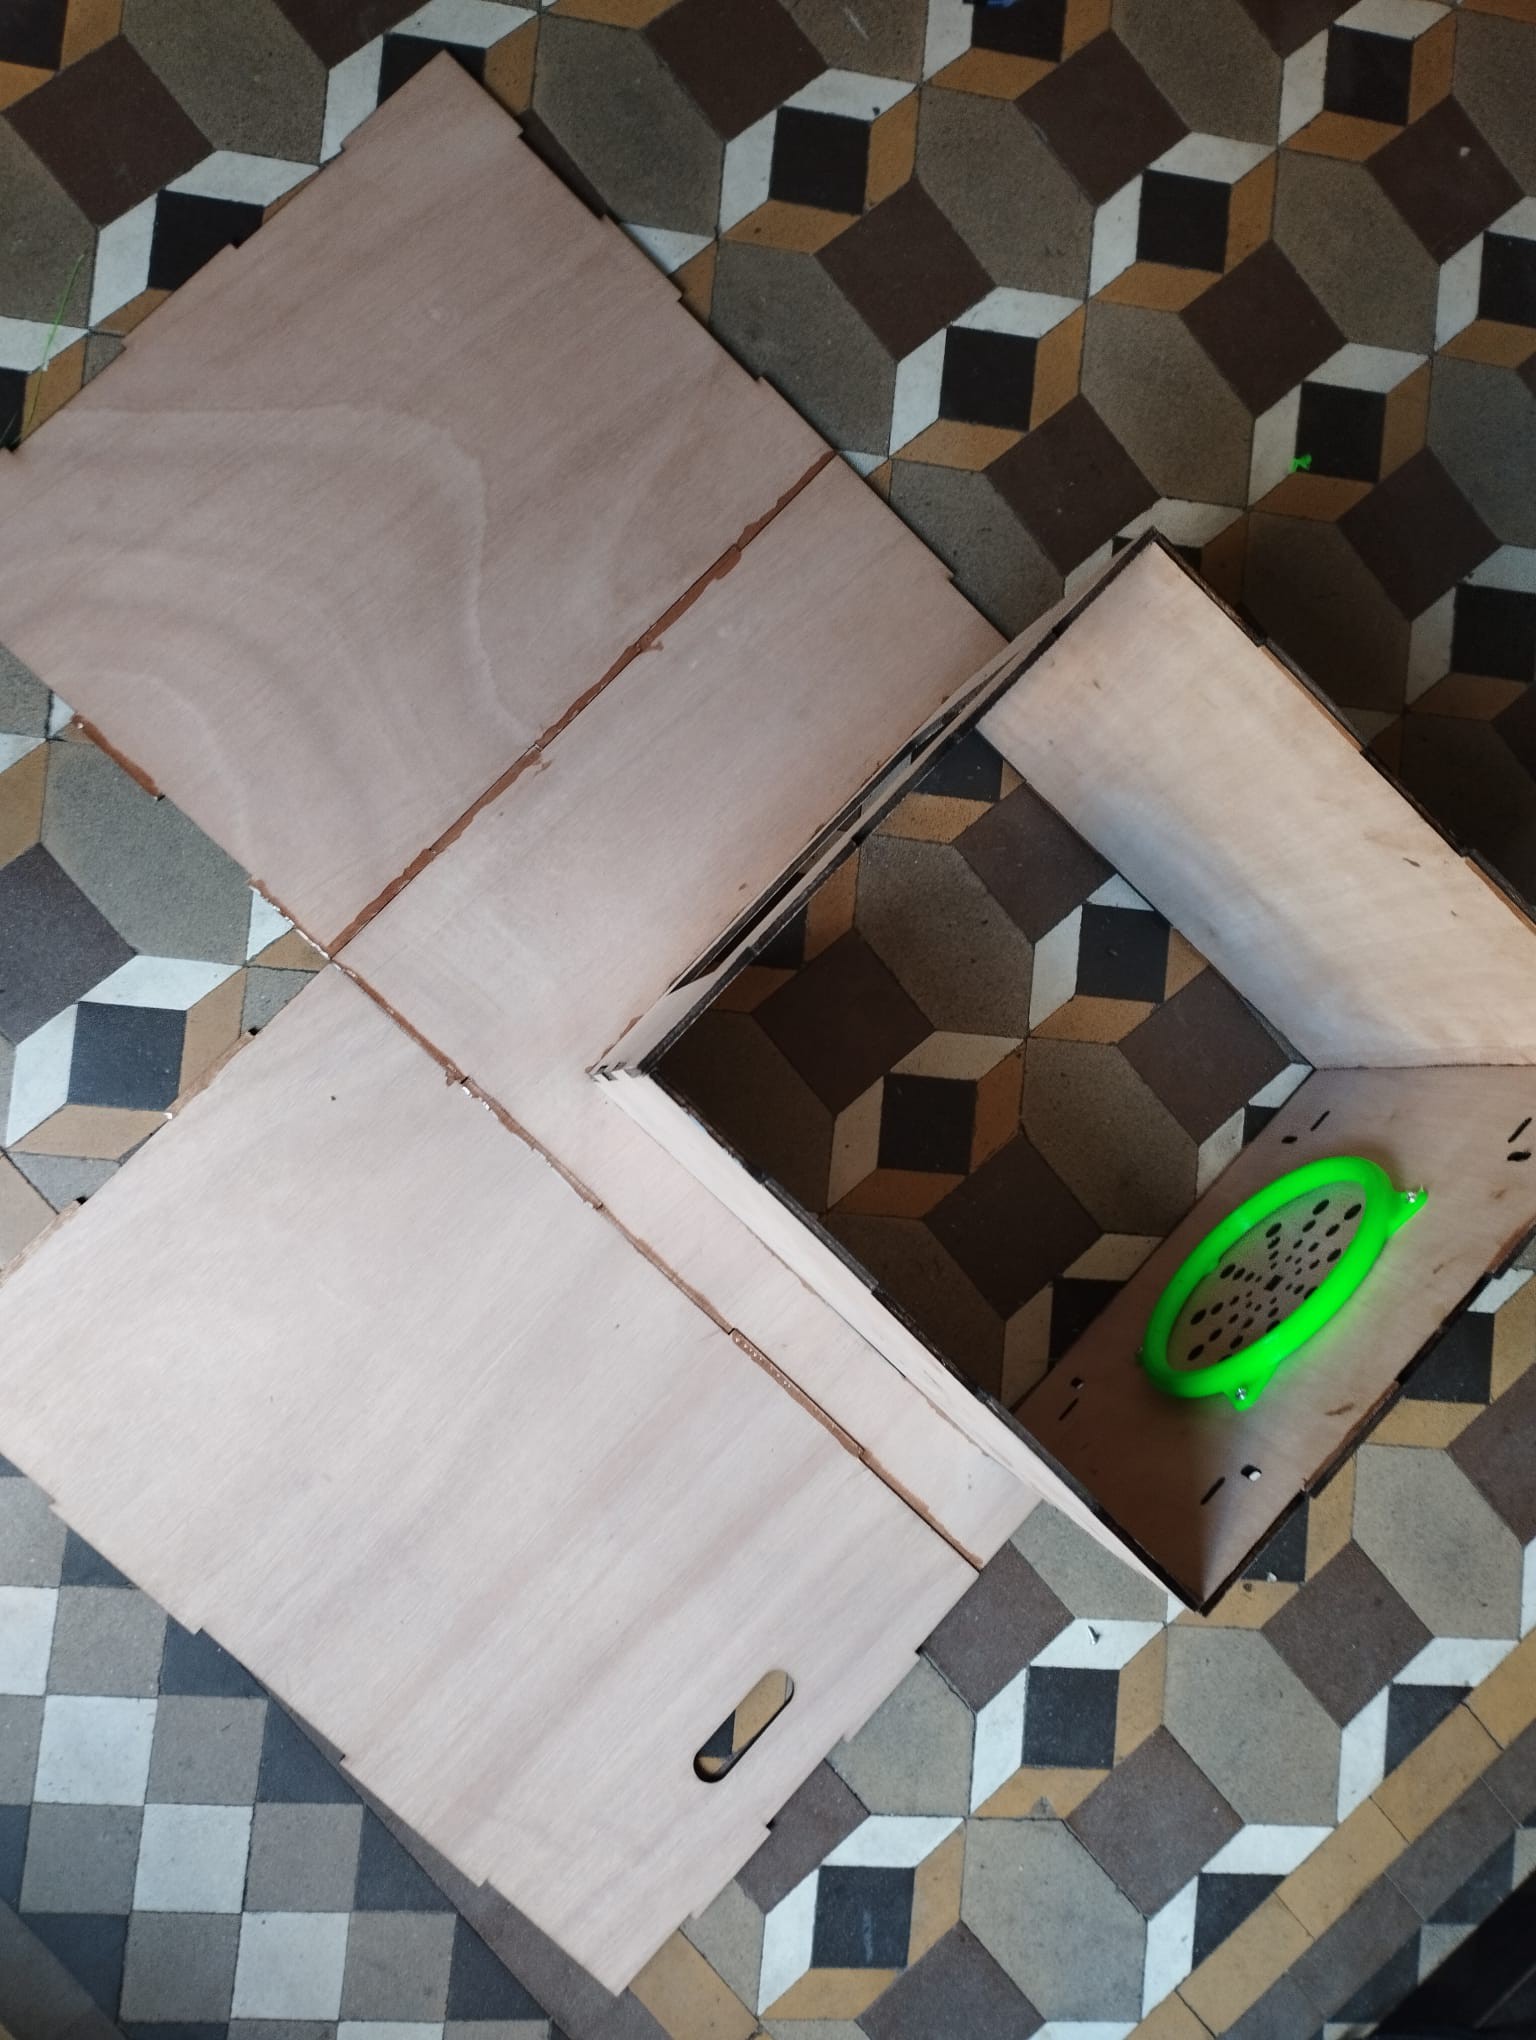
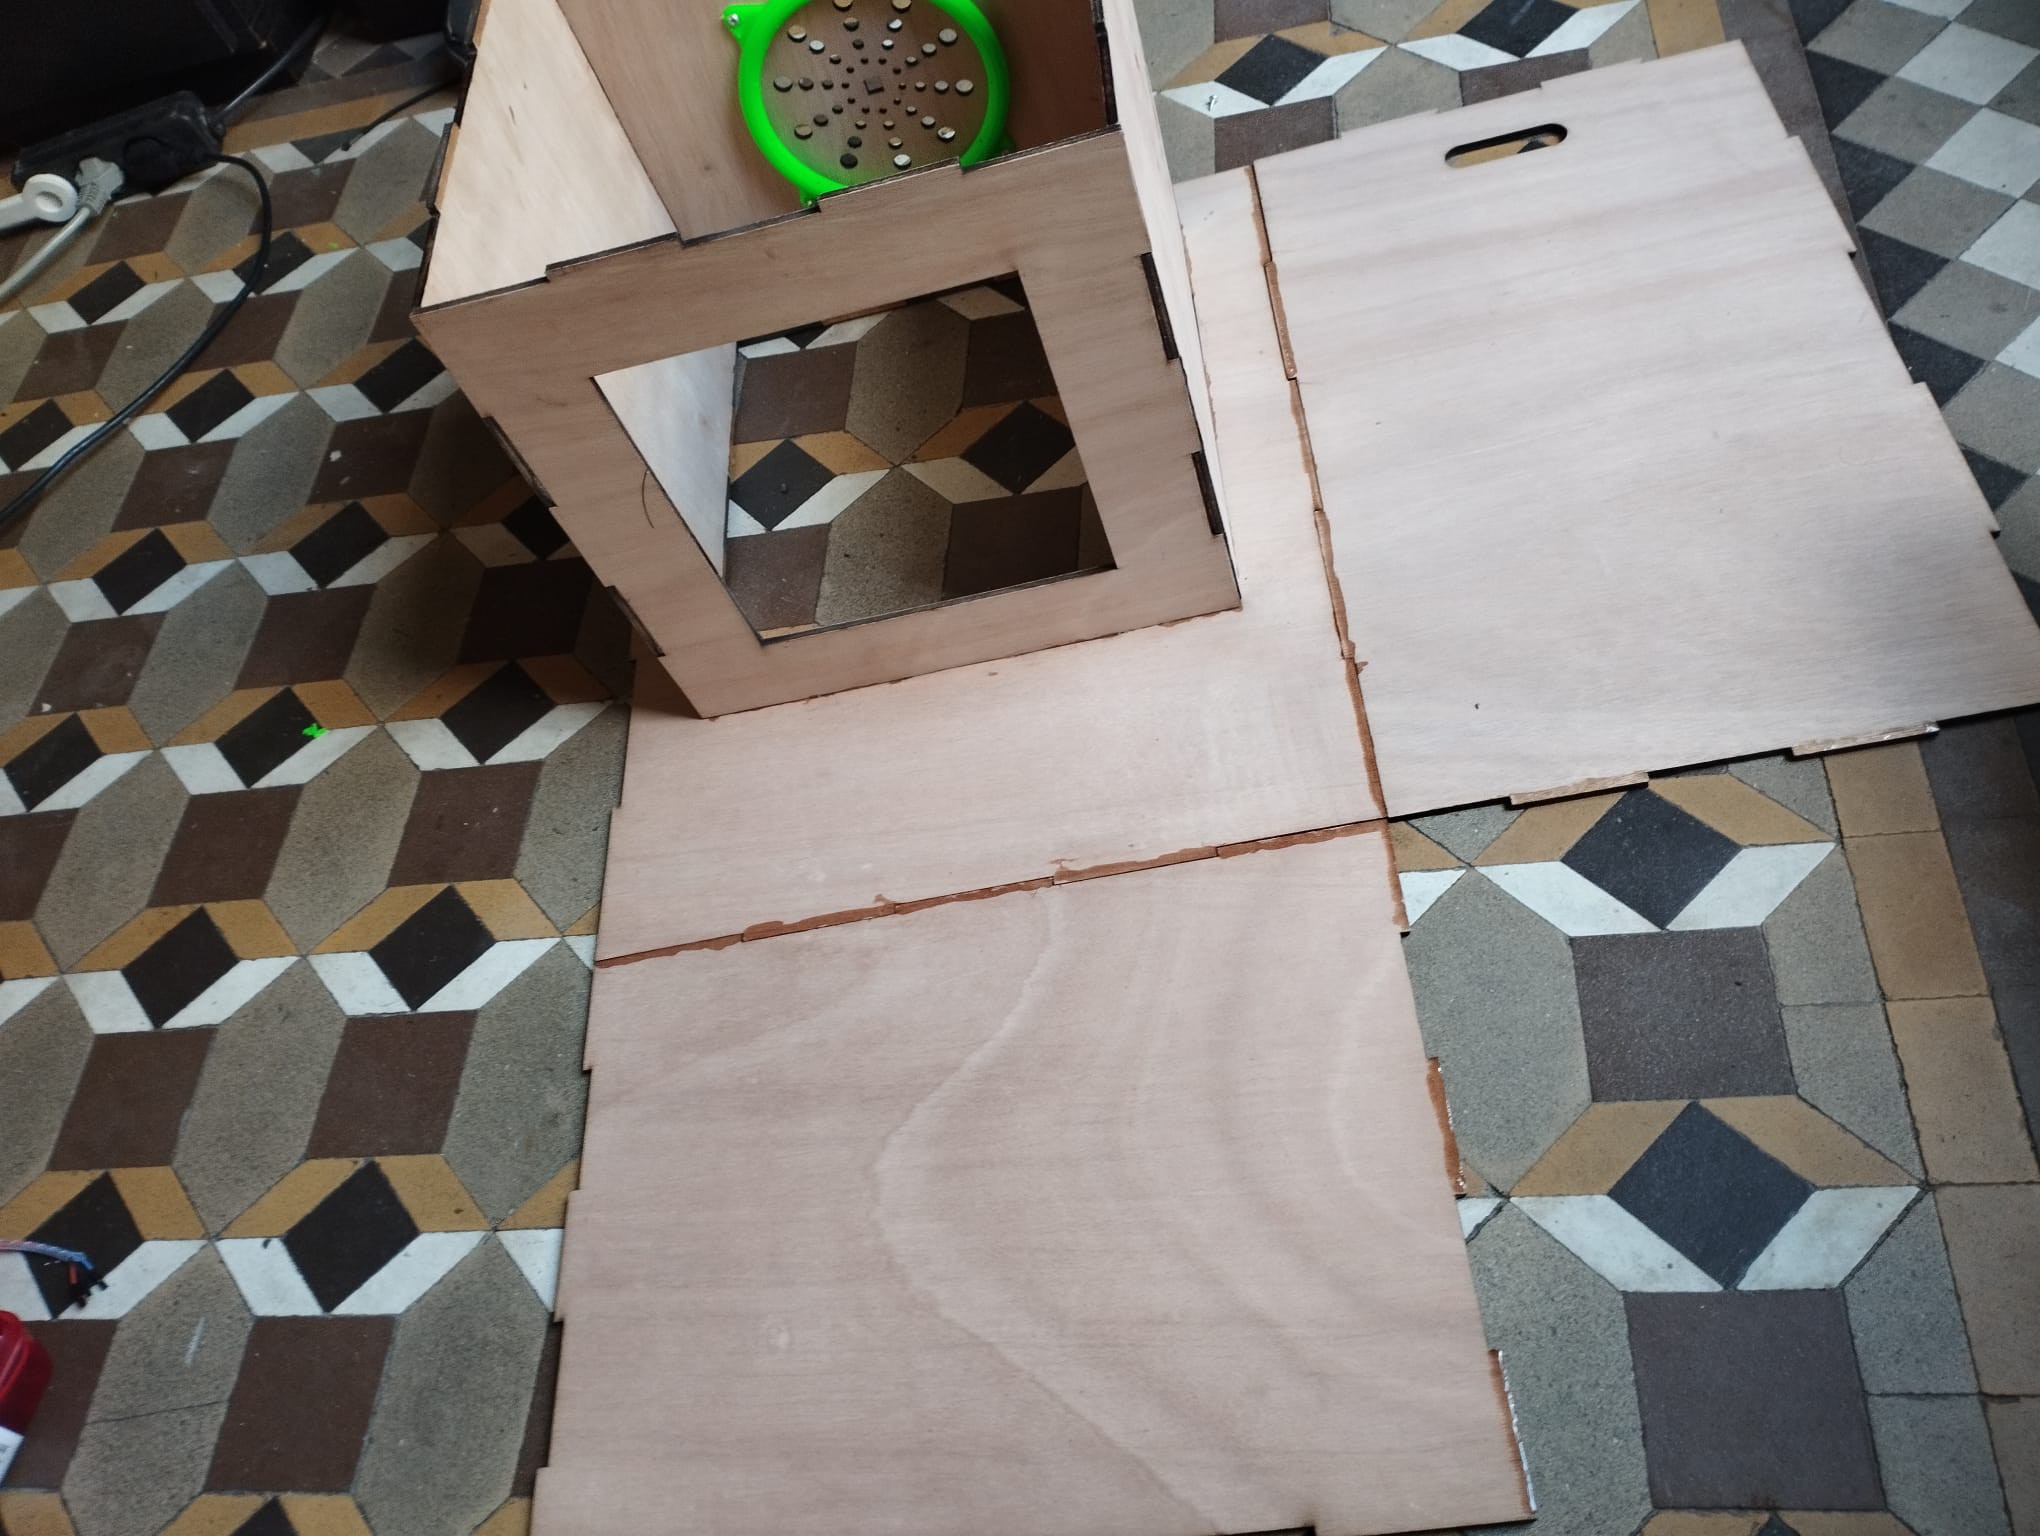
Then you can start adding one of the sides and the bottom part.
![]()
![]()
And after adding the front.
We always leave one side open so we can easily connect the electronics.
![]()
-
43D Printed Parts
![]()
-
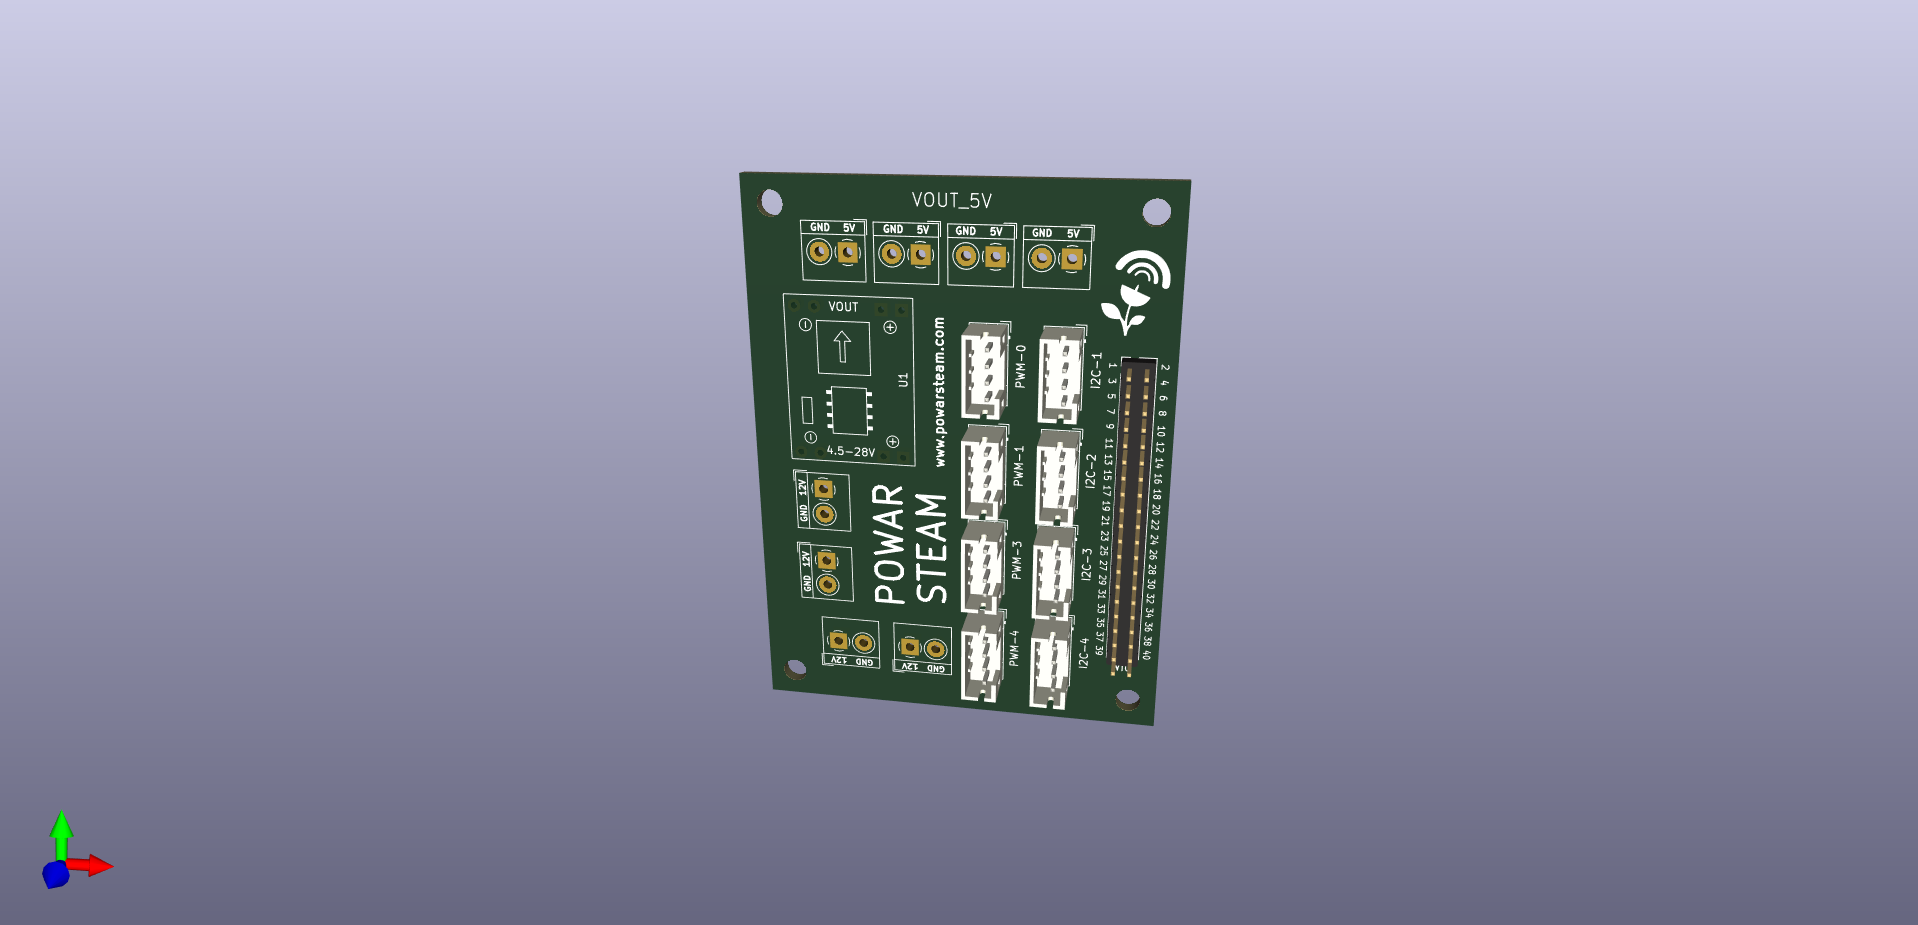
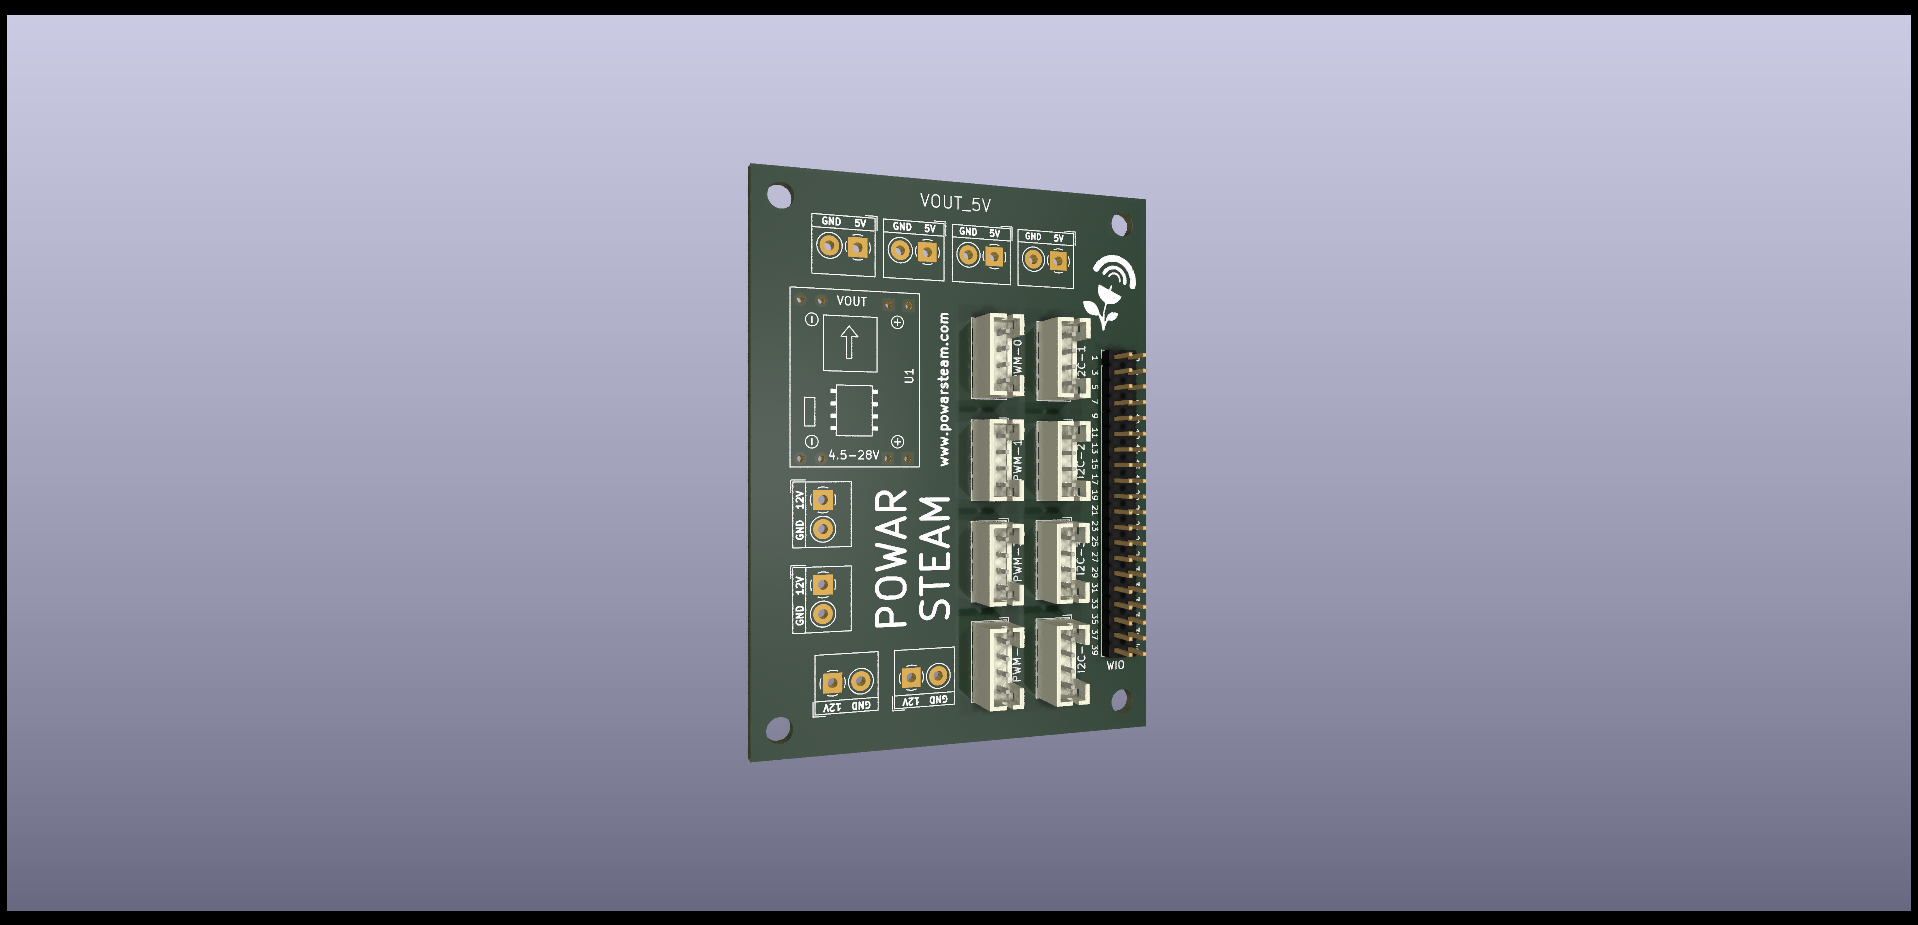
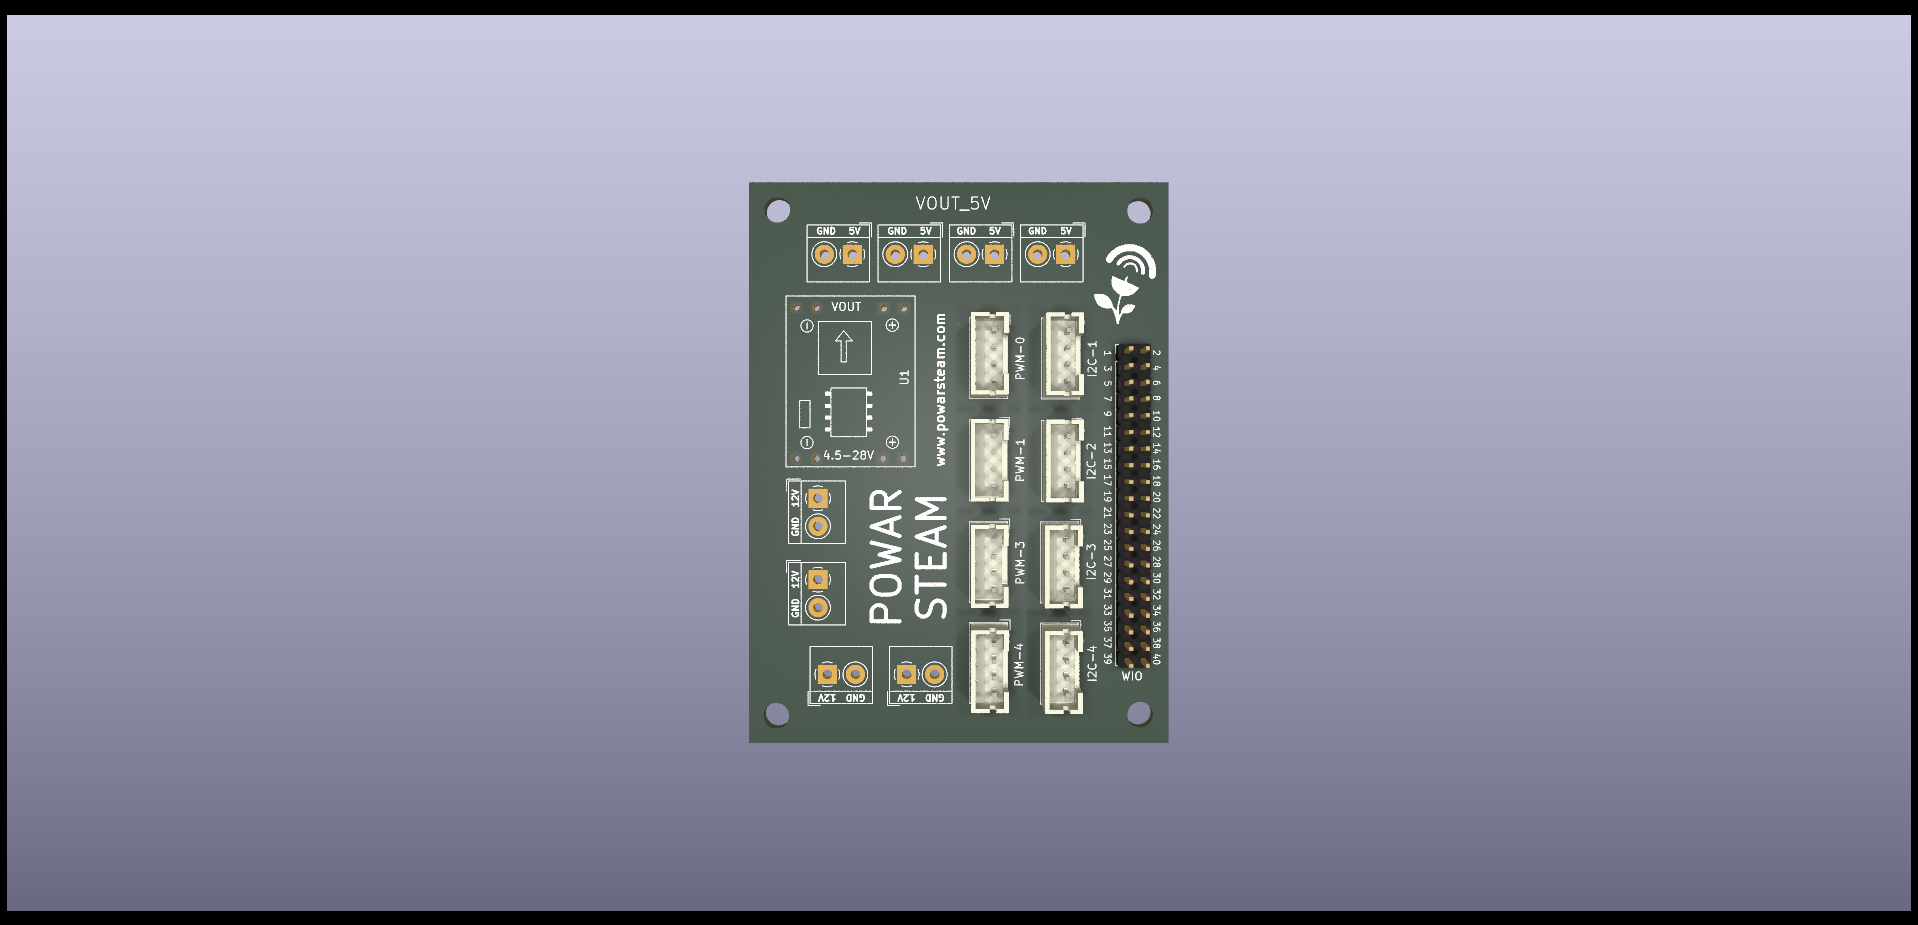
5POWAR Electronic Board
We've designed a tailor-made board that helps us easily connect all the components of POWAR, and manage the power supply from 12v to 5v.
![]()
This board includes a 40 pins connector to connect to the WIO terminal, 4 x I2C grove connectors, and 4 GPIO (PWM) grove connectors.
![]()
For the power management side, we use an LM4158 Bucket that leads to 4 x 12v Inputs/outputs, and 4 x 5v outputs.
![]()
-
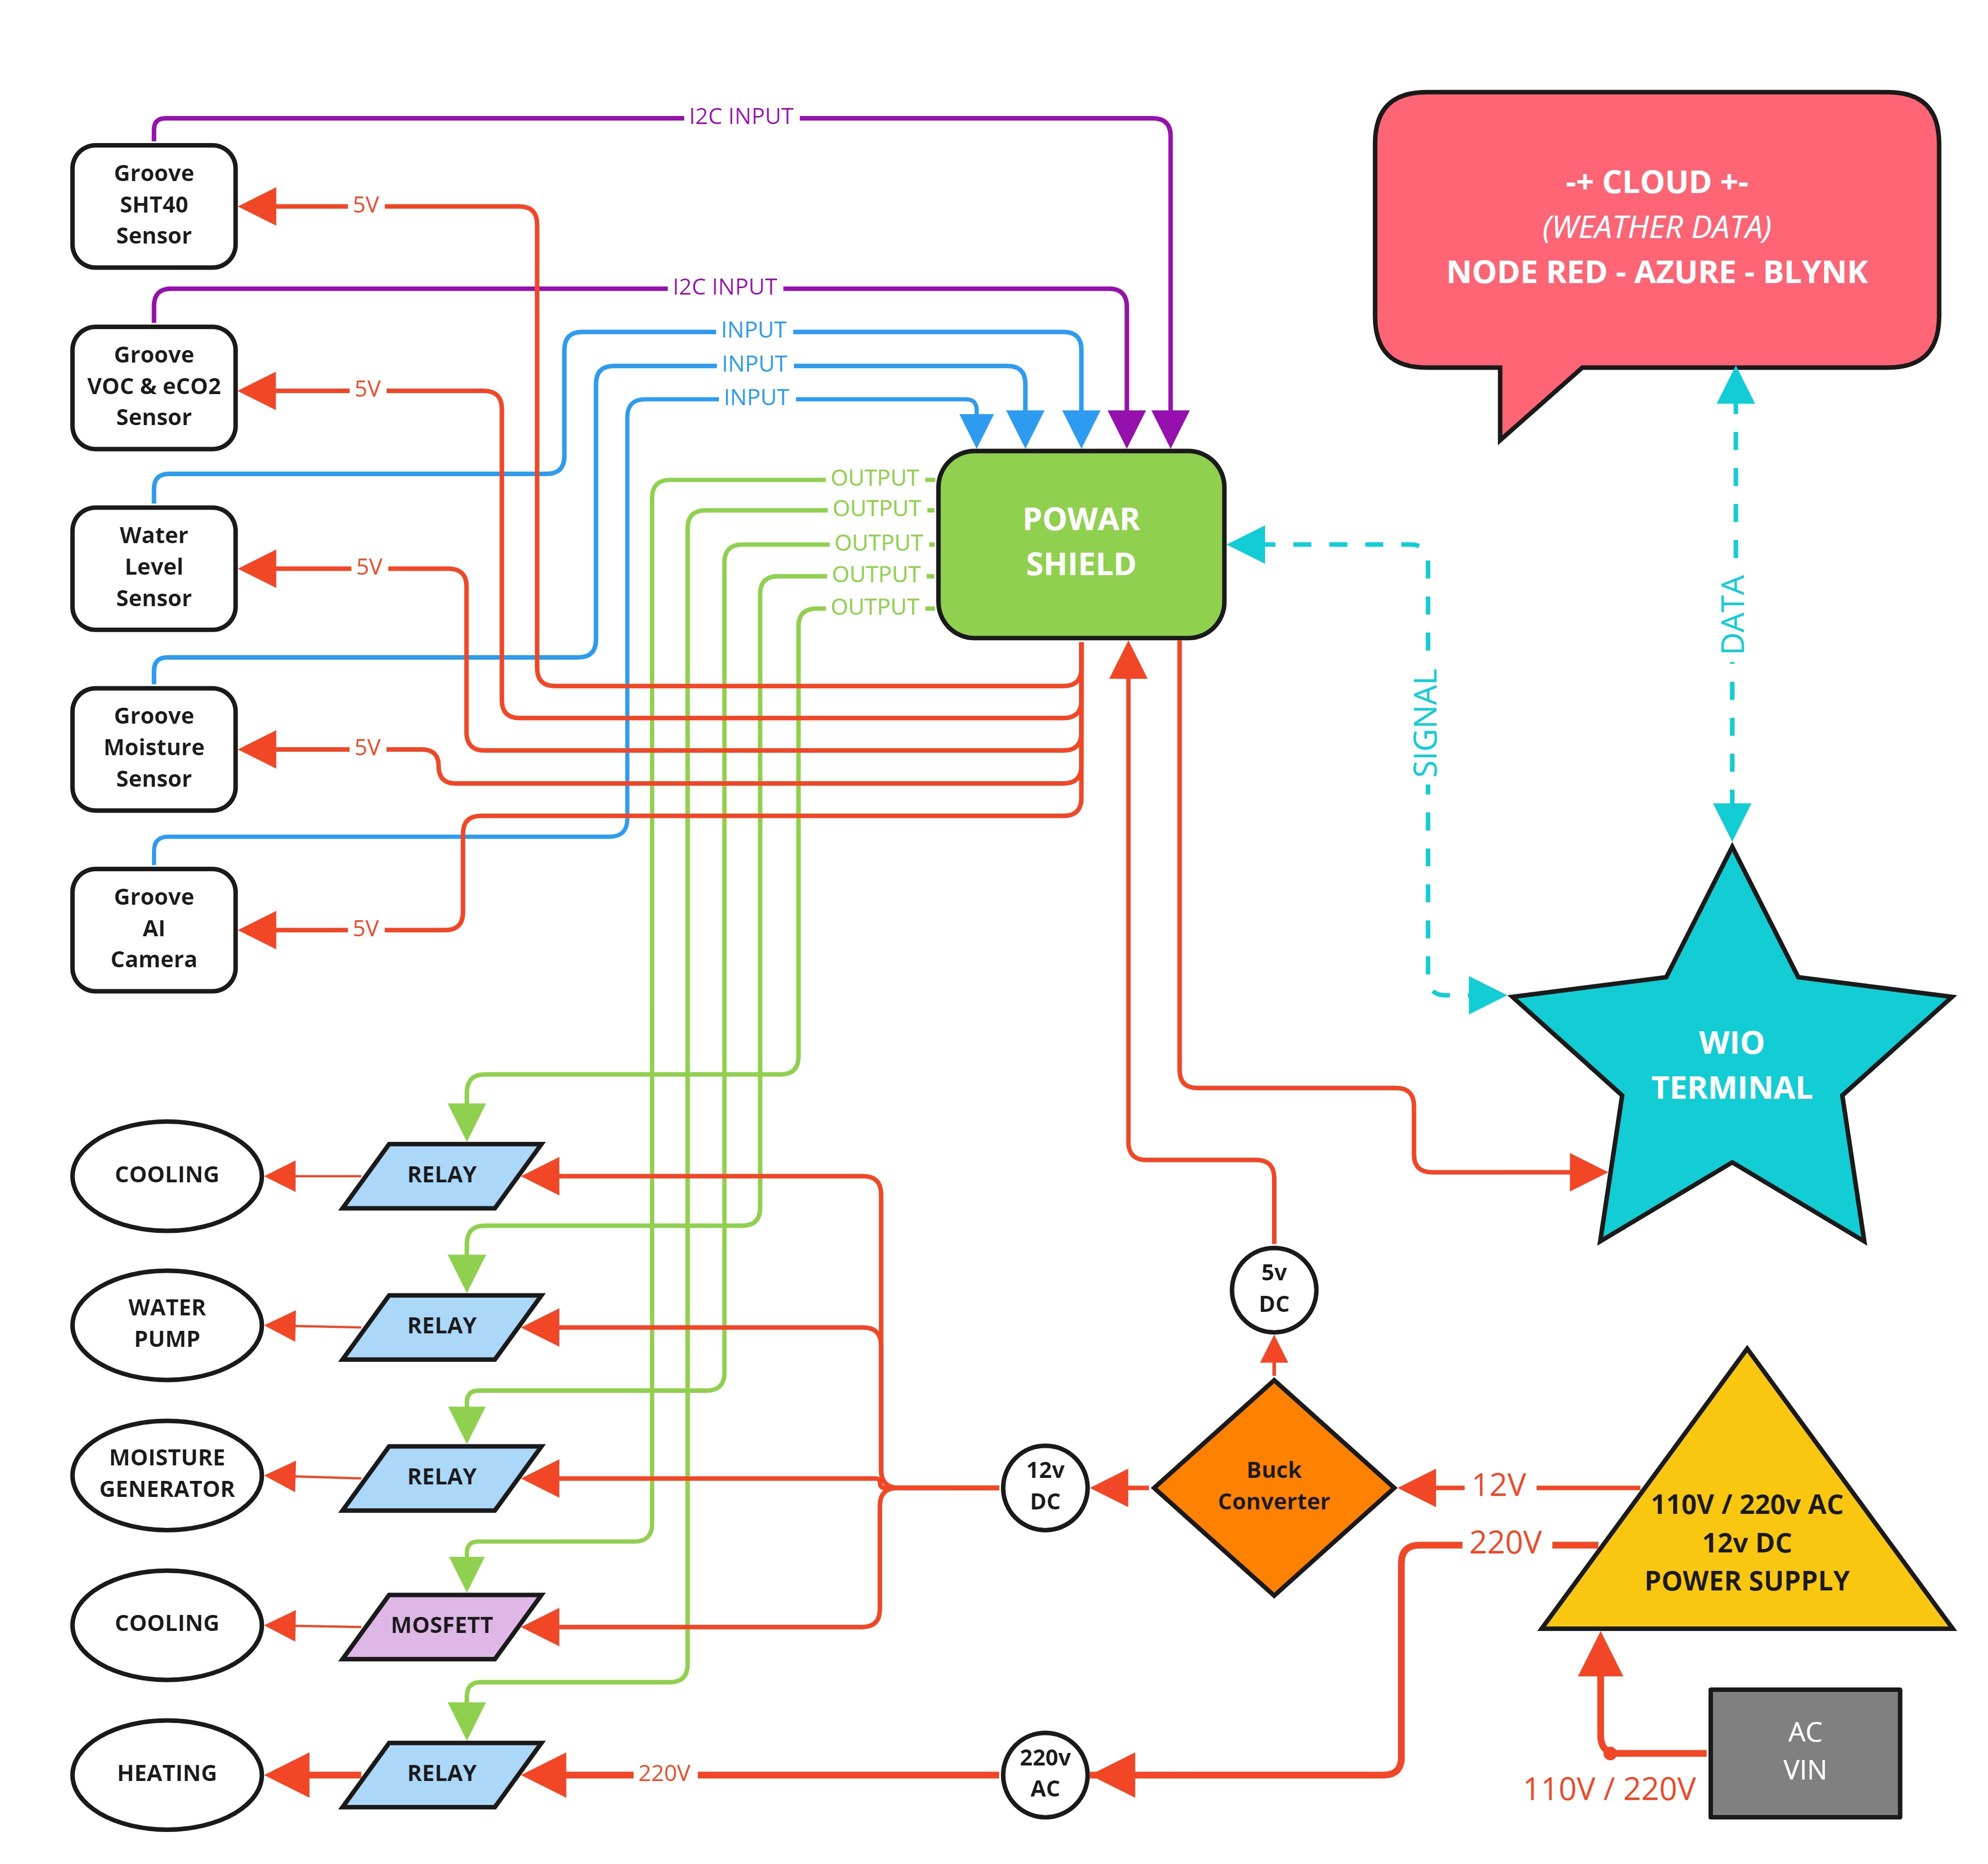
6Electronics Logic
Here is a diagram of how the POWAR electronics logic works.
![]()
POWAR - Future Climate Simulator
Low-cost climate simulator to grow food under future predicted weathers for research and education.

Discussions
Become a Hackaday.io Member
Create an account to leave a comment. Already have an account? Log In.