 Karl
Karl-
1Step 1:
Cut your fabric to size for all bag components. In this case, the main body of the bag is 42x55cm and the flap x2 measures 42x30cm.
-
2Step 2:
Sew the body panel of the bag. First create a seam for the top and bottom of the sheet, and the fold it in half to create the volume of the bag. Once the seams are complete, the bag can be turned inside-out to hide the seams. (Optional - hide the seams with additional nylon, or add a bag liner)
![]()
-
3Step 3:
Sew the top flap 42x30cm for the bag by cutting a opening in the first panel 23x13cm for the solar panels to be displayed and add seams to all four sides. Then add the second alternative color back nylon panel and add a seam around all four sides. Then turn the entire flap inside out, and stitch the solar panel into the window.
![]()
-
4Step 4:
Insert the electronic LED display, and attach the flap to the body of the bag. Be cautious not to damage the electronics, or the back of the bag while sewing.
![]()
![]()
-
5Step 5:
Add the strap by attaching the hardware and nylon strap to the side seam of both ends of the bag using a multi-directional stitch. When the hardware has been installed on both ends, add your preferred shoulder strap.
![]()
-
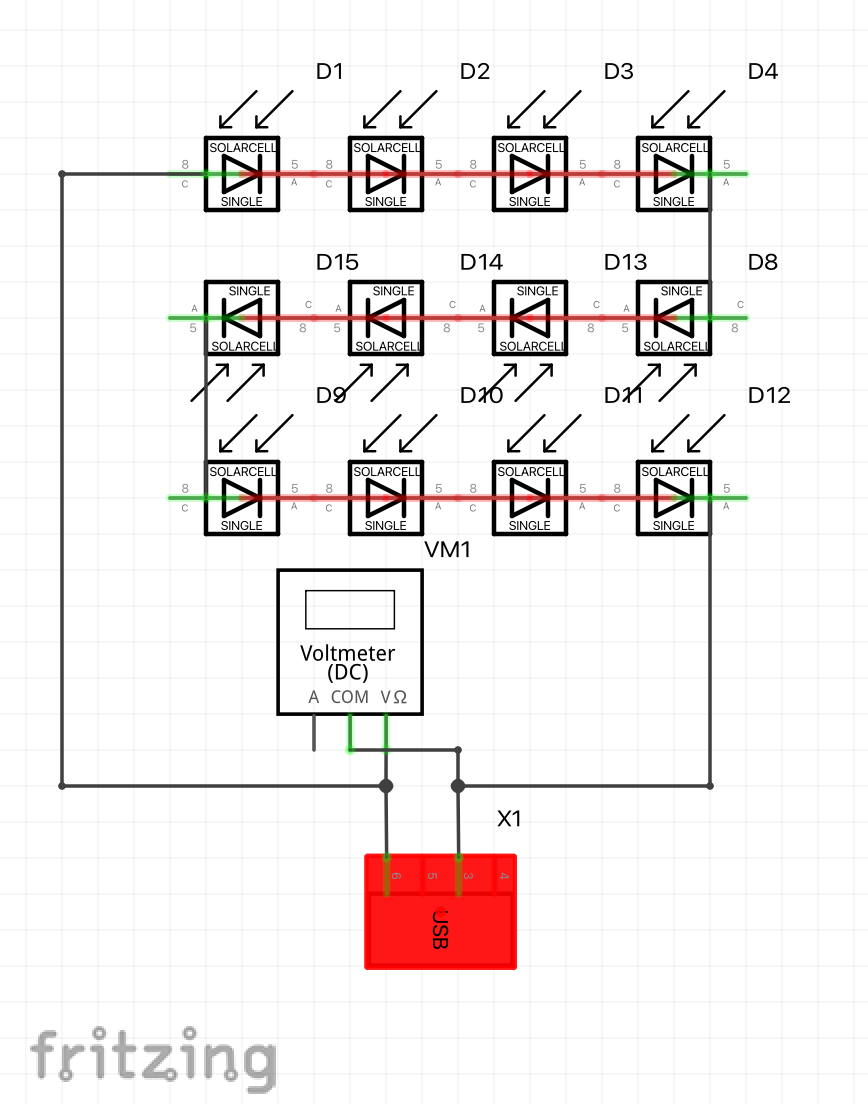
6Step 6:
Enjoy your stylish new bag! Just make sure to put it into the sun so the voltage rises above 5v for charging your devices.
![]()
Lightweight Solar-Powered Messenger Bag
This eye-catching and lightweight nylon messenger bag can charge your devices on the go using an organic solar panel.


Discussions
Become a Hackaday.io Member
Create an account to leave a comment. Already have an account? Log In.