North American Cyberarms Cyberdeck
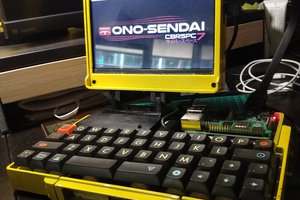
Cyberdeck from an old pistol case for the 2023 contest
Cyberdeck from an old pistol case for the 2023 contest
To make the experience fit your profile, pick a username and tell us what interests you.
We found and based on your interests.
halfbutterqmk.tar.bz2qmk source files for the keyboardx-bzip - 0 bytes - 08/16/2023 at 03:24 |
|
|
CaseBottom - BottomPlate.stlBottom half, slots for keyboard, mouse and wiresStandard Tesselated Geometry - 7.82 MB - 08/16/2023 at 03:22 |
|
|
CaseTop - Top beizel.stlTop half, cutout for screen, blinkenlights and protoboardStandard Tesselated Geometry - 3.21 MB - 08/16/2023 at 03:22 |
|
|
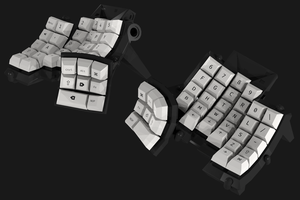
Keyboard - Ergo Plate.stlErgonomic version of the keyboard plateStandard Tesselated Geometry - 819.22 kB - 08/16/2023 at 03:22 |
|
|
Keyboard - Ergo Case.stlCase for the ergonomic keyboardStandard Tesselated Geometry - 1.34 MB - 08/16/2023 at 03:22 |
|

As finished as any cyberdeck project can be, just need to do some documentation and the project video
As a bonus, blinkenlights, and my sons opinion on the case
the PiJuice, short of a basic power brick, is the quickest and easiest way way to add power to a Pi Project. It's plug and play, snap it on the top and you have power. Add some software and you have fancy battery monitoring and control. It has nifty features like programmable LEDs and buttons. It has two notable downsides: 2.5 amp limit, which shouldn't be a problem for my project, and hat format means it adds a decent amount of vertical clearance to the Pi. it's a thicc board.
A large pair of pliers and a quick twist later:
and then we just snip those bits off -
and I flew too close to the sun and cracked my flush cutters
If that is god telling me I should have gotten a power board that fit instead of forcing in what I had, god should have made staying under budget easier on this project. New flush cutter coming tomorrow, but I'll be able to fit all three boards, LCD driver (blue) power (red) and pi (green)
since I want to use the power feature, I have to make sure the I²C pins connect, so when I do trim the top parts off, going to want to keep the 5v, gnd and 3 and 5 pins intact to plug in.
Added a power plug and a reset switch. Debated making the plug flush but with it sticking out a bit it looks like a one eyed duck and that amuses me
Sadly I have to use a different mouse, the relacon is too thick to fit, but I found a pocket mouse I can substitute. 
Now that i have the screen in hand and can get an idea of exactly where everything goes, it's time to work on the top plate.
Had a few prototyping blocks around, so will be using those to access 5V, 35 and ground on the fat block and various to be determined and hopefully swappable lines on the skinny one, hole on the bottom right is for the USB hub, and the big hole in the top left is for the headphone jack, little holes below the monitors are for LED's
Rev 1 didn't have the depth to fit the raspberry pi, rev 2 is on the printer right now:
Screen and new pi showed up, pretty soon we'll start having a minimum viable deck
test print on the bottom half of the deck, which is designed to hold the keyboard, mouse and a videogame controller. The keyboard case was the wrong size and the whole thing was about a cenimeter too short. Remeasure, reprint and move on.
width was due to me accidentally not replacing the default with the proper variable, keyboard outline was due to using the wrong revision of the keyboard, Onshape is handy but not being able to integrate it into my normal version control is a headache
waiting on a USB ttl cable so I can check and see if there is anything on the boot log, if I have to get a new pi that would more than double the budge of the build, bah.
Pulled some batteries out of my laptop that died previously in the project:
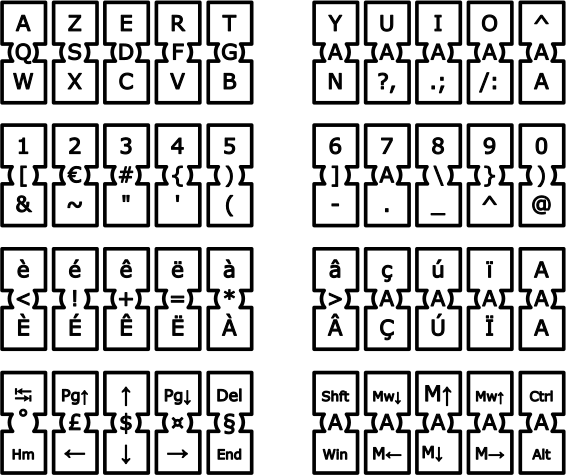
Same keyboard, different hand sizes.
Create an account to leave a comment. Already have an account? Log In.
Become a member to follow this project and never miss any updates
By using our website and services, you expressly agree to the placement of our performance, functionality, and advertising cookies. Learn More
 David H. Bronke
 Richard
 tecywiz121