Mx. Jack Nelson
-
Countdown to PCB
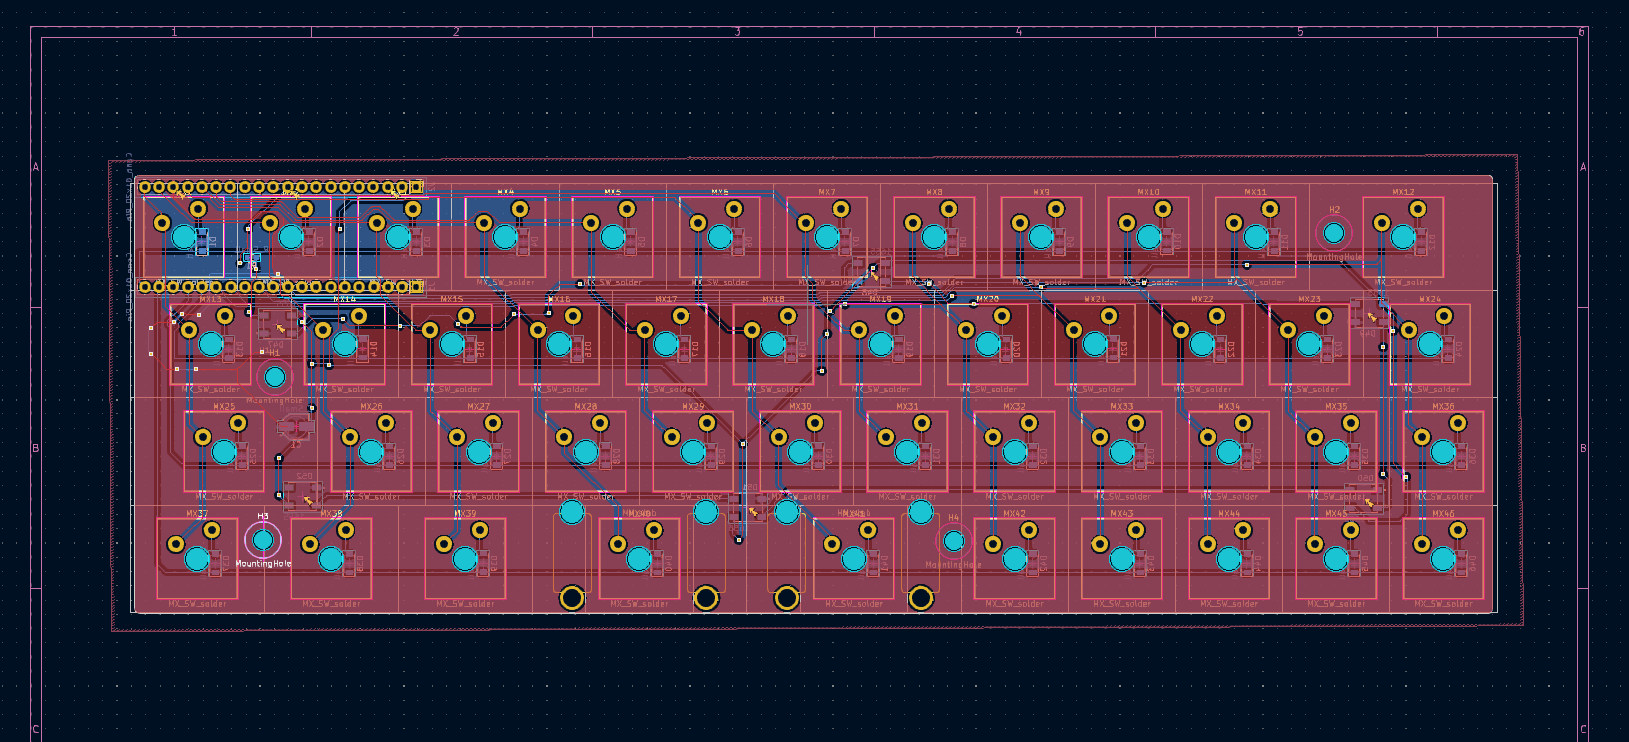
10/12/2023 at 20:59 • 0 commentsAfter more corrections and a few edits I have finally ordered the board through JLBPCB! Today starts the countdown till my board is semi-assembled and sent to me. I need to buy the Neo-pixels, too, but after that purchase I'll have acquired almost all the necessary parts for a keyboard. The switches are here, the keycaps are in the mail, and now I just have to figure out a case.
-
Many things were wrong
10/12/2023 at 05:37 • 0 commentsI cringe looking at how the board was wired in my last post, but hey, that's learning. Since then I've had my lovely wife @Steph go over the schematic and inform me that my conceptual knowledge of lighting an LED was indeed lacking. With help from them and the website Falstad I was able to learn that the LEDs needed to each be connected to 5v, because they're not a strip, they're individual LEDs, and they needed a capacitor placed across the power and ground lines, not in series with the power and ground lines. Being able to visualize the circuit was very helpful, and though I know it may have been wise to breadboard it I really liked the digital equivalent. Many thanks to @Steph for pulling me out of that knowledge hole, and for later teaching me about ground planes.
![]()
-
It took a while to get here
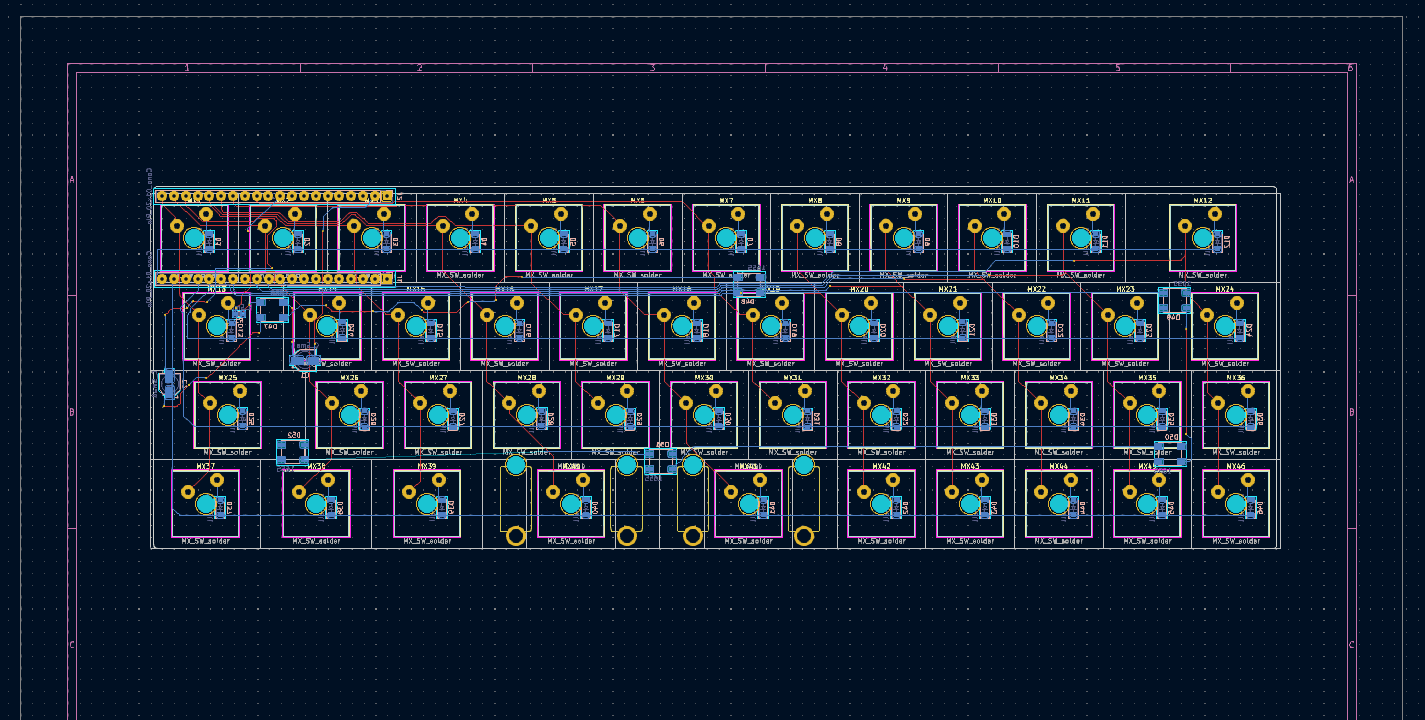
10/08/2023 at 05:47 • 0 commentsNow I have the design for a 40% keyboard with RGB underglow finally finished. I added all the recommended capacitors and resistors, though I'm shaky on the fundamentals it seems I am able to route traces without too much difficulty. It reminds me of puzzle game obsessions I've had. I'm learning some of the principles of PCB design on this project, and I'm happy with the conceptual progress I've made.
![]()
-
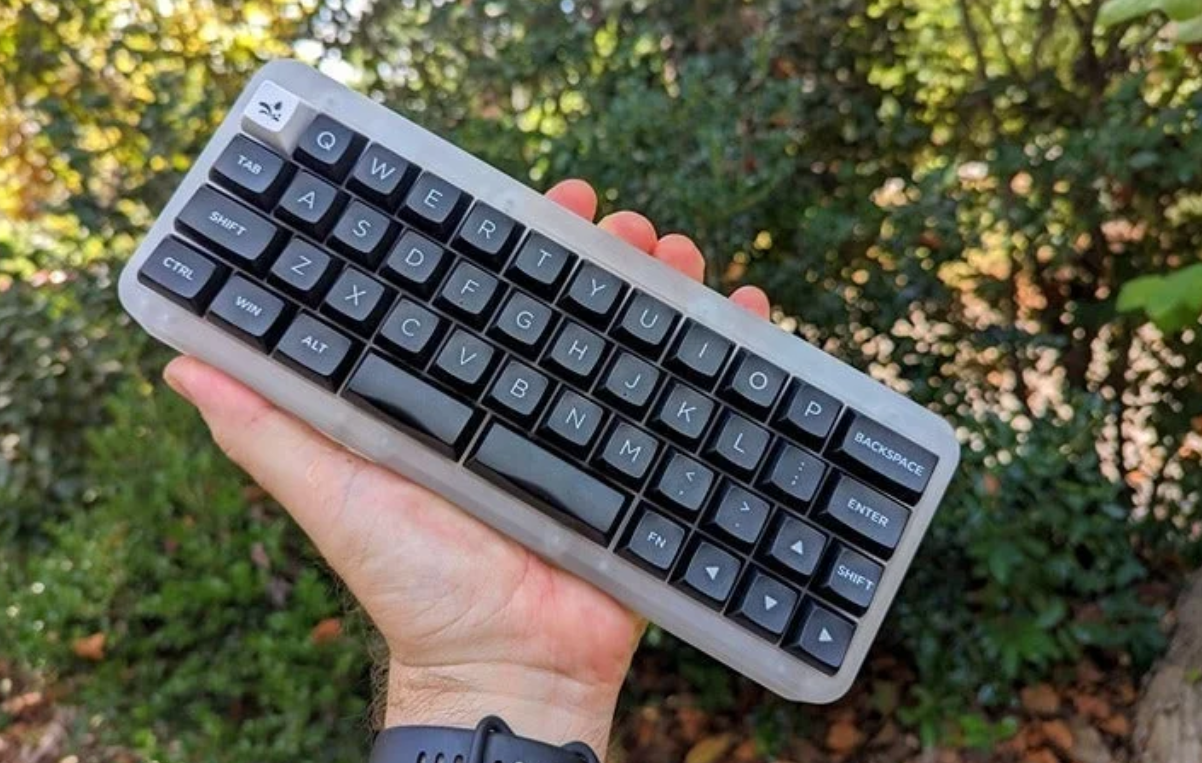
A 40% keyboard layout
09/22/2023 at 16:48 • 0 commentsI don't need a 60% layout with number keys but I do want arrow keys, so I've decided to go with borrowing a 40% layout from Akko that I really like. This is a picture from an online listing for the Akko ACR TOP 40%, which I've fallen in love with as far as the key layout goes, however I'm going to replace the CTRL, ALT and WIN keys with the CMD, OPT, CTRL keys for Mac. There is no caps lock on this design, and I think for a conversational keyboard it isn't needed.
![]()
Here's the beginning design for the keyboard in KiCad, which I'm learning as I do this project. Nothing is routed to the Pi Pico W yet, but you can see where I intend to put headers and have the Pi Pico W mounted to the back of the keyboard PCB.
![]()
-
Am I building a keyboard from scratch? Yes.
09/15/2023 at 21:21 • 0 commentsI want to make a haunted keyboard, that types back when I type on it, or completes my sentences with spooky endings. In order to accomplish this I need to use a microcontroller, a keyboard, and an API call to ChatGPT, but the outcome I want is a keyboard with only one USB cable to connect it to my computer, so it looks like a normal keyboard. I want the microcontroller to live inside the housing of the keyboard.
My first decision was whether to try to modify a prebuilt keyboard. I choose not to, as I cannot imagine how to attach a microcontroller to an existing keyboard without reverse engineering the keyboard to find all the rows and columns, and figuring out how to get rid of its onboard processor.
So a custom keyboard it is!
I could buy a premade PCB, but I want the keyboard itself to be able to make an API call to ChatGPT, so the microcontroller on the PCB needs to support wifi. There's this kit that supports Adafruit Feathers, but the wifi Feather is one of their more expensive Feathers. Therefore I am going to build my own PCB with connectivity to a Pi Pico W. I am fine with using any USB cable to connect the keyboard to the computer, so Micro USB will work.
This means I'll be designing the keyboard's PCB in KiCad, ordering the related components, assembling the PCB and then adding switches and keycaps. And a case. I'm still looking into ways to get an acrylic case made, I know there are many.
Haunted Keyboard
Type on this keyboard for a haunting response generated by ChatGPT