Close
0%
0%

Esp32-C6-Bug + Esp32-Bug-Eth

Playing with the new Esp32-C6FH4:
https://www.crowdsupply.com/prokyber-s-r-o/esp32-c6-bug

Similar projects worth following
Hello everyone, this project is about building a small development board with battery support around the Esp32-C6FH4. The Esp32-C6 is a quite interesting new low-power RISC-V MCU from Espressif with multi-protocol support (WiFi, Ble, Zigbee, Thread...). WiFi-6 further reduces power consumption. So making a board with battery charging and protection circuits seems like an obvious idea. The multi-protocol feature allows easy implementation of protocol bridges or dongles. Low-power consumption, along with battery support, gives users the opportunity to create things like Zigbee sleepy devices...
Official Arduino support is on the way and you already can give Esp32-C6 a test drive by manually installing the newest Esp32 core into the Arduino environment.
For more info about the board check out:
https://www.crowdsupply.com/prokyber-s-r-o/esp32-c6-bug

Okey-dockey let's dig into the details. How Esp32-C6 is actually cooler than previous existing Esp32s? Well the first thing that comes to mind is of-course the multi protocol support. What does it mean? Using Esp32-C6 you can basically switch between WiFi/Zigbee/Thread on the go, which allows building protocol bridges like the ones described in the demos section of the datasheet.
Now to the schematics which is actually quite simple:
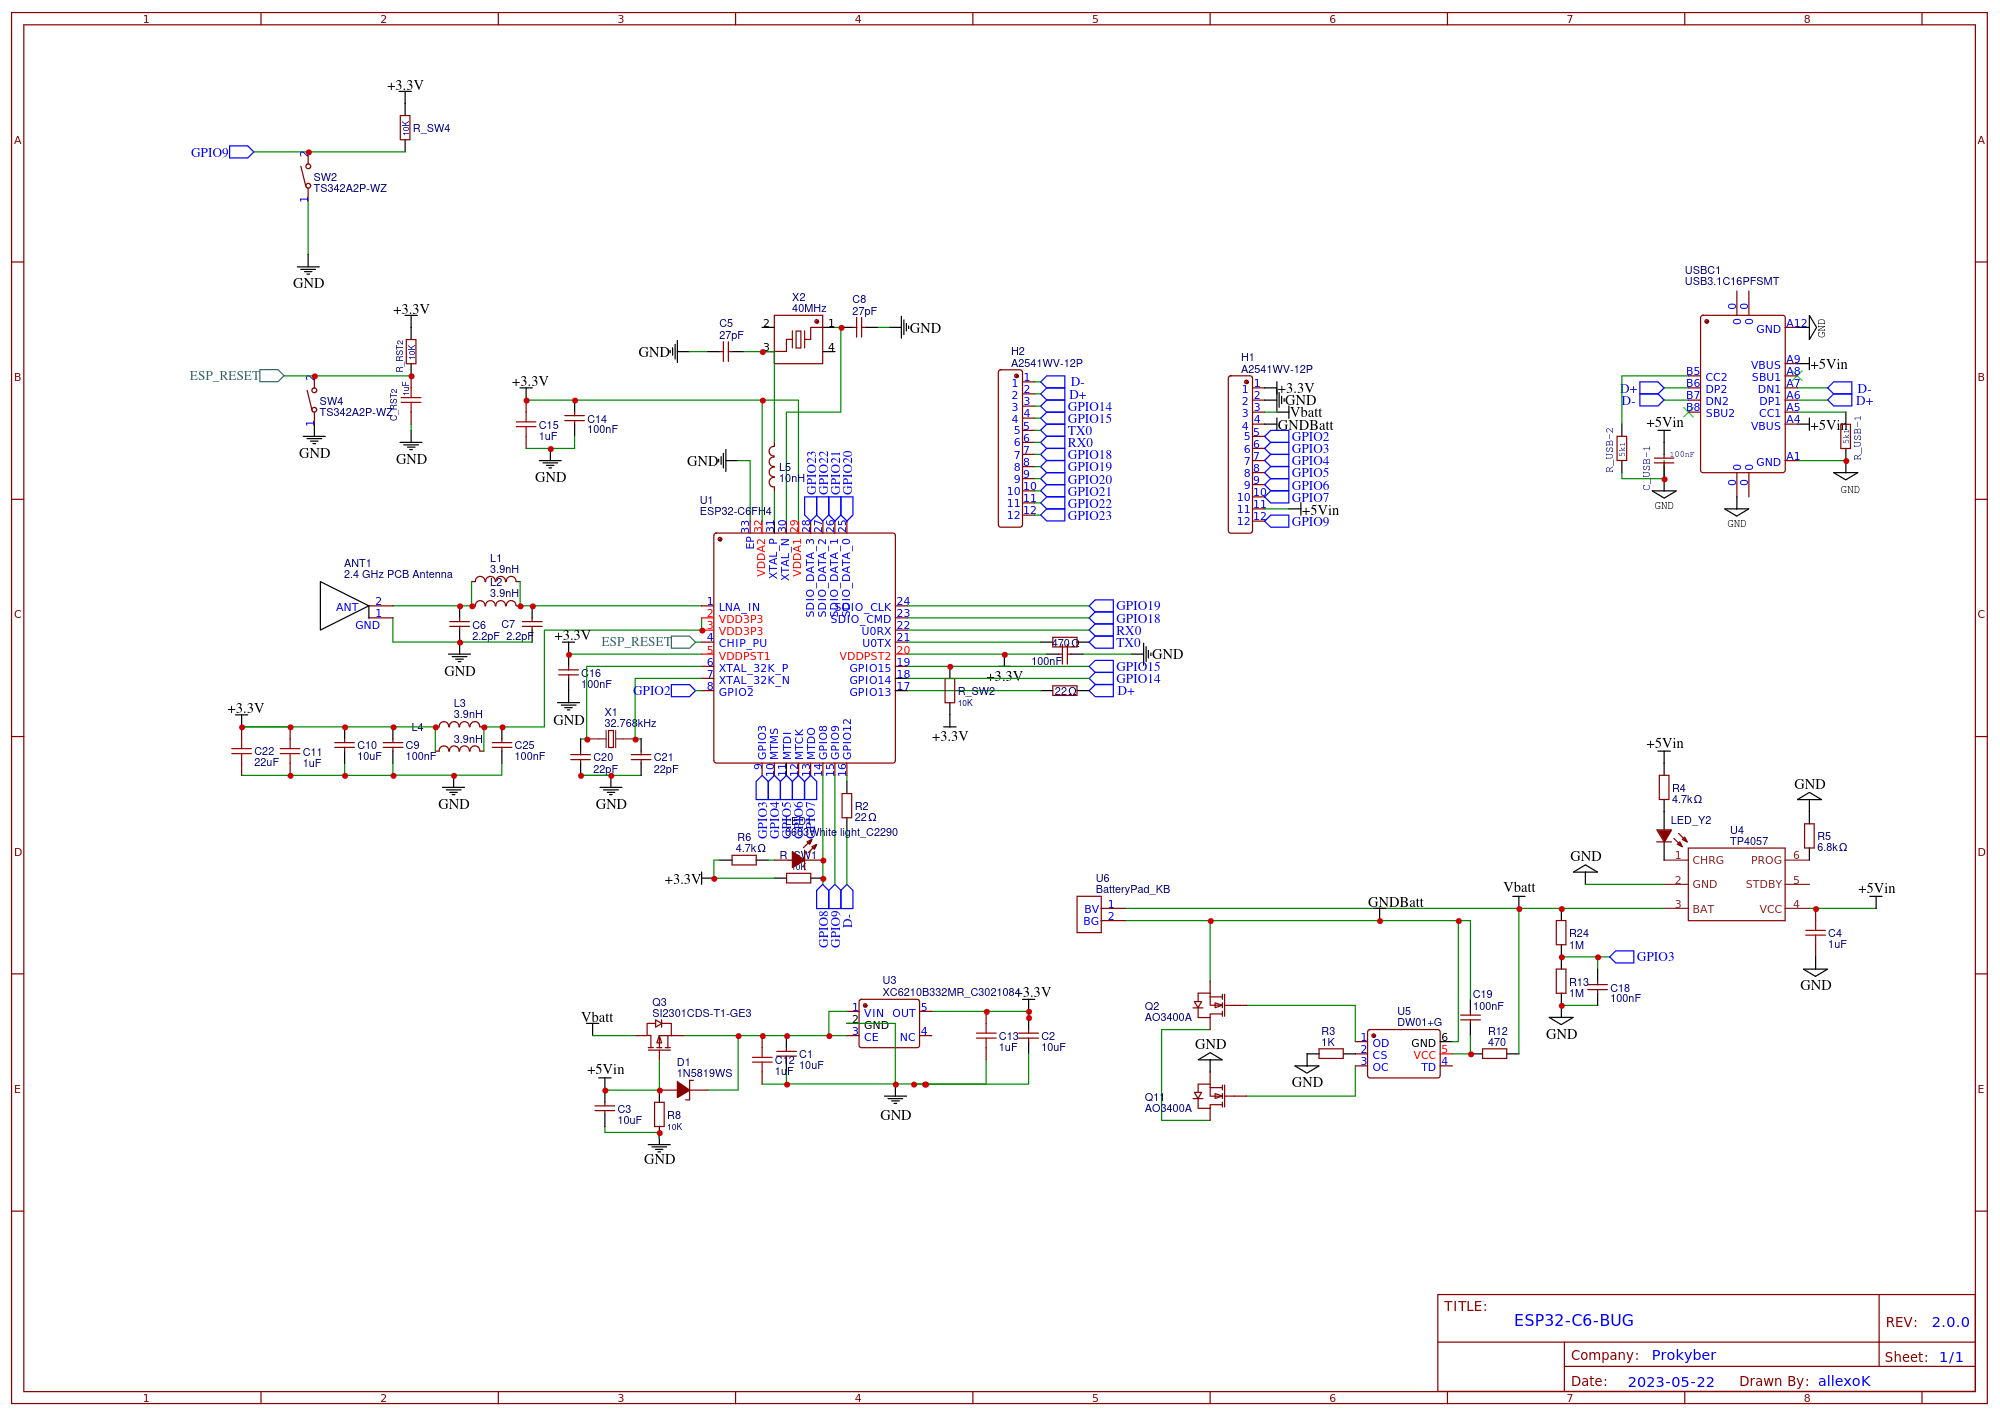
All the parts are quite 'classic' except for the Esp32-C6FH4 which is a version of Esp32-C6 with integrated 4MB flash memory. The LDO can deliver up to 700mA. Some of that power(around 200mA, but depends on the enabled features) is drawn by the MCU. TP4057 handles the battery charging. The battery is protected from under-voltage by DW01+G.

Since the high frequency signals generated by the antenna may influence the oscillator(for more info check the datasheet), the most challenging part was the oscillator placement and inductor design... Also I had to replace the L5 several times to find the correct value.

Here is a picture of MARK 1:
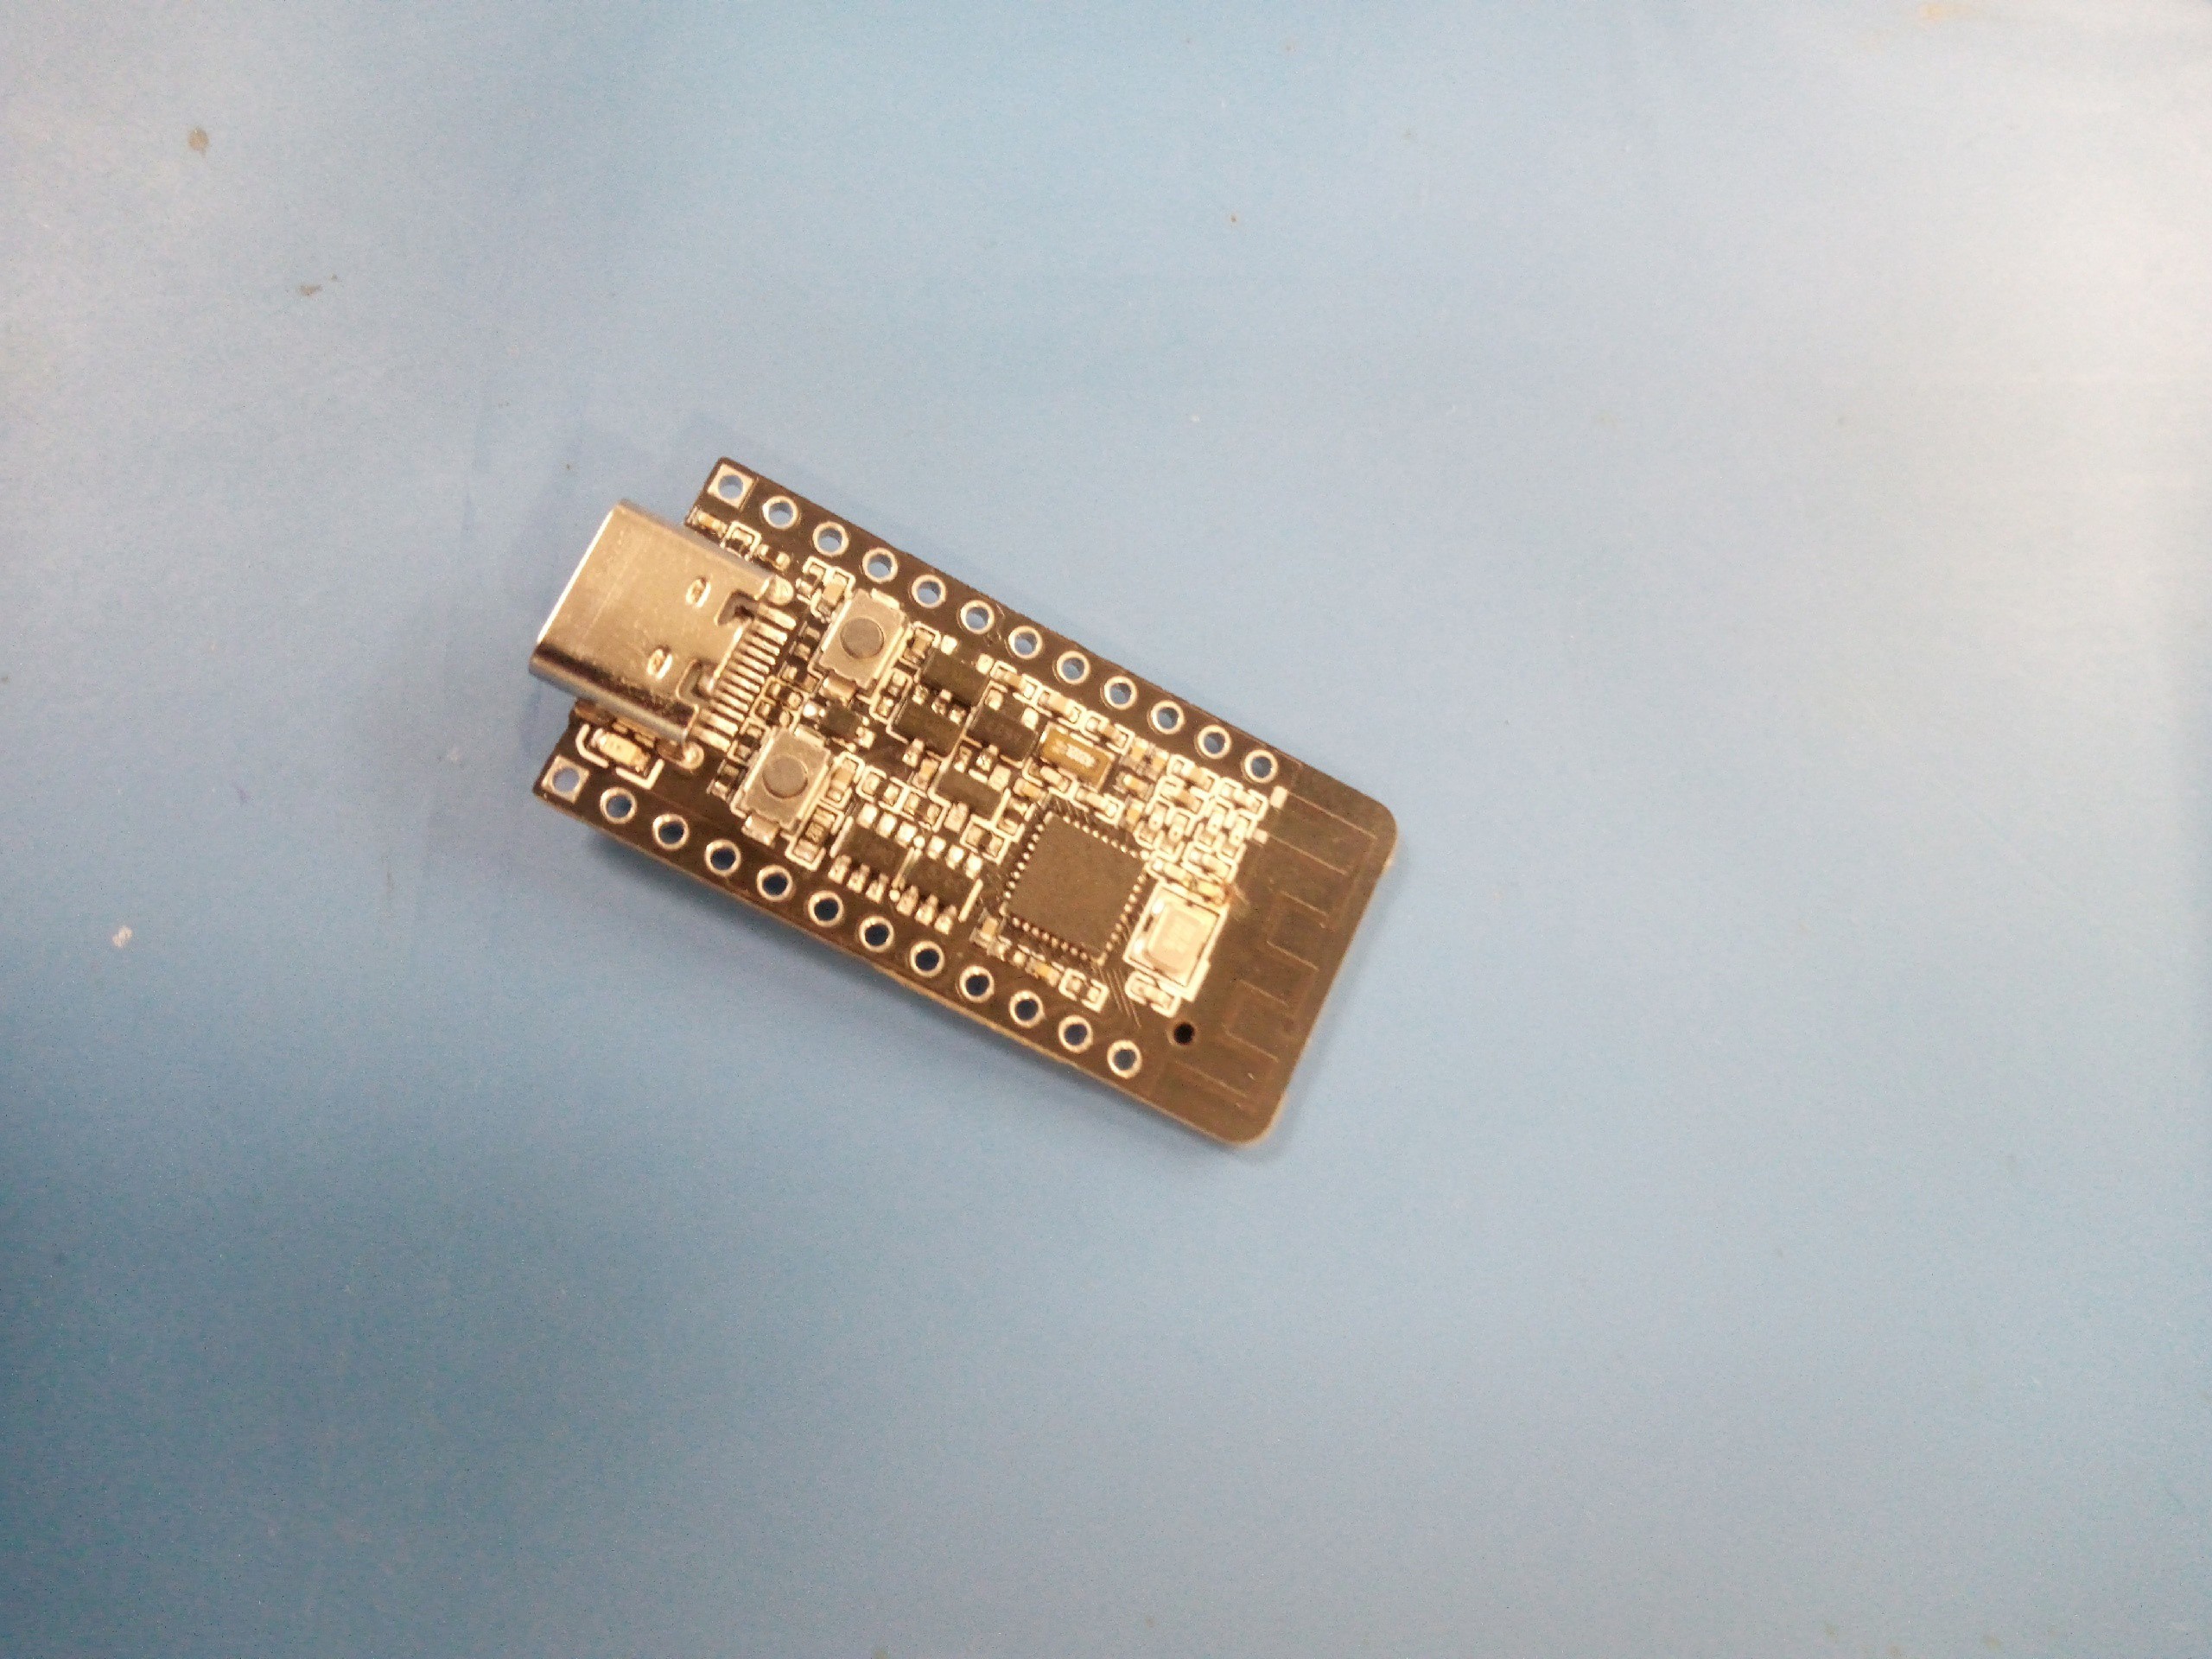
And the final design(I am actually proud of that picture:) Since I am a terrible photographer, I am very surprised by how good it looks):
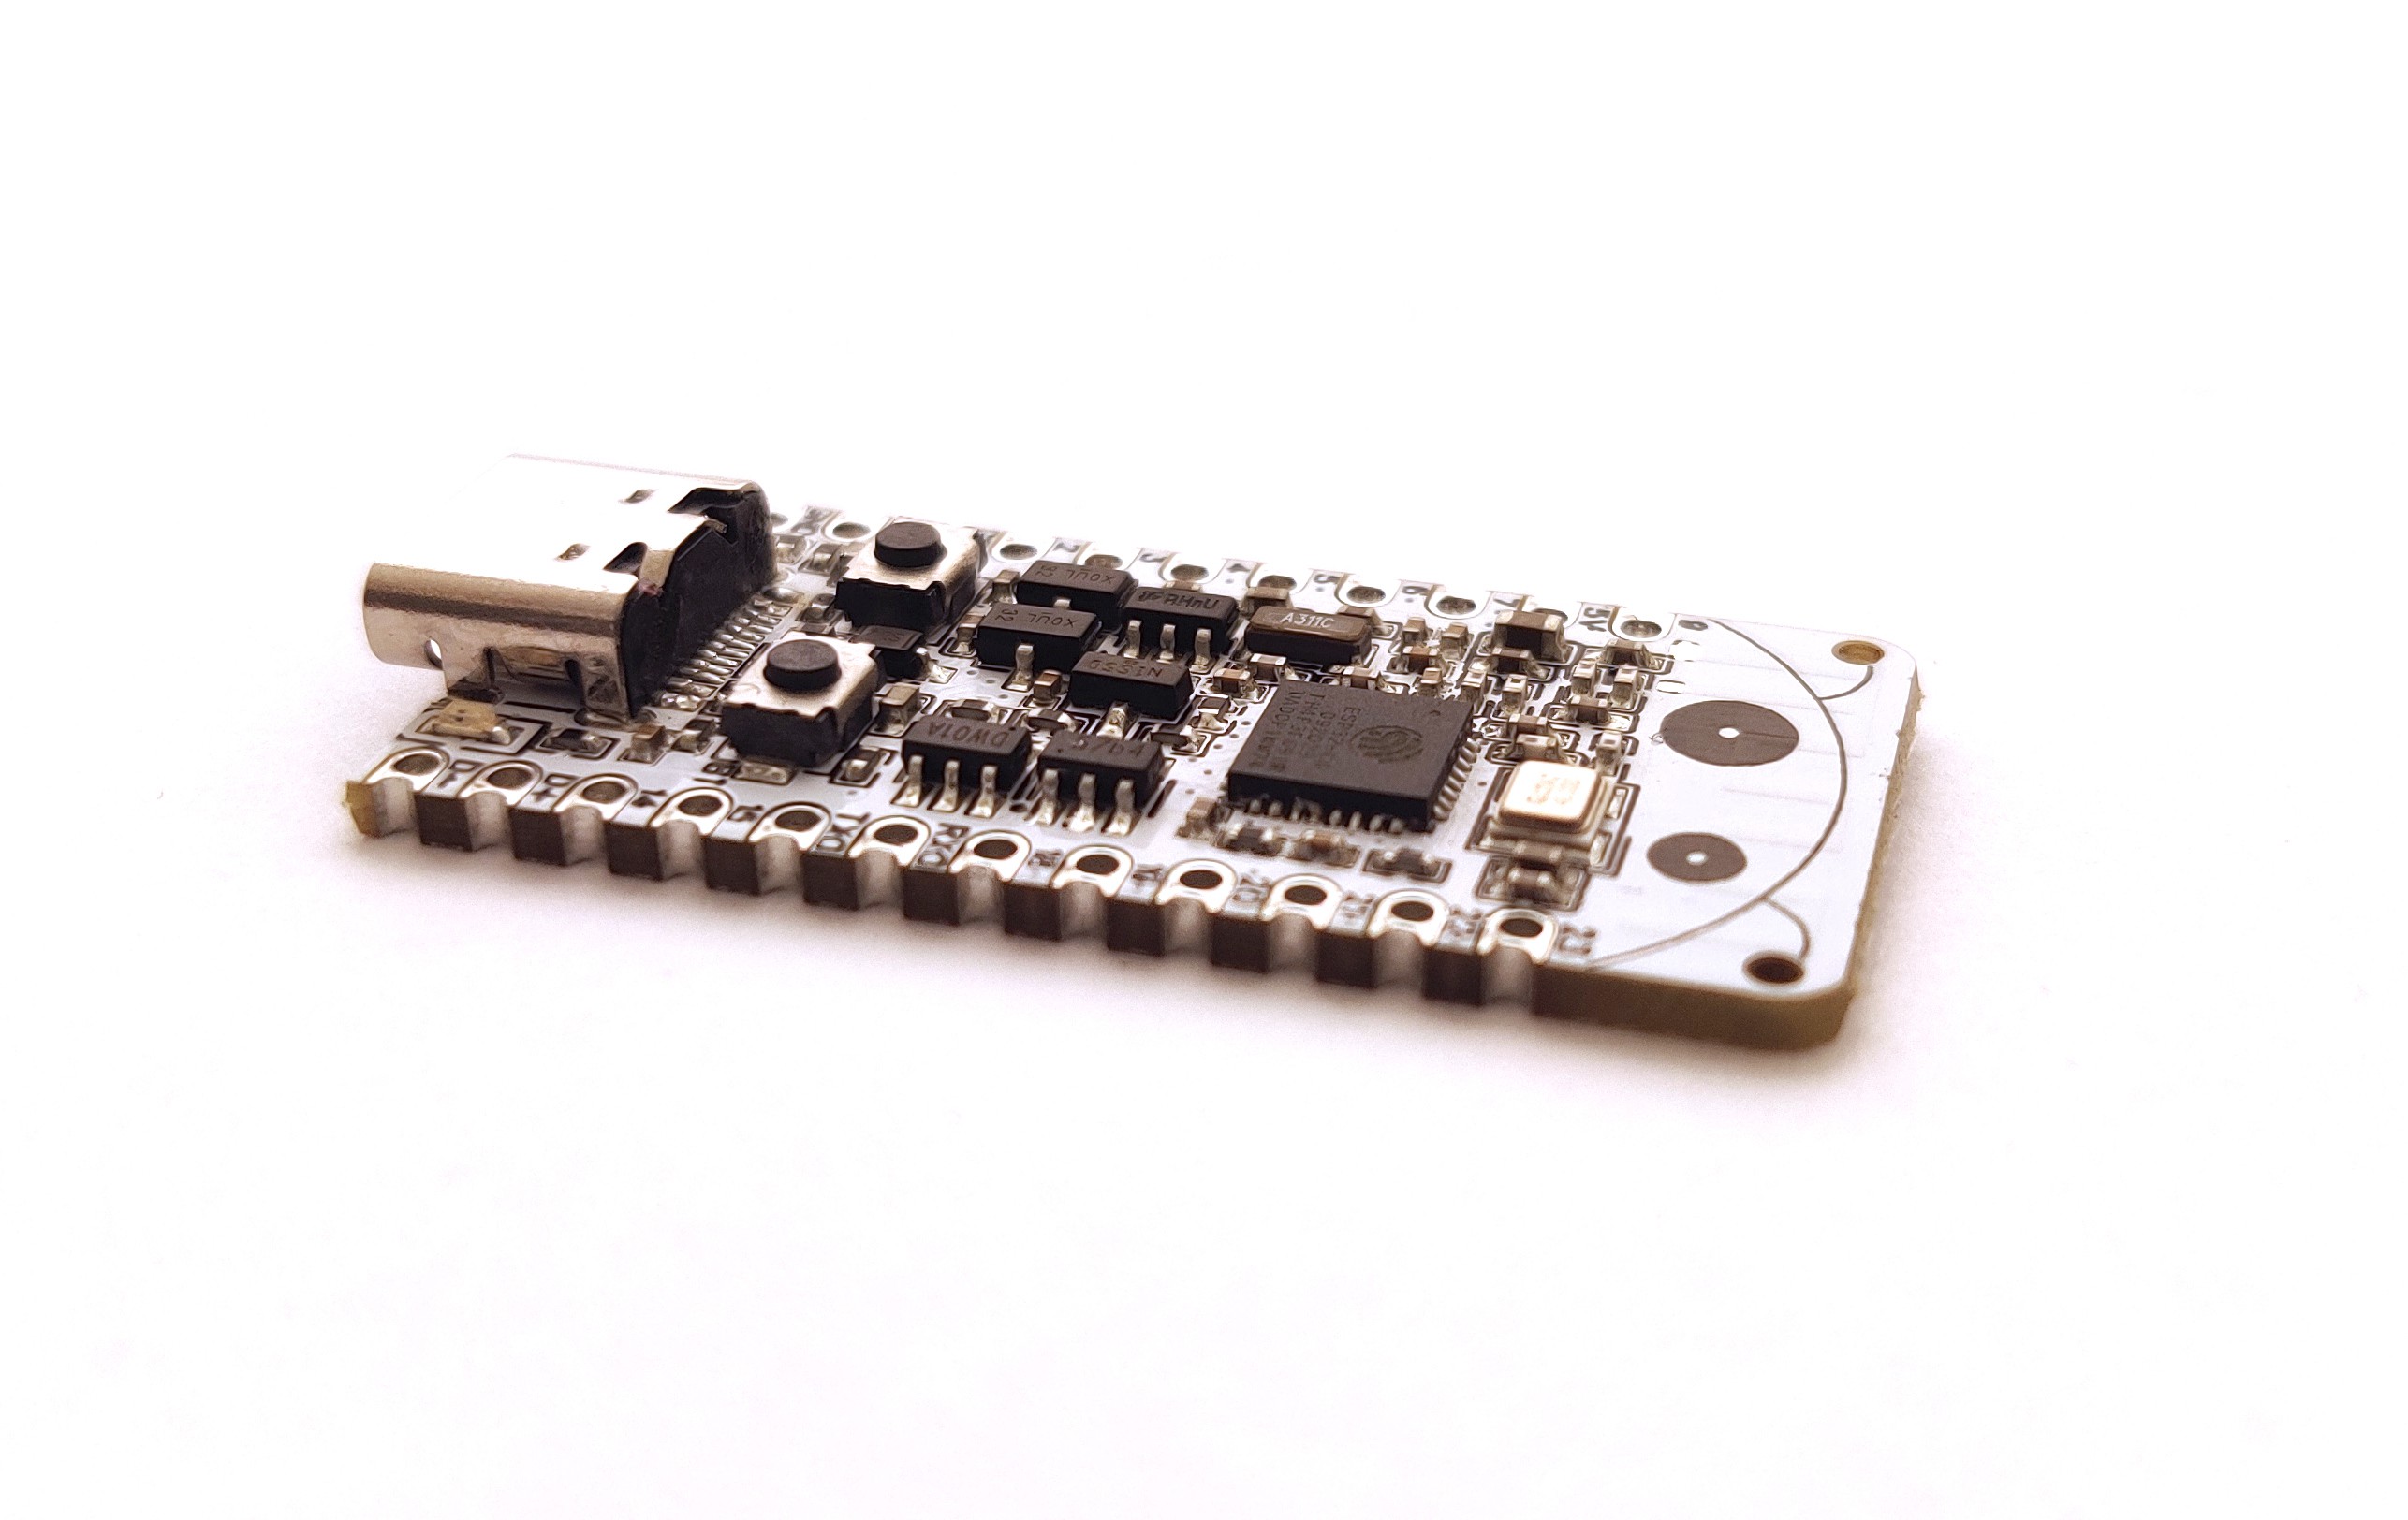
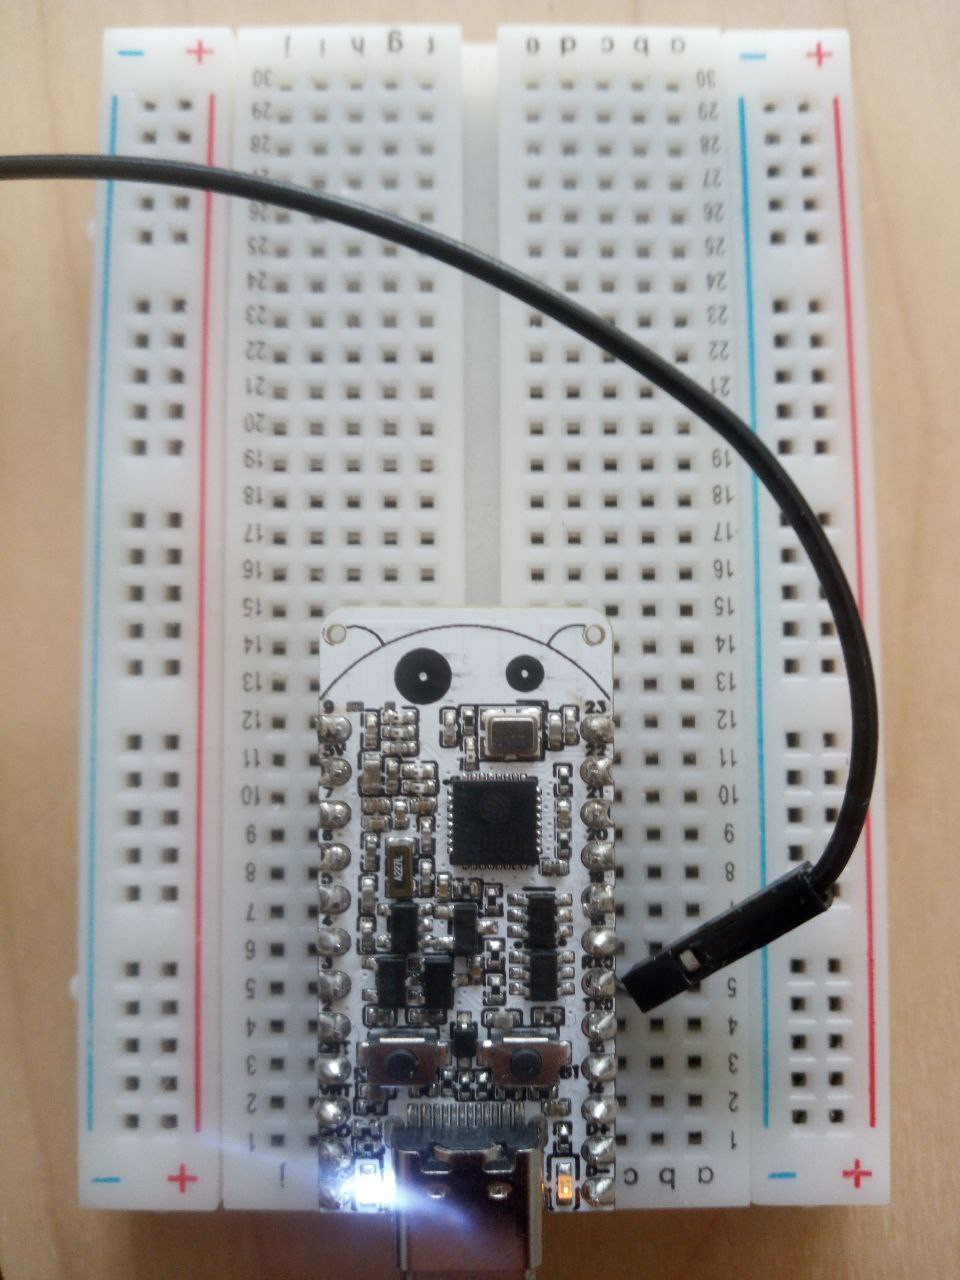
The reference size can be seen on the picture:

The programming options now include:

  • ESP-IDF
  • CircuitPython - The Esp32-C6 support is on the way, but if you compile the CircuitPython for Esp32-C6 yourself you can get some basic functionality already.(Checkout project logs)
  • Arduino IDE - the official support for Esp32-C6 is on the way but I have already tested the board with the Esp32-Arduino core available on github(master branch as of 15 October 2023)

Checkout this tutorial made by my friend:

schematics.png

Just a schematics

Portable Network Graphics (PNG) - 316.43 kB - 10/04/2023 at 22:08

Preview

  • Programming Esp32-C6-Bug with Swift (Language used to program Apple products)

    allexoK06/26/2024 at 15:40 0 comments

    As you may have heard, Apple recently showcased Embedded Swift at WWDC24. So, I decided to give it a little test drive with the ESP32-C6-Bug. Just to mention, I have zero experience with Swift. It just sounded interesting, so why not?

    The SDK is available from here

    Before any programing can take place you need to install ESP-IDF (I used v5.2.1) and Swift nightly toolchain (I used swift-6.0 on Ubuntu 20.04). After updating my Cmake to 3.30 and setting the Swift path in .bashrc all I needed to do was to compile some example. The two examples available were this Led Strip example and Matter example. Since Esp32-C6-Bug currently has no Led strip integrated, I decided to make this simple Led blinking example, which is essentially just a wrapper around ESP-IDF functions:) One problem I run into was that Ubuntu was not recognizing ${SWIFTC} in CMakeLists.txt so I replaced it with 'swiftc' and everything compiled with no problem.

    So overall, the results are good. The LED blinks, and I was surprised by how easy it was to make the wrapper! Doing the same thing for, let's say, MicroPython would be much more painful (IMHO).

    Best regards,

    Alex

  • AI and Self-learning on Esp32-C6, teaching the MCU to detect CNC tool breakage

    allexoK04/23/2024 at 12:50 0 comments

    Maybe a little bit off topic, but I was recently experimenting with training decision trees directly on the MCU.  For those unfamiliar, decision tree is a machine learning algorithm and you can teach it to perform some classification task.

    Problem definition 

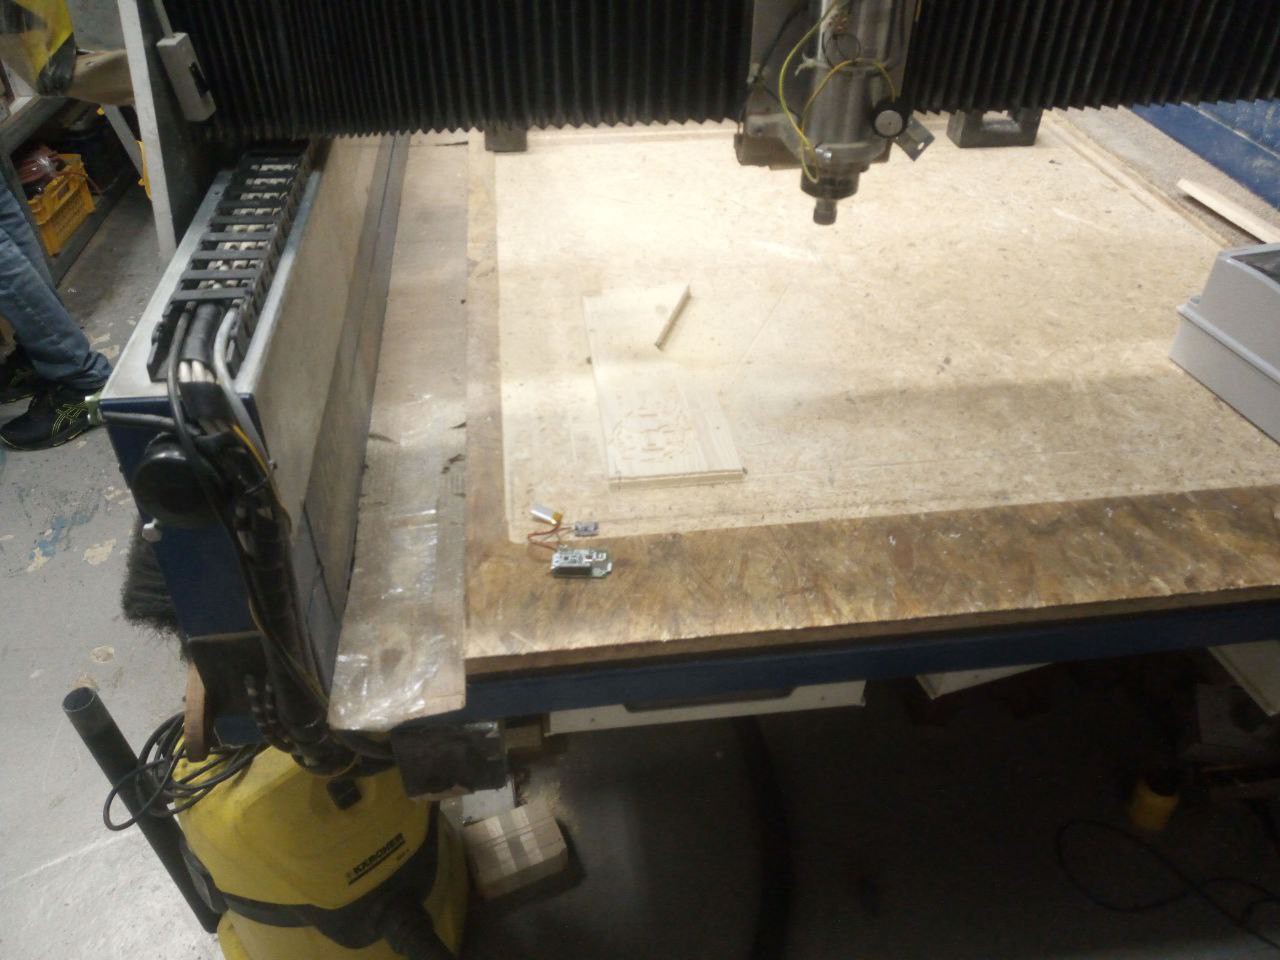
    We have a huge CNC machine that we use to process wood or aluminum. Sometimes CNC tool breaks during CNC processing, but the machine can't detect it and just keeps going forward without touching the material. (Just moving above it). So when sometimes we leave the machine working and go somewhere, we return and the job is undone. It would be good from a practical standpoint to get alerted, when such error occur(via some messenger app or sms ), so the process can be stopped and restarted.

    Other requirement

    • We don't have a server or cloud for data gathering or processing, so no cloud processing. Training and inference should be done without network connection directly on the device.
    • We don't have budget to pay data scientists. The sensor should be robust enough to be controlled, trained and used by everyone.
    • Possibility to adapt to different materials.

    Solution

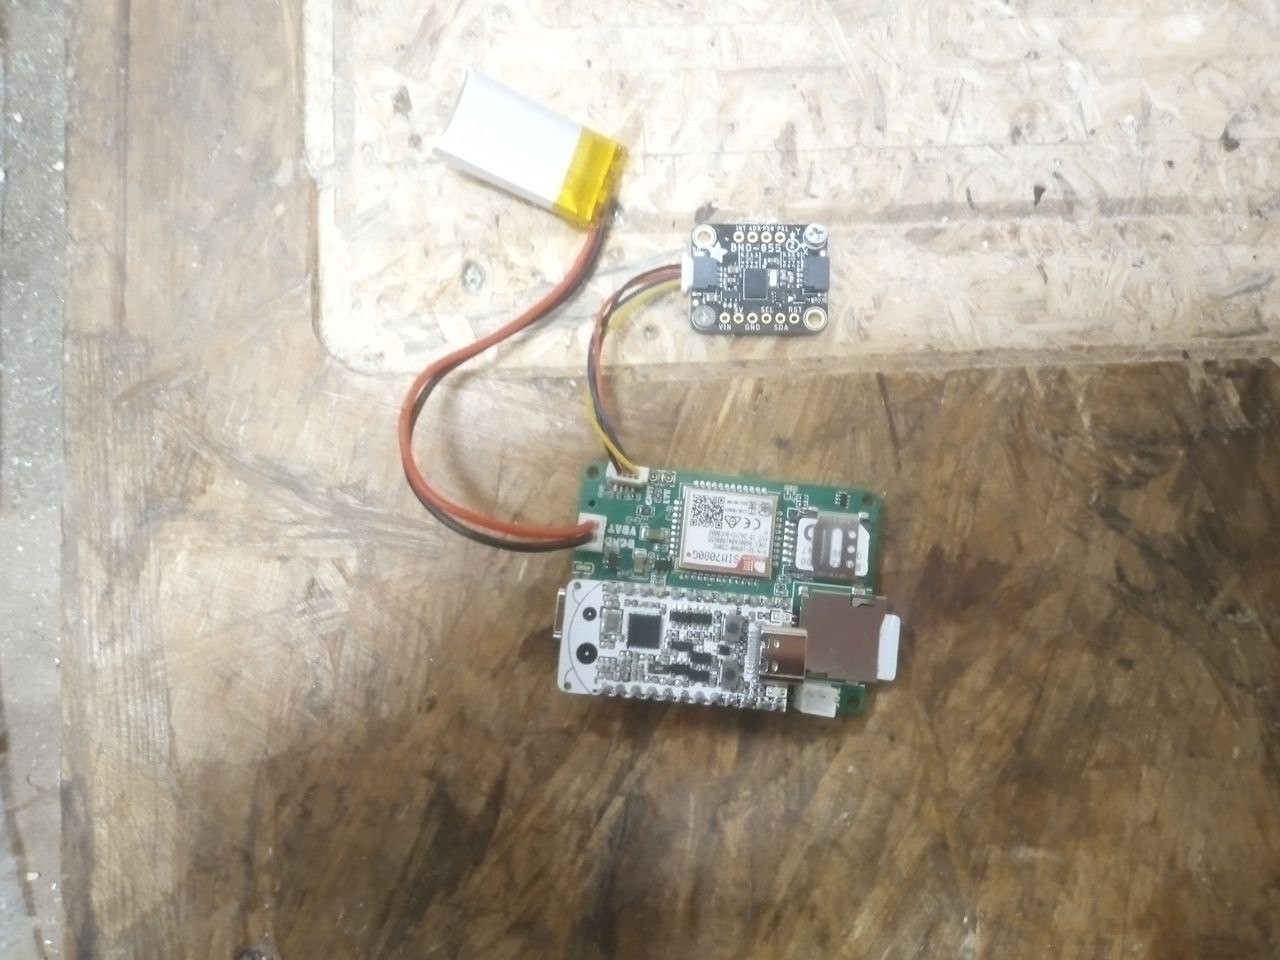
    So based on the requirements I made a simple smart accelerometer that can learn the tool breakage state from vibrations. The device is made around bno055, Esp32-C6-Bug and a solar shield. I decided to use Esp32-C6-Bug because it's currently the only board I have that has battery support, Stemma QT connector, SD card for saving the data and a sim card module. 

    Classified states: 

    •  OK(the device is idle or cutting the material).
    •  Error state (the device tool is broken and the machine is moving above the material).

    Both the code and my learning data are available. For now the device was trained with only one tool and only wood. The classification result is printed to UART, of course it you can send info about state change via SMS, some messenger (like Telegram) up or control a relay to automatically turn of the CNC machine.

     The accuracy was 0.89 after learning on 24 minutes of data.

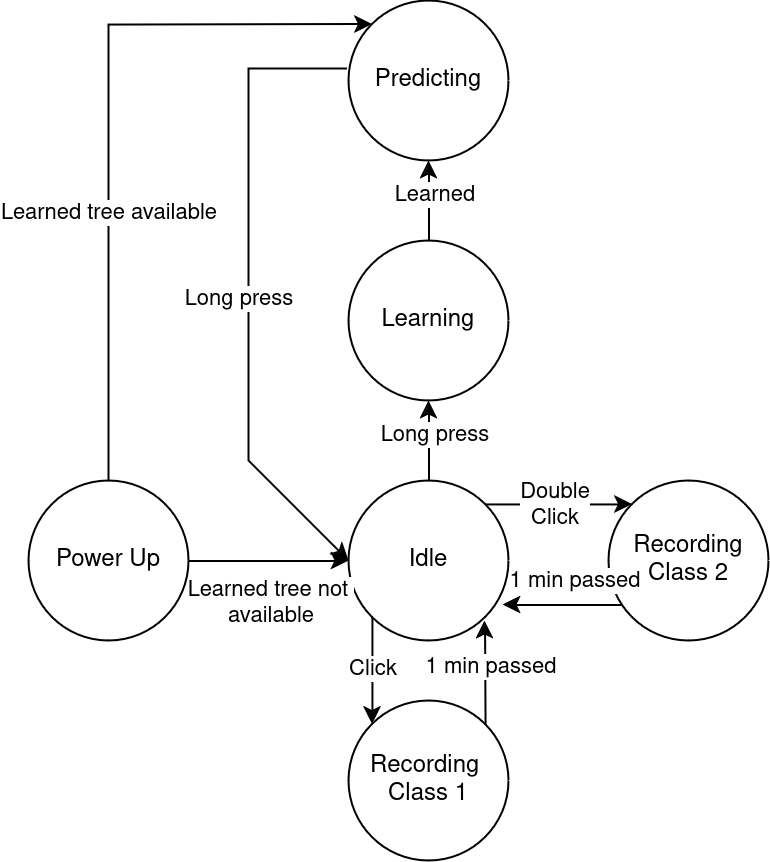
    Device states and events that trigger state transfers are on the picture:

  • A little bit on Esp32-C6 Ultra Low-Power Second Core

    allexoK04/19/2024 at 21:00 0 comments

    This week I did some tests on Esp32-C6 second core. The core is intended to be low-power and can be run even when the main core is in deep sleep, which is pretty interesting. The core runs at 20MHz, has 16KB SRAM and only subset of pins available, but it can still run programs it just like the main core.

     Of-course the question is, how low power it actually is? Unfortunately, I was unable to find info about real power consumption of the ULP core so I decided to run some test.

    Without further adieu here are the results:

    Main core deep sleep, ULP core disabled
    20uA
    Main core deep sleep + ULP core GPIO poling once in 10mS
    80uA
    Main core deep sleep + ULP core Uart printing once in 1 second360uA
    Main core deep sleep + ULP core full speed reading I2C sensor1622uA

  • Solar shield arrived, Amazon AWS via Sim7080G works!

    allexoK04/05/2024 at 18:44 0 comments

    Today I received the first prototype of the Sim7080G board I designed earlier. No problems with connection to AWS, the code is in the repo. I had to change pin definitions a little bit, but almost no changes aside from that. I used 'eu-central-1' AWS endpoint, perhaps it solved the problem I encountered earlier(described in the previous log).

    Best regards,

    Alex

  • Sim7080G Solar shield, Testing Esp32-C6 with Amazon IoT Core

    allexoK04/01/2024 at 18:28 0 comments

    Hello,

    Hope everyone enjoyed their Easter holidays! First things first, I was experimenting with connecting the ESP32-C6-Bug to AWS via their Amazon IoT Core. Connecting via WiFi connection worked as expected, but it's no surprise since the ESP32-C6 high-level Arduino functions are the same as for other ESP32 chips.

    I also spent some time battling with the SIM7080G connection to Amazon AWS, but it seems to be a problem with SSL certificates. Amazon certificates are not working with the SIM7080G and legacy VeriSign certificates seem not to be working in my area (I can't use their certificate even via WiFi).

    There is also some progress on the SIM7080G Solar Shield; check it out:

    Since it's the first pre-alpha prototype, statistically speaking it has a very low chance to be working, but we will see:)

    I plan to make work on Sim7080G later and of course try to combine Zigbee and Sim7080g some time in the future.

    Best regards,

    Alex

  • Esp32-C6-Bug + Sim7080g testing

    allexoK03/24/2024 at 18:35 0 comments

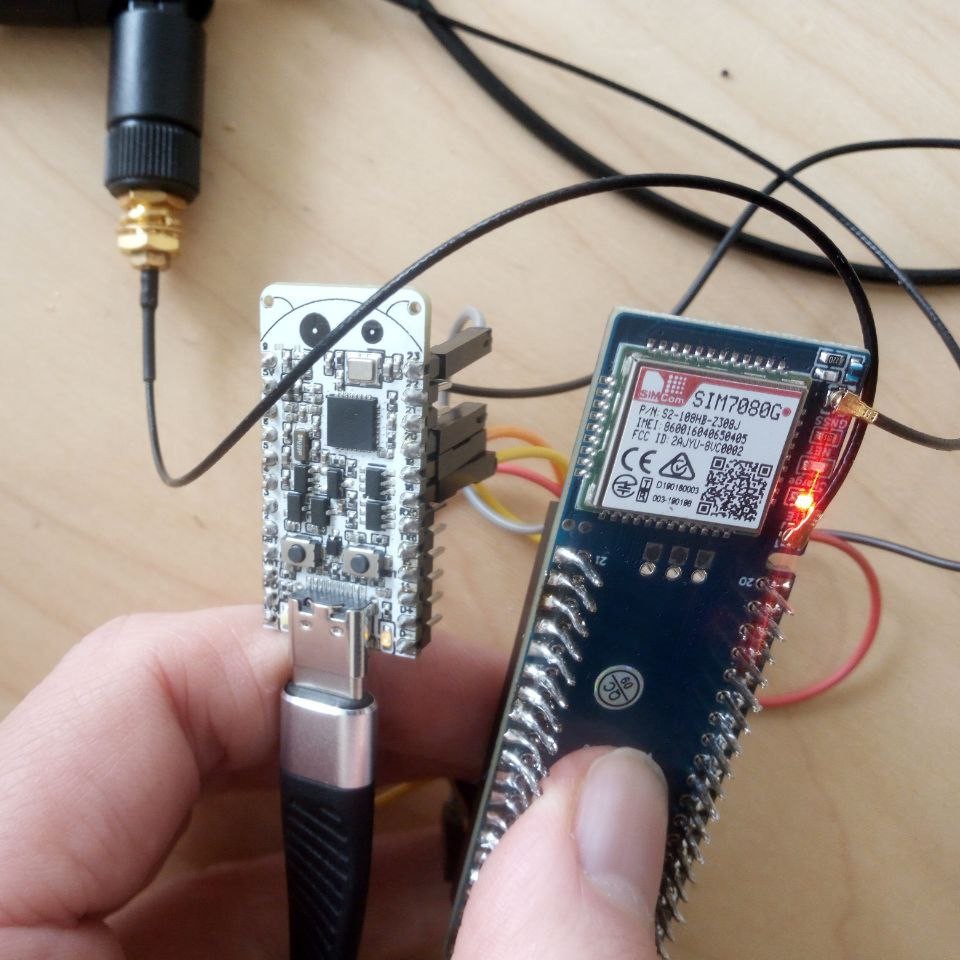
    So I made some tests on Esp32-C6 and Sim7080g connectivity. I used Sim7080g Waveshare Raspberry Pi Pico Shield. Everything works well, but the connections are not very trivial:

    • ESP32_C6_GPIO_BUG_20->Waveshare_SIM7080G_PWR
    • ESP32_C6_GPIO_BUG_23->Waveshare_SIM7080G_DTR
    • ESP32_C6_BUG_GPIO_19->Waveshare_SIM7080G_RXD
    • ESP32_C6_BUG_GPIO_18->Waveshare_SIM7080G_TXD
    • ESP32_C6_BUG_5V->Waveshare_SIM7080G_VBUS
    • ESP32_C6_BUG_3.3V->Waveshare_SIM7080G_VSYS
    • ESP32_C6_BUG_3.3V->Waveshare_SIM7080G_3V3
    • ESP32_C6_BUG_GND->Waveshare_SIM7080G_GND

    When testing GPS example, it's necessary to put the GPS antenna outside!

    The examples are available from the github repo.

  • HomeAssistant Auto-Discovery For The Home Brewed Zigbee To MQTT Bridge

    allexoK03/09/2024 at 21:34 0 comments

    This week I made some significant upgrades to the home-brewed Zigbee to MQTT bridge I described earlier:

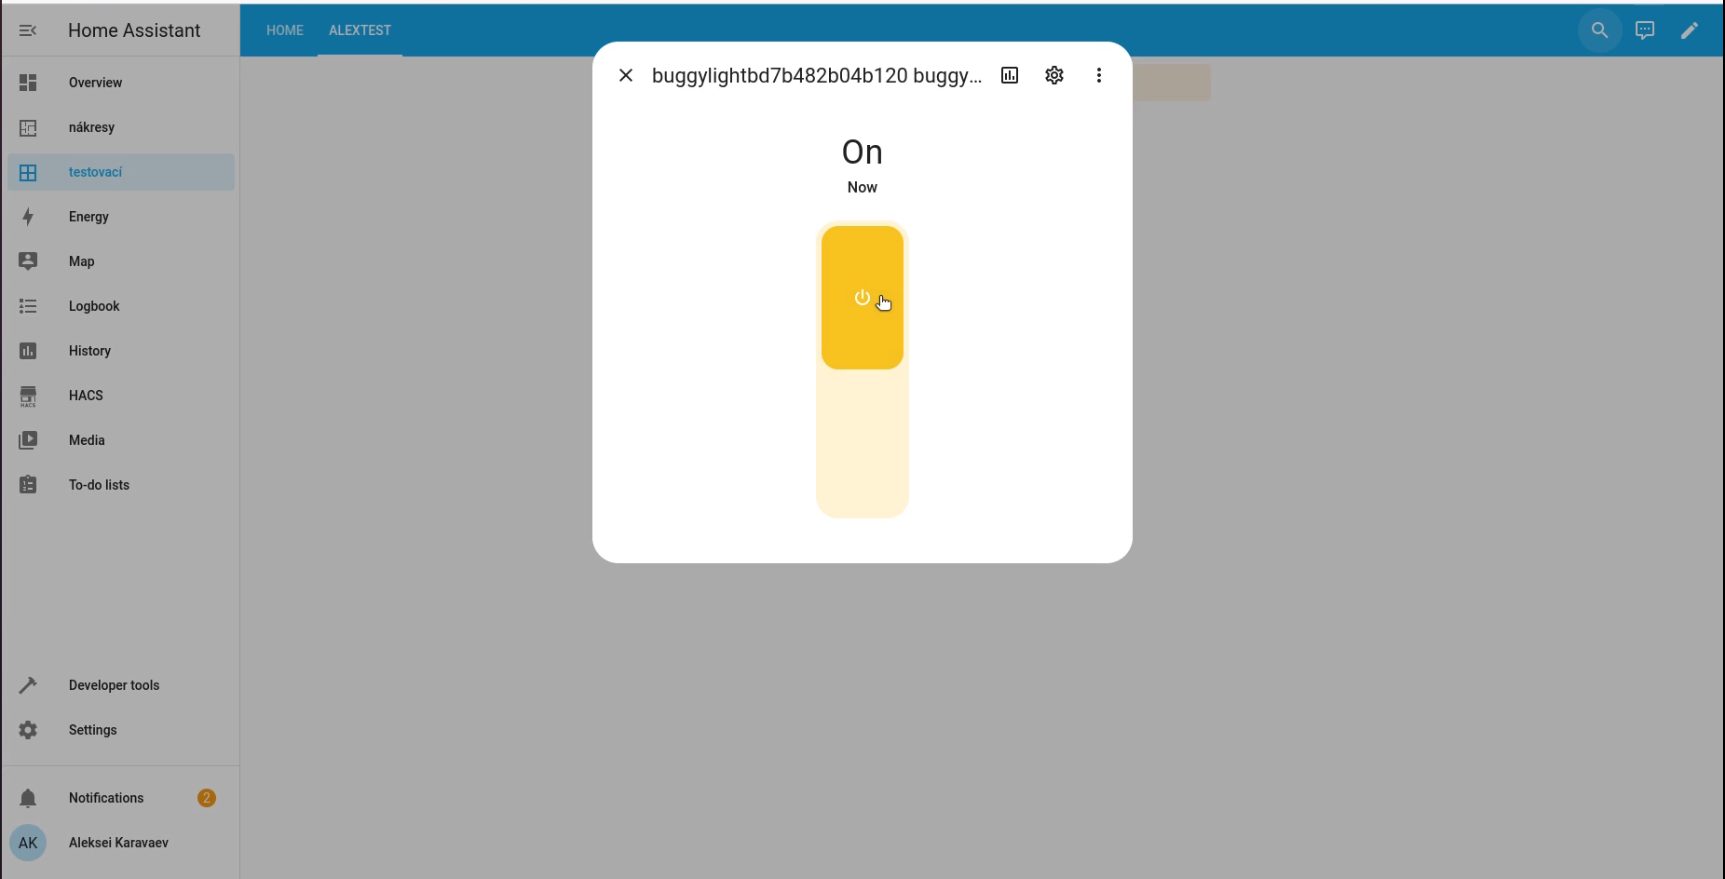
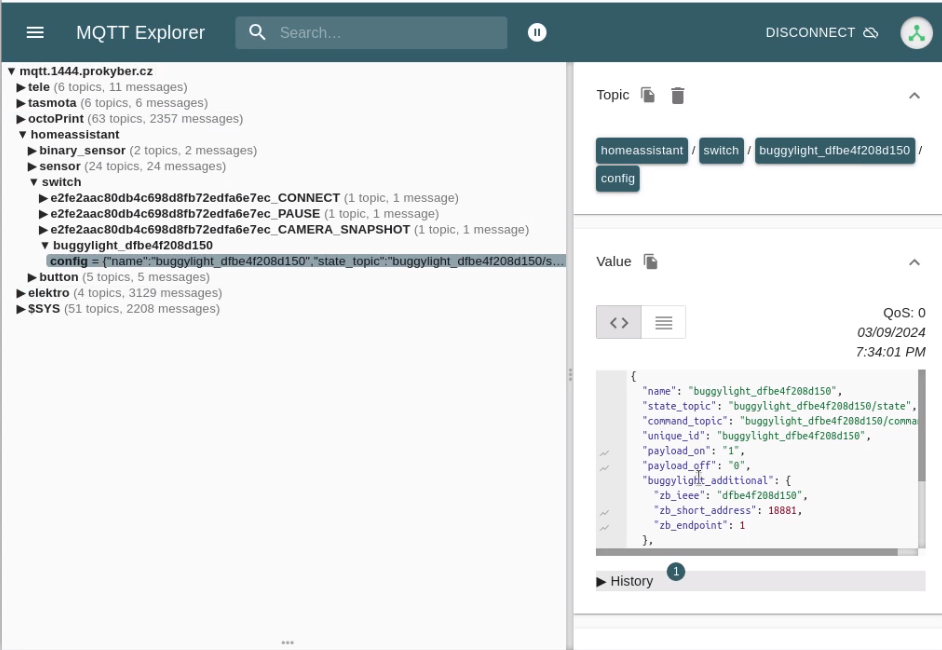
    • Home assistant auto-discovery implemented. All the found devices are now published to MQTT (you can also use this functionality to find out their command/state MQTT topics to control via Node RED for example)
    • It's now possible to configure MQTT via web server running on the bridge.(Activate by pressing the Esp32-C6-Bug button). Configuration is saved to internal file system and persists after reboot.
    • Discovered Zigbee devices are now saved to internal file system. So the bridge remembers them even after the reset.
    • Zigbee end-device switch report support implemented.
    • Bridge status display via LED (Off=No Network, ON=Connected to MQTT, Fast blinking=Configuration mode, Slow blinking = connecting to MQTT)

  • Zigbee to MQTT bridge in Arduino

    allexoK02/24/2024 at 17:50 0 comments

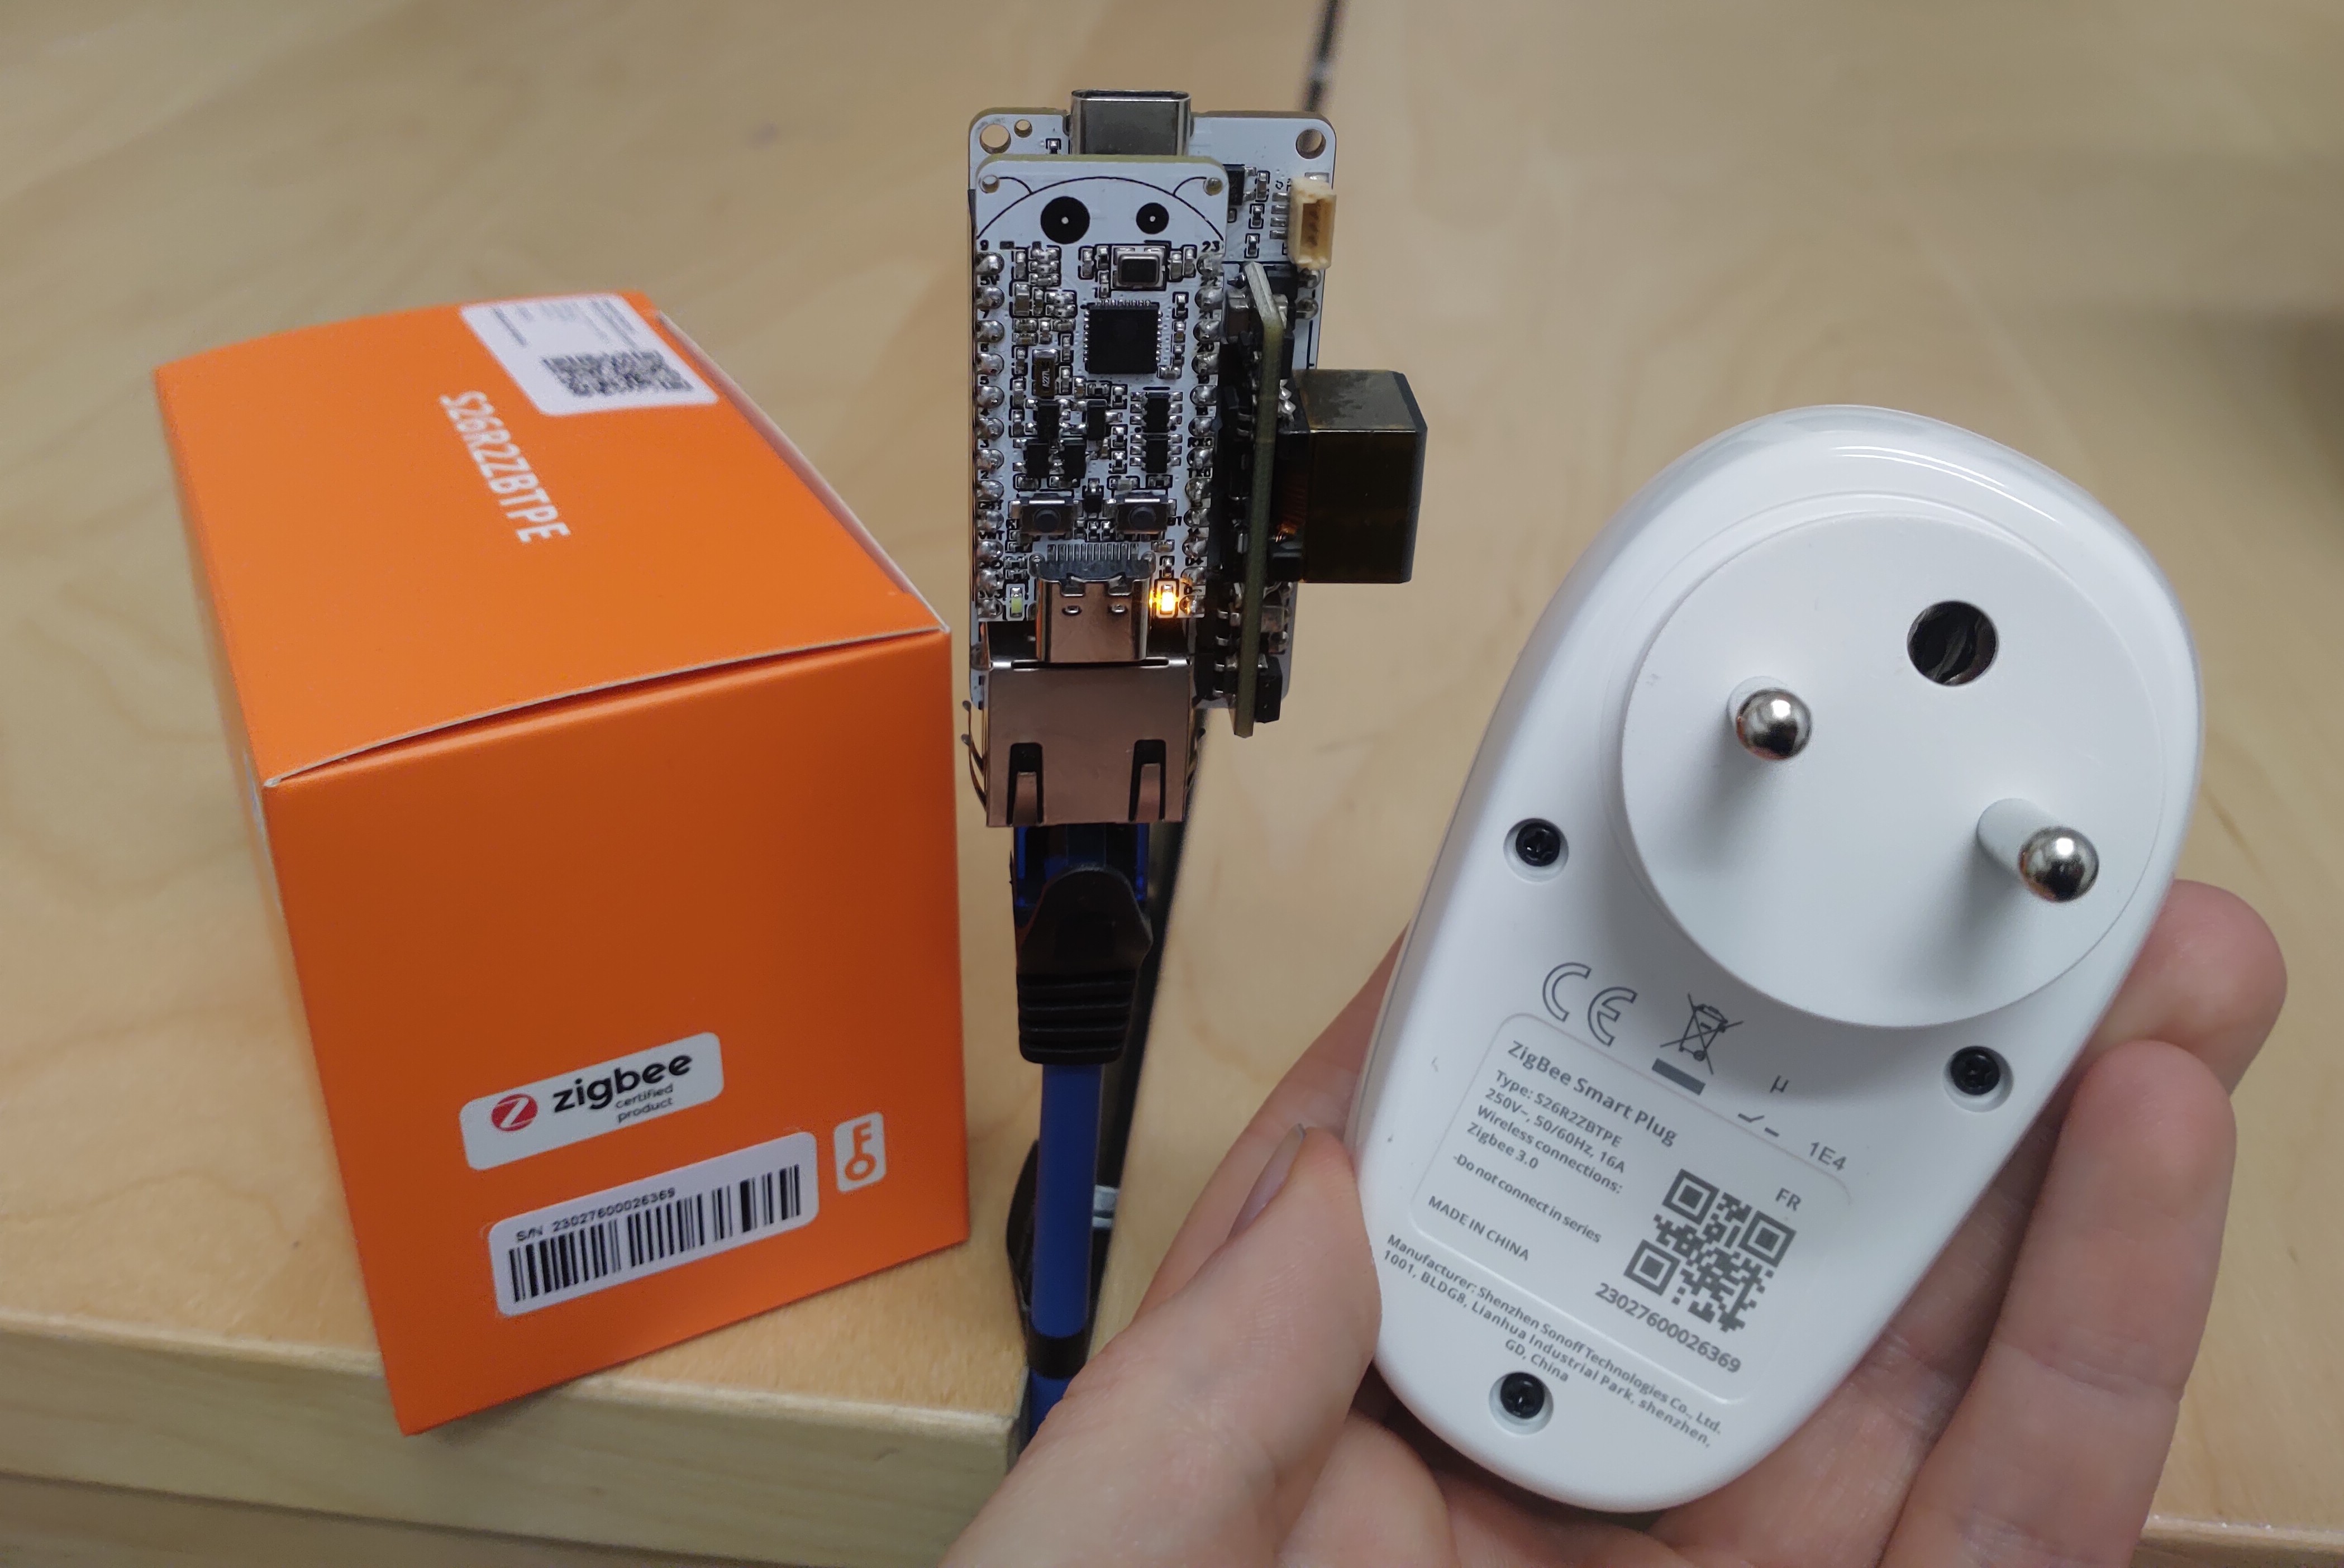
    Over the last couple of days, I was experimenting with making a simple Zigbee to MQTT bridge in Arduino using the Esp32-C6-Bug+Esp32-Bug-Eth combination, and today I succeed! The code is available from here. It's a proof of concept, so only the basic functionality is implemented, like turning on/off Zigbee devices via MQTT.

    I was surprised that even some commercial Zigbee devices (tested with Sonoff S26R2ZBTPE smart plug) connect to the bridge out-of-the-box!

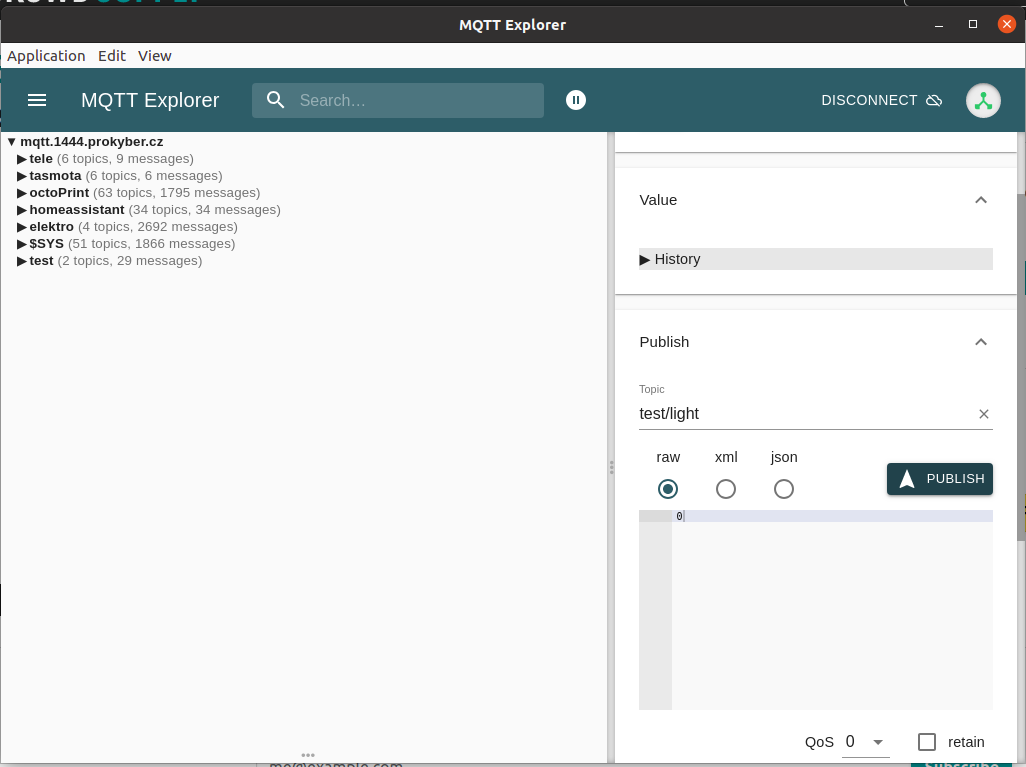
    The MQTT functionality was tested via MQTT explorer

  • Esp32-C6-Bug + Esp32-Bug-Eth Crowdsupply project is now live!

    allexoK02/19/2024 at 23:08 0 comments

    And so we have launched!

    Be sure to checkout the project page. I ended up implementing both PoE and Ethernet, everything worked as expected and I'am very satisfied with how small it is!

  • Esp32-C6-Bug Ethernet shenanigans, Surpassing Esp32-C6 radio limitations

    allexoK10/20/2023 at 14:28 2 comments

    Hi,

    as we all know Esp32-C6 supports multiple radio protocols: Zigbee, Thread, Wifi, Ble. The problem is that using them at the same time may be challenging since the chip has only one RF path, which means Wi-Fi and Thread can't receive simultaneously and it has a significant impact on performance. Even if it is definitely possible, as demonstrated in ESP-IDF thread-bridge example, there is a better solution. The user can just use the Ethernet and leave the RF to the Thread/Zigbee.

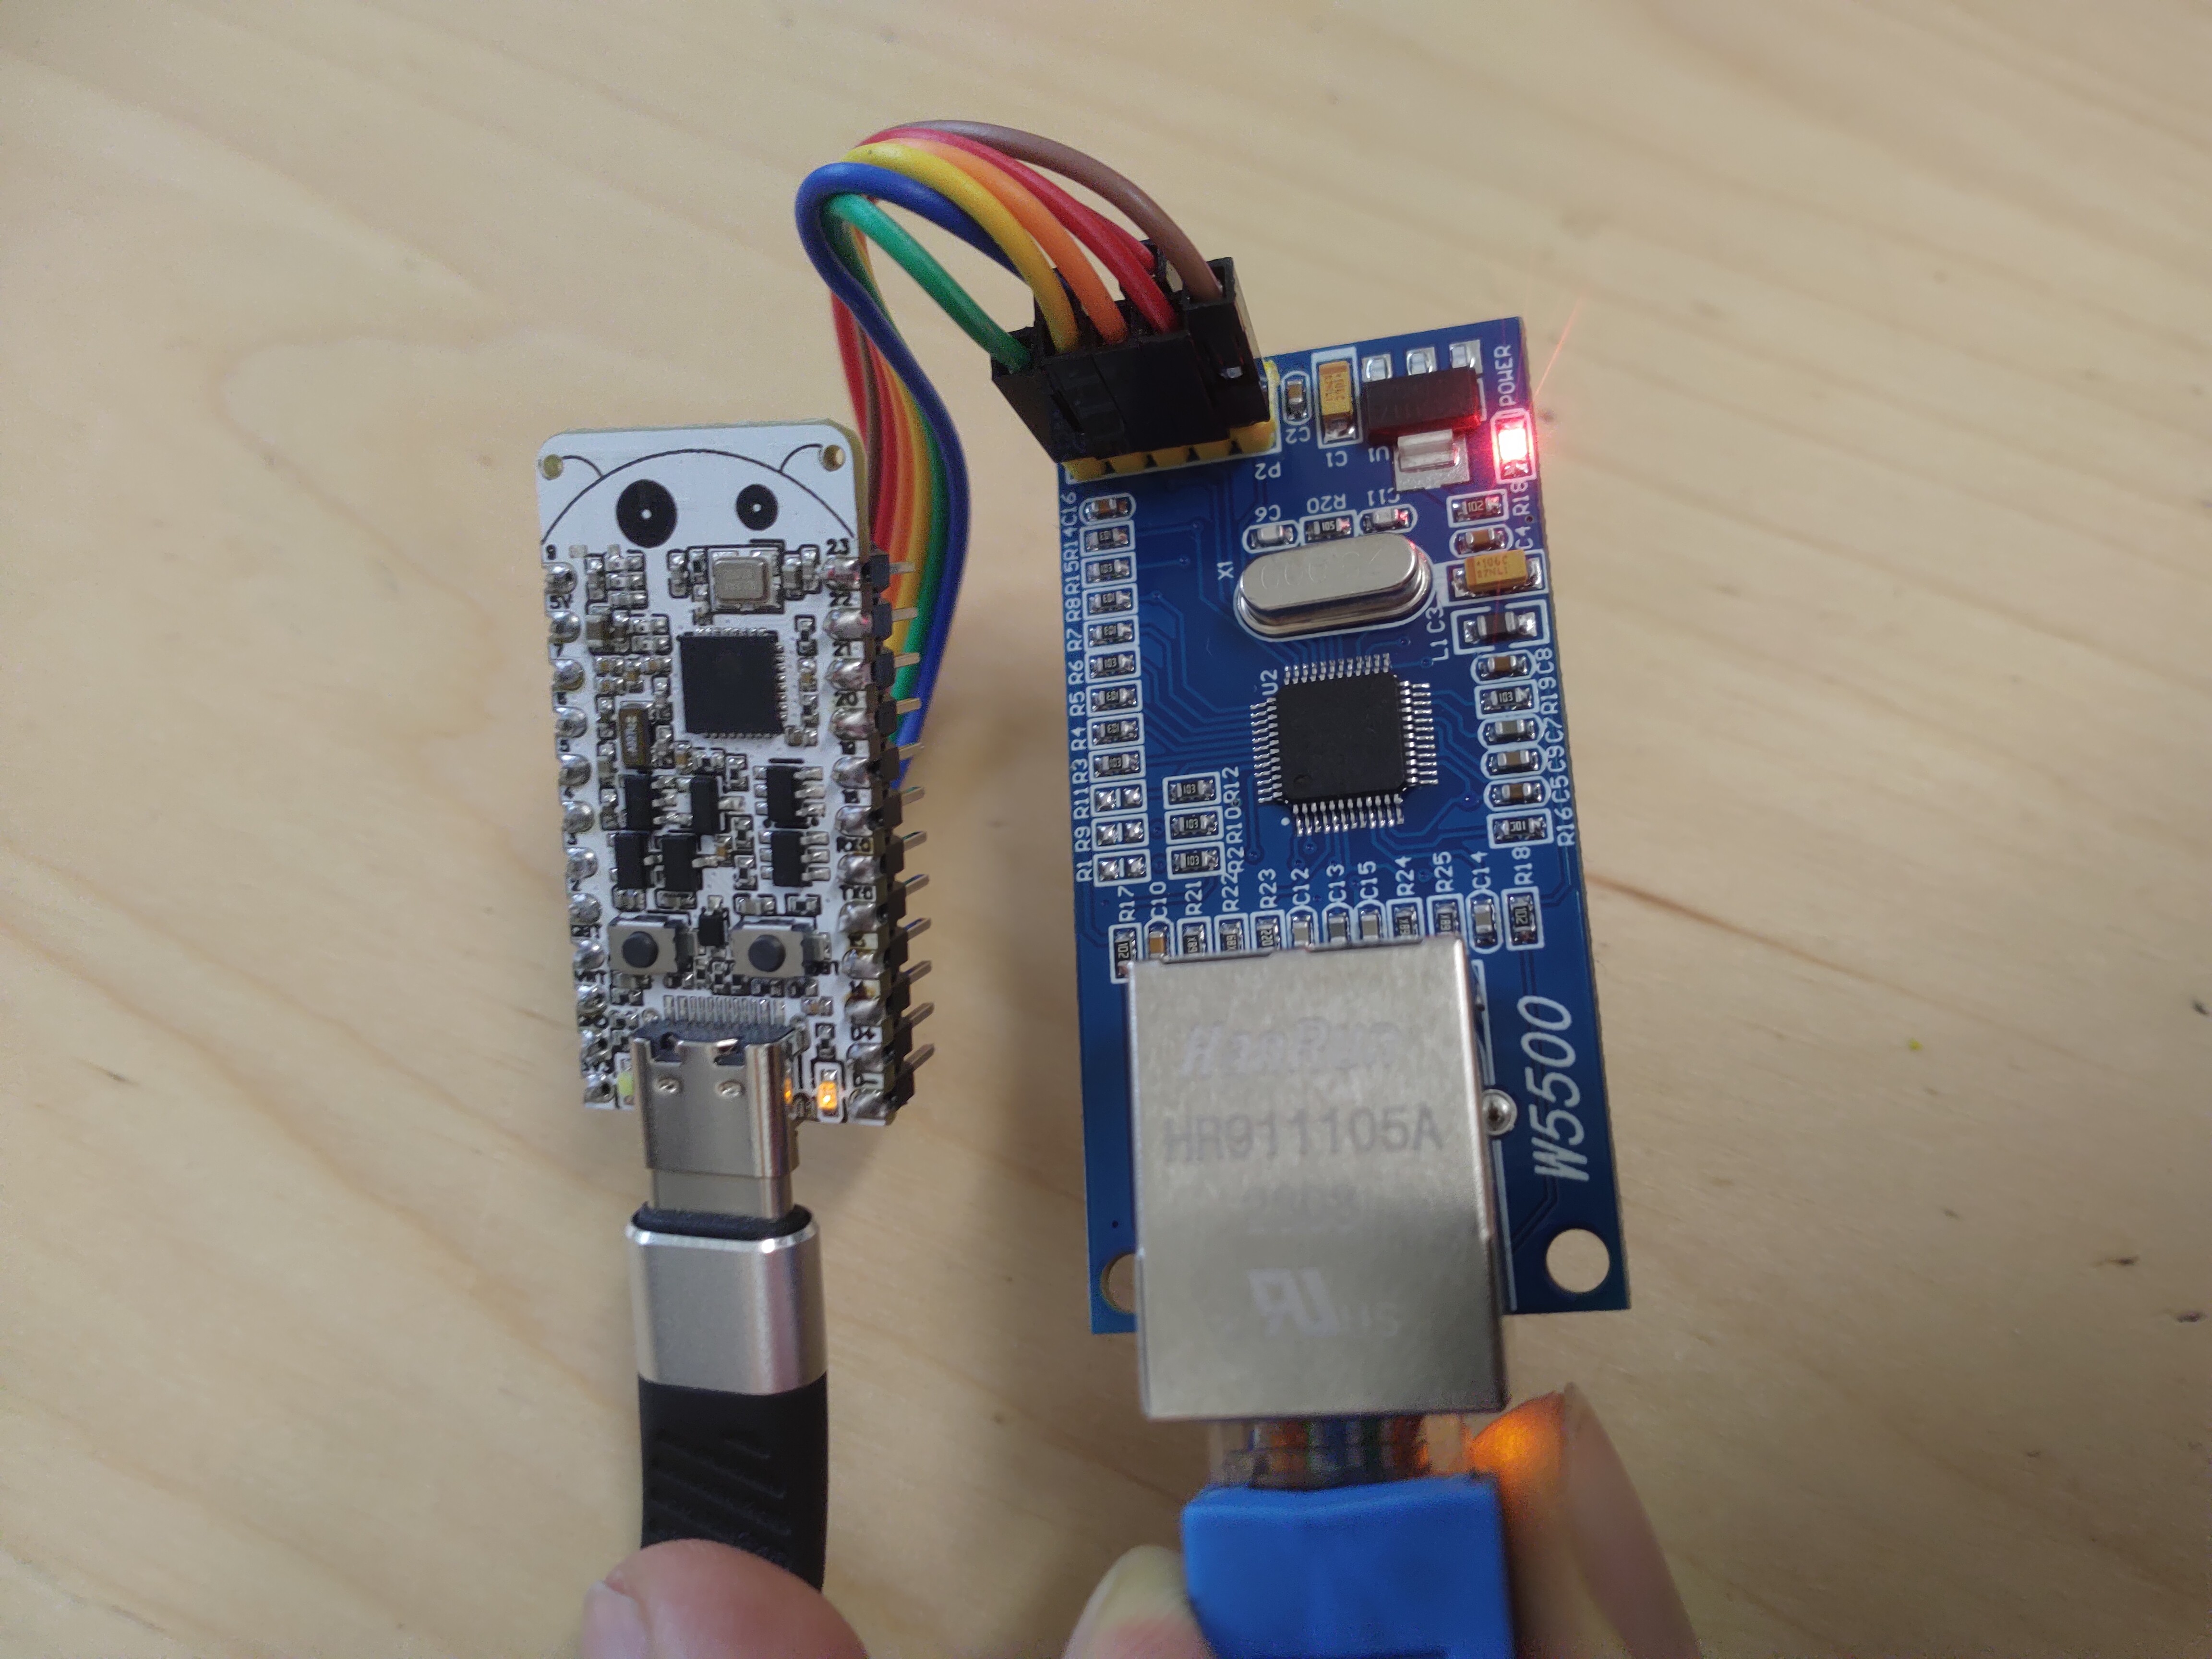
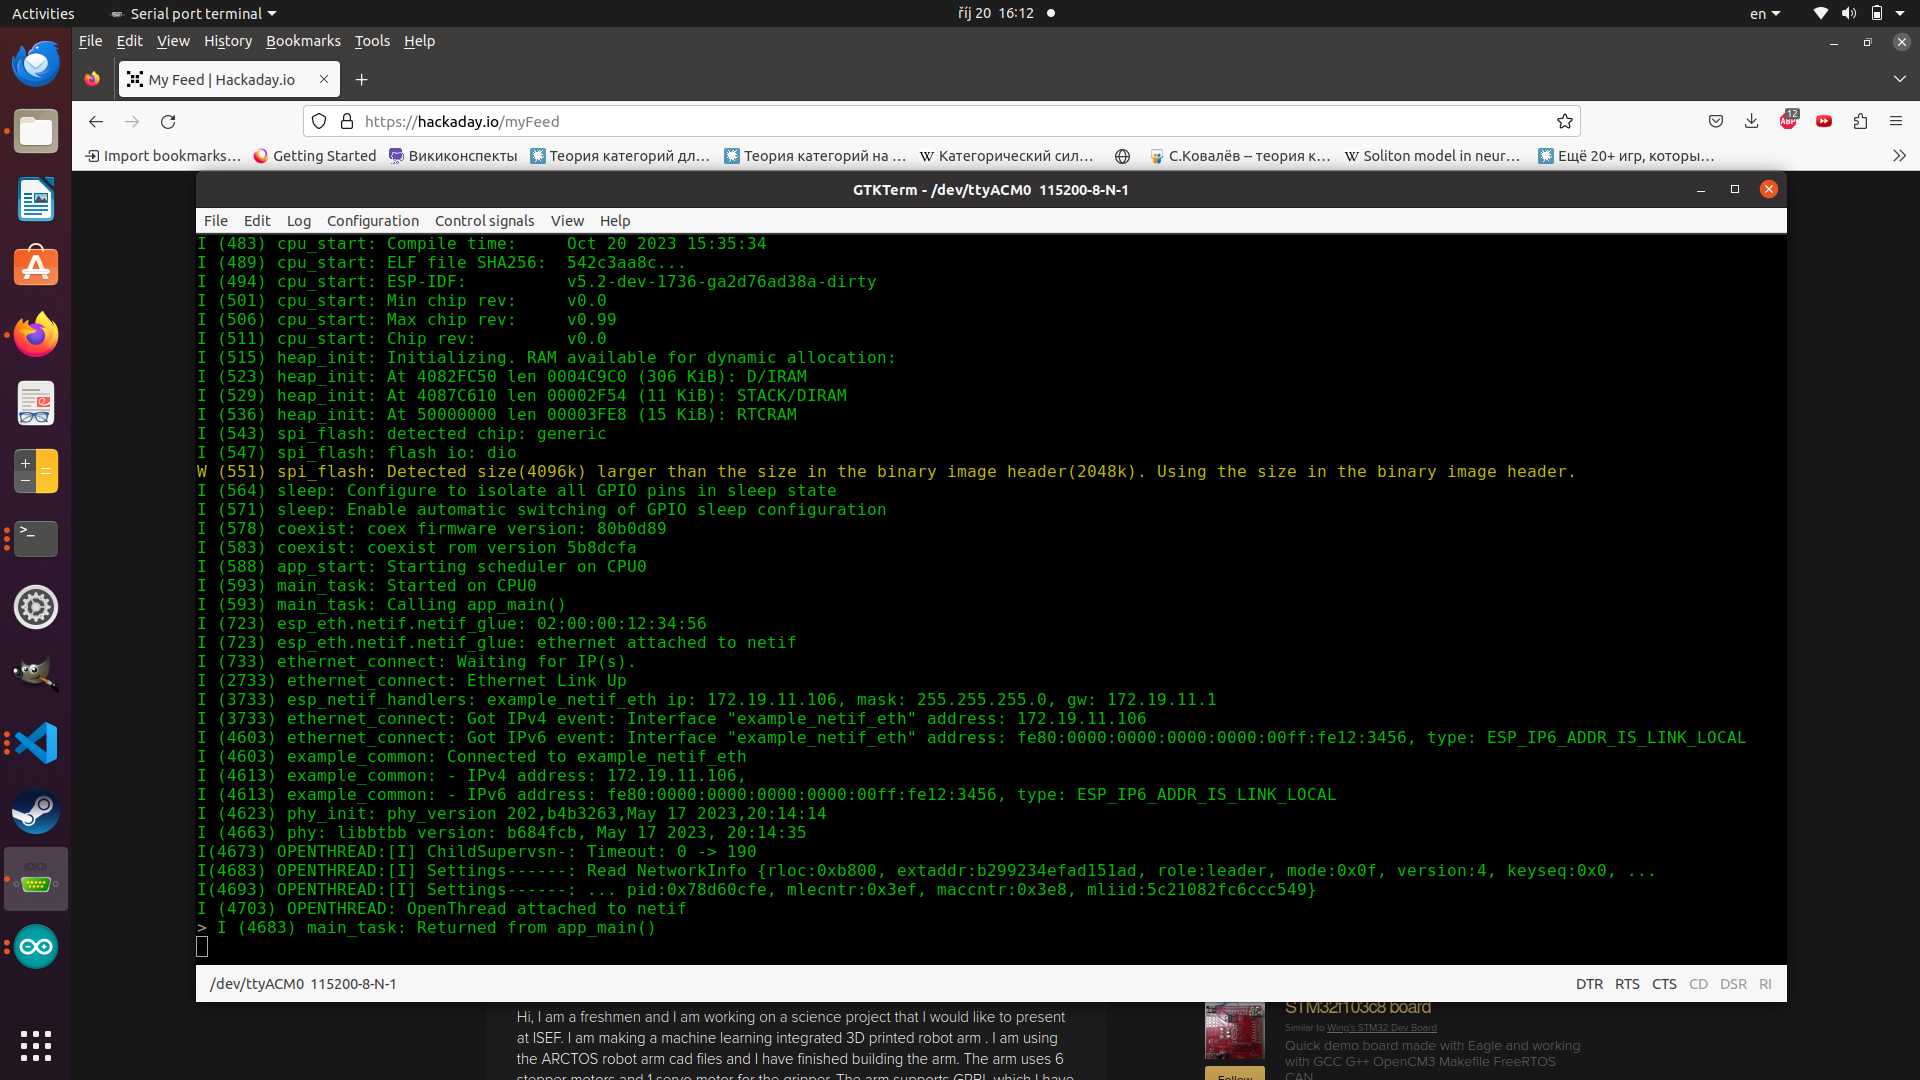
    The mentioned example also supports Ethernet out of the box, so why not to check it out? I have used the cheapest W5500 module and Esp32-C6-Bug board. Be sure to set CS pin to GPIO5 using 'menuconfig' if you are using the mentioned example.

    The connections are as follow:

    W5500 SCLK->Esp32-C6-Bug GPIO6

    W5500 MOSI->Esp32-C6-Bug GPIO7

    W5500 MISO->Esp32-C6-Bug GPIO2

    W5500 CS->Esp32-C6-Bug GPIO5

    W5500 INT->Esp32-C6-Bug GPIO4

    W5500 GND->Esp32-C6-Bug GND

    W5500 3.3V->Esp32-C6-Bug 3.3V

    Works like a charm...

    Since I am a big fan of Ethernet and PoE I am thinking about making a little shield for the Esp32-C6-Bug, what do you think about it?

View all 12 project logs

Enjoy this project?

Share

Discussions

Similar Projects

Does this project spark your interest?

Become a member to follow this project and never miss any updates