Aaron
Aaron-
Outdoor Speakers and Audio setup
10/10/2023 at 05:54 • 0 commentsOf all of the project, this is probably the most simplistic. I considered building a more permanent speaker enclosure, but at the end of the day I was more interested in getting the project up and working than I was in diving into the specifics of outdoor audio.
![]()
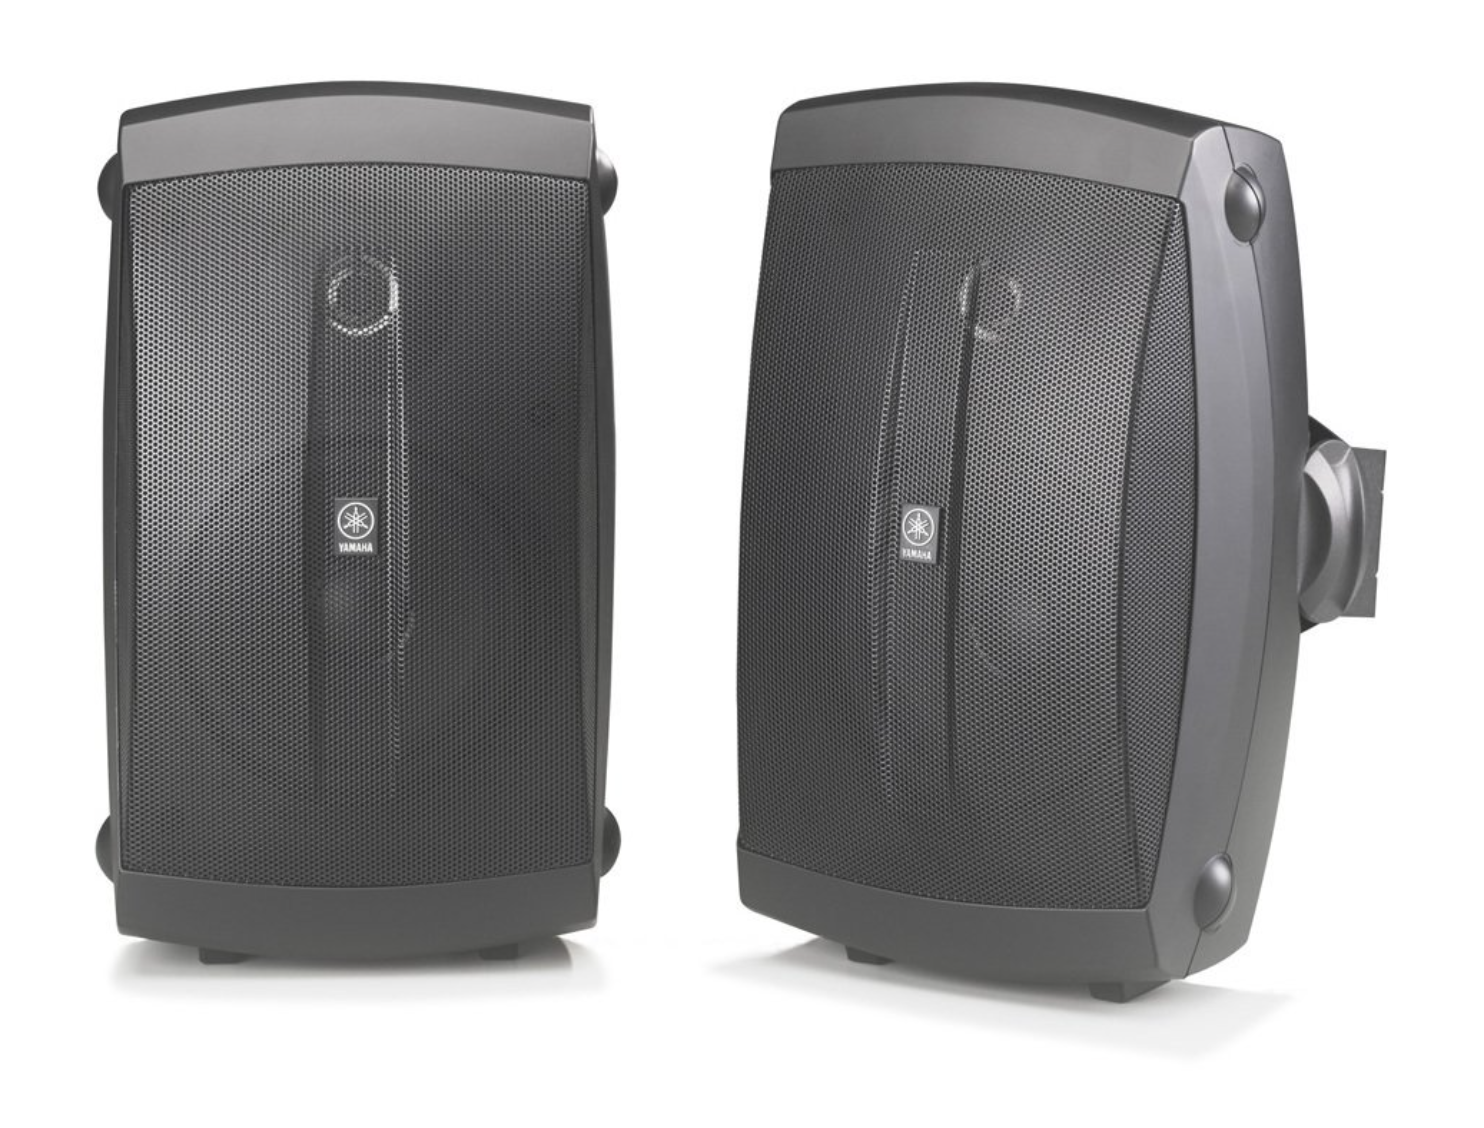
My speakers are refurbished Yamaha NS-AW150BL. I went with black because I figured it'd be easier to hide them in the bushes. Even though these are outdoor speakers, I was surprised to learn when I got them that the recommended usage is to install them under an eave, or otherwise generally protected from the elements. I had really hoped for actual weather-proof speakers, and if I were going to do it again I'd just splurge for the rock-shaped speakers that are really meant to just be out there.
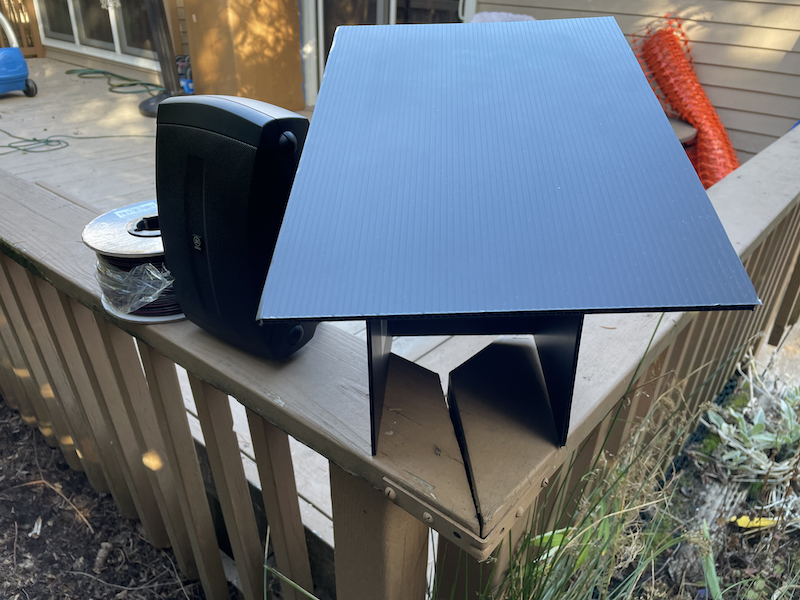
---------- more ----------So because my speakers needed to be protected, and I'm not much of a carpenter, I decided to make a simple housing that I could slip over the top. My goal was to just make sure that the top, sides and back were walled away from rain/wind/snow/etc. I still wanted sound to come through and didn't want it impeded.
![]()
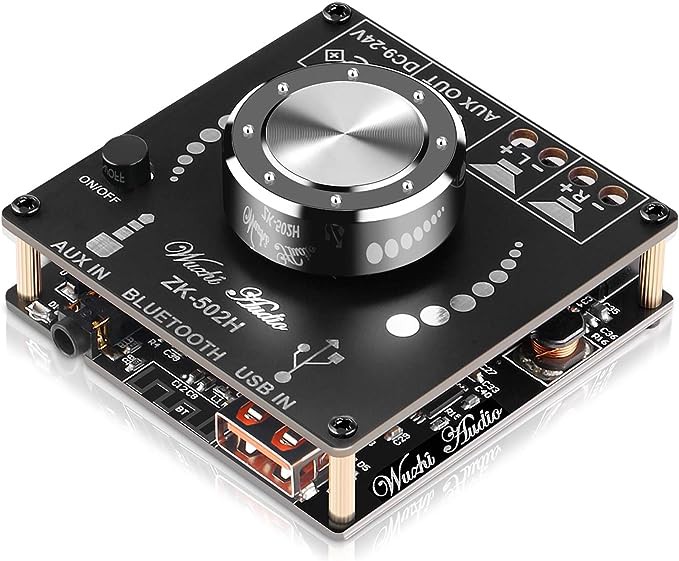
On the hardware side, the speakers are powered through a cheap amplifier I picked up off of Amazon. The amp is overkill for most of what I need, but it was inexpensive, and powerful enough to drive the speakers, and offered Aux in. This one uses a TPA3116D2 to drive. Mildly annoying is that it assumes you want to use bluetooth and a spoken-language "Bluetooth not paired" message comes up when you power on. Fortunately I run my Pi 24/7 during the season, so that message only comes up once or twice a season.
![]()
If I were doing this again, I'd see if I couldn't find a cheap amp that didn't have bluetooth. While it's a great technology, it cannot be used reliably for synchronized sound. Also I would love an amp that I could digitally control the volume on. I haven't looked into the USB input on this amp to understand what feature set is available, but would be nice to manage everything from the Pi. Having a volume knob requires going back and forth from the display area to where the box is setup to adjust the sound.
![]()
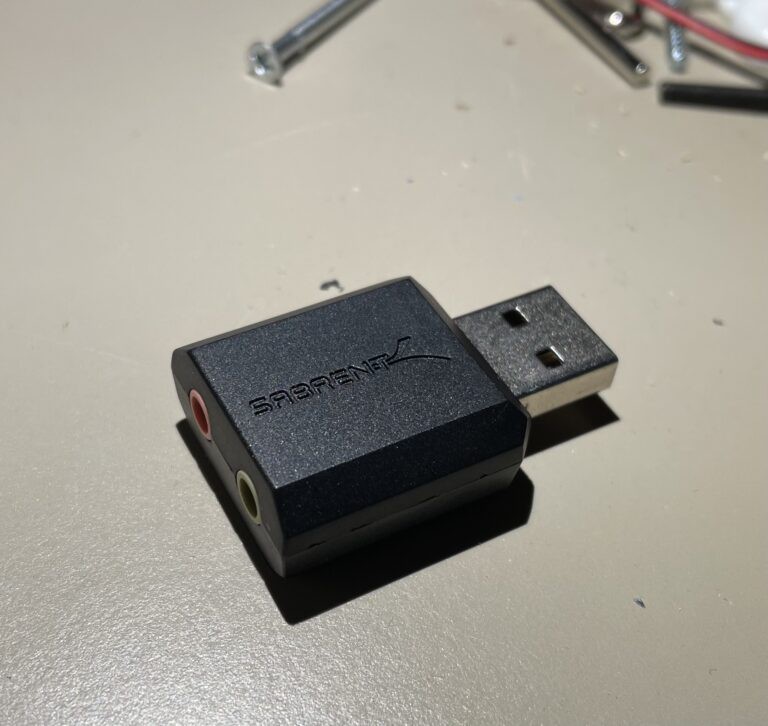
In addition to the amp, I got this little USB "Sound card". I noted in another post that the Raspberry Pi 3 has a PWM it can use to display lights. It turns out that it shares that PWM with the HDMI, where the sound is also managed. So you can either use it for audio, or you can use it for light displays. Fortunately these little sound card devices are inexpensive. Plug it in, and then use a mini stereo cable to send audio to your amplifier.
You do have to make sure you set the sound output in Falcon Player to use the device, but otherwise it's pretty much plug-and-play.
-
Software for Sequencing and Showing
10/09/2023 at 07:25 • 0 commentsThere are two big pieces of software that I use in my show. XLights is an open source sequencing program that will generate light shows with patterns, colors, and timings. And it can do so associated with music as well. Falcon Player (or sometimes Falcon Pi Player - FPP) is the software that schedules and manages your show. You can run shows directly from XLights, but I find it's much easier to use FPP and have a dedicated system managing the show.
Both pieces of software are complex and go deep on features. For the singing pumpkins, I'll outline some specifics of how I build my shows:
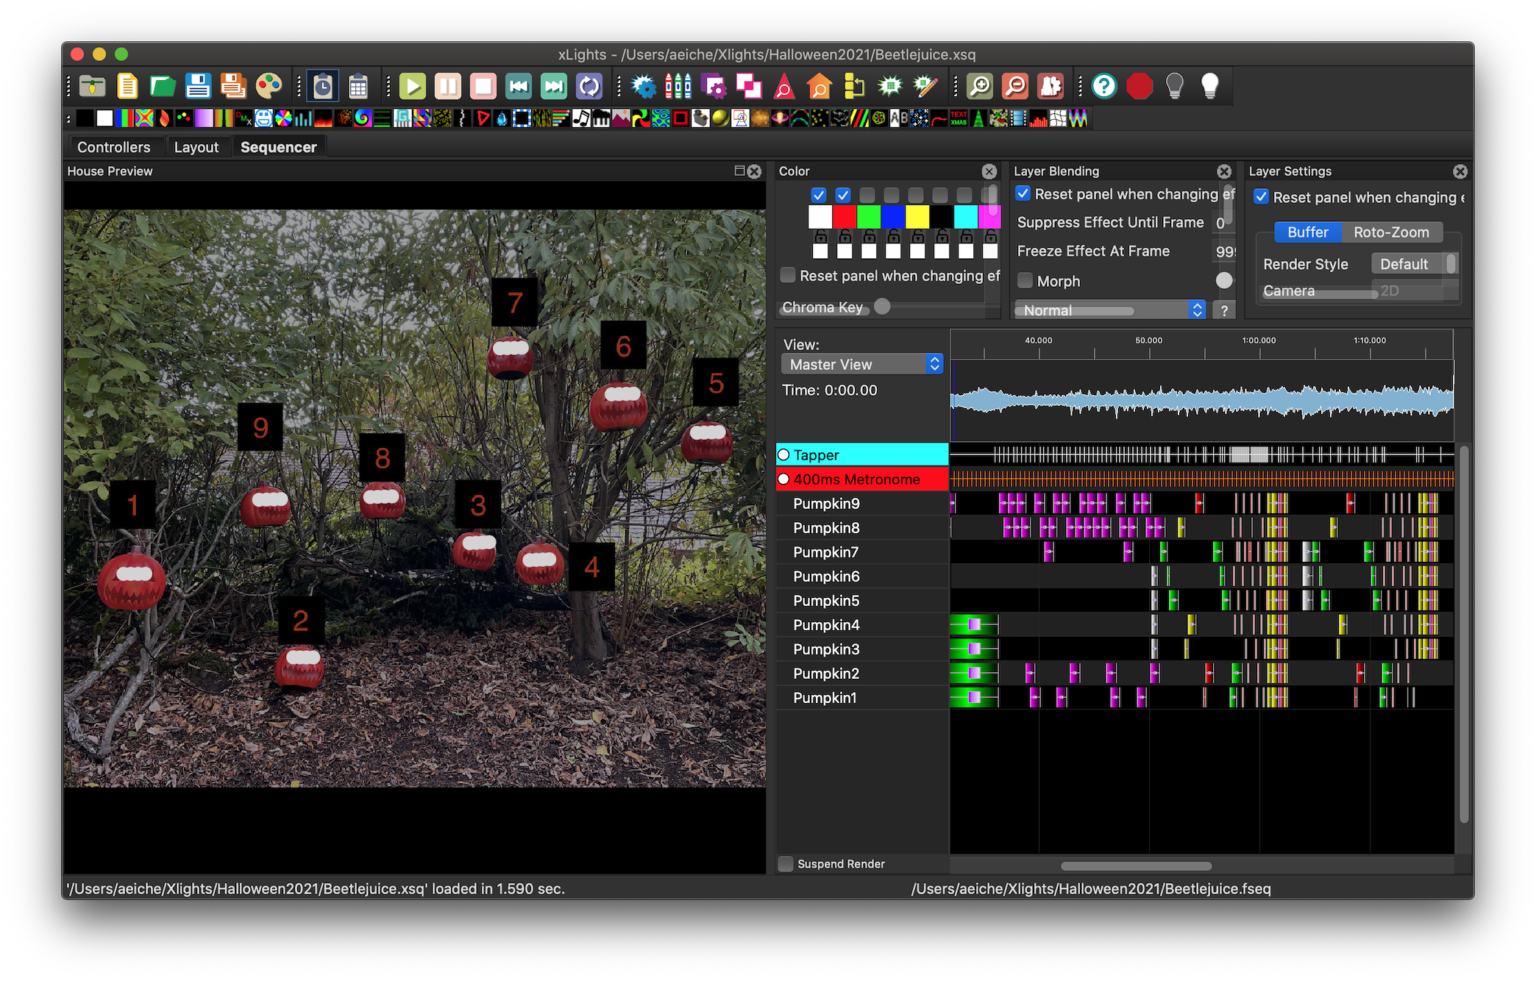
XLights
My pumpkins are made up of 4 LEDs each, and there's not really (so far as I know) a good way to represent that, so I just made a 4-light-string for each pumpkin. After I had the pumpkins setup for the year, I took a picture and used an image editor to add numbers to each indicating where in the chain they were. This makes a difference when you're decided which pumpkin should be singing at a given moment, and injecting some variety into a show can really delight an audience.
![]() ---------- more ----------
---------- more ----------For the pumpkins, I use the gradient effect almost exclusively. It's excellent for correlating to volume and when vocals or musical tones hit. The exception to this is using the "fire effect" which simulates the randomness of fire, and works great as something for the pumpkins to do between shows.
Sequencing music can be very time consuming. There are some built-in tools that will generate timing marks through audio analysis. You can use this to build sequences against.
Falcon Player
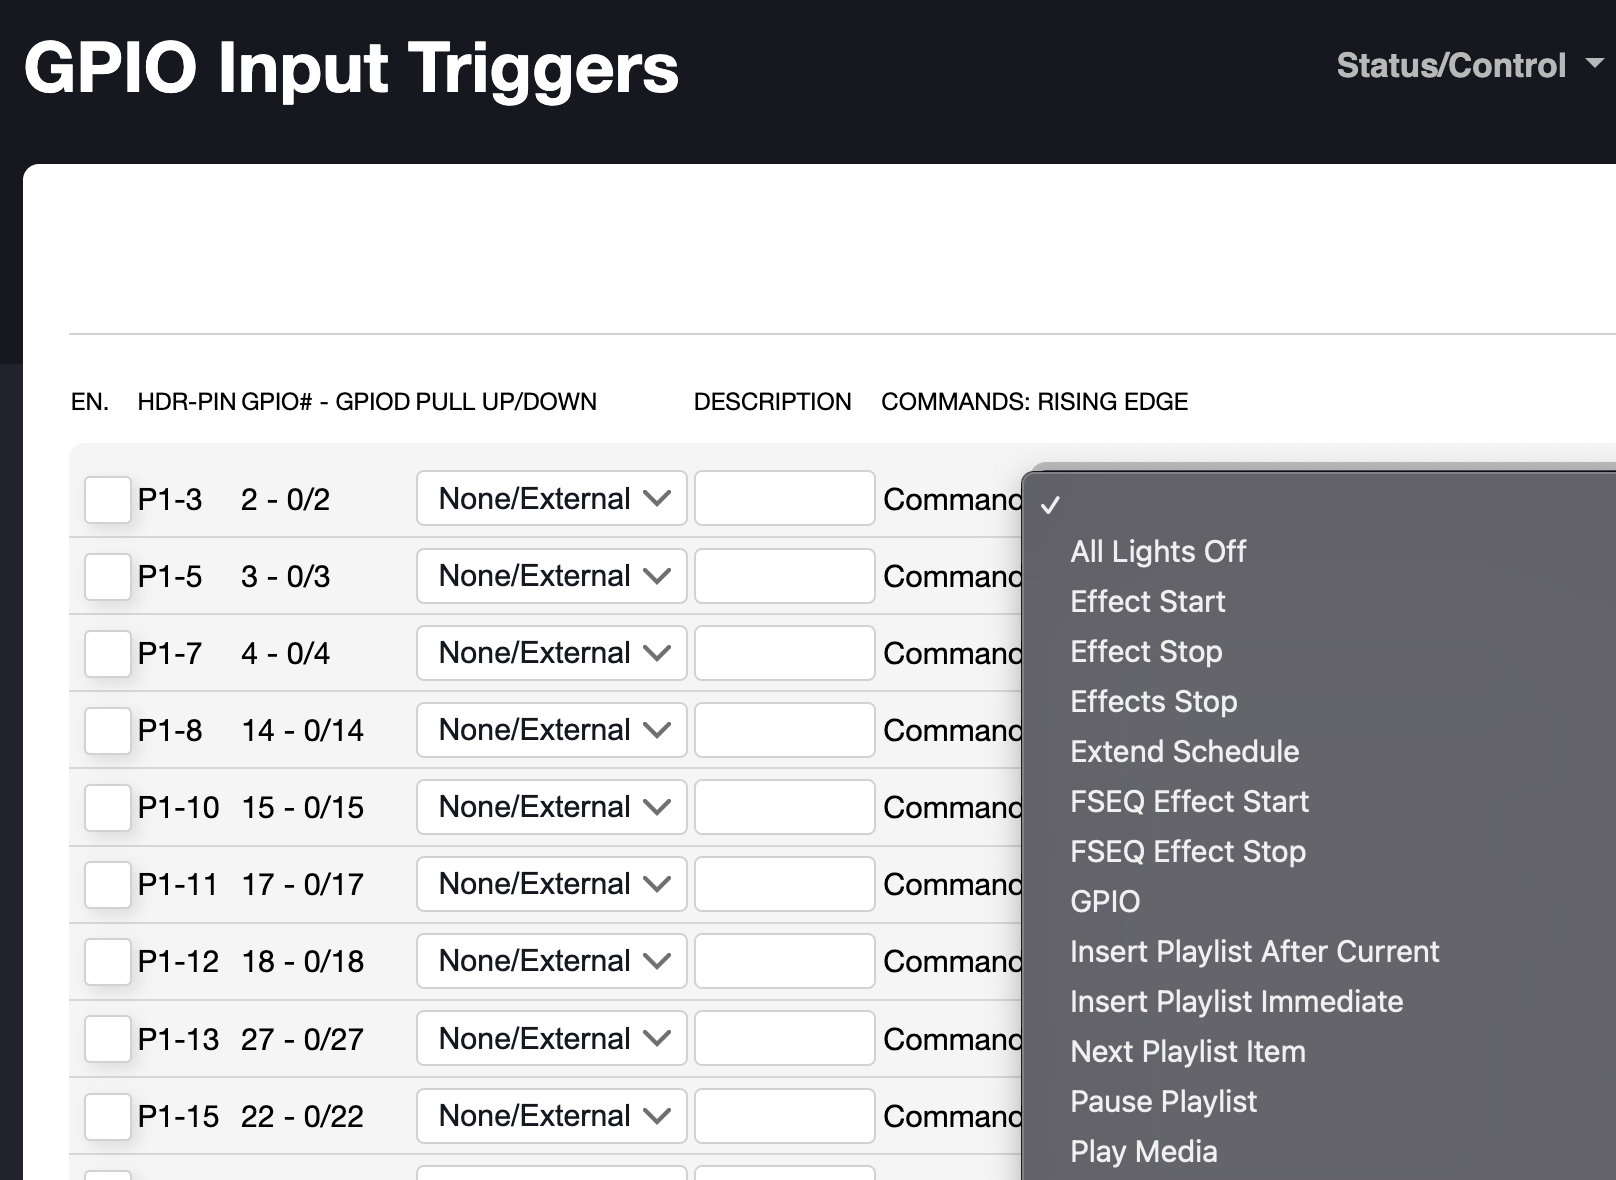
I'll start by saying that in both cases of my Musical Pumpkins as well as my Christmas display, I have not dug much into the feature setup of Falcon Player. For instance, I obviously drive LEDs with them, but you can also setup GPIO inputs to add interactivity to your haunt. A Pyroelectric or sonic sensor can be the perfect trigger to cue lightning and thunder. Or in my case startup the next song on a list.
![]()
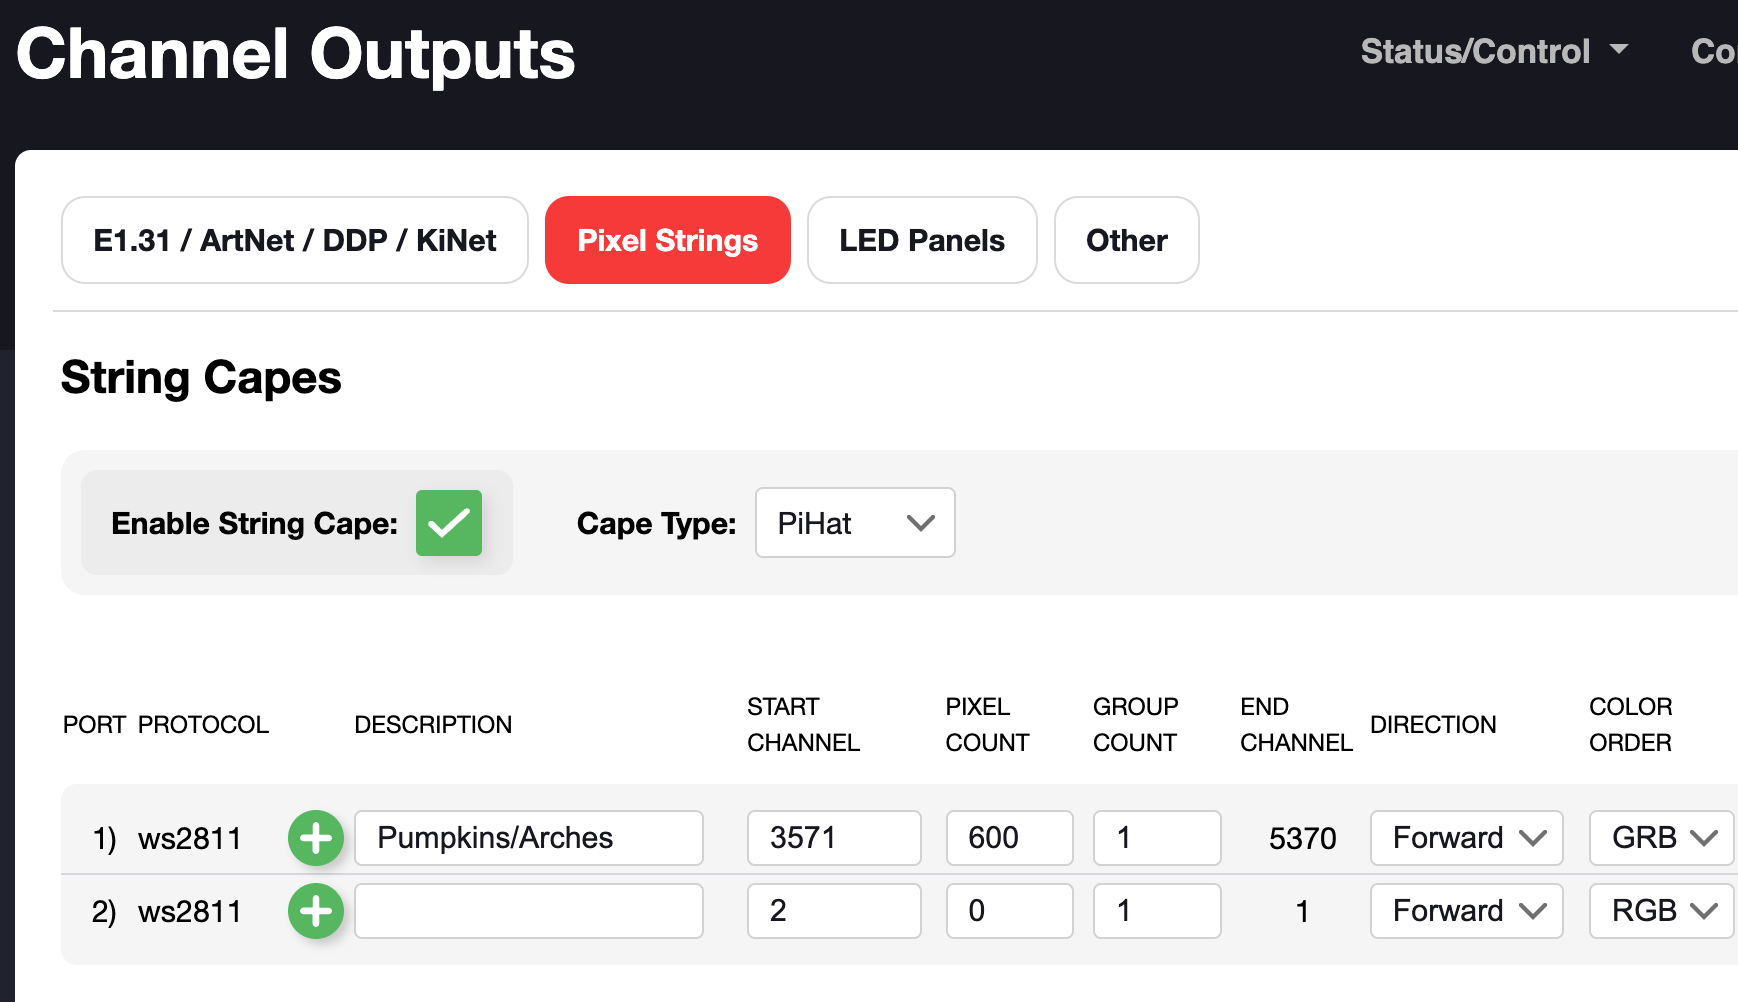
Because I drive the pumpkins directly off the Raspberry Pi, I have to map the output pins (I only use pin 6, but they come as a pair) to the appropriate lighting channels. There are 3 channels per RGB LED, and 4 LEDs per pumpkin. In this case, I reuse this setup for Christmas time as well - so while my pumpkins need only 108 channels, the arches need more.
![]()
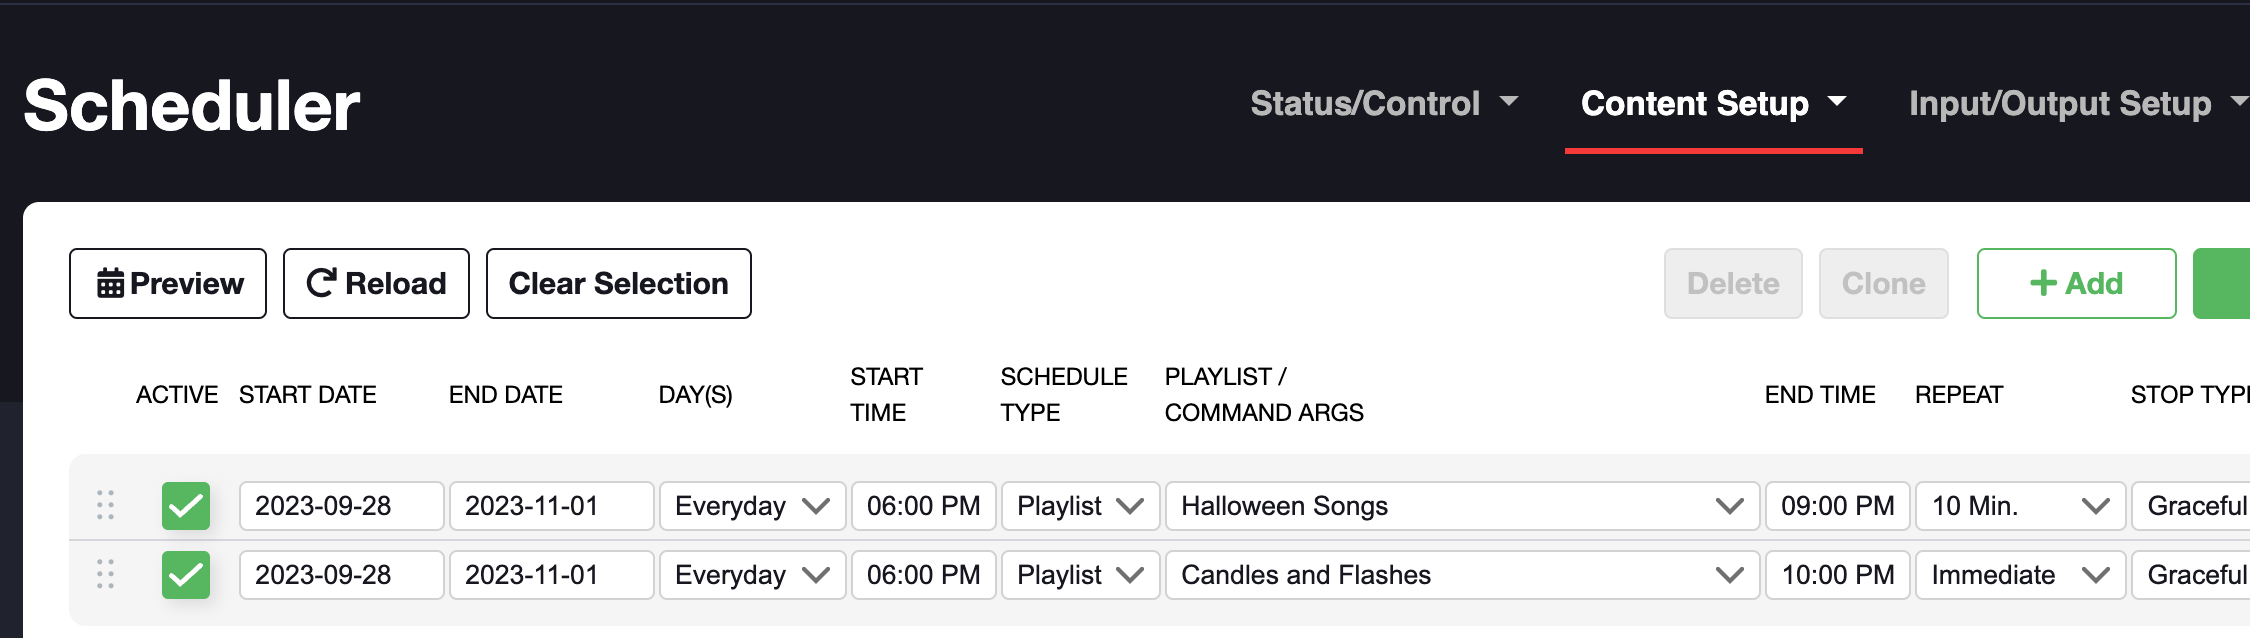
FPPs scheduler is really smart. Not only can you setup different shows for different days, you can also order them so if one schedule doesn't apply, the next thing on the list will execute. For my pumpkins, I play my show every 10 minutes. The playlist is only about 6 1/2 minutes long, so I have a second sequence which displays flashing colors (which my wife likes) and glowing firelight (which I like)
![]()
Obviously there's a lot to be said about these two software packages. I encourage you to spend time time in the forums for each. They're really incredible programs and you can accomplish a really impressive show with them.
-
Driving computer and support
10/09/2023 at 06:40 • 0 commentsThe pumpkins are great, but they don't really do anything without a conductor.
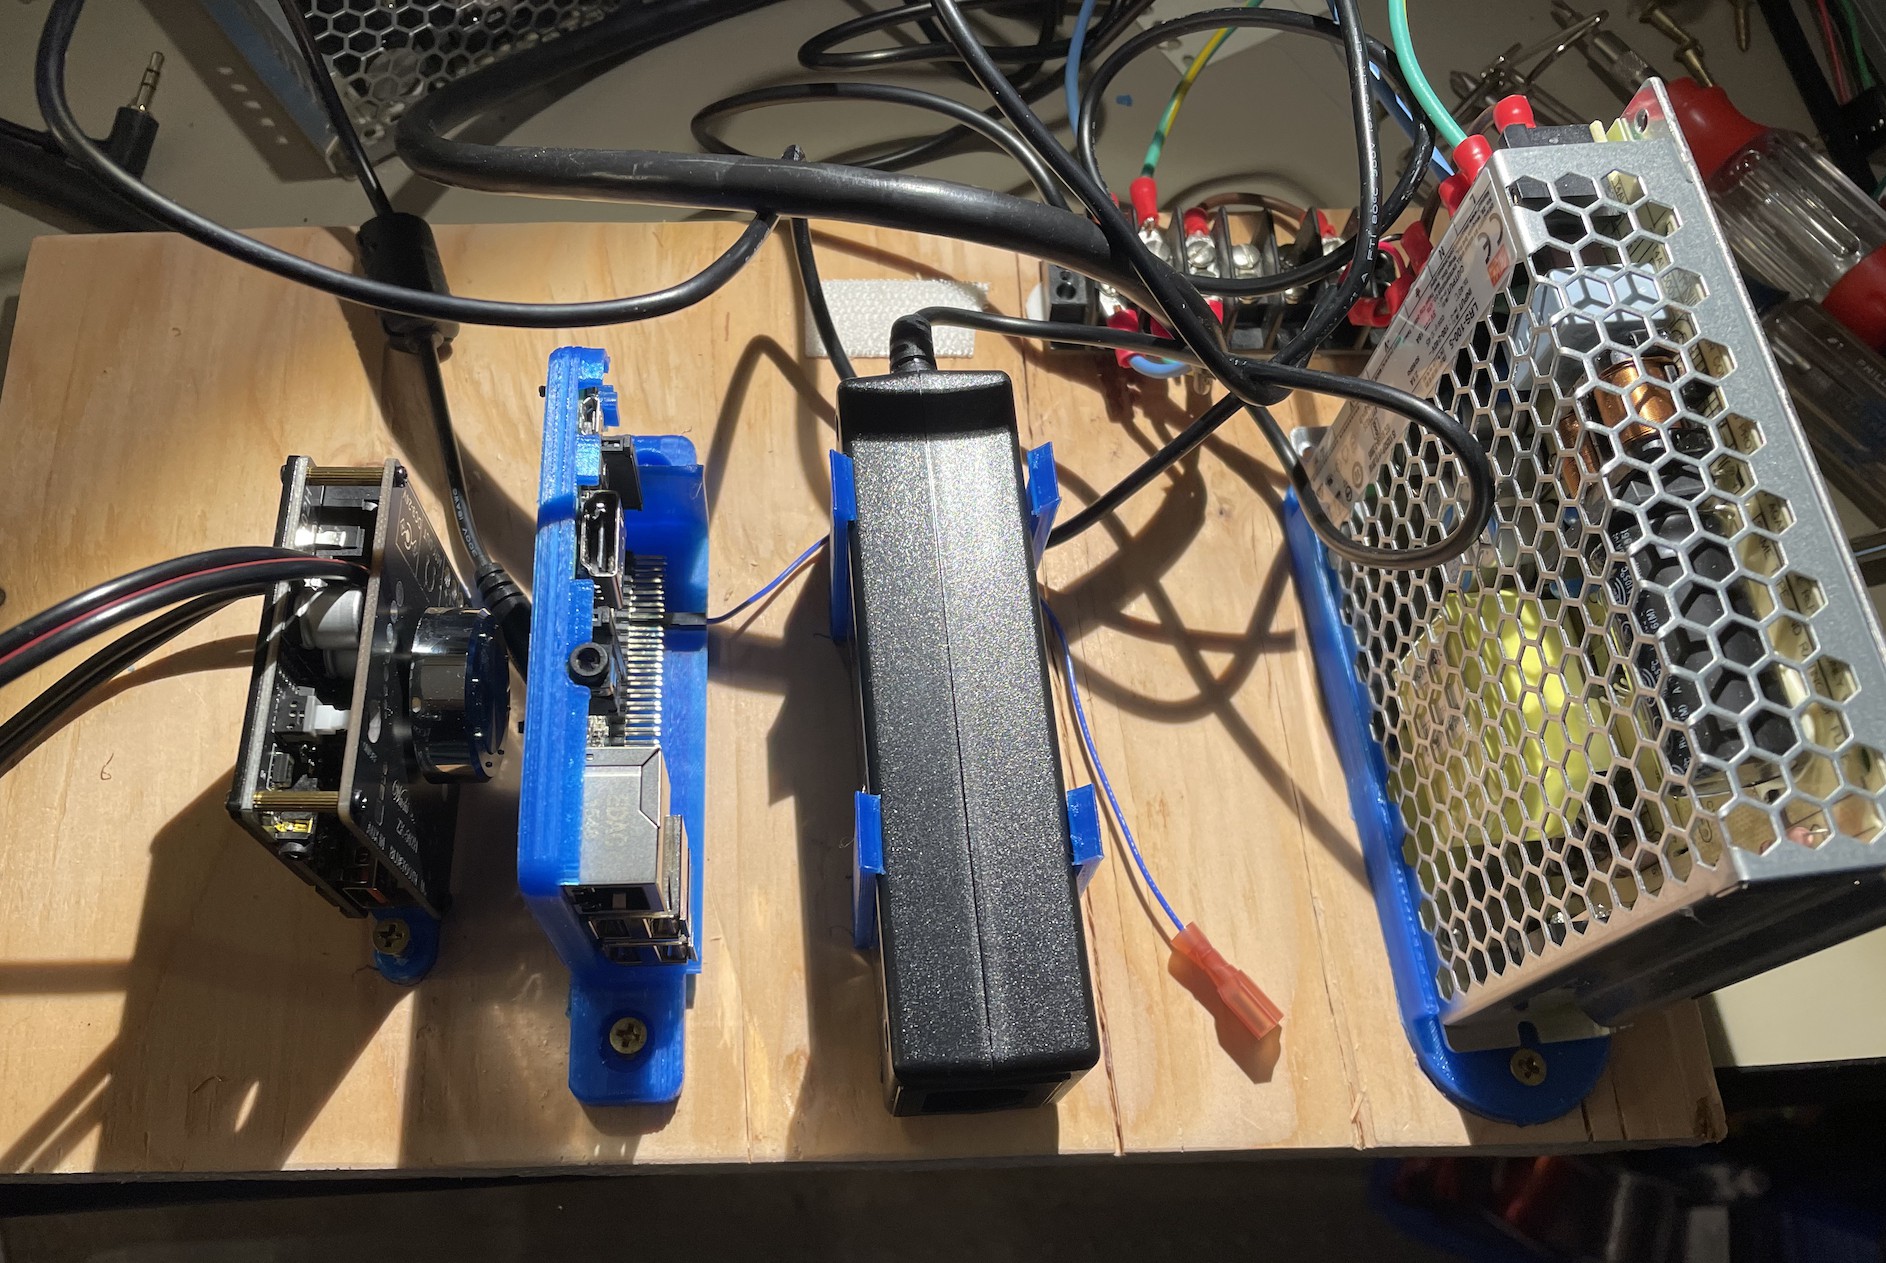
On the hardware side of things, there are 4 components that live inside the weatherproof outdoor box for my shows:
- An amplifier
- A Raspberry Pi 3
- A 12V PSU for the audio speakers
- A 5V PSU for the Raspberry Pi and Pumpkins
Additionally, I have a distribution terminal strip to get power to a couple of places, and the Raspberry Pi has a USB "sound card", that provides sampling for the audio. It turns out that you can either multiplex the lights or the audio, but not both on a Pi 3. The sound card was an inexpensive solution. (It's worth noting that the BeagleBone Black, for instance, doesn't have this problem. It has plenty of PWM) I'm not sure if the RasPi 4 or 5 do)
![]() ---------- more ----------
---------- more ----------I got an old grounded computer power cable (typical NEMA 3-prong to C13 cable) and cut off the end to make a pigtail. I crimped on some appropriate fork connectors, and screwed them in to terminal strip. I ran those into my 5v PSU, and the 5v signal out to the terminal strip where it'd be accessible.
The Pi, and the cable that gets 5v to the pumpkins get their power here. Additionally, the pumpkin cable has a third signal line that it connected to a blade connector that plugs into the Raspberry Pi (Pin 6 is available for the PWM)
The 12v power supply gets a C13 pigtail that connects to the terminal strip as well. (Coincidentally, I have one I just cut off a NEMA cable!) The barrel connector on the other side goes into the amplifier.
The amplifier takes an 3.5mm stereo out of the RasPi USB sound card, and provides speakers with 16AWG stereo lines.
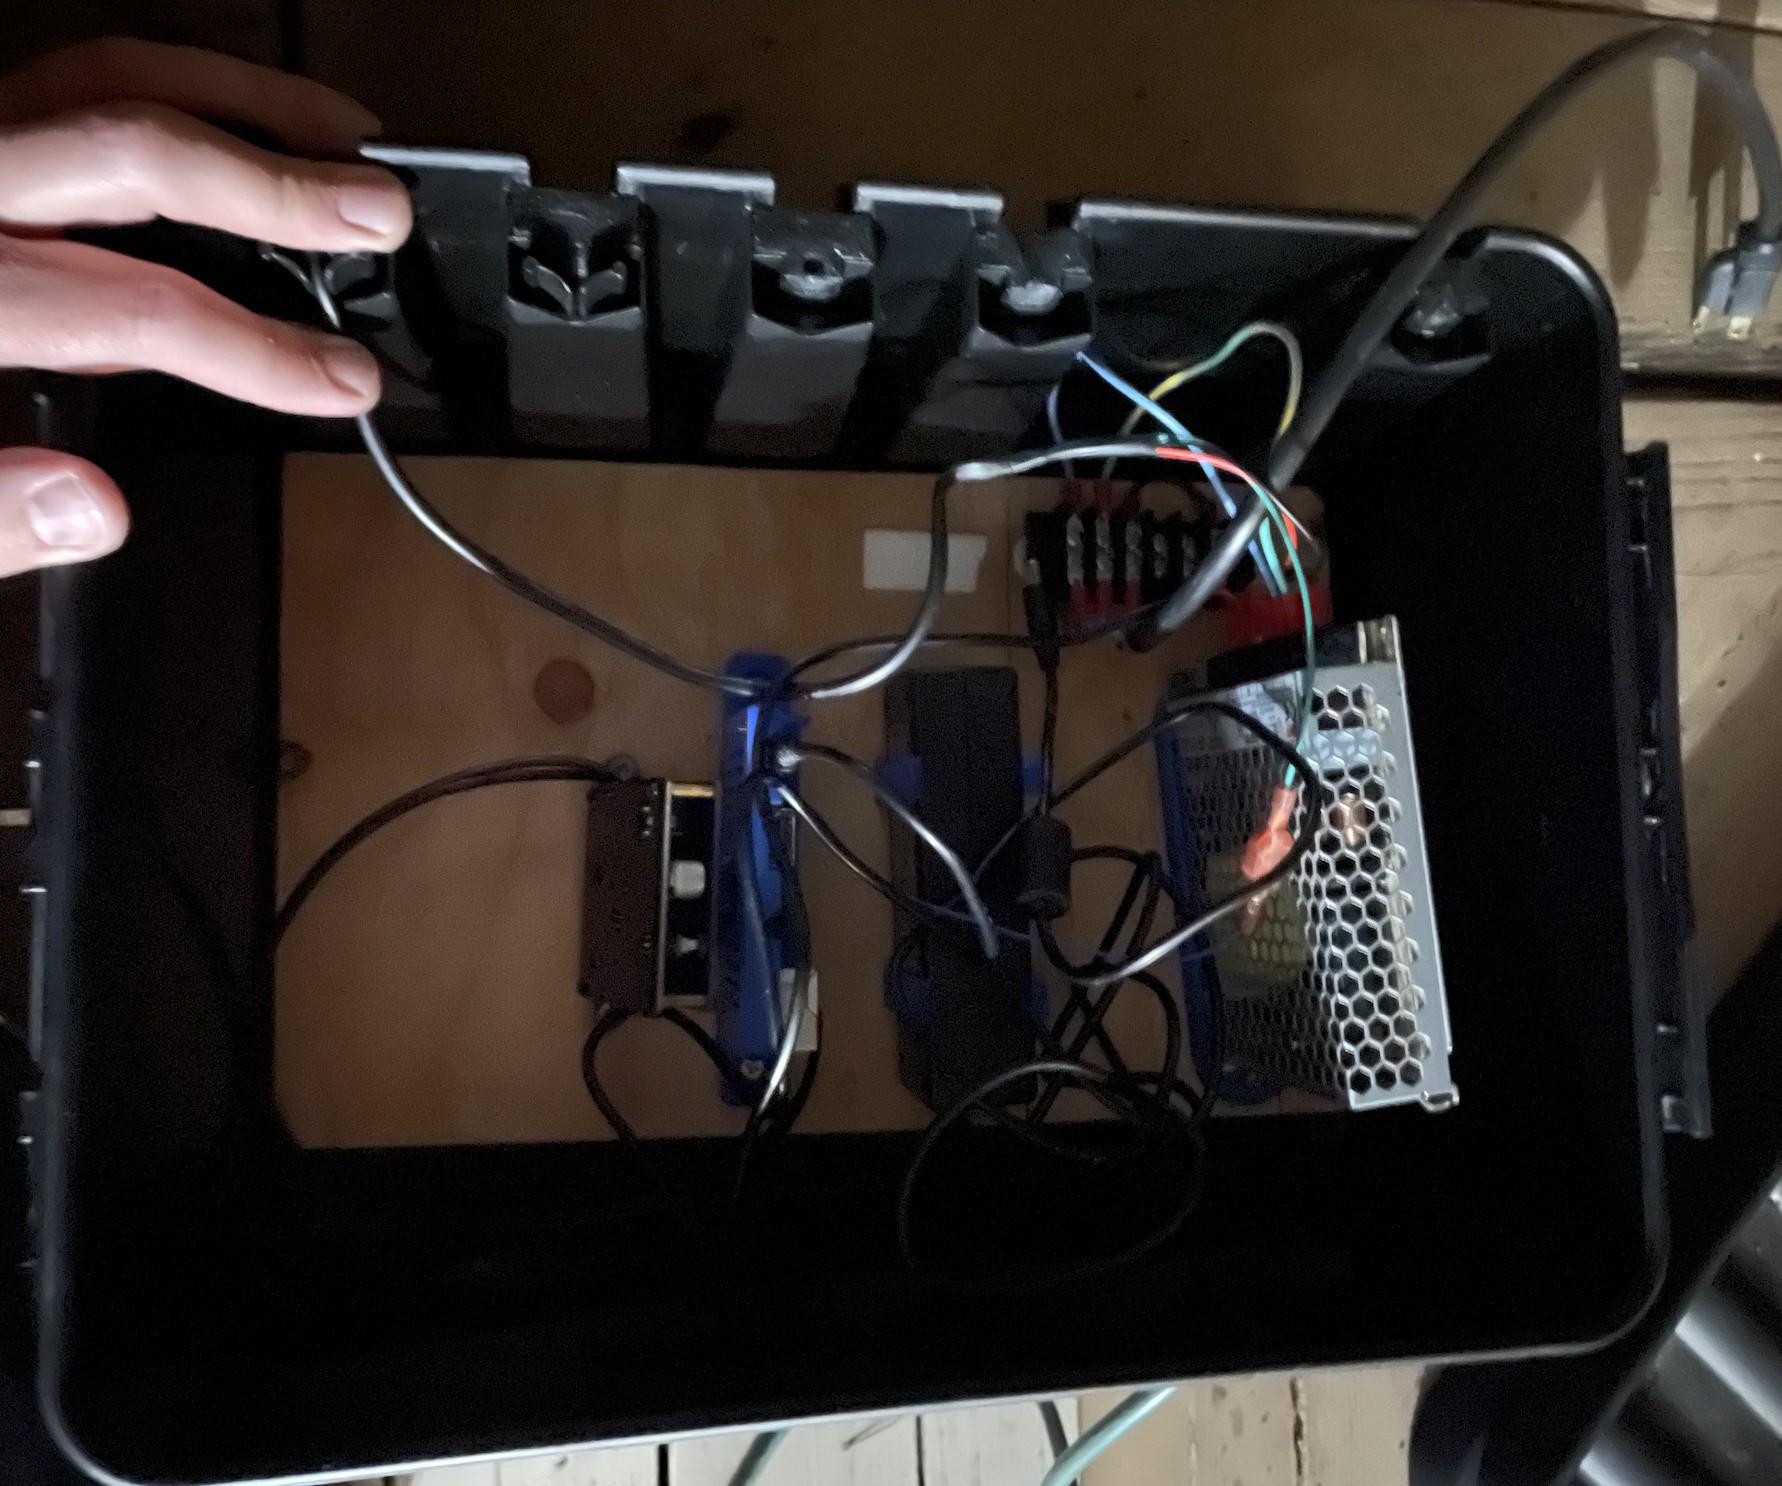
I mounted all of this onto a piece of wood using various 3 parts. In some cases I extended existing models I found to mount. In others, I just designed something all together.
The wood base with everything on it goes into a Weatherproof box. I bought a medium-sized SOCKiT box, which fit everything I needed into it.
![]()
In order for there to be a show, you have to have something to run the show. On my RPi I use Falcon Player (or sometimes Falcon Pi Player)FPP runs a daemon on the RasPi and provides an interface for specifying, uploading, and scheduling your light shows, and has become a mainstay of the light show hobby community. Though most folks use it for Christmas Light shows, it works just as well for Halloween :)
-
Frankenstein'ing your pumpkins
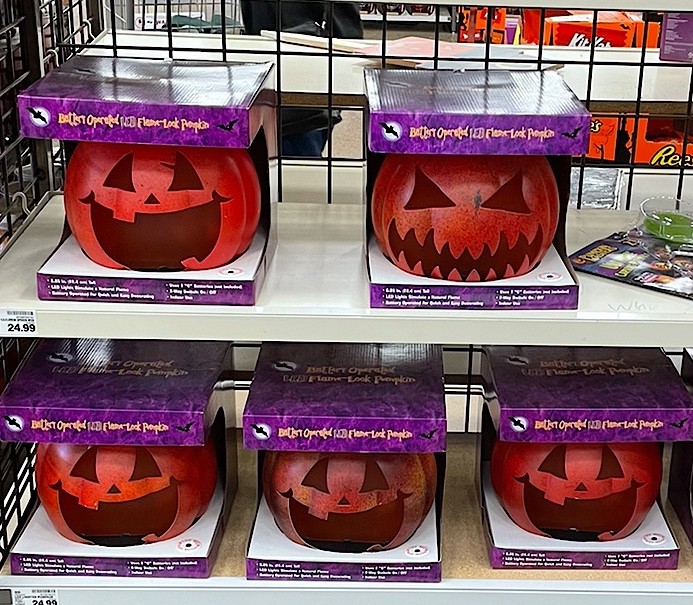
10/08/2023 at 02:44 • 0 commentsA few years ago, my wife (who loves Halloween) found these plastic jack-o-lanterns at the store, and we were rapidly approaching Halloween. The pumpkins were being offered at a deep discount because (I assume) the store was concerned about being able to get rid of them. So we bought 6 or 7.
![]() ---------- more ----------
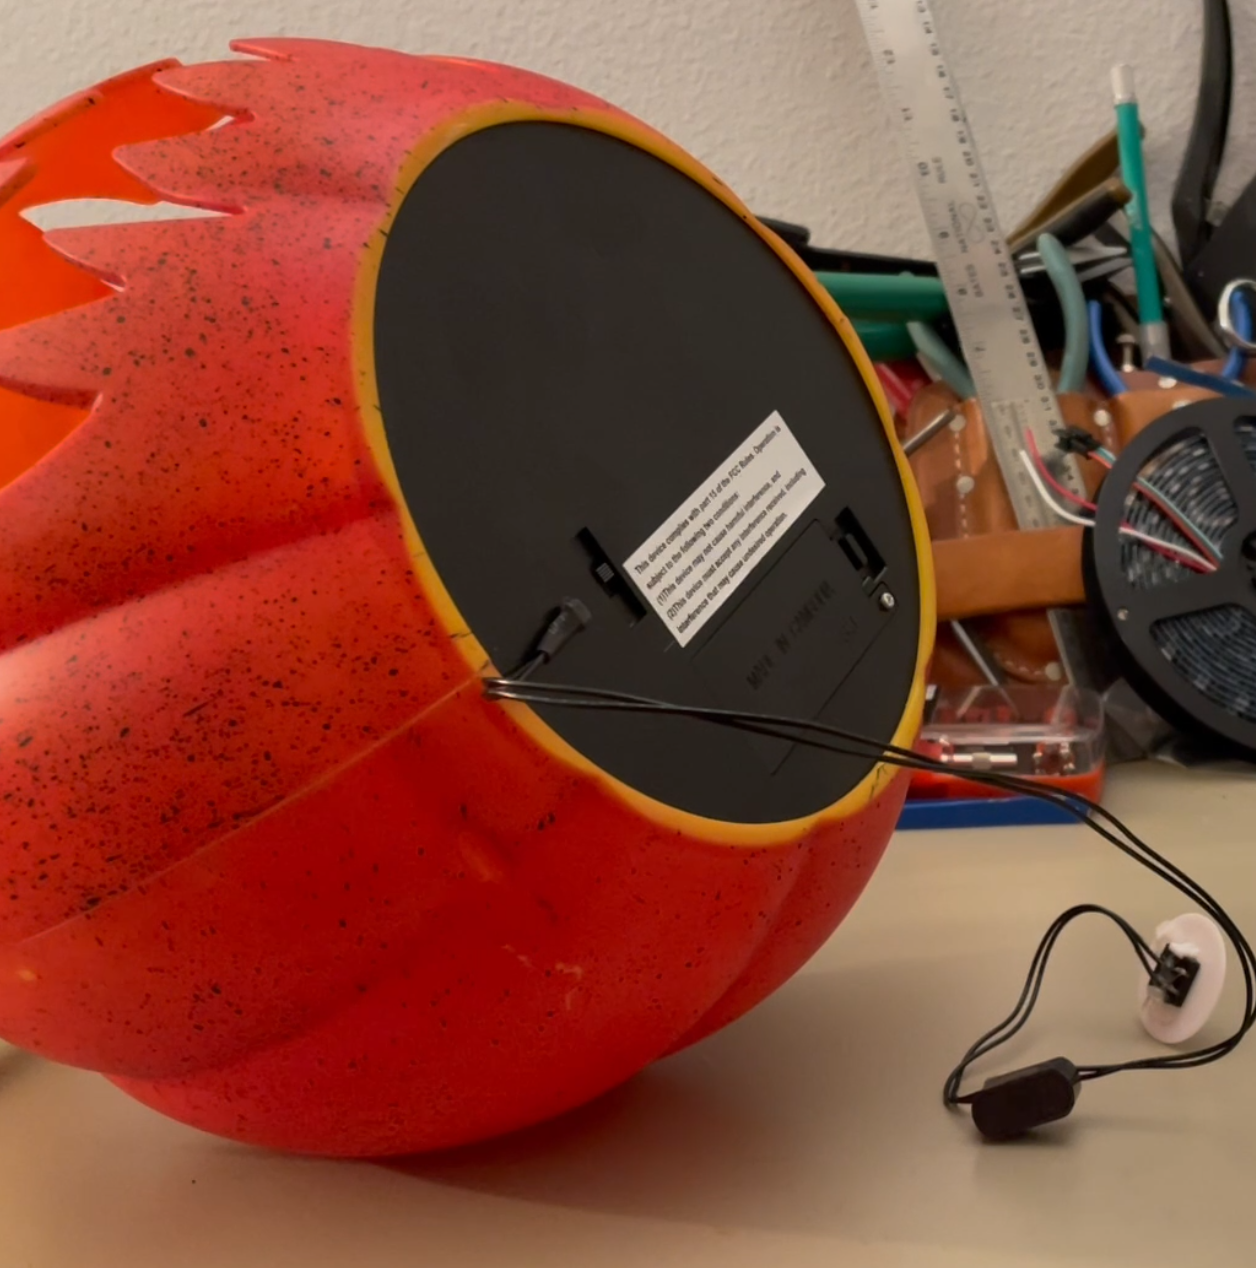
---------- more ----------When we got them home, I was curious about how the "Try me" button worked. It turned out that there was a 2-pin 0.1" header on the bottom of the prop that the button was plugged into. The button completed the circuit and had 3 very small coin cell batteries to provide the ~5v to run the electronics inside that would otherwise be powered by batteries.
![]()
We placed them outside and hung them from the branches, when it was dry enough. I was sure through that little 2-pin connector that I could remotely manage them, and tried a couple of things before realizing I didn't have enough time to build a sequencing system from scratch.
The following Christmas I learned a lot of light shows utilizing various light control protocols (DDP, Artnet, E1.31) and realized that I could run lights directly off of a Raspberry Pi.
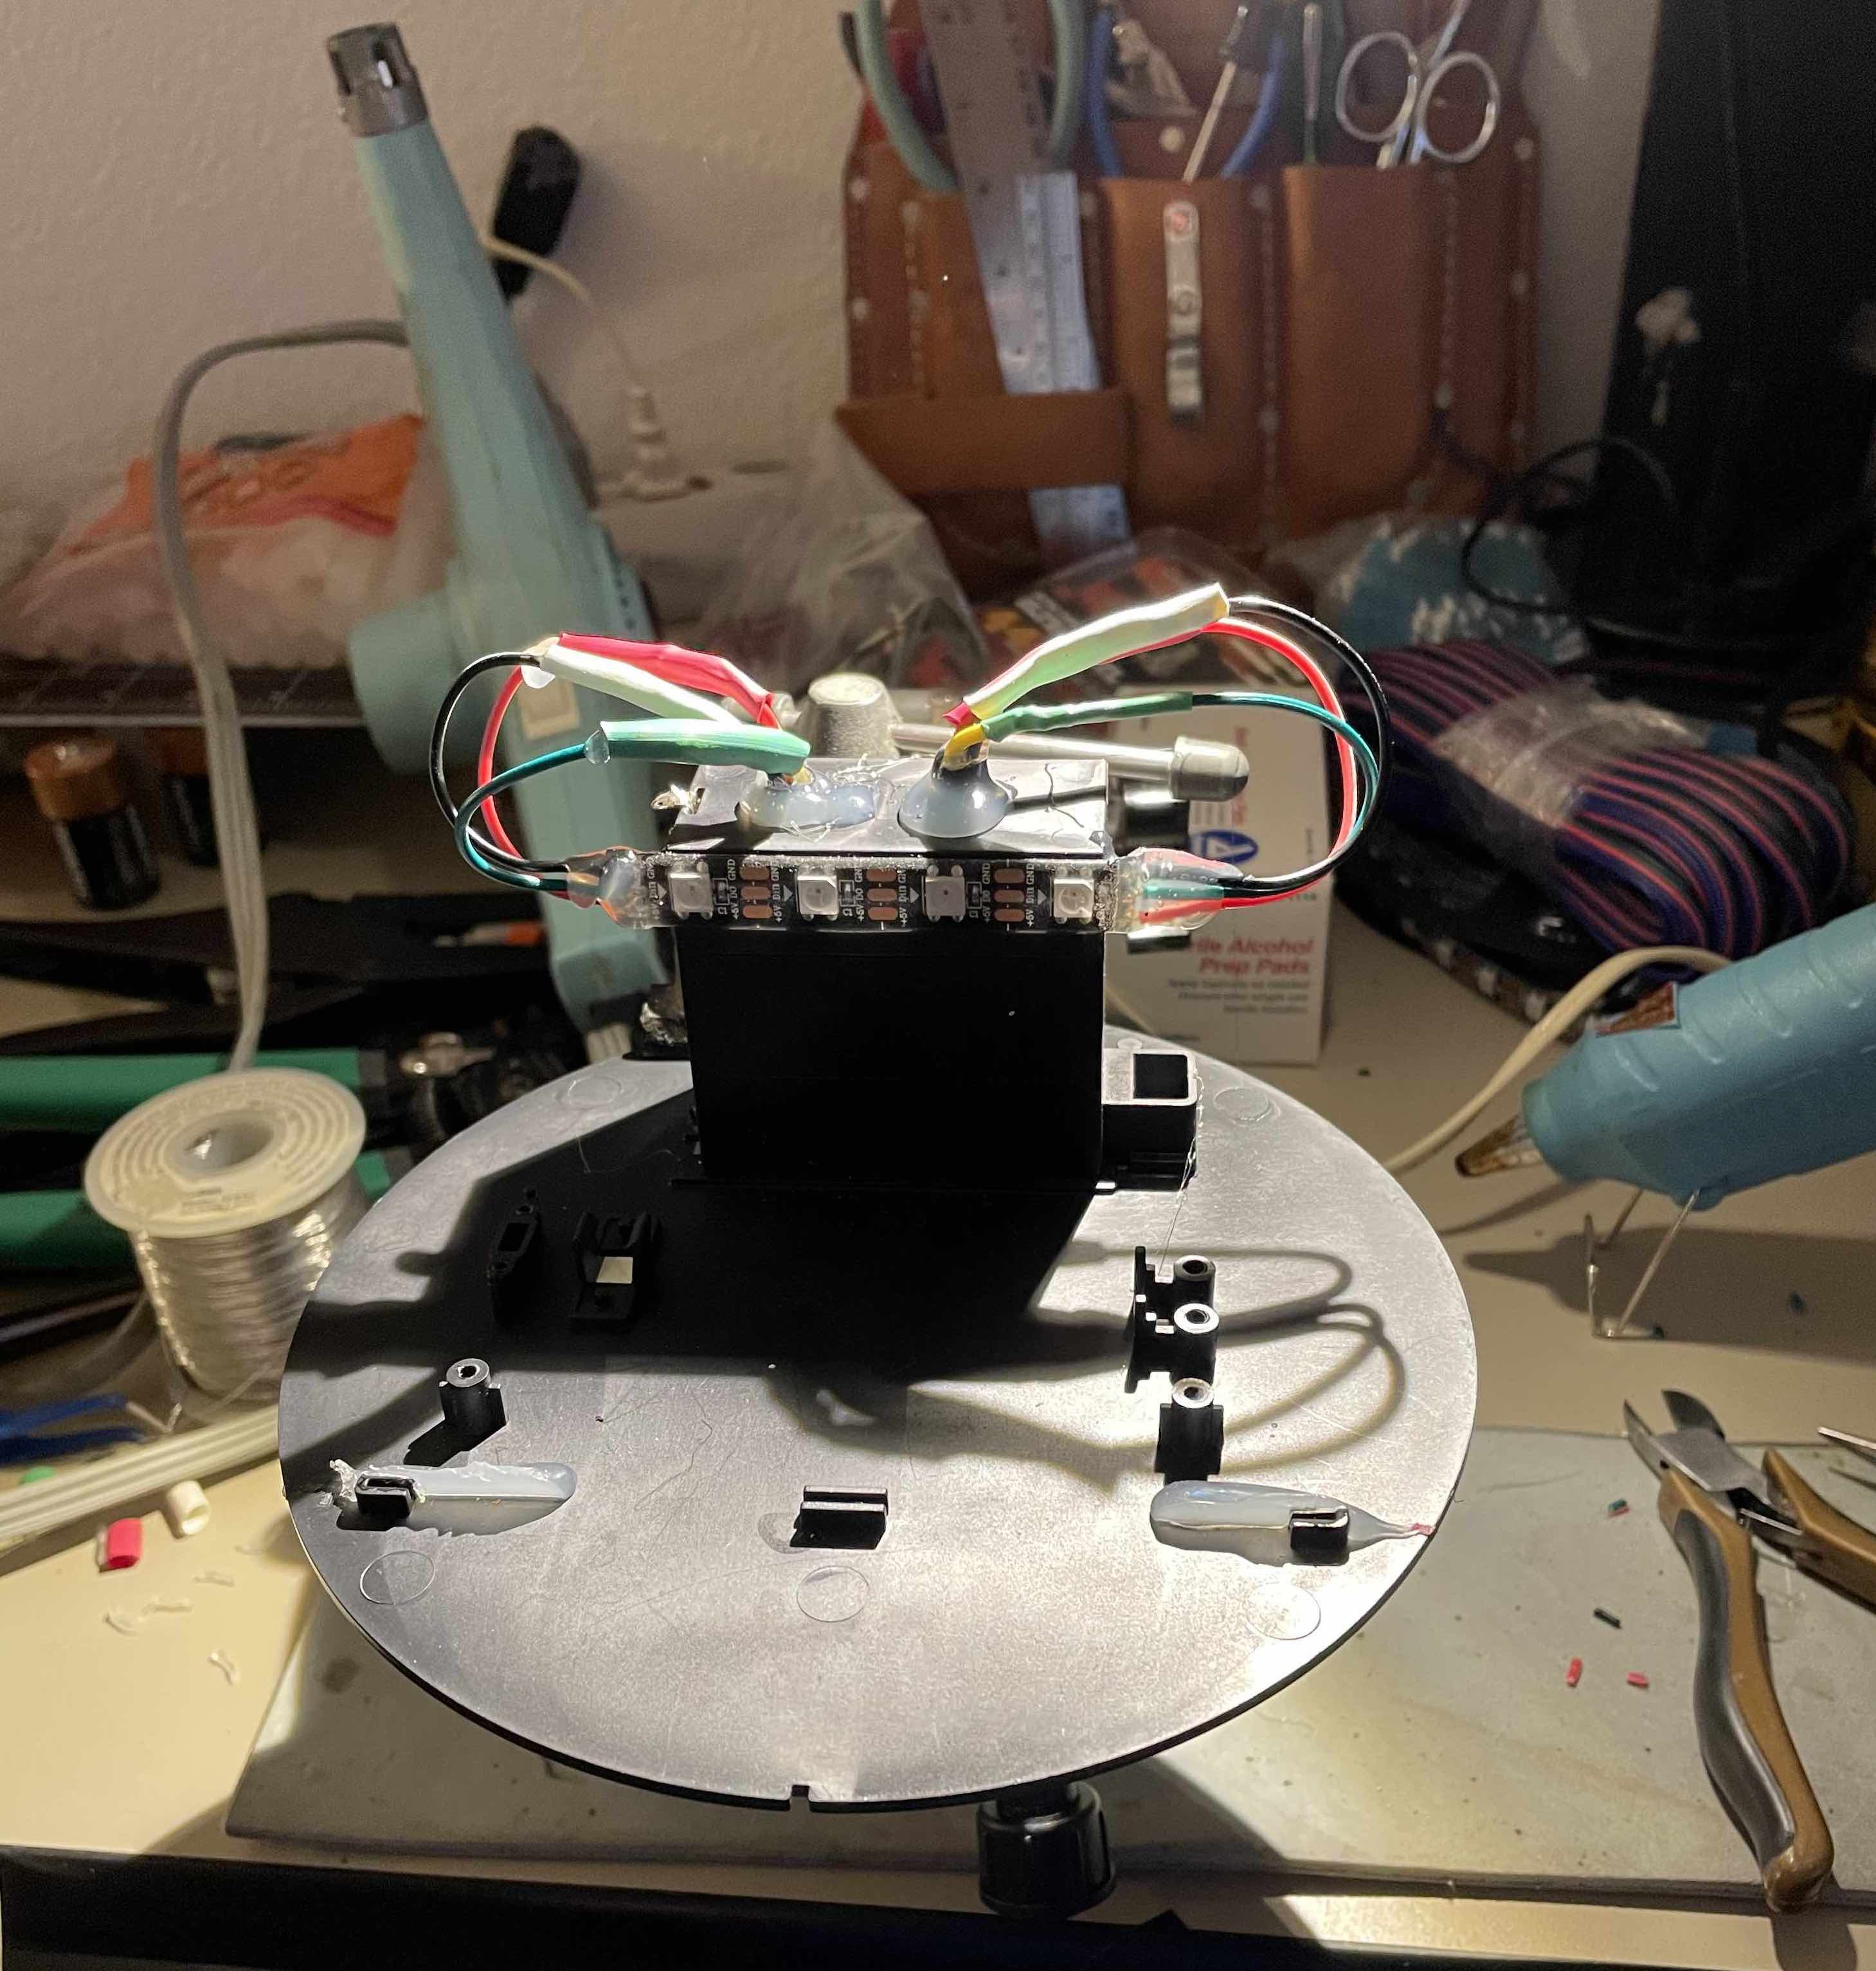
Amazon sells some strips of IP65 addressable LEDs, and with some surgery our pumpkins could be very easily controllable. I applied what I learned to the pumpkins the following year by replacing the internals with those weather-safe LEDs.
The basic concept here is to make a "chainable" pumpkin that will supply power, ground, and signal to the next pumpkin. This is made up of:
- A WS2812b LED strip
I chose the IP65 version that has molded silicone over the top. You could go with the IP67 version that has a sheath, but I think that'd be more work to waterproof
- A male and female 3-signal weather-resistant pigtail
You can buy pigtails with connectors typically from the same manufacturer as the LED strip. - Some appropriately AWG wire
- Hot Glue
- Heat shrink
I drilled a hole for each pigtail up through the battery compartment. My theory a the time was that it'd be less conspicuous and get extra protection from weather there. It ended up consuming a bit of the pigtail length which could be useful. I doubt it makes much difference in the rain, and would probably just drill through the floor of the pumpkin.
Here I trimmed the wires, slipped in the heat shrink, and soldered the connections. I'll note here that it's important to test your connections before moving on to weather-proofing. It's a real pain-in-the-neck to remove the hot glue and rebuild the whole thing.
To weather-proof(ish) the setup I coated the the solder joints in hot glue. Then I slid heat shrink over the hot glue and shrunk it, which melts the glue again and it conforms to the shape of the heat shrink - it also ensures that you have a really good insulation around your connectors.
Additionally I put hot glue over the soldered connections to the LED strip.![]()
Once everything was done, I'd plug in using a pigtail connected to screw terminals and a microcontroller running the Adafruit LED test. It's a really easy way to make sure your LEDs are working as intended without getting the sequencing software setup.
![]()
The whole process of converting a pumpkin is captured in this video:
- A WS2812b LED strip
Musical Jack-o-Lanterns
Commonly available Halloween Decorations coupled with some Addressable LEDs, and weather-resistant speakers make for a fun evening show