-
Instruction book - 2nd Log
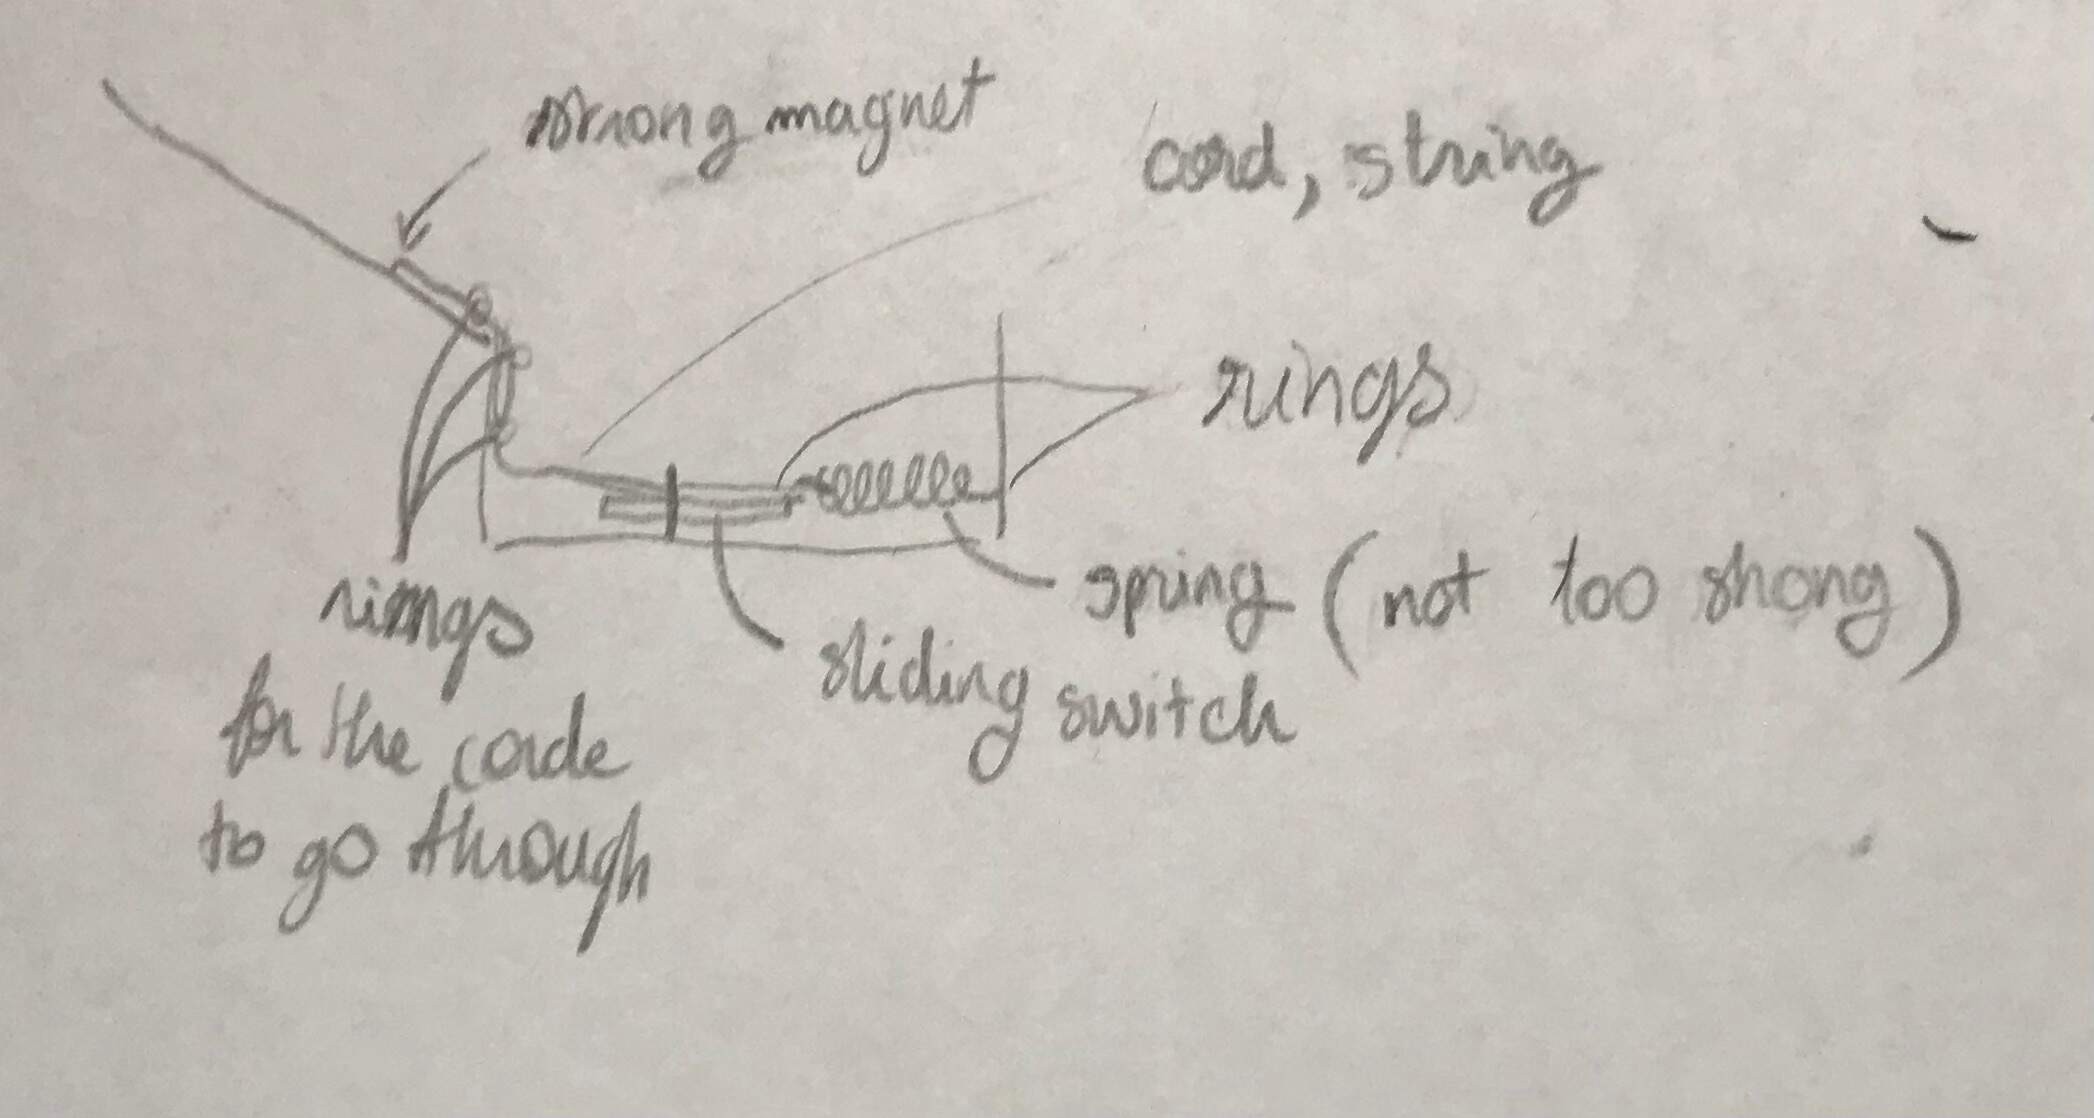
11/16/2023 at 11:38 • 0 commentsHow we made the sliding switch:
Theoretical plan:
![]()
Our realisation:
![]()
![]() ---------- see switch videos from the files of the project ----------
---------- see switch videos from the files of the project ----------Material list:
- cord/string
- 1 spring (not too strong)
- 3 fasteners
- 1 small ring fixed support
- 1 small ring
(- magnets)
-
2023-11-16
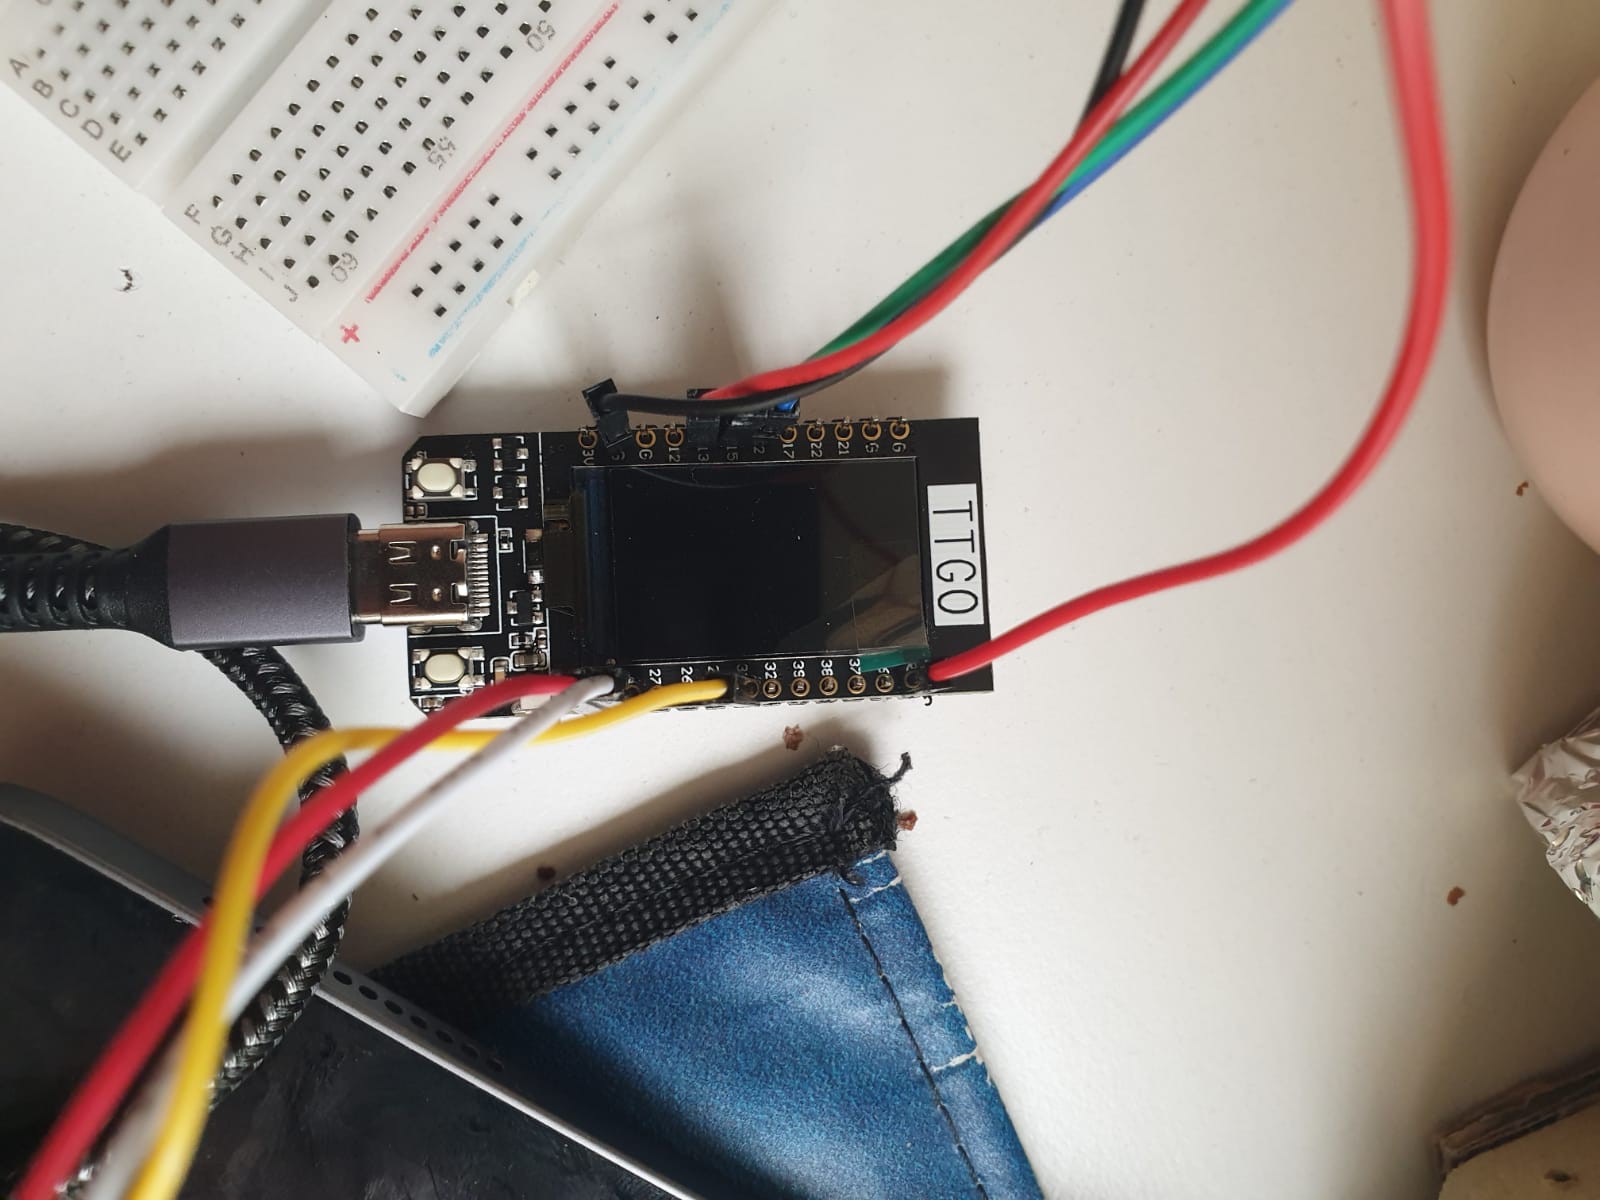
11/16/2023 at 11:37 • 0 commentsWe tried to connect and display a message on the 8X2 LCD screen through the ESP32, but it did not work for several reasons:
- the ArduinoIDE app doesn't detect any screen
- the ESP32 is really complicated to handle since the wires leave all the time and the screen is glitching a lot since the power is not well fixed/delivered to it
We will try again after researching even more.
For the box, we're thinking about the mechanism to open and close it.
We're thinking of a lock like a chest or a screw process.
-
Instruction book - 1st Log
11/16/2023 at 11:33 • 0 commentsAn instruction book that lights up when opened.
Magical display :
acrylic carved + LED band to light the sides
resources :
- (4902) How To Make A Magic Book with Lighting Effects - YouTube
- LED Book Light - Inside a Book! : 10 Steps (with Pictures) - Instructables
- Plexiglass éclairé par ses bords | Plexiglasssurmesure.fr
- Techniques d'éclairage en plexiglas (galerie-creation.com)
Opening system that acts as a switch:
Inspired by Birthday greeting cards.
resources :
- (4902) Musical Greeting Card with LED light (Happy Birthday) - YouTube
- Musical Greeting Card : 17 Steps (with Pictures) - Instructables
- Musical Greeting Card With Minimal Parts | Hackaday
sound option ( to add more cool options) :
- (4902) MP3 Sound Chip Modules by Talking Products Ltd - YouTube
- How To Hack An Audio Greeting Card | Musicworks magazine
- Add sound to anything - YouTube
- How DoAudioBirthdayCards Work | Audio-Digital.net
Our solution to integrate this into our project:
sliding switch:
- (5014) How to Make a Slide Switch - YouTube
- https://www.youtube.com/watch?v=qSmYT6hPjUU
battery:
- coin battery
- finger battery
- rechargeable battery
-
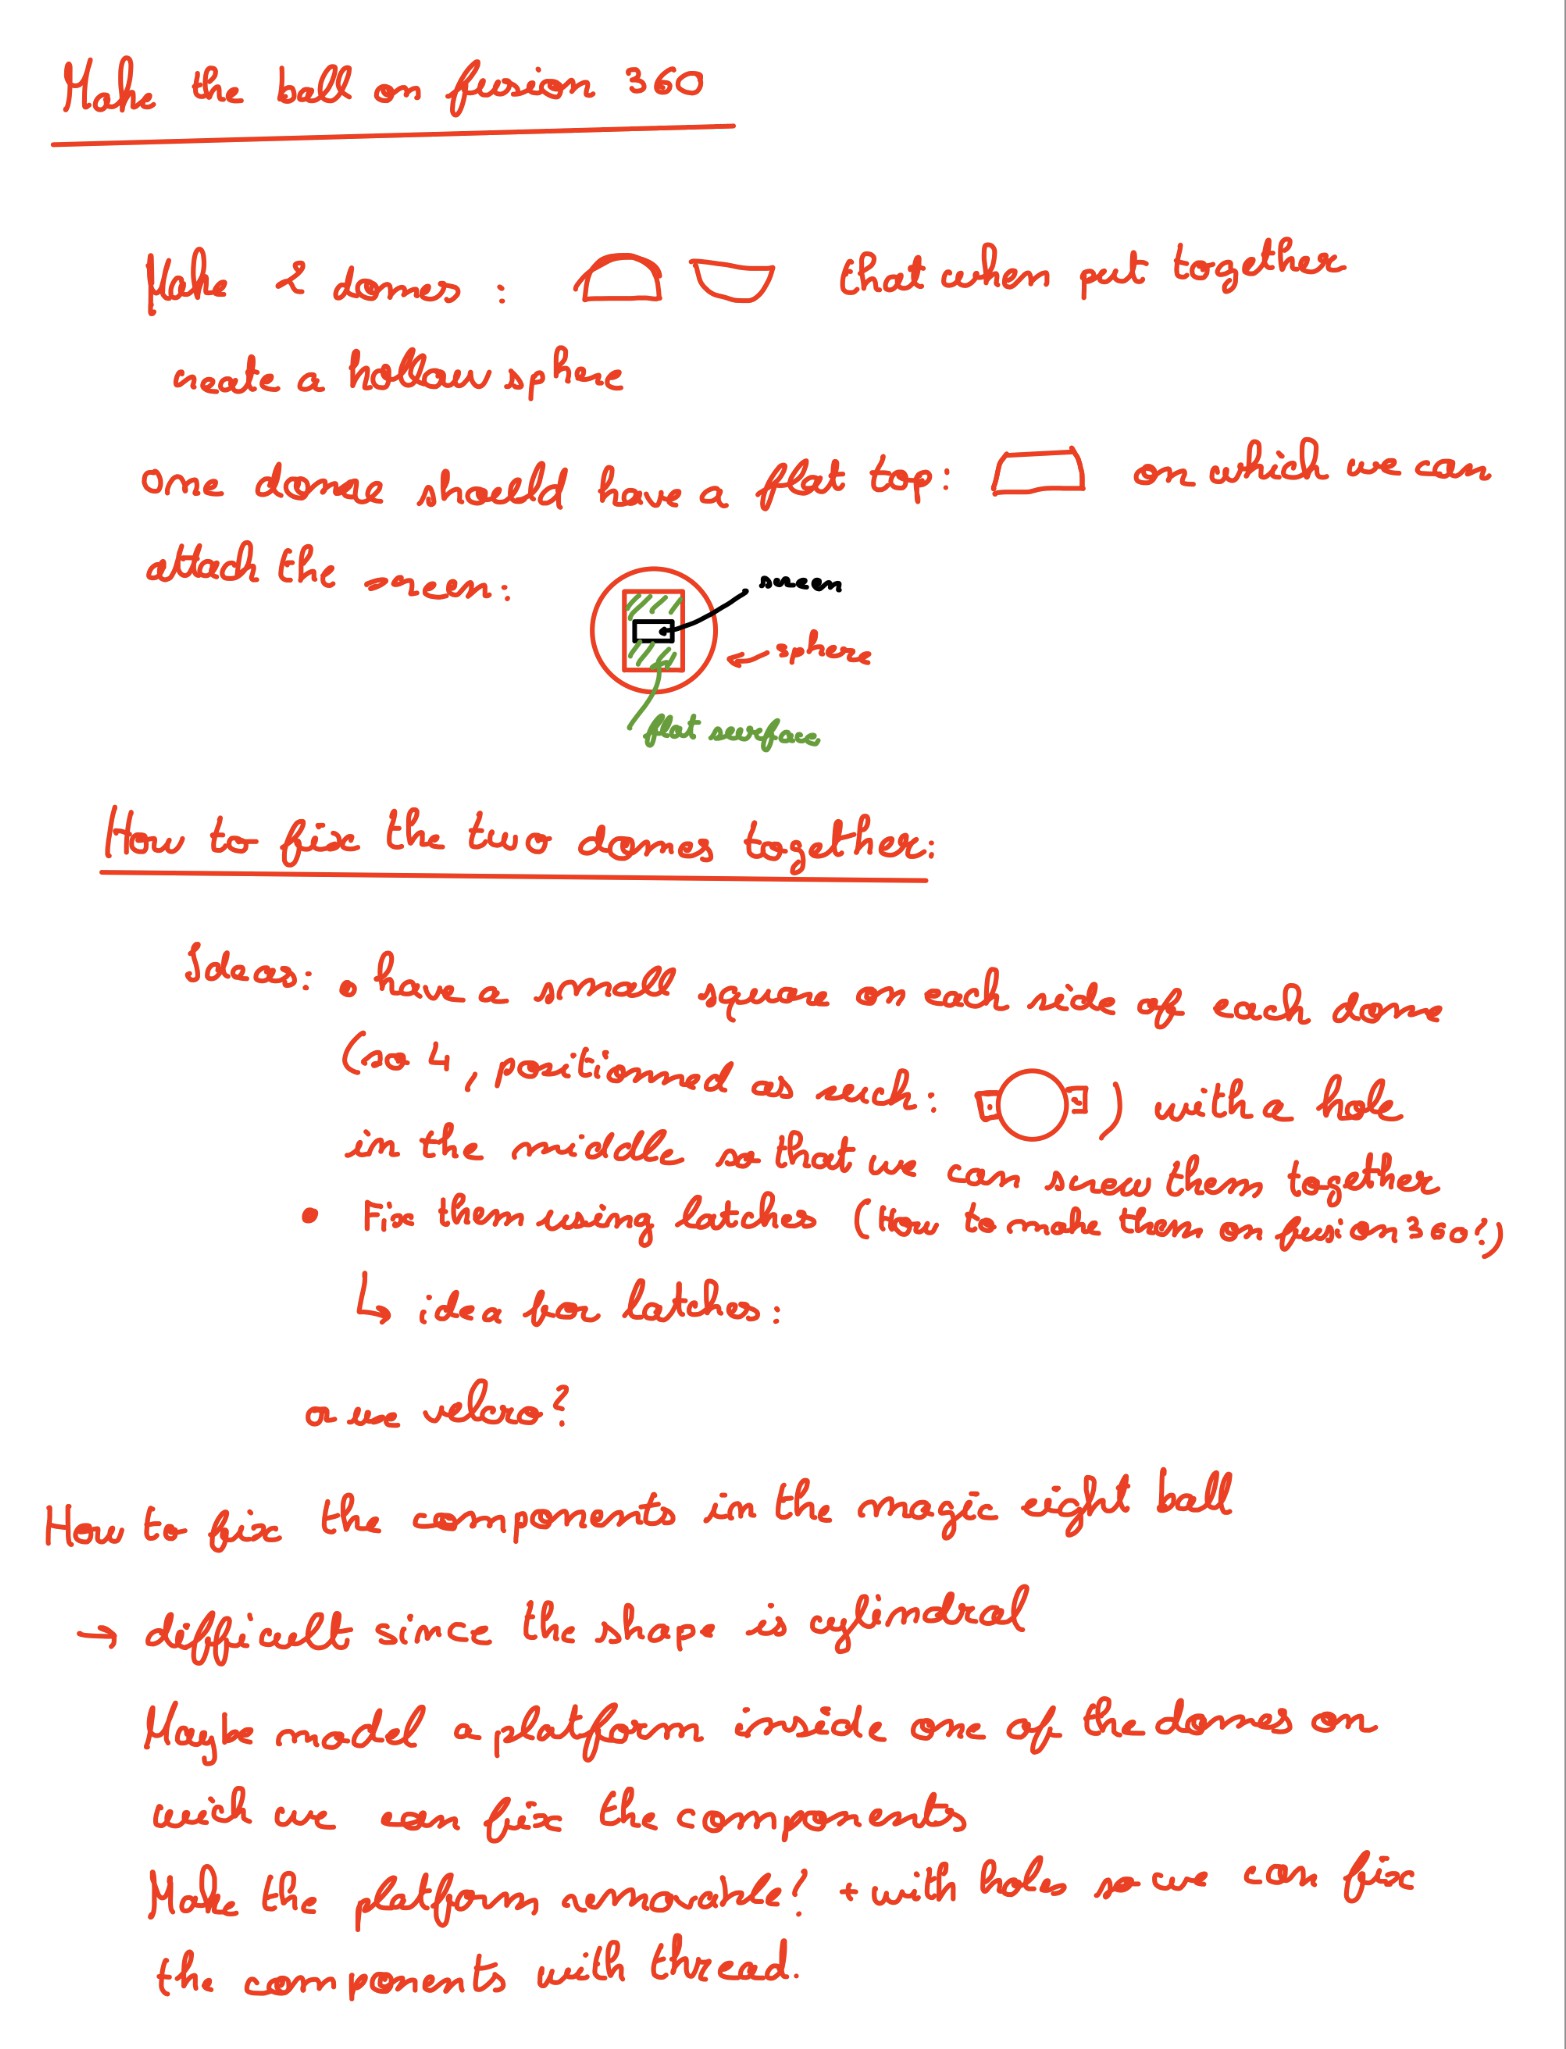
16/11/23 creating the ball for the magic eight ball
11/16/2023 at 11:24 • 0 commentsMain idea: get two hollow domes and fix them together.
Problems: the surface is circular: how can we fix the screen? And how can we fix the components inside the domes?
![]()
-
2023-10-26
10/26/2023 at 08:26 • 0 commentsSummary of the session:
- Working on wirying the LEDs and the touch sensor
- Research on the mechanism of greeting cards to reproduce it on the instruction book
- Research on the LEDs, buzzer, switch and battery
![]()
![]()
![]()
-
2023-10-19
10/19/2023 at 09:01 • 0 commentsSummary of the session:
- uploading our code on the ESP32 through Arduino IDE for the touch sensor and for displaying a word on the screen
- listing all our components
- looking for ways to make our project open and close easily
- exploring new ideas (like using an accelerometer to detect shaking and displaying the answer of the M8B)
List of the materials required to construct our Magic 8 Ball:
- 0802A LCD screen or an black and white picture screen
- ESP 32
- board
- wires
- touch sensor
- resistors
- LEDs (in bands)
- accelerometer
- outside box
To display the word "Magic 8 Ball" on the screen:
- We needed the "LiquidCrystal" library on Arduino IDE to be able to connect the 0802A LCD screen.
- We have to connect the LCD object with the pins RS, E, D4, D5, D6, and D7 of the 0802A LCD screen.
Requirements:
- Design For Manufacturing (= optimasing, reducing the cost without reducing the quality)
- Design For Assembling (= easy to assemble, we're required to be able to open our project freely, so we won't use any tape or glue)
-
2023-10-12
10/19/2023 at 09:00 • 0 commentsSummary of the session:
- connecting the ESP32 to our computers through Arduino IDE (connecting it to the WiFi, understanding how it works)
- modelisating our circuit on TinkerCard
- collecting pieces of information on how to create our Magic 8 Ball and for it to be efficient
- listing all the components we'd need to carry the project
Positive points:
- We managed to get all our components.
- We understood how we could make the Magic 8 Ball.
Negative points:
- We spent a lot of time figuring how to make the ESP32 work and how to make it available on Arduino IDE.