Close
0%
0%

TIG Pedal for non-pedal TIG welders

This is a a simple solution to equip every welder, which does not have a pedal input, with a pedal to control the current.

Public Chat
Similar projects worth following
I am interested in many things: electronics, 3d printing, machining and the newest addition: TIG welding. So I bought myself a TIG welder(IPOTOOLS ACDCTIG-200P). Quite a nice unit and after messing around a bit I quickly realized, that I had to change the amp settings on the machine quite often, because of course the material gets hotter over time and to keep the welding consistent you have to either weld quicker or reduce the amps. So I decided I need a pedal.
The problem: This welder doesn't support pedals out of the box. This project should change that!

I am interested in many things: electronics, 3d printing, machining and the newest addition: TIG welding. So I bought myself a TIG welder(IPOTOOLS ACDCTIG-200P). Quite a nice unit and after messing around a bit I quickly realized, that I had to change the amp settings on the machine quite often, because of course the material gets hotter over time and to keep the welding consistent you have to either weld quicker or reduce the amps. So I decided I need a pedal.

The problem: This welder doesn't support pedals out of the box. I knew that when I bought it, but I thought I better save some money and can get a better machine later on if I like TIG welding. But then I thought, it could be a nice, little project to try. 

My requirements:

  •  inexpensive
  •  use stuff I have at home
  •  no disassembling of the unit (warranty)
  • easy to install/remove

The solution: 

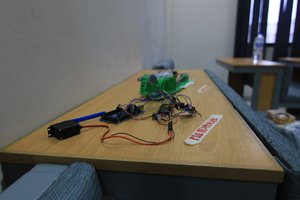
Using a cheap footpedal (e.g. volume pedals for guitars) with an potentiometer output. The pedal is connected to an analog input of an Arduino Nano. The signal is then transformed to a PWM signal that controls a servo connected to the Amp setting knob of the welder via a simple coupler. The servo is placed in a 3d printed mount and simply stuck onto the welder.

PXL_20231013_204822486.PORTRAIT.jpg

JPEG Image - 4.69 MB - 10/14/2023 at 07:00

Preview

PXL_20231013_204754029.mp4

MPEG-4 Video - 5.76 MB - 10/14/2023 at 07:00

Download

PXL_20231013_204103081.PORTRAIT.jpg

JPEG Image - 3.66 MB - 10/14/2023 at 07:00

Preview

PXL_20231013_204737650.PORTRAIT.jpg

JPEG Image - 4.12 MB - 10/14/2023 at 07:00

Preview

PXL_20231012_210821928.mp4

first prototype

MPEG-4 Video - 5.02 MB - 10/13/2023 at 18:43

Download

  • 1 × Arduino Nano
  • 1 × Volume pedal about 15 euros on Amazon

  • Good news...

    cmaierhofer10/30/2023 at 07:26 0 comments

    I tried running the Arduino on a 2 cell lipo battery and this seems to have fixed the problem with stopping the code execution when the torch is ignited in HF mode. So I think I will include this battery pack into my design and therefore also a micro or usb-c plug and charging module.

  • First problem

    cmaierhofer10/25/2023 at 21:57 0 comments

    After some more welding I saw that the Arduino basically stops executing it's program sometimes and starts again after a reset. I think the HF ignition is responsible for the problem. The first thing I want to try is to power the Arduino from a battery. Atm it is powered from a USB charger. If this doesn't help, I will need to invest some time in thinking about better shielding of cables and housing. Will keep you updated.

  • 3d printed clamp

    cmaierhofer10/14/2023 at 07:05 0 comments

    I 3d printed the clamp and it fits quite well. I think I will add a poti to limit the maximum current next to get the full range from 5 to max Amp of the pedal. Then I need to think about a housing for all of it. Perhaps I will put it inside the panel or onto the clamp itself or even build a small separate case to not put to much weight onto the knob. 

  • First working prototype

    cmaierhofer10/13/2023 at 18:52 0 comments

    A first working prototype with a simple mount has been built and tested. It seems the components work together and the mechanic also works. ATM not the full range of 200 amps is available; I saw that there are servos that can handle about 270 degrees; that should work. 

View all 4 project logs

Enjoy this project?

Share

Discussions

cmaierhofer wrote 10/16/2023 at 21:44 point

Hey Dan, thx for your comment. There is no current control on the device. The button for the torch is only used for starting/stopping the arc and the connector is only 2-pin (open/closed) . Later, when the warranty is gone, I will perhaps add a dedicated connector for the pedal to the welder, but for now I am pretty happy with this hack.

  Are you sure? yes | no

Dan Maloney wrote 10/16/2023 at 17:39 point

Strange that such a nice welder doesn't have a foot pedal. Does it have any current control? Almost looks like there's a finger control on the torch.

Anyway, good workaround!

  Are you sure? yes | no

Similar Projects

Does this project spark your interest?

Become a member to follow this project and never miss any updates