Andrey Kalmatskiy
-
Finale
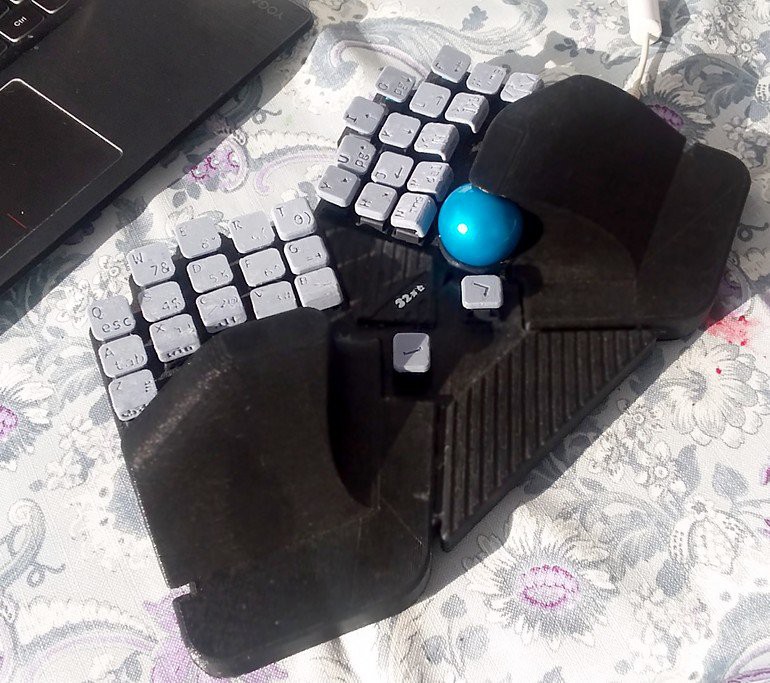
12/20/2017 at 16:24 • 0 commentsI used this keyboard for almost a year. It works good, but its exploitation revealed a number of fields that need improvement.
What I like about 32xe keyboard:- Layout.
- Solid single-part body.
- Built-in pointing device.
- Mechanical switches.
- Noisy Blue Cherry-MX switches.
- Long key travel (yes, I'm used to laptop keyboards). I'll try using ML switches.
- Keystrokes are detected (sent to computer) on release not on press, this is unusual and not comfortable. 32xe keys act both as shift-keys and as ordinary keys. I'll try moving shift keys to a separate row.
- Wireless (BT) interface needed.
- Replace trackball (that works good) with touch-pad. This makes mouse mode detection more intuitive.
- Split the uni-body design into separate units (left-right-thumbs-tracker) attached to the rigid chassis. This helps to experiment with different designs (ergonomic, compact, back-typer, with built-in laptop etc).
The accumulated improvements demands the complete redesign.
So it'l be the completely different new keyboard and the new project. -
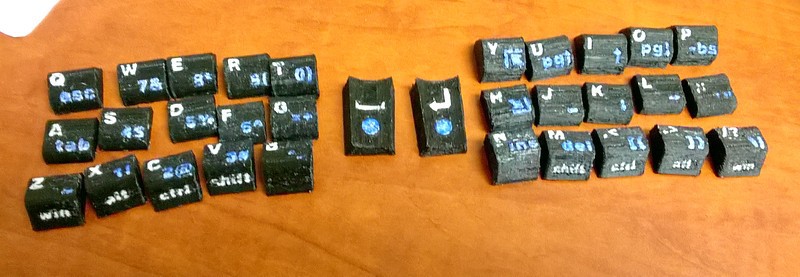
Flat key caps
12/20/2017 at 15:27 • 0 commentsKey caps made flat
![]()
New keyboard look
![]()
I tested flat key caps for two months. For me it works pretty good. So it is the final look.
New STLs are uploaded to github.
-
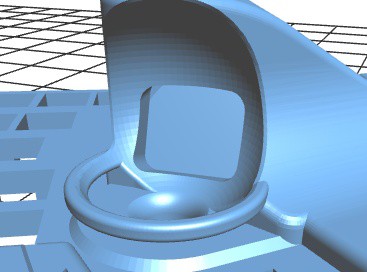
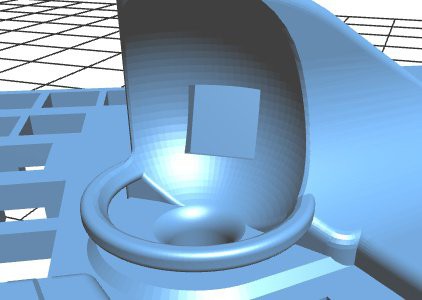
Tray and Sensor Window
03/29/2017 at 21:57 • 0 commentsIt turns out that ADNS-9800 sensor has much wider view angle than I expected, so it didn't work well till I expanded the window from this:
![]() to this size
to this size![]()
Modified STLs were uploaded to github.
And finally I attached the bottom tray, so the keyboard body is considered finished.
![]()
Tray is just a flat plate glued to the main body.
Also the new STL can be found here: https://github.com/karol11/32xe.
-
3D-Printed parts postprocessing
03/20/2017 at 18:47 • 0 commentsFirst I tried to refine PLA printed parts:
- printed on slower speed
- sanded
- painted with XTC-3D coating.
![]()
And the same keycap using ABS and acetone bath
I tried many techniques, it turned out that the best one is the simplest one:
- Take a food box.
- Put the paper towel slightly wetened with acetone to the bottom of the box.
- Put a piece of aluminium foil atop of towel in its center.
- Put ABS parts on the foil.
- Close the box with hermetically fit cover.
- Wait 15 minutes.
- Profit.
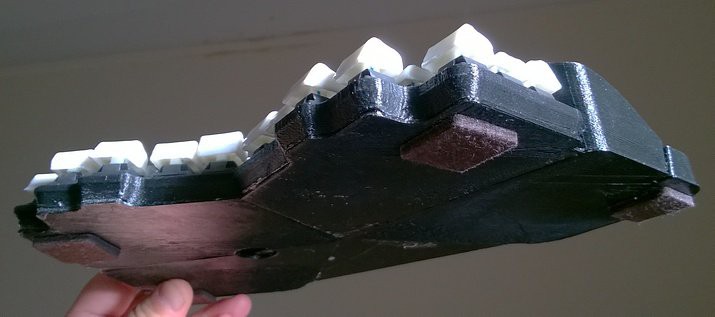
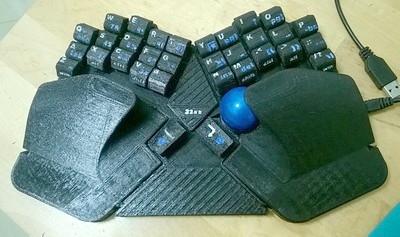
Despite some curling, I chose ABS parts for their slick ivory look and feel:
![]()
So now my keyboard looks like this:
![]()
-
How Keyboard Works
02/13/2017 at 17:25 • 0 commentsKeyboard part is almost ready, though mouse one still needs some work.
Main Layout
Q W E R T Y U I O P A S D F G H J K L ; Z X C V B Space Enter N M , . / Numeric Layout
Esc 7& 8* 9( 0) Print Screen MLB MRB MMB ? Tab 4$ 5% 6^ =+ Menu MLB MRB MMB ? `~ 1! 2@ 3# -_ (hold) Mouse lock ? ? ? ? ? Arrows
Num Lock F7 F8 F9 F10 Home Pg Up Up Pg Dn BSpace Caps Lock F4 F5 F6 F11 End Left Down Right '" Scroll lock F1 F2 F3 F12 Pause (hold) Ins Del [{ ]} \| Shift-keys
Gui Alt Ctrl Shift Shift Ctrl Alt Gui -
Firmware
02/06/2017 at 16:05 • 0 commentsfirmware: https://github.com/karol11/32xe
Done:
- key matrix scan
- USB HID connectivity
- trackball sensor reports x-y-deltas
- logic for shift-control-alt-win modifiers
- thumbs shift to numeric an navigation mode.
Todo:
- mouse mode
- wheel
- repeat
- num-lock mode
- game mode
-
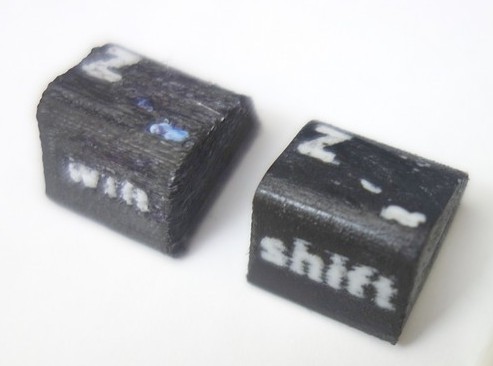
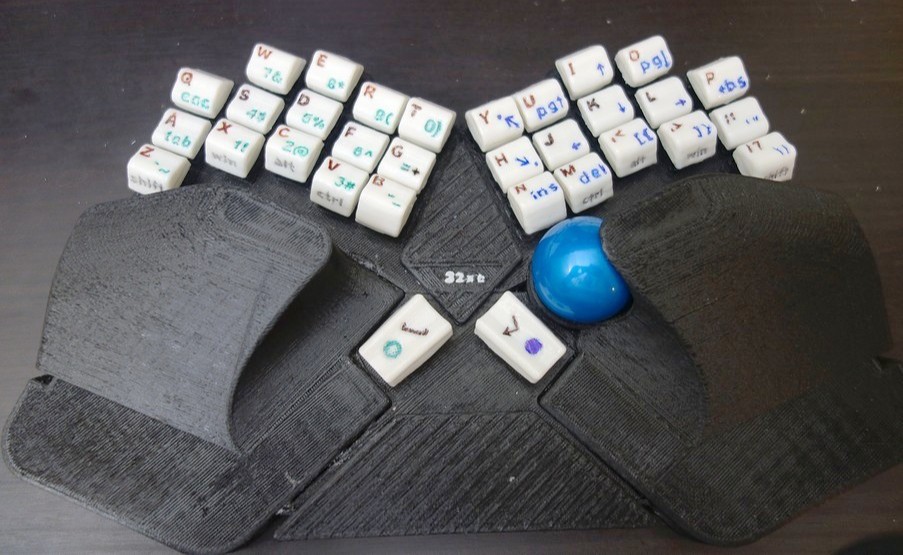
Key caps
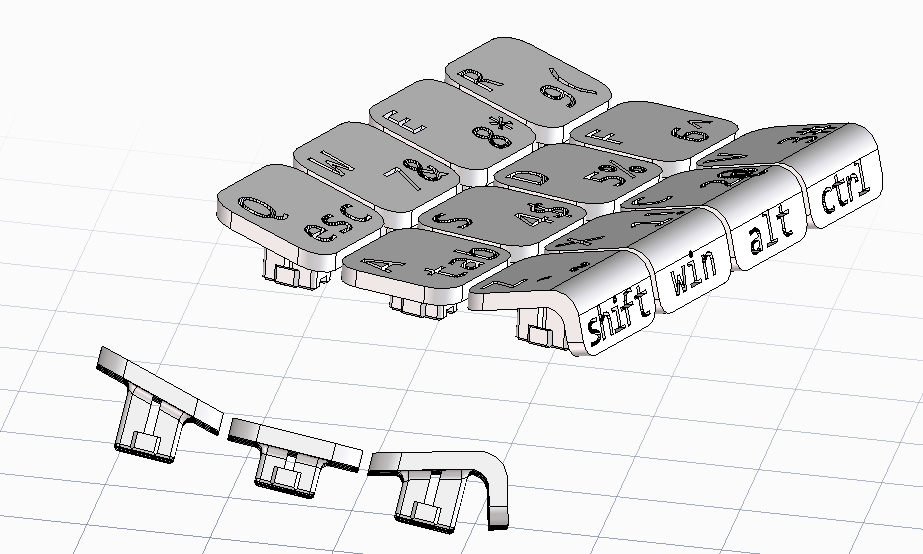
01/30/2017 at 17:42 • 2 commentsPrinted key caps (using keycaps.pk2):
![]()
If a 3D printer does not support multiple materials, the final model can be painted by permanent markers. I found that the Sharpie felt-tip pens are durable and well-adhesive to PLA.
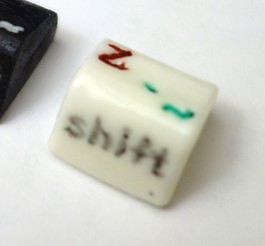
The model texture is formed by parallel lines (at side surfaces) or cross-hatched pattern on top and bottom ones, and the ink flows in those micro cracks, thus spoiling the painted regions. So I performed a trick:
- Made a model as if it is two-material.
- Setup a slicer for two headed printer having zero offsets.
- Removed all Tn commands in resulting G-Code text file.
Resulting model texture is having etched contours of inter-color borders, and the ink of different color don't intermix.
Keys "TGBYHN" are raised by 2 millimeters:
Thumb caps are too long and unsteady, so I'm going to redesign them.![]()
Here is the assembled keyboard from top (this time having full wiring):
Now I've started coding the firmware. This code looks useable for mouse sensor Dwergmuis![]()
-
Wires
01/23/2017 at 16:22 • 0 commentsKeyboard body has been printed as six pieces. I find out that the PLA plastic can be firmly glued by SCIGRIP 16 Acrylic Cement, maybe this helps someone.
Cherry switches fit well. Unfortunately I broke one during installation. Guess which one.
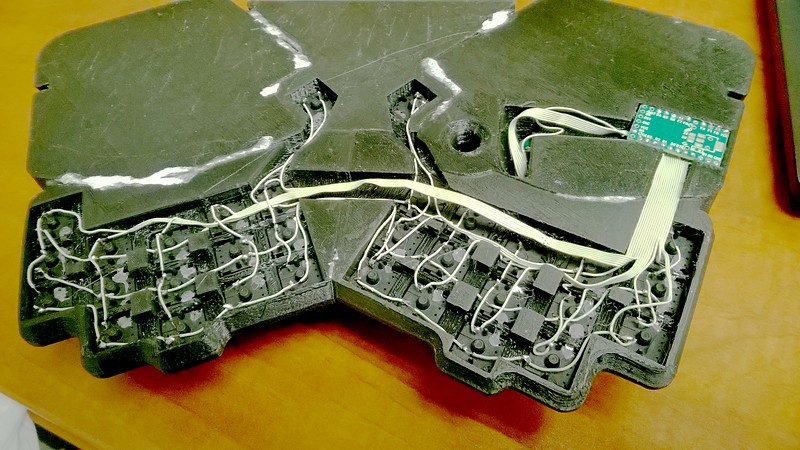
Mouse sensor fits well in its hole.![]()
Loose wire soldering looks worse than it is:
It's time to mount caps and code the firmware.![]()
-
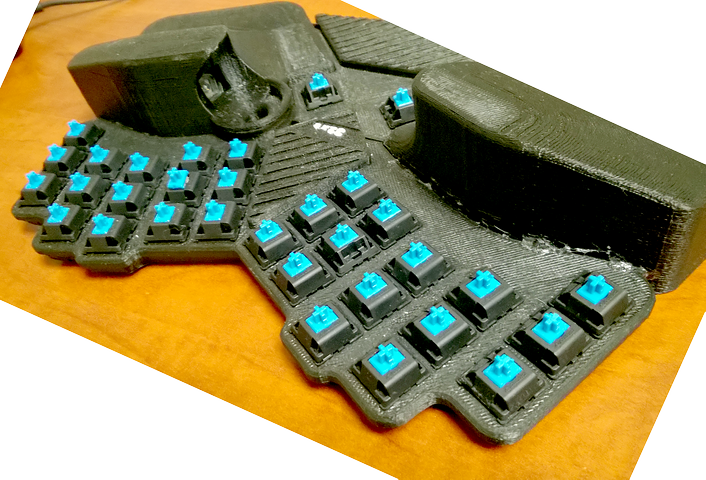
Electronic parts and body
01/16/2017 at 16:24 • 0 commentsSince this is just a early prototype, I decided to work without any PCB.
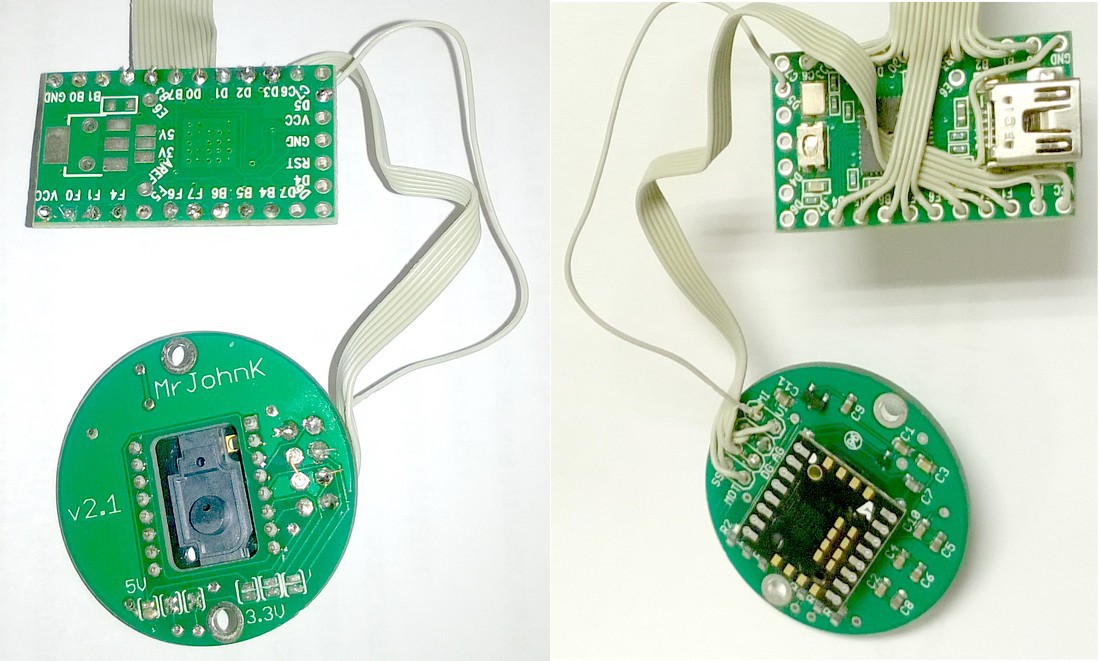
I decided to employ ADNS-9800 as a mouse sensor and Teensy 2.0 as the main controller board.
Wiring is done with some old IDE cable (yeah soldering is not my talent ;-).![]()
ADNS-9800 switched to 5 V.
Cherry MX keys (I've chosen Blue ones for its soft clicks) are mounted in the main body.
![]() Keys are wired in 3 rows by 12 keys in each row. This occupies more pins but reduces the ghosting problem: a finger cannot press multiple keys of one grid column.
Keys are wired in 3 rows by 12 keys in each row. This occupies more pins but reduces the ghosting problem: a finger cannot press multiple keys of one grid column.Thumb keys are wired to the middle row on their own columns.
 to this size