jefmer
-
Fixing the Real-time Clock
02/14/2024 at 10:25 • 0 commentsOut of the box, a Raspberry Pi 4 does not have a real-time clock. When it is booted up, it initially displays the time it was shutdown at - then when it connects to the network, it updates the time via Network Time Protocol (NTP).
I fitted a DS3231 real-time clock module to the Portable Pi as I do use it when there is no network connection and it is confusing if files end up with the wrong date. The DS3231 has internal temperature compensation and has by far the lowest drift of all the RTC modules available for the Raspberry Pi. The module plugs into the GPIO pins and you can just see it in the photo of the back of the display assembly. Because, the Pi usually connects to the network with little delay, I only noticed recently that the clock had stopped working and that the Pi was starting up with the same time it had shutdown at.
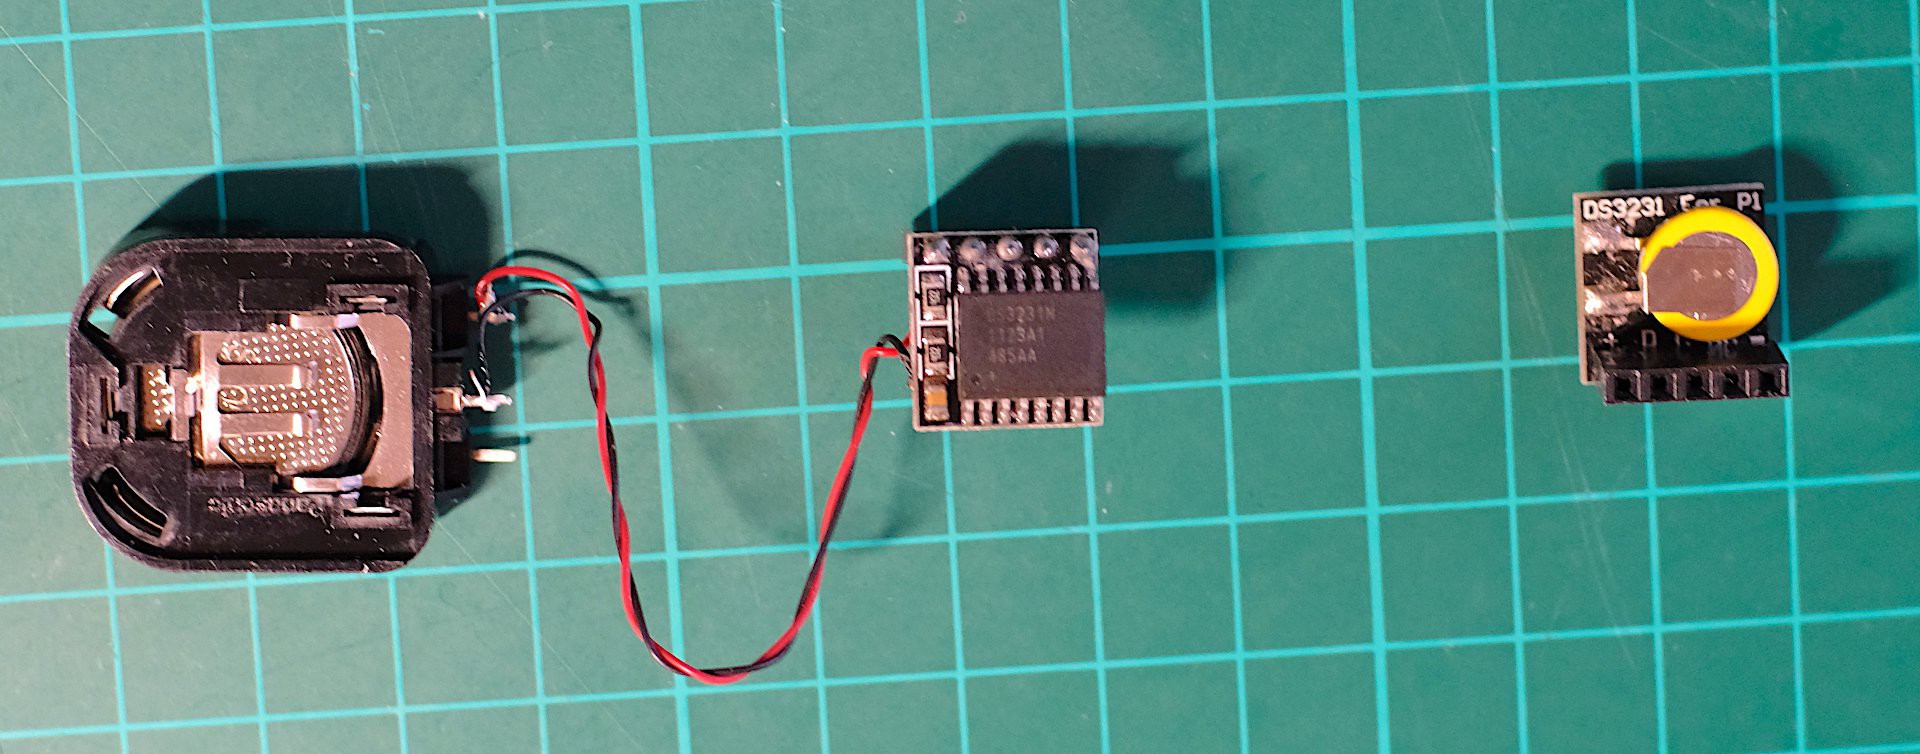
My first thought was that I had done something wrong in the setup - I used these excellent instructions* - https://pimylifeup.com/raspberry-pi-rtc/. However, everything in the software set up checked out, so I removed the clock module as seen in the right of the photo below:

The module has a small long-life battery fitted under the chip - it has some yellow plastic around the rim. This proved to be completely flat - I bought a set of three of these modules some time ago and I think in addition the modules were manufactured some time before that. As can be seen on the left of the photo, I cut out the failed battery and connected a standard CR2032 Lithium battery which should last for quite a long time as, on standby, the DS3231 draws only a few micro-amps.
* ( There are a lot of out of date instructions on the Web - of course the RPi5 has a built in RTC.)
-
Installing Ubuntu
02/10/2024 at 12:39 • 0 commentsTo make it easy to experiment with different OS images, I fitted a 15cm SDCard extender* from Pimoroni so that I can change SD cards without doing any dismantling. I used a bit of double sided tape to stick the card holder on to the edge of the case. You can just see the card protruding slightly to the left of the screen in the photo below. Out of the box, an RPi4 tries to boot from the SD card and if that fails it looks for a USB device. So, if an SD card is fitted, the Portable Pi boots from that an if none is present in boots from the Integral SSD. This does slow booing up a little but it is really convenient for experimenting.
* Some have reported problems with using this on an RPi4 but it worked fine for me - see Pimoroni website.
As you can see from the photo, I installed Ubuntu with no problems on the Portable Pi from the image available from the Raspberry Pi Imager utility. Ubuntu selects a 1024x576 (15:9) screen resolution. I only had to adjust the icon size and Terminal text font size to make it quite useable.
Overall, it is a bit slower to load applications than the native OS and I had the impression that it was a bit slower at rendering webpages on Chromium, so for the moment, I am sticking with Bullseye.
-
Getting the HDMI speakers to work on Bookworm
02/07/2024 at 17:51 • 0 commentsI mentioned previously that I had not managed to read a valid EDID block from the WIMAXIT monitor - in fact I thought it did not have one. However, running Bookworm, I managed to read it using the raspberry pi documentation guidance:
edid-decode /sys/class/drm/card1-HDMI-A-1/edidFrom that, I saw that the EDID had an Audio Data Block describing the HDMI audio capabilities. This is of course missing from the EDID I generated.
So, I edited this new edid with AW EDID Editor v3.0.20 which is available free from ANALOGWAY to put in the 1024x600 timing information which seems to be incorrect in the version of the EDID from the display. This edited EDID when installed, as I outlined in the previous log, does let the display run with the correct resolution. (The editor is only available for Windows or Mac)
- The GOOD NEWS: The speakers now work under Bookworm - yeh!
- The BAD NEWS: When I look closely at the display, text is not as clear as it is under Bullseye, so I am sticking with Bullseye until the display manufacturers come up with something or I can think of how to improve it - by adjusting the timings perhaps.
In an case, I have replaced the EDID file I previously uploaded with this new one.
-
Bookworm and 1024x600 WIMAXIT screen
02/04/2024 at 10:55 • 0 commentsThe new version of the Raspberry Pi OS (Bookworm) as I mentioned above now uses Wayland rather than X. Consequently the config.txt hdmi commands recommended by WIMAXIT to configure their display for a Raspberry Pi no longer work. The display still works but the resolutions it offers 1920x1080 etc results in blurred text and images.
My first attempt to remedy this was to convert the hdmi-timings to a custom modeline in the the ~/.config/wayfire.ini file as outlined in raspberry pi configuration documentation:
[output:HDMI-A-1]
mode = custom_mod_1
custom_mode_1 = 51.2 1024 1224 1242 1442 600 650 653 703 +hsync +vsync
position = 0,0
transform = normal
The problem with this is as follows. When Pi boots up, it starts with the display in 1920x1080 which is visible but blurred on the WIMAXIT. I can then select 1024x600 resolution from screen preferences and the display is fine - so the custom mode line works. However, the entry above in wayfire.ini gets overwritten with:
[output:HDMI-A-1]
mode = 1024x600@50507
position = 0,0
transform = normal
and then the next time, I boot, the 1024x600 resolution is not available.
The real issue is that the WIMAXIT display does not return an EDID - Extended Display Identification Data - description and so the RPOS assumes it is a standard monitor. To remedy this I used edid-generator to produce a custom edid file 1024x600.bin which must be stored in /lib/firmware/edid. Finally, cmdline.txt is updated to register the edid file:
drm.edid_firmware=HDMI-A-1:edid/1024x600.bin video=HDMI-A-1:1280x800@60D console=serial0,115200 console=tty1 root=PARTUUID=4cad4df9-02 rootfstype=ext4 fsck.repair=yes rootwait quiet splash plymouth.ignore-serial-consoles cfg80211.ieee80211_regdom=GBThe video clause is to make the splash screen more visible even though it is the wrong resolution. Since 1024x600 is a non-standard aspect ratio, it has no effect if included in a video declaration.
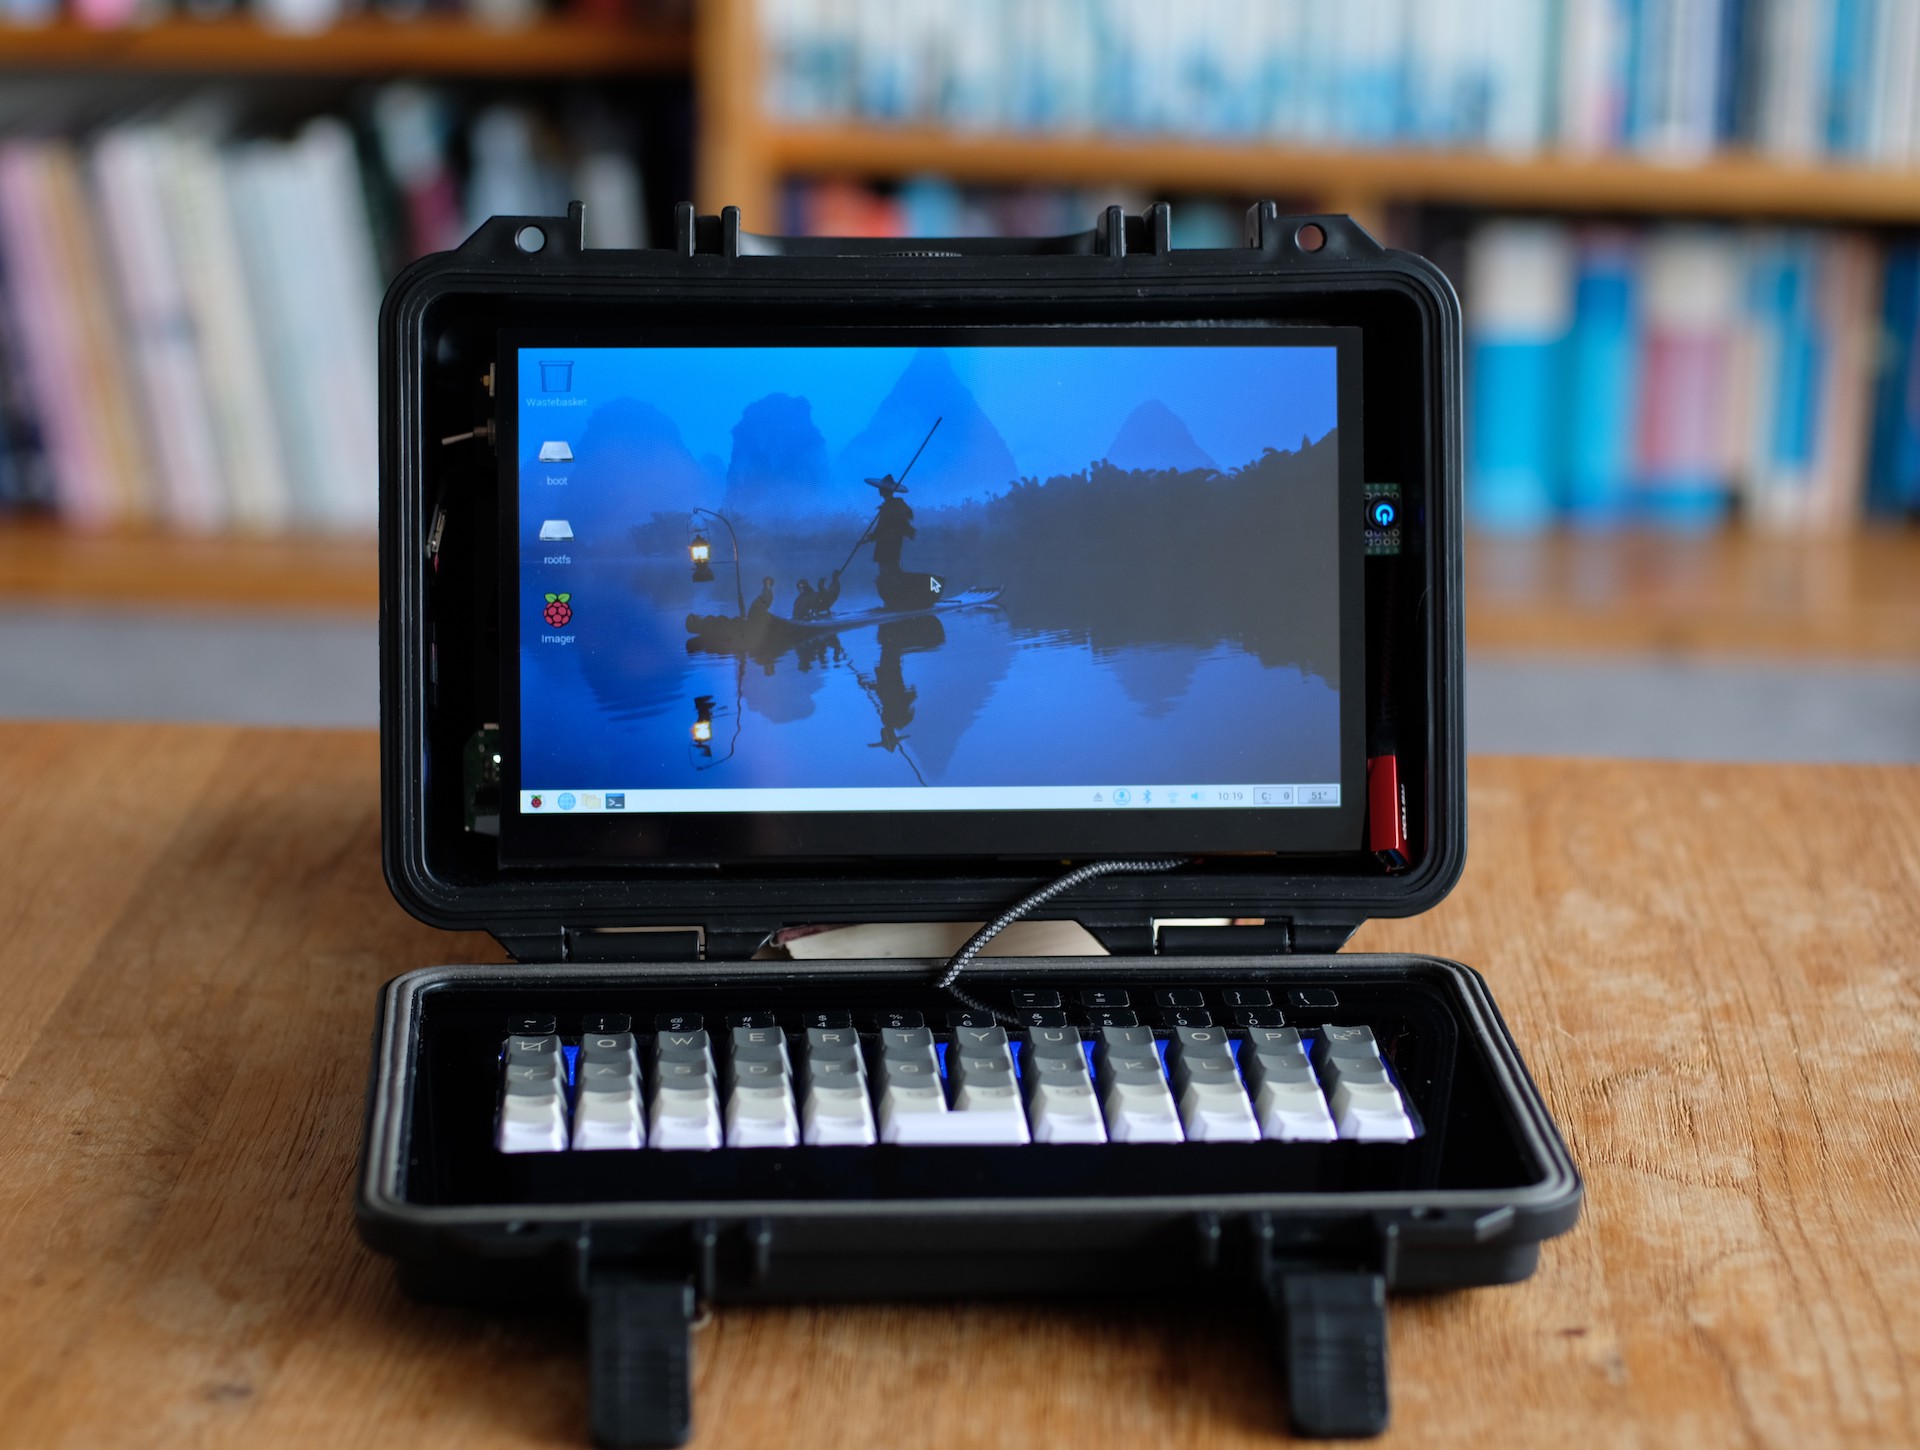
The end result shown below seems to work correctly as shown below with the Portable Pi running 64-bit Bookworm.
I have uploaded the edid file to the project file section. However, although it works, it may not be completely correct as it results in a few error lines in the boot log.
Next problem is to get the HDMI speakers to work....
Portable Pi
An easy to build rugged-ish, portable-ish raspberry pi with a 10.1 ins screen and a 40% mechanical keyboard.