Close
0%
0%

Desktop Thermometer

A simple desktop thermometer using a TMP36/TMP37, small microcontroller and LED display

Similar projects worth following
This is a simple thermometer that acquires the ambient air temperature and shows the current temperature on 3 7-segment LED displays.

Designed to be low cost (under USD20) and be powered by a computer USB port, USB wall wart or power bank.

At the heart is a Microchip PIC16 microcontroller that reads the voltage produced by the sense pin on the TMP36/TMP37 sensor and shifts the converted value out to the display using 74HC595 shift registers.

There are two versions of this thermometer that vary by power input jack only. One is the standard USB-2 with the through hole socket that is easy to hand solder. The second variant is fitted with a USB-C input jack. This is a little more difficult to solder however the connector chosen has fewer pins that that of a full blown data USB connector so it will be easier to solder with a small soldering iron and a steady hand.


Additionally there is a debugger add on board. This has been created to overcome the lack of programming pins on the thermometer. It allows for both programming and debugging of the software by plugging into the socket that holds the PIC chip. This chip is then plugged directly into the debugger board. I am sure I will get the question "Why didn't you put in programming pins on the board?" and the answer is that we only program once and if that can be done prior to assembly then we don't need the headers and this saves a little cost when making a few of these and it makes the board a little less cluttered.

PIC16F15214 Debugger.pdf

Adobe Portable Document Format - 56.77 kB - 02/20/2024 at 07:18

Preview

Desktop Thermometer USB-C Version.pdf

Adobe Portable Document Format - 198.50 kB - 02/20/2024 at 07:17

Preview

Desktop Thermometer USB-2.pdf

Adobe Portable Document Format - 188.39 kB - 02/20/2024 at 07:17

Preview

  • Updated schematic….hopefully the final ones!

    TheBrokenEngineer02/20/2024 at 07:16 0 comments

    OK, so I might be tempting fate here or perhaps just outright jinxing myself, but I am still waiting for boards because I didn’t realise that everyone was on holidays and so I’m getting a little bored.

    I have just PDF’ed the schematics for what I “think” is the final version of the schematic. I’ve updated the files section of the project, and the updated KiCad source files are already up on GitHub.

    The astute observer will notice that there is a single TMP3x IC when the project description states that we can use either a TMP36 _or_ TMP37. The reason I need only one schematic is because the pinout and power requirements for the TMP36 and TMP37 are identical. The same cannot be said for the configuration of the different USB receptacles , these _do_ need different schematics and boards.

  • Programmer/Debugging Board

    TheBrokenEngineer02/13/2024 at 07:32 0 comments

    While I am waiting for the boards to arrive, the time could be spent explaining the idea behind a separate programmer/debug board. 

    As mentioned in a previous post, there is no way of programming the microcontroller while it is installed on the thermometer board. The reason for this choice is to make the layout simple and the fact that the programming header would not be used all that frequently. The downside is that there is no way of programming the microcontroller rendering the device useless. 

    This is where the separate programmer/debugger board comes in. Depending on the components fitted it can be a programmer, programmer/debugger, or both. 

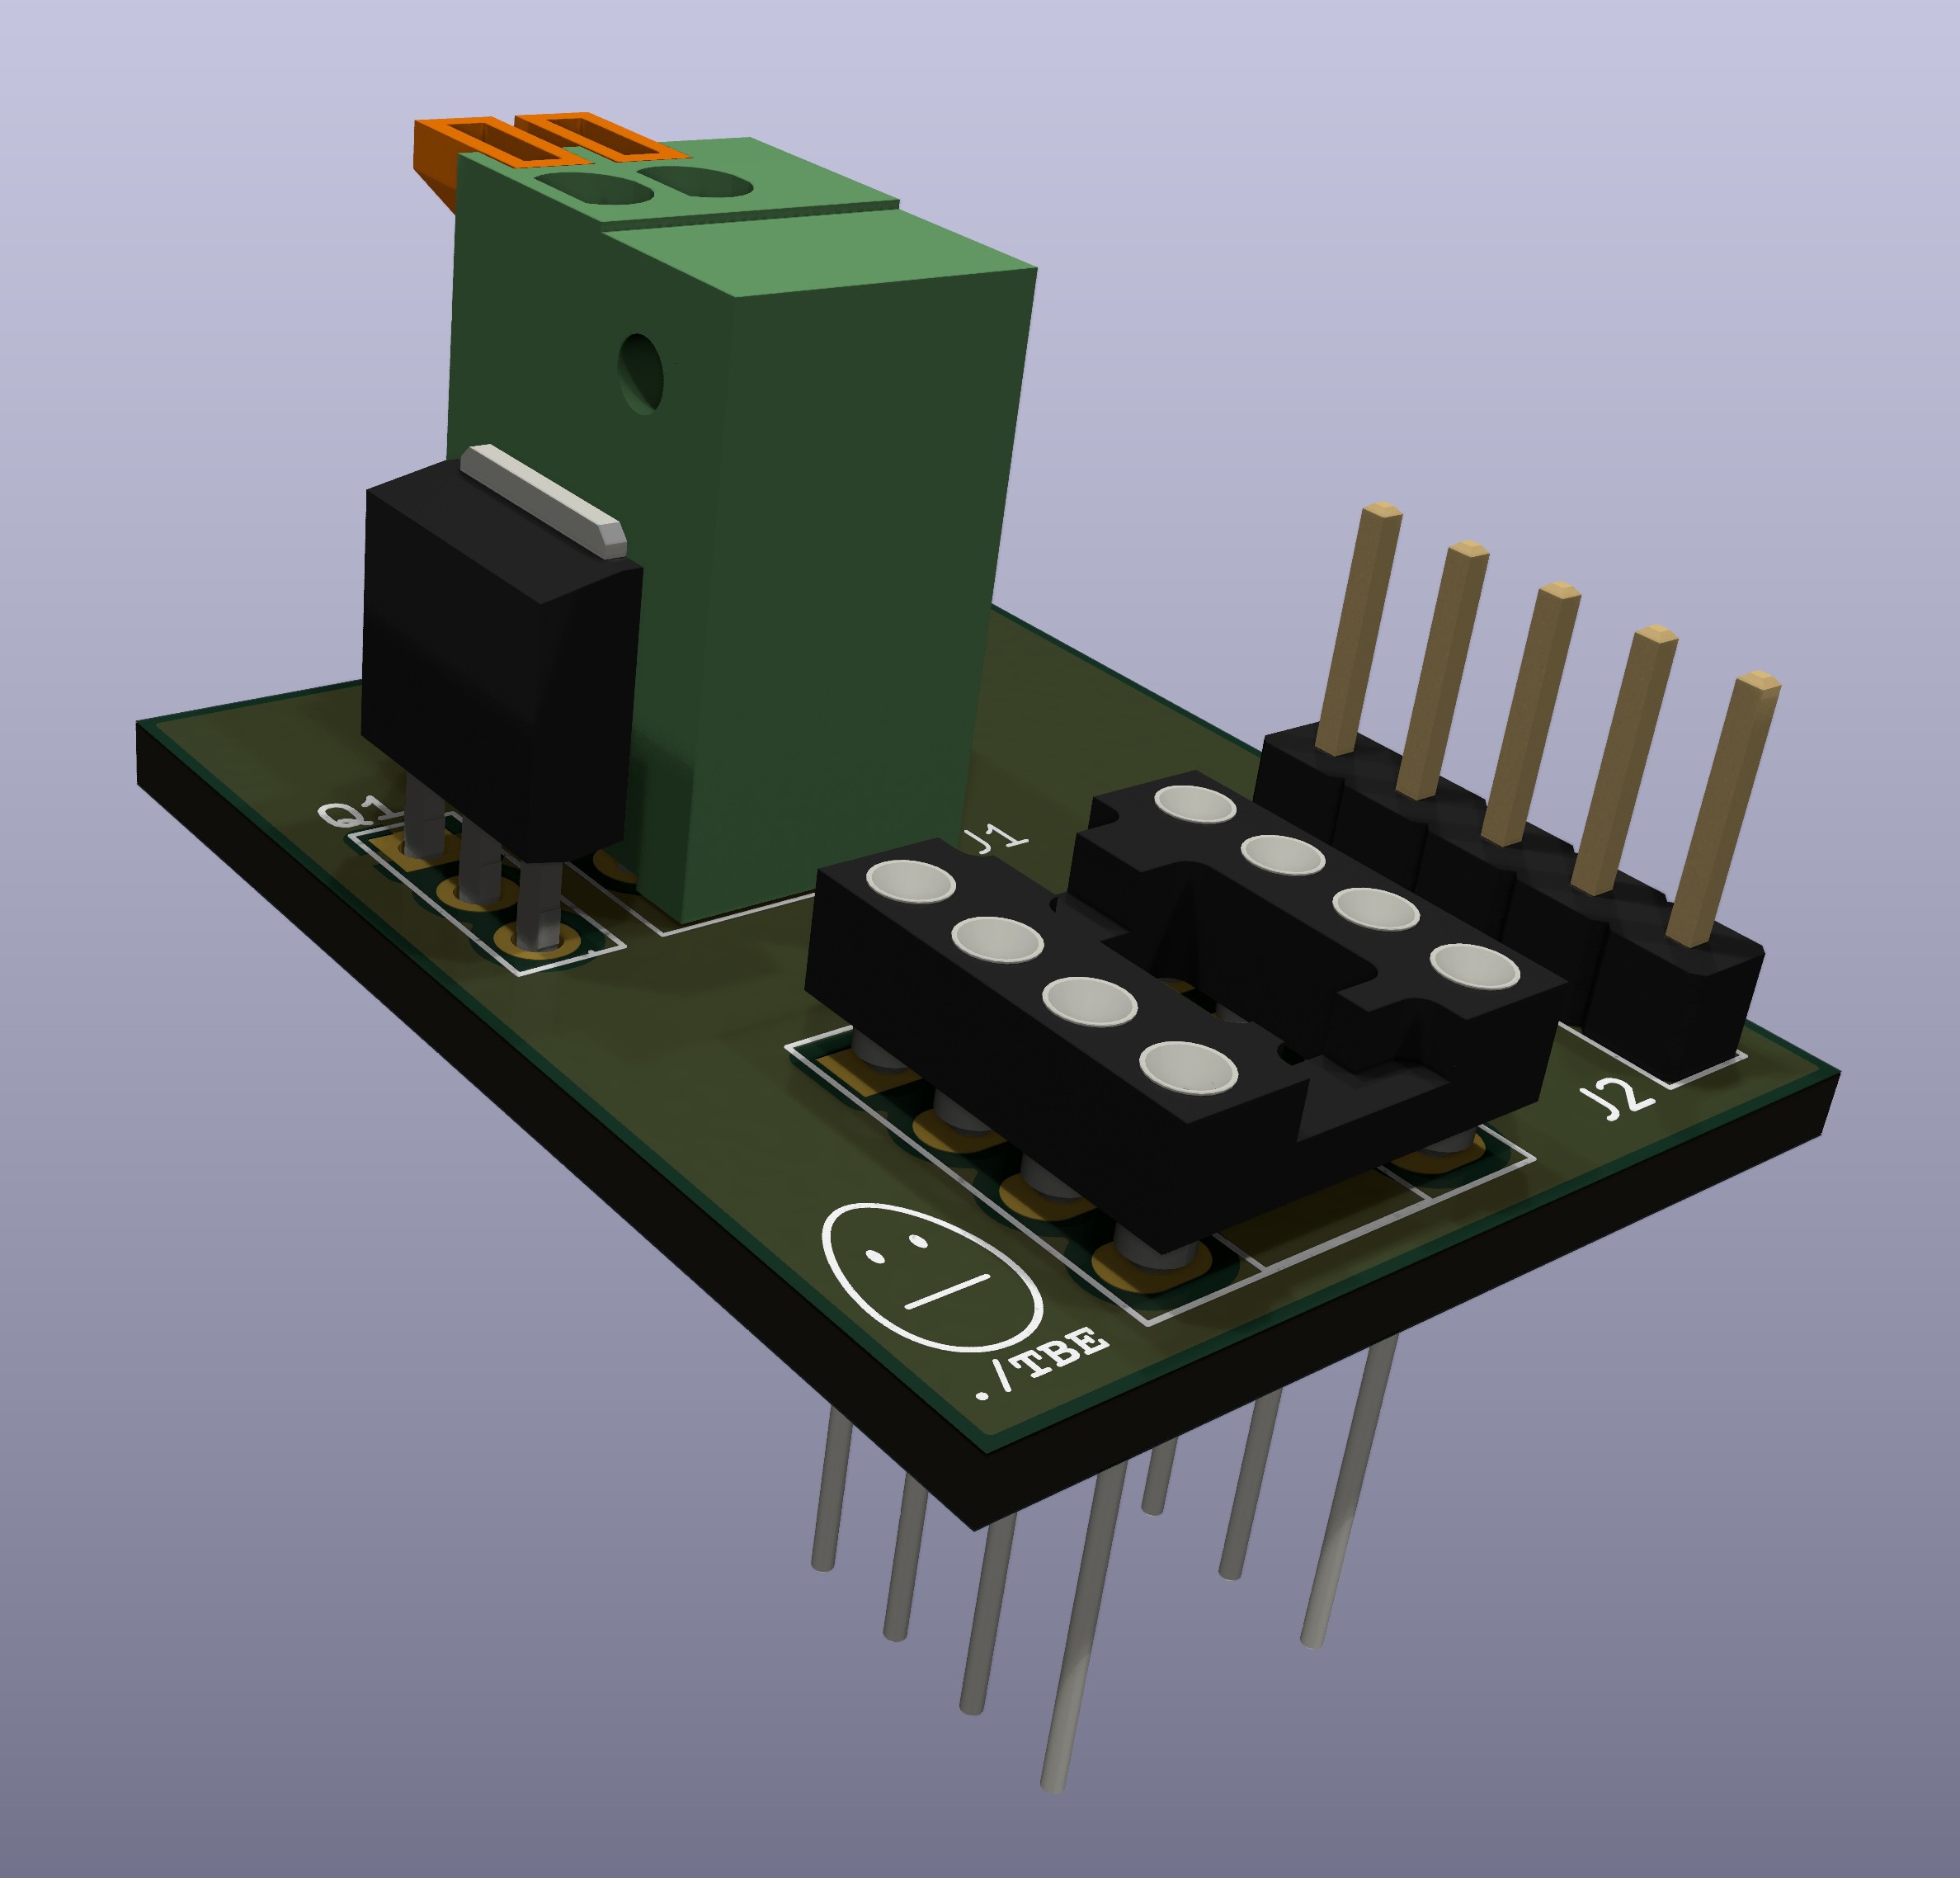
    Starting with the programmer, the board is fitted with a 5-pin header, standard DIP-8 socket and two wire spring terminals for power. The microcontroller to be programmed is inserted into the socket, 5-volt DC power is supplied via the spring terminal connectors and the PICkit-4 programmer plugged into the header. The chip is then programmed using the MPLAB X IDE. An additional feature is the reverse voltage protection for the power input terminals which is implemented using a p-channel MOSFET. In this configuration ALL components in the schematic must be fitted.  

    The second configuration is as an in-circuit programmer/debugger. This required the fitting of a wire wrap DIP 8 socket and 5-pin header. All other components can be omitted as the power supply for the microcontroller is provided by the desktop thermometer. The board is then plugged directly into the socket on the thermometer board and the thermometer is powered up. Once the PICkit-4 is attached debugging and programming can be performed using the IDE.

      The final configuration is to populate the board with all components like that of the programmer configuration replacing the standard DIP socket with the wire wrap socket. This allows for the power to be connected to the board and used as just a programmer. Additionally, the board can be plugged into the target thermometer device with the programmer board connected to a 5-volt supply. The advantage is the programmer powers the desktop thermometer removing the need to plug the thermometer into a USB power supply.

    This all might be a little hard to visualize so the non-AI rendered (KiCad viewer to the rescue on this one) image below might help.

  • Off to manufacture!

    TheBrokenEngineer02/09/2024 at 02:24 0 comments

    Both variants of the hardware have now been completed and tested on a breadboard. The code which drives all of this stuff is also pretty much ready to go.

    So it is all off to JLCPCB to get it manufactured. The down side is that it is the start of Chinese New Year which means it may take a little longer to get the boards back.

    One other small thing the astute reader may have noticed is that there is no way of programming the microcontroller as I have omitted any sort of programming header on the board. This is actually a separate board that allows for programming the microcontroller and additionally plugs into the DIP-8 microcontroller socket to allow for both programming and debugging.

  • So prototyping is a GOOD thing!

    TheBrokenEngineer02/06/2024 at 10:52 0 comments

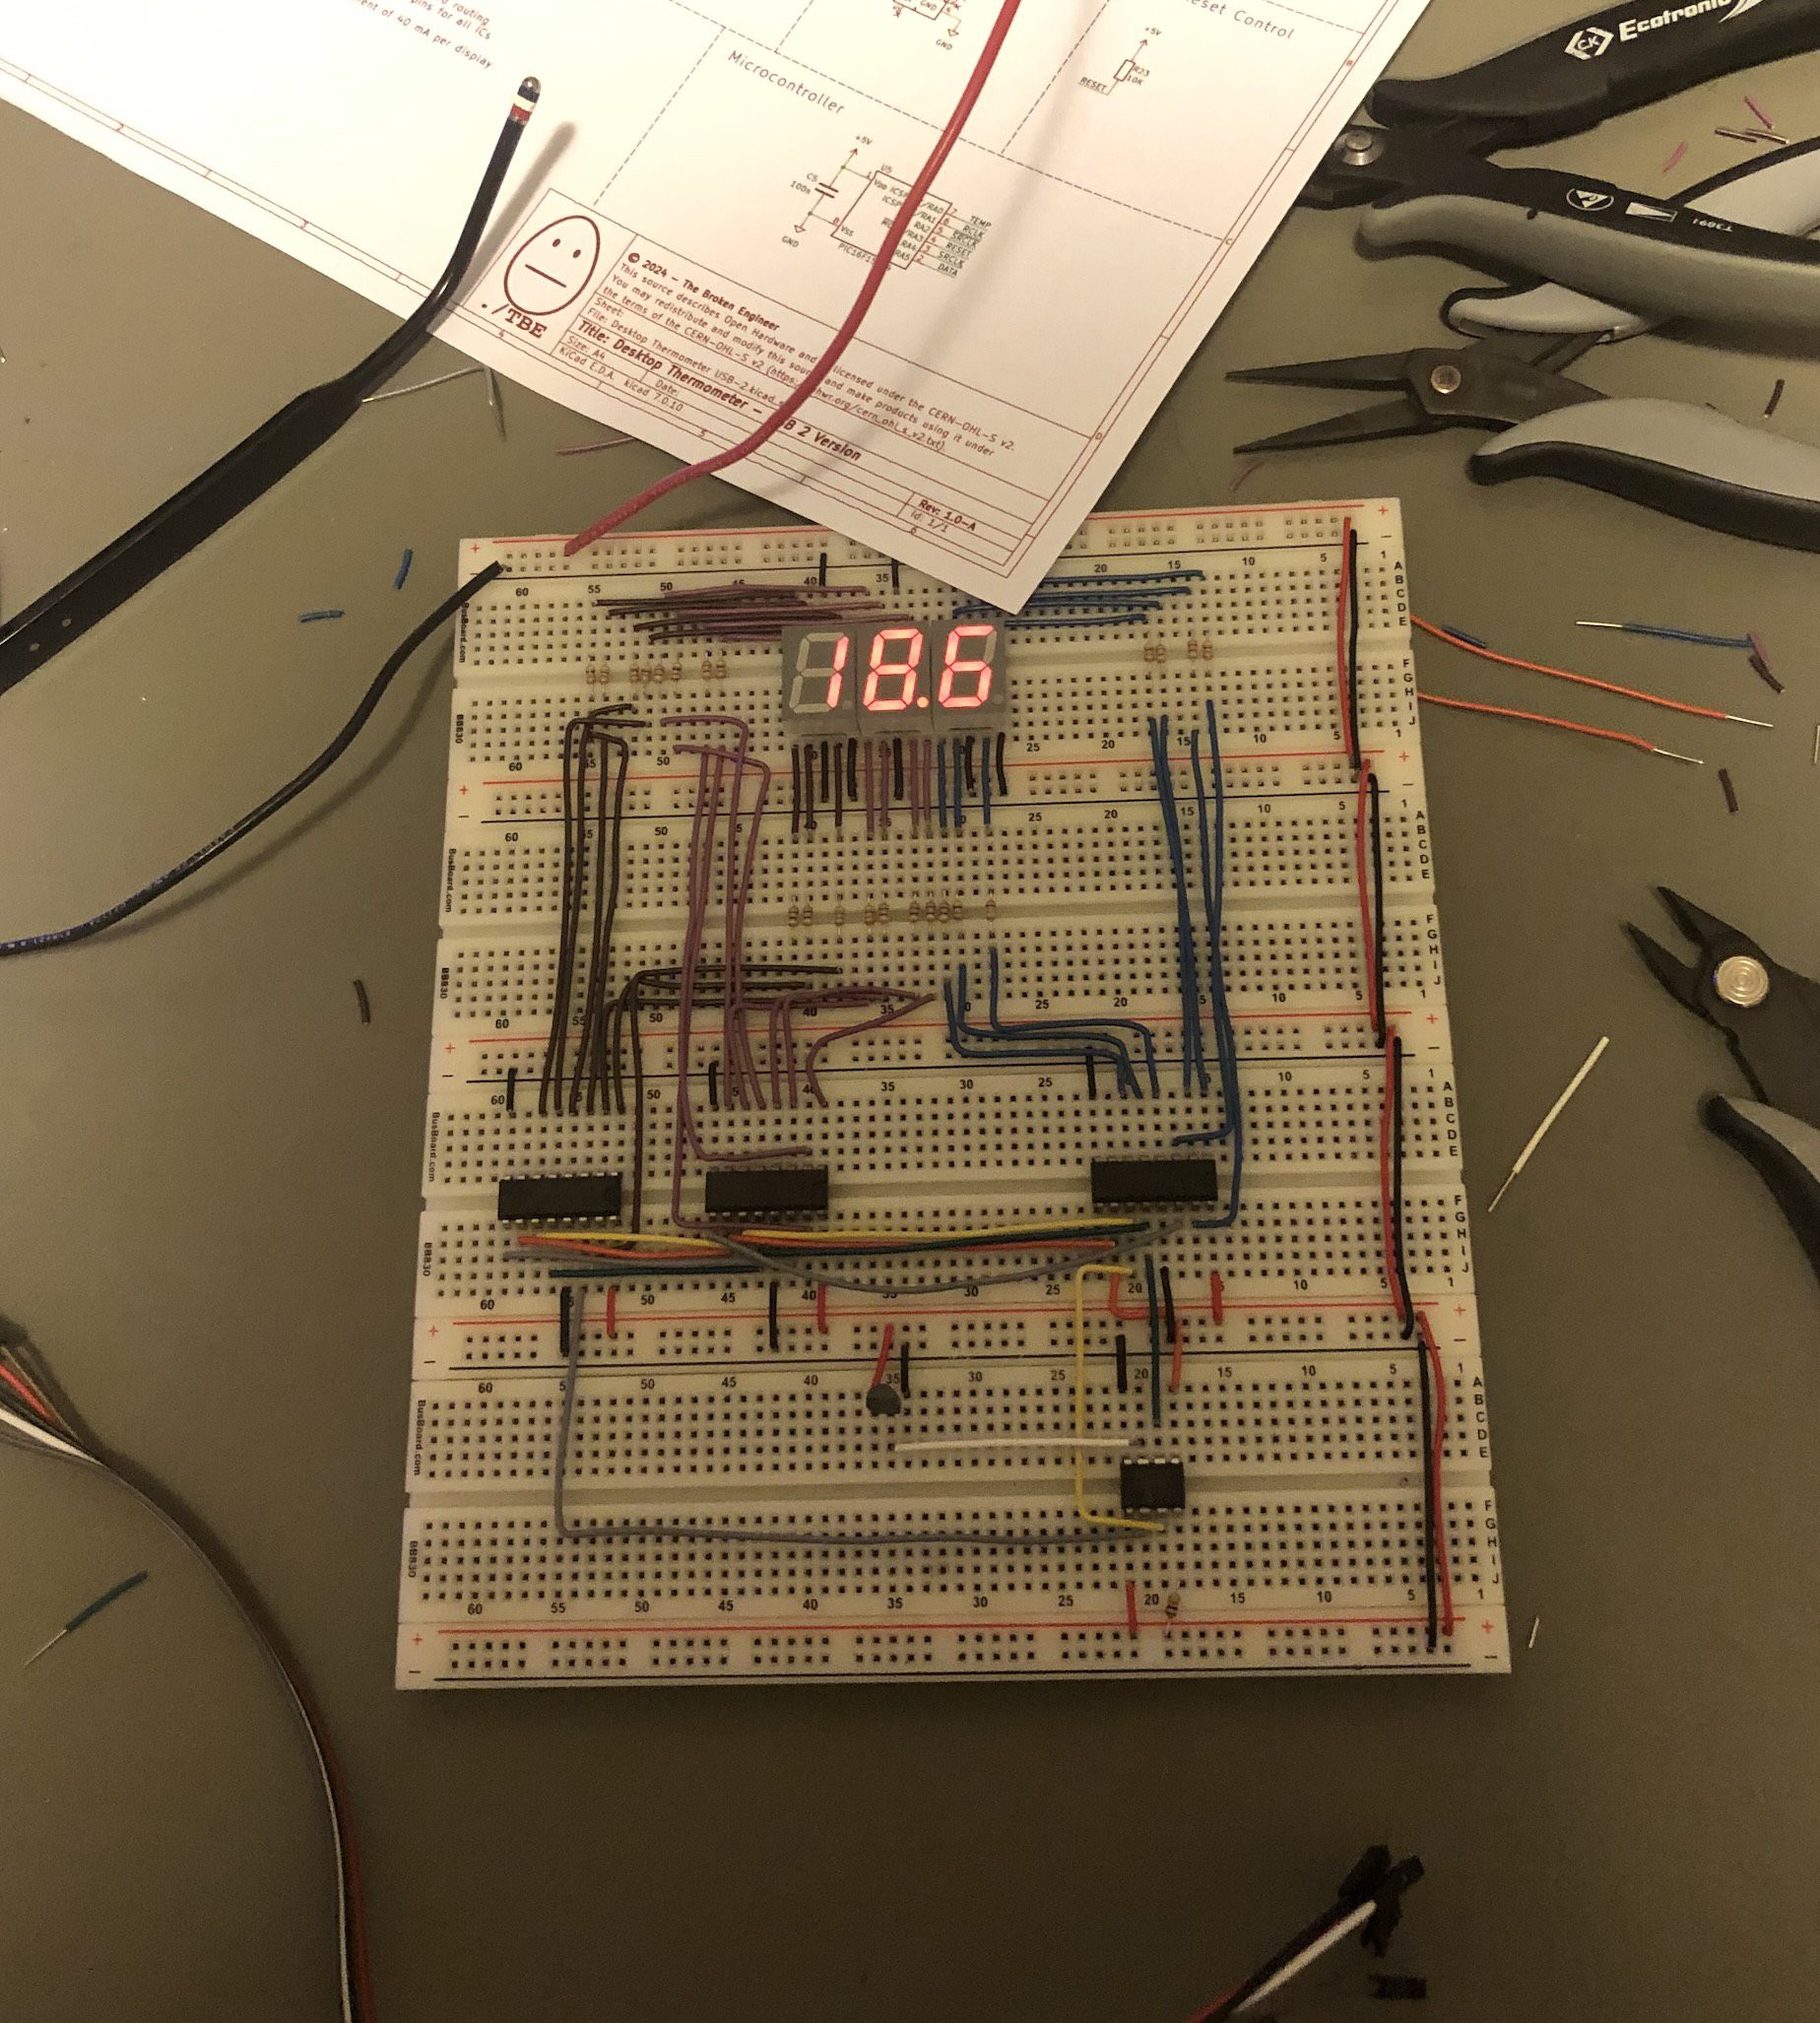
    In my previous post I rambled on about having to plug little wires into a breadboard. It turns out that this is a good thing. I did have a mistake in my design, not with the schematic but the footprint for one of the components. If you have been reading along, I will give you a photo of the correct/working version below, see if you can spot the difference.

    Take a look at the small transistor looking thing at the bottom of the breadboard, notice it now? This device is the TMP3x temperature sensor. The component is still in the same orientation but the power and ground are swapped. 

    I wired this as per the schematic/PCB pin layout, the problem was that the datasheet has the pin orientation viewed from the BOTTOM and not the TOP as with other data sheets such as those from TI or Microchip.

    Top Tip: If you wire this thing backwards it gets very, very hot; touch it and you burn yourself; don't ask me how I know. I guess that is why I am the broken engineer :(

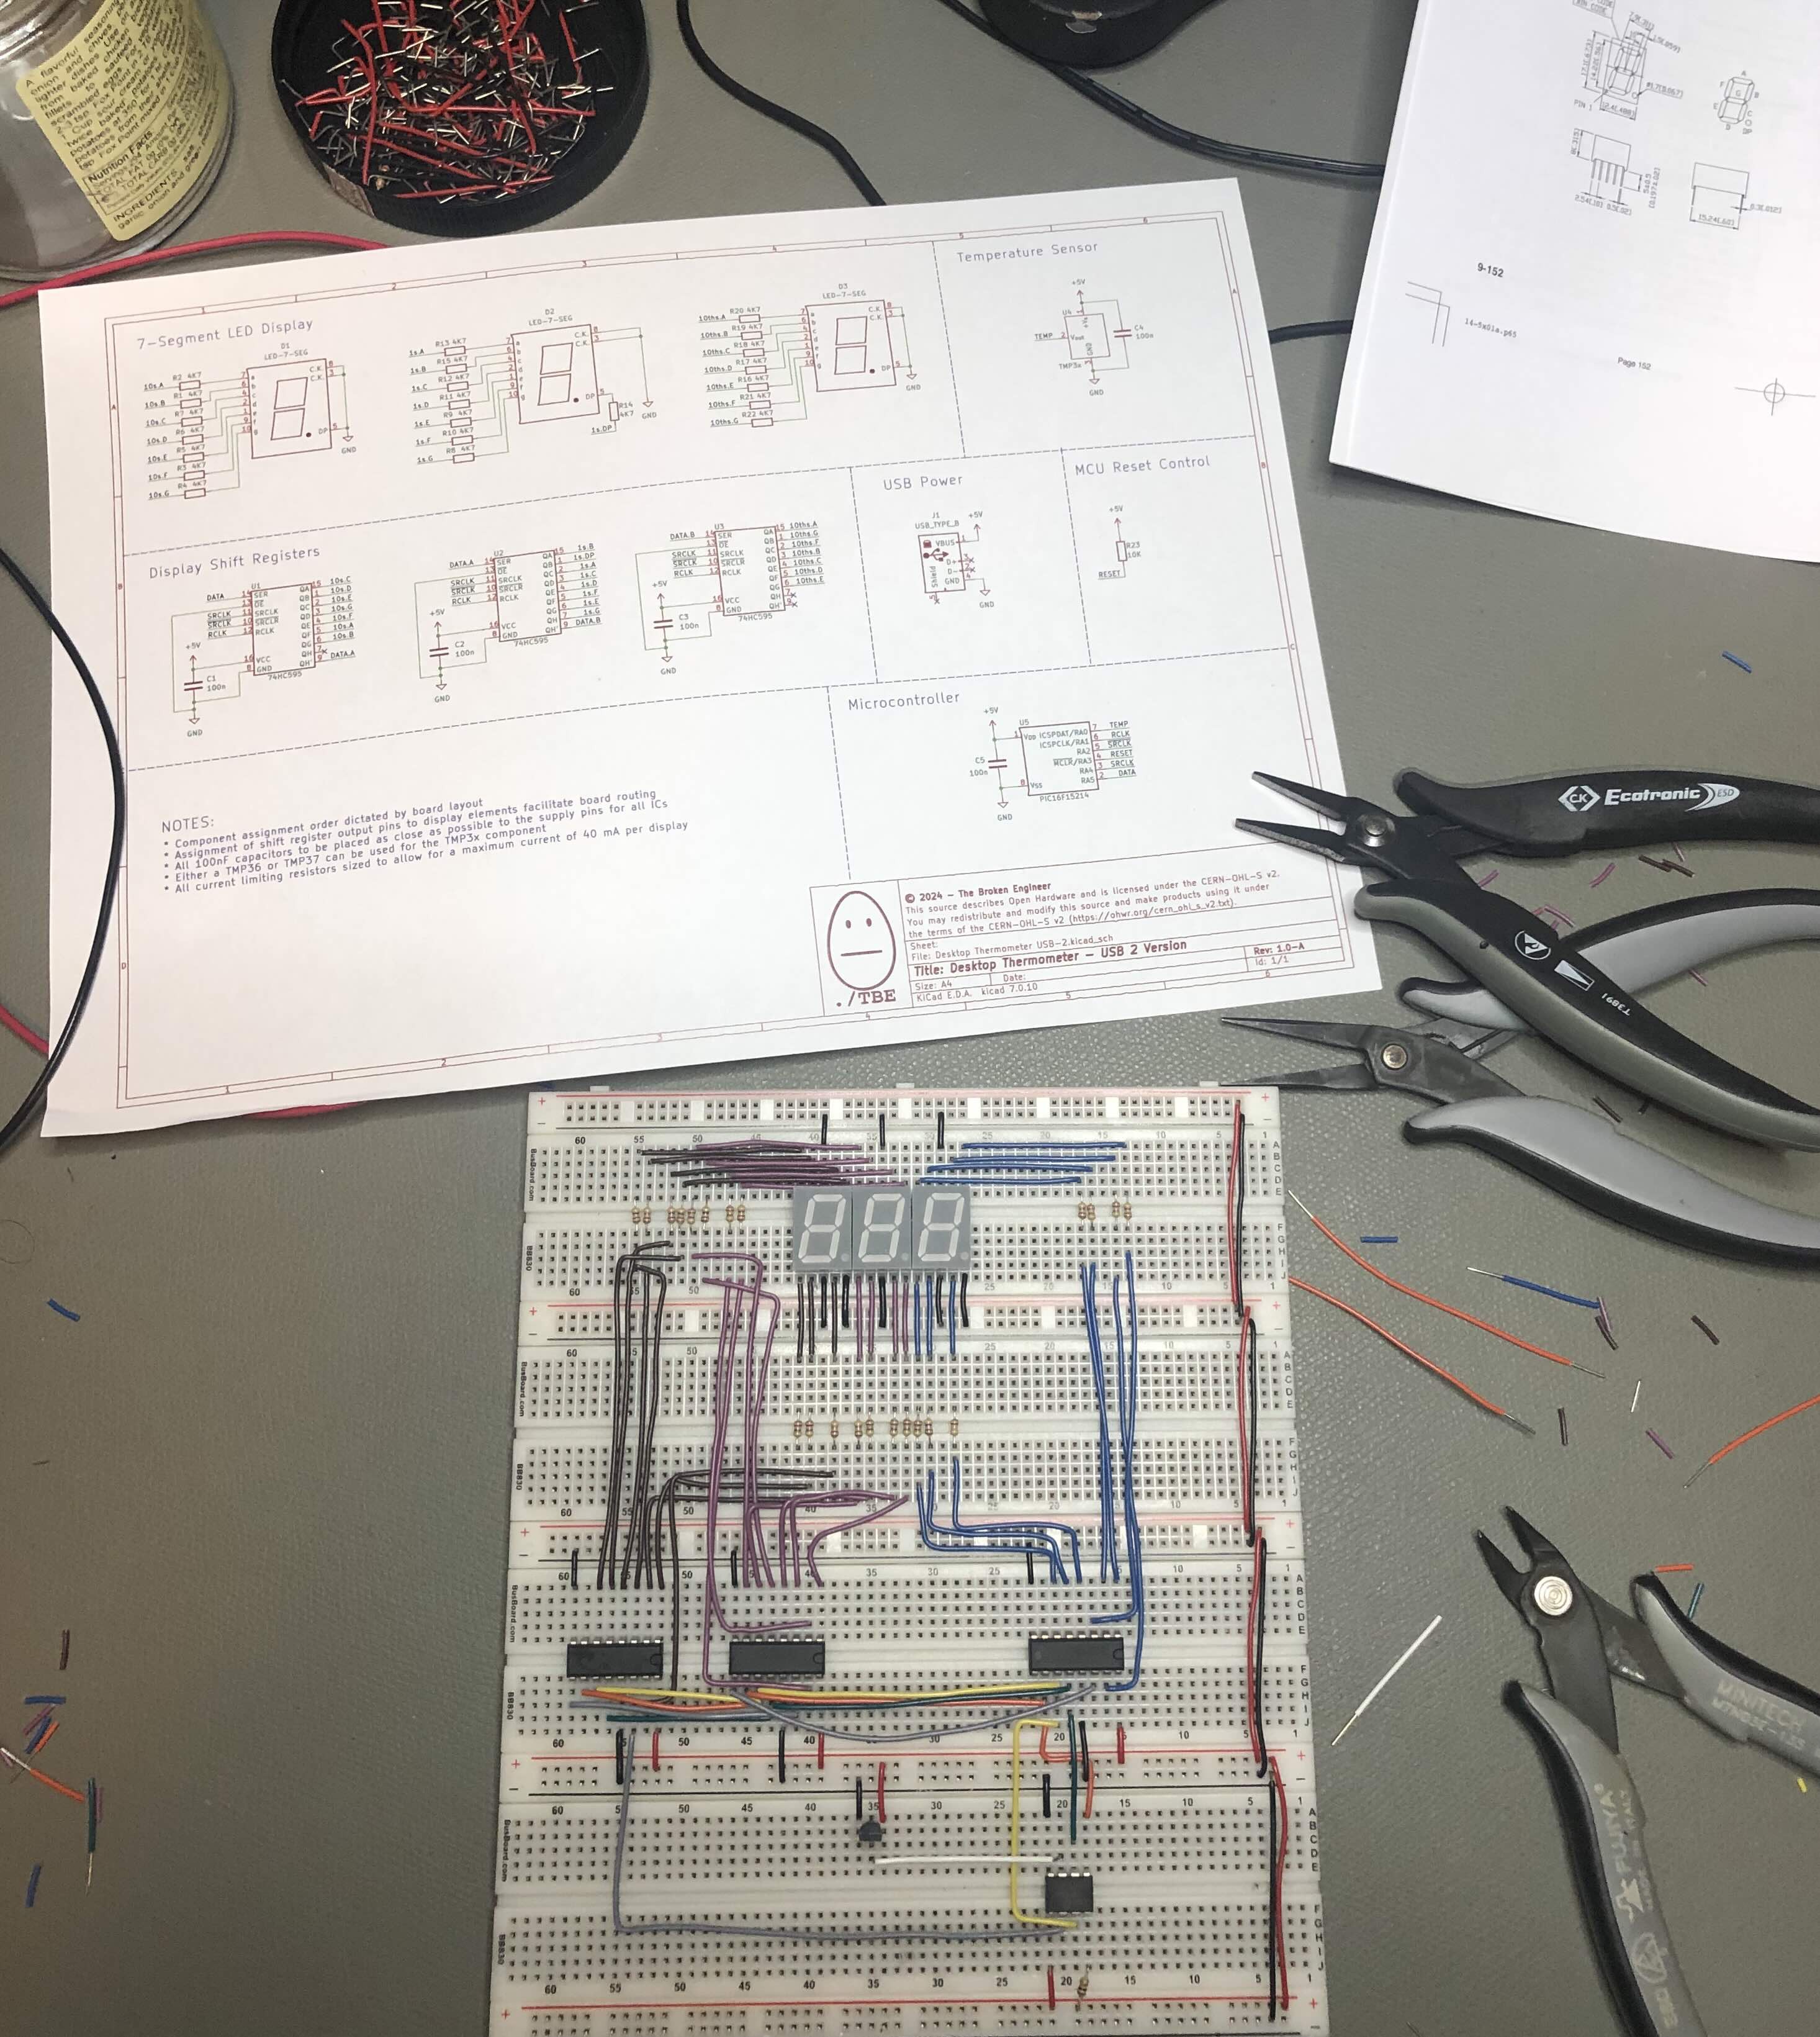
  • And the solderless breadboarding begins...

    TheBrokenEngineer02/06/2024 at 08:51 0 comments

    I know some people love this stuff and I know that this is necessary before going to copper boards but it is really something that I do not like all that much. 

    I think the thing about it is that I design the schematic in such a way that it is easy to lay out and route the traces. The down side is that when making this up on a breadboard, nothing seems to line up in a great manner.

    In any event, the prototype is all wired up (hopefully correctly) and now all that is left is to connect the debugger and test the code I have written to see if the board is wired correctly, I have wired the breadboard correctly and have actually written code that works. So many places where this could go wrong, so little brain power available to fix it.

    Will be interesting to see what happens....as they say in the television business....stay tuned!

  • The hardware design is taking shape

    TheBrokenEngineer02/06/2024 at 01:27 0 comments

    So have updated the source repository to include the hardware design and the rough layout for the board. None of this has been bread boarded yet so all untested but as they say, what could possibly go wrong?

    There are two variants of the hardware, one for the old style USB-2 standard which means the connector is hand solderable. The second is for the newer USB-C. This unfortunately does use a SMD connector as I could not find a USB-C connector that was through hole. The up side is that the number of pins on the connector is kept to a minimum to make hand soldering a little easier for those without a hot air gun.

  • The project starts now :)

    TheBrokenEngineer02/05/2024 at 19:08 0 comments

    Decided that I wanted a simple thermometer that would show the current temperature when I was in the house. So, in true maker fashion I decided that designing and building one would be the solution rather than going out and buying one.

    Thus far I have created the project, created a github repository and decided on the components I would be using. All of which can be seen in the github repository. The next step is to begin with the hardware design and also document the journey.

View all 7 project logs

Enjoy this project?

Share

Discussions

Similar Projects

Does this project spark your interest?

Become a member to follow this project and never miss any updates