-
Boards arrived!
09/05/2024 at 04:27 • 0 comments🎵 "PCBWay, PCBWay, come and get your PCBs from PCBWay, hey!" 🎵
Alright, I know I keep going forever between updates, but I finally had some time with the right kind of obsessiveness to sit down and get boards designed and sent off to a manufacturer. Not only that, but PCBWay graciously reached out to sponsor boards for me!
This entry will be part showing off my design, and part sponsored product review for PCBWay. Note that while PCBWay did give a hefty discount on these boards, they haven't paid me in any other way and haven't asked to review this blog. Some photos have been retouched to correct camera and lighting errors (I should really get a nicer setup) but are representative of how the boards look IRL and in good light. The following thoughts are my own, influenced as they are.
Main Board:
So first off, what did we change from last time? Well the giant trace widths and single board design wasn't working out, so we switched to an enclosure with front panels to hold the mechanics, and used the remaining routing flexibility (and "smaller" traces, though they're still 12 mil!) to shrink the mainboard.
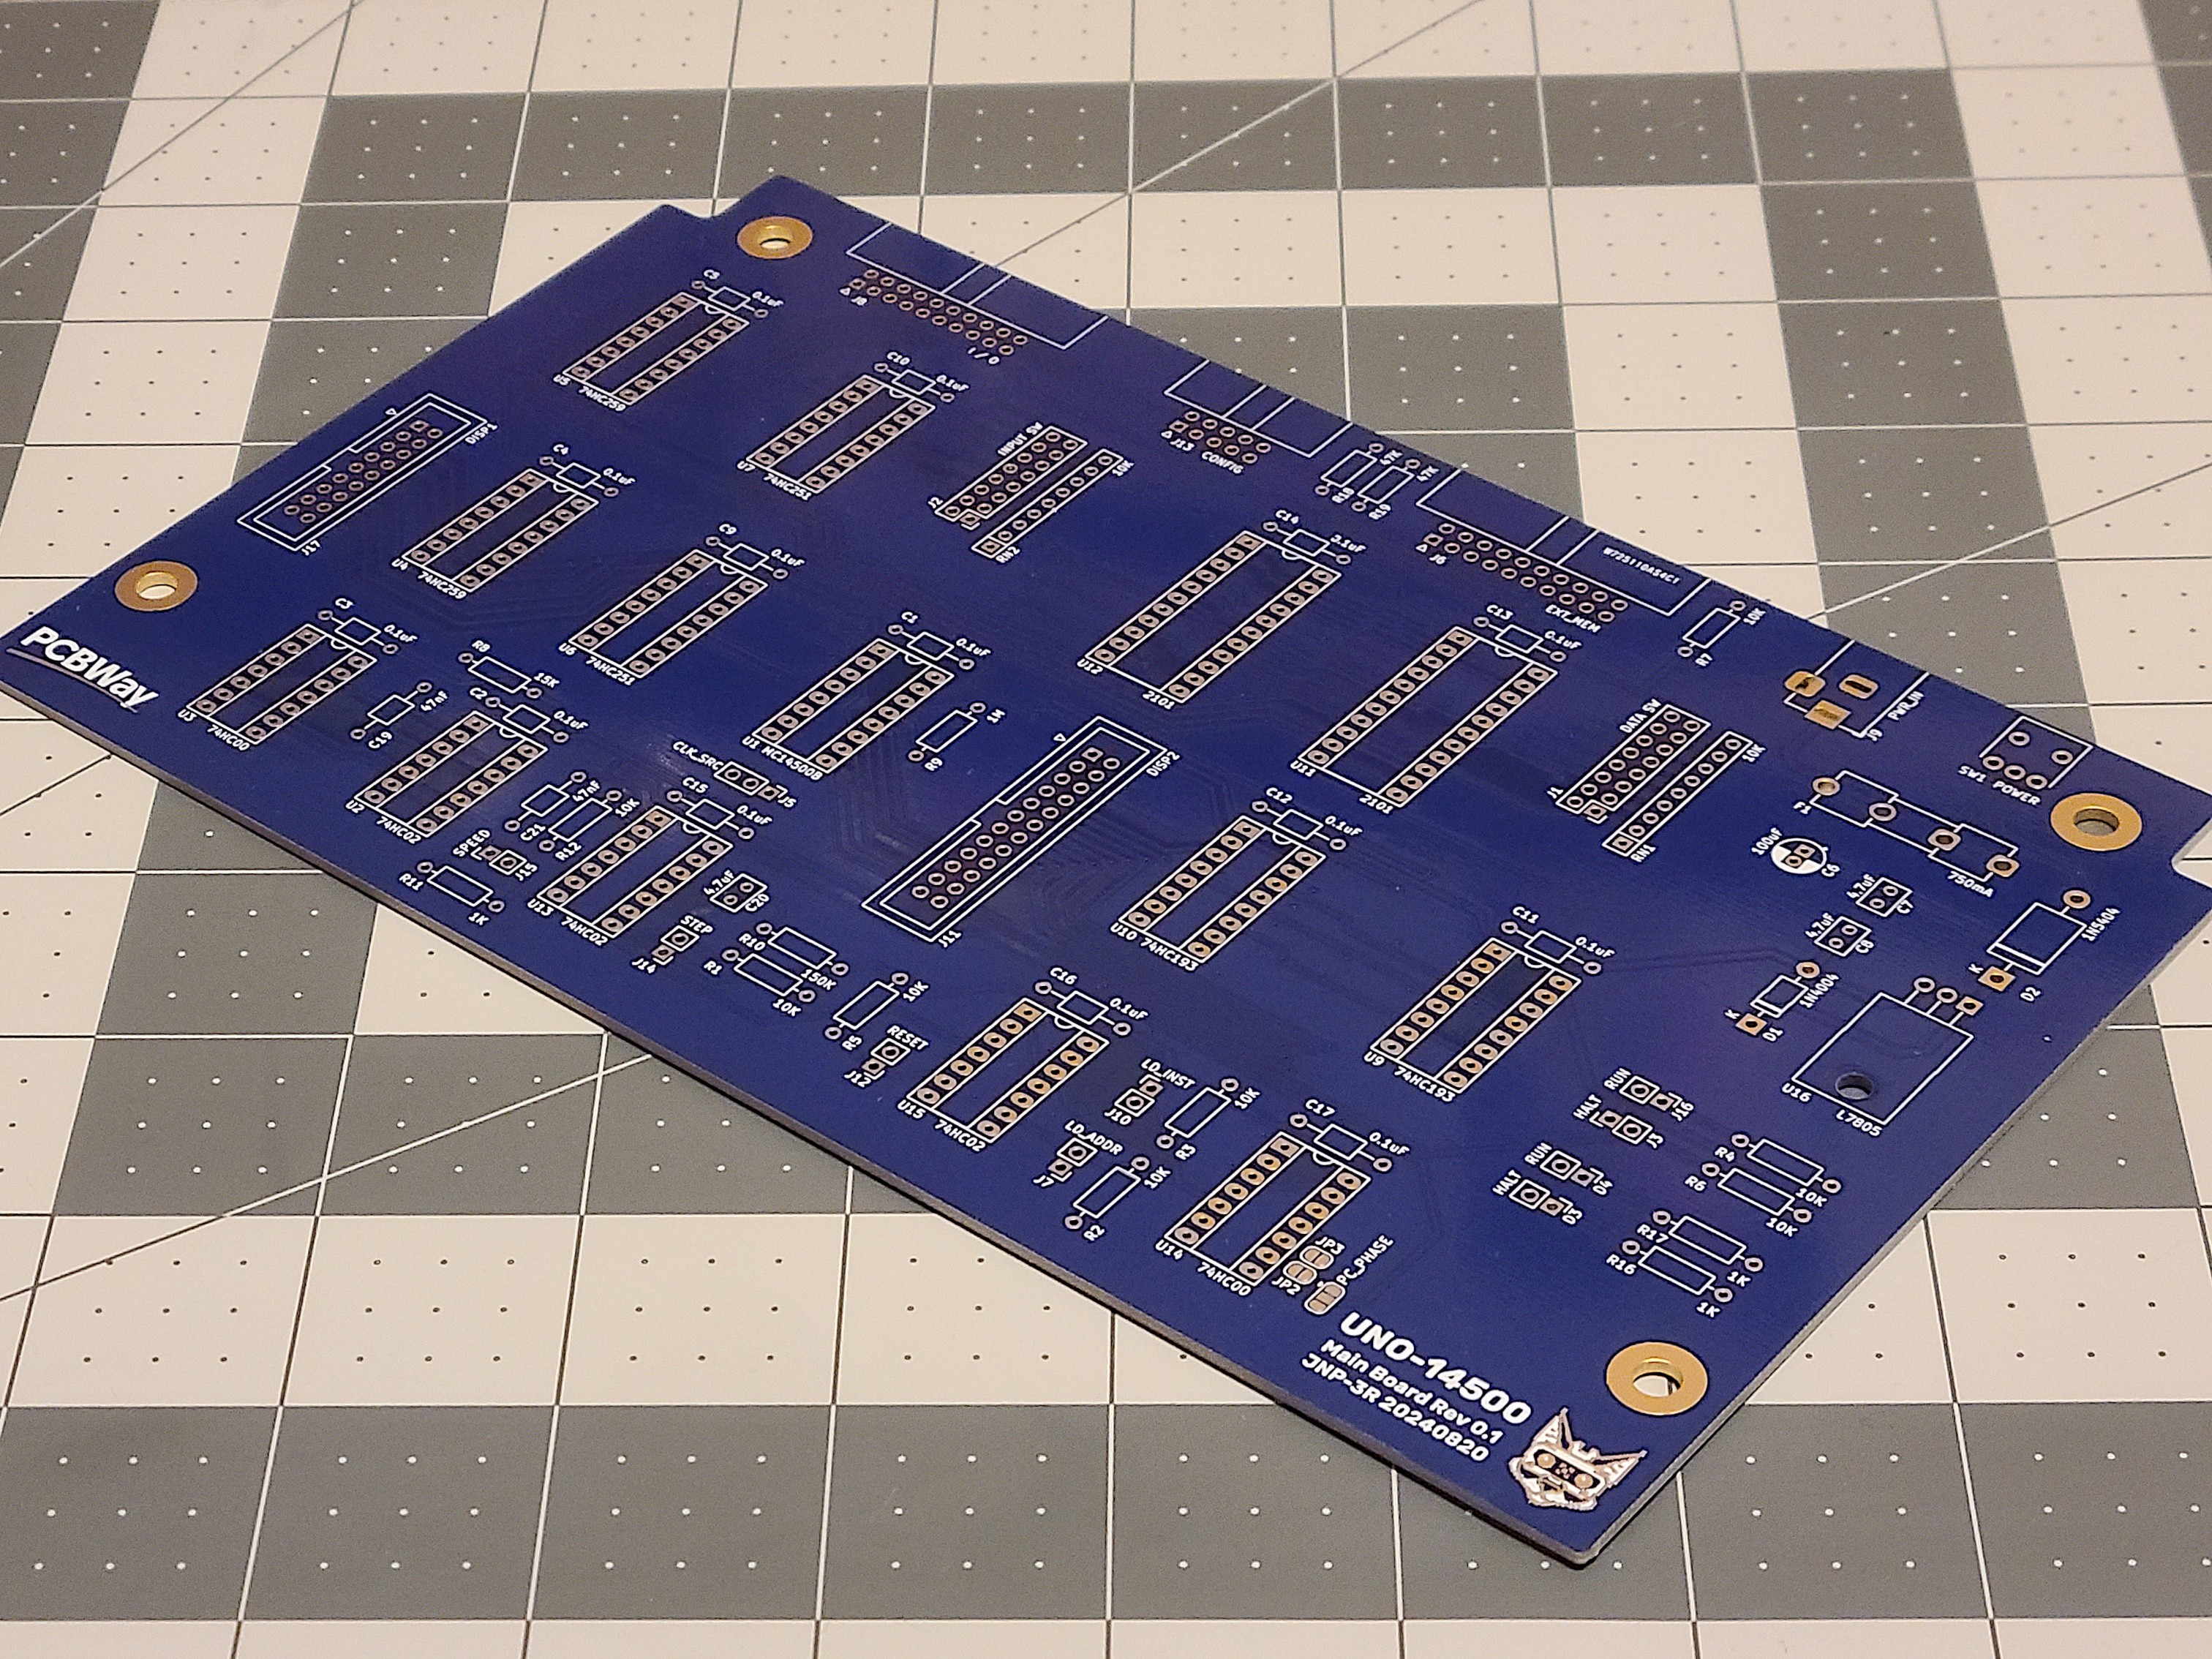
I unfortunately forgot to order a few parts to do a final assembly, but while we're waiting for those we can at least oogle the boards:![Main board overview Main board overview]()
Oooh, sparkly... I kept the board layout simple with wide spacing for ease of routing / rework and because the large case needed for the panels gives me extra room. There's also some argument about "retro feel" but we're breaking enough rules here...
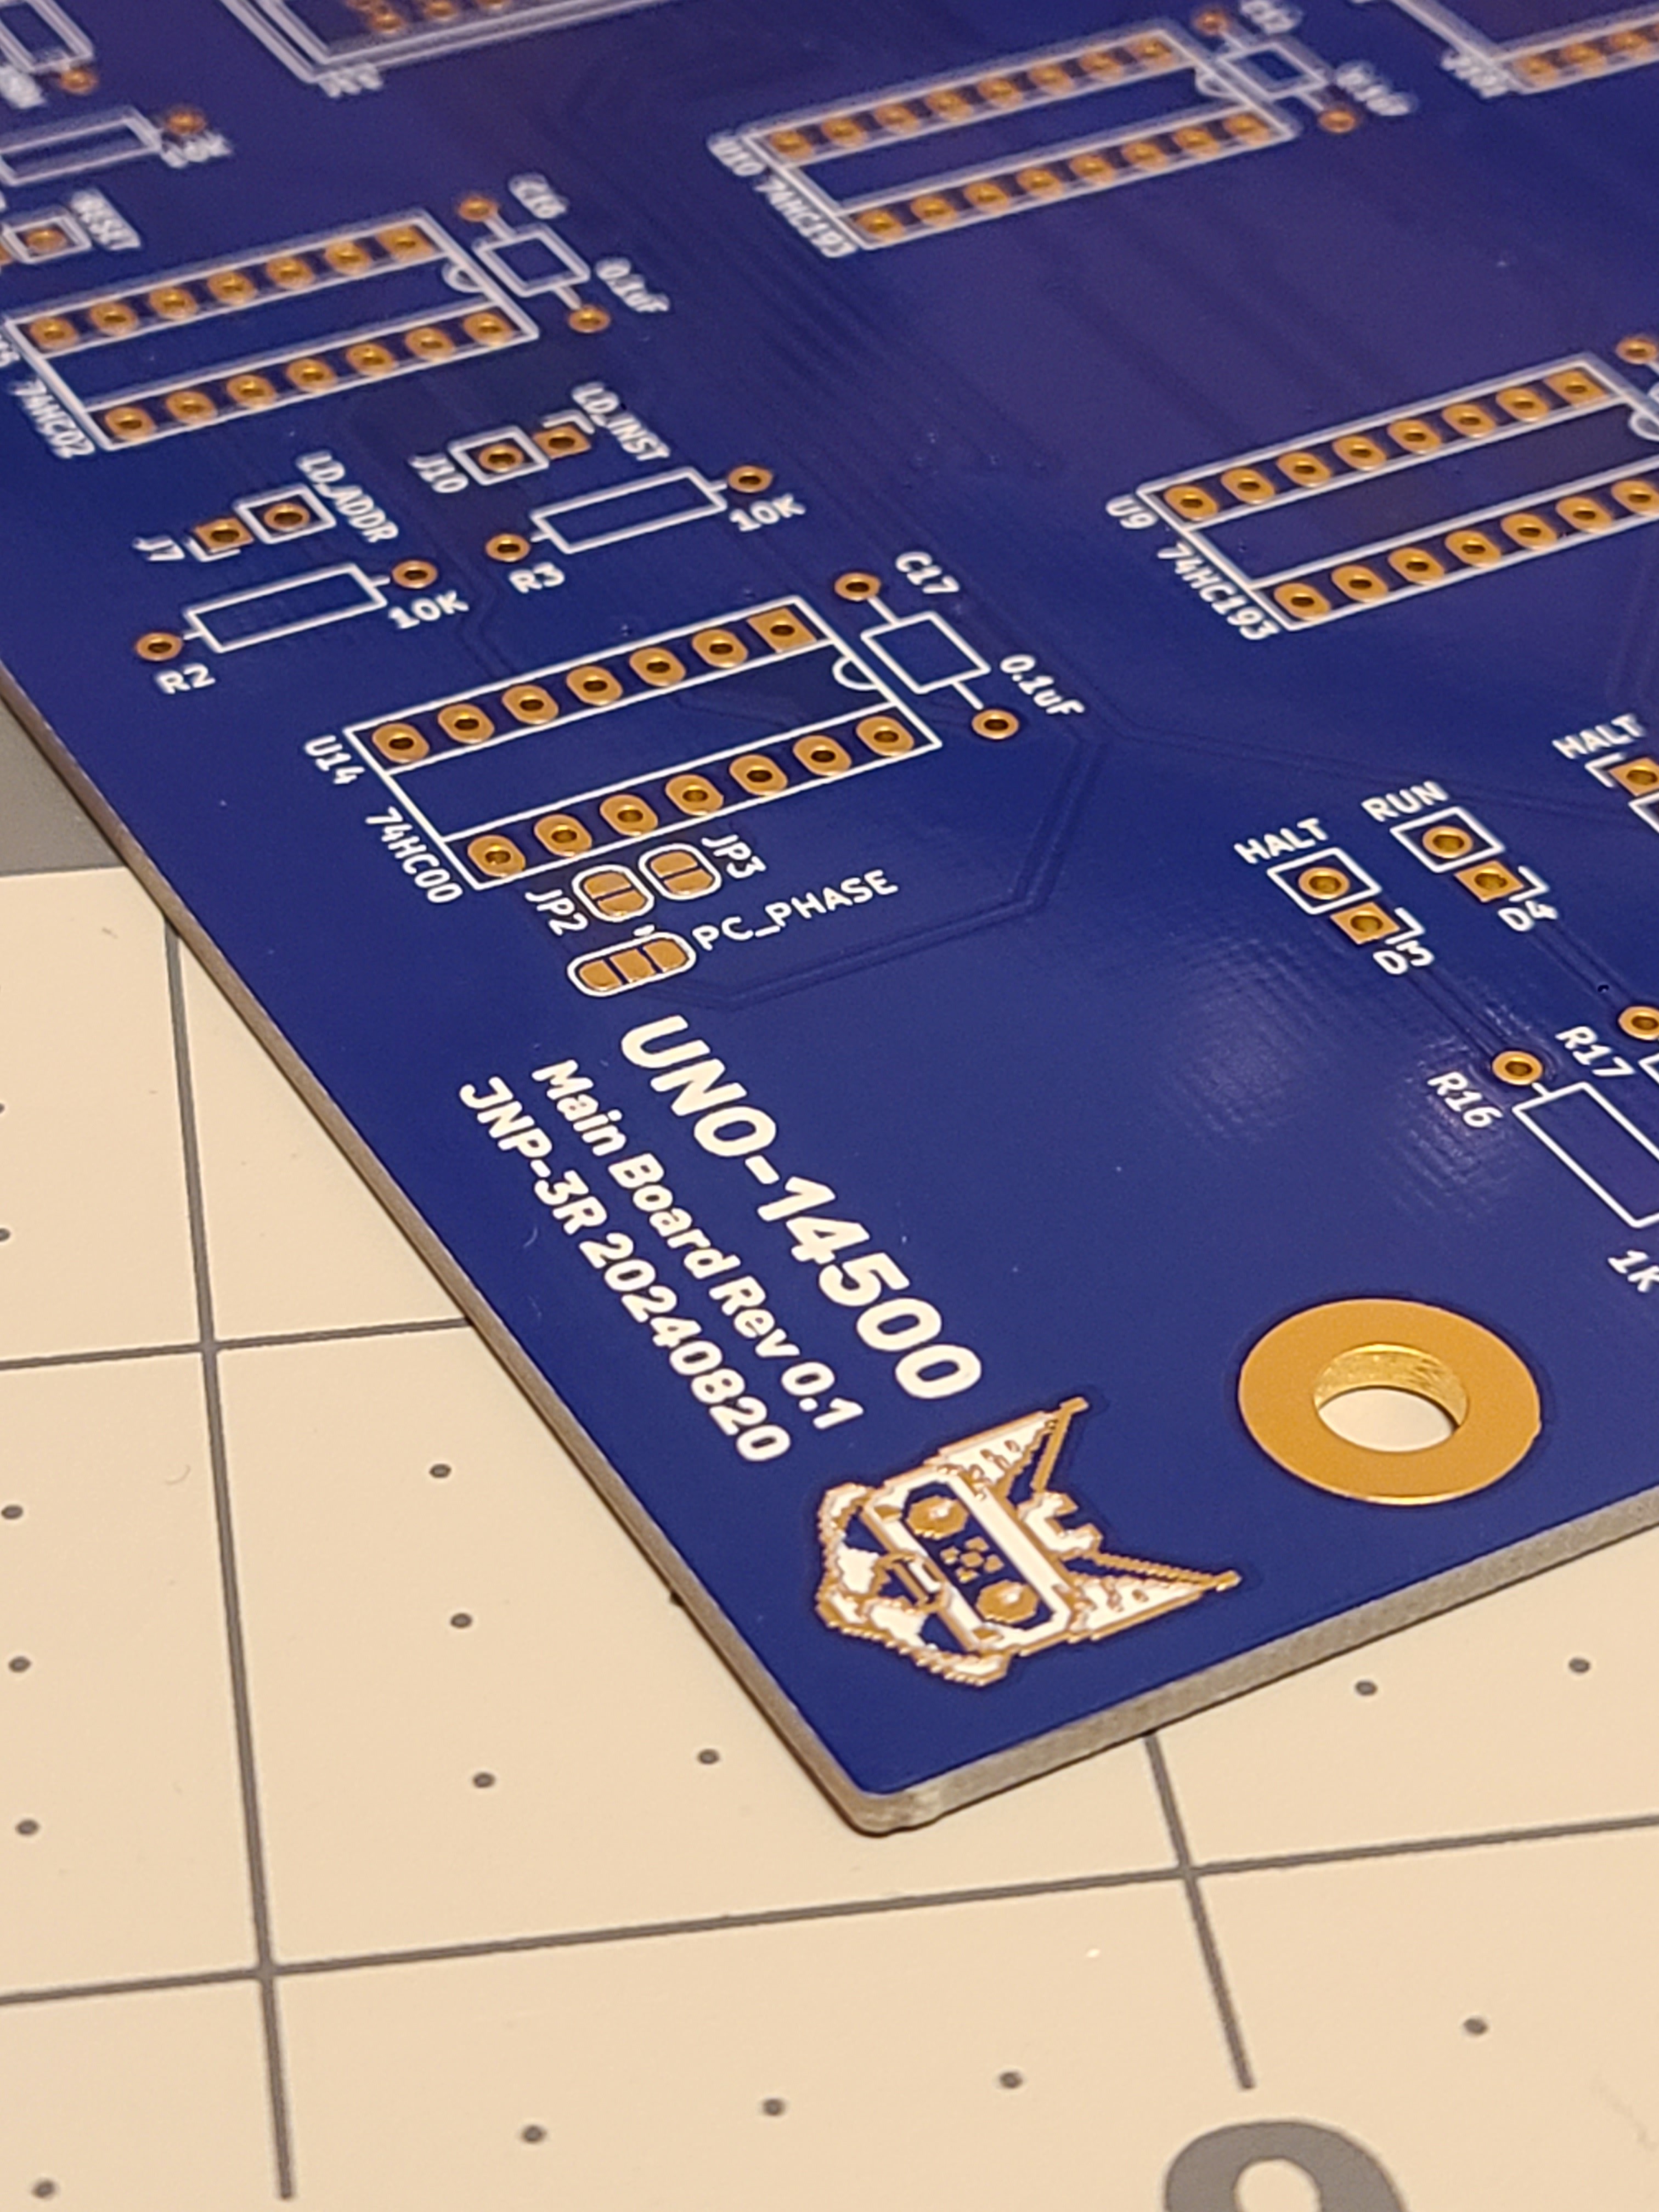
One thing a big wide board doesn't do is show off PCBway's capabilities, so had some fun with PCB art and made a pixel version of my visored lynx character:
![Close up of board art on main PCB Close up of board art on main PCB]()
They made me look so cute! Now that's some pretty gold and impressive registration. This was a last minute addition, but one that came out really nice and gives me some ideas for future projects..
Case & Panels:
The one set of parts I had already ordered were for the case and mechanicals, so let's skip to the end of the story to see how those'll look.
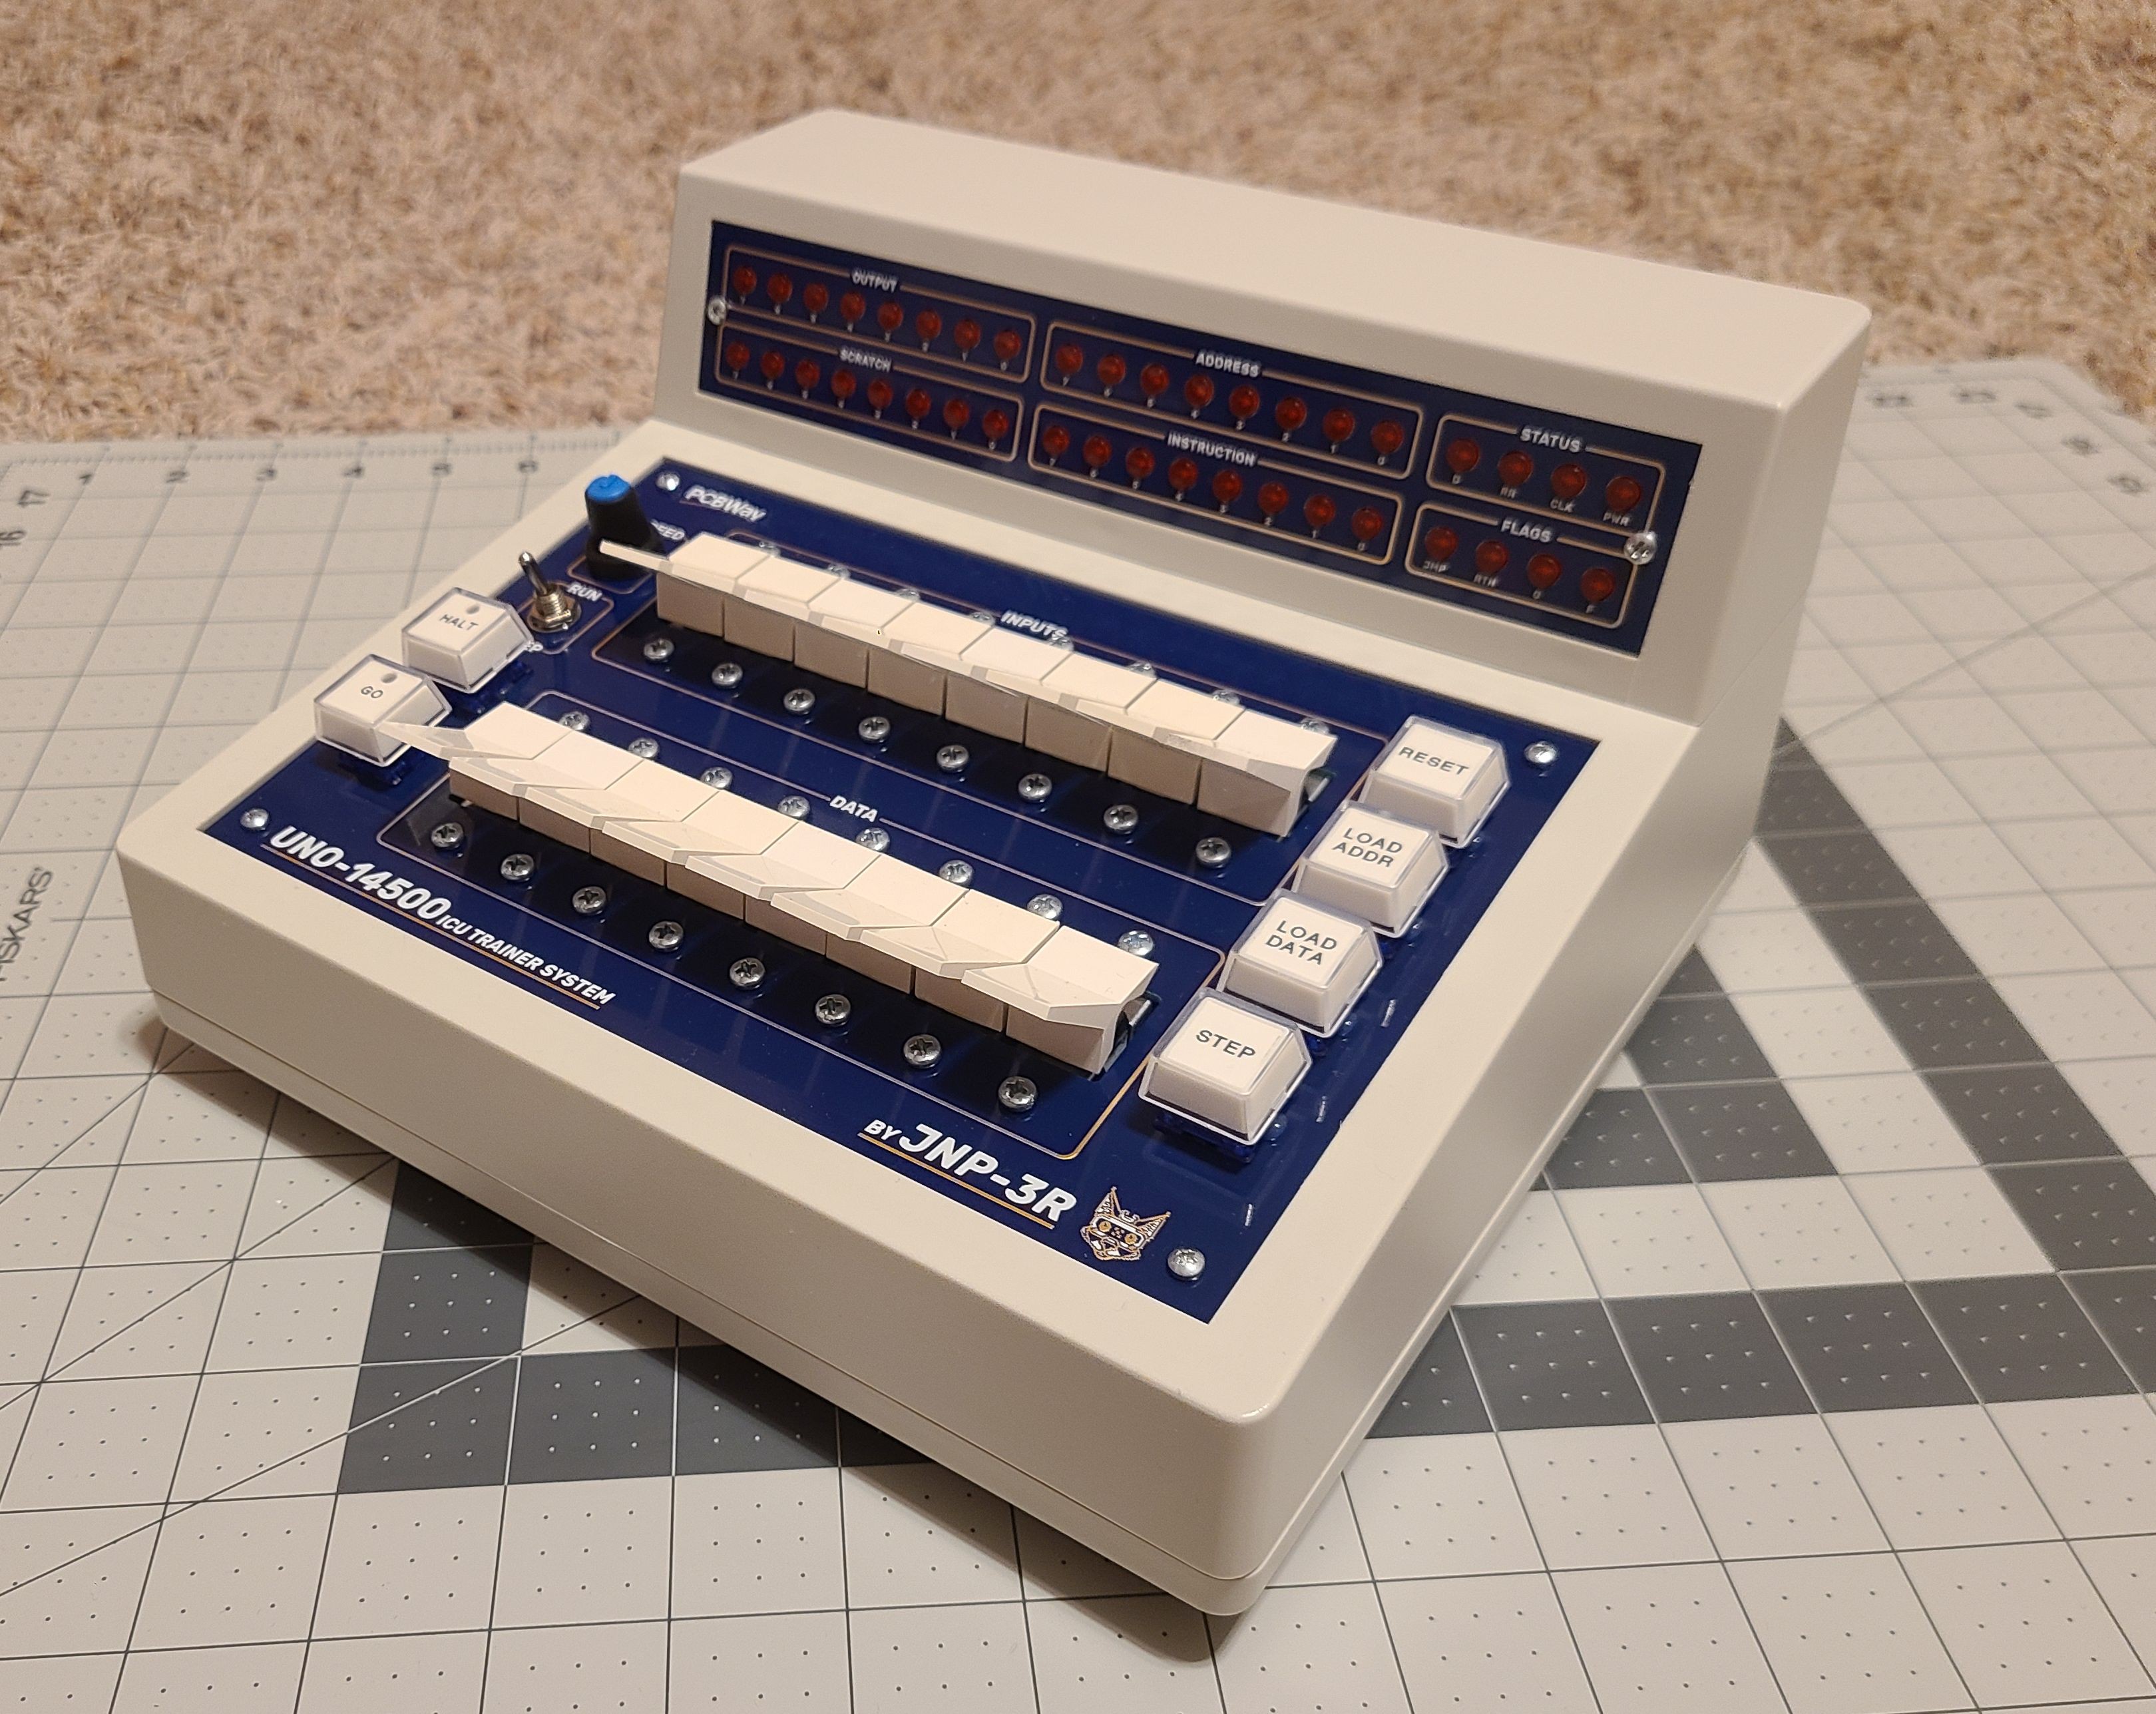
The case I've chosen is a Bud Industries Plasticase PC-11495 and I used the budget leeway from the PCBWay sponsorship to have PCB panels made for it. I ordered these in blue with ENIG plating and the result is quite stylish if I may say so:
![Case with panels installed Case with panels installed]()
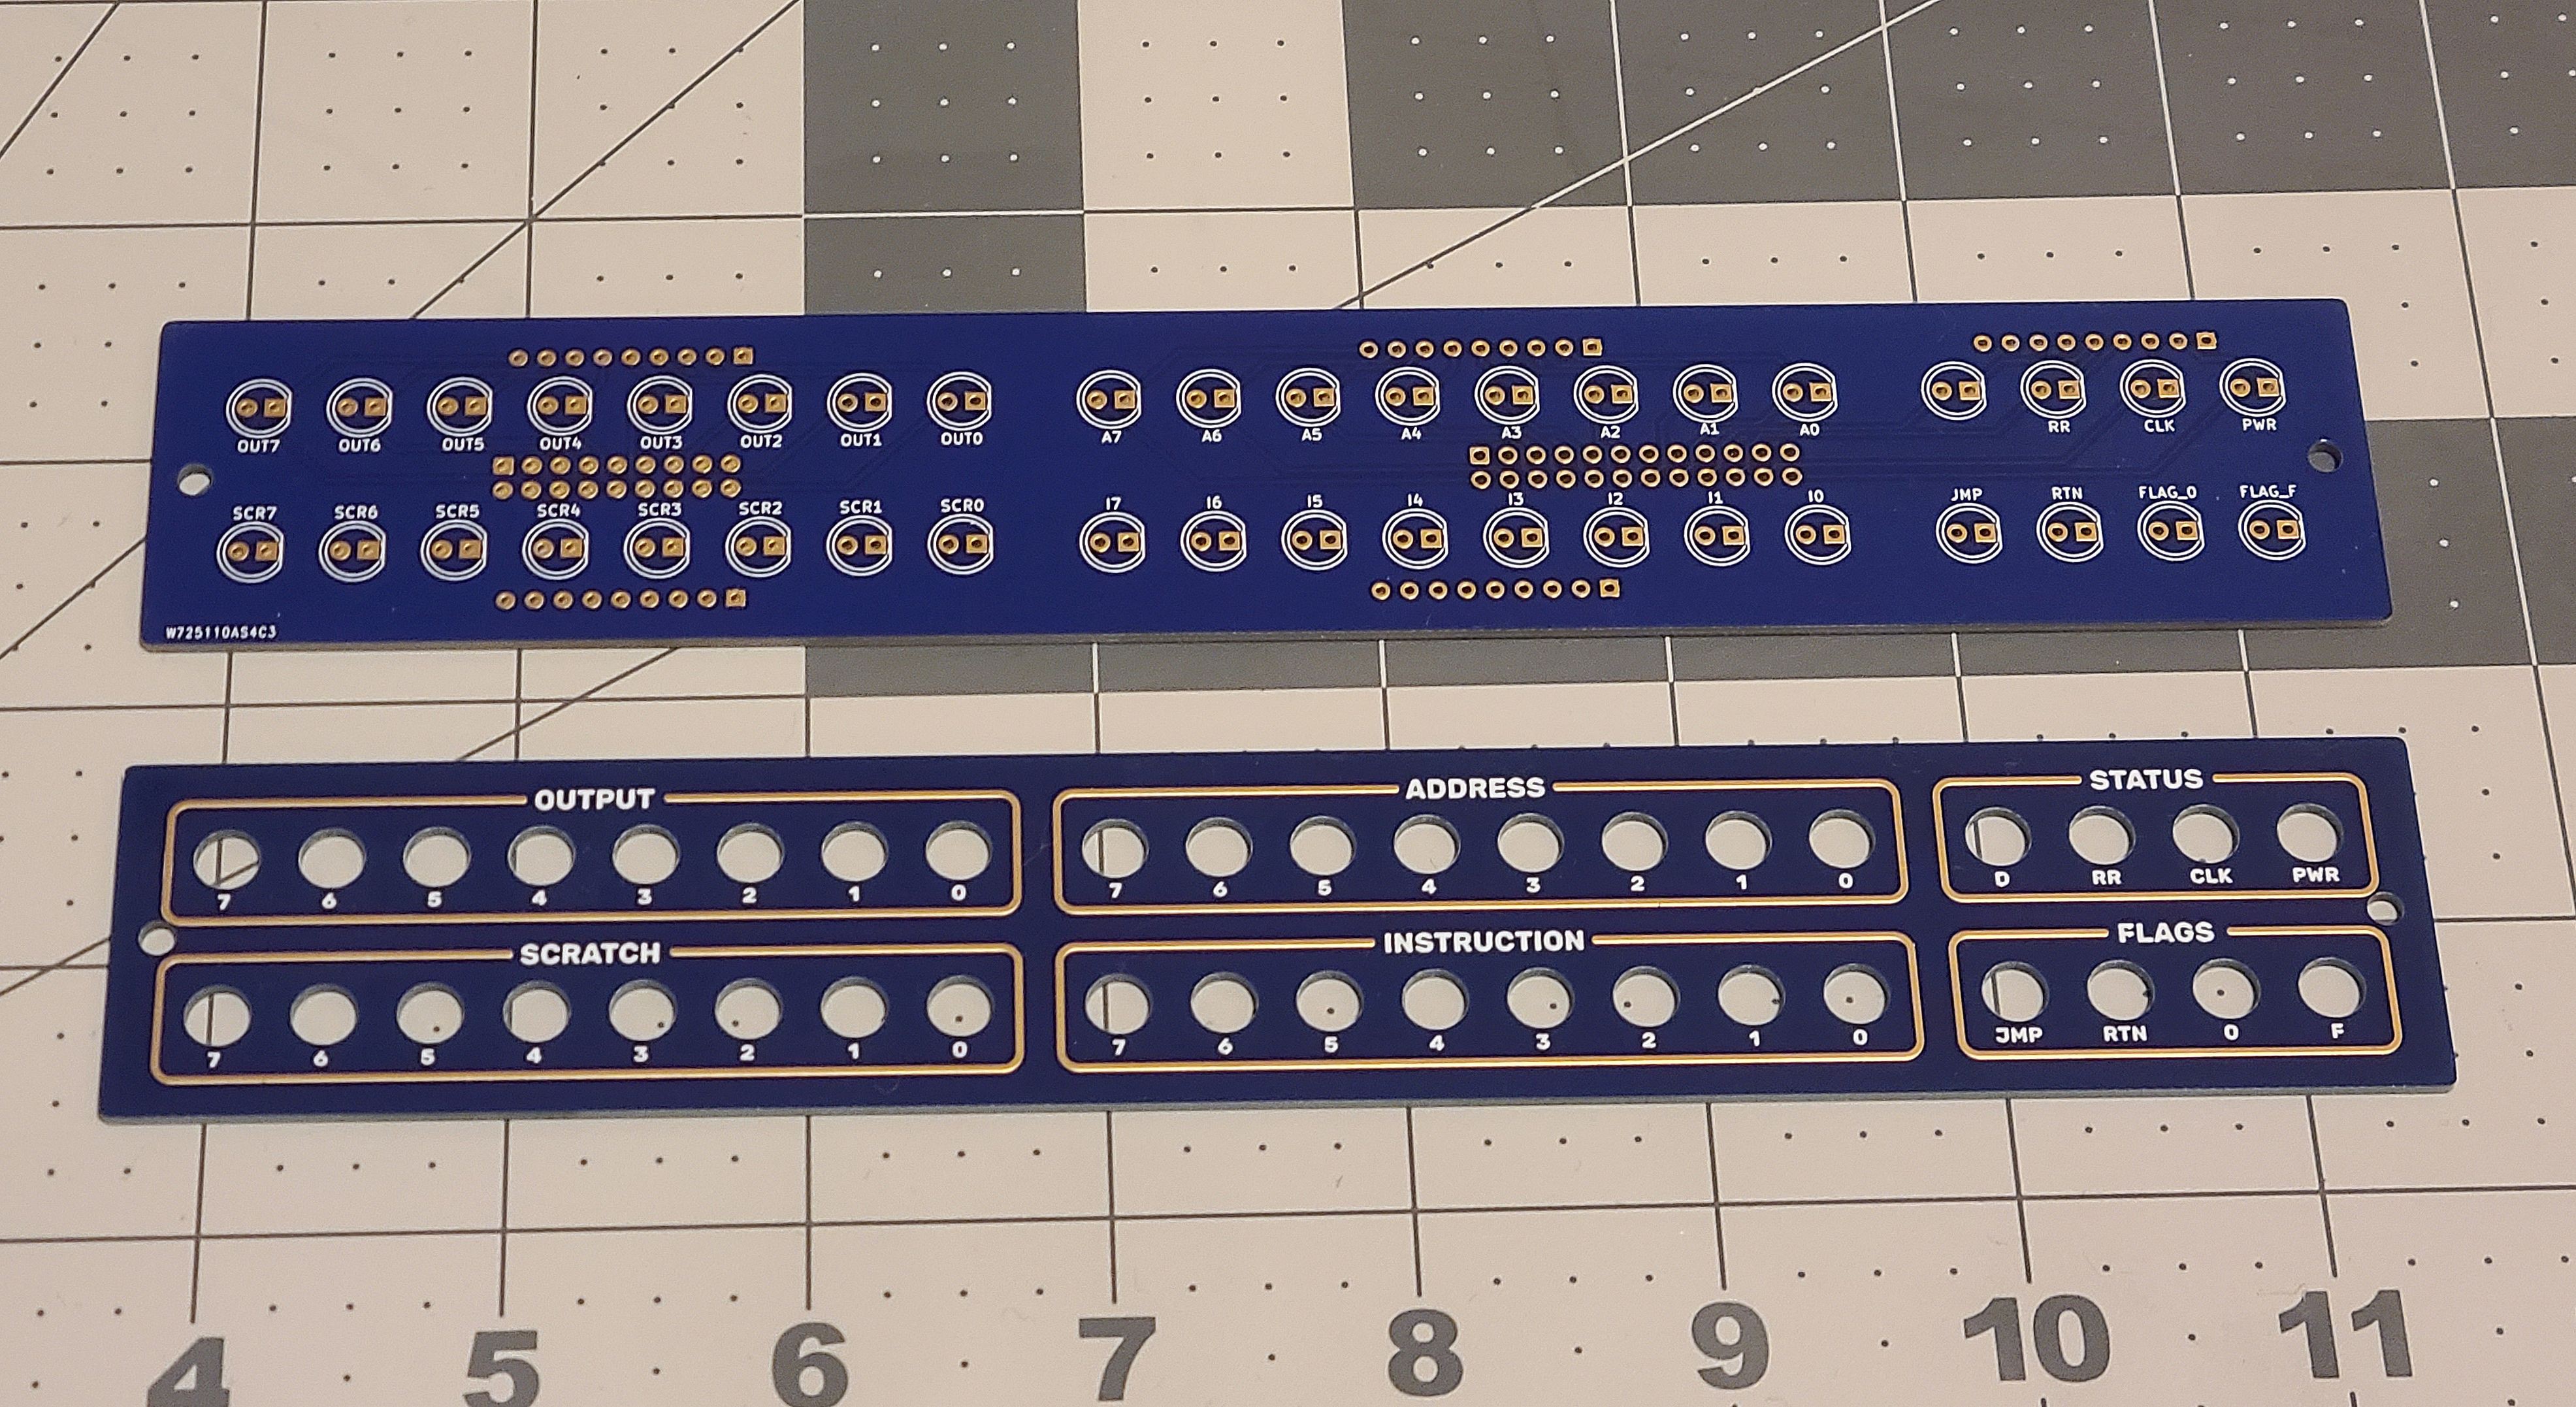
Real "Tech school trainer system" vibes... The "display" has a front face panel that's backed by an LED board, and the front panel is purely mechanical. Everything lined up and registered perfectly between display boards, and the front panel is both stylish and sturdy. I did make a slight fudge sizing the speed potentiometer mount, but I'll fix that in another revision
![Front and rear display boards Front and rear display boards]()
These were so satisfying to line up In conclusion
I still have parts on order and a few design issues to fix, but overall I'm quite pleased with how things are going, and excited to get things built when the last few parts arrive! Building a system like this has been a long time dream, and getting this level of finish wouldn't be possible without PCBWay's help. Both Liam, my sponsorship contact, and Aria, my sales engineer have been helpful in getting this going and sorting out issues (that I caused) in my order. If getting PCBs for your project is something that interests you then I'd encourage checking PCBWay out at pcbway.com.
Until next time, (when hopefully we'll have it booting!)
Juniper
-
Side quest and redesign progress
05/08/2024 at 07:06 • 0 commentsSorry it's been forever since the last update, inspiration comes in spurts and all, but having gotten myself stuck I did what anyone with sense would do, start another project!
Well there's actually been a few, but the one that's relevant to this project is this little guy:
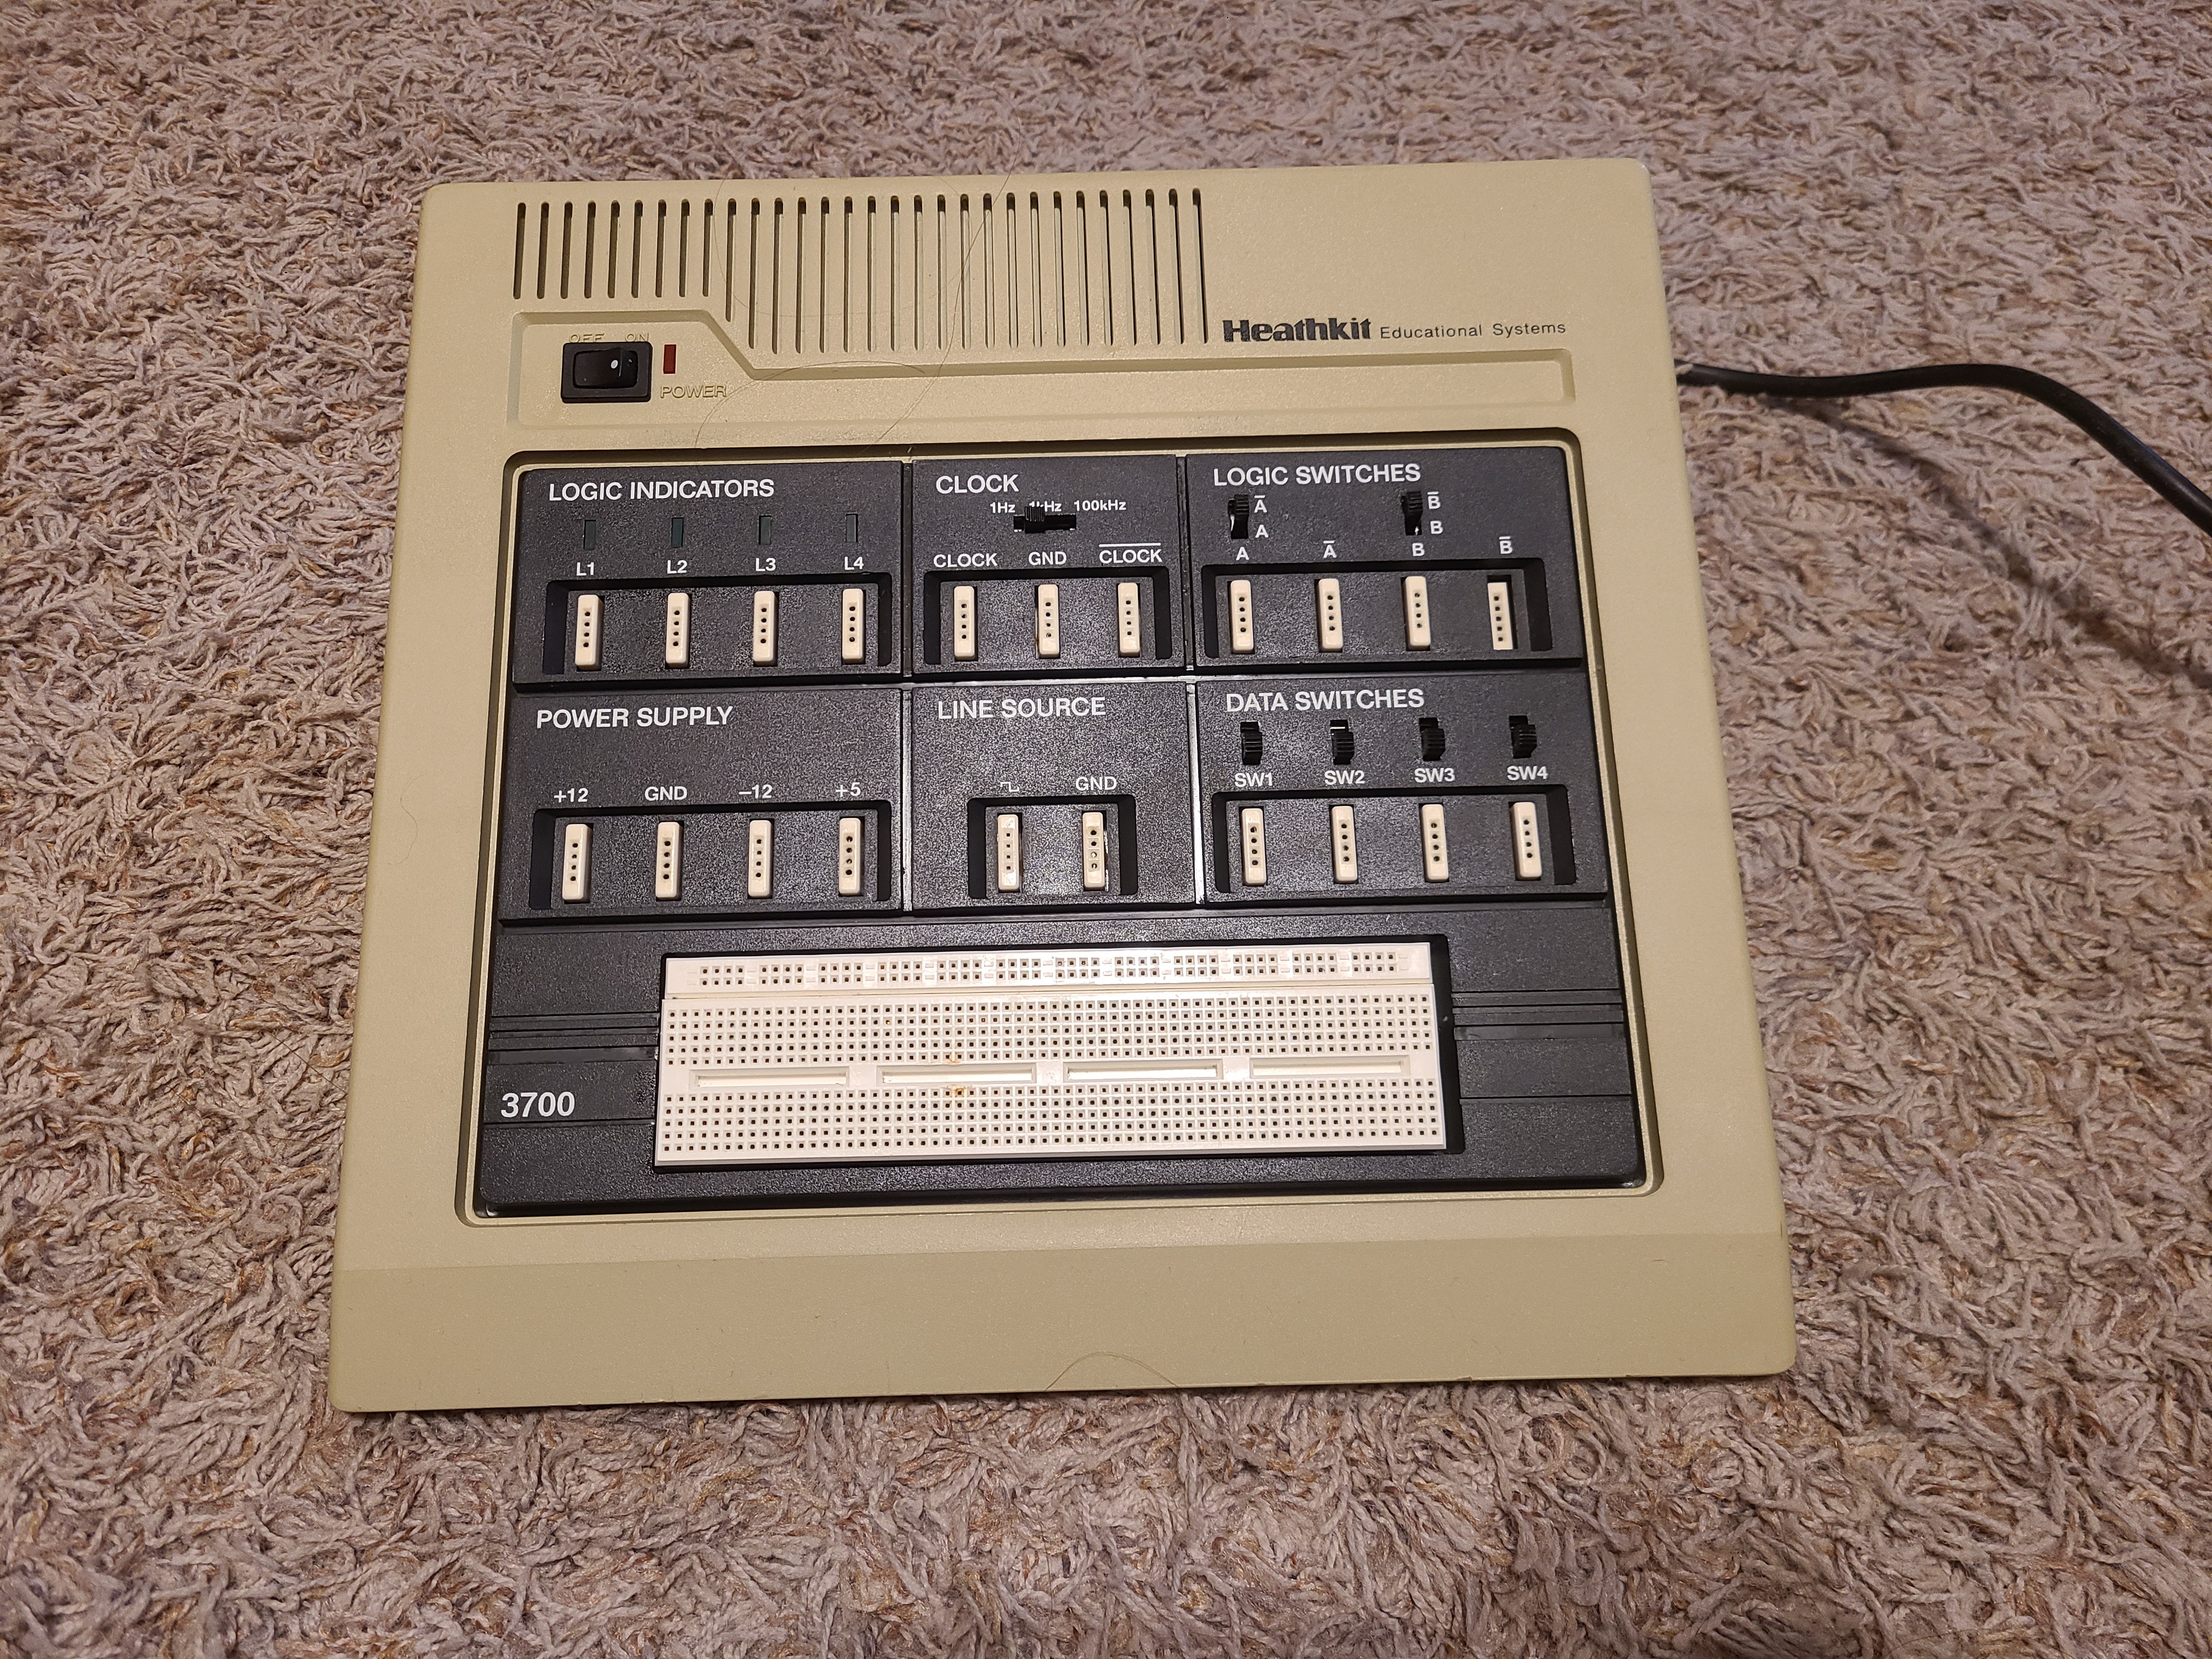
![Heathkit digital trainer console with logic switches, lights, clock generator and breadboard Heathkit digital trainer console with logic switches, lights, clock generator and breadboard]()
She looks nice, but everything's a little wobbly. Let's see if we can fix that. A Heathkit ETW-3700 Digital Logic Trainer. I hate dealing with sprawling wires from power supplies and peripherals, so this fella's a good option to prototype with these older chips without the mess. Unfortunately, it needs work.
---------- more ----------The PSU and clock generator work, but the breadboard and terminal strips have seen better days, and logic switch B is super wobbly. Let's take a look:
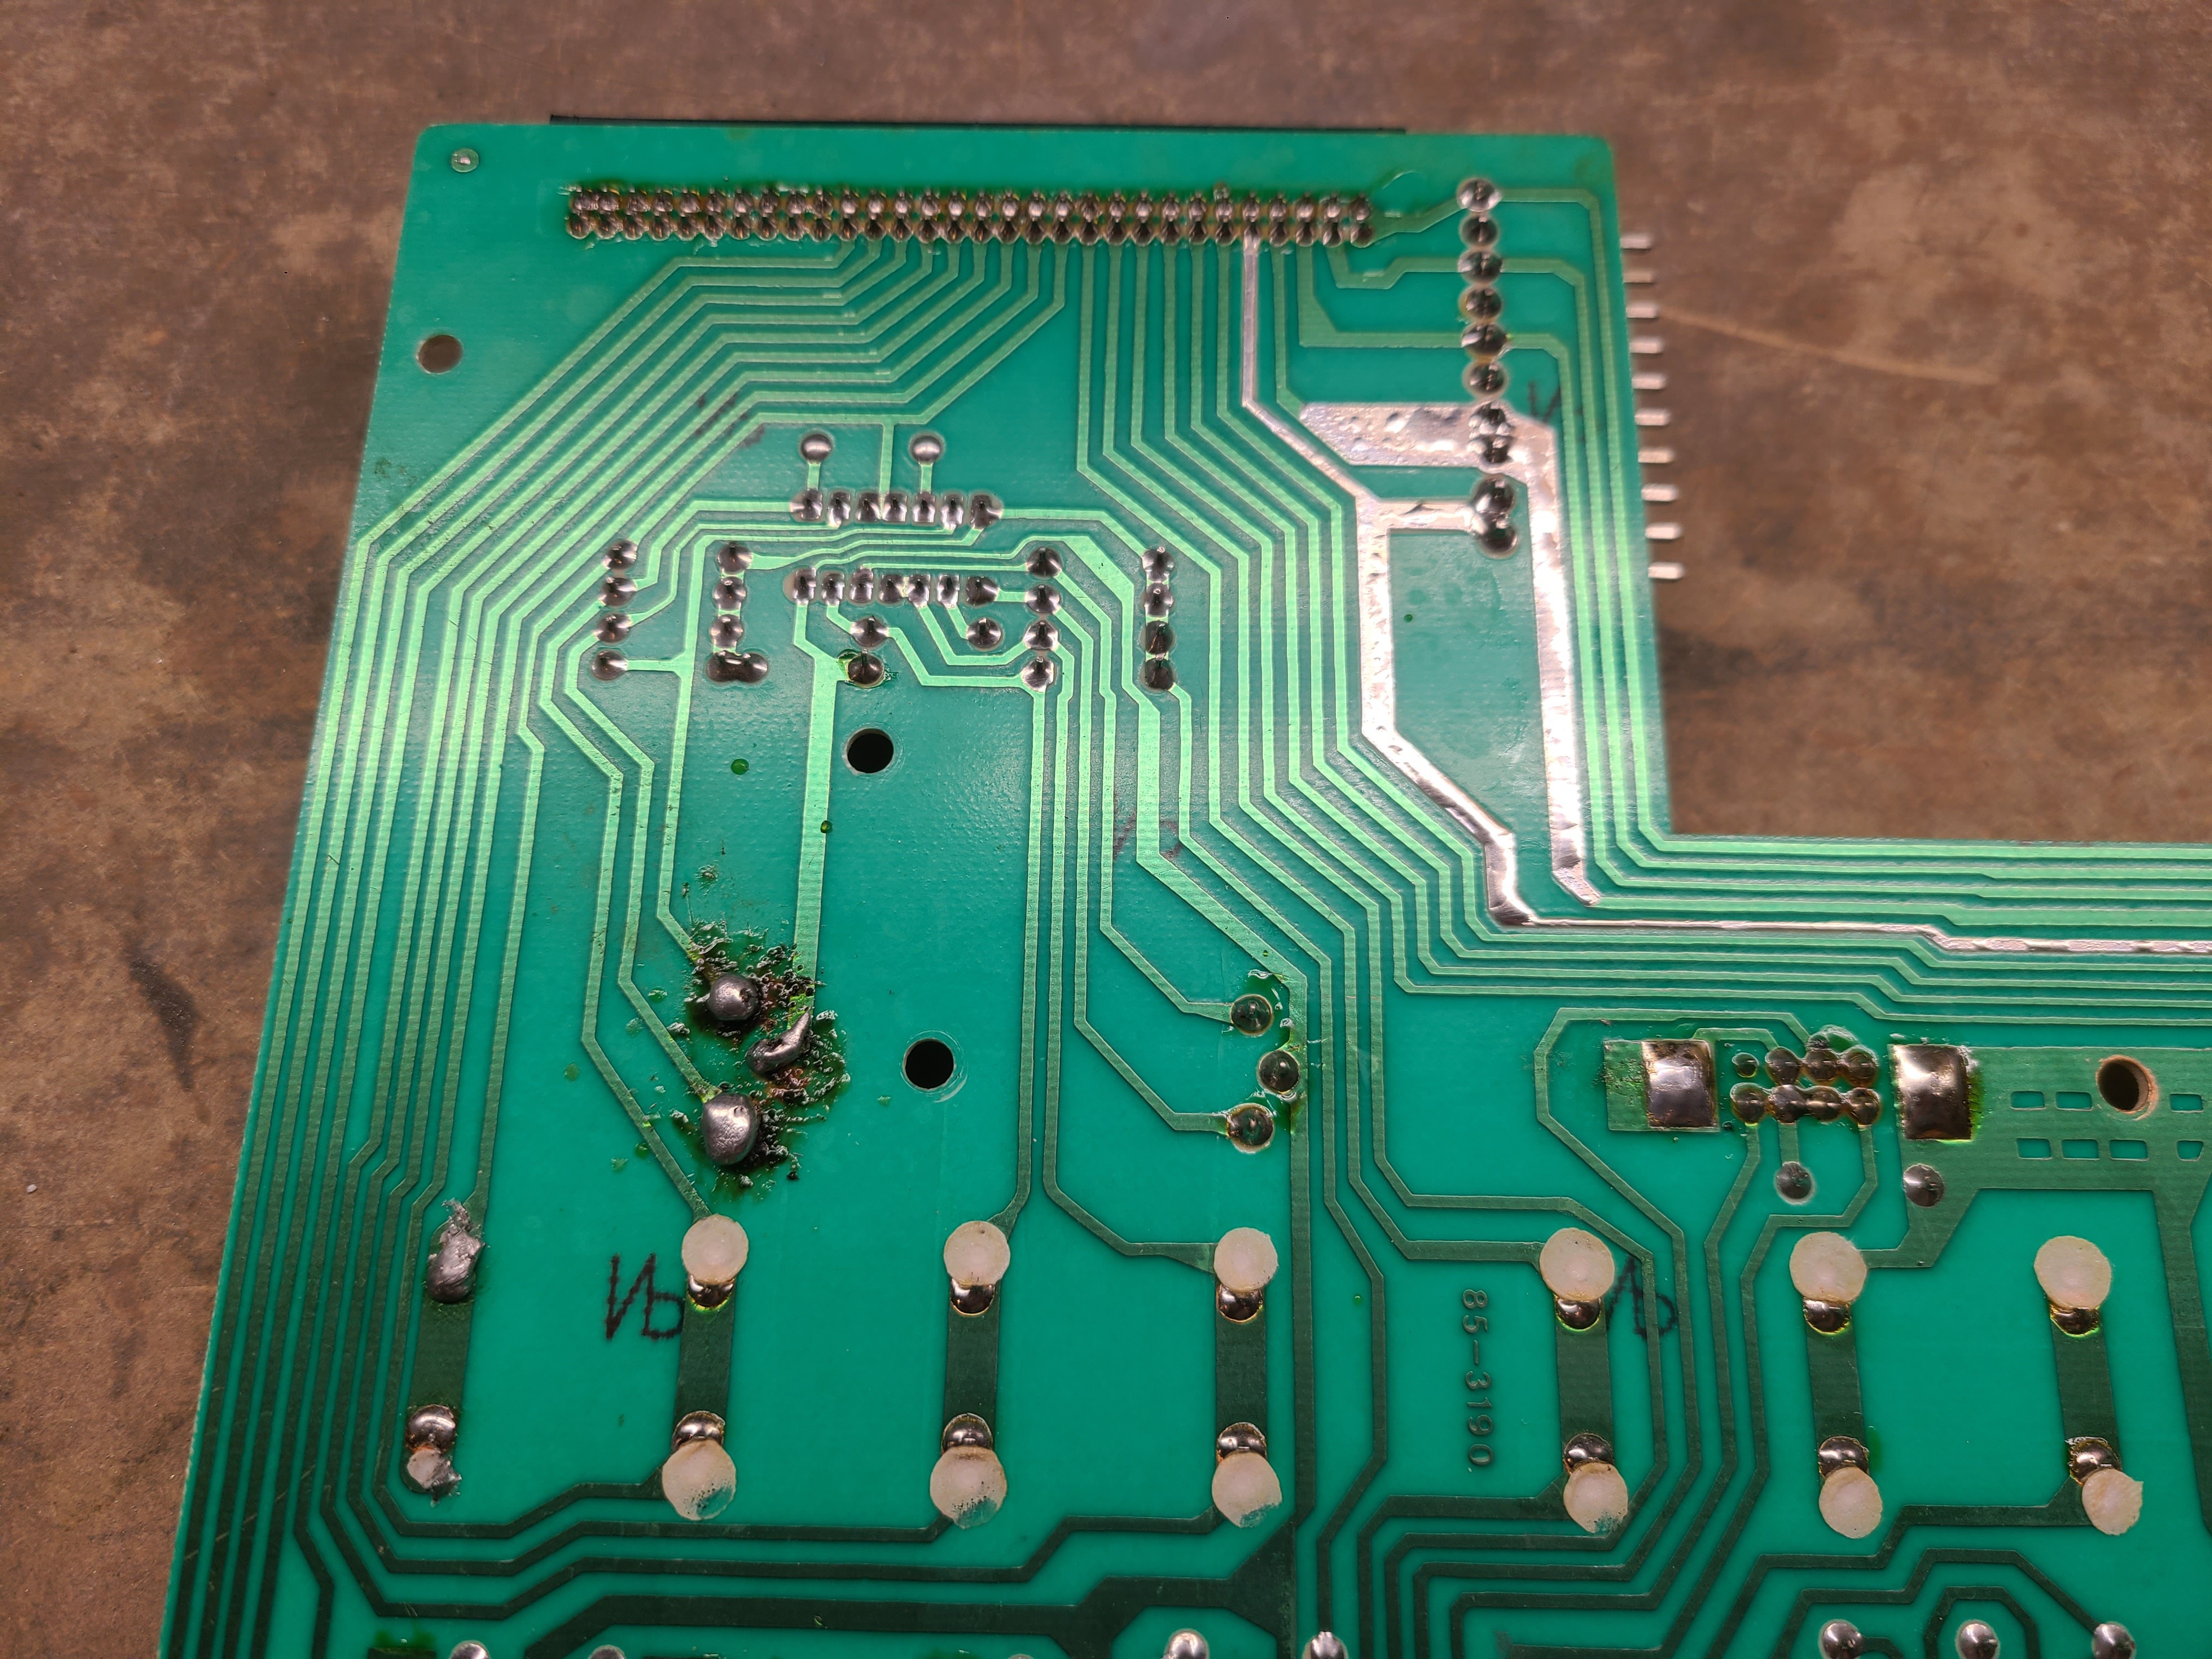
![Underside of the PCB from the digital trainer. Large solder blobs and lifted pads are visible Underside of the PCB from the digital trainer. Large solder blobs and lifted pads are visible]()
Oh, ohh.... We're not the first ones in here.
Looks like someone broke the switch off and figured a bigger glob would fix the ripped pads. Thankfully some epoxy to hold the switch and the proper amount of solder has us going.The terminal strips were also pretty wallowed out and loose, but we found some replacements from Electronix Express that'll work well enough.
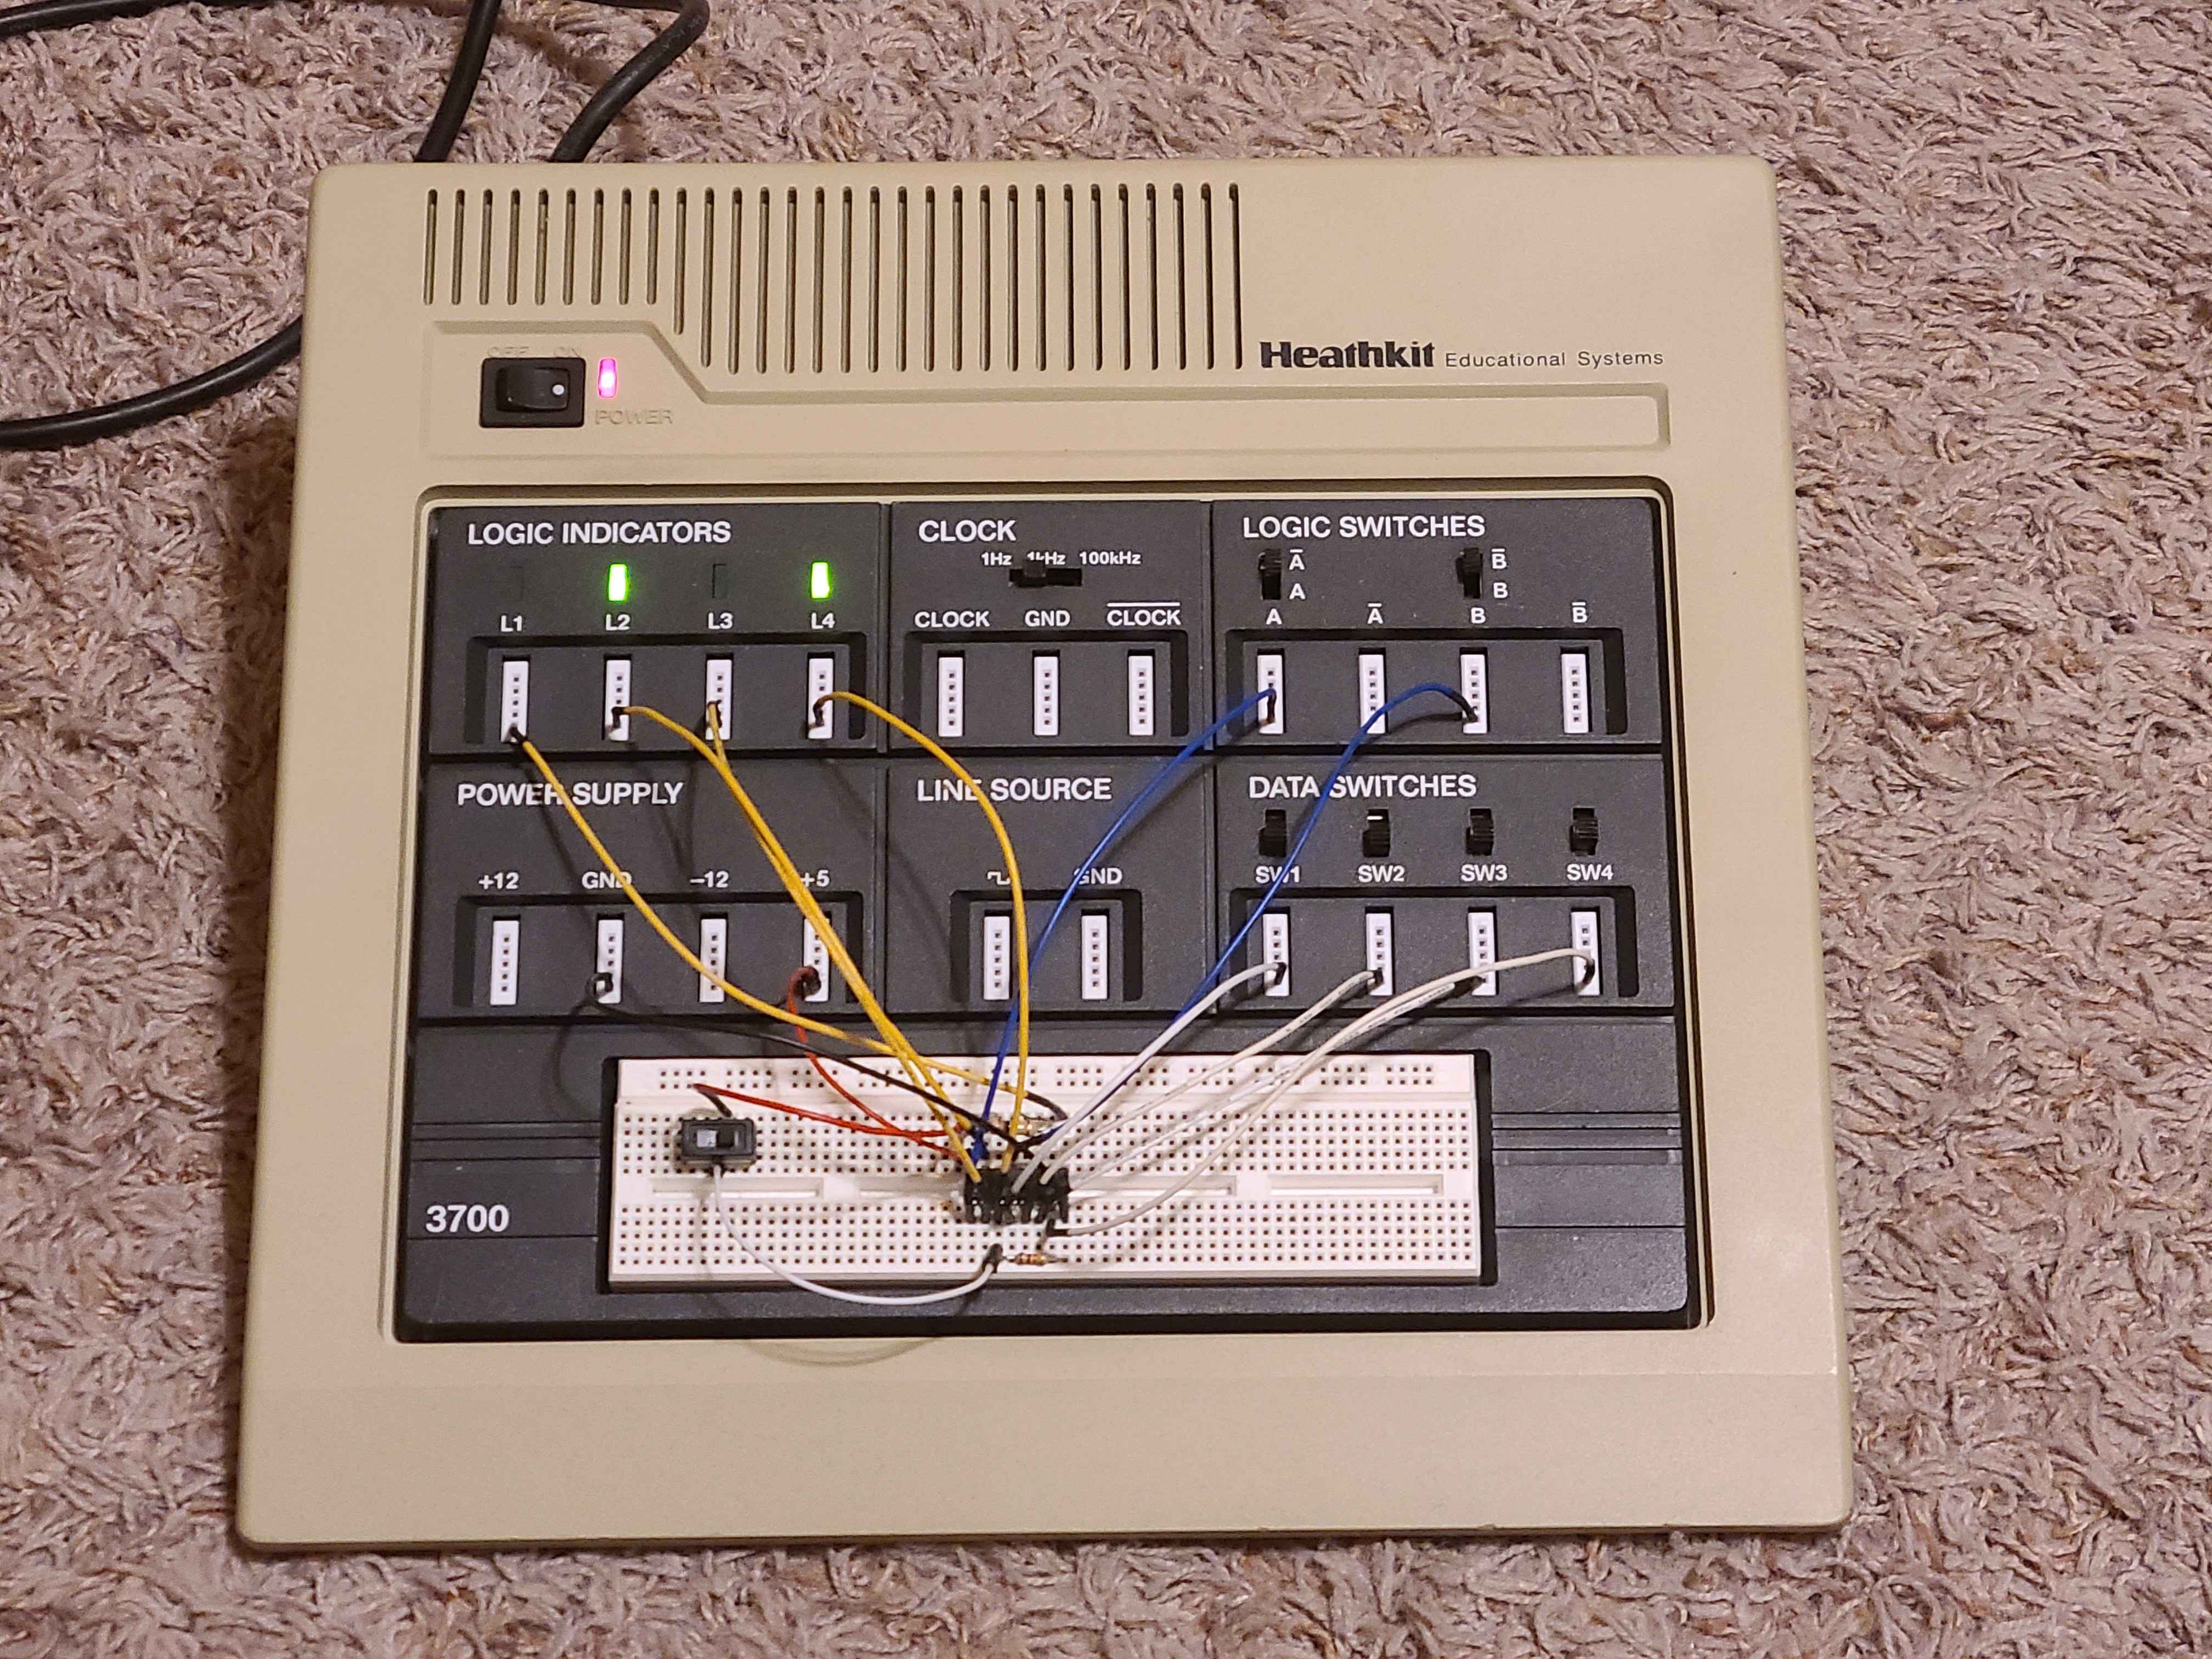
With those fixes she's all good to go, and running an ICU on the breadboard:
![Heathkit ETW-3700 Trainer all fixed up with an MC14500B on the breadboard Heathkit ETW-3700 Trainer all fixed up with an MC14500B on the breadboard]()
She works! Just loaded a one from data (L4) to RR (L2)! Now that we can play with some testing we've realized our clock circuitry may not be correct. The datasheet for the 14500B only shows X2 (the internal clock out) and shows it going *low* during the execution cycle, but the unit on the breadboard responds to X1 going *high*. Other builds we see (that don't use the internal clock also use a clock that's high during the instruction, so... We may need to do some redesign.
We like Nicola Cimmino's clock and program counter design for the PLC14500 (and already used his LED suggestion), but will have to make some changes for the parallel preloadable counters we're using. Maybe a flip-flop to delay the clock and implement the 74HC590's "output is one phase behind clock" feature? More tinkering is required! -
False Starts, Change of direction?
02/18/2024 at 01:35 • 2 commentsI've been busy working on the PCB and routing on the computer, but while I'm getting much quicker and better at it, I've ran myself into a corner.
![As far as I got on the PCB before realizing things were a bit to tight As far as I got on the PCB before realizing things were a bit to tight]()
We're gonna need a bigger board... This project is one of odd anachronistic design choices, pulling in design for aesthetics here, cost there, speed of construction in another place. The design so far is a single board computer with onboard front panel, simply because that seemed the most expedient and reminiscent of old kits and educational machines like the KIM-1, MicroProfessor, ELF, Superboard, and so on. I love the vintage look with simple boards and wide curved traces, and I really want the front panel to be organized and clear. That said I also want the board as small as possible to reduce cost. There's no sense paying $100 for bare boards, and I don't want the machine to become too large and unwieldy to use on a small desk.
This contrast has unfortunately not been working out well. Positioning the front panel on the main board, keeping output LEDs near their related input switches, and keeping the I/O connectors out of the way on the back of the board means a large number of signals have to traverse the whole length of the board, often twice, while also navigating tight areas between the processor section, LED drivers, and clock logic.
Is it possible to route the board? Yes, definitely, but it means giving up on trace spacing, and conceding to building a tight rat's nest. If aesthetics were the only concern we may be okay with that, but... Well, our nostalgia is for educational and exploratory systems, systems that are designed to be easy to follow along with and understand, and a tight mess severely limits that ability. We'd like to be able to show this thing off and maybe help teach something, you know?
So where do we go from here? Well, the board could be made larger, but I'm neither interested nor willing to risk finances on having to re-order something like that. That leaves us with a card bus / backplane system. I'd initially rejected this idea due to the cost and complexity of connectors and a chassis, but if we can use smaller boards we can take advantage of special pricing, and there's less wasted in case of a screw up or reorder. Plus, modularization makes further development easier and means we can get more out of what we've spent on the backplane and chassis.
My next step is going to be doing some research and measurement to see what kind of connectors or backplanes are available cheaply and seeing what it'll take to split the design up. Something with 60+ connectors and a small size would be ideal and allow for a straight through backplane, but we may need a smaller pin count to accommodate fan out on a fine pitch board. Currently PCIe x4 is near the top of the list due to its low price, small size, and availability, but we'd like to not have to "cheat" to route it. Let me know if you have any other suggestions.
Edit: Wait a second, the biggest trouble I'm having is coming from trying to accommodate the front panel and its wiring on one board while hiding or moving components from line of sight. Simply letting the chassis host the front panel would save a huge amount of space. A short bit of ribbon cable and freedom to place connectors wherever's convenient would help tremendously (though boards may still need stacked / modularized). To the enclosure catalogs!
-
Catch Up and Component Selection
02/12/2024 at 05:00 • 0 commentsWe've been working on this project for a little bit now. Mostly iterating through pen and paper designs and descriptions to figure out what we even want to build, up to the first iteration of the schematic from earlier this week. The design is heavily based on Usagi Electric's UETTL, though I have added some features, made substitutions (CMOS mono and astables instead of 555s, 74HC251s instead of 74HC4051s and so on) and most of the clock and control logic is taken from my earlier Uno TTL computer project.
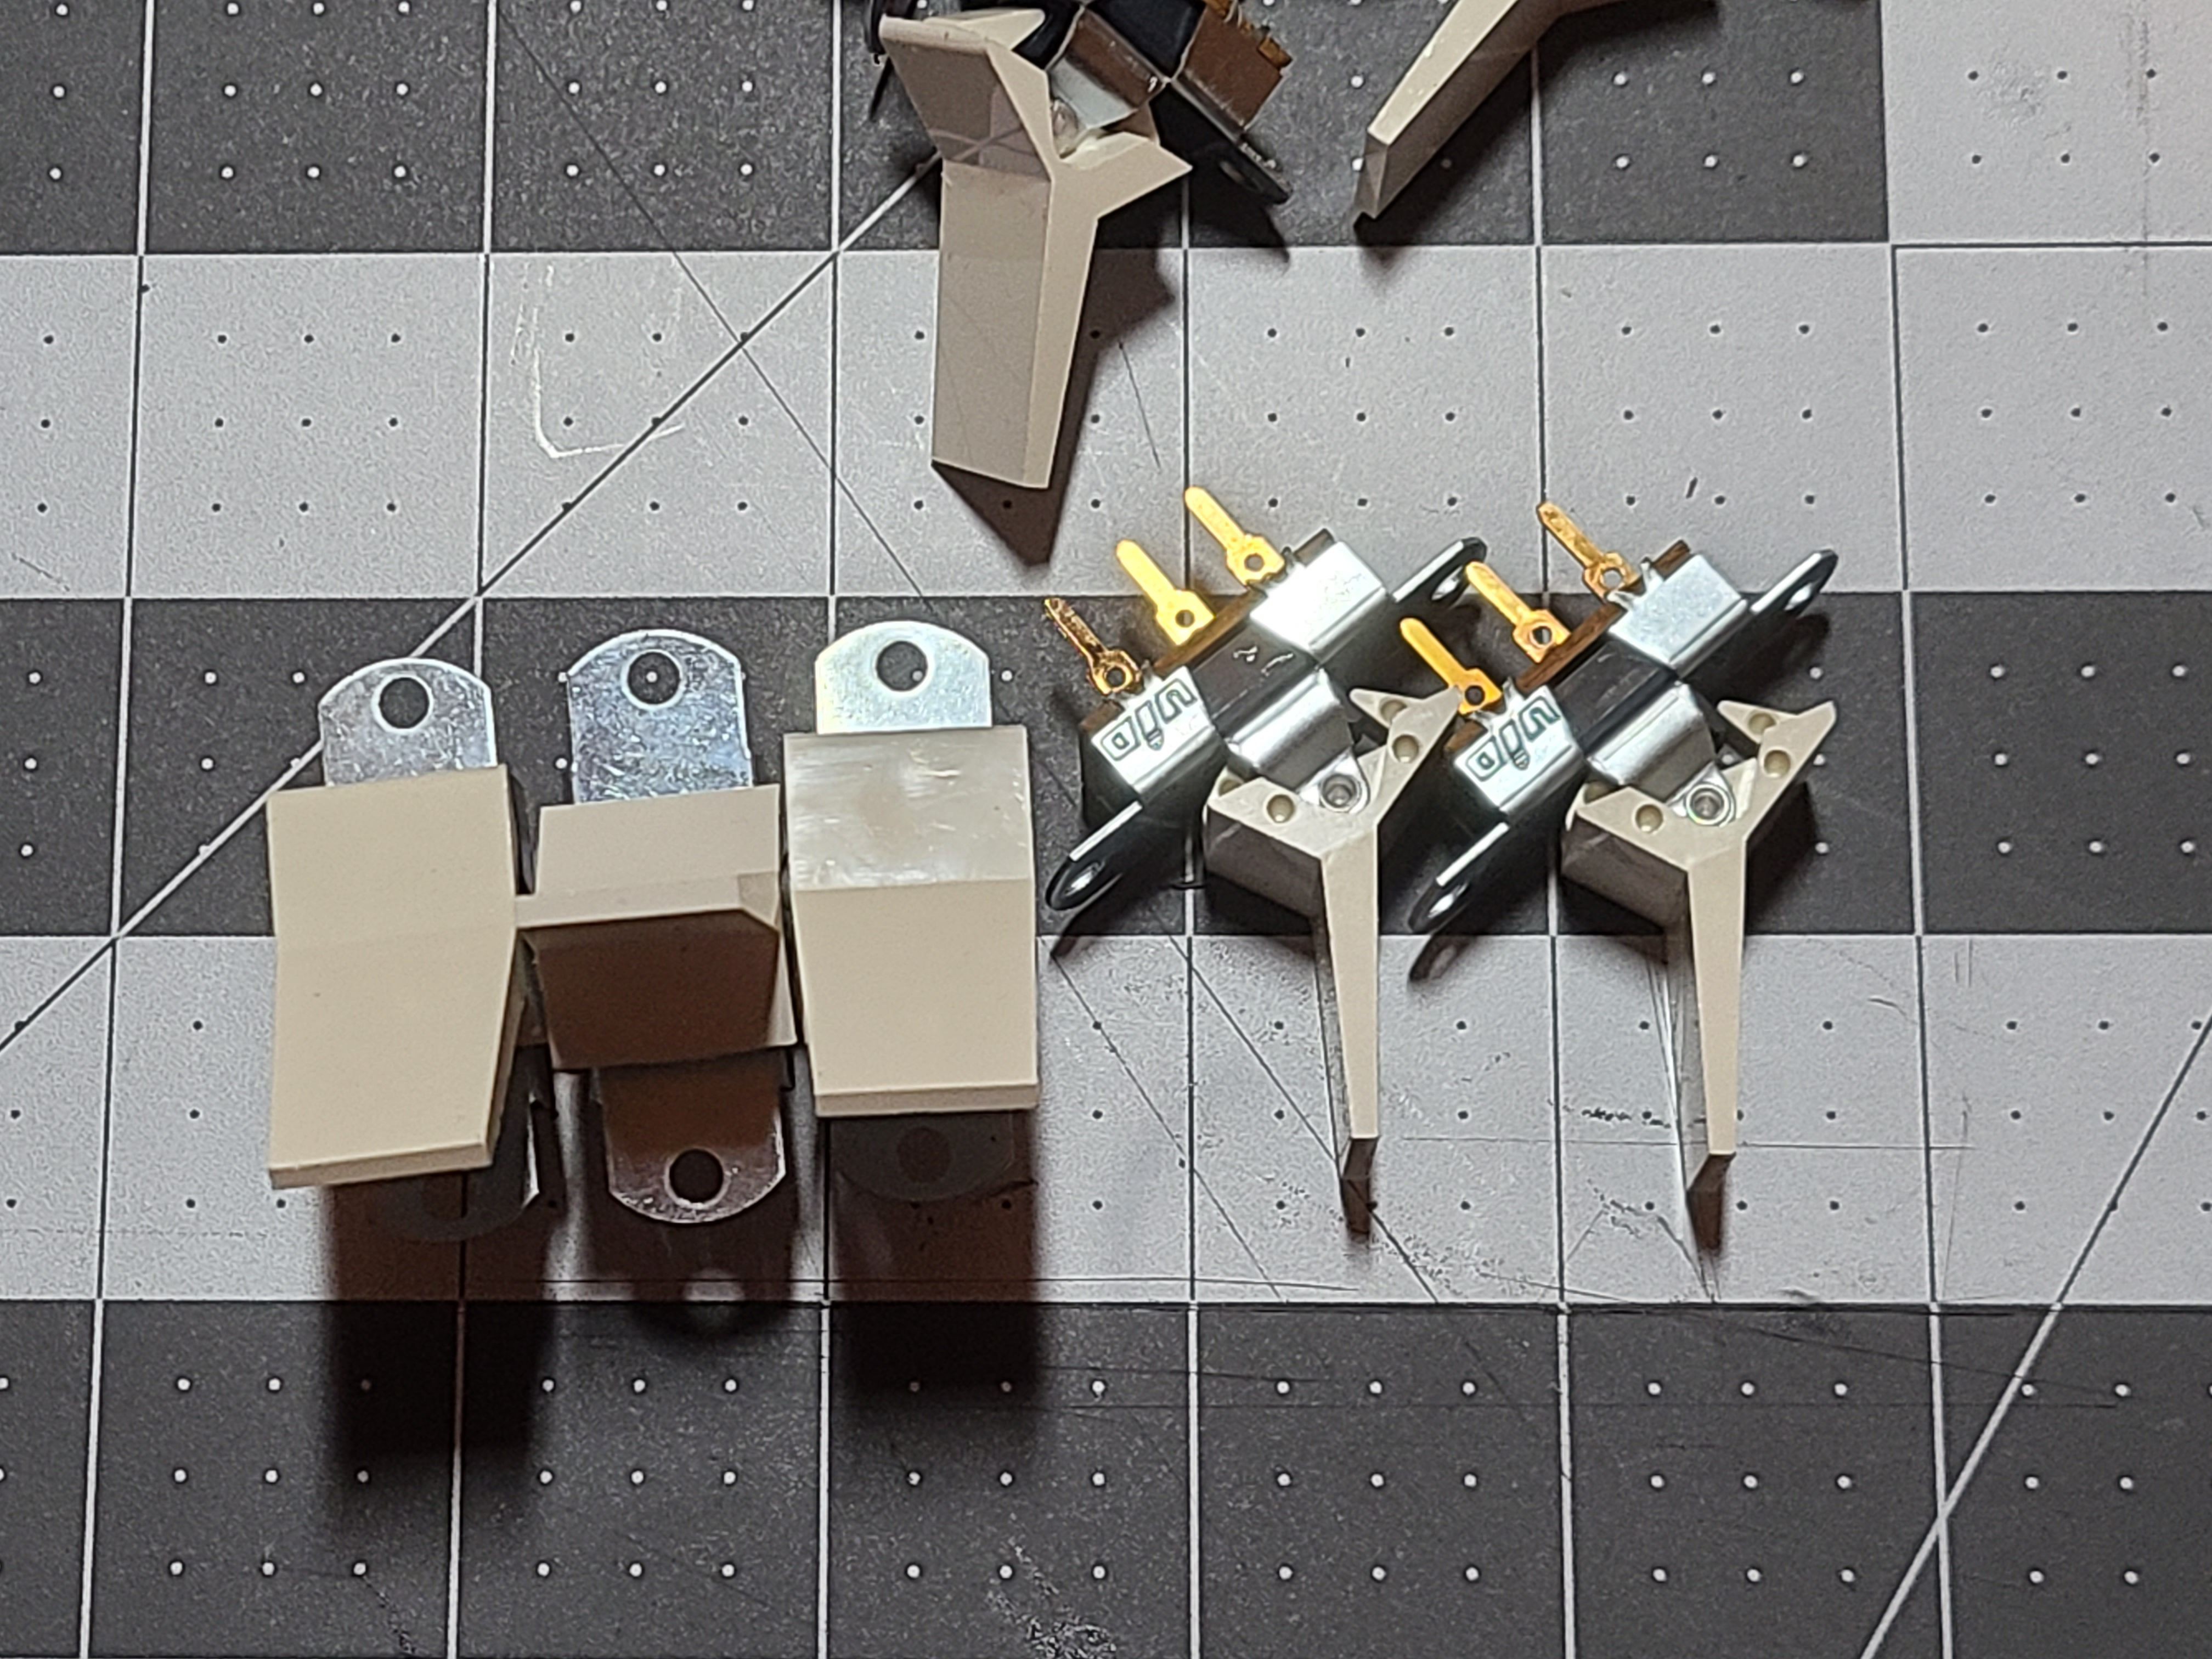
The front panel design and interface concept is largely sorted, as is preliminary component and footprint selection. I was able to track down some super stylish and cheap paddle switches from Unicorn Electronics (they still have an eBay store!), so I'll be working those in the design.
![Assortment of paddle slide switches. Some are loose one the desk, but 3 are arranged in a row Assortment of paddle slide switches. Some are loose one the desk, but 3 are arranged in a row]()
Switches for our front panel. Unicorn Electronics SW1004 Obviously these plus the vintage RAMs with separate ins and outs make the build tricky to replicate, so I may work some modifications into version 2. For now parts are available enough through NOS sellers.
Uno 14500
An MC14500B based single board computer with an old-school front panel for interactive programming
 JNP-3R