 Thomas Kremser
-
1Step 1
wire the 433Mhz module like shown
![]()
-
2Step 2
Install OctoPrint like normal to your SD Card
configure WIFI using the octopi-network.txt file or plug in a LAN cable
Login to your Pi using pi/raspberry
do update everything and install git-core
sudo apt-get update sudo apt-get upgrade sudo apt-get install git-core -
3Step 3
install wiringPi and Raspberry-Remote
cd git clone git://git.drogon.net/wiringPi cd wiringPi ./build cd git clone git://github.com/xkonni/raspberry-remote.git cd raspberry-remote make send cd -
4Step 4
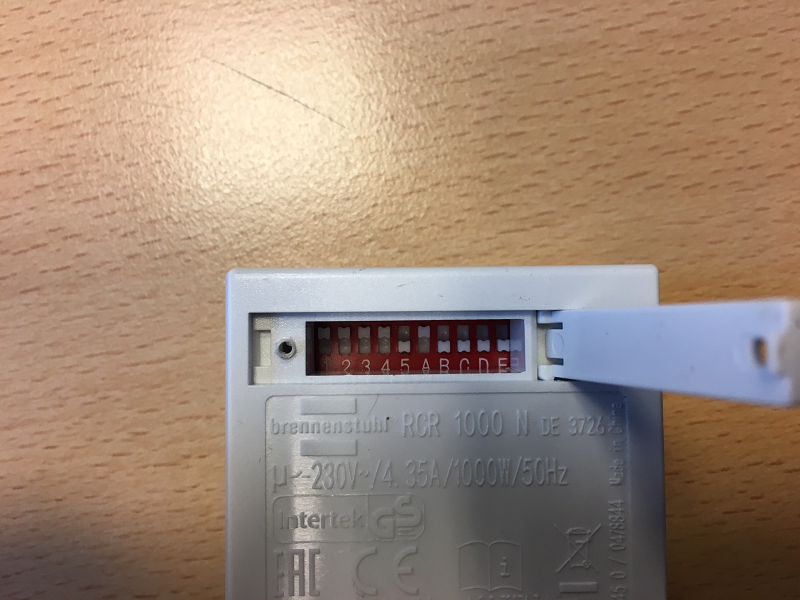
Test if you can Power Up and Down your Plug
the first 5 Digits are the System Code for the plug
(hex Code Pin Up = 1, Pin Down =0)the letters are plug A-D
(A=1 / B=2 / C=3 / D=4)sudo ./send (Systemcode)(plug A-D)(1 On, 0 Off)
![]()
in the Picture it would be like
all numbers up except 5 which is down = 0
and A up = 1cd /home/pi/raspberry-remote #power on plug A
sudo ./send 11110 1 1#power off plug A sudo ./send 11110 1 0
</ -
5Step 5
sudo nano /home/pi/.octoprint/config.yamlreplace the following in this file
system:
actions: []
with the following code
system:
  actions:
    - name: Shutdown 3D Printer
      action: shutdown 3D printer
      command: sudo /home/pi/raspberry-remote/send 11110 1 0
      confirm: You are about to shutdown the 3D Printer.
    - name: Power On 3D Printer
      action: power on 3D printer
      command: sudo /home/pi/raspberry-remote/send 11110 1 1
      confirm: You are about to power on the 3D Printer.
restart OctoPrint Server with the following command
sudo service octoprint restart -
6Step 6
then you should see the new commands in the drop down menu
and of Course they should do what they are ment too :)
![]()
OctoPrint mod to remotly trigger plug sockets
Modify OctoPrint to remotly trigger plug sockets out of the Webinterface Wire 433Mhz Sender to the Raspberry Install wiringPi


Discussions
Become a Hackaday.io Member
Create an account to leave a comment. Already have an account? Log In.
Thank you Thomas! It work's great! Full control over my Printer from anywhere in the world!
Are you sure? yes | no