 EmericB
-
1Let's continue developing the structure of our database.
In the first part of the project, you had already created your database in phpMyAdmin. It contained a single table called ‘ACTIVITY’.
We will now create the additional tables required for the efficient operation of LeanC-IOT MES.
Table structure for table `MESSAGES`
CREATE TABLE `MESSAGES` (
  `id` int UNSIGNED NOT NULL,
  `content` text CHARACTER SET utf8mb4 COLLATE utf8mb4_general_ci NOT NULL,
  `initials` varchar(30) CHARACTER SET utf8mb4 COLLATE utf8mb4_general_ci NOT NULL,
  `id_activ` int UNSIGNED NOT NULL,
  `reading_time` datetime DEFAULT CURRENT_TIMESTAMP
) ENGINE=InnoDB DEFAULT CHARSET=utf8mb4 COLLATE=utf8mb4_general_ci;
Table structure for table `STOPS`
CREATE TABLE `STOPS` (
  `id` int UNSIGNED NOT NULL,
  `id_activ` int UNSIGNED NOT NULL,
  `type` varchar(30) CHARACTER SET utf8mb4 COLLATE utf8mb4_general_ci NOT NULL,
  `id_activ2` int UNSIGNED NOT NULL
) ENGINE=InnoDB DEFAULT CHARSET=utf8mb4 COLLATE=utf8mb4_general_ci;
Table structure for table `USERS`
CREATE TABLE `USERS` (
  `idPrimaire` int NOT NULL,
  `usernameIndex` varchar(50) CHARACTER SET utf8mb4 COLLATE utf8mb4_general_ci NOT NULL,
  `password` varchar(255) CHARACTER SET utf8mb4 COLLATE utf8mb4_general_ci NOT NULL,
  `emailIndex` varchar(100) CHARACTER SET utf8mb4 COLLATE utf8mb4_general_ci DEFAULT NULL,
  `created_at` datetime DEFAULT CURRENT_TIMESTAMP,
  `last_login` datetime DEFAULT NULL,
  `level` varchar(50) CHARACTER SET utf8mb4 COLLATE utf8mb4_general_ci NOT NULL
) ENGINE=InnoDB DEFAULT CHARSET=utf8mb4 COLLATE=utf8mb4_general_ci;
We simply insert a default user with login = 'Admin' and password = 'Admin' to test the system. You should delete this user afterwards for obvious security reasons.
INSERT INTO `USERS` (`idPrimaire`, `usernameIndex`, `password`, `emailIndex`, `created_at`, `last_login`, `level`) VALUES
('Admin', '$2y$10$1bOu35b9CERvi9Y2IW5tnO46WyH7agG/Cz62jSrUn.4EhblLiv.Qy', 'admin@yourdomain.com', '2024-03-10 00:17:55', NULL, 'Admin');
Logically, on the left side of your phpMyAdmin control panel, you should be able to see the list of your tables.

Great news! Our database is now ready. We will now start deploying our .php files on the server.
-
2Creat the 'db_config.php' file
Use your text editor and modify it to include your specific database credentials.
<?php
// Database connection information
$servername = 'xxxxxxxx.hosting-data.io'; // Your database server
$dbname = 'your database name';// Database name
$username = 'enter your user name';// Database username
$password = 'enter your password';// Password for the user


// Connecting to the database
$conn = new mysqli($servername, $username, $password, $dbname);

// Checking the connection
if ($conn->connect_error) {
    die("Connection failed: " . $conn->connect_error);
}
?>
It's crucial to place your 'db_config.php' file outside of the public root directory of your web server.
This practice significantly enhances the security of your application by preventing unauthorized users from accessing sensitive database connection details via a web browser.
The public root directory, often named
public_html,www, orhtdocs, is accessible to anyone on the internet. Files within this directory can be accessed directly through a URL.However, files placed outside this directory are not accessible via direct URL, making them secure from web-based attacks.
To implement this security measure, move your 'db_config.php' file to a location on your server that is not publicly accessible.
For example, if your public root directory is
/var/www/html, you could place 'db_config.php' in/var/wwwor another secure directory outside/var/www/html.After uploading the file, it's important to note the complete file path of 'db_config.php'. You will need this path to include or require the 'db_config.php' file in your PHP scripts.
-
3Adapting the code for your application
The next steps in adapting the code for your application are remarkably straightforward. All you need to do is download the application structure provided in the resources.
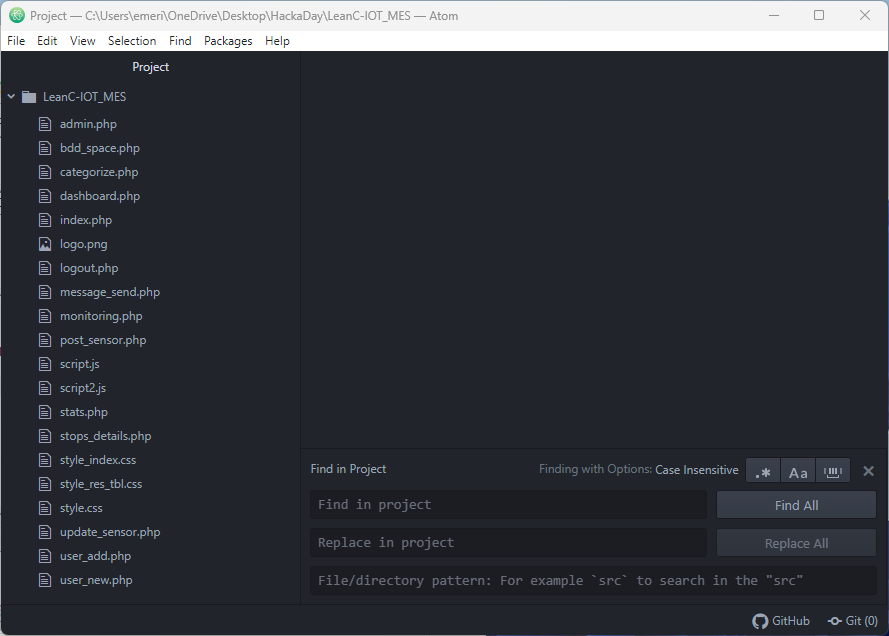
Once downloaded, open the folder locally to perform batch replacements in the code. It's advisable to use Atom Text Editor for this task. Atom offers a powerful feature for searching and replacing text across multiple files, which can significantly streamline the customization process.
To utilize this feature in Atom, simply use the shortcut CTRL+SHIFT+F (CMD+SHIFT+F on macOS). This command opens the "Find in Project" search box, allowing you to search for specific strings of text throughout your entire project and replace them as needed.
This method is incredibly efficient for updating paths, customizing configuration settings, or making any other widespread changes to your codebase. By taking advantage of Atom's search and replace functionality, you can ensure that your code is quickly and accurately updated according to your project's requirements.
-
4Find and replace
Search Replace with Number of expected changes /my_custom_url/PRIVATE/db_config.php The real URL of your db_config.php file 10 dbs12345678 The name of your database 2 Europe/Paris Your TimeZone. The list of supported time zones can be found at:
https://www.php.net/manual/en/timezones.php1 -
5Transfer Your .php Pages
Your customized version of Lean-C IOT MES is ready to be deployed on your server! Use your preferred FTP transfer software to upload your files online.
Log in to the interface using the 'Admin'/'Admin' account.
Create your users and don't forget to delete the 'Admin'/'Admin' account.
I hope this application will assist you in reporting your activities. In a future project, I will post a model of an acquisition card that allows not only connecting a new IR sensor to your ESP32 but also receiving signals from any 24V relay to feed the database. Enjoy, and I would love to hear from you! See you soon!
Industry 4.0: An economical SAAS MES part 2
An OpenSource MES that is easily implementable with resources accessible to everyone.

Discussions
Become a Hackaday.io Member
Create an account to leave a comment. Already have an account? Log In.