In today's class, we focused on refining a new component that complicated the complete smooth movement of the train. The decision to remove the gears was based on their tendency to complicate the overall movement of the train assembly. We redesigned this axle and removed some helical elements it had. These helices were supposed to make the axle rotate by colliding with the wheel axis when the wheels moved. However, after printing and testing it in real life, this mechanism didn't work quite as well as expected. Therefore, we decided to remove the helices and install another mechanism to ensure the shaft rotates properly. By redesigning the piece without the helices, we aim to achieve a smoother and more dynamic motion.
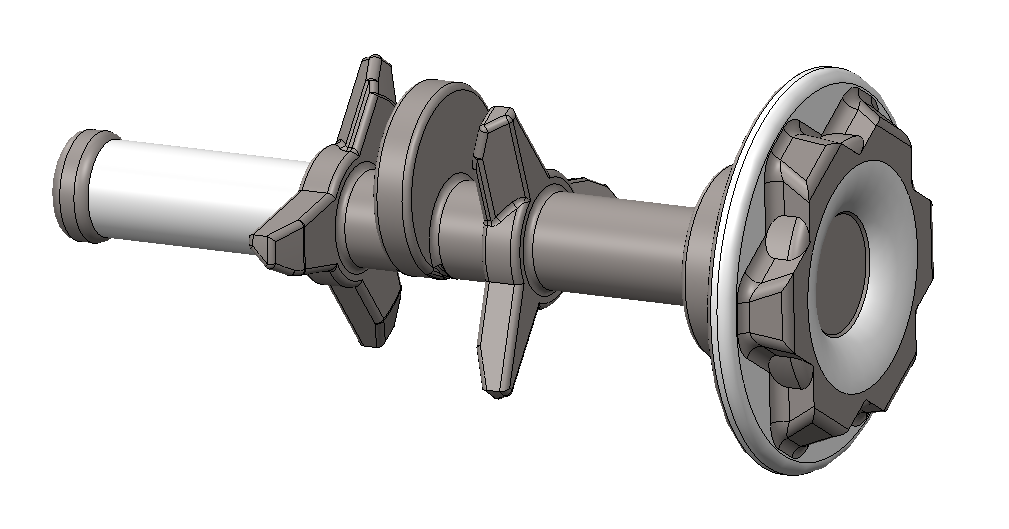
Redesigning this piece
.
Our primary task today was to sand the new printed piece meticulously. This step is crucial because any imperfections in the surface could hinder the rotational movement, leading to a less efficient operation. By sanding the piece, we aim to reduce unfinished rough surfaces and ensure that the cam follower moves smoothly within its designated path. This will contribute to a more fluid movement of the entire train mechanism, enhancing its overall performance. The improved design has a more reliable and effective operation, making the movement of the train assembly as smooth and dynamic as possible.
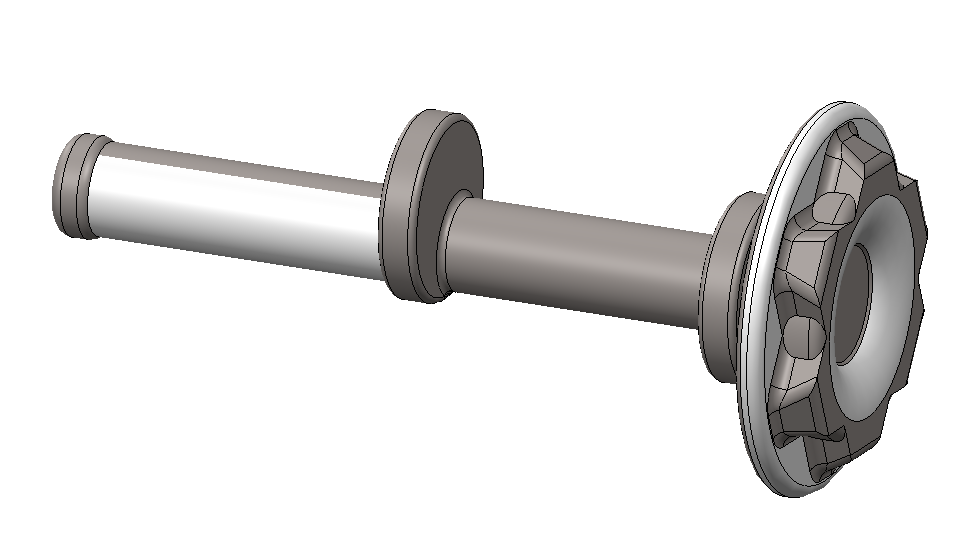
Redesigned axis without the helices
Furthermore, we successfully integrated the geared DC motor into the system by establishing a connection to the battery. This involved a meticulous solding process to connect the cables to ensure secure and reliable electrical connections. By using solding techniques with tin, we created strong bonds between the wires and the terminals, which is crucial for maintaining electrical conductivity and preventing any potential interruptions in power flow.
Once the cables were securely solded, we carefully checked they were appropriately connected to positive and negative terminals of the battery before turning on the motor by connecting the batteries to the batery holder. This ensures that the motor receives the necessary electrical current to initiate and sustain its operation. By adhering to proper polarity, we ensure that the motor rotates in the desired direction, which in this case, is clockwise.
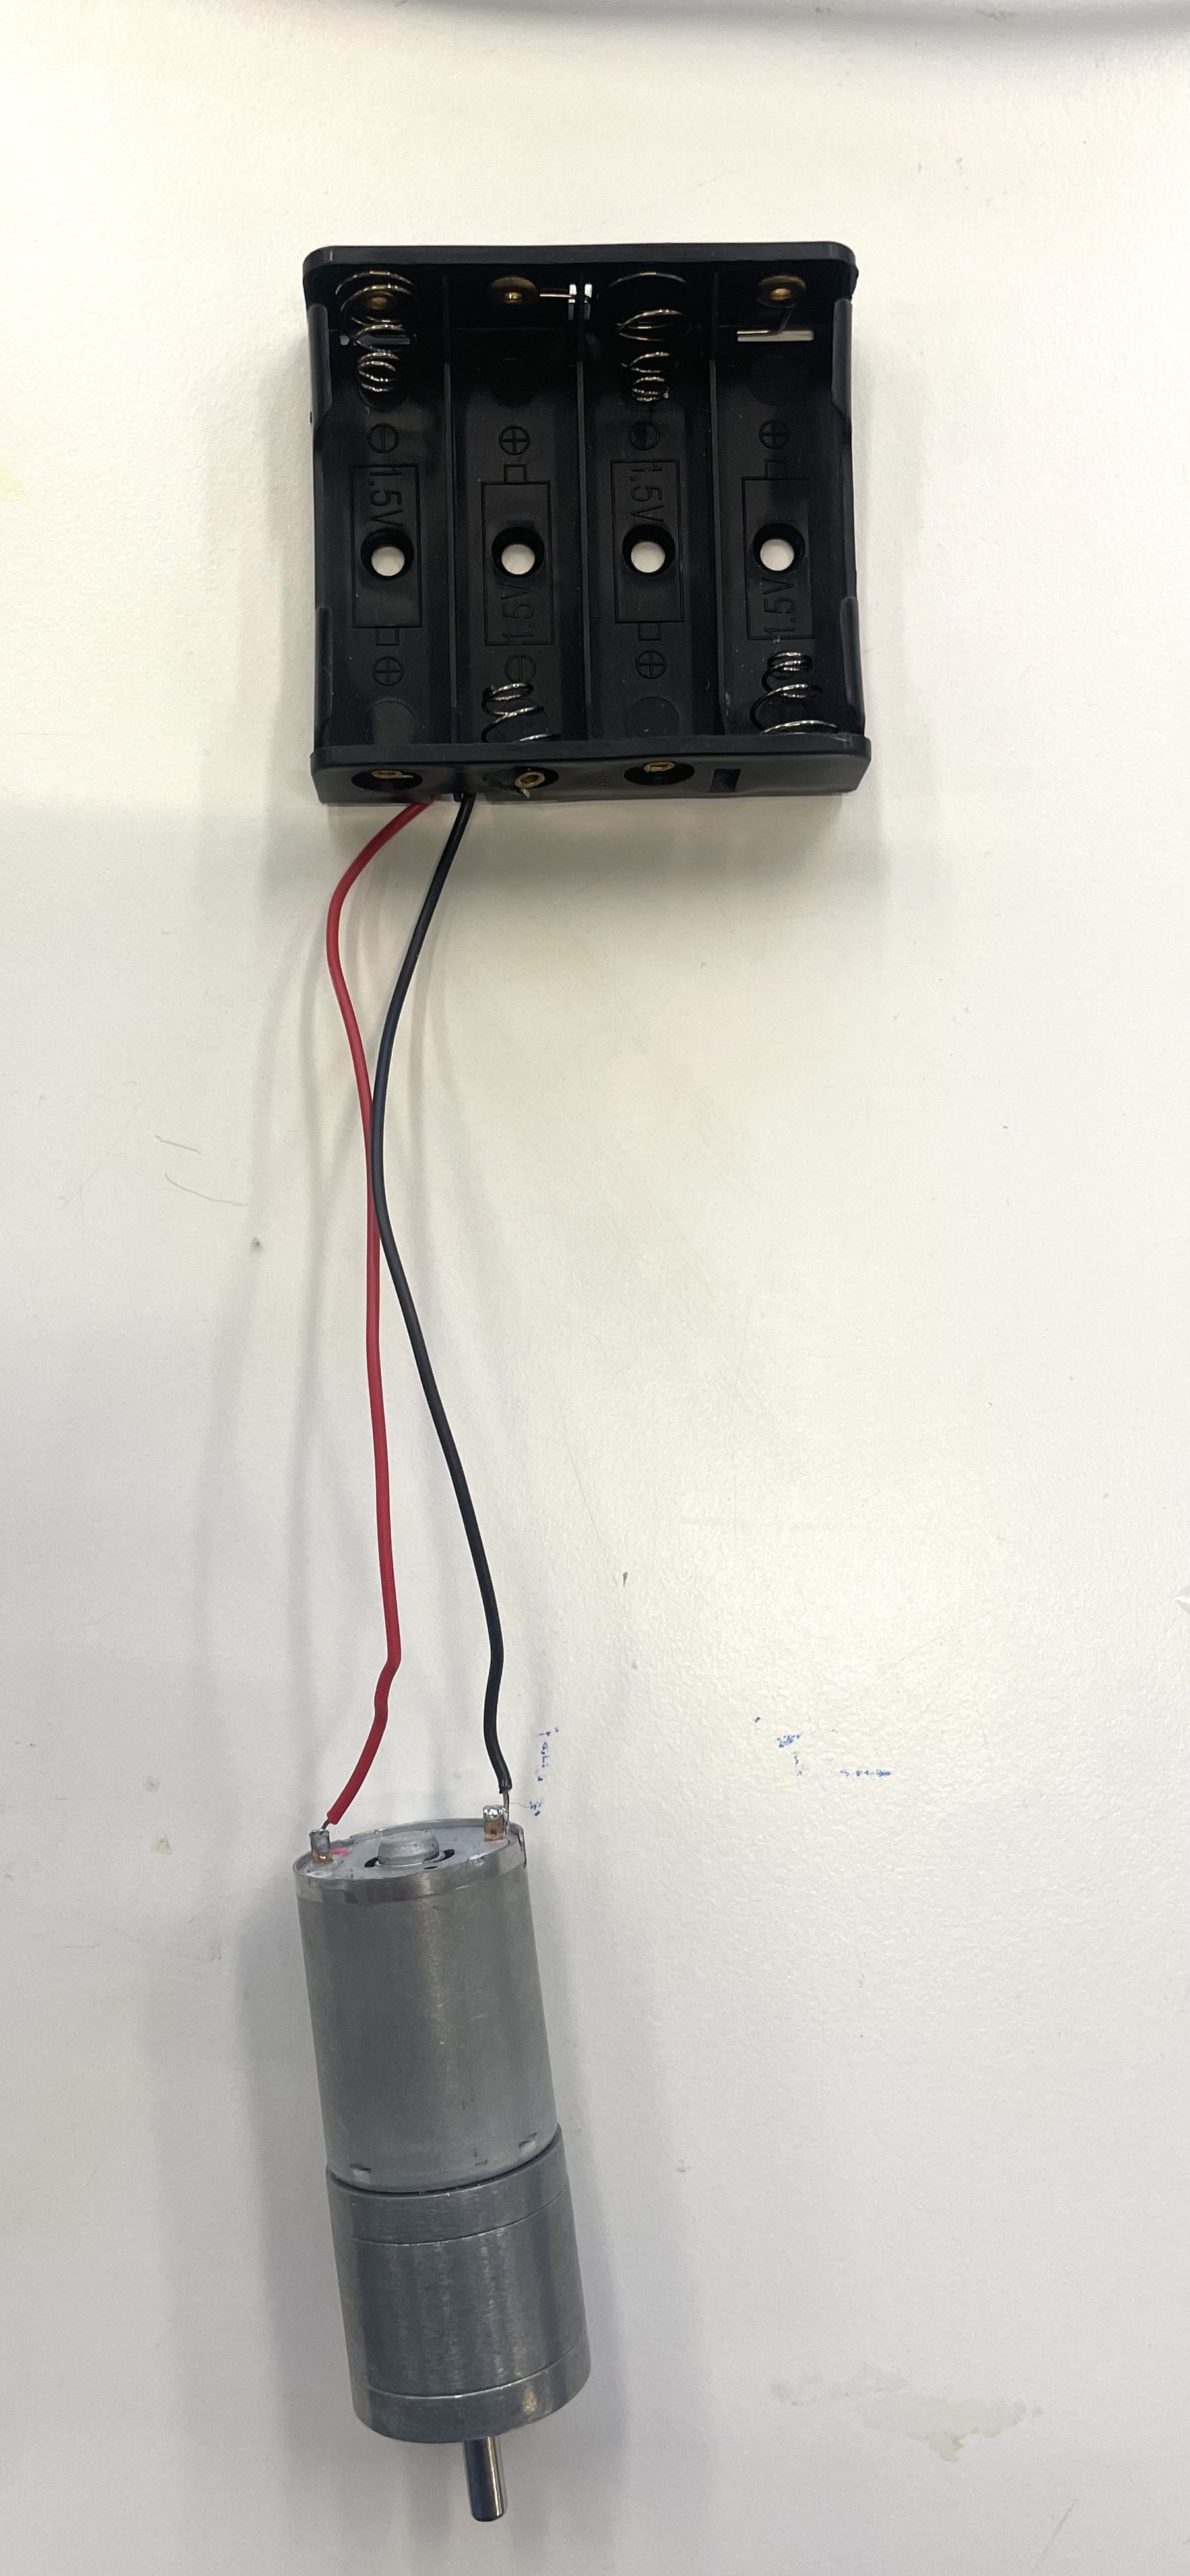
Solder motor to a 6V battery
This integration of the DC motor with gears into the system marks a significant milestone in our project, as it brings us closer to achieving our desired functionality. With the motor now connected and ready for operation, we can proceed with further testing and fine-tuning to ensure optimal performance.
Lastly, we designed a support to fit the motor with the new geared wheel that drives the entire train (driver geared wheel). This support includes a component that is screwed in place, ensuring the motor remains stationary and securely locked in position. For calculating the distance where to place the driver geared wheel and ensure the wheel could mesh correctly, we used the Pythagorean theorem to determine the appropriate height and distance from the gear next to it for the driving wheel to function properly.
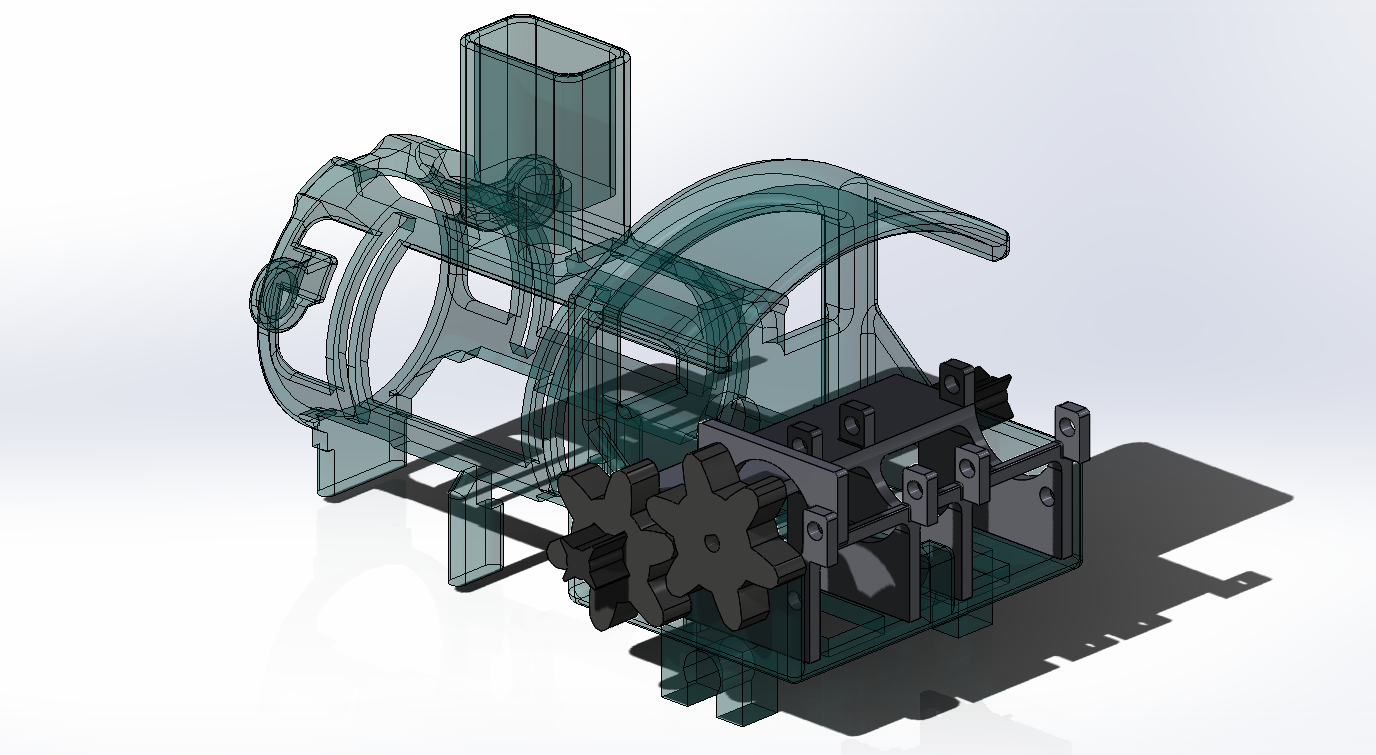
Support to fix the motor in place
Additionally, we had to redesign the geometry of the driver geared wheel, as we are going to fit it in the motor's axle. This way, when it rotates, it will drive the other gears, facilitating the entire movement. To achieve this, we had to measure the diameter of the motor's axle to ensure it fits perfectly with the wheel, leaving just the right tolerance for a proper fit.
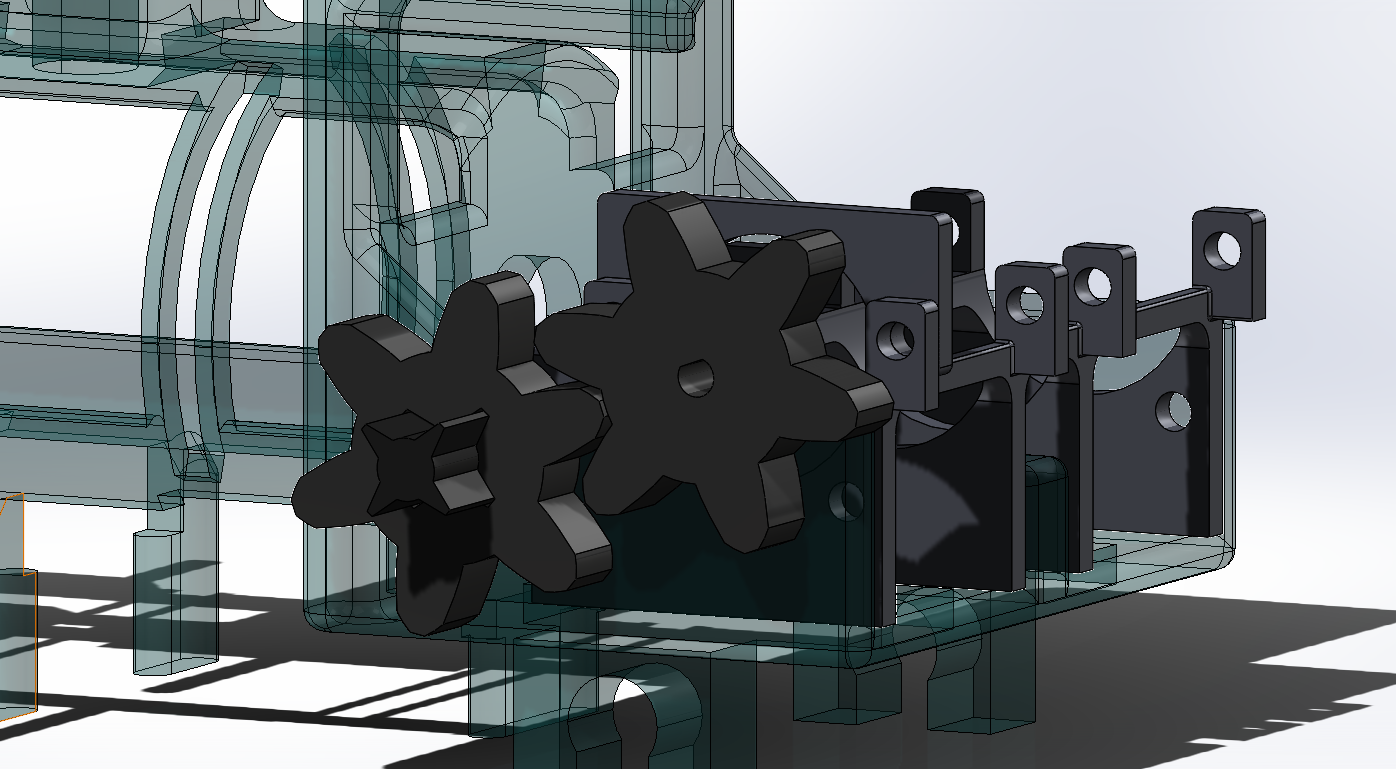
Detail of the geared wheel with the geometry of the motor axis
The following image shows the piece that locks the motor in its position. Additionally, we have integrated a geometry into the motor support that secures one of the jn5`56axes, preventing it from moving upwards and coming off its shaft when the train is in motion. Previously, we encountered this issue with the axis, which hindered the train's proper movement.
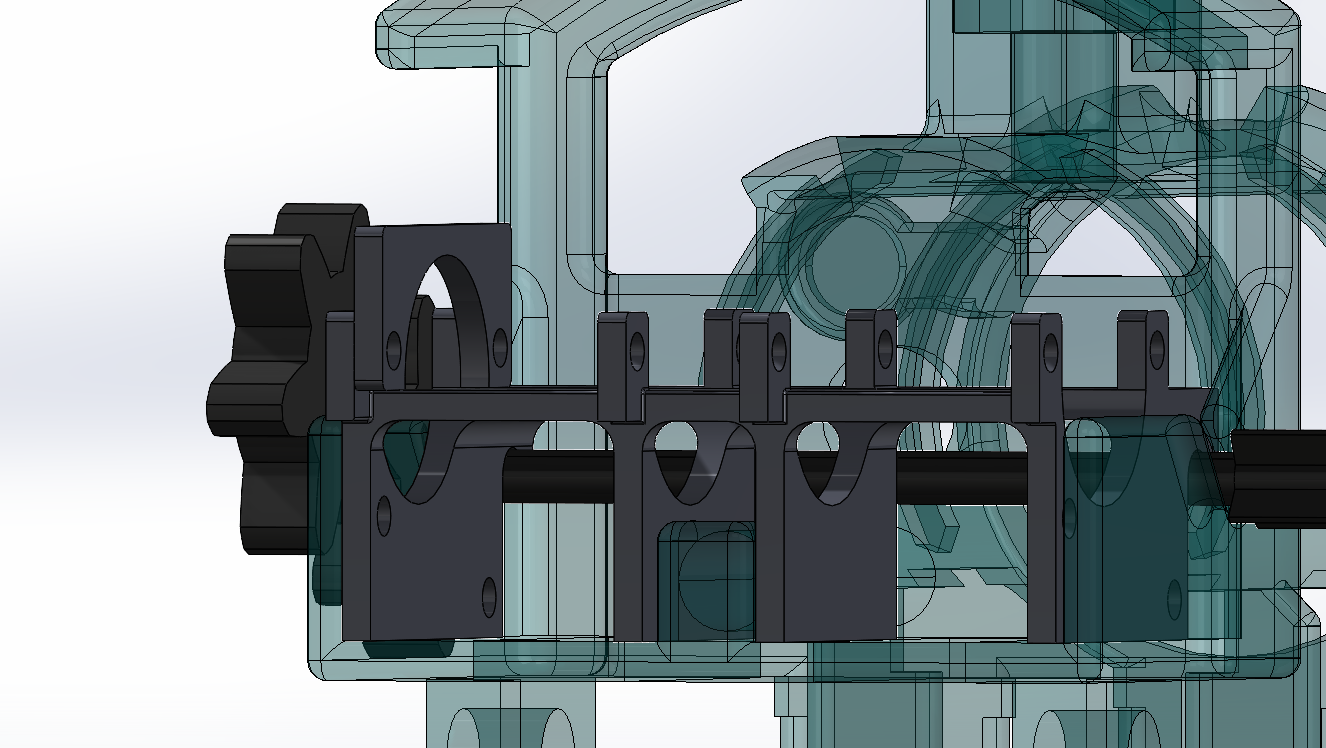
support lock for the motor
Overall, today's class was dedicated to ensuring that the new piece is perfectly prepared for its role in the train assembly, reflecting our commitment to precision and efficiency in our engineering work
Discussions
Become a Hackaday.io Member
Create an account to leave a comment. Already have an account? Log In.