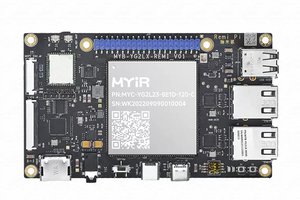
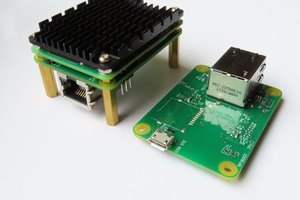
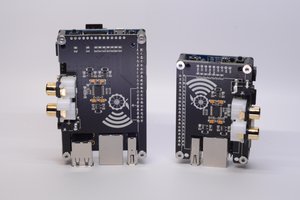
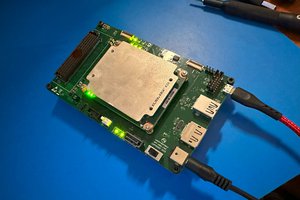
Following the example here, I wanted to get this working on a RPi 5. I purchased this extension board from 51PI (got it here). The Litefury can be purchased at Amazon.
I have no connection of with any of the products/sellers I've linked here - just trying to save time for anyone who wants to duplicate this.
This FPGA board has a Xilinx XC7A100T with 512MB of DDR3, but there's also a version with a XC7A200T and twice as much memory.
Incidentally, the pi is so much faster using an external USB SSD instead of a microsd. I needed to use the CanaKit 45W USB-C power supply to stop getting the low-power warning at boot up. Also, I installed an Argon THRML 30mm heatsink/fan and it works well with the M.2 expansion board (got it here).
Starting with a new rpi 5, I installed a few things (not sure they are all necessary):
sudo apt install git bc bison flex libssl-dev make
sudo apt install linux-headers-rpi-v8
The XDMA driver is what lets the Pi talk to the PCIE core in the FPGA. It's from Xilinx (https://github.com/Xilinx/dma_ip_drivers/tree/master/XDMA/linux-kernel) but is only officially supported on x86. I'm using the version I found here (https://github.com/laurencebarker/Saturn), which has been modified to work on the Pi:
git clone https://github.com/laurencebarker/Saturn
Probably this is for a slightly older version, so I needed to make a few tweaks to get it to build on the latest raspian (see patch file at bottom). You should be able to apply this with patch -p0 -i ../../jk.patch, but it's not hard to make the changes manually. Then I was able to build the driver (go to Saturn/linuxdriver/xdma and type make).
With the hardware installed, the Litefury with the factory image should show up with lspci (this should show up even without the driver loaded):
jayk@pi5:~/xdma $ lspci
0000:00:00.0 PCI bridge: Broadcom Inc. and subsidiaries Device 2712 (rev 21)
0000:01:00.0 Processing accelerators: Xilinx Corporation 7-Series FPGA Hard PCIe block (AXI/debug)
0001:00:00.0 PCI bridge: Broadcom Inc. and subsidiaries Device 2712 (rev 21)
0001:01:00.0 Ethernet controller: Device 1de4:0001
Then go to Saturn/linuxdriver/tests and load the driver:
jayk@pi5:~/xdma/Saturn/linuxdriver/tests $ sudo ./load_driver.sh
Loading xdma driver...
The Kernel module installed correctly and the xmda devices were recognized.
 DONE
Get the Litefury tools:
git clone https://github.com/RHSResearchLLC/NiteFury-and-LiteFury
And then run the tests:
jayk@pi5:~/xdma/NiteFury-and-LiteFury/Sample-Projects/Project-0/Host $ sudo python3 test-general.py
Found product ID b'LITE' version 1
Temp C=57.6
VCCInt=1.02
vccaux=1.80
Checkout passed
jayk@pi5:~/xdma/NiteFury-and-LiteFury/Sample-Projects/Project-0/Host $ sudo python3 test-ddr.py -i 3
Sent 256 MiB in 0.651s (412.643MBPS)
Received 256 MiB in 0.688s (390.023MBPS)
DDR test passed
Sent 256 MiB in 0.650s (412.721MBPS)
Received 256 MiB in 0.690s (388.961MBPS)
DDR test passed
Sent 256 MiB in 0.650s (412.699MBPS)
Received 256 MiB in 0.690s (389.004MBPS)
DDR test passed
400 MBytes/s (1 lane of 5Gbps PCIe 2.0) is not too shabby from Python over a little piece of flex cable!
I was able to do the same thing with a CM4 (RPi 4 embedded compute module) on the Compute Module 4 IO Board using one of these. Transfer speeds were about the same (pretty much the limit for PCIe 2.0).
I haven't tried rebuilding/reloading the default FPGA image yet, but once I test that out I'll update this post with any glitches I run into.
These are the changes I made to get the driver to build:
diff --git linuxdriver/xdma/cdev_ctrl.c linuxdriver/xdma/cdev_ctrl.c
index ce1e0dd..d41f3d7 100644
--- linuxdriver/xdma/cdev_ctrl.c
+++ linuxdriver/xdma/cdev_ctrl.c
@@ -237,7 +237,8 @@ int bridge_mmap(struct file *file, struct vm_area_struct *vma)
         * prevent touching the pages (byte access) for swap-in,
         *...
Read more »

 linuxguy

 andriy.malyshenko
 Chance Reimer
I'm interested in re-creating this. Can you list the hardware for jtag device? Also, seeking a clarification. Did mean in your post that you left the bit load on the fury device alone and used it as is? Or did you have to build a load an program it?