Martian
-
Updated Wiring Diagram
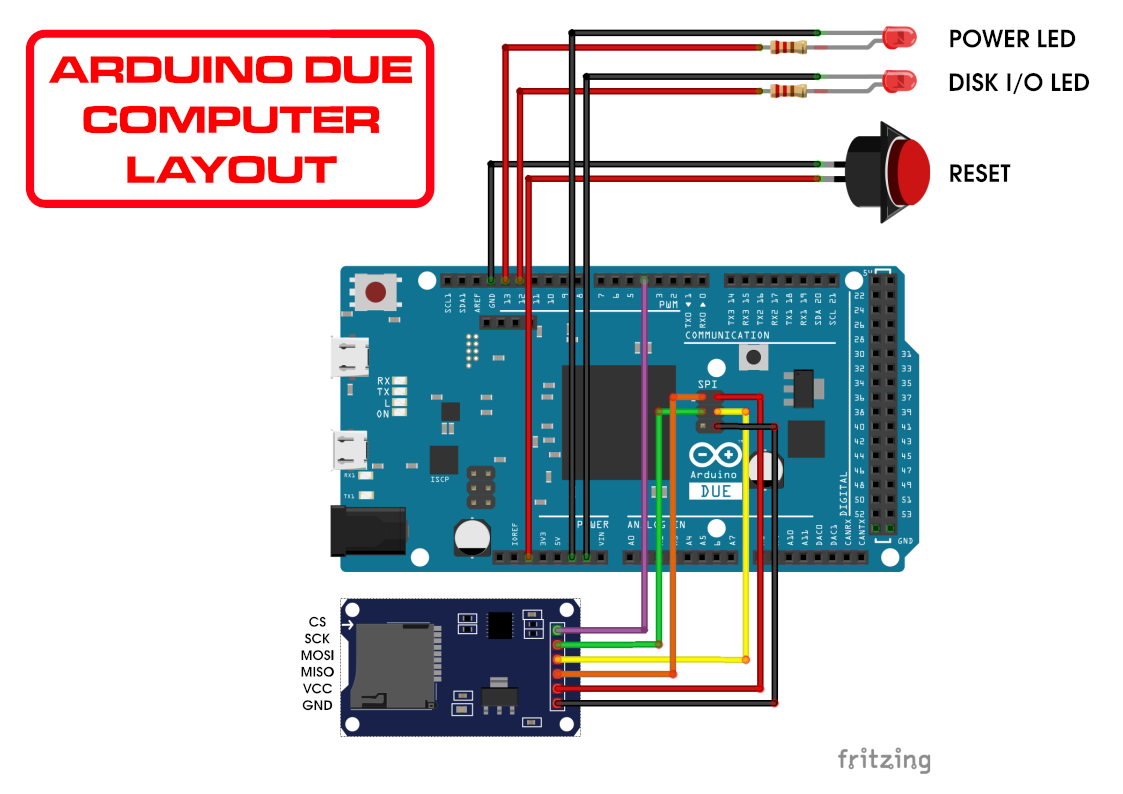
03/07/2019 at 20:00 • 0 commentsFor the sake of completeness, I've created a new wiring diagram. It's neater and includes the LEDs and reset switch.

-
New Enclosure - Feb 2019
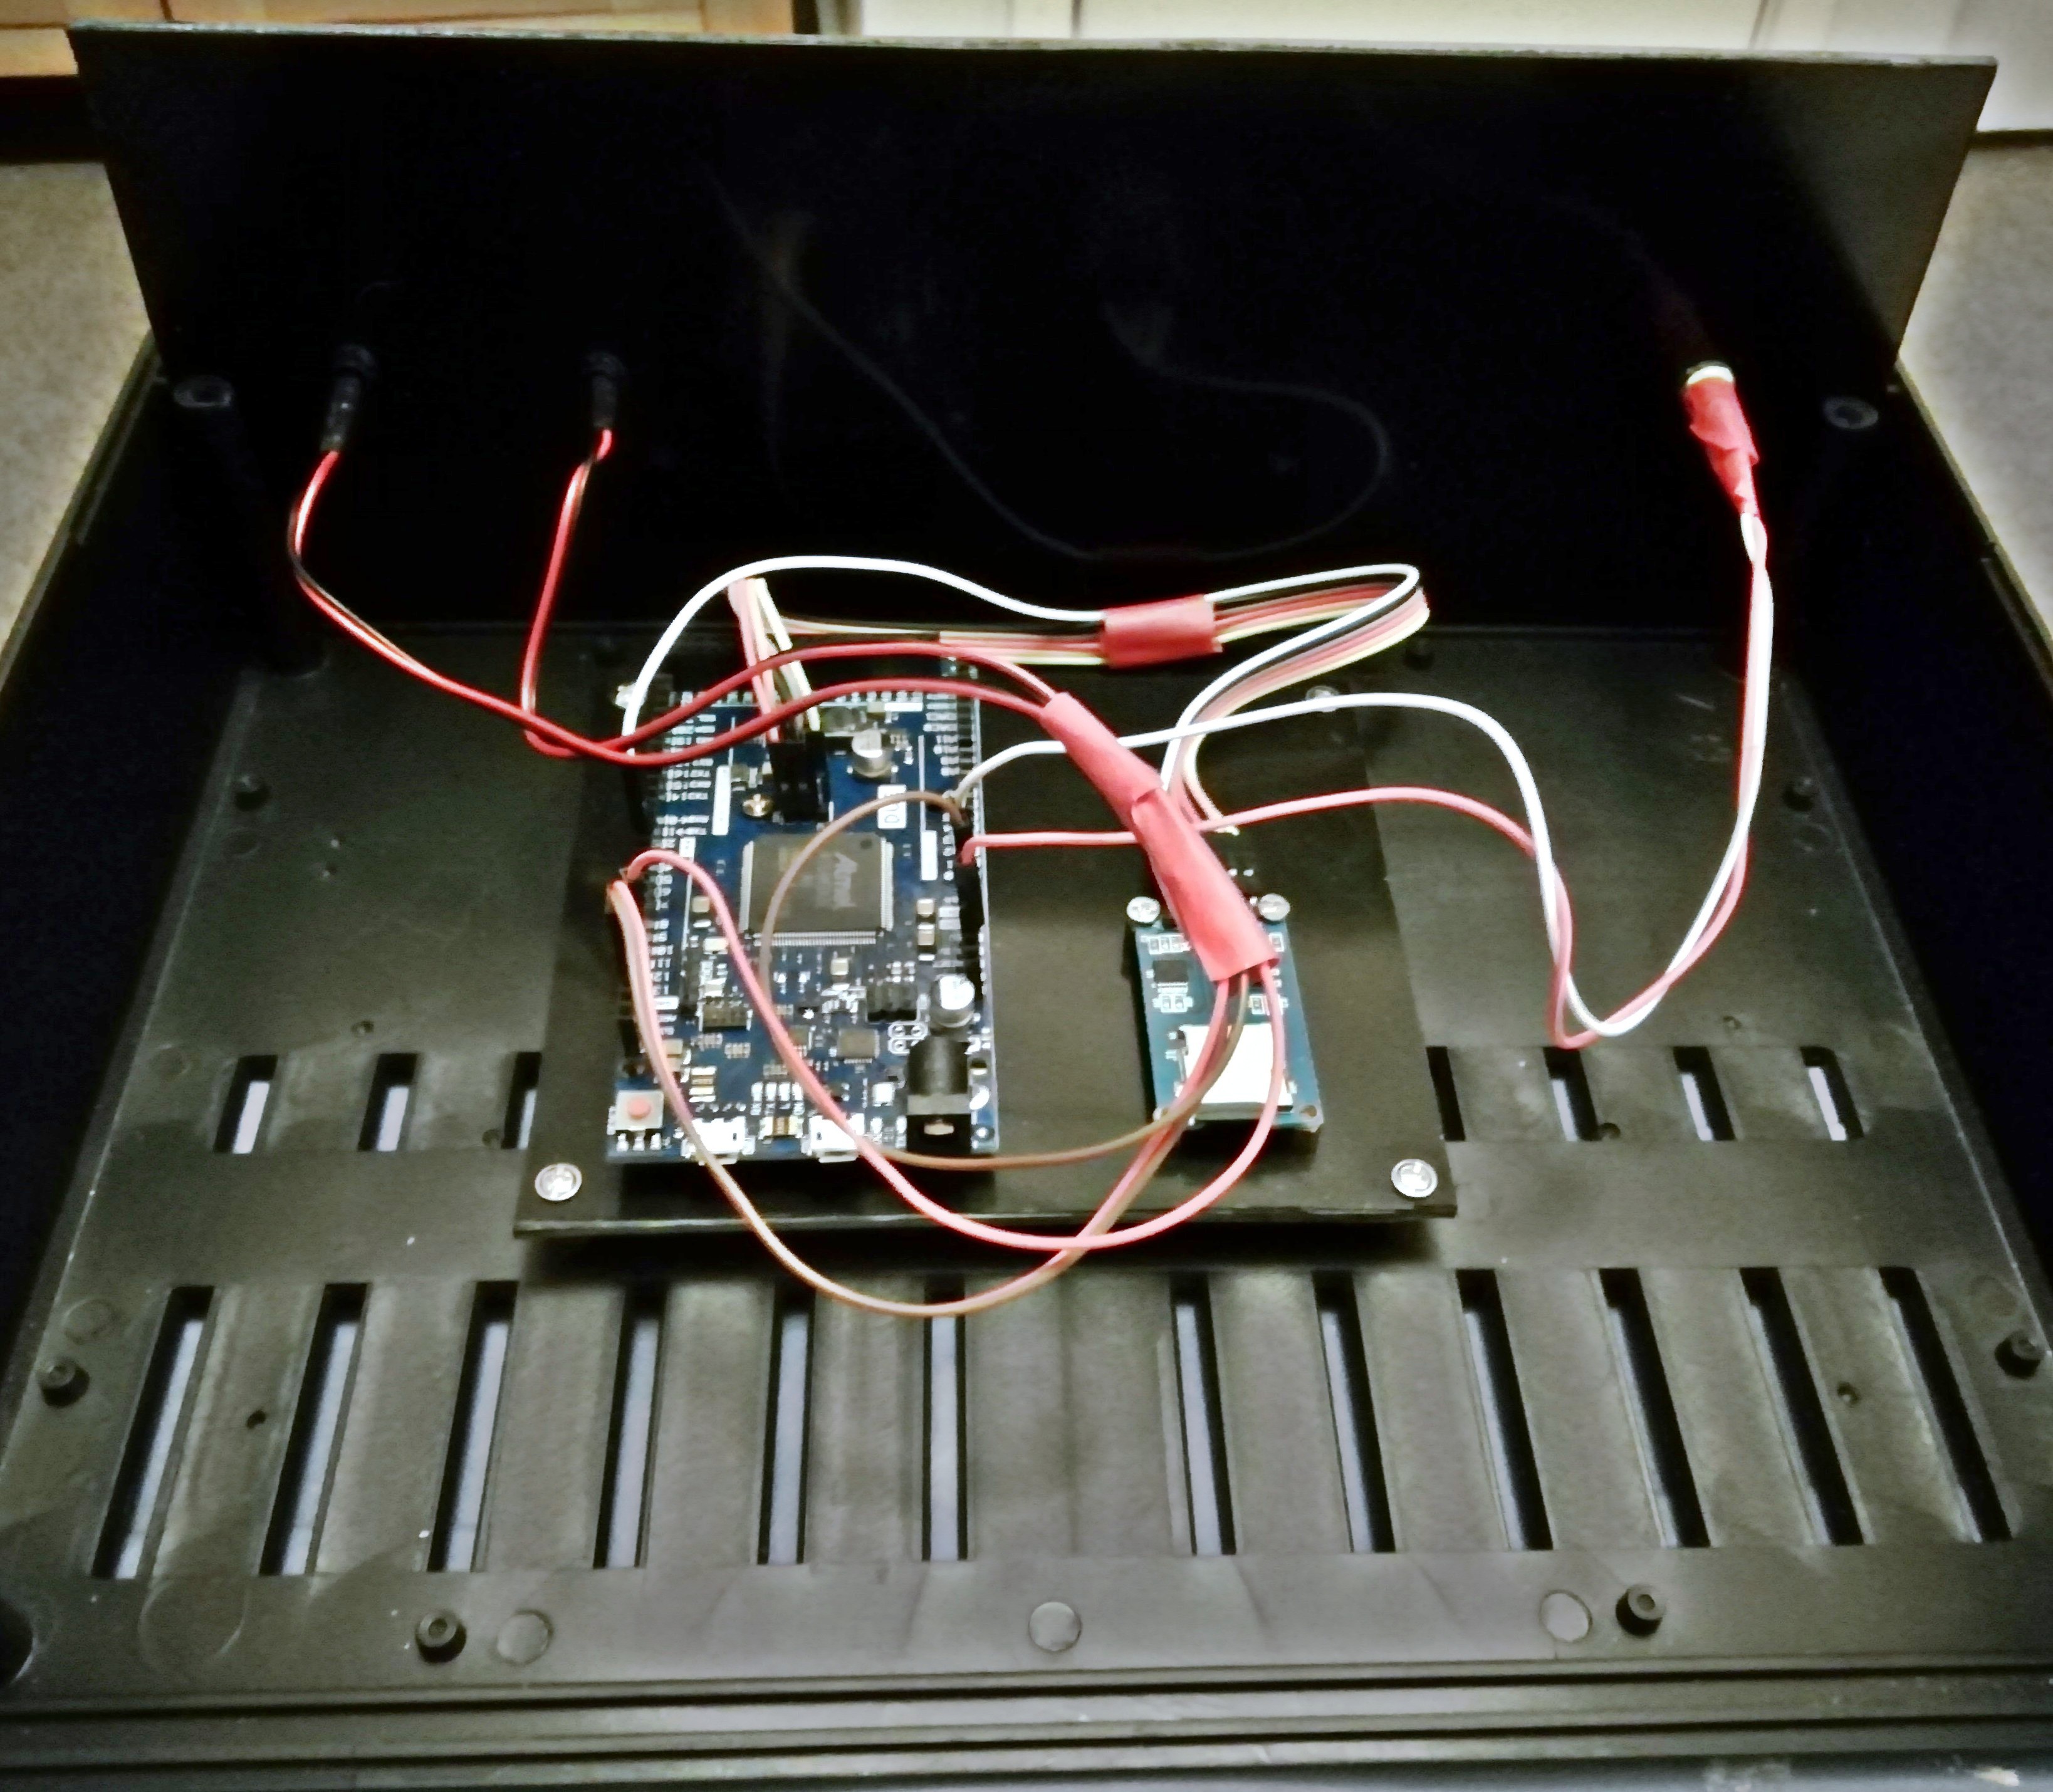
02/23/2019 at 16:08 • 0 commentsAs per the last project log, I've moved the internals to a larger enclosure.
Inside... plenty of room for future projects...
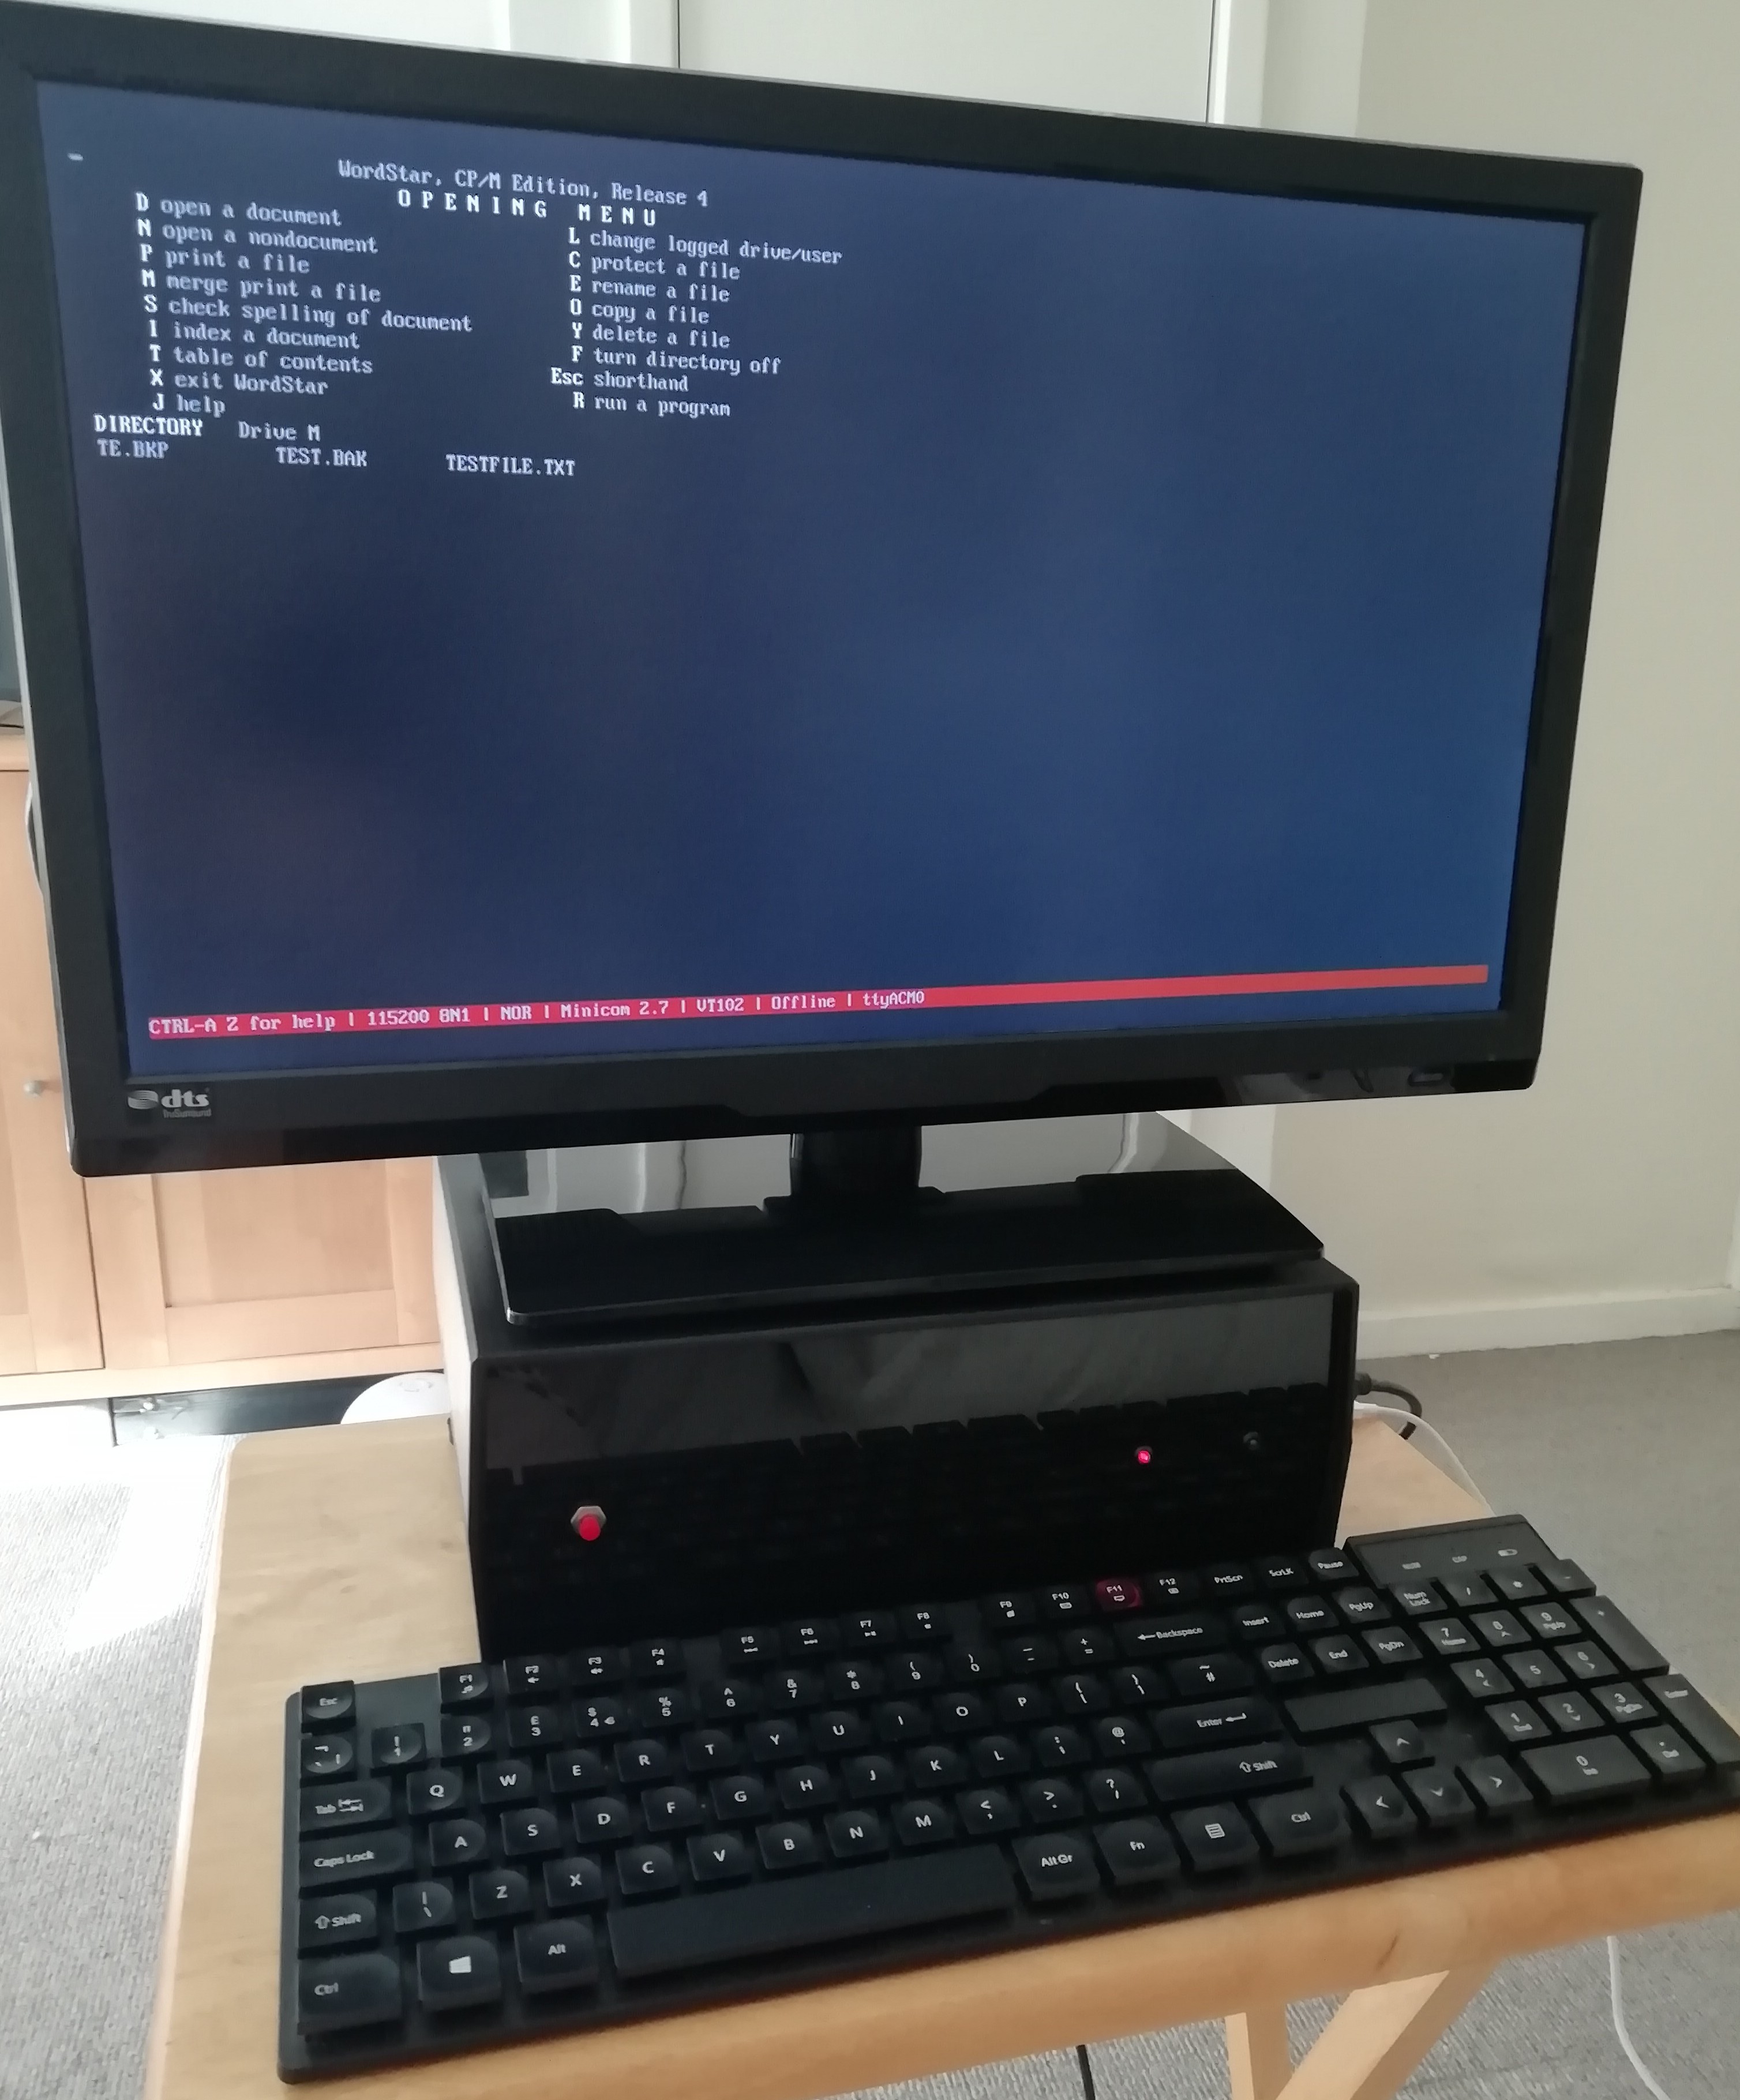
Connected up to a Pi acting as a terminal via minicom...
That's all folks!
-
Going further...
01/29/2019 at 03:21 • 0 commentsThis project for an Arduino Due CP/M Personal Computer is complete. People should be able to follow what I've done to make a low-cost CP/M computer without too much effort, which was the goal.
..but I have some ideas for the future..
Software:
For a while I also added a fork of Tiny BASIC and I shared the code with a few interested people. This meant the computer started up in BASIC and CP/M could be booted with a 'cpm' keyword. But any further development of that idea is beyond the original goal for -this- project, so I will create a separate project for that in due course. The BASIC allowed saving files into CP/M's drive B: and provided an autoexec function via a autorun.bas file. It also featured some ANSI colour and block graphic support.
I've also experimented with a menu system to provide some simple organisation tools, such as a calendar, address book, card file, calculator, editor etc. I'm looking at how the text versions of DeskMate worked on the TRS-80 Model III, the UI on the TRS-80 Model 100/200 and the Locoscript software on the Amstrad PCW8256.
Hardware:I now have a larger spare project enclosure. Something I may consider is relocating the internals (Arduino, SD card etc on the mounting board) to the new case. This will would provide a much larger area for future expansion.At present the computer is a black box with a USB cable, requiring another machine with USB to power it and communicate through a terminal. I am interested in developing it into a standalone computer, again this would be a new project beyond the scope of this one.
The RC2014 Z80 computer can use a Pi Zero as a £5 graphics card. It boots pigfx - a bare metal solution to drive a HDMI display and USB keyboard. It supports an ANSI terminal and has some support for colour graphics.
https://hackaday.io/project/9567-5-graphics-card-for-homebrew-z80
-
RunCPM Modifications
01/25/2019 at 07:01 • 0 commentsThere are a few changes I made to the standard RunCPM. It is easier for me to describe them than fork a copy of Marcelo's code.
Since the Power LED connected to Pin 12, I added the following define:
#define POWLED 12In setup() I added the following to light the Power LED:
pinMode(POWLED, OUTPUT);
digitalWrite(POWLED, HIGH);
I also set the serial speed to 115,200:
Serial.begin(115200);I altered loop() so the LEDs blink alternately after CP/M exits:
void loop(void) { digitalWrite(POWLED, HIGH); delay(500); digitalWrite(POWLED, LOW); delay(1000); digitalWrite(LED, HIGH); delay(500); digitalWrite(LED, LOW); delay(1000); } -
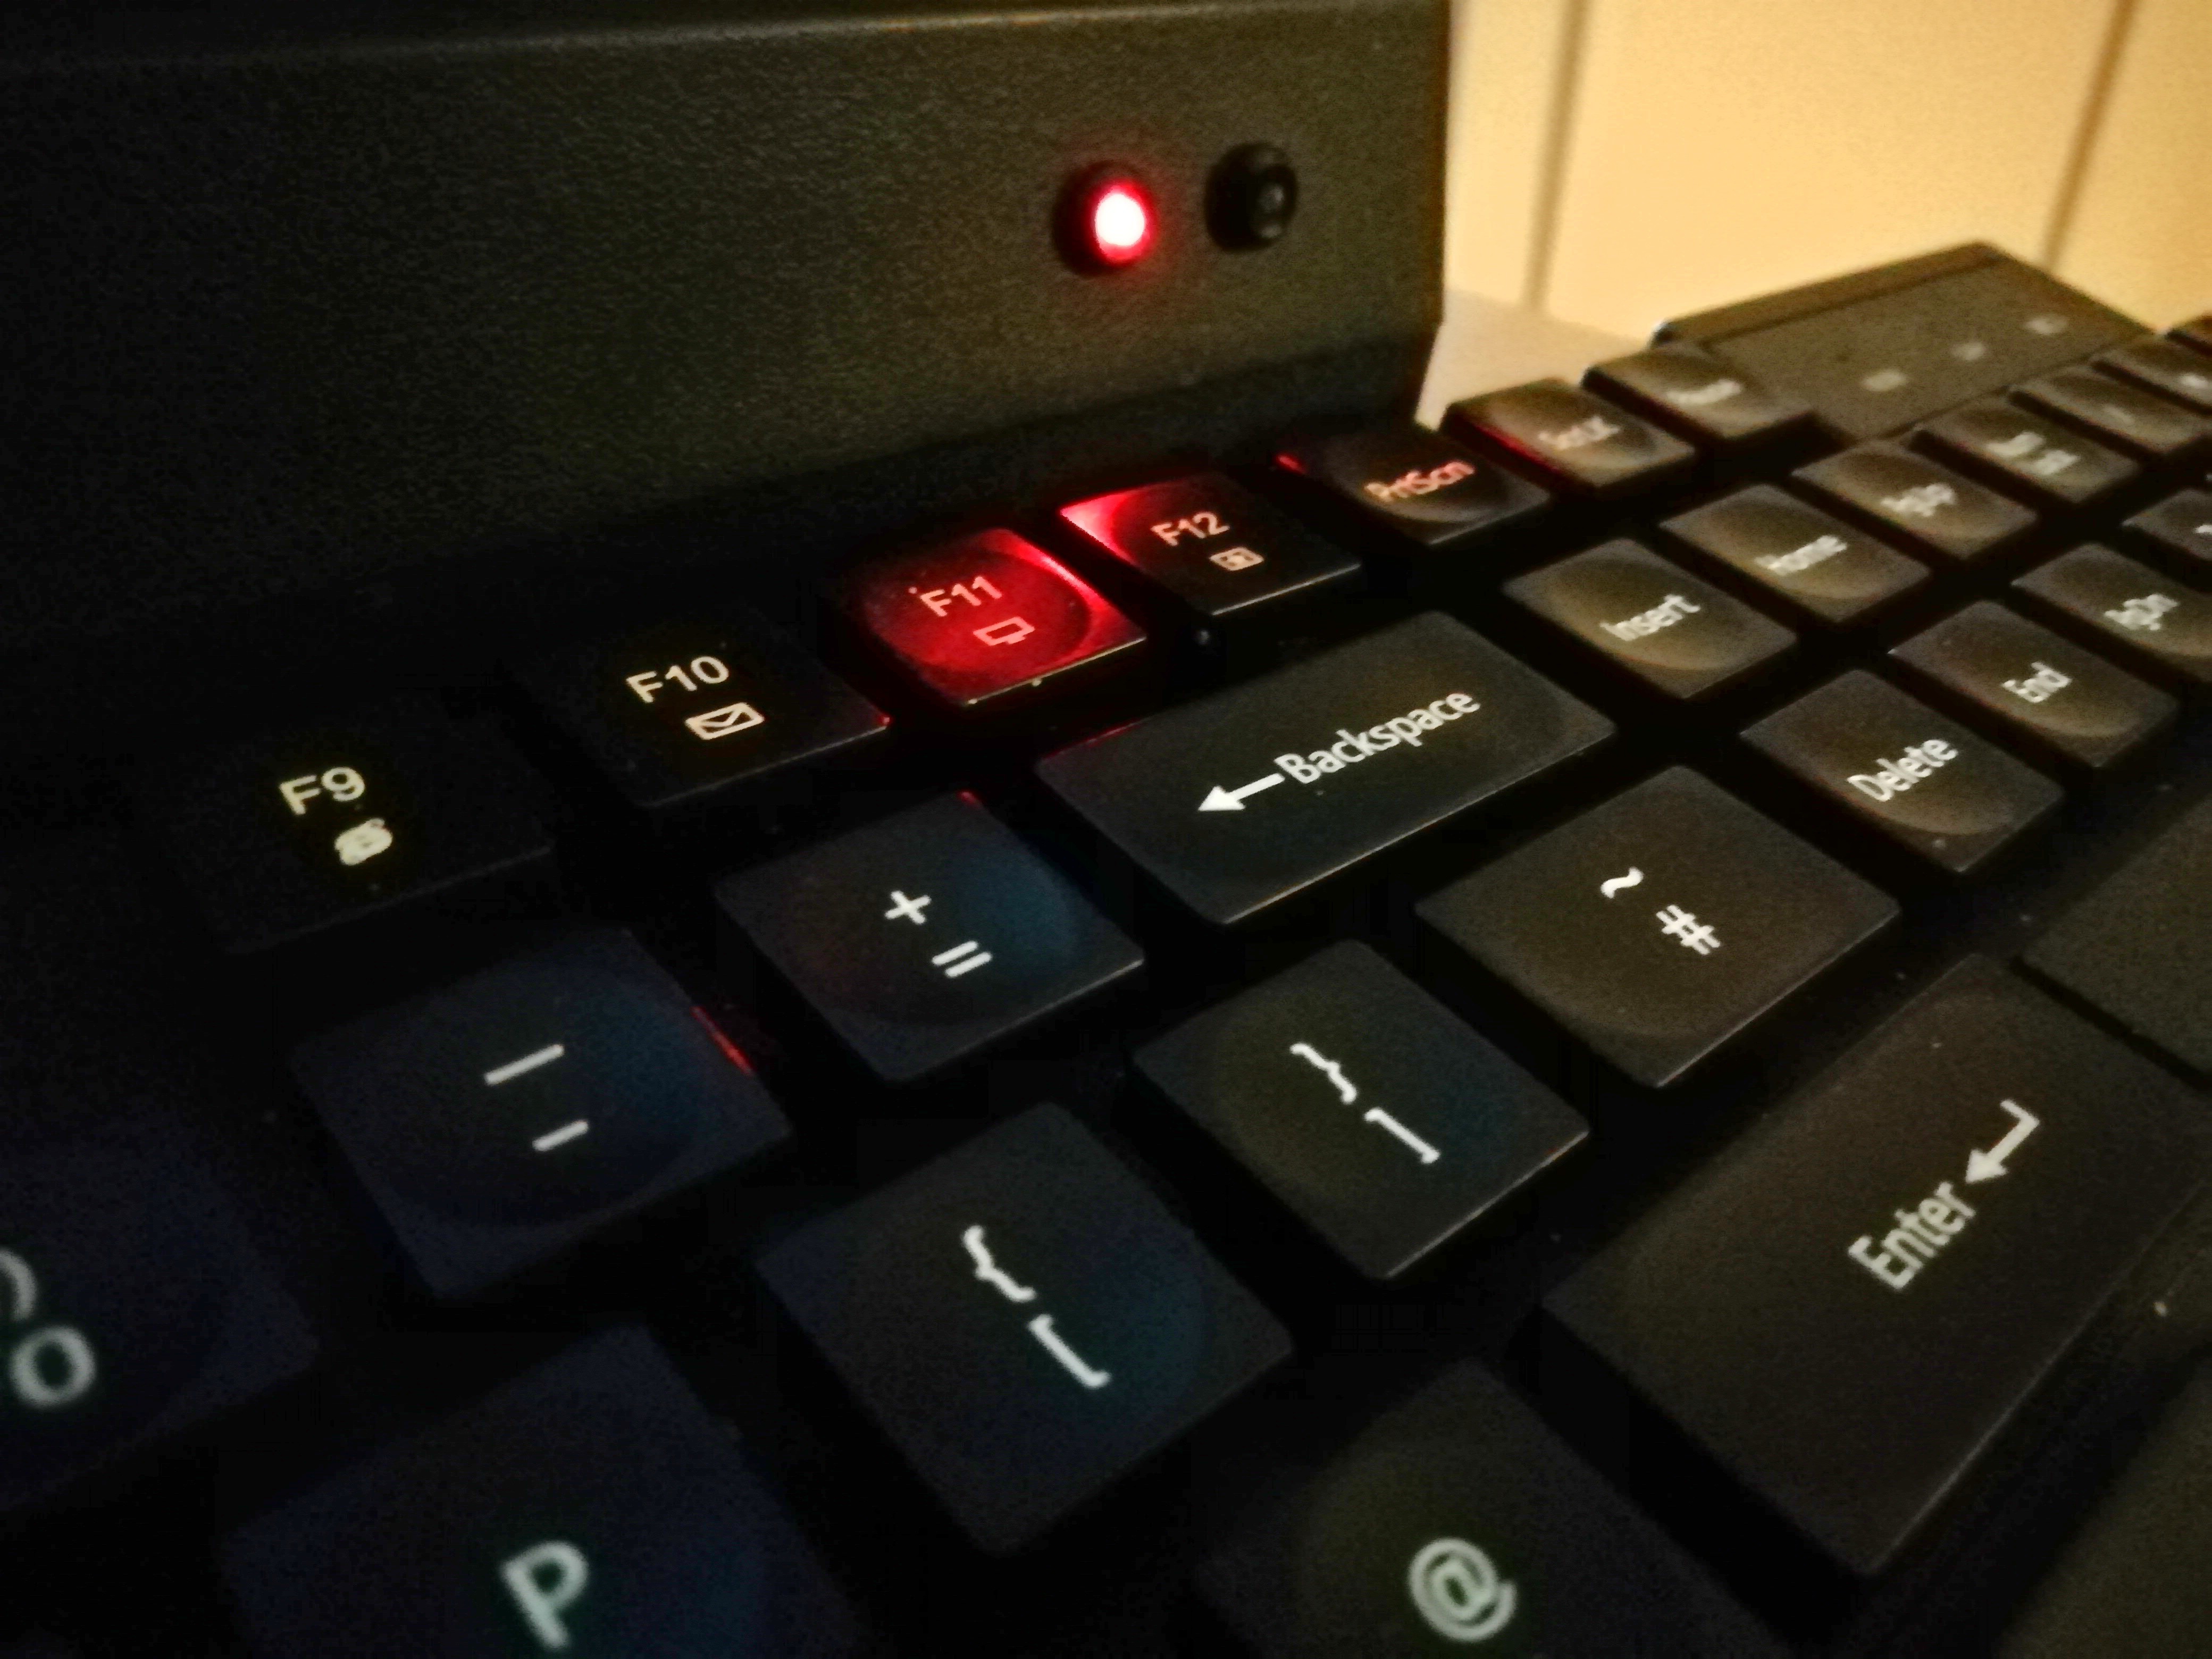
LEDs Working
01/24/2019 at 22:03 • 0 commentsPower LED:
Disk LED:
Arduino Due CP/M Personal Computer
An affordable computer that anyone can make! CP/M for all! *** A RunCPM Project***