Close
0%
0%

1:3 Scale VT100 with working keyboard

I've made many retrocomputer miniatures but this is the most complex.

Similar projects worth following
The DEC VT100 is an iconic computer terminal from the 1970s and many influential software applications like VI were written on them.

So, to continue my smol retrocomputer series I decided to make this project a bit hard by giving it a working keyboard that looks, feels, and sounds as much like the original as I can manage.

I also post regular build updates on Mastodon: https://machines.social/@trevorflowers

I'm using FreeCAD to model the case parts and then 3D print them in Polylite PLA or PLA+.

I'm using KiCAD to make the custom circuit board for the small keyboard. I wish I had a LumenPNP to populate the boards but until I get one I'm working with a fab house.

The case is sized to fit a single board computer like the RPi 4 or similar.

I've ordered but not yet tested a 3.5" diagonal TFT display that is 640x480 pixels and takes HDMI input. That would give it enough resolution to display the orginals' 80x24 character mode.

There are a few good emulators for the VT100 so I'm hoping that with the working keyboard and a serial port on the back it can be a handy portable terminal to use with old big iron like an IBM System/360 or the excellent PiDP/11.

  • Tiny haptic motor and LED daughterboard

    Trevor Flowers06/11/2024 at 21:52 0 comments

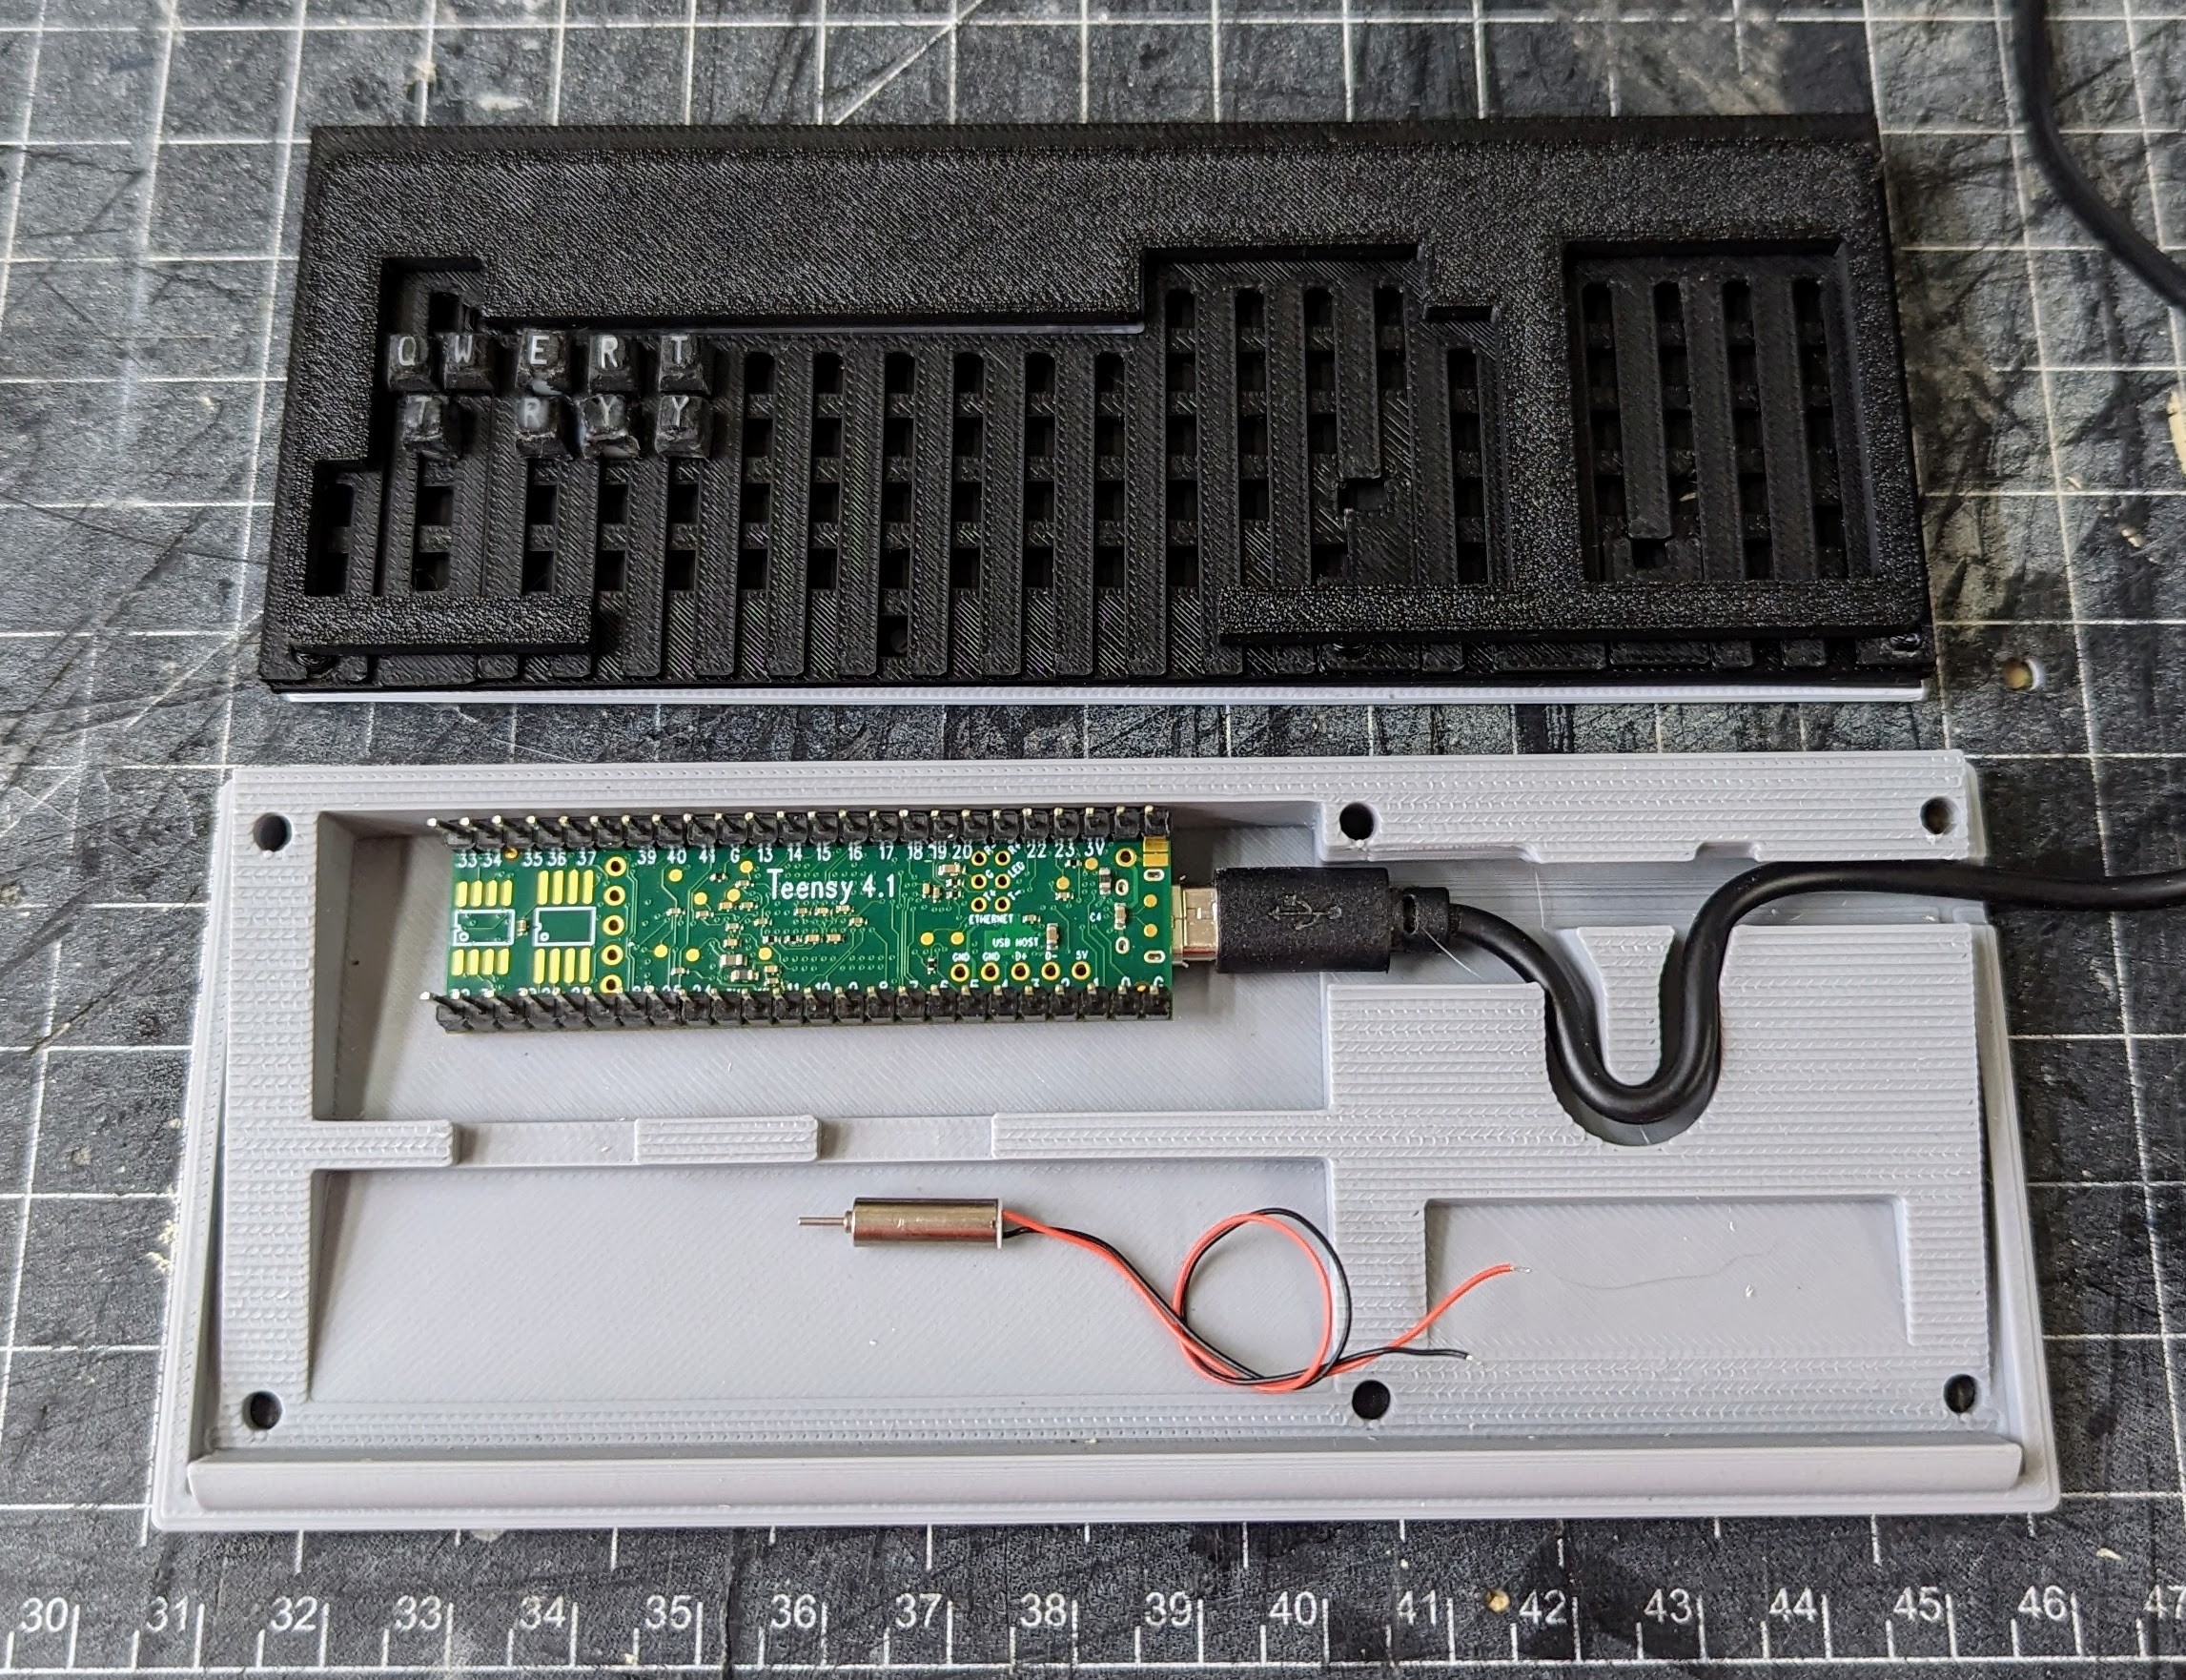
    The gray part in this photo is a case bottom for the 1:3 scale keyboard, showing where the Teensie 4.1 will sit and showing the tiny size of the motor that I intend to use for haptic feedback of key presses.
    The USB cable goes through that jog in the case to provide stress relief when someone inevitably tugs on the cable.

    The screenshot below shows a sketch (in green) of where the LEDs need to be relative to the key caps and how much space is available for a daughterboard. Check out this photo of an original keyboard and look for the labels "online", "local" and "kbd locked". The original red lights are below those labels.

  • 1:3 scale keyboard stack-up: DONE

    Trevor Flowers06/08/2024 at 19:12 0 comments

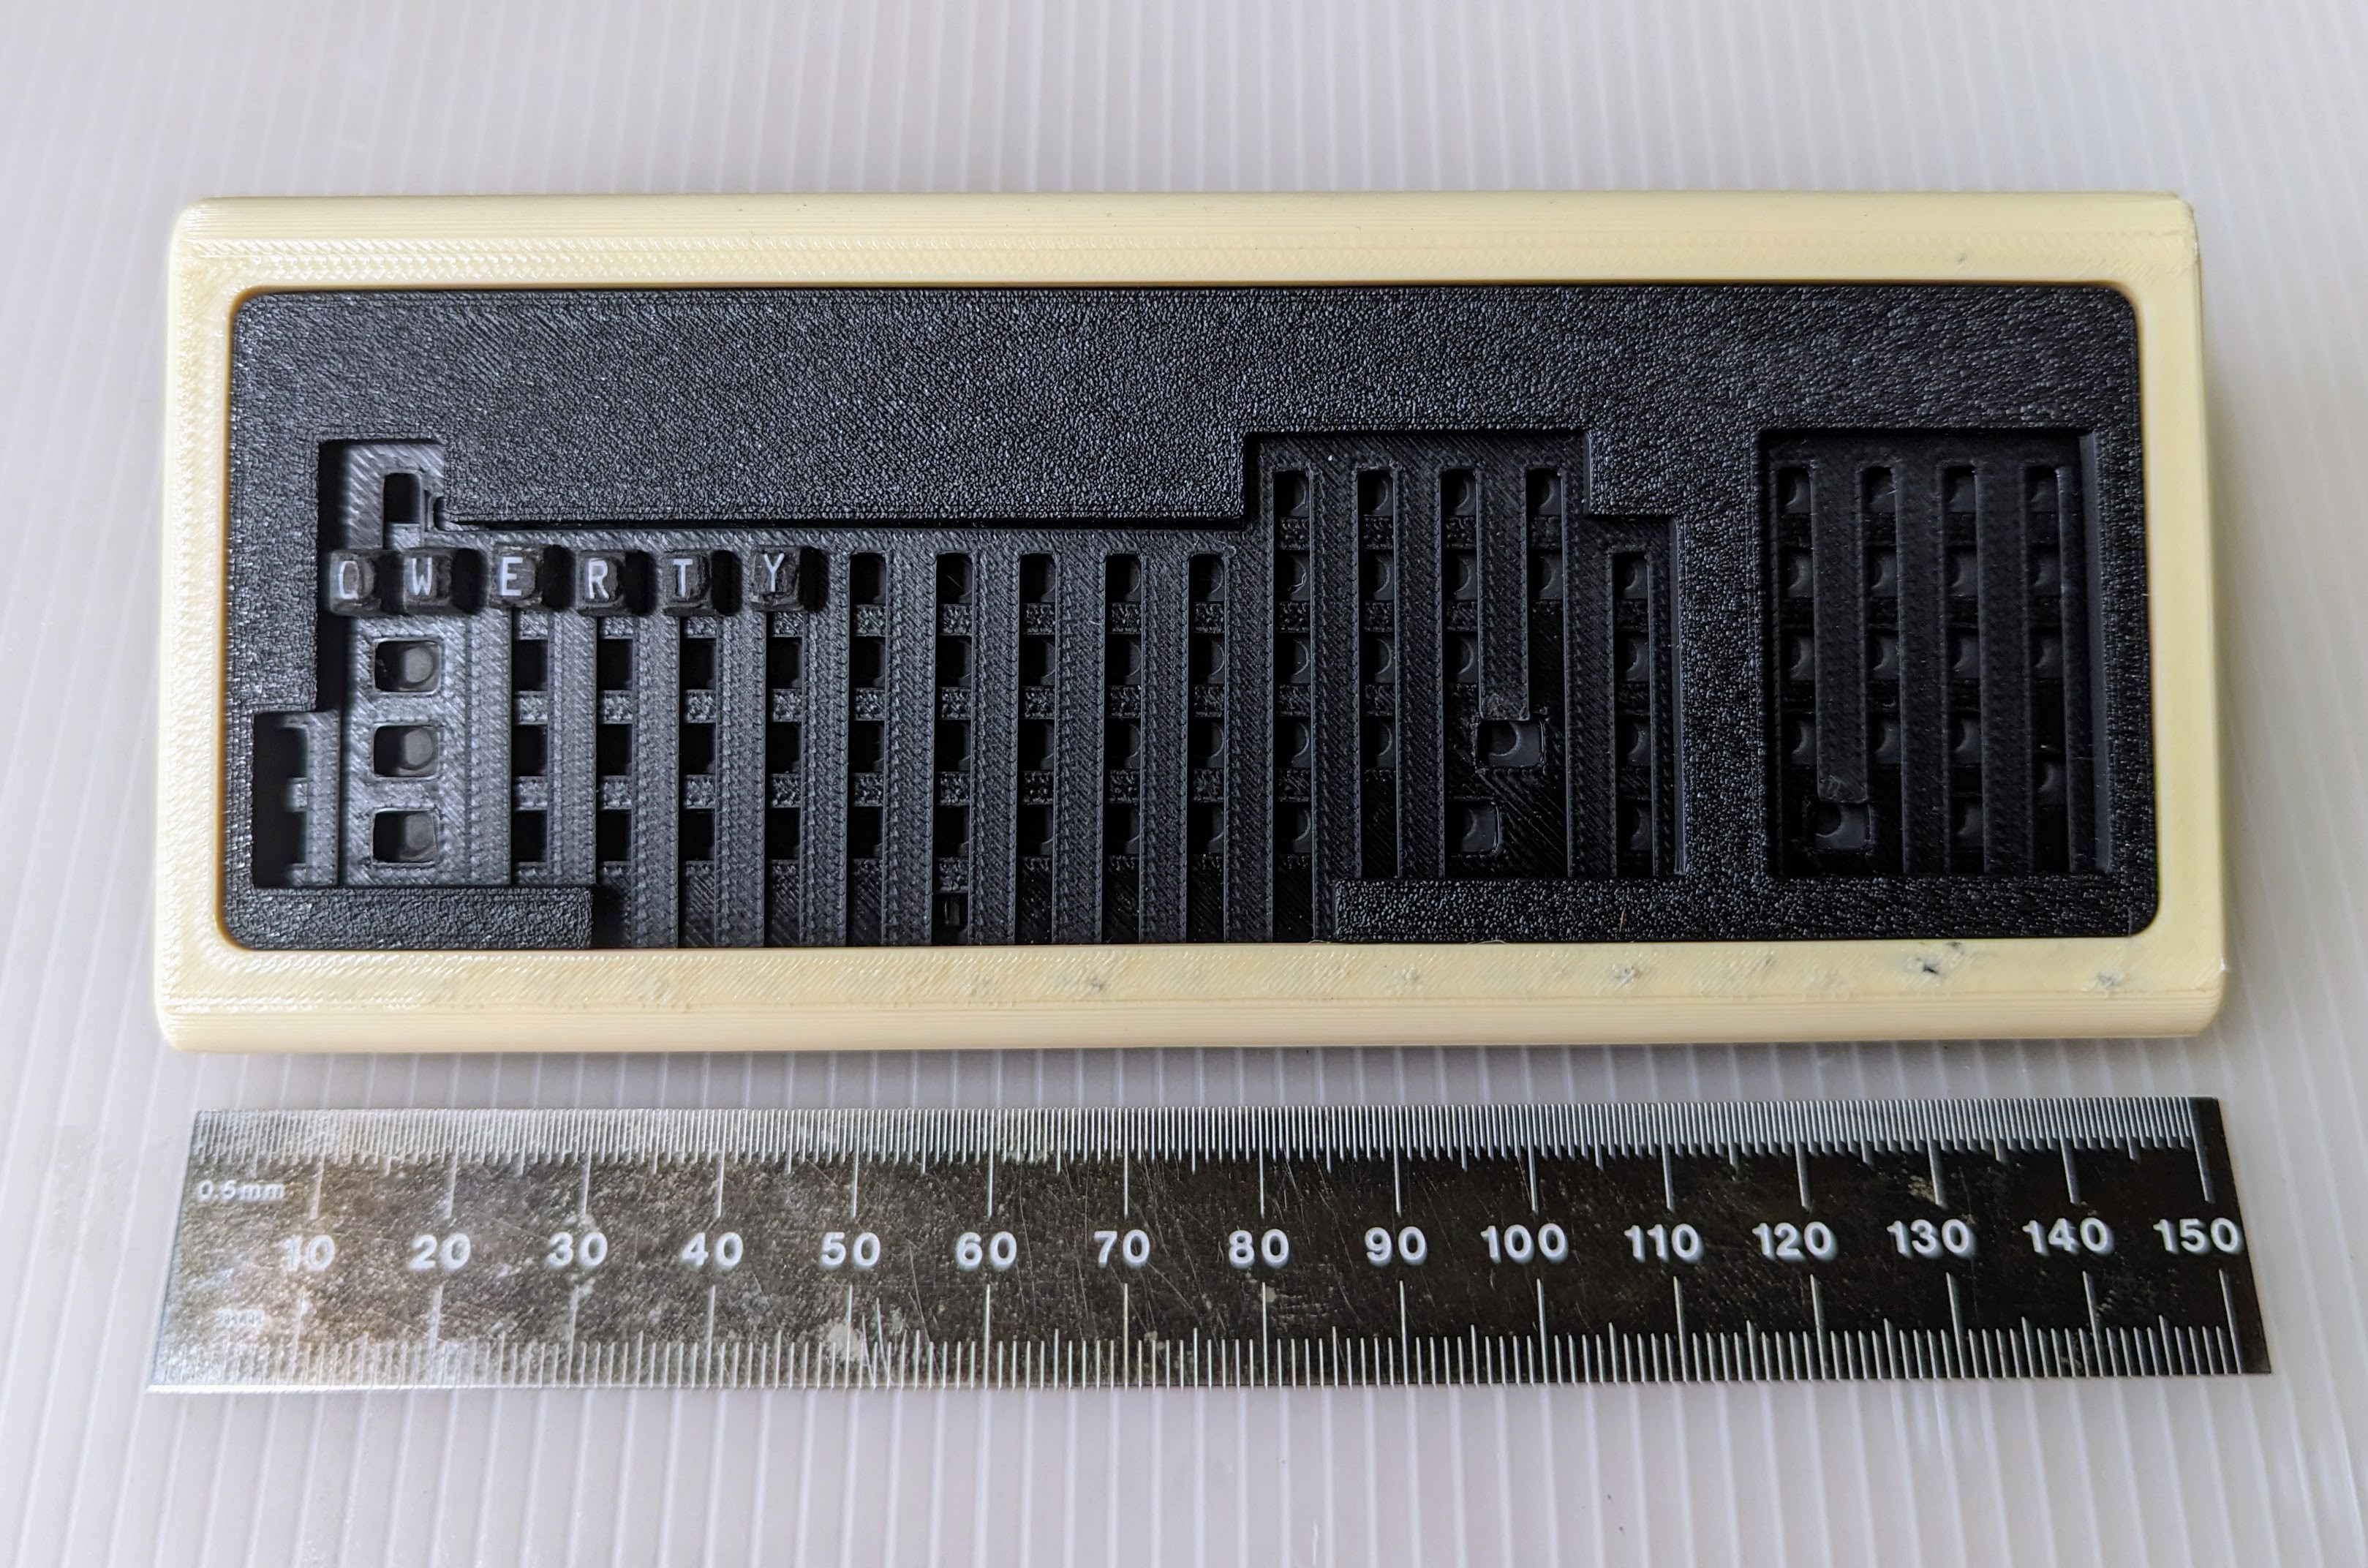
    Ok! After quite a bit of iteration, trying different part shapes, materials, and layer stack-ups I have a working USB keyboard for the 1:3 scale VT100.

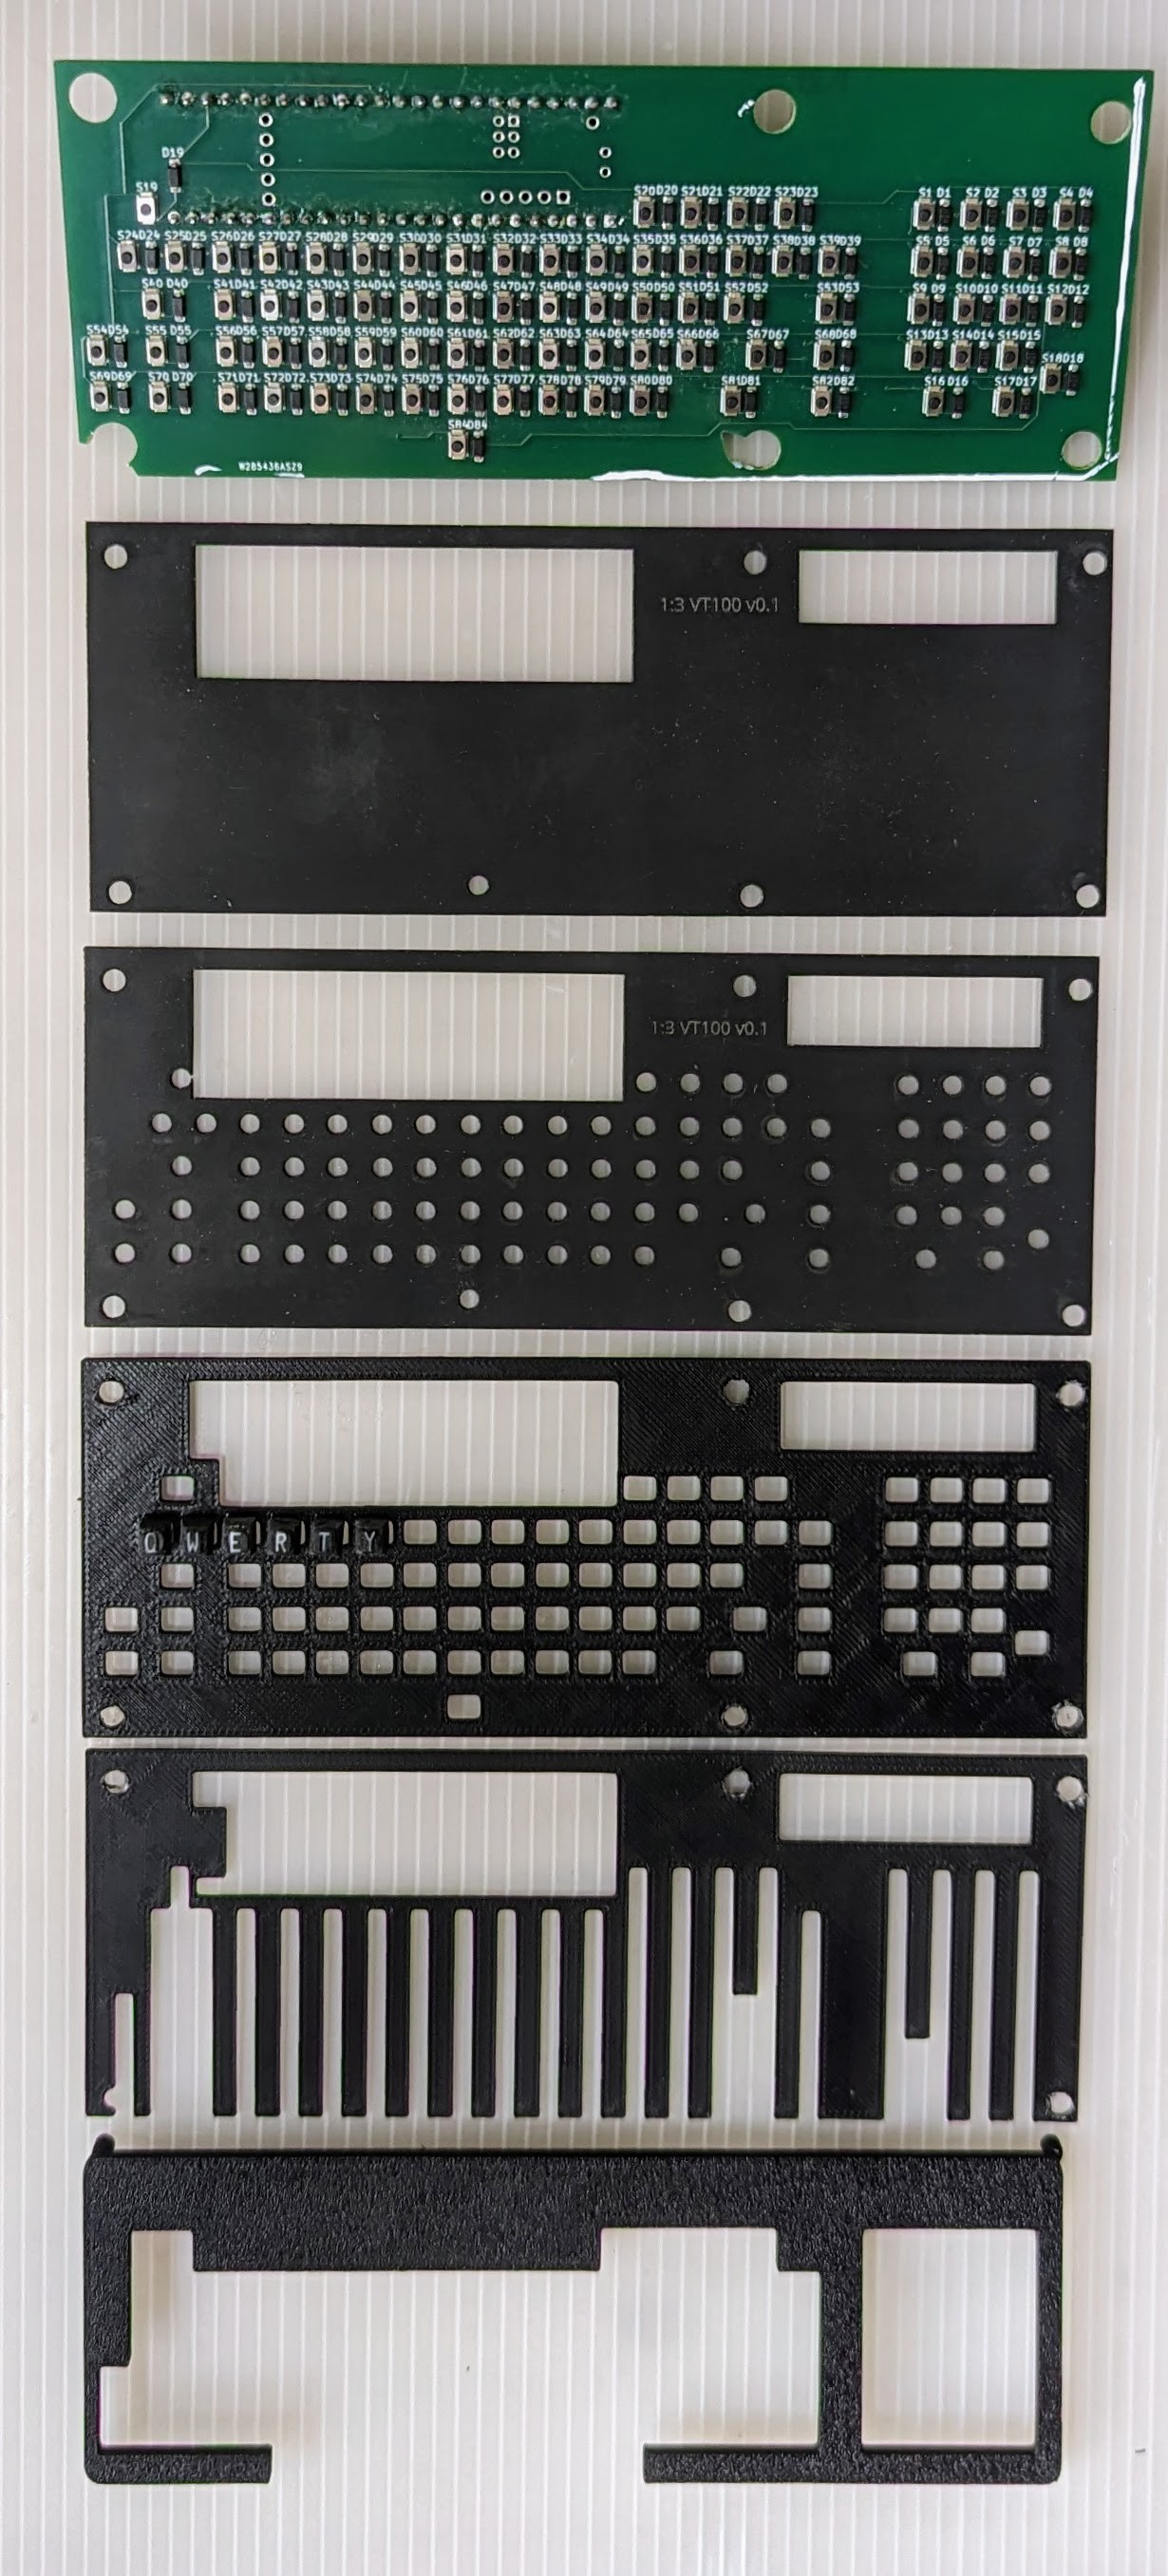
    Here is the stack:

    The layers in the photo:

    - PCB on the bottom

    - silicone rubber cushion sheet

    - silicone rubber guide sheet

    - switch shaft guide sheet

    - switch lock-in sheet

    - bezel on the top


    The circuit boards contributed by the PCBWay board prototype team have been great, too. Each board has 200+ surface mount components so they would have taken forever to assemble if I had to do it by hand. Luckily, PCBWay has production engineers with a ton more experience than I do and millions of dollars in machinery at their command. So, I'm deeply grateful for Liam at PCBWay for reaching out to collaborate like this and for the rest of the team for making it easy.

    As an aside, if you're a machine tool nerd like I am then check out this video they made showing the various machines involved with making PCBs. I've made PCBs at home using CNC mills, chemical etching, and even conductive ink so yeah, I'm deeply grateful for their help.


    As you can see in the photo I've taken chunks out of the prototype board to move fasteners and I've drawn lines in white-out to show where the next revision should be cut. I'll also design a little daughter board to hold the four LEDs that will mimic the status lights on the original keyboards. KiCAD, here I come!

    I'm using Teensie 4.1 boards as the MCU because it has enough GPIO for a full keyboard with numpad, lights, and if I can fit them in the case, a little haptic motor and audio clicker so that each keypress feels like it's a full sized mechanical switch. If you've used an Apple touchpad recently you've probably experienced a similar haptic trick as the most recent touchpads don't actually move, they just feel like they do because of a little motor jiggle.

    In a future log I'll go into how I'm combining resin printing with polymer clay casting to make the keycaps and actuator shafts. In the meantime, I post behind the scenes photos and videos over on Mastodon: @trevorflowers@machines.social

  • PCBs arrived, mechanical assembly in progress

    Trevor Flowers05/20/2024 at 01:06 1 comment

    The prototype boards from PCBWay arrived and they look exactly as I spec'ed them. The components that their engineer helped choose look like they'll nicely work as expected, too. I really appreciate that they sponsored this first order.

    I've refined the mechanical assembly of the 1:3 scale keyboard switches quite a bit, trying out various materials and tolerances to find a great feel when pressing a key.

    One new material I'm working with is polymer clay. The curing temperature of polymer clay is lower than the melting point of PLA so it's possible to print molds and bake the clay in the molds. This is helpful because some of the parts for these switches are tiny, not much bigger than a couple of grains of sticky rice together, so they would be hard to remove from molds if they clay was still soft.

    Polymer clay can also be shaped after it is hard using machine tools like small milling machines and lathes. I have watchmakers tools including a mill and lathe so I can cut and turn precision features on molded and baked parts.

    If you've ever touched some of the polymer clay art from artists on Etsy or other platforms then you know it can be good to touch, feeling nicer than 3D prints and warmer than metal.

  • PCBs on their way

    Trevor Flowers05/02/2024 at 02:23 0 comments

    PCBWay is sponsoring a round of PCBs for the 1:3 scale VT100 keyboard! 🎉

    Their assembly engineer (who didn't know about the sponsorship) gave me advice about the design and component choice which is a level of service that I haven't received from other fab houses. The order is in so we'll see how they look in a week.

    In the meantime I'll to make a handful of switch parts so that when the boards arrive I can validate the entire assembly and code before making a bigger board order.

View all 4 project logs

Enjoy this project?

Share

Discussions

svofski wrote 05/02/2024 at 16:31 point

I'm a huge fan of mini versions of working keyboards. Would love to see more about your VT100 variant.

  Are you sure? yes | no

Trevor Flowers wrote 05/03/2024 at 22:28 point

Once the PCBs are here and I have a chance to validate the mechanical assemble of the switches I'll post more details. The short story is that I'm using a combination of printed mechanical parts, a bit of springy material, and an epoxy wiped into the keycap glyph indents to provide visual contrast.

  Are you sure? yes | no

Similar Projects

Does this project spark your interest?

Become a member to follow this project and never miss any updates