 Isaac Zammit
Context: the below happened between November and December 2023.
After purchasing and successfully transporting the machine back to base, I was ready to give the machine a much needed teardown in order to take a closer look at everything. I started by dismantling the Z axis column from the base held by four long M12 bolts. The column was taken off as a complete Z axis assembly, and will be disassembled afterwards.
The X and Y axis were next, but to do this it became clear that the Y ballnut needed to be accessed from underneath. The base casting assembly was therefore unbolted from the base structure and flipped on its side. The underside exposed the Y axis ballscrew and ballnut (wrapped in aluminium tape for some reason), and a some amount of aluminium swarf stuck on the greasy bits of the machine.
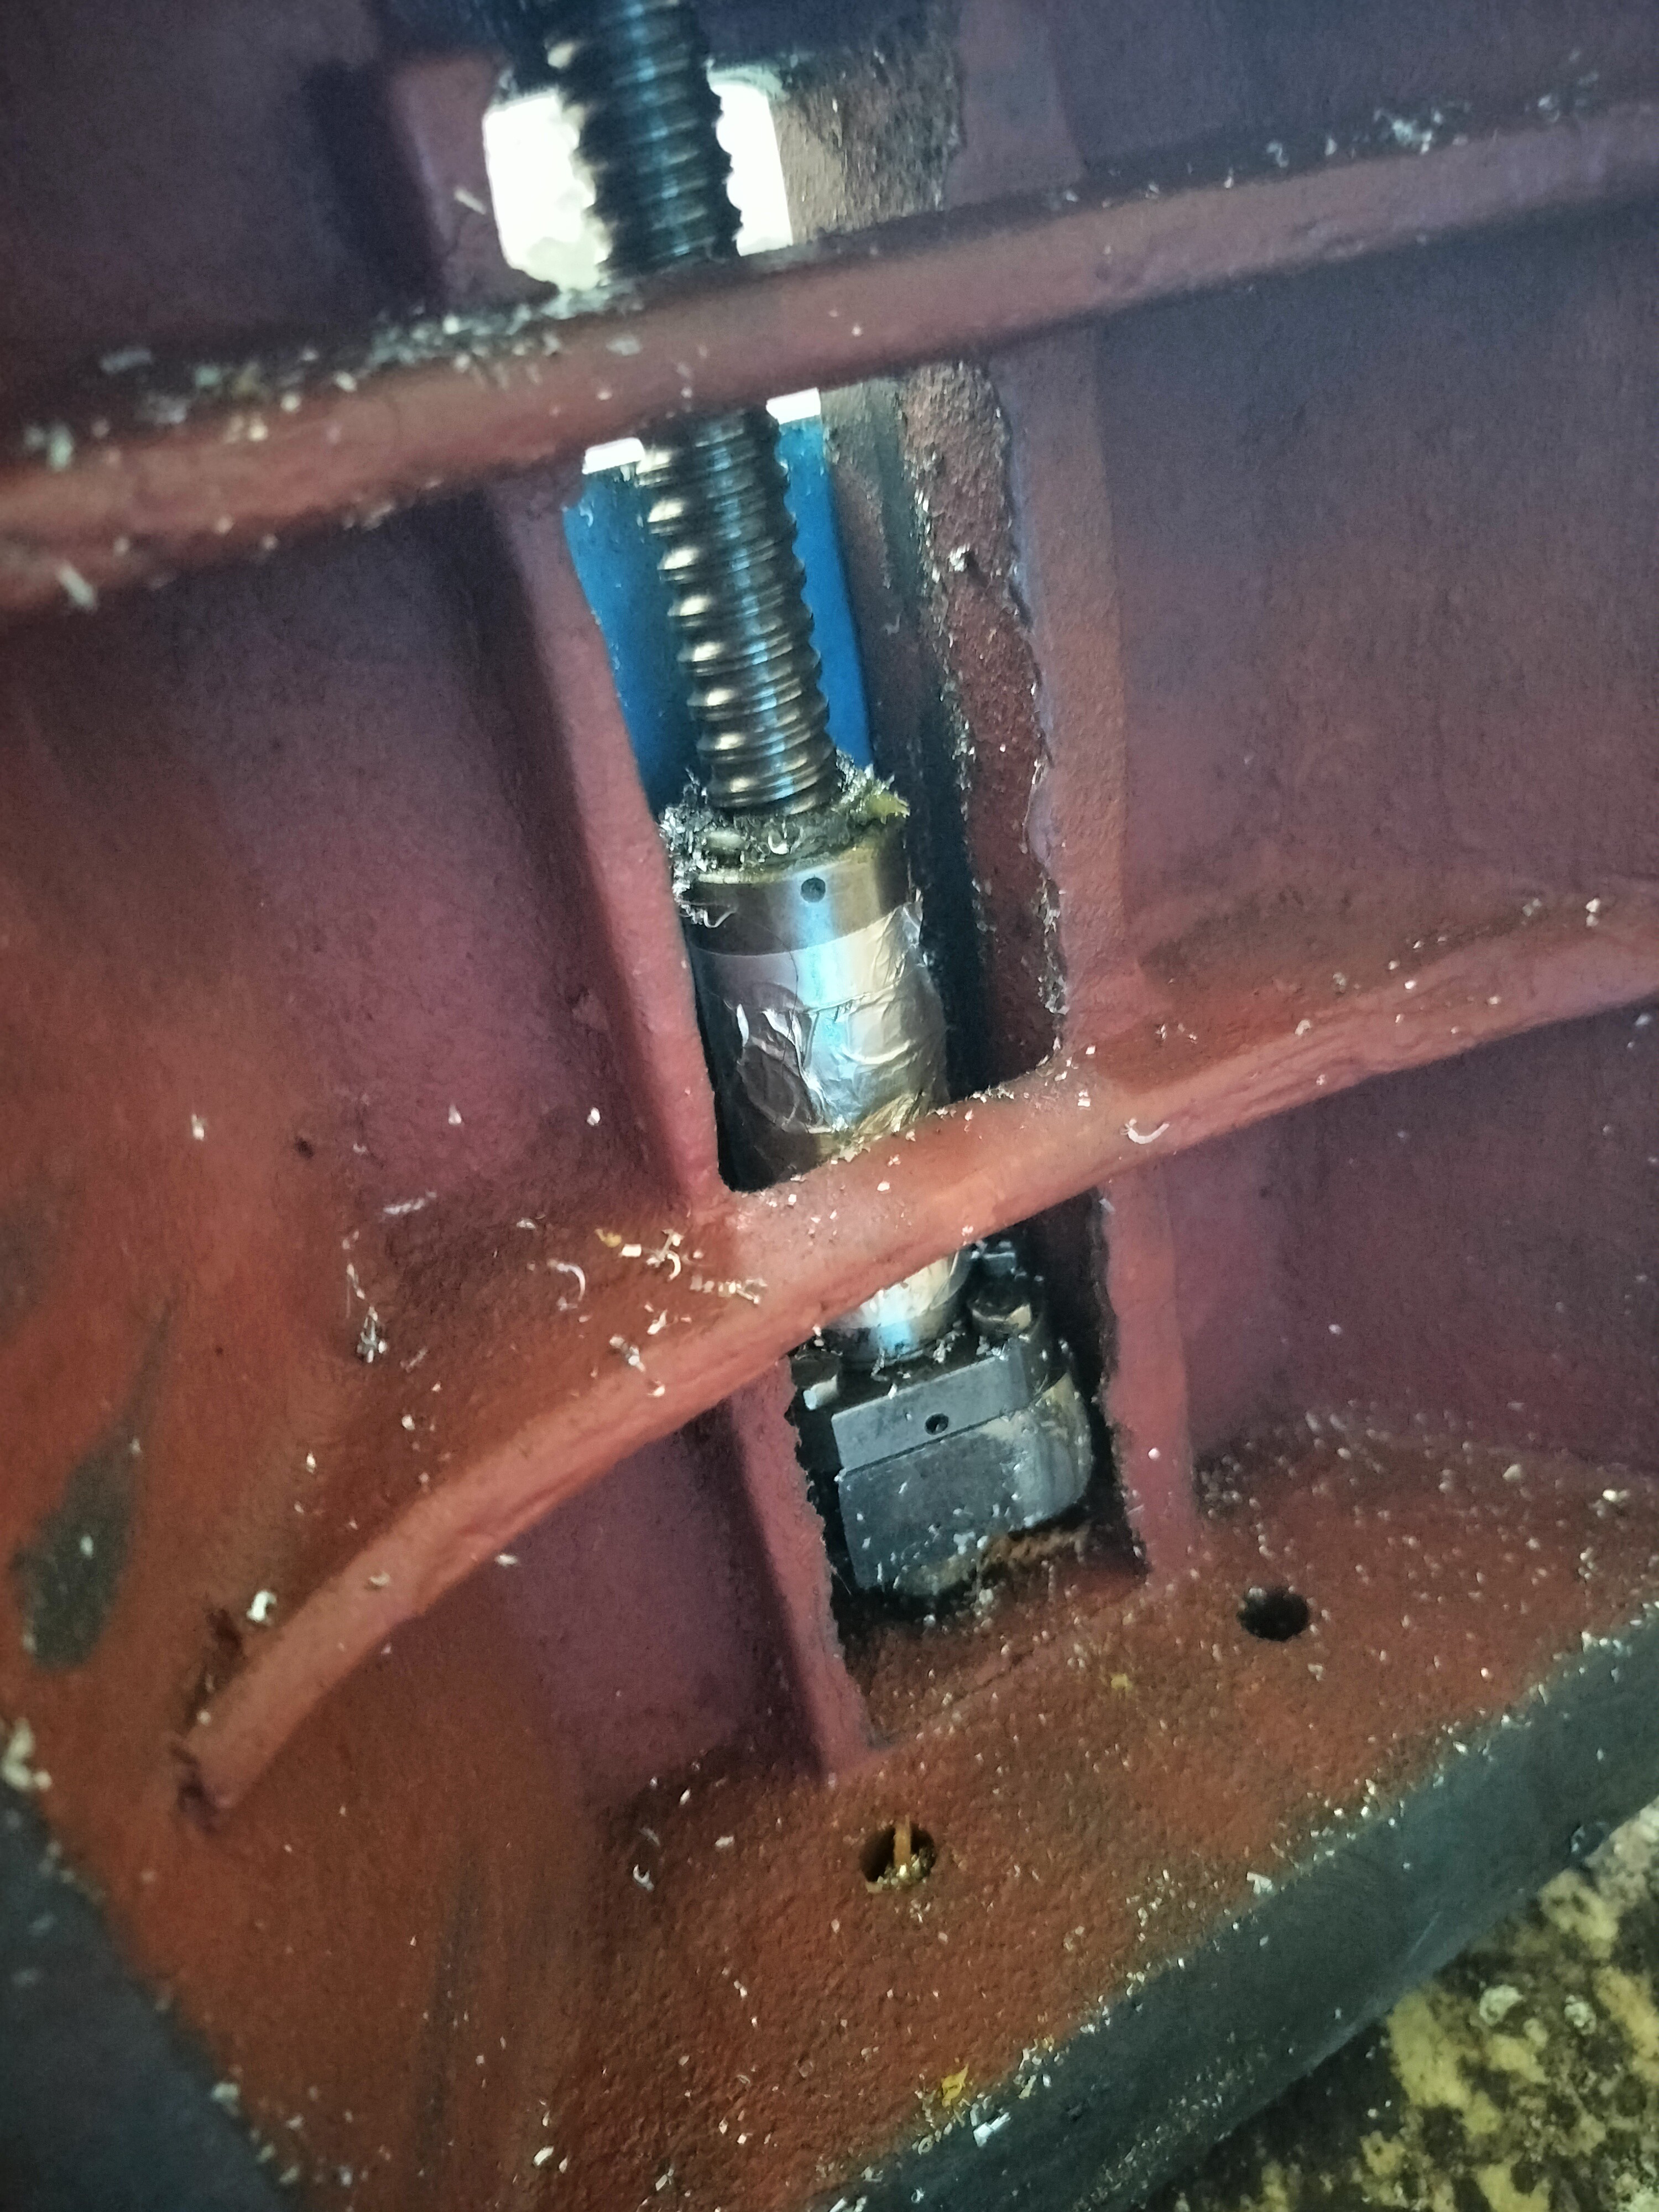
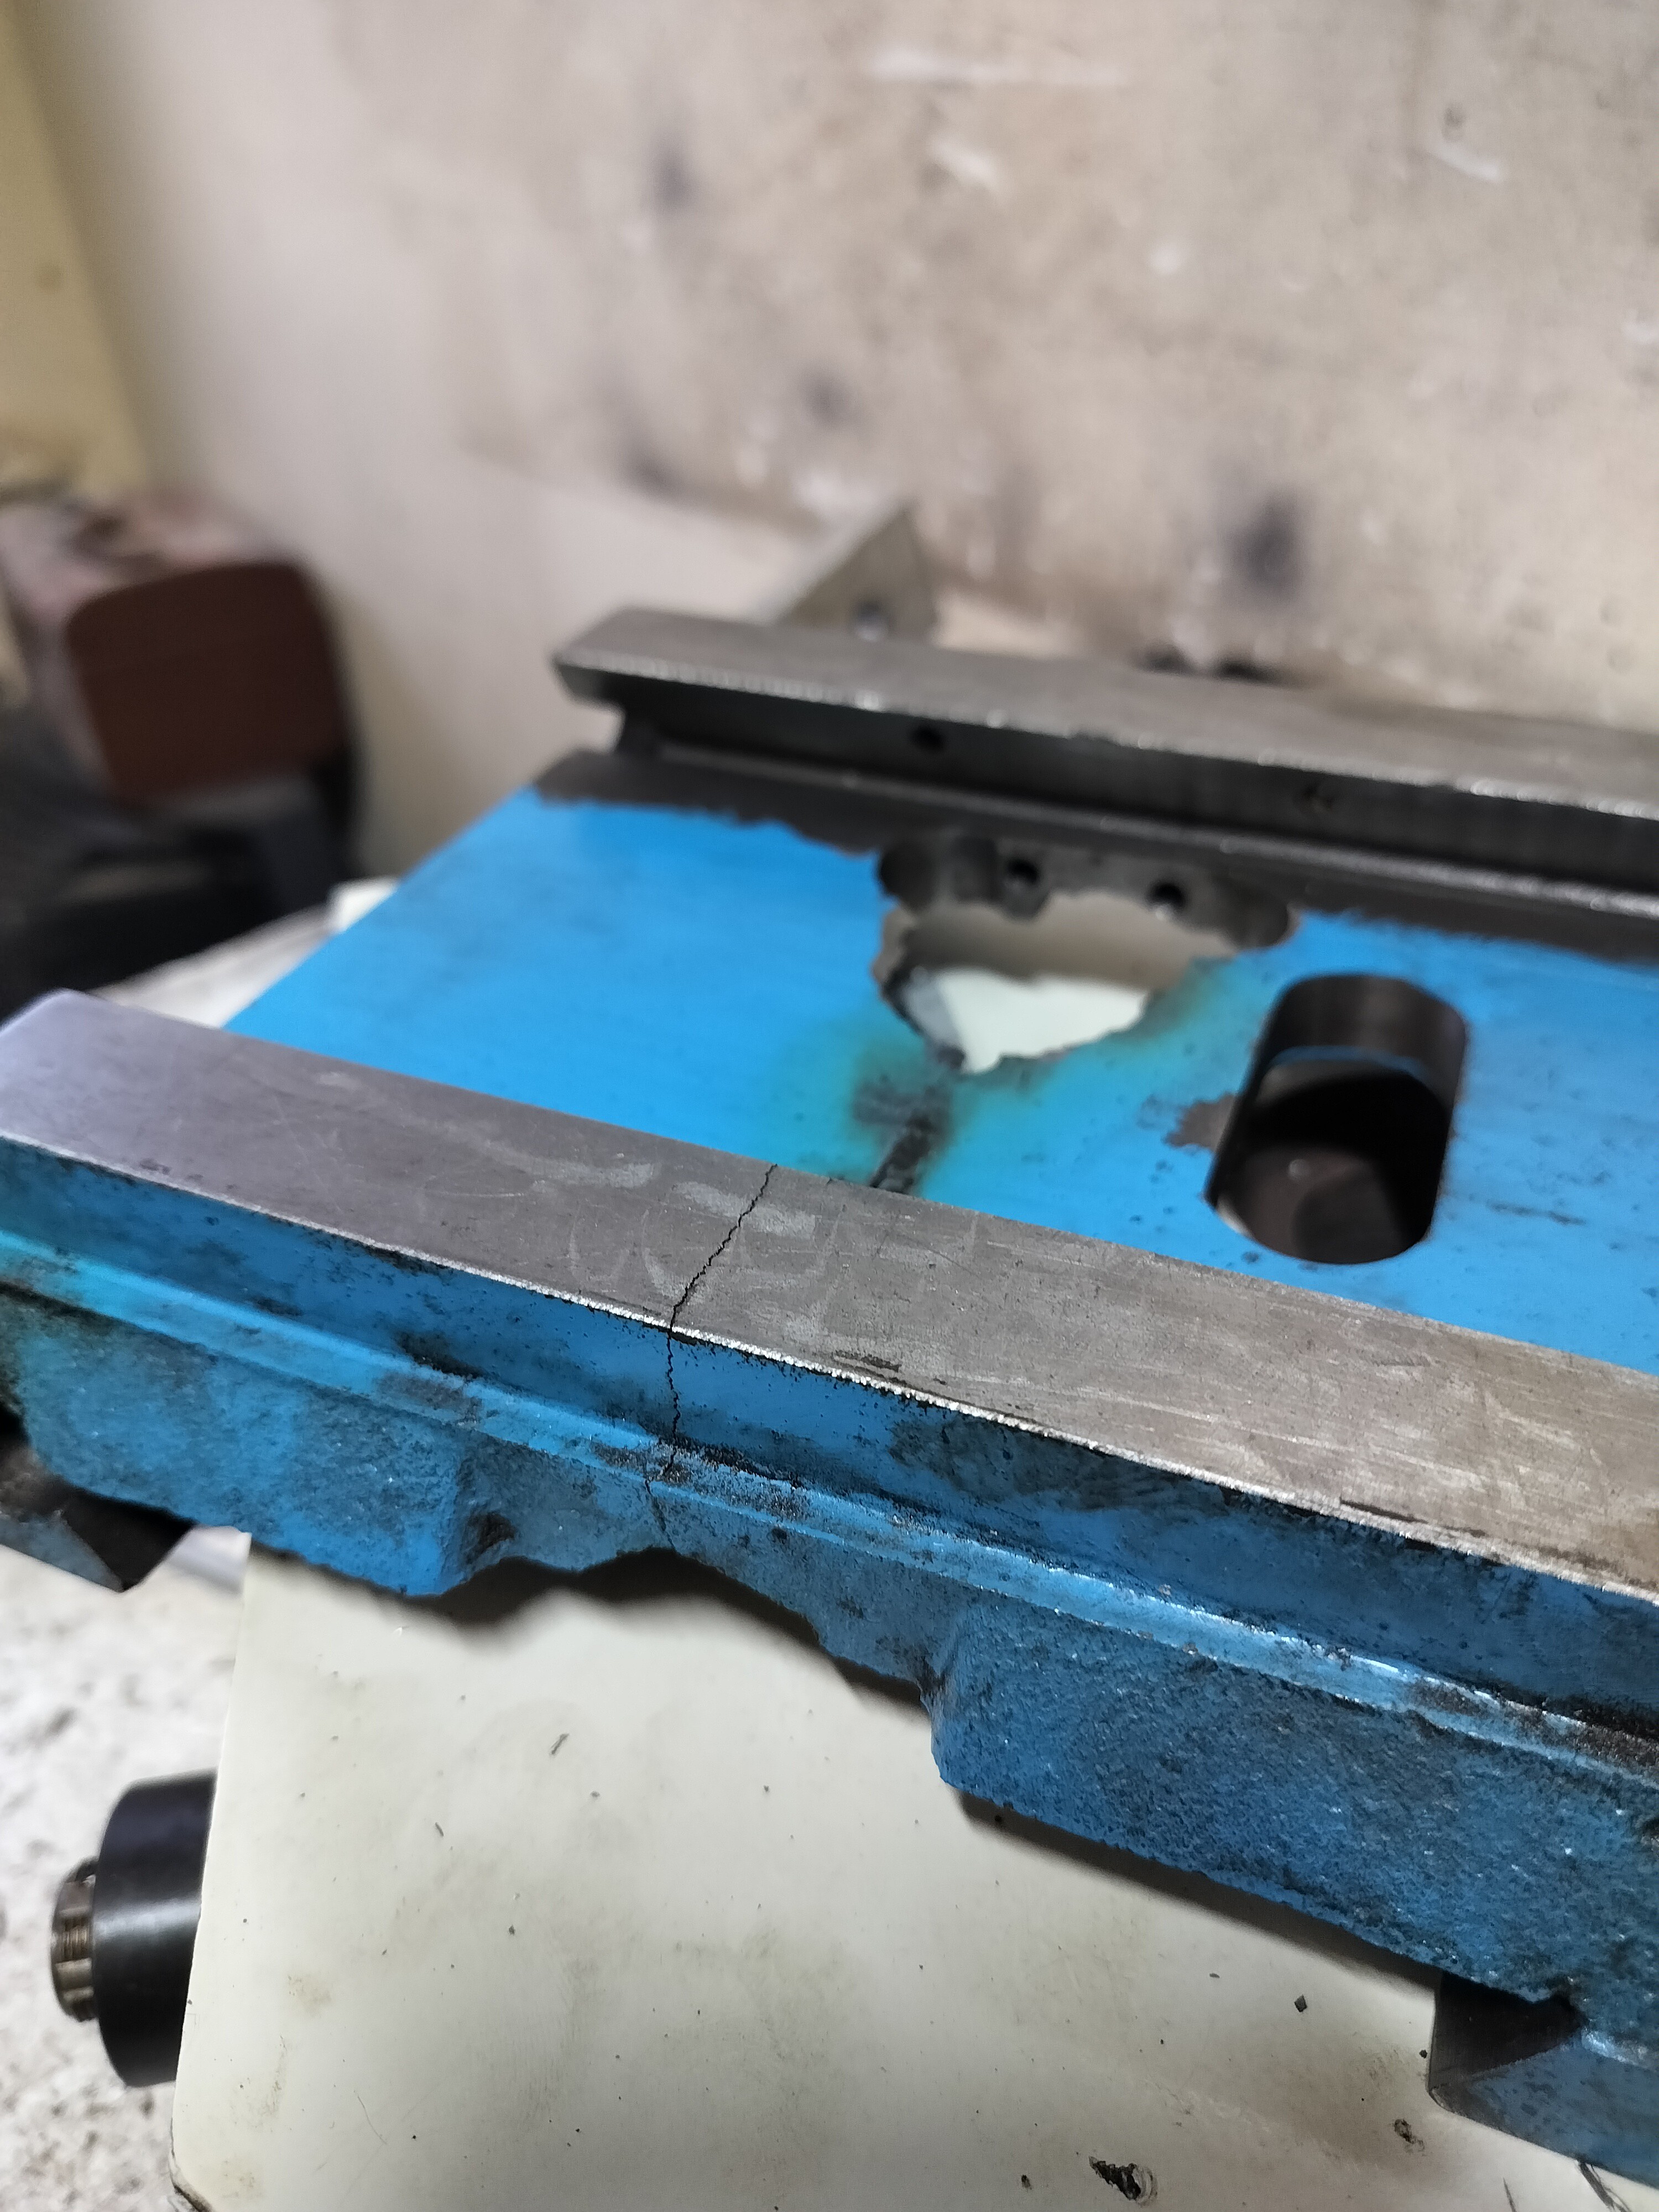
After learning how the ballnuts are clamped to the saddle, the X axis, consisting of the table and ballscrew, was stripped off the machine. This of course revealed the root cause of the cracked casting, which was a cavity created with an angle grinder in order to make clearance for the X ballnut. Unfortunately, not enough care was taken and the casting became too thin near the middle, also penetrating through the casting in some areas. This therefore created a major weakpoint and became a perfect area for a crack to form upon application of stress caused by machining forces.

With that out of the way, the saddle needed to be taken out, but it seemed that there was no way of doing this without completely removing the ballnut from the ballscrew shaft. Ballscrews differ from conventional leadscrews as they contain many small, closely packed ball bearings inside to reduce the backlash as much as possible, among other advantages. Removing the ballnut without an appropriate tool meant that the ball bearings would fall out and the ballnut will need re-packing or replacement. Seeing how the ballscrew shaft was actually corroded in some areas, I decided to take off the ballnut anyway and the ballscrew assembly will be bought new completely later on.
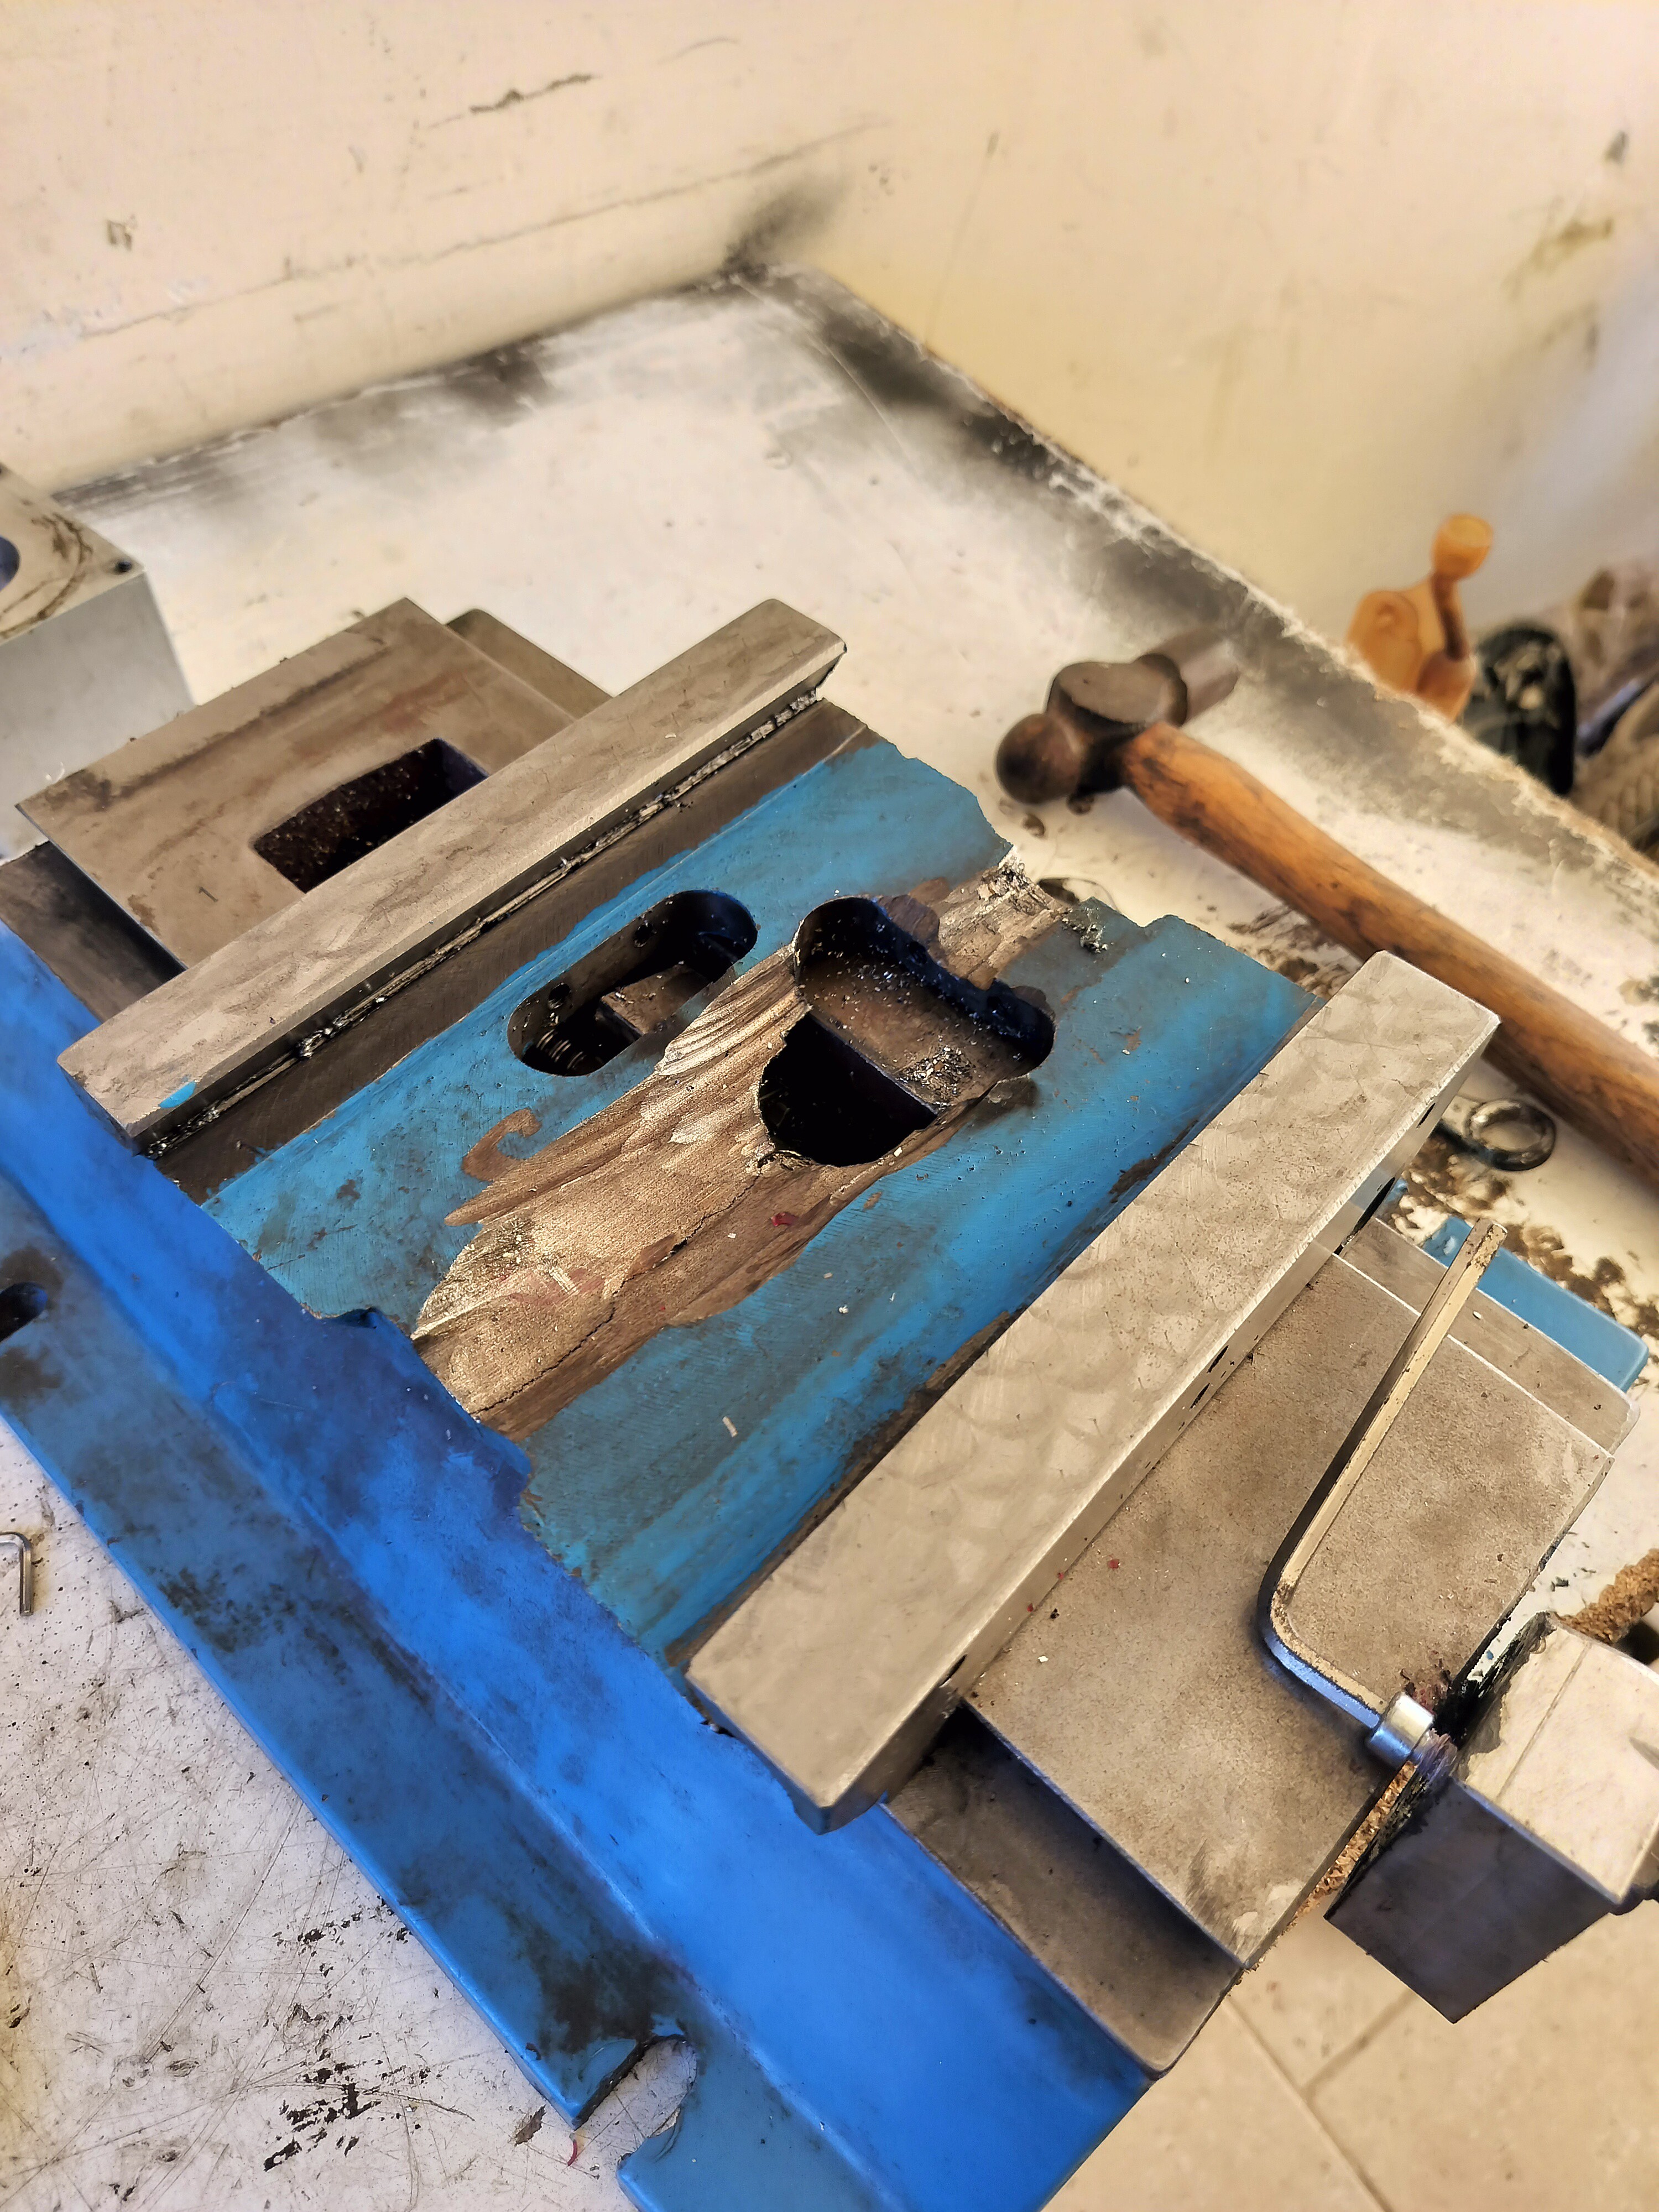
Upon removal of the saddle, the crack was found to pass through the Y axis slideways. It was later discovered that the Y axis gib was also given the angle grinder treatment for some strange reason. This is unfortunate since machining new gibs will be a challenge, as it requires matching with the already existing tapered slideways.

Discussions
Become a Hackaday.io Member
Create an account to leave a comment. Already have an account? Log In.