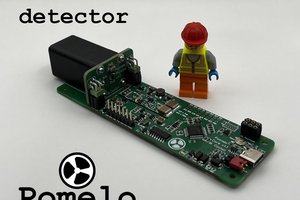
BetaBoard - Tiny Particle Physics Lab
A Business Card Sized Particle Detector
A Business Card Sized Particle Detector
To make the experience fit your profile, pick a username and tell us what interests you.
We found and based on your interests.
Multiple noise sources are relevant for this detector. The dominant higher-frequency noise source is the USB connection. The lowest-frequency component in the USB signal is the 1 kHz polling rate. At this frequency, passive RC filters are very doable and are used to attenuate noise from the USB power supply.
Unfortunately, there are also noise sources below 1 kHz. The most relevant ones are the mains power cables all around us. As I'm in Europe, they emit electromagnetic fields at 50 Hz and multiples of 50 Hz (overtones).
One important way of reducing low-frequency noise is to keep a decent distance between the device and any power cables or powered devices. Using a battery-powered laptop also helps to reduce the coupling of 50 Hz noise into the detector.
Building passive filters for these low frequencies requires large and expensive capacitors and is therefore not feasible here. Digital filters, however, can be designed for these low frequencies. The effect of a simple digital high-pass filter is shown in the figure above. This only works well when the low-frequency noise is small and does not reach the upper or lower limit of the amplifier or digitizer. As long as the device was not placed directly on a power supply, the noise level was significantly smaller in all measurements I performed so far.
Using a digital high-pass filter has the added benefit of removing any offsets and nicely centering the signal around zero.
The firmware for the RP2040 microcontroller implements a simple first-order low-pass filter. With a 125 MHz clock speed, the microcontroller is capable of continuously filtering the 500 kHz input signal.
In designing the high-pass filter, it is important not to significantly attenuate the input signal. The figure below shows an average pulse. Looking at the spectrum, we can see that most of it is above 1 kHz. So, adding a 1 kHz high-pass filter is a good option to get rid of the mains hum without losing much of the signal.
In planning the PCB casing, I forgot that I needed a layer of black tape to block out light. With the PCB stack that I created, I had to wrap the front panel in tape.
My simple solution for now is to add an additional PCB directly below the top PCB. This adds nothing to the functionality and makes the whole device thicker, but it somehow irked me that it did not look as intended.
To get a new detector up and running, it just needs to be assembled and programmed. The assembly includes painting the PCB edges with a black marker, tightening 6 screws and covering all openings to the analog section with thin black tape to block the light.
Programming can be as simple as dropping a .uf2 file onto the detector. As most RP2040 boards it will show up as a mass storage device, similar to a USB stick, when the boot select pin is pressed during startup. Additionally the programming headers and a UART are accessible to simplify software development.
Recording Waveforms
With a correct trigger setting, the board will record a few pulses per second. These are partially noise and partially our signal. We can measure the beta radiation as an increase in this rate. We can also look at the height (amplitude) of these pulses to learn about the energy of the particles.
Once programmed, the device shows up as a serial device. The very simple serial interface can be used by hand, but I've mainly used python scripts to record waveforms and analyse them.
Actual experiments
As an example for the experiments possible with this small detector I've measured the rate of a 15g package of potassium carbonate. Potassium carbonate is an old-school baking ingredient that I could just buy in the supermarket. Also here the Potassium-40 isotope that is contained in all natural potassium sources emits a bit of beta radiation. Due to the low activity we only get a few recorded pulses per minute. Therefore each data point in the figure below took 23 minutes.
It is clearly visible that the rate drops with increasing distance. That it does not drop to zero is because of the dark rate of our detector. Due to many different reasons like thermal excitation and background radiation it will always create some pulses.
This simple experiment already teaches a very important lesson about radioactivity: Distance helps! If you want to work safely with radioactive materials, you should try to maintain as much distance as possible.
Conclusions and Outlook
This cheap detector is easy to assemble and works quite well. I will redesign one of the structural PCBs to keep the front artwork visible, but that is a minor detail.
The next step required to make this a usable teaching tool is to add some more documentation and supporting software. I am also still waiting for a good opportunity to try this as a business-card to demonstrate my skill-set.
My first revision of this project was just a single PCB. To protect the sensitive detector from electromagnetic radiation I wrapped it in tape: First Black electrical tape to block light and then Aluminum tape to shield it. A hole was left in the aluminum tape as it would also block most of the beta radiation.
To simplify the assembly process and make it prettier my second revision is made with a stack of four PCBs. The stack of PCBs acts as a fielding cage around the analog section. By painting the edges black and covering the openings with black tape all light can be blocked. Unfortunately this also blocks parts of the nice front side. I'm planning to redesign one of the middle PCBs to put the tape layer below the top to make it look nicer.
The detector principle is illustrated on the top of my second revision design:
A beta source like Potassium-40 (⁴⁰K) throws off very fast electrons (e⁻). These are the particles that we want to detect. Our detector is a PIN diode. The electron bumps into the atoms of our detector as it travels through it. With each bump the electron changes direction a bit and creates new charge carriers (electron hole pairs) in the sensitive volume in the middle of the detector. These charge carriers produce the current that we want to measure. My guess is that an average beta decay creates a pulse with a few hundred electrons as a signal. Luckily each charge carrier can also bump into other atoms and amplify the signal a bit.
PIN photodiodes are optimised to detect light particles (photons), but not the beta radiation that we are interested in. Especially with our limited voltage we can see that detecting the very small pulses will require a lot of amplification. This also means noise will be a concern. This is even more the case as we will run off a noisy USB supply.
If we assume that we have 1000 charge carriers induced within 100 us (1/10.000th of a second) this is equivalent to a peak current of 1.6 pA. Using an amplifier with an effective transimpedance of 2.2 GΩ these pulses become measurable at an amplitude of 3.5 mV.
To get a higher event rate, six diodes are connected in parallel. This way we increase the sensitive area and the detection rate by a factor of six.
Concept
The main difficulty in the design here is in the analog frontend. For the microcontroller I'm mostly just following the recommendations in the hardware design with RP2040 document. As we are just using built-in ADC of the RP2040 to digitise our signals, there is not much to do either. Using the integrated ADC reduces cost and complexity and allows for high sample rates without fiddling with external buses. But we will of course have to accept the infamously high non-linearity of the RP2040 ADC.
Input Amplifier design
Being powered through USB, this design is already quite limited. So we want to use a rail-to-rail operational amplifier here in order to not loose any more voltage headroom than necessary. There are many possible chips available. My choice was the MCP6232 as it checks all the boxes and is relatively cheap:
Our particle detector creates small current pulses. As these are difficult to work with, we will first use a transimpedance amplifier to convert this into a voltage signal. I started my design based on the DIY particle detector by Oliver Keller, but there are quite a few things I had to change to make it work with 5V. The maximum transimpedance (effectively the gain of the amplifier) possible is limited by the minimum bandwidth we require. With a small 2.2pF capacitor and 22 MΩ transimpedance we are already limited to 3 kHz.
Another major difference is that the USB power supply is significantly more noisy than the 9V battery in the design by Oliver Keller. Therefore the bias voltage on the positive input pin of the operational amplifier is implemented with a zener diode instead of a simple voltage divider. Also the capacitor C45 and resistor R21 act as a low pass to further stabilise the voltage.
Shaping Amplifier
The 22 MΩ transimpedance in the first amplifier are not enough to bring our signal into the range of our ADC. Another x100 amplification stage is required. This stage is also used to shape our signal, meaning that we will further cut the bandwidth of our signal, especially for low frequencies. By adding a high-pass filter we can get rid of most of the mains-frequency hum at 50 Hz (or 60 Hz respectively). By low-pass filtering to below a few kilohertz we get rid of most...
Read more »Using PIN diodes as particle detectors has been demonstrated before. Ionising radiation can create charge carriers in a photodiode, similar to how they detect light. This concept has been used in a few DIY particle detectors. A famous design has been created at CERN. It is a really cool idea that teaches a lot of things, but requires soldering equipment and a bit of electronics knowledge to recreate.
With this project I want to create a cheap (<10 $ in low quantity) teaching tool. A particle detector that can be handed out to students, that they can assemble themselves and that gives a hands on experience with the basics of particle physics and radiation safety.
Here are the requirements that I set out with:
Choosing to use USB has some consequences: We only get ca. 5 Volt to work with. Semiconductor detectors have a larger sensitive volume at higher voltages, that would be advantageous. But hey, there is no free lunch. A voltage converter could have been added to the design. As a voltage converter adds cost, complexity and noise, I decided against it.
When using photodiodes as particle detectors, they can mainly detect Beta radiation. Alpha particles are comparatively bulky and are blocked by the transparent plastic that covers most photodiodes. Gamma radiation has no problem with that, but also mostly just passes through the sensitive volume of the detector.
But a working detector for beta radiation can already teach quite a lot about particle physics and radiation safety:
Safe but measurable sources of radioactivity
A particle detector is very boring when there is nothing to detect. Searching for sources of radiation in every day life can be super interesting, but it would be great to have a known working source to start with. My choice here is Potassium salt. Natural Potassium always contains a small fraction of radioactive Potassium-40 that emits beta radiation. It is completely safe to handle and even a legal food additive.
As potassium salt is very cheap to buy as a powder it is also a perfect test emitter to include in the bill of materials. Using a thin plastic bag of the powder is possible, but with a bit of patience it can also easily be grown into larger crystals.
In the image below you can see some crystals I grew. This was my first ever attempt, so they did not come out perfectly clear. But that doesn't affect their radioactivity :D
Overall this gives us another design goal: Be able to measure the comparatively low (radio)activity of potassium salt!
Create an account to leave a comment. Already have an account? Log In.
Become a member to follow this project and never miss any updates

 mihai.cuciuc
 Grant Giesbrecht
 Jianjia Ma
 Petteri Aimonen