Close
0%
0%

Magfest Swadge 2024

An ESP32-S2 handheld game system

Similar projects worth following
An ESP32-S2 powered handled swag badge (Swadge) with a TFT display, buttons, a touchpad, accelerometer, dual buzzers, games, and more!

MAGFest, short for "Music And Gaming Festival," is a four day-long event dedicated to the appreciation of video game music, gaming of all types, and the gaming community. The event runs 24 hours a day, and offers consoles, arcades, tabletop, LAN, live video game cover bands, chiptunes, vendors, guest speakers, and much much more.

Swadges are MAGFest's swag badges. They play games, make music, look cool, and generally have a good time. This year's Swadge was modeled to look like a spaceship and ran the following games:

  • Magtroid Pocket - A first person adventure shooter with exploration and puzzles
  • Galactic Brickdown - A Breakout-style game with touch controlled paddles in two dimensions
  • Lumberjack Panic & Attack - A PvP arcade game about jumping on things heads
  • Pushy Kawaii Go - Push button, number go up
  • Swadge Land - A challenging platformer with worlds, levels, powerups, and everything else you'd expect
  • Flyin Donut - A 3D wireframe flight simulator. Fly through all the donuts!

It also had these music apps:

  • Colorchord - Visualizes sounds from the microphone on the LEDs. Each octave gets its own color
  • Jukebox - A quick way to play music from all the other apps
  • TechnoSlideWhistle - A synthesizer with tilt controls
  • Tunernome - It's an instrument tuner and a metronome. Get it?

And a few utilites for good measure:

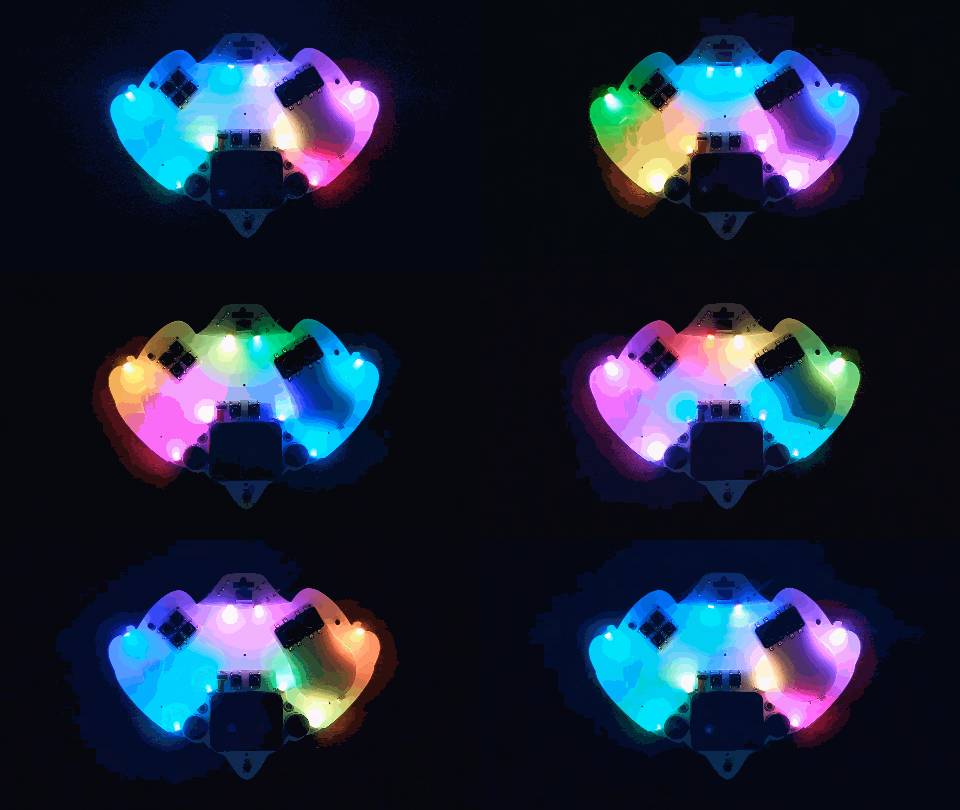
  • LED Animations - The CPU is put in a low power state, the display is turned off, and the LEDs are animated. Perfect for walking around.
  • MFPaint - An image drawing app with tools like drawing pixels, shapes, curves, filling areas, etc.
  • Gamepad - Plug in the Swadge to a computer and use it as an HID gamepad! You get orientation and 2D touchpad data too 
  • Timer - It's a general purpose timer

The Swadge was developed by a team of 28 hardware, firmware, and mechanical engineers, artists, musicians, testers, and brainstormers. Go team!

Super-2024-Swadge-Simulator_v1.1.0.zip

A simulator that runs in Windows

x-zip-compressed - 1.94 MB - 07/26/2024 at 22:28

Download

Super-2024-Swadge-HW_v1.0.1.zip

Design files for the hardware (KiCad, 3D objects)

x-zip-compressed - 44.47 MB - 07/26/2024 at 22:17

Download

Super-2024-Swadge-FW_v1.1.0.zip

Source code for the firmware. Build it with ESP IDF 5.1.1

x-zip-compressed - 2.45 MB - 07/26/2024 at 22:16

Download

  • 1 × ESP32-S2-MINI-1-N4R2 Microcontroller
  • 9 × LC8812B-4020 Side-facing addressable LED
  • 1 × B4013AM423-098 Electret Microphone
  • 2 × ZL-YDW1207-4005PA-5.0 Piezo Buzzer
  • 1 × RB017A1505A 280x240 Color TFT Display, Rounded Corners

View all 10 components

  • The Shell: An Infodump

    Emily Anthony10/15/2024 at 17:54 0 comments

    TLDR:

    • Design tools used:
      • Fusion360, Plasticity, Blender, SolidWorks
    • Material:
      • PETG dyed green and amber
    • Supplier:

    Introduction

    From the beginning we knew that the gunship needed a barrier shield; every good sci-fi ship needs a sick transparent shield that makes a satisfying "ding" when asteroids bounce off.

    The 2023 swadge had a prototype that we called the "eggshell", a name inspired by the username of the 3D printing guru "eggman" who churned out 200pcs pre-event to give the squarewavebird a more ergonomic shape.

    For 2024, we set our sights on bigger and better, moving away from the 3D printed pieces and embracing a more Professional™ manufacturing method: injection molding. MAGFest chose Protolabs as the supplier, as I had worked with them previously in my day job and was very happy with their user-friendly interface, web-based quoting and analysis tools, and turnaround time.

    Design Process

    The 3D design team consisted mostly of myself, Erik Jacobs, and Greg Lord.

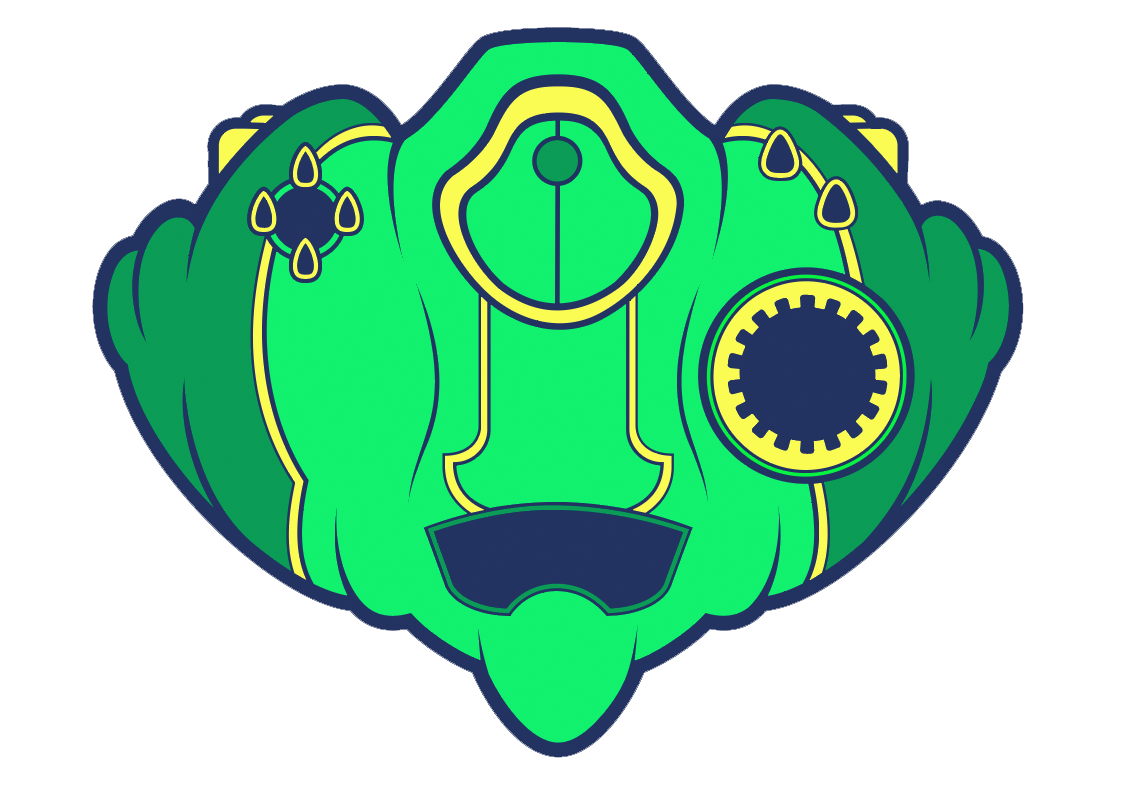
    1. Greg created some concept sketches that were used in other merch and swadge designs of a ship's hull. This formed the basis for not only the shell design, but the shape of the swadge itself.

    2. I exported a 3D STEP file and a 2D DXF from KiCad of the swadge PCB and components, and Erik pulled it into Fusion360. 

    3. Erik offset the PCB outline and created a base 3D model to prototype. Considerations were made for component clearances, ergonomics, and early Design for Manufacturing concerns - adding rounded edges, avoiding thin features, minding draft angles, and accounting for fastener interfaces. Erik noted the biggest challenge he had was the high poly count of the PCB geometry and translating that to Fusion360; in the end, he decided to fit a spline over the shape instead of rely on the exported outline to fit the PCB.

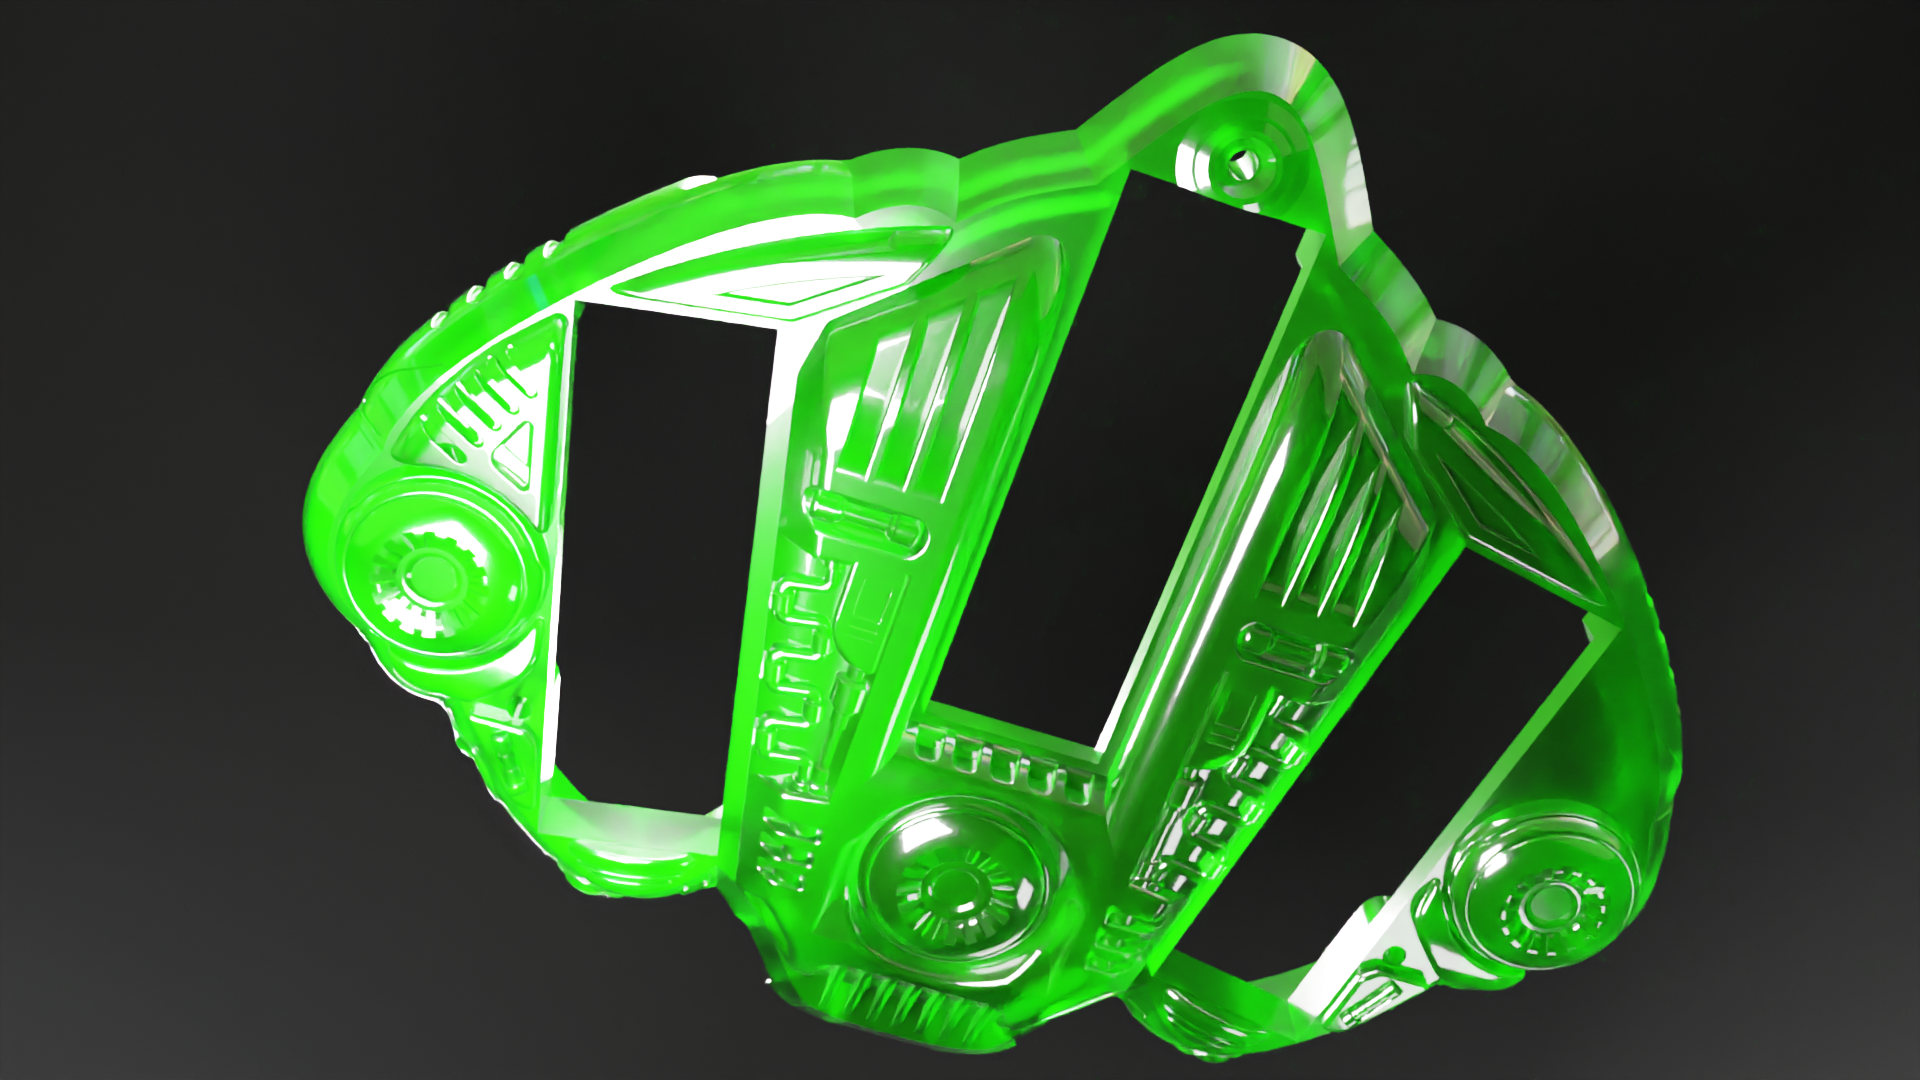
    4. Erik passed the prototype 3D model to Greg, who created some really beautiful detailed models in Plasticity and Blender to bring the ship to life. The goal was to keep the functional footprint from Erik's model and to incorporate artistic features that brought it closer to the original sketches. Tubes, weapons, turbines, vanes, and more were added. The concept art was very detailed, shown rendered in Blender here:

    5. I received the model at this point and needed to prep it for Injection Molding. Design for Manufacturing was my primary task at this point, as Erik and Greg had already accomplished the fit and form tasks. Injection molding is less forgiving than 3D printing, and requires many considerations for manufacturability. Protolabs has a really cool online interface that was able to clearly illustrate errors in the model that were adding cost or causing it to be not-moldable. Between that and the tools in SolidWorks to do some manufacturing analysis, we were very well-equipped to transition the concept to a manufacturable piece. Some considerations to be made were:

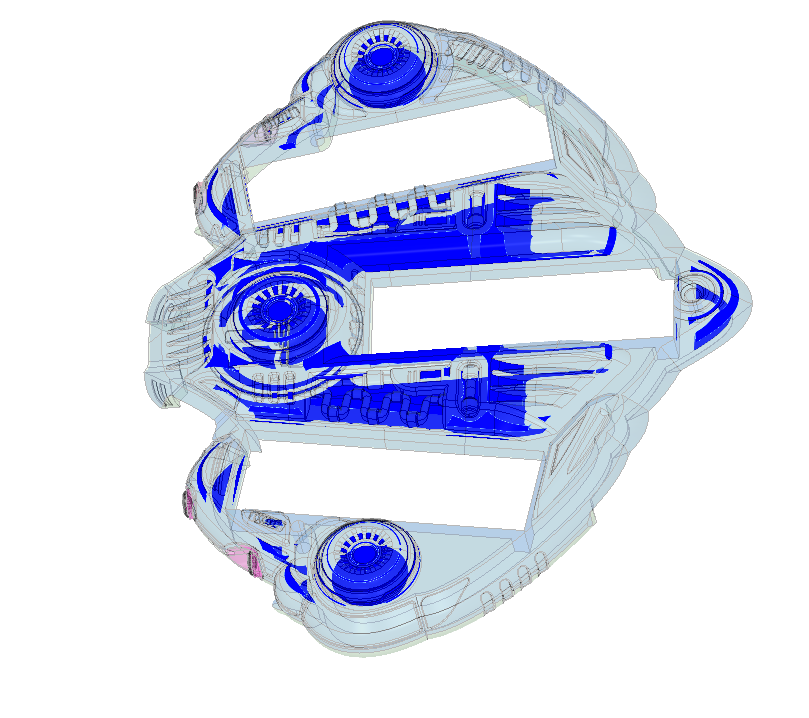
    1. Wall thickness - I needed to make sure the thickness of the shell was consistent or risk pitting, warping, or other errors in the final plastic. Here's a render from the Protolabs interface showing thick walls:
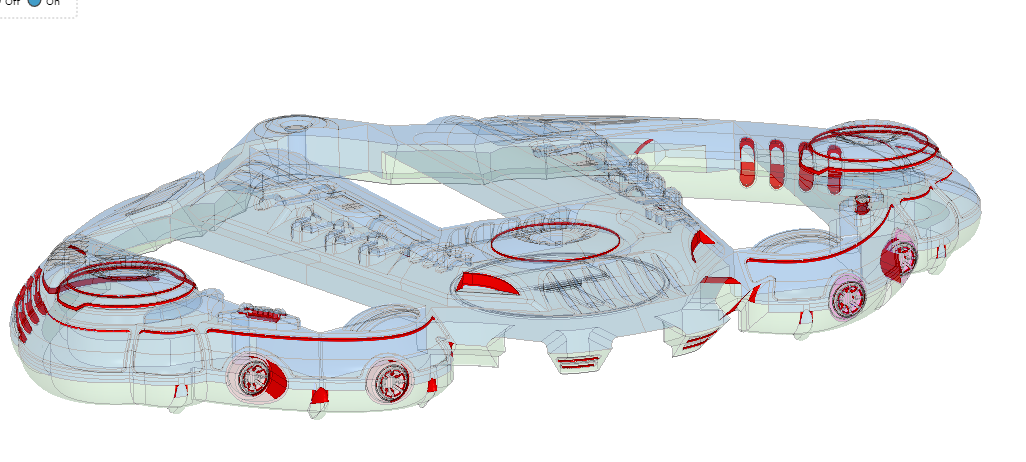
    2. Draft angle - as the piece is removed from the mold, it needs to have an angled wall in some areas to prevent it from basically suctioning to the mold. A 1-3 degree draft angle needed to be added on tall walls and sensitive areas. Red highlighted areas show where a draft was required:
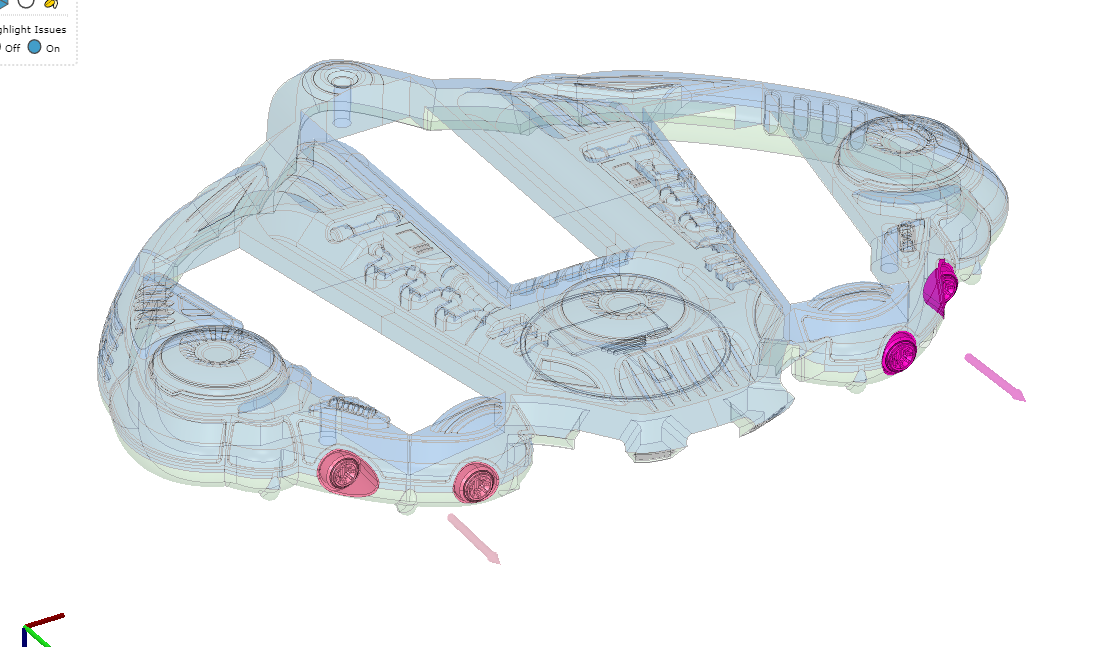
    3. Overhangs and undercuts - overhangs can be molded, but for an extra cost because they require what are called "side actions", or a removable part of the mold which ejects from the side. We had like $6 to work with, so I needed to adjust the model to remove the undercuts. Here's an image showing the model with side pulls required:
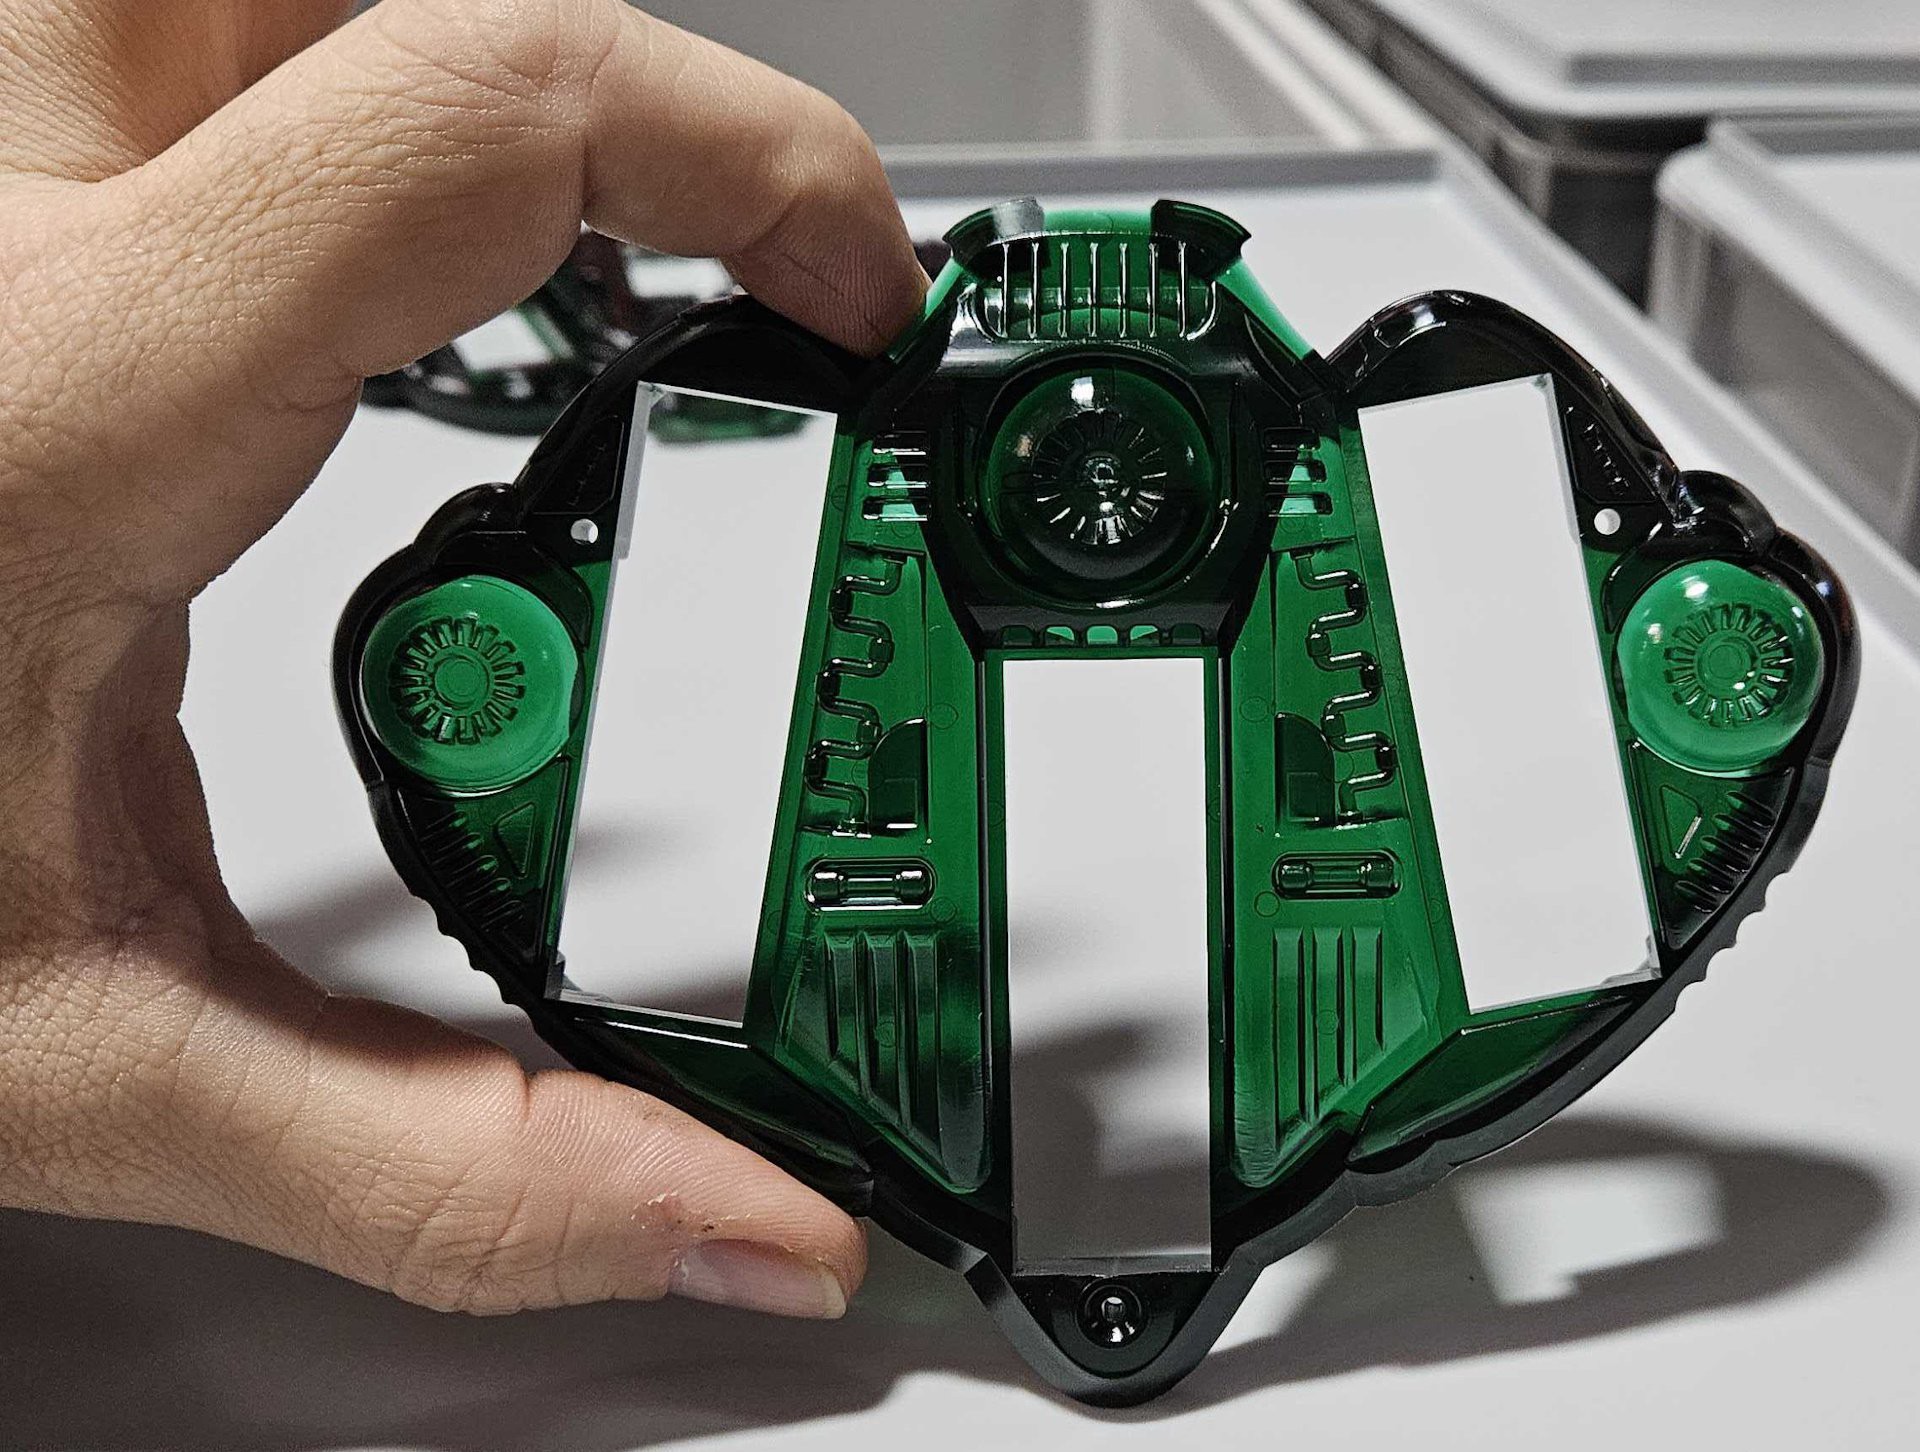
    4. Material selection - we really wanted a transparent shell, and I selected PETG because I loved the green and amber colors which would fit really well with the purple and red PCBs of the gunship.
    5. Embossing...
    Read more »

  • The Shell

    gelakinetic07/27/2024 at 00:53 0 comments

    To be honest, I'm still not entirely sure how the shell was designed and made. That's the magic of teamwork, sometimes someone else does the thing! All I know is that I exported a 3D model of the populated board from KiCad and handed it off to the mechanical teammate. From there we printed a series of tests to make sure the fit was good.

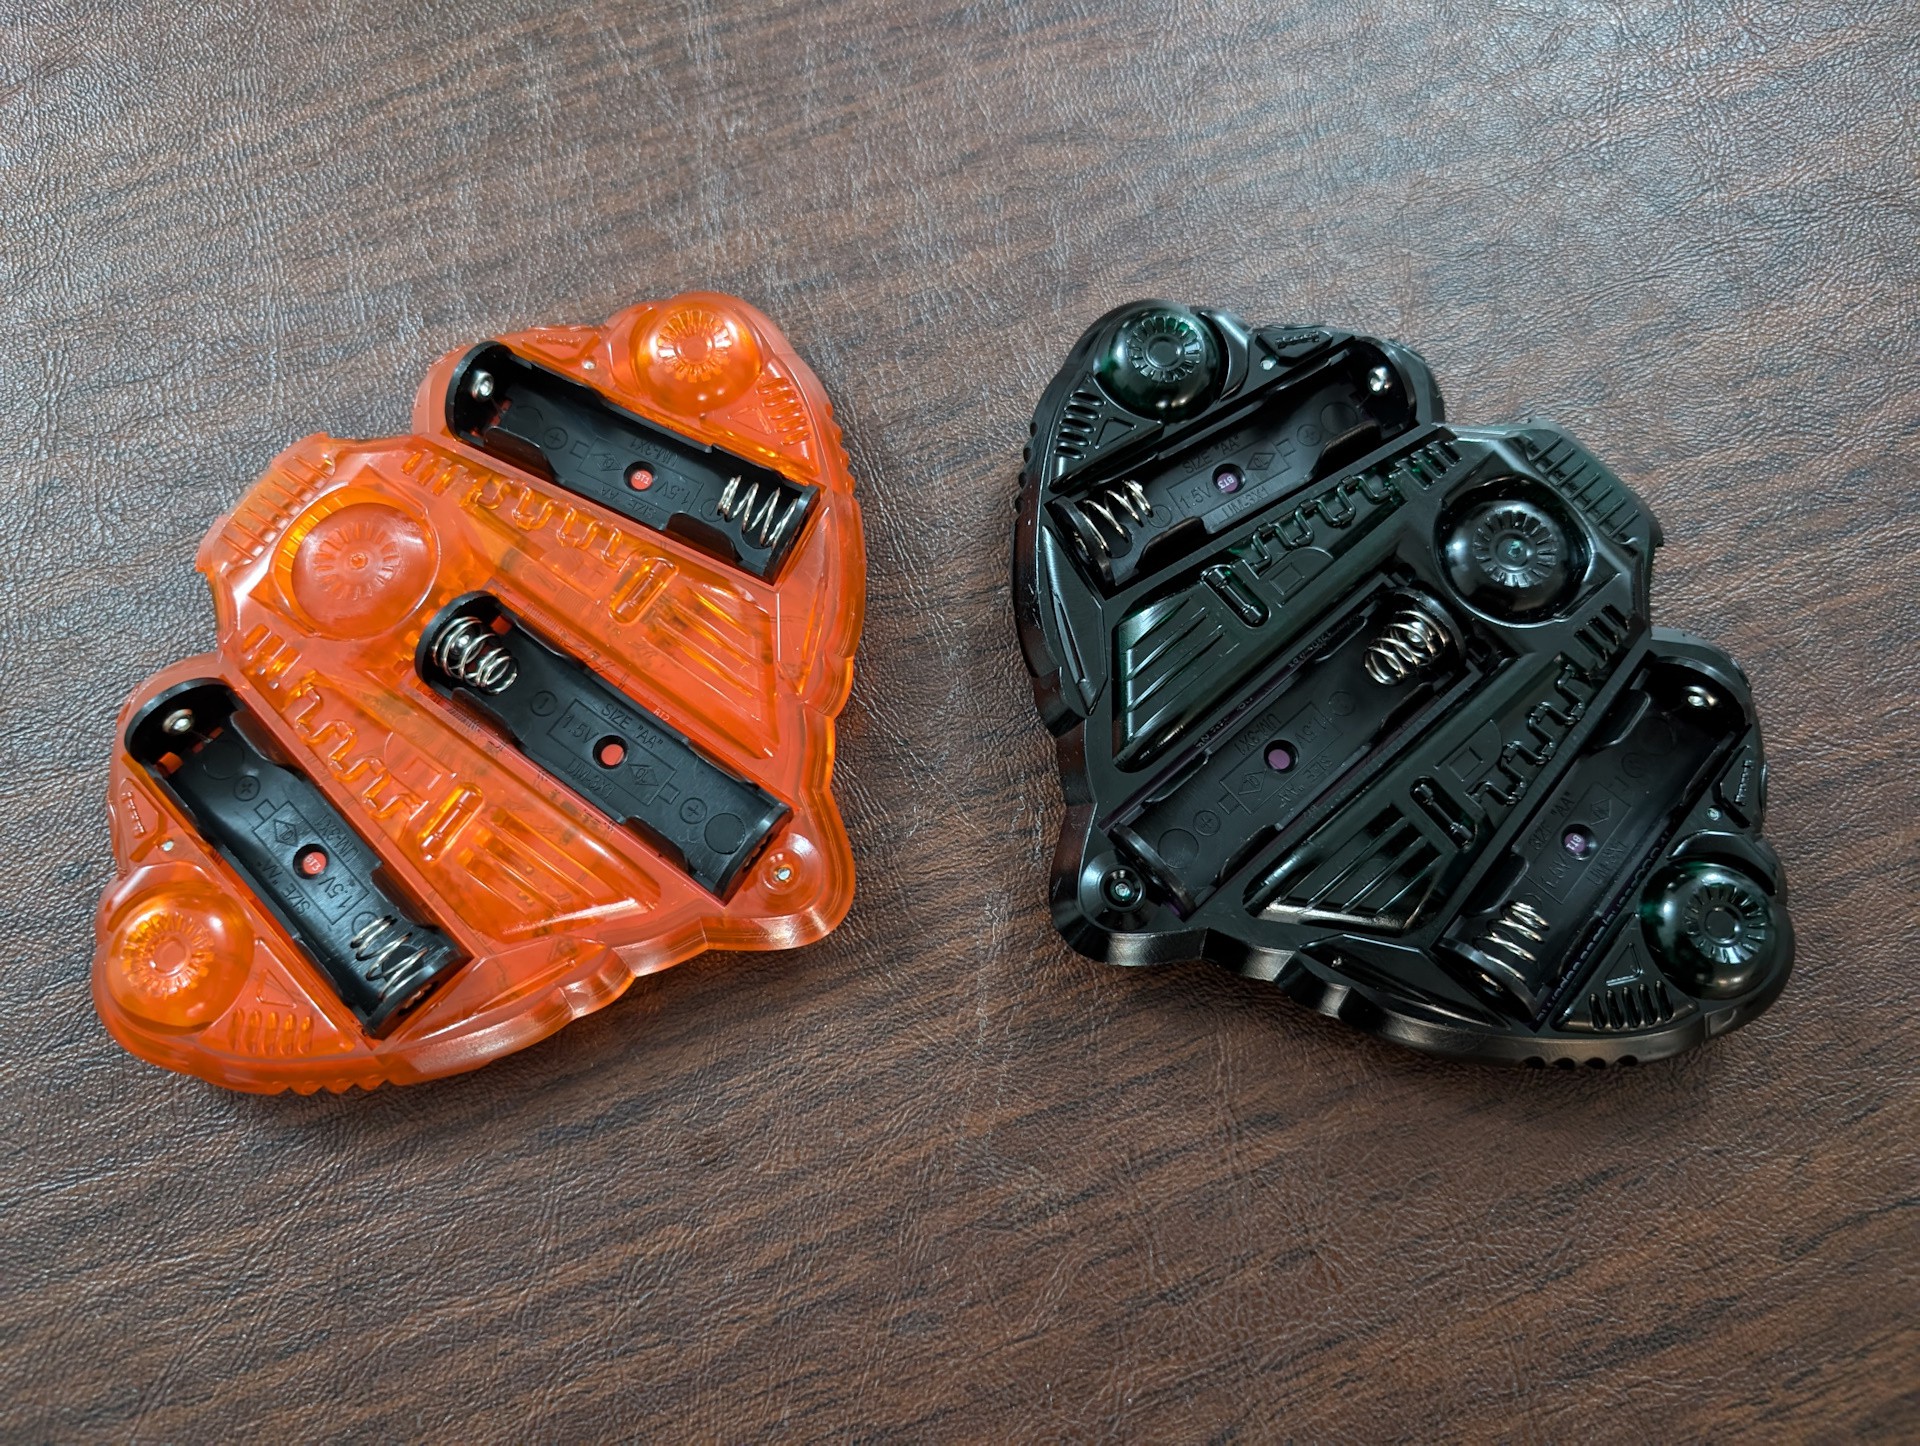
    Once the mechanicals were good the project was shipped to an artist on the team who added exquisite spaceship detailing. There was a bit of back-and-forth to make sure it was manufacturable with injection moulding, and then it was off to the manufacturer, Protolabs. We had them made in two colors and both came back amazing!

  • Magtroid Pocket - Vinegrasp

    gelakinetic07/26/2024 at 23:58 0 comments

    Here's a bit of the second area, Vinegrasp, running on a Swadge. Enjoy!


  • Simulation

    gelakinetic07/26/2024 at 22:27 0 comments

    Everybody knows that developing and debugging an embedded application is slower than a desktop one. That's why the Swadge project has two compilation targets, the ESP32-S2, and a desktop application.

    It's not an emulator, because we're not emulating the ESP32-S2. Instead, we reimplemented the APIs we're using from the ESP IDF, as well as our own APIs for any hardware peripherals. It's not perfect, since horribly inefficient code can run with no problem on the simulator and with many, many problems on the actual hardware. It's more than good enough to quickly prototype a game, debug with gdb, fix memory issues with asan, make sure graphics are pixel-perfect, and get everything working before ironing out any last few bits on real hardware.

  • Doxygen Documentation

    gelakinetic07/26/2024 at 22:12 0 comments

    We have Doxygen documentation. A lot of it! You It's built by Github Actions and hosted here. It goes over everything you could want to know about the firmware project, like how to use hardware peripherals, how to draw shapes, images, and fonts to the TFT, what random utilities already exist, and how to get a game to peacefully coexist with a bunch of other games. If you love reading documentation, give it a go! If you don't, I can't force you.

  • LED Diffusion

    gelakinetic07/26/2024 at 10:49 0 comments

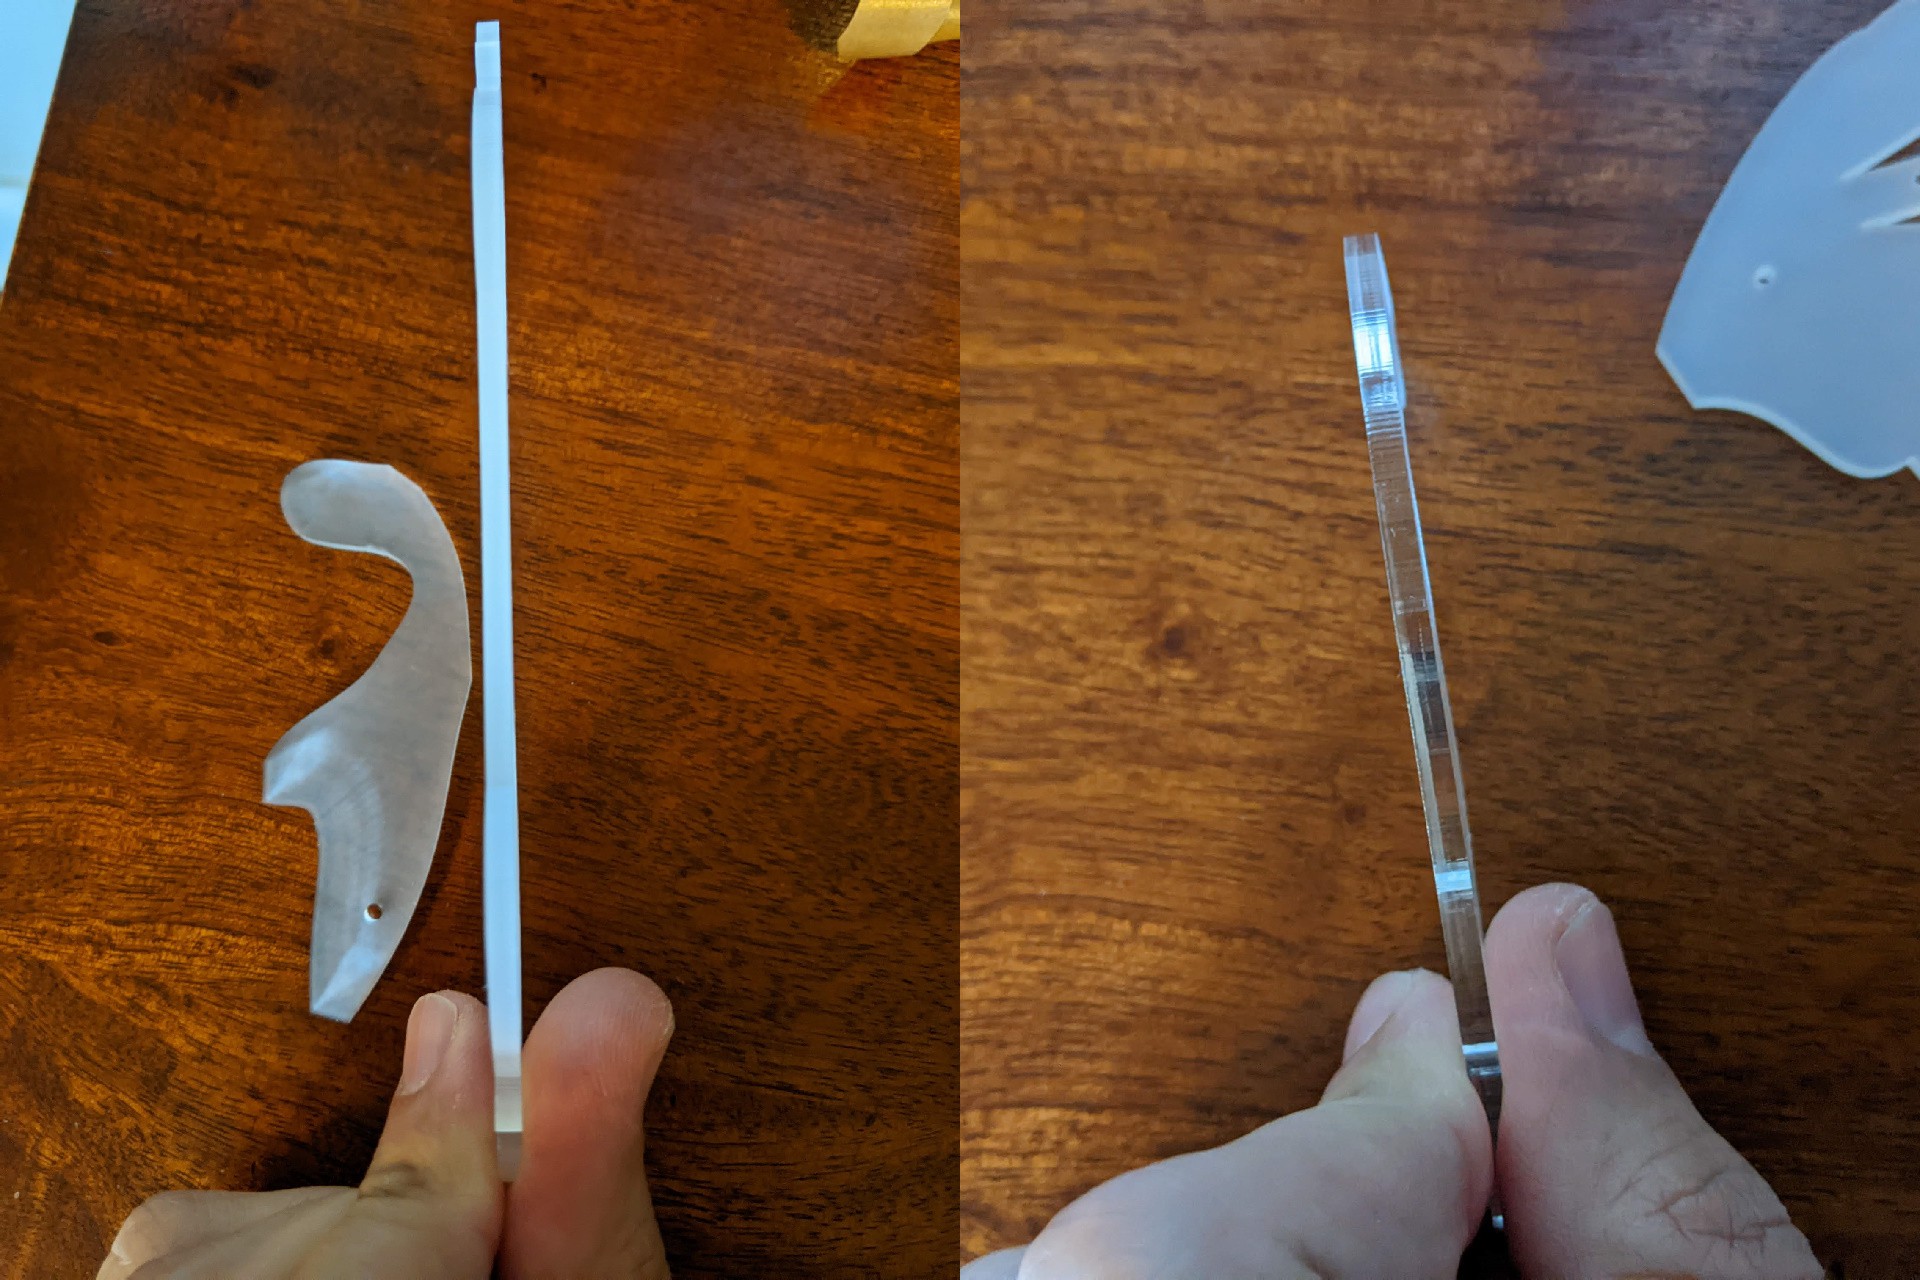
    RGB LEDs are a must for any Swadge. They should be bright enough to be seen at a distance, but diffuse enough to not blind someone playing a game on the Swadge. That means they need to be diffused. We decided to use side-firing RGB LEDs and an acrylic diffuser.

    Elecrow offers acrylic cutting and assembly, which was very convenient. When ordering samples, we noticed that the "Matte Transparent" material option was actually two different materials. One had a matte edge when cut, the other had a clear edge. We specified the matte edge for production and it worked out great. Always check your samples!

    The shape was created by exporting an SVG of the layout from KiCad and drawing around the components in Inkscape. I think it turned out pretty well, even if this GIF compressed all the fun out of it.

  • Writing Magtroid Pocket

    gelakinetic07/18/2024 at 01:17 0 comments


    Inspiration

    Magtroid Pocket is a first person adventure game that drew inspiration from both 2D and 3D Metroid games, as well as classic FPS games like Wolfenstein 3D. The core gameplay elements I designed around were:

    • Exploration: The player explores the map to find items to access new portions of the map to find more items, and repeat that loop.
    • Combat: The player shoots enemies, with each enemy having a weakness to a particular weapon. Each weapon has unique traits and are swapped using the touchpad. The player can lock-on to, and strafe around, enemies.
    • Puzzles: The player can find and solve optional puzzles and be rewarded with powerups when solved. There are special endings for both acquiring all items, and intentionally acquiring none.
    • Plot: The player should have enough of a story to be interested in

    Creative Development

    Magfest had already developed characters and theme for the event, so I took that and wrote a plot, which was then touched and fleshed out by a friend. I tried to keep it fun and lighthearted by poking fun at videogame tropes. The tone does shift from silly to serious as the game progresses.

    I drew some textures for testing, but had nearly everything including items, enemies, and textures, replaced by artist friends. A little of my art squeaked into the final game. The same friend who helped with the plot also composed all the music and sound effects for the buzzers. I could not have made this game without the tons of creative help I received, and you can read more about that in the Player's Guide.

    Technical Development

    I learned a ton from Lode Vandevenne's Raycasting Tutorial. It was the basis for pretty much all of the rendering. I highly recommend you go read it.

    It was really important to get the rendering loop as fast as possible for fluid gameplay. A few techniques were used to improve performance.

    • perf and Hotspot were used to profile the simulator and find out where the time in the rendering loop was going.
    • gcov and lcov were used to more thoroughly inspect functions identified by perf & Hotspot
    • Because the ESP32-S2 doesn't have an FPU, no floating point numbers were used. Instead, fixed point Q16.16 was used.

    Once the rendering engine was up to speed, I wrote a combination tile based map and script editor in Python to create interactive maps. The scripts are a series of simple "if trigger / then event" statements. Triggers included entering areas, shooting walls in a specific order (puzzles!), defeating all enemies, and more. Events included opening doors, spawning enemies, showing dialog, and more. The editor would export the map and script data for the game to load later.

  • The Panel

    gelakinetic07/17/2024 at 14:19 0 comments

    The project has been completed for a few months now, and will get some retroactive logs. Let's start at the very end with the panel we gave about the Swadge at Magfest 2024.

View all 8 project logs

View all instructions

Enjoy this project?

Share

Discussions

gelakinetic wrote 07/29/2024 at 09:30 point

Thanks! I'll see if I can get a teammate to write more about that design process. The problem is we like designing more than writing 😅

  Are you sure? yes | no

shivmsit wrote 07/29/2024 at 05:55 point

It was amazing to read details about the project. It would have been much better if there was some more details on how the shell was made, nevertheless it was useful.

  Are you sure? yes | no

Emily Anthony wrote 10/15/2024 at 17:02 point

Hi shivmsit! I will update this today with shell information. :)

  Are you sure? yes | no

Similar Projects

Does this project spark your interest?

Become a member to follow this project and never miss any updates