Craig Hissett
-
Nodemcu
07/19/2017 at 22:21 • 0 commentsFinally arrived - hurrah!
I've been doing a lot of work recently on other esp8266 based boards and I've got to say - they're brilliant!
I look forward to getting the Nextion and the Nodemcu working together soon!
-
Still waiting for NodeMCU
06/13/2017 at 13:18 • 0 commentsI've just been refunded on my EBay purchase for my NodeMCUs and have ordered some more.
Hopefully once these arrive I'll be able to get this one going again! :-)
-
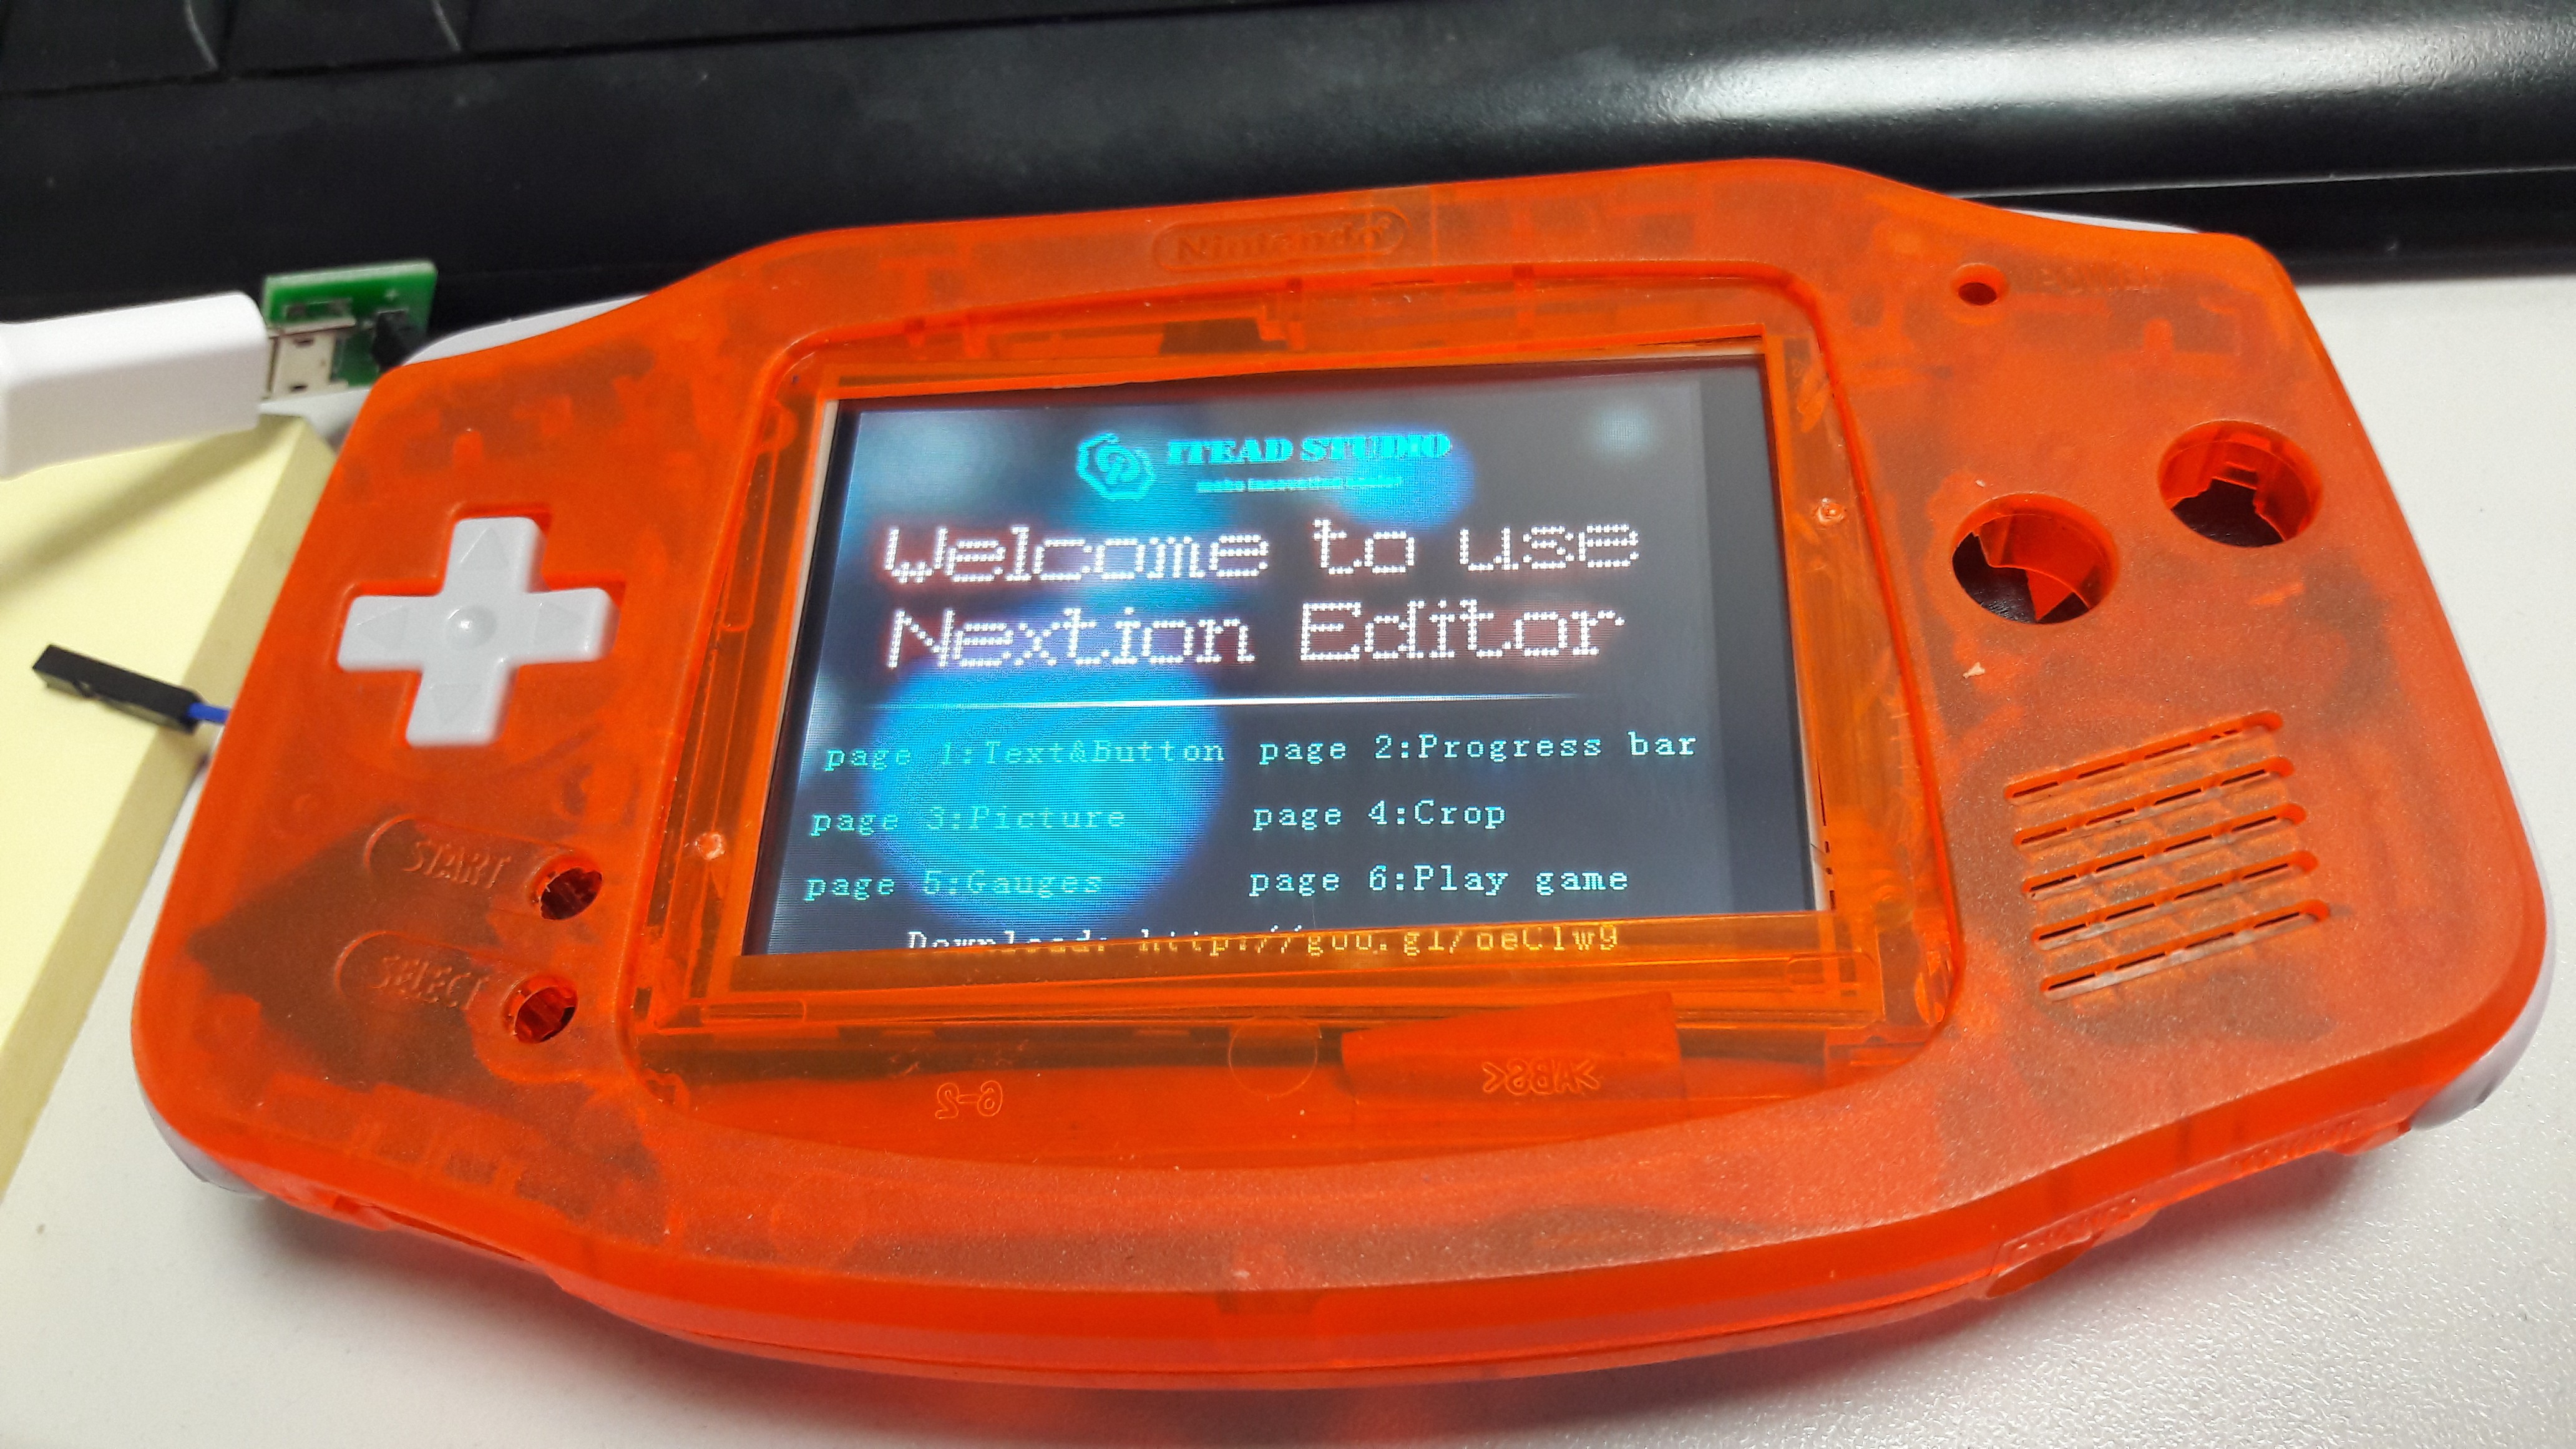
Nextion has arrived: test fit
05/15/2017 at 16:56 • 4 commentsFinally, after after ordering from 3 sellers (and being fleeced by two) the Nextion 2.8" screen has arrived!
A quick bit of filing to remove impeding plastic and it sits quite nicely
![]()
It is taped in for now; going to secure it soon.
I could stick a pro micro or Wemos d1 mini into the battery compartment space, connect to the screen'shot Tx and Rx and start playing, so that's good.
-
Grrrrrr
05/03/2017 at 11:34 • 13 commentsNextion Touchscreens. It appears that Chinese sellers are very precious of their Nextion stock. So much so that, even when a customer pays for them, they won't send them!
Both sellers on Ebay and AliExpress have left me screenless and refundless too.
I've tried again, but this time with a UK-based seller. Much more expensive, but surely more reliable.
We shall wait and see!
Once the screen arrives I'll be test fitting it in my GBA case. Being 2.8" it should fit the hole nicely; it's more the depth of the board that may be the issue. I may have to cut out some of the cartridge slot assembly to make it fit.
Then it's a waiting game to see if my Nodemcu boards arrive. While waiting for those I'll be working on fitting the Pro Micro slave and breaking out it's pins, ready for the Nodemcu to drop in when it arrives :-)
-
ESP Spree!
04/03/2017 at 15:41 • 0 commentsThat monthly sacred day known as Pay Day has arrived.
I've ordered a few different types of ESP8266 based boards for my various projects:
- An ESP-07 based serial port board for my #Arduino Mega Expansion board
- A few ESP-01 modules to use as plug-in modules with my #Aquariumatic project
- For this, my #GBAA: Game Boy Advance Arduino project, a handfull of NodeMCU boards.
While I've been looking at various ways of connecting all the devices planned in here I've also been looking at ways to reduce the number of components.
I've ordered a 2.8" Serial Touchscreen from Nextion. These screens look great; design your GUI using their software and upload it to the screen via a micro SD card. Using this screen I can just use serial commands to interact with the user interface, offloading the grunt work of running menus in the process.
If I can get this to work to my advantage I can almost definitely do away with one of the arduinos in this build, and have the ESP8266 board (potentially the NodeMCU) operate as the master for all the GUI and WiFi connections. I would still love to keep keyboard emulation as a feature, so the Nano would be dropped, and the Pro Micro used as a slave with it's pins broken out.
Not only does it reduce the number of components, it also makes the flow of the project much, much simpler.
I can't wait for all my shiz to turn up!
-
Tight Fit!
02/22/2017 at 21:34 • 2 commentsWhile work continues on writing menus and working on my Arduino Mega-based prototyping setups (which are great little things in their own right - mayou design a case for them and keep them as is!) I have been looking at test-fitting the components into the GBA case.
As much as I'd like to just a the 16x2 screen via i2c the i2c backpack board makes it way deeper than what can fit in three relatively shallow space. One solution would be to remove the original battery compartment and mount a slimmer LiPo or Li-Ion battery instead of the normal batteries.
Another alternative would be to use the screen via spi, connected to the master arduino (leaning towards this being the Nano rather than the Pro Micro). But, by the time it is wired up would the loom of wires be any more space saving?
The plot thickens...
-
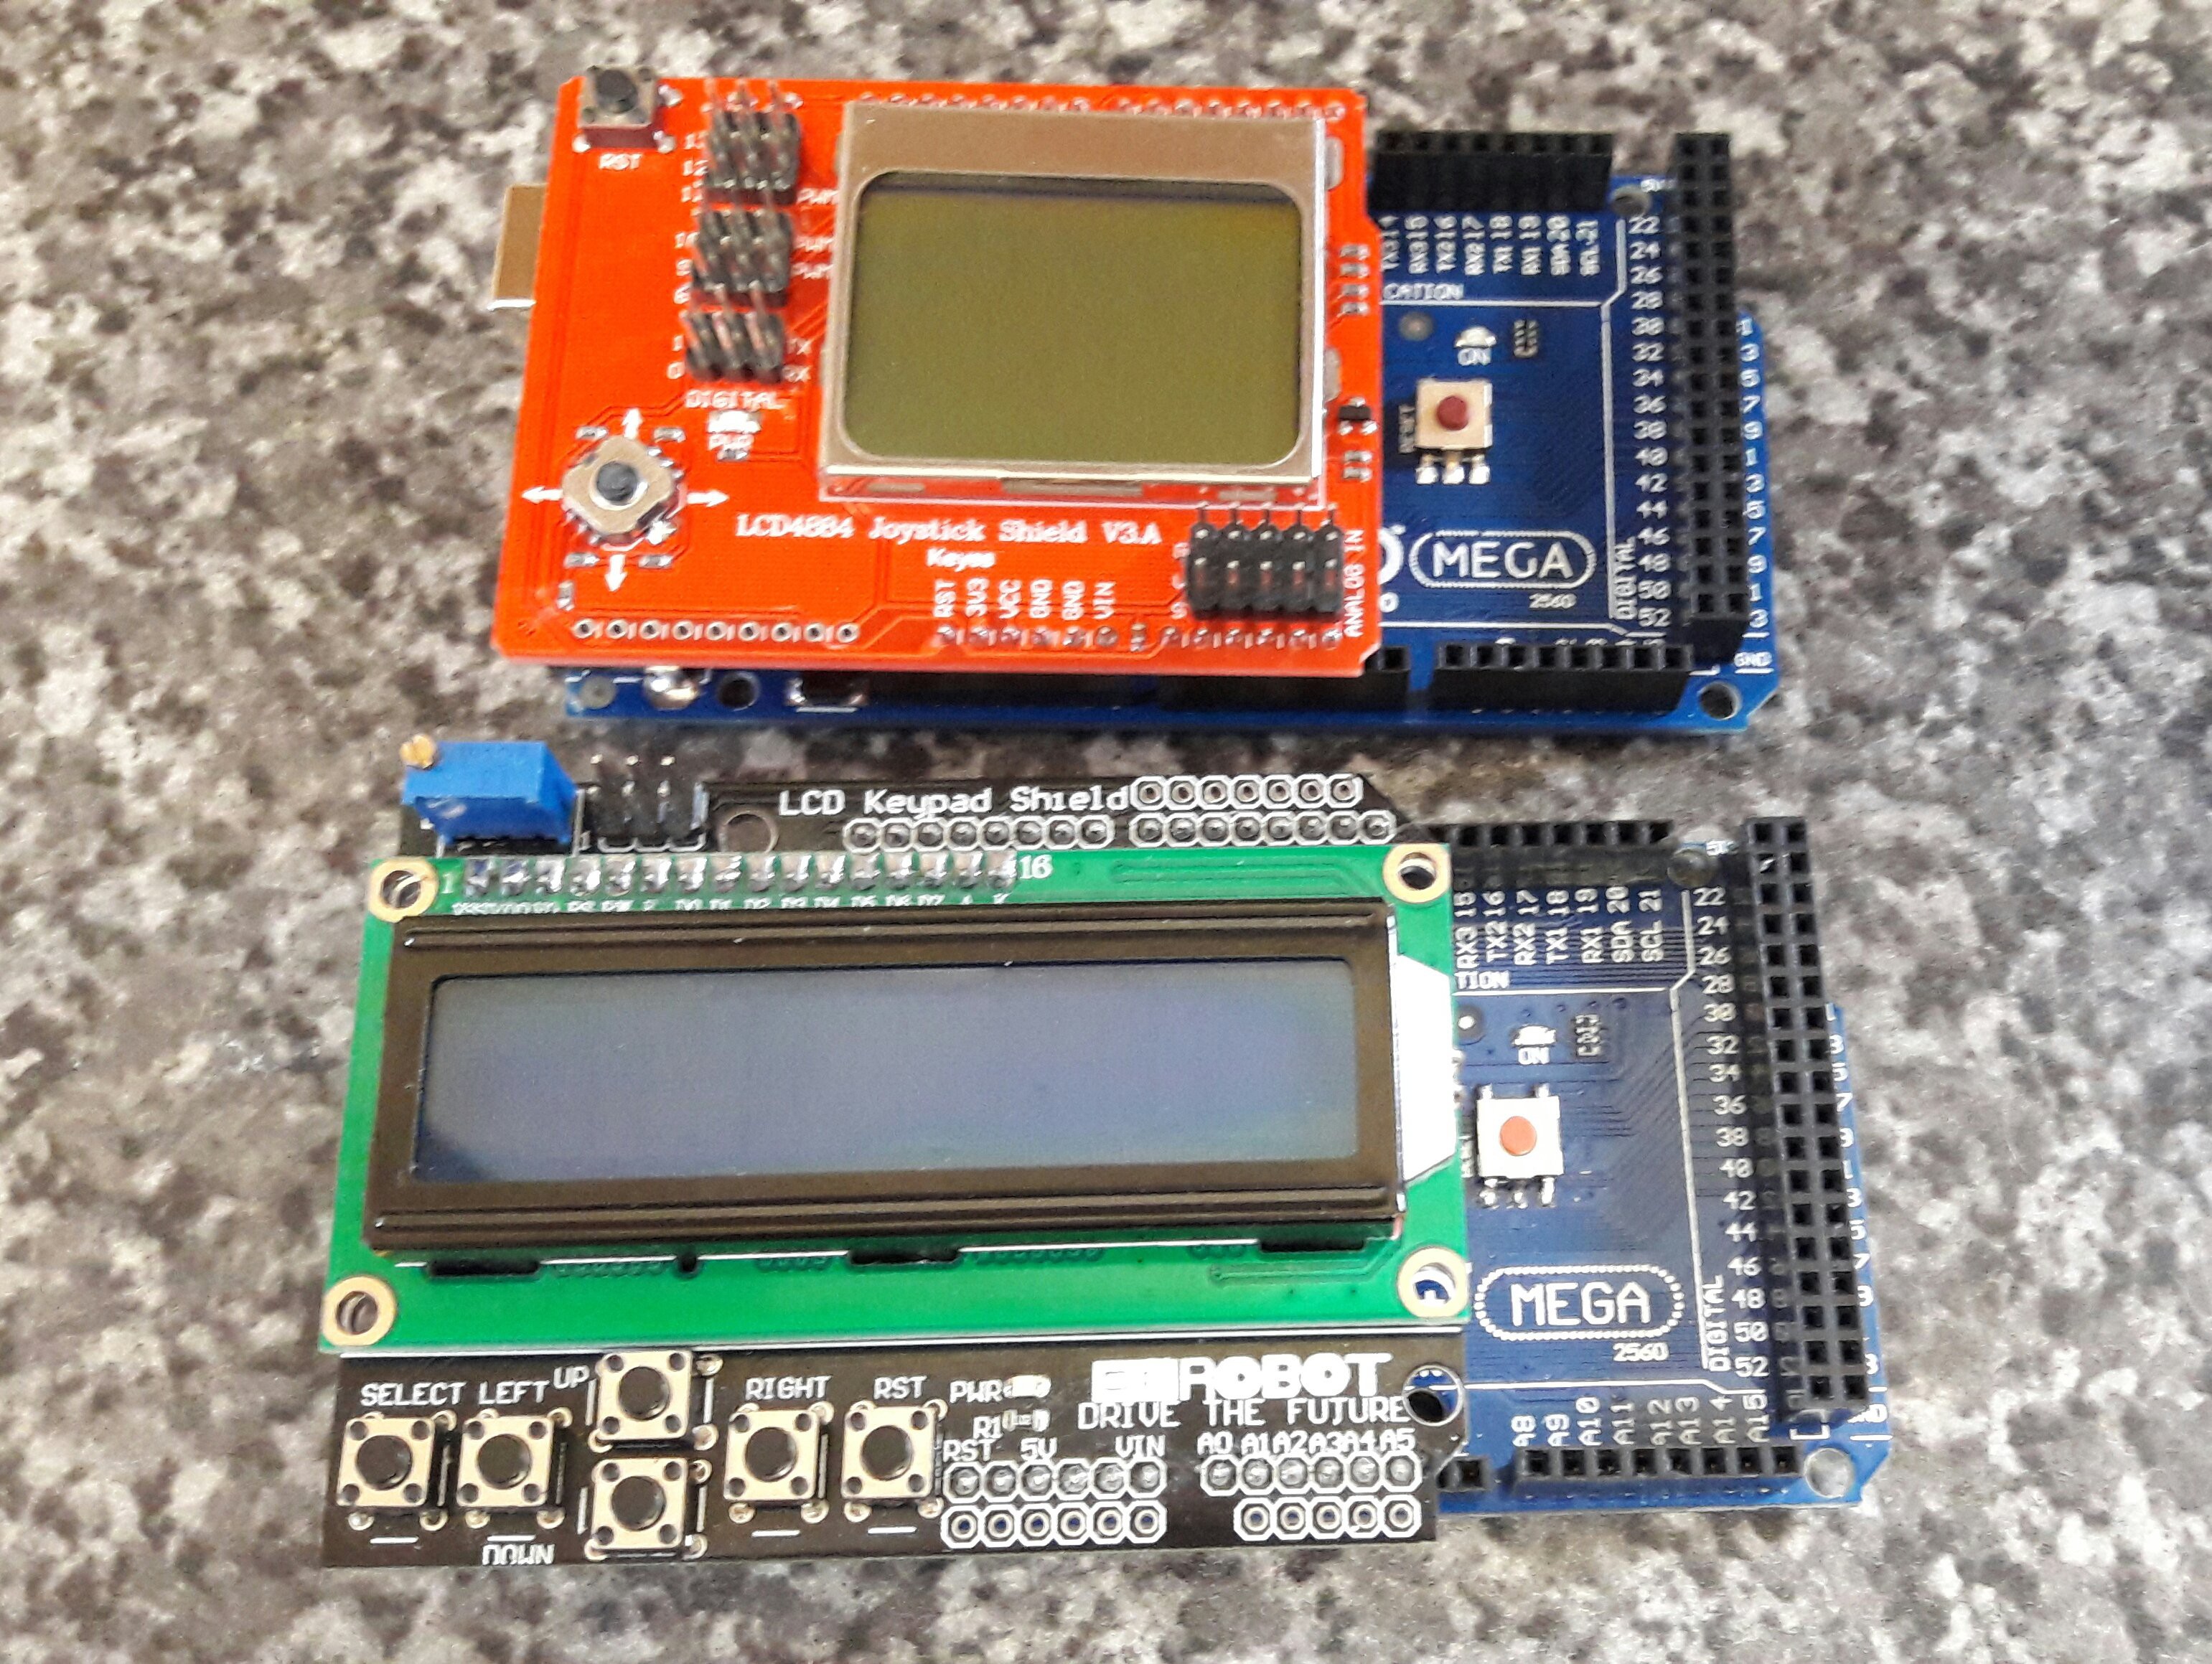
Refining the Prototyping
02/21/2017 at 00:14 • 0 comments![]()
Over the last week or so I have been messing around with breadboards and jumper wires and all that kind of shiz to get my project up and running in some shape or form.
Writing the menu I'm after is proving a bit (read: a lot) more tricky than I first thought, but enjoying the challenges.
In order to make it easier to carry my prototyping setups around (I'm working on both 16x2 and Nokia screens, between home and work) I am going to streamline them by making a little board to plug into the Mega's free pins to the right of the Shields.
This board will contain the Wemos D1 mini for wifi-based shenanigans, and also the Pro Micro for HID functions. Both will be connected to the i2c bus as slaves.
I was going to use the pro micro as the master and the nano (being represented by the Mega for convenience in this setup) as the slave, but it makes sense to handle all functions (including the keyboard/hid stuff) one one device. It also means if I ever switch the screen to the Nextion serial touch screen in a future revision I can potentially ditch the Nano and have the ESP8266 as the master.
Booya!!
-
More prototyping: Screen Options
02/18/2017 at 02:16 • 0 commentsSo... While prototyping my Pro Micro/Nano/ESP8266 communication I have also been working at my dynamic menu options, using an Arduino lcd/button shield on an Arduino Mega.
While looking at the case and the space available for a screen I started considering other options that could possibly utilise the space better. Within approximately 90 seconds I'd found and bought a shield with a Nokia screen and buttons etc.
I'm going to have a play around with this as I could possibly use two of these screens in the space given and have a much better menu system and more feedback given.
Could be interesting!
-
Parts Layout
02/10/2017 at 22:08 • 1 commentI couldn't find my breadboard, but managed to dig out an old Arduino Mega with a prototyping shield. That should do the trick ha ha!
The Mega can act as the slave for now. On Monday I'm going to solder some headers onto the protoshield for the Wemos D1 mini and also the Pro Micro, and this shield can serve as the test unit for this project and many more in the future.
I've been having a bit more of a look at the case and where to fit my components. For the cartridge slot I will fit the Nano and its breakout; it's usb port exposed for serial use and programming. I will need to remove the 2x3 pins on top of the Nano and potentially shorten the pins on the bottom to get it to fit nicely. For the breakout pins I have some right-angled headers from my Pi Zero kit to use. If I can get the nano and header soldered nicely onto a bit of perfboard and make it fit it could even be modular.
I have a plan to fit the Pro Micro above this board and inline with the Link cable socket to keep the case looking clean on the outside. There will be a bit of plastic to be removed to allow the board to fit in flush. I will need tomake sure the screen doesnt get in the way when it arrives before deciding on that.
I have also decided to drop the start/select buttons and swap them for status/mode LEDs.
-
Weekend To Do List
02/09/2017 at 21:22 • 0 commentsIve managed to dig out my breadboard and so over the weekend I'll hopefully be beginning to start working on getting this fella working!
Nothing fancy at first; basic functonality, all written using the Arduino IDE. This log is just to outline roughly an order for myself to approach this.
First up, the pro micro:
- Add code for button capture (lift from another arduino project I have going)
- Add code for lcd display (borrowed from my Aquariumatic project, which also uses i2c displays)
- Add code for menu creation (lift from the other project mentioned previously. Use an array to contain the menu options, and a secondary array containing the commands/function names to be executed on selection. Later in the build I can revisit this code and have the arrays populated from a menus file on an sd card. This in turn opens the door to allowing users to add menus and functions via the esp8266 Web interface later)
- Add code for keyboard emulation (to be used for sending keyboard commands and also for using the device as a game controller)
- Add i2c master code ready for use later.
Arduino Nano
- for the time being have the nano coded to recleve i2c commands from the Pro Micro.
- Also writer basic function to toggle pins on/off via i2c command.
- More work on this will take place once the breakouts board is created.
ESP8266
- add some simple webserving code
- Add i2c/software serial code for created comms with the pro micro
- Add code to support sd card shield
- Work on the html for the Web interface
For the second version (the one using the nextion screen ) I'm planning a slightly different approach. With the Nextion screen handling all the menus I can hopefully have the esp8266 as the main controller (using serial to communicate with the screen and its one analog pin for button reading)
The pro micro can then be repurchased as the slave (doing all the shit the nano will do in this build, but retaining the keyboard functions) and removing the nano from the equation.
Lots to be testing and getting on with! :-)
GBAA: Game Boy Advance Arduino
An Arduino- based prototyping handheld housed in a GBA case