shlonkin
-
log 7: Complete!
03/05/2017 at 08:41 • 0 commentsThe staff weapon is complete! And just in time for the contest deadline. Here are a bunch of pictures, but I'll show you the video first.
It is hard to take a picture of the full staff. It's about 2m long.
![]()
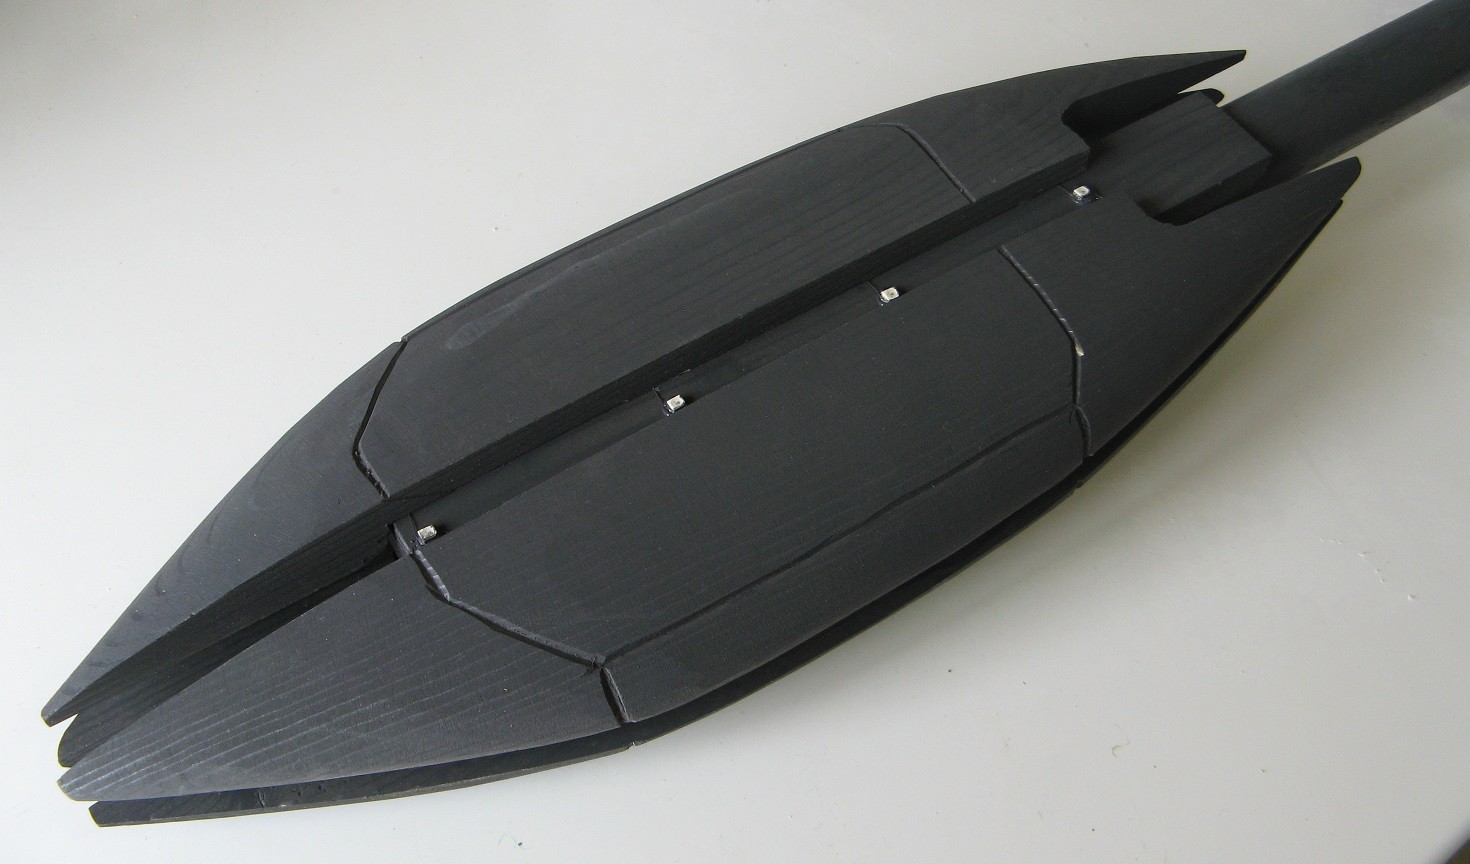
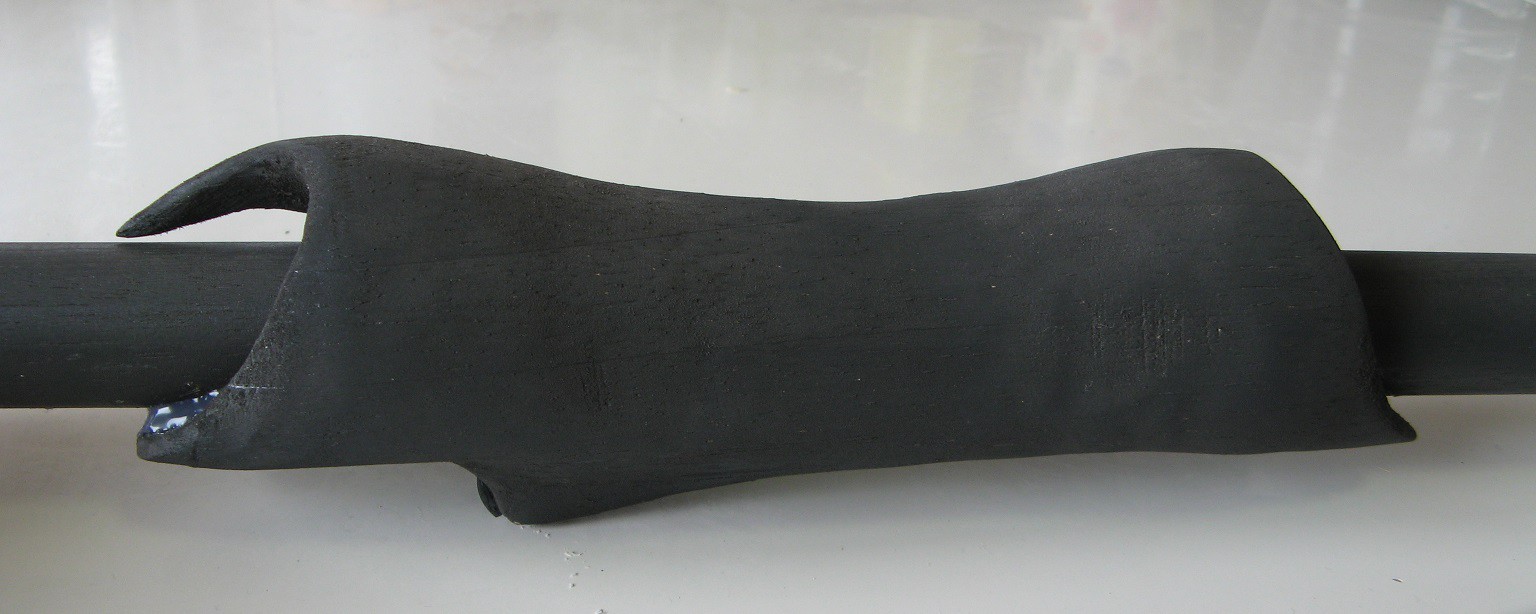
Here are the main components starting with the head.
![]()
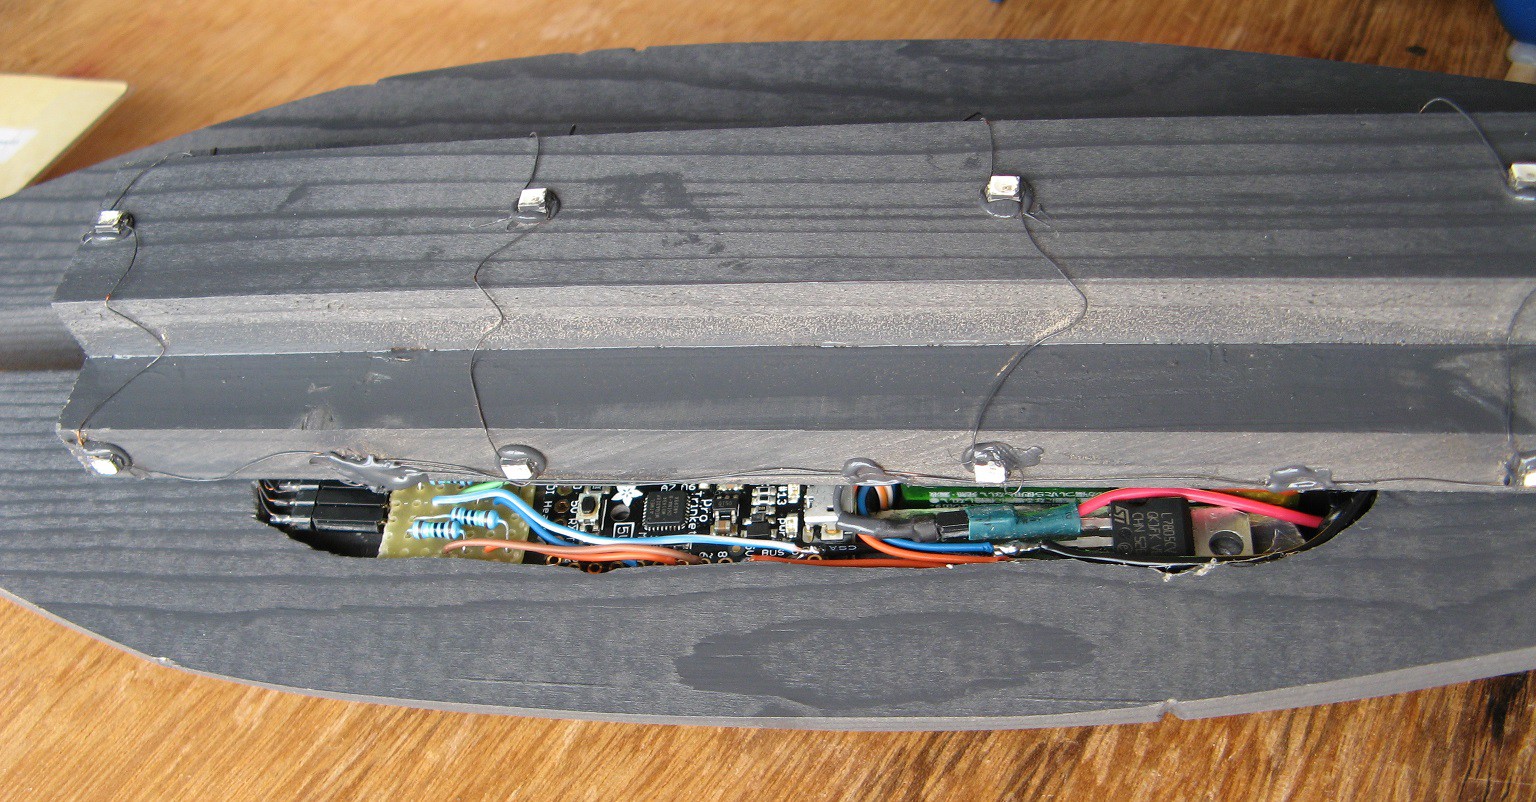
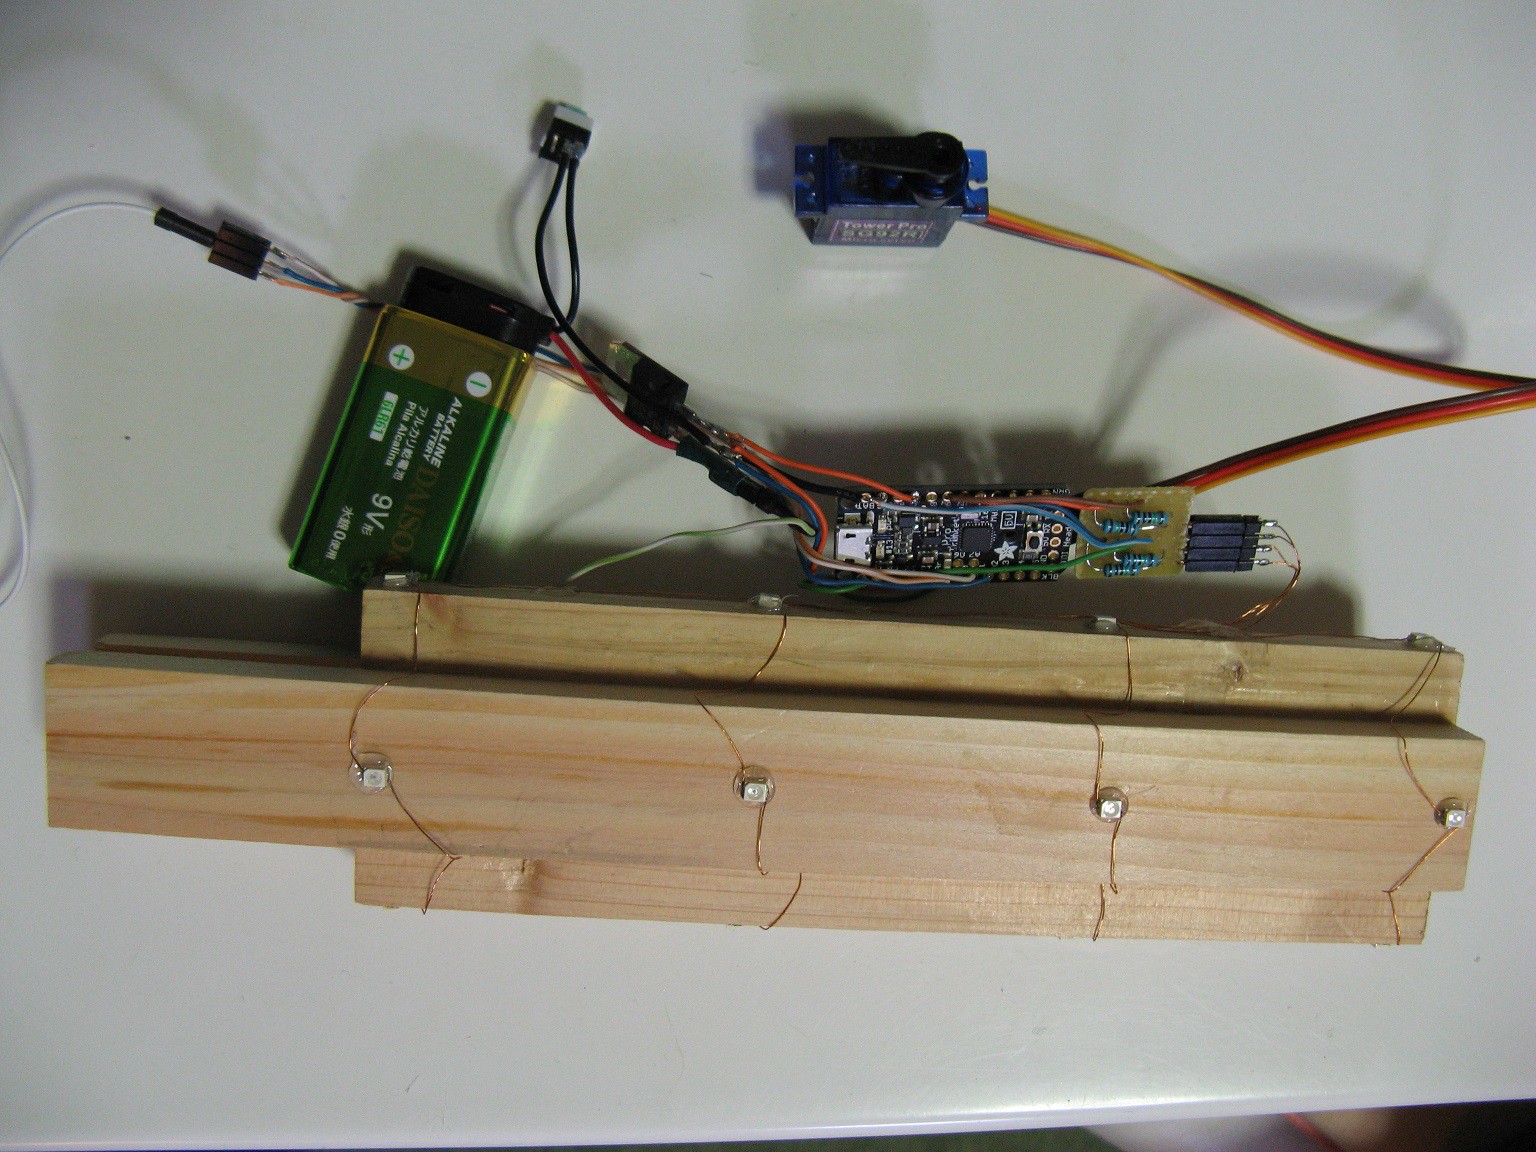
With the top half removed you can see the electronics tucked inside.
![]()
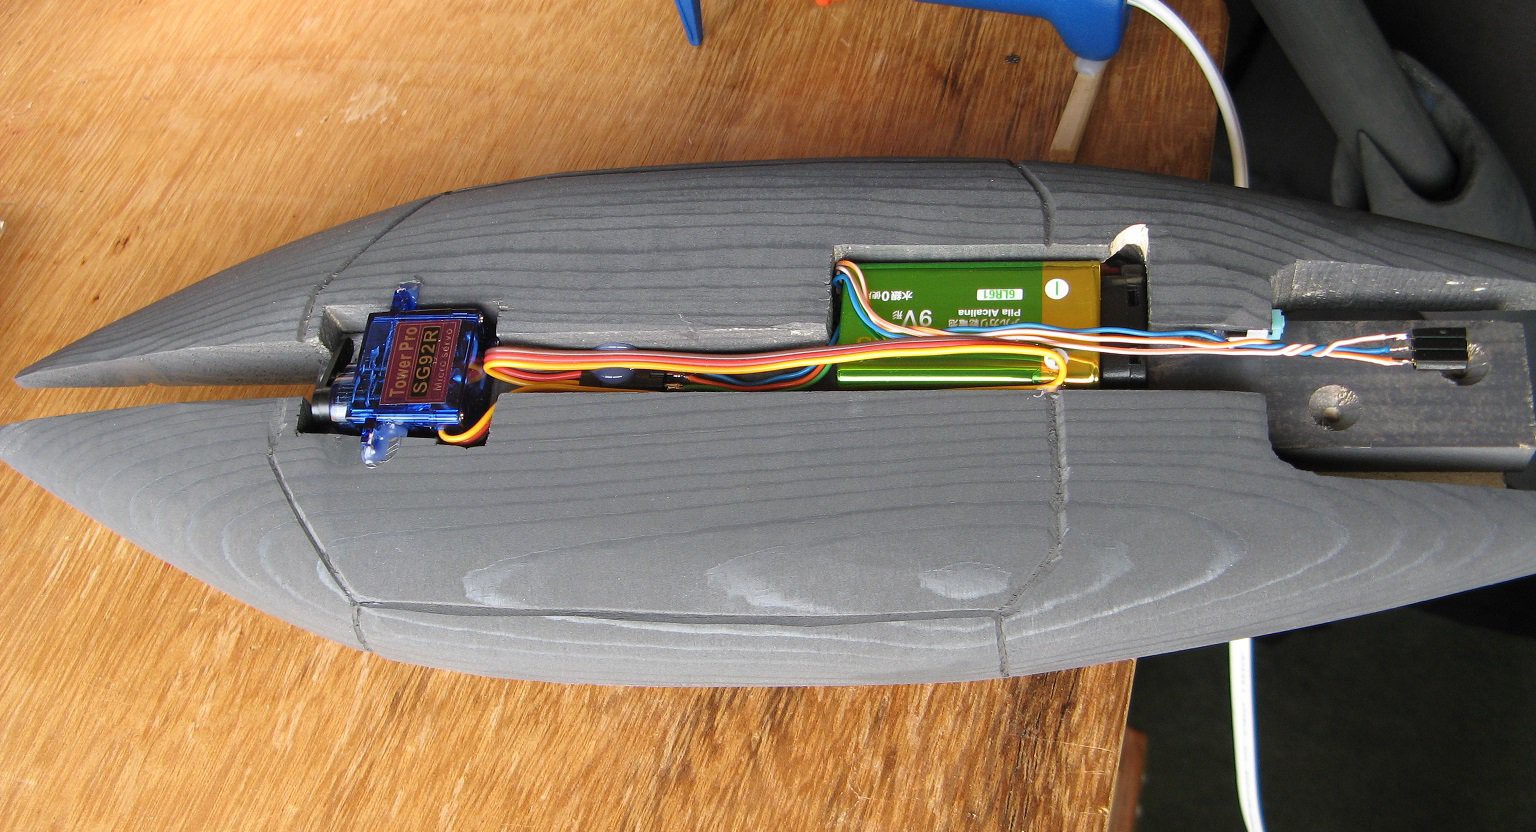
From below you can see the battery, servo and some wires. They just wouldn't fit inside nicely. The wires leading back to the control section run inside a 3mm groove along the bottom of the shaft. They are painted, so they really aren't very visible.
![]()
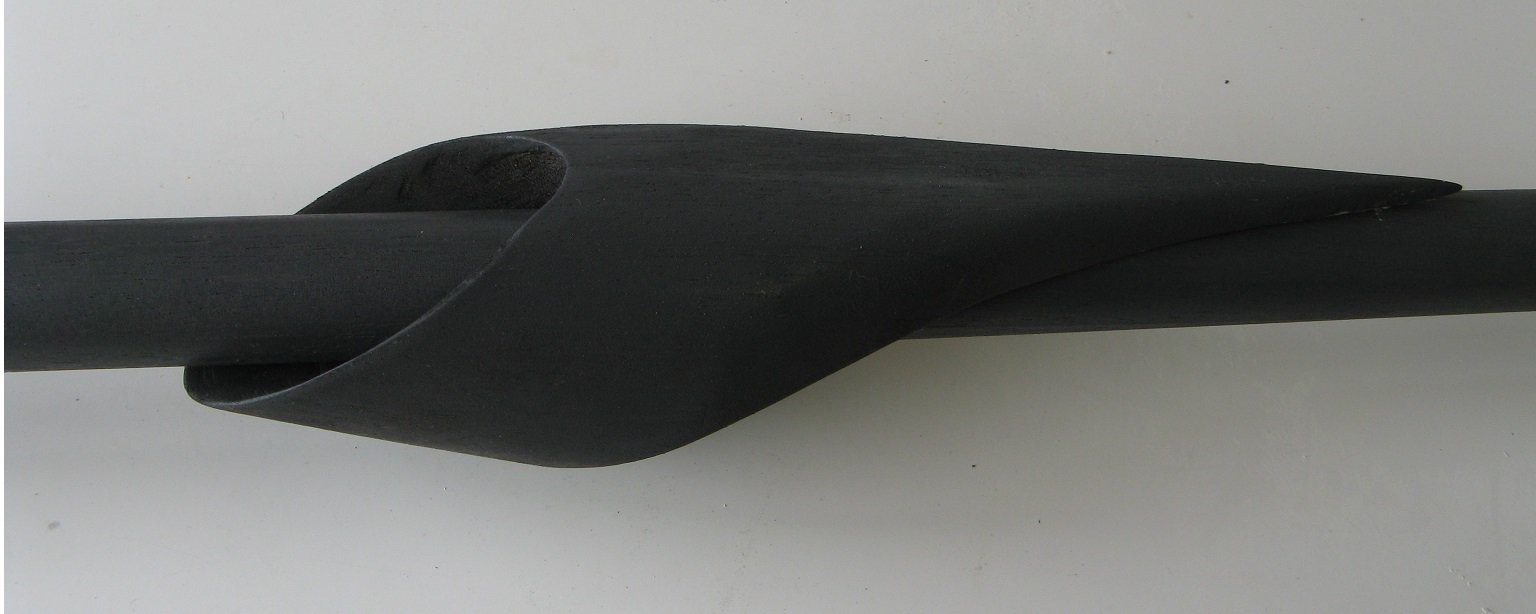
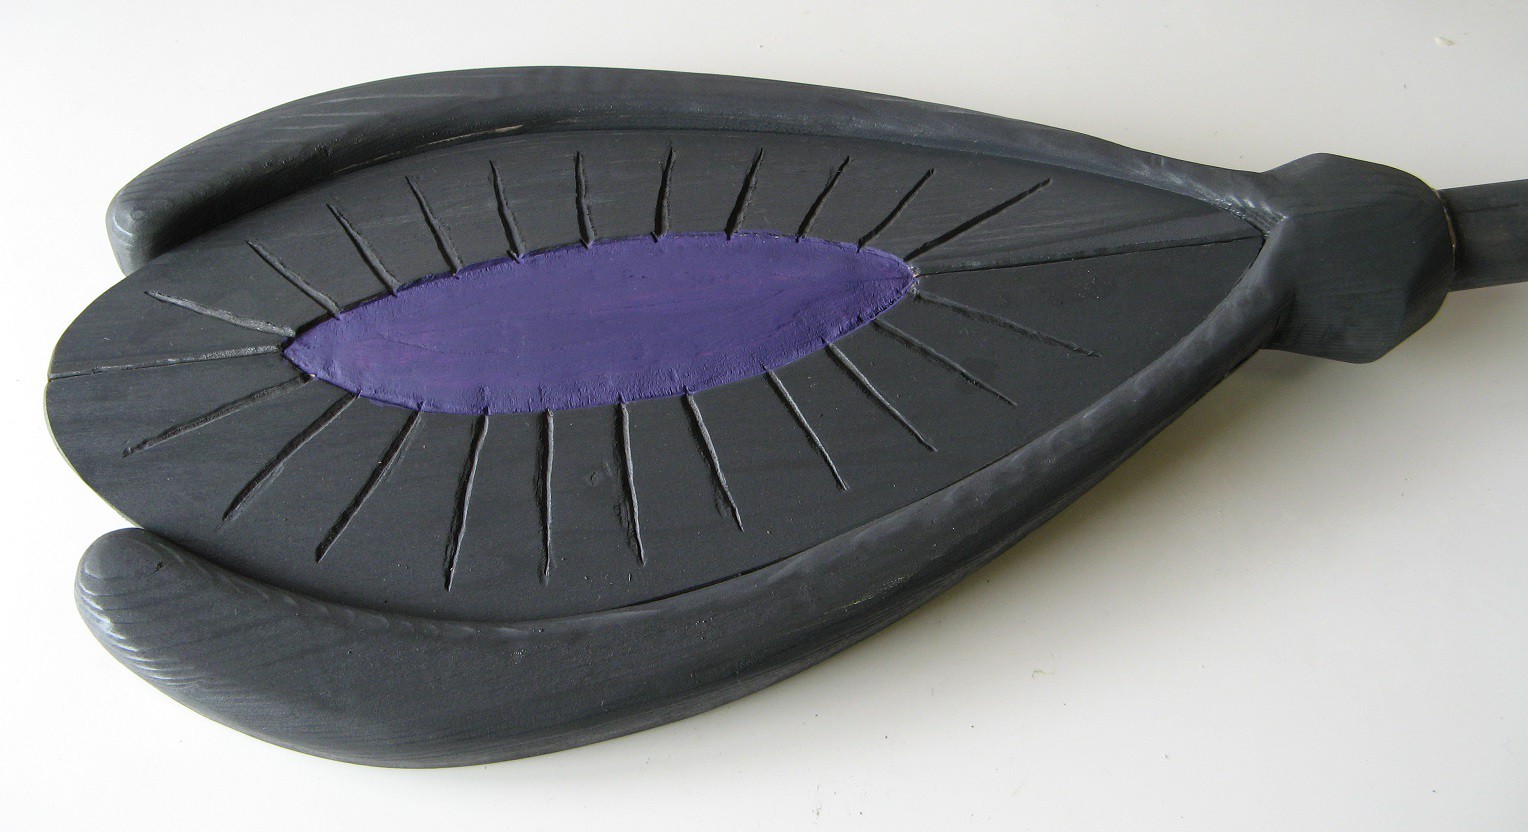
Next is the little forward decoration. It doesn't do anything, but I like the look of it and it stands out.
![]()
Then comes the control section. There is a little lever switch for a trigger that is easier to see in the video. Push up for arming/disarming, push back for firing. This part didn't turn out as well as I would like, but with the time constraints I'm satisfied.
![]()
Finally, the tail. Again, good enough considering the time.
![]()
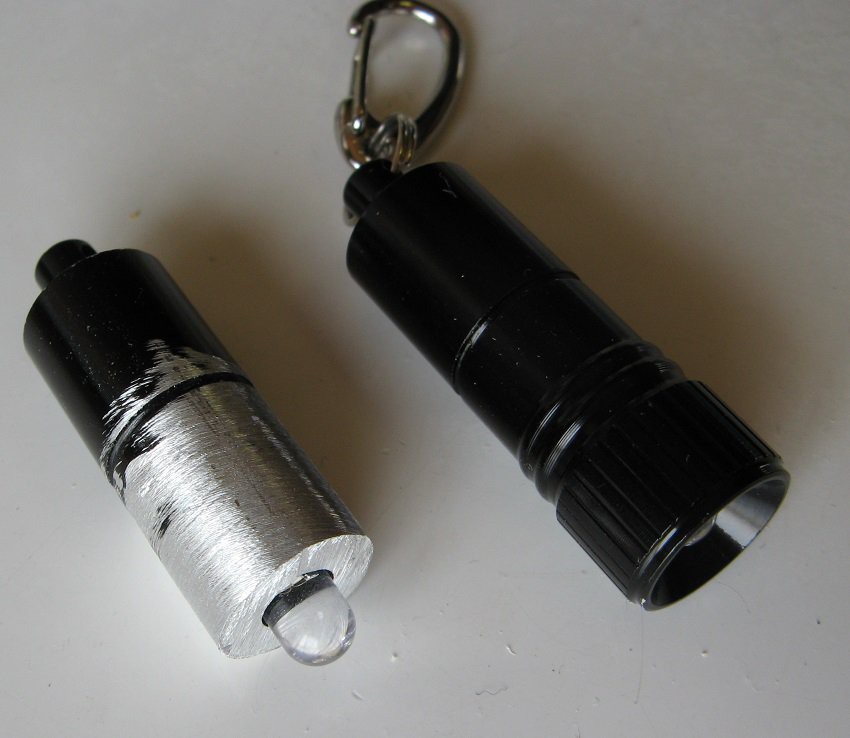
Whoa, wait a minute. I just realized I forgot to tell you about the projectiles. They are based on dollar store key chain lights that were ground into a cylinder and the white LED was replaced with an orange one. Completed one on the left.
![]()
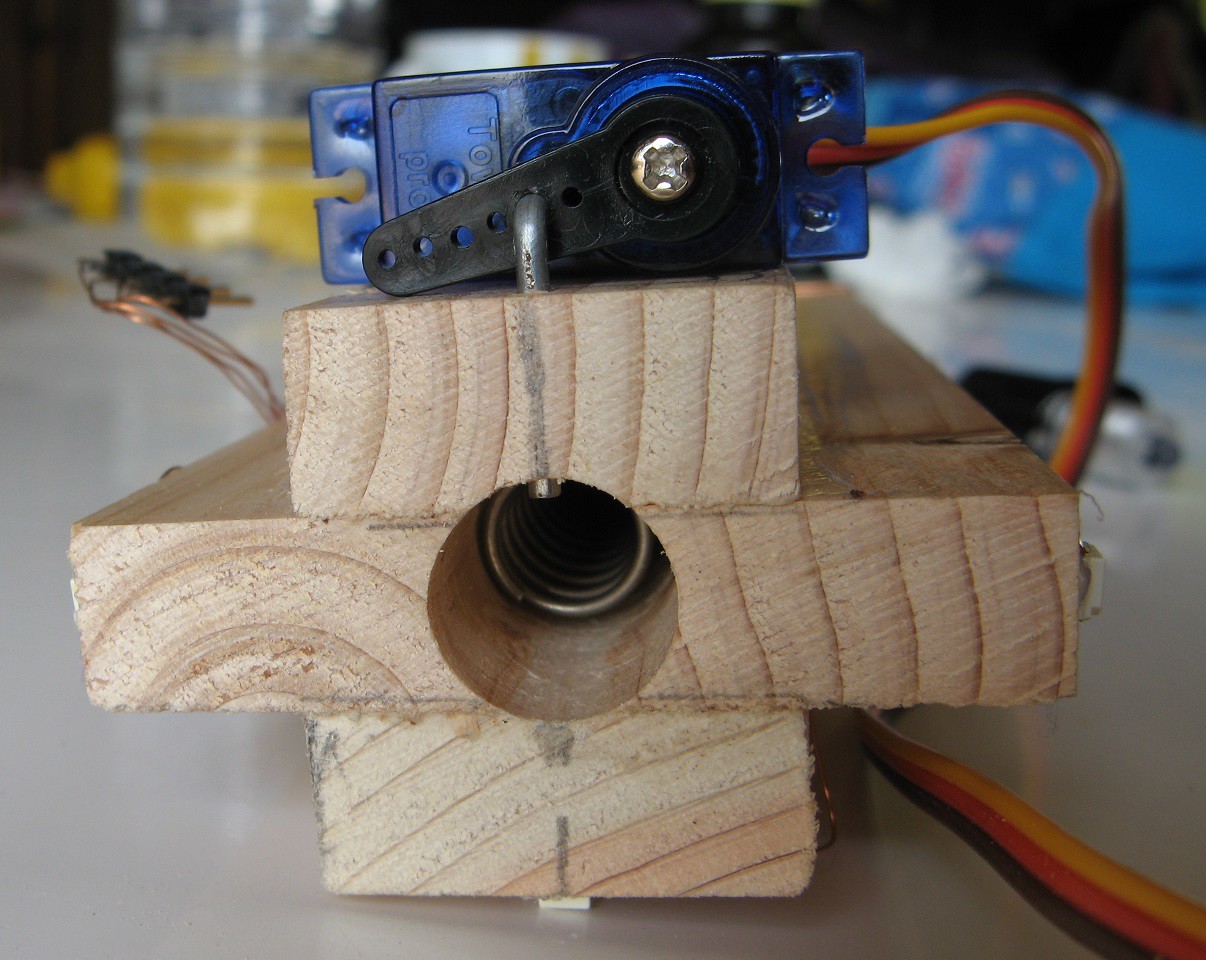
They are launched by a spring which resides in a hole in the center of the head. The servo pulls a piece of wire that holds the projectile in the hole. The projectile is inserted with the light facing back, so it isn't visible till it shoots. Just watch the video.
![]()
And with that the project comes to completion. Thank you for your interest and I hope there are more sci-fi contests in the future.
-
log 6: soldered up and tested
02/28/2017 at 14:36 • 0 commentsI know what you're thinking. It's about time for some electronics. Well here you are.
I got all of the electronics soldered up and tested (except the trigger switch which is on tomorrow's list). I was pleased and just a little surprised that almost everything worked just right. I did have two LEDs that didn't work. I think I destroyed them in the soldering process with my way too hot iron. But they were easily replaced and now it all functions. Here's a picture of the mess which is clearly not yet installed.
![]()
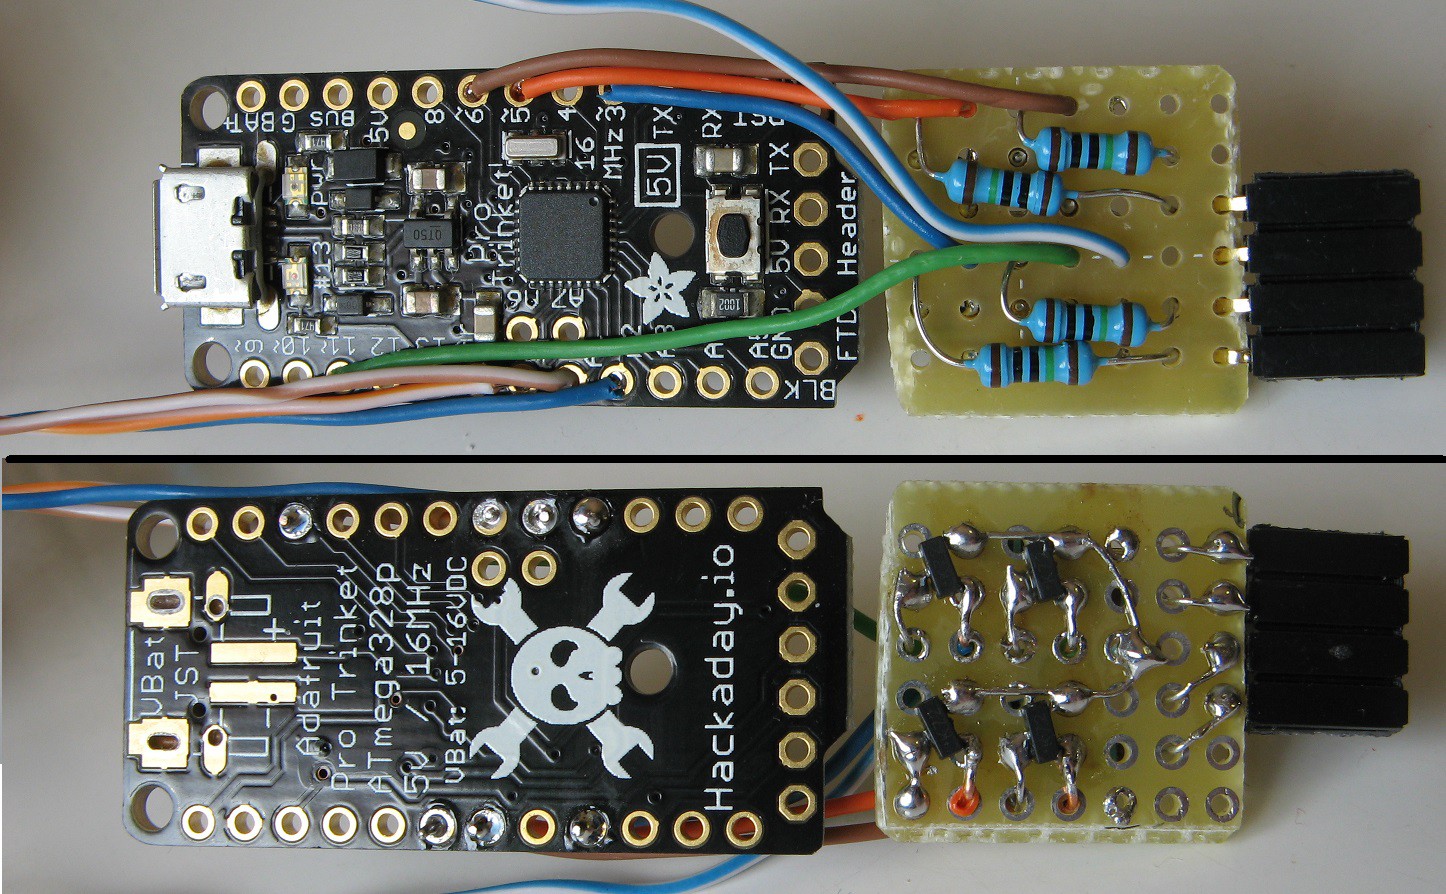
And here are some highlights. As you can see the LEDs were soldered onto some magnet wire and hot glued in place. They are connected to the little brown board next to the Trinket. It holds the transistors and resistors(see the schematic for details).
![]()
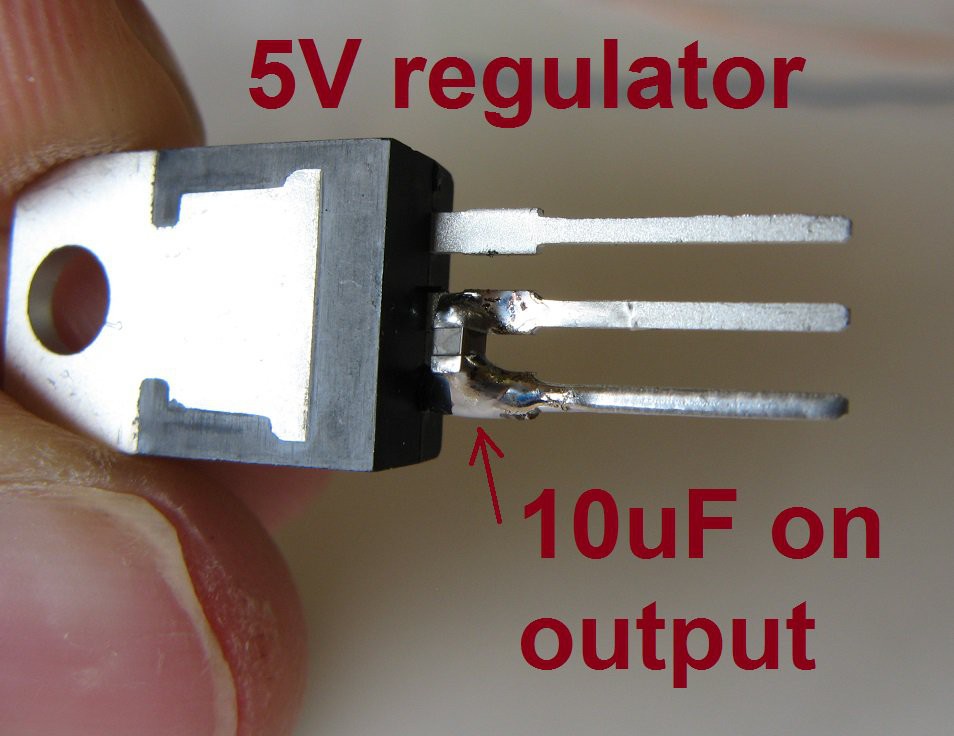
Here's a nice trick. Save some design hassle by soldering capacitors directly onto the voltage regulator. I skipped the input capacitor because It's connected right to a 9V battery.
![]()
Now to stuff this all into the head of the staff I had to remove a good bit of wood from one of the segments and the center. The servo will go in another segment. This really isn't visible when it's put together, except a little from the bottom.
![]()
Up next is the trigger, projectiles and launcher which will be inside that center piece of the head, and writing code. Then comes some carving details and lots of testing and fixing. By Saturday I'll be working on final assembly and paint. That should get the project done in time for the contest end. Awesome. Now I can sleep.
-
log 5: woodworking almost complete
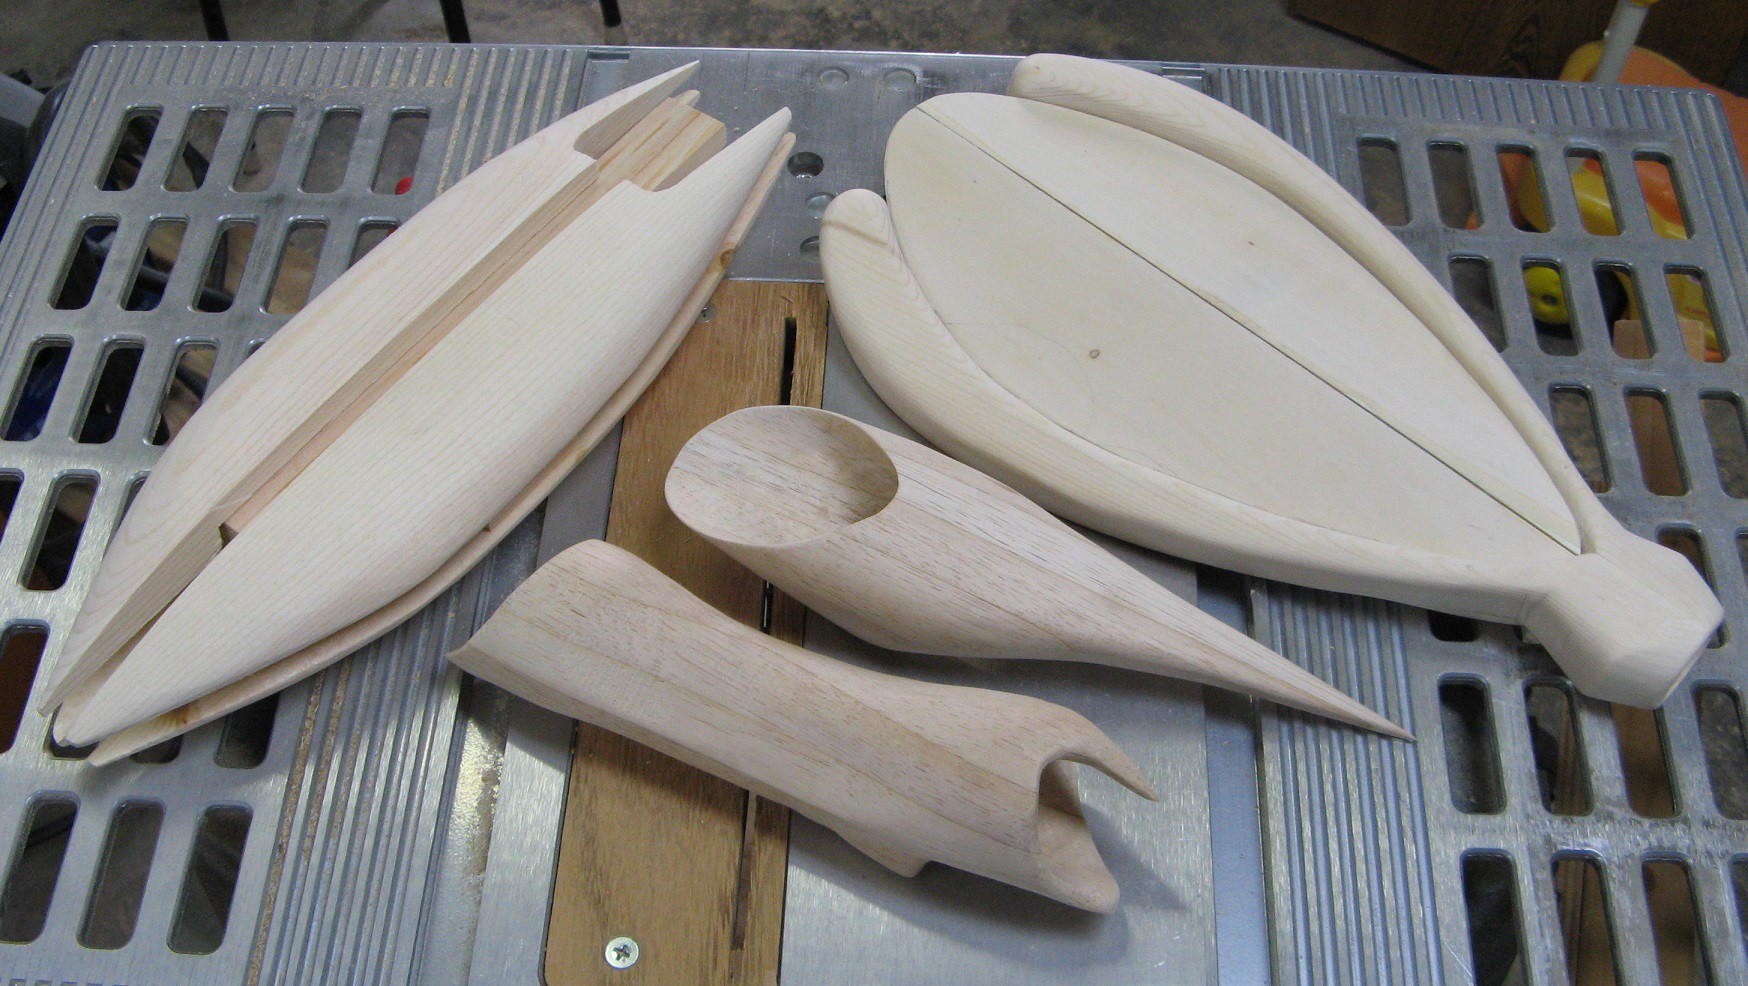
02/25/2017 at 09:54 • 0 commentsThe shaft, head, forward decoration, control section, and tail are all roughly complete now. Well, structurally at least. I still haven't installed the electronics, carved details, made the projectile launch mechanism, or painted it. Here's a picture of the major components.
![]()
Note that there is no plastic in this picture. I decided to just go with wood for everything. I think it turned out much better that way. But it was educational to try the pvc.
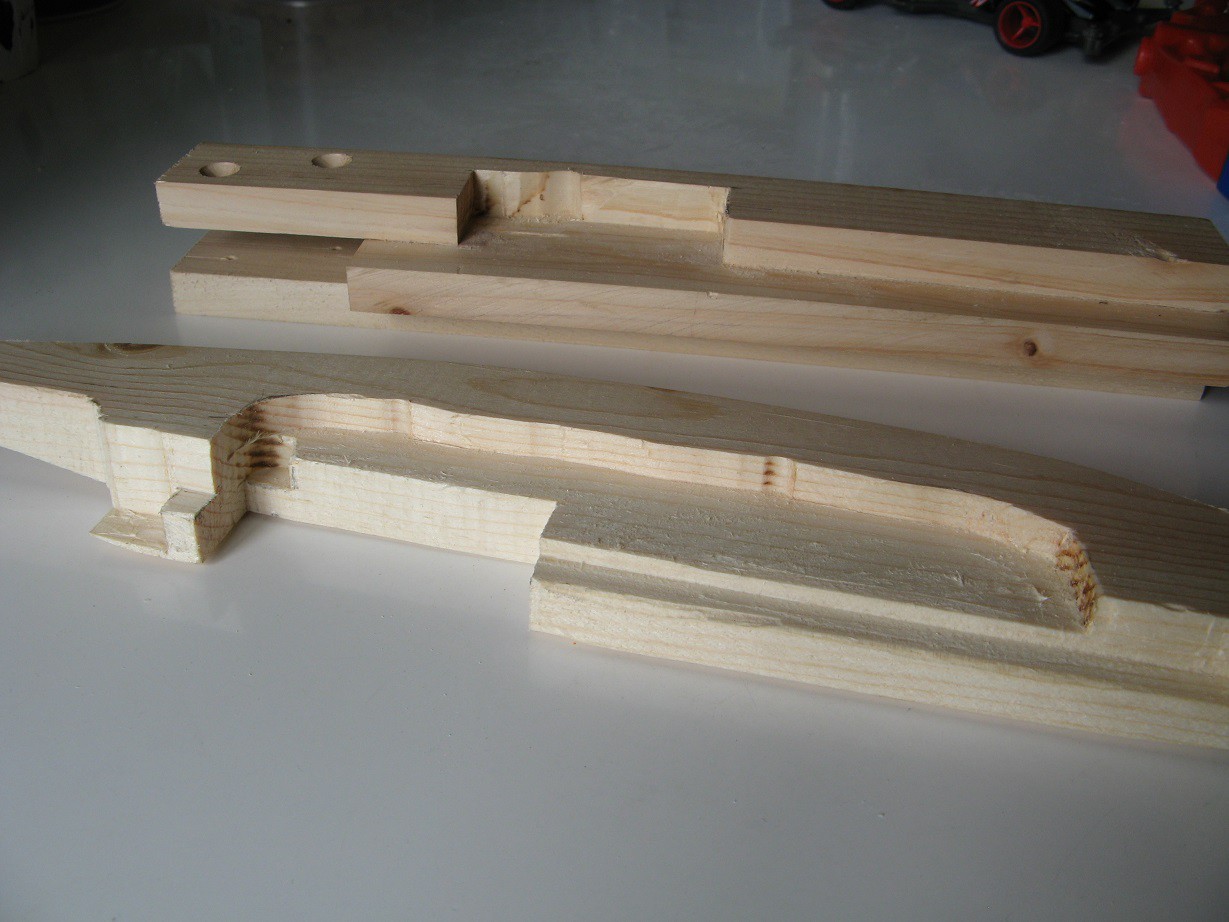
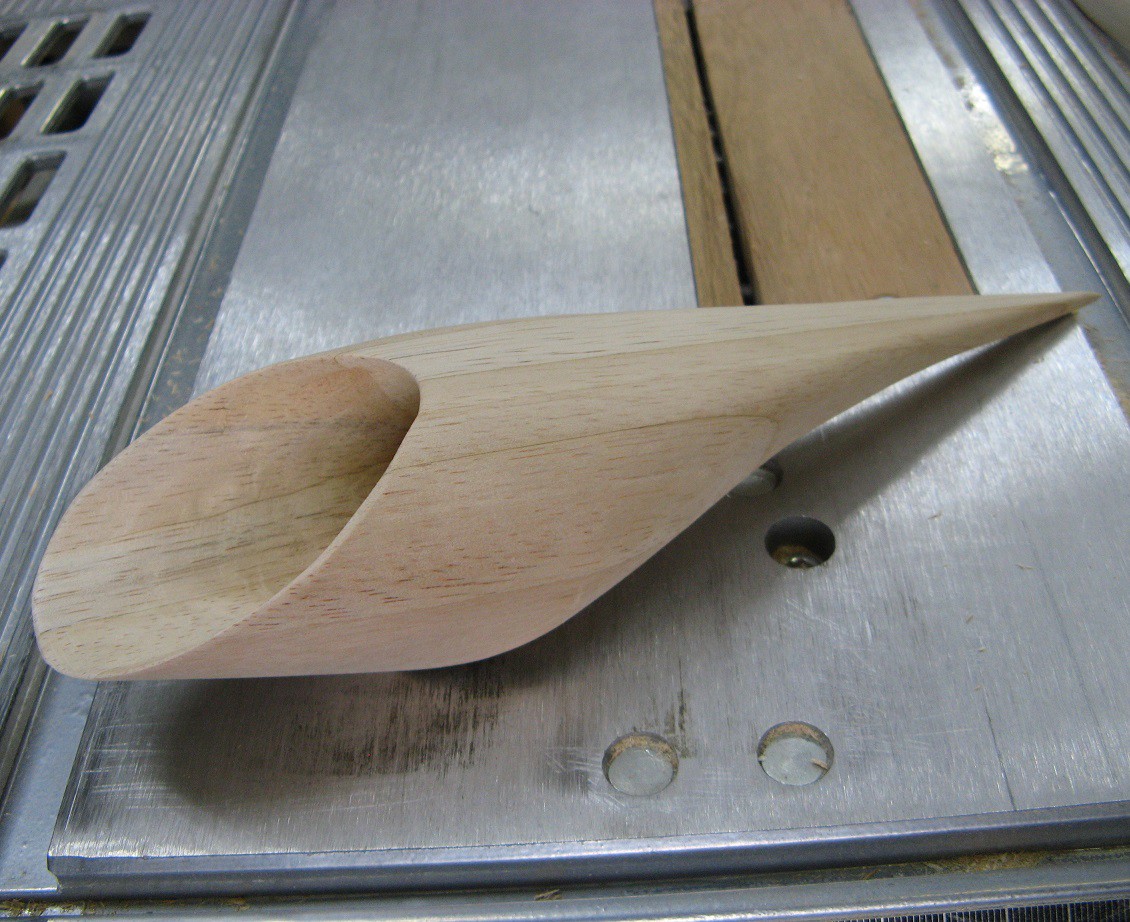
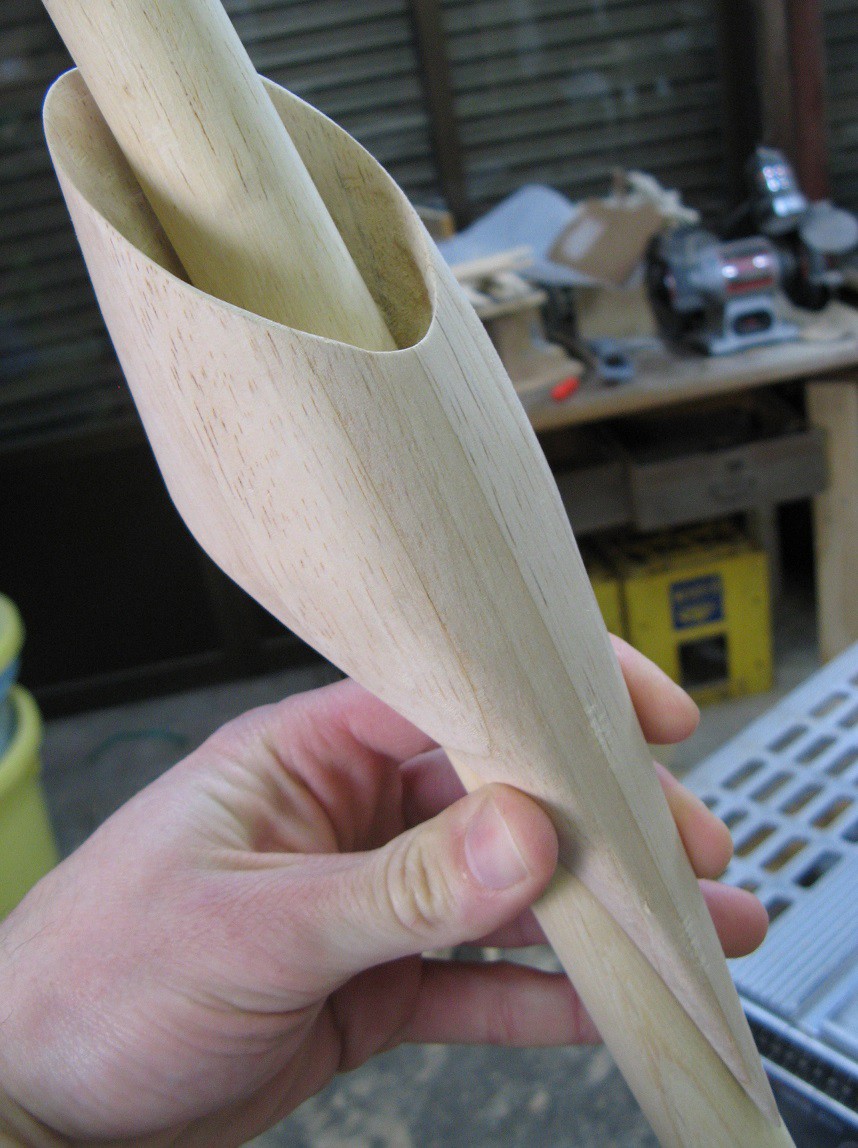
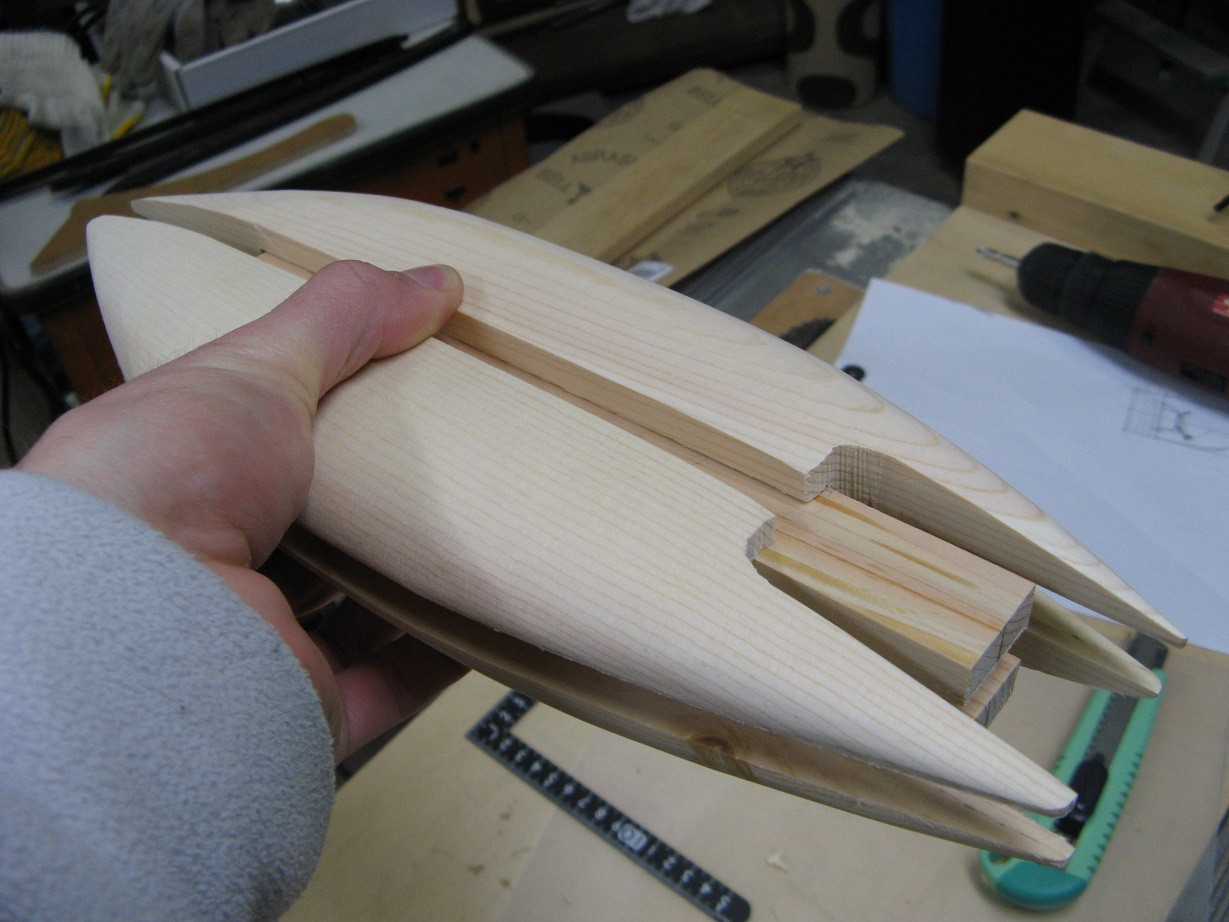
I showed you a picture of those scrap boards glued up with a big hole bored down the center. I made another stack for the decorative part, that long pointy bit. After some work on the bandsaw, the belt sander and a dremel with sanding spindle, it came out even nicer than I expected.
![]()
![]()
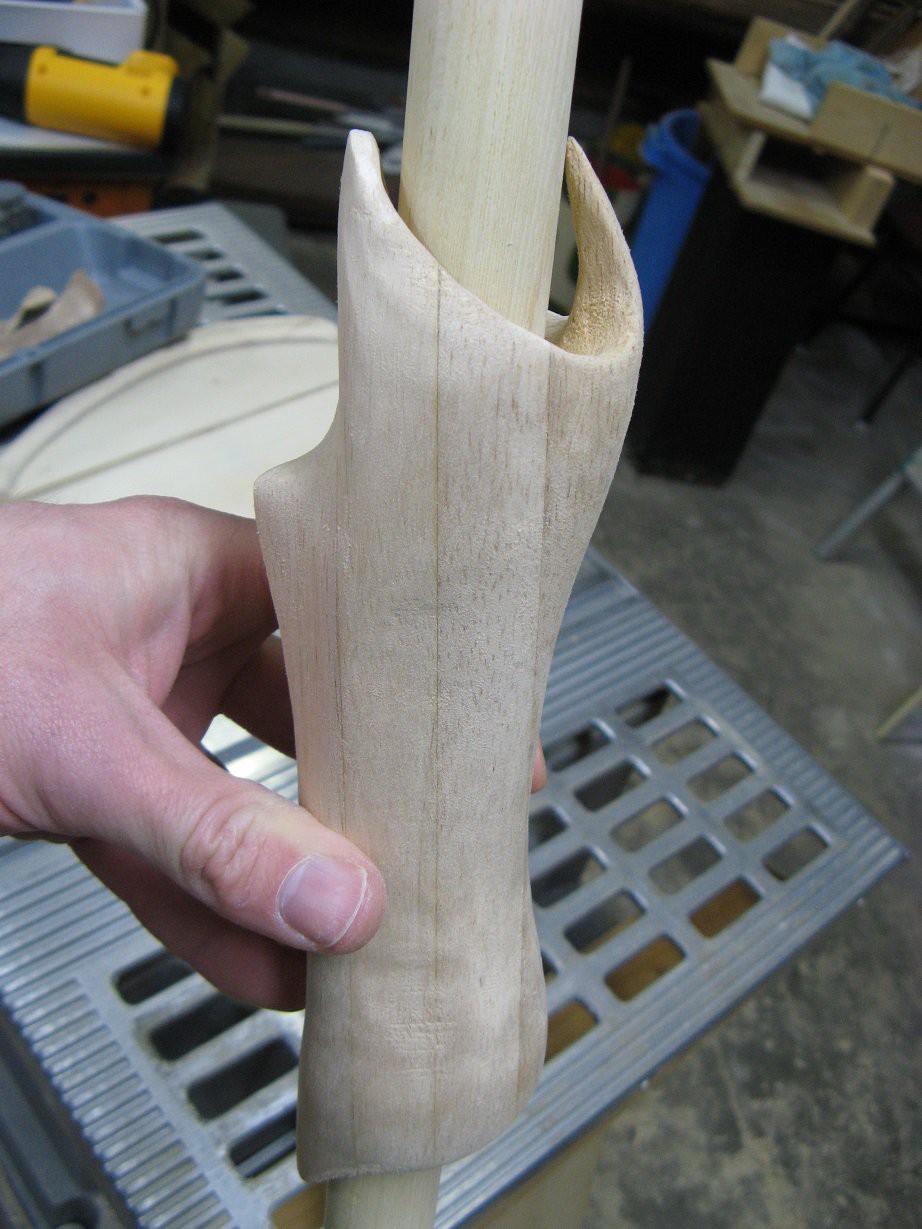
I used the same technique for the control section. It didn't come out quite how I wanted, but it's good enough. I still need to make a small trigger to attach to a lever switch which will be embedded in that bump on the bottom.
![]()
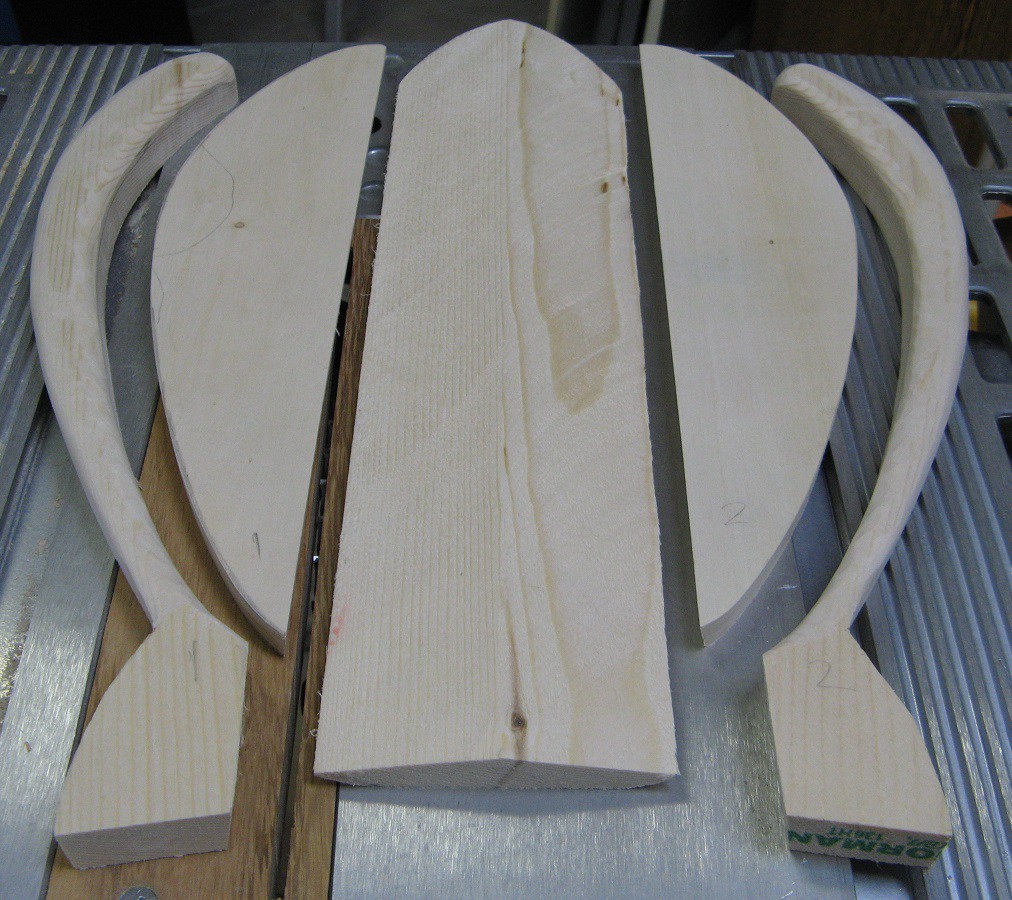
The most complex, but not most difficult part was the tail section. It was made from several pieces. The one in the middle is a piece of 1x4 cut with a 10 degree bevel on both sides. The flat pieces are plywood with a 10 degree angle on the mating edge. The long curved pieces were cut from 1x4 and rounded on the belt sander.
![]()
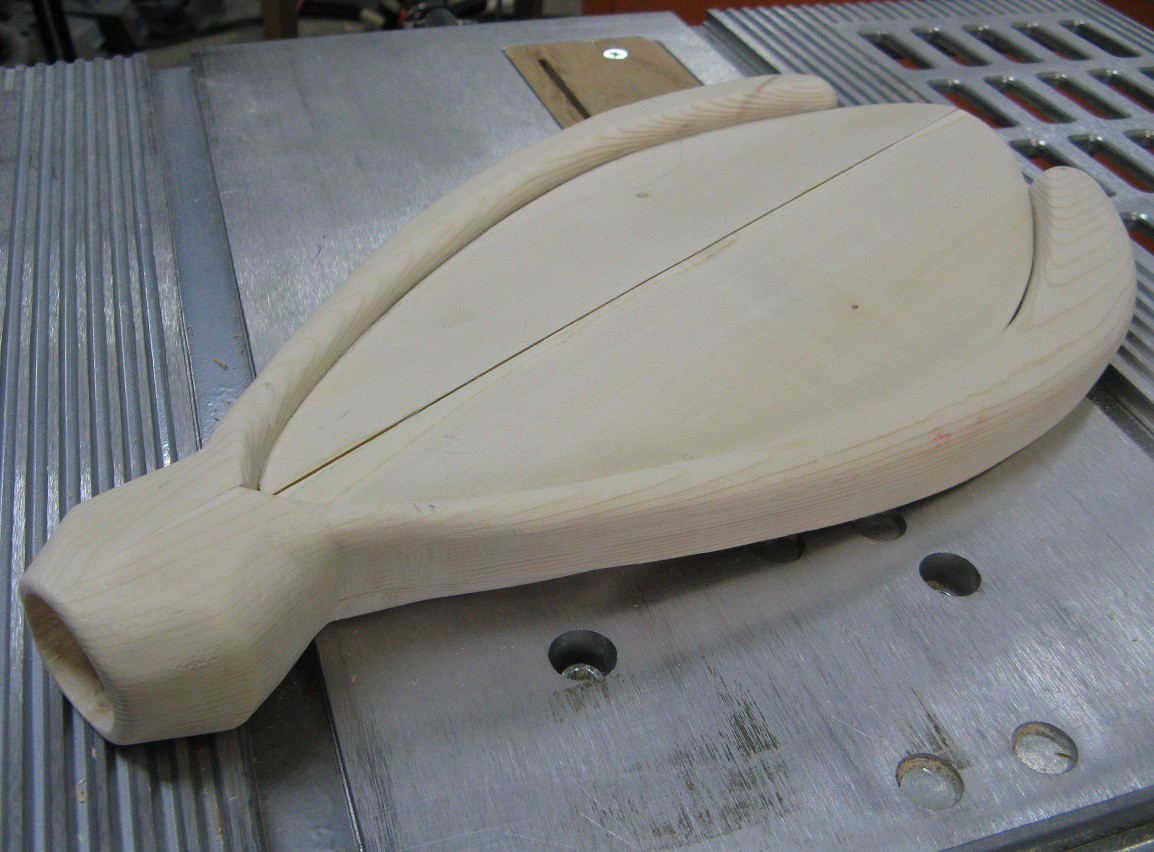
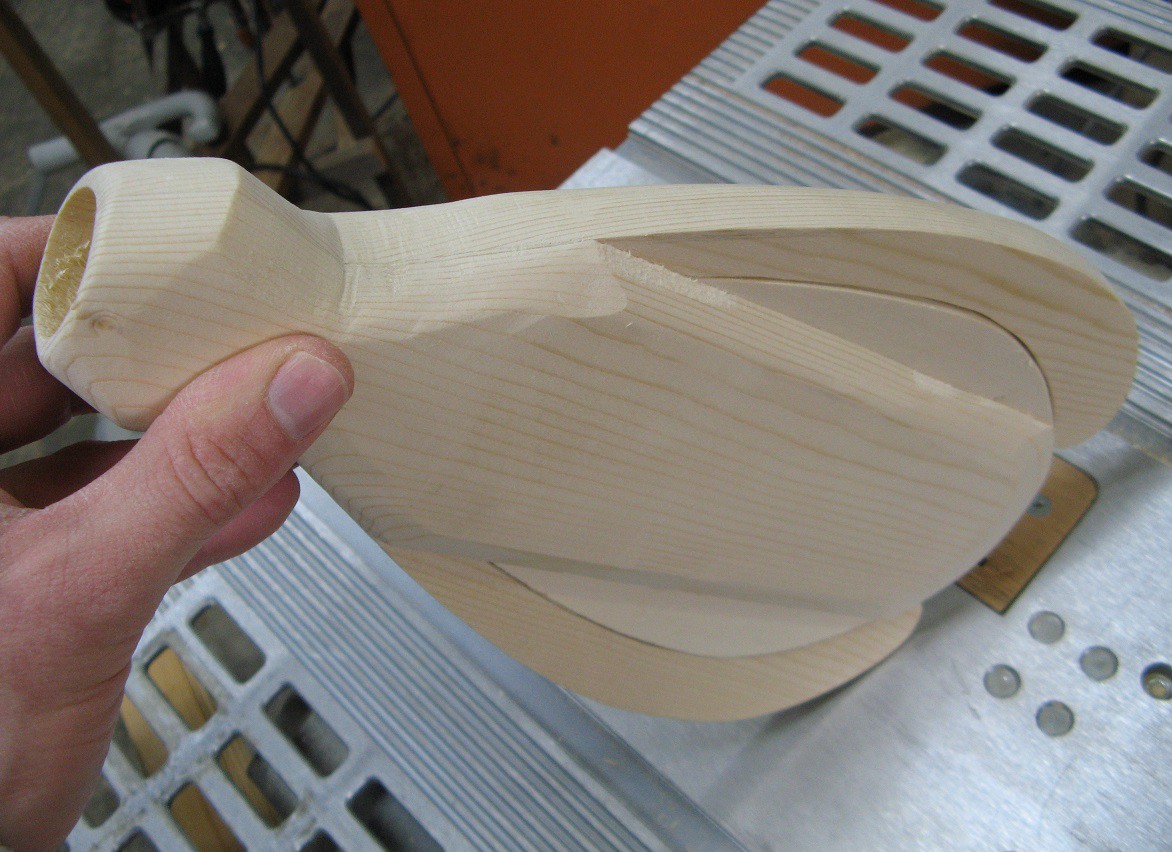
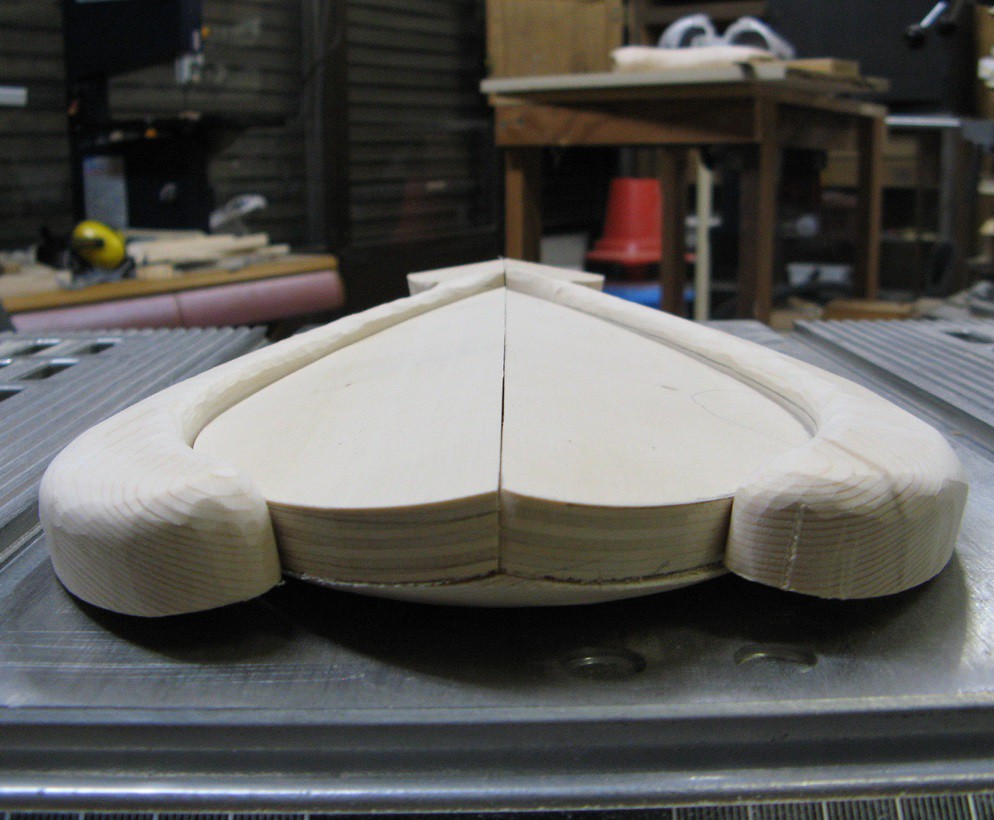
After gluing them up and more sanding the results look pretty nice. I still need to do some carving and crack filling before I paint it.
![]()
![]()
![]()
-
log 4: Schematic and plastic
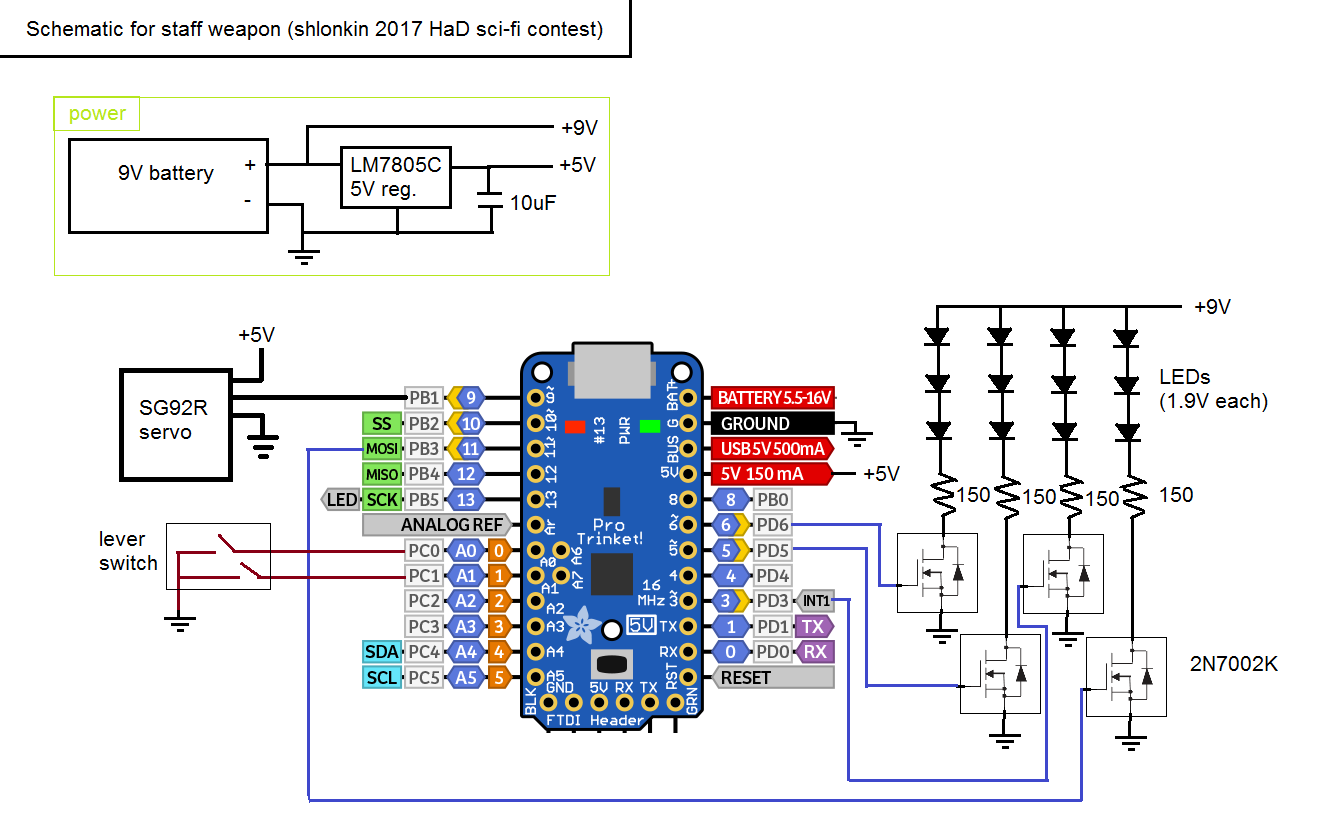
02/21/2017 at 13:25 • 0 commentsHere's an electrical schematic. It really is very simple. I wanted to have another one or two LED rows, but I want separate pwm for each one and the servo library eats up two of my pwm pins. Oh well, four will still look cool.
![]()
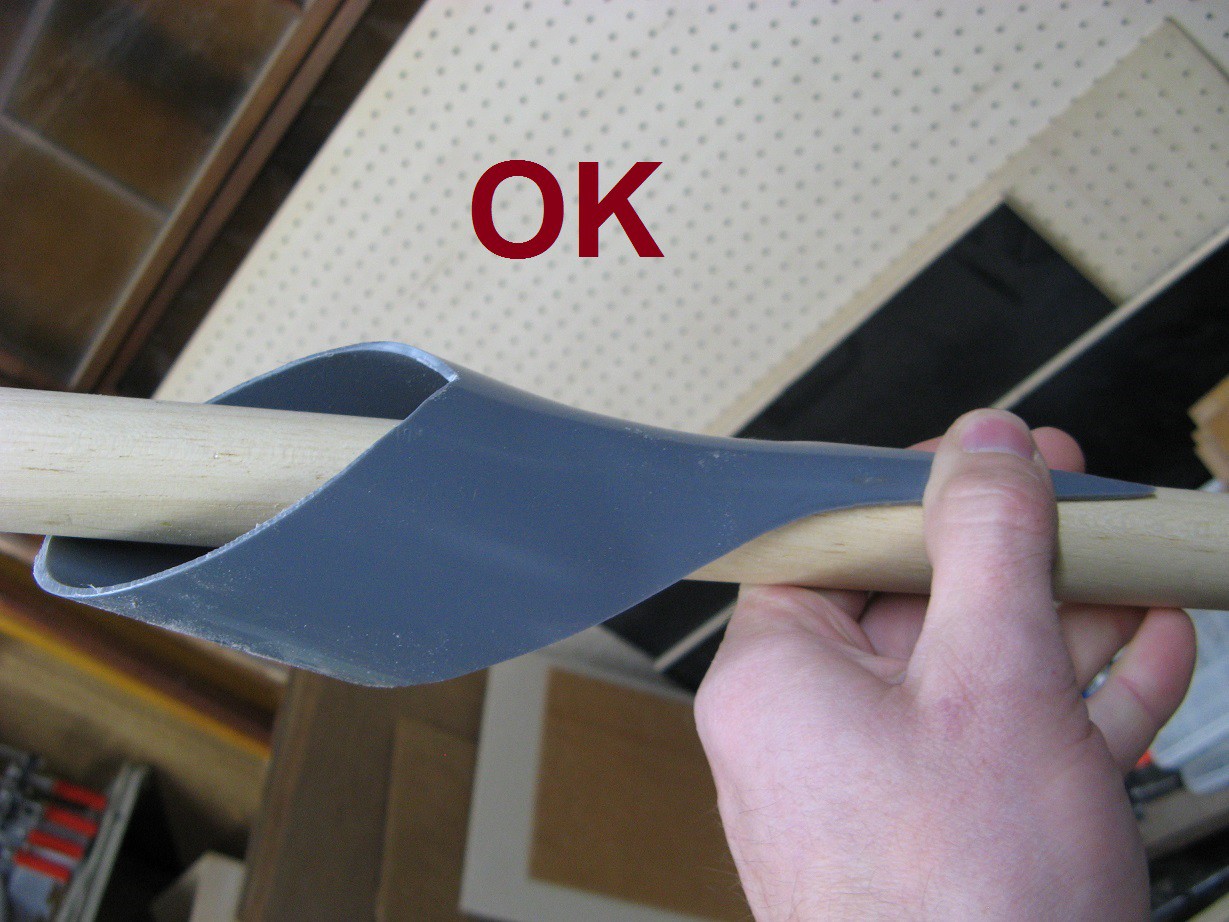
I have been making the various sections of the staff. I tried applying a heat gun to some 50mm pvc pipe for the decoration just behind the head. It worked out pretty well.
![]()
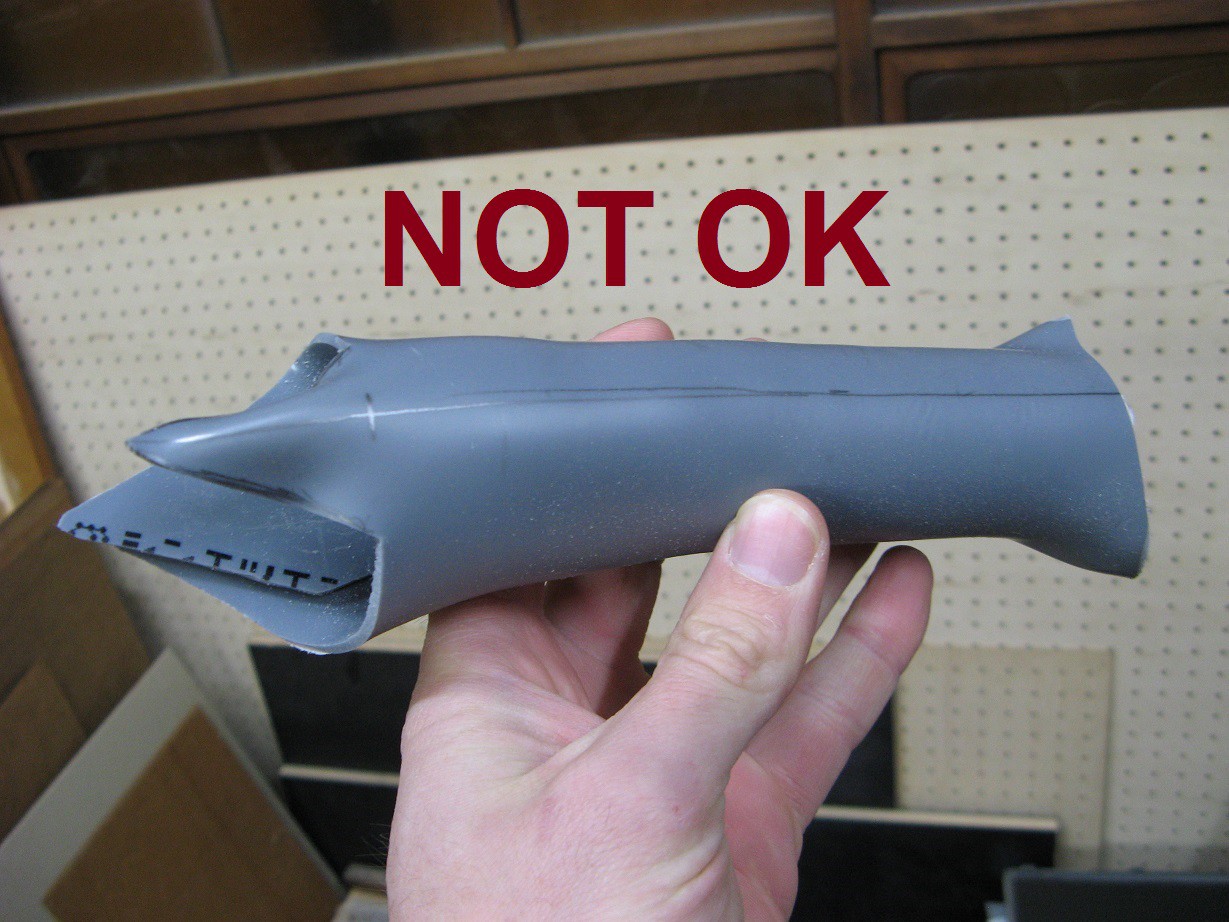
Then I tried to form the control section. Then I tried again, and again. The results were not so encouraging.
![]()
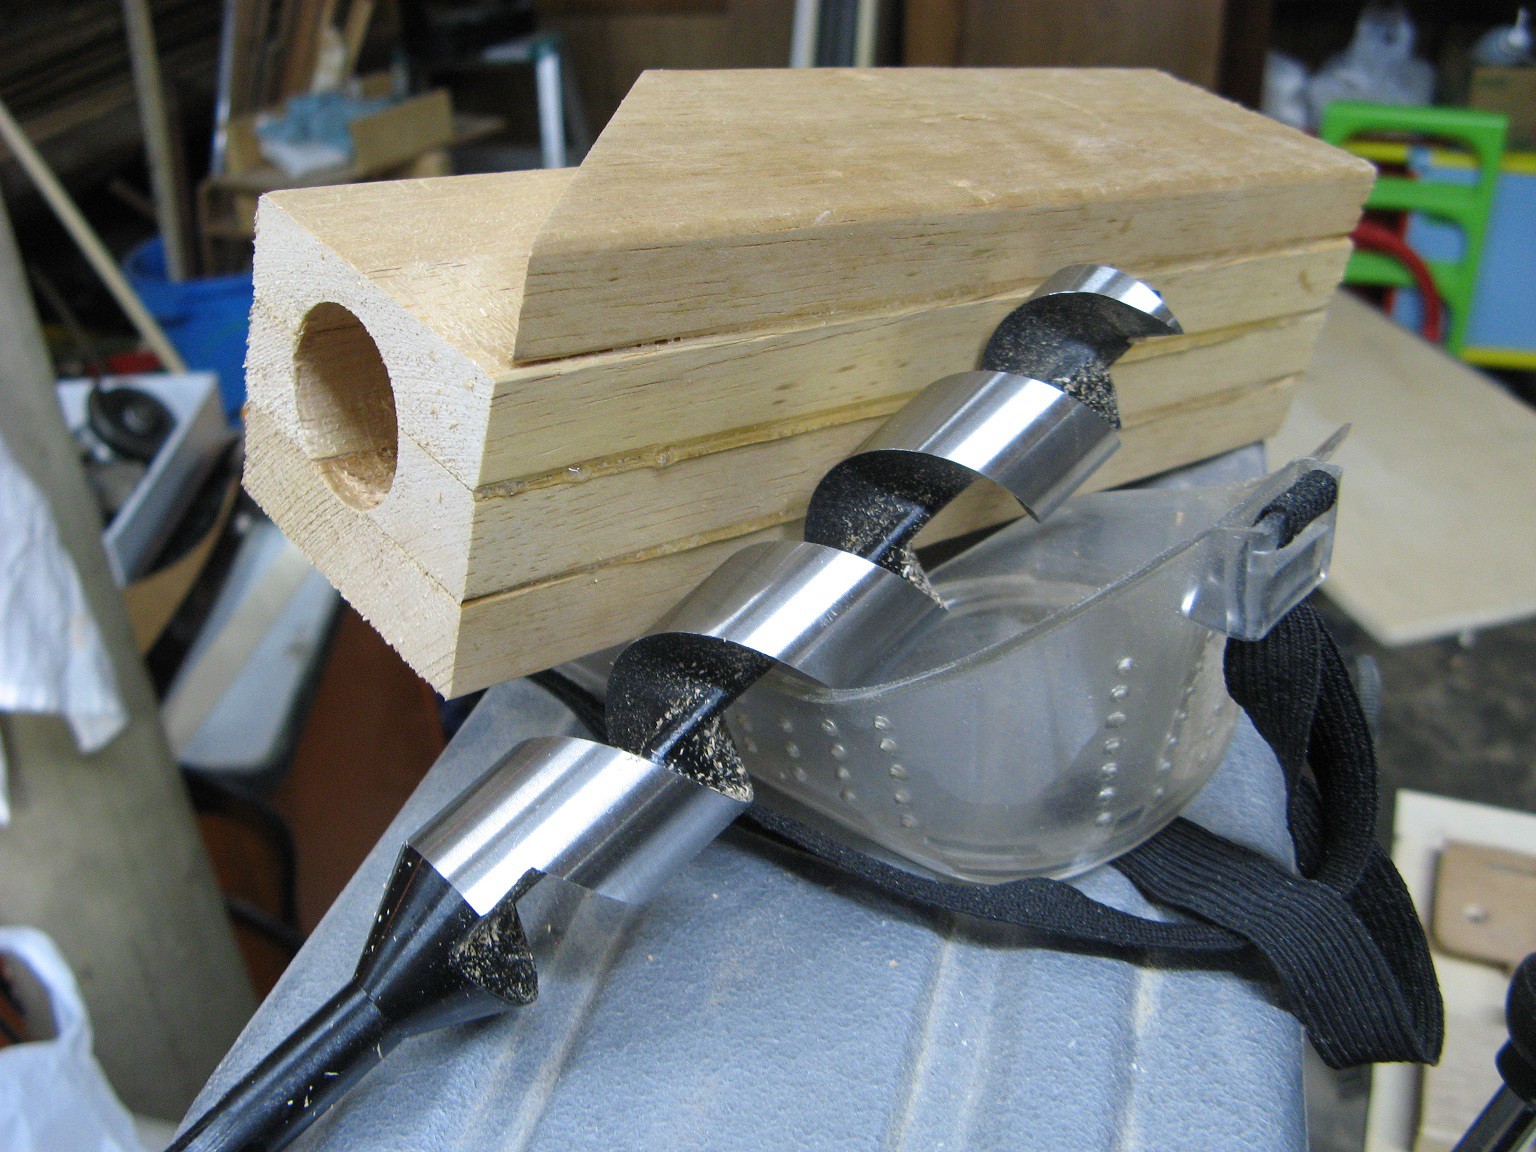
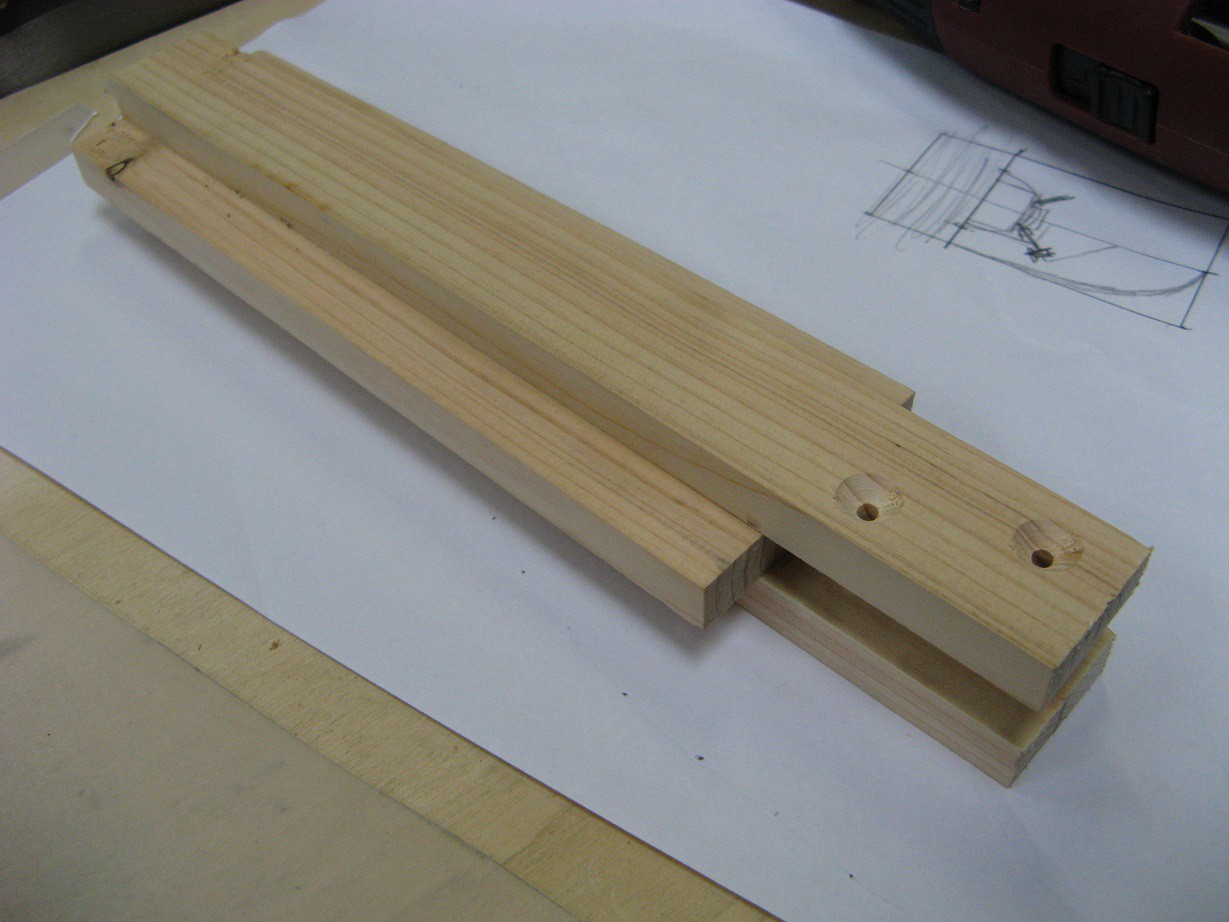
I decided to abandon the plastic idea and make something out of wood. The only reason I didn't do this in the first place was the need to bore a huge hole for the shaft. But It turns out a large auger bit is not as expensive or hard to handle as I thought. I glued up some scrap boards and put a hole through what will become the control section.
![]()
-
log 3: electronics overview and more wood
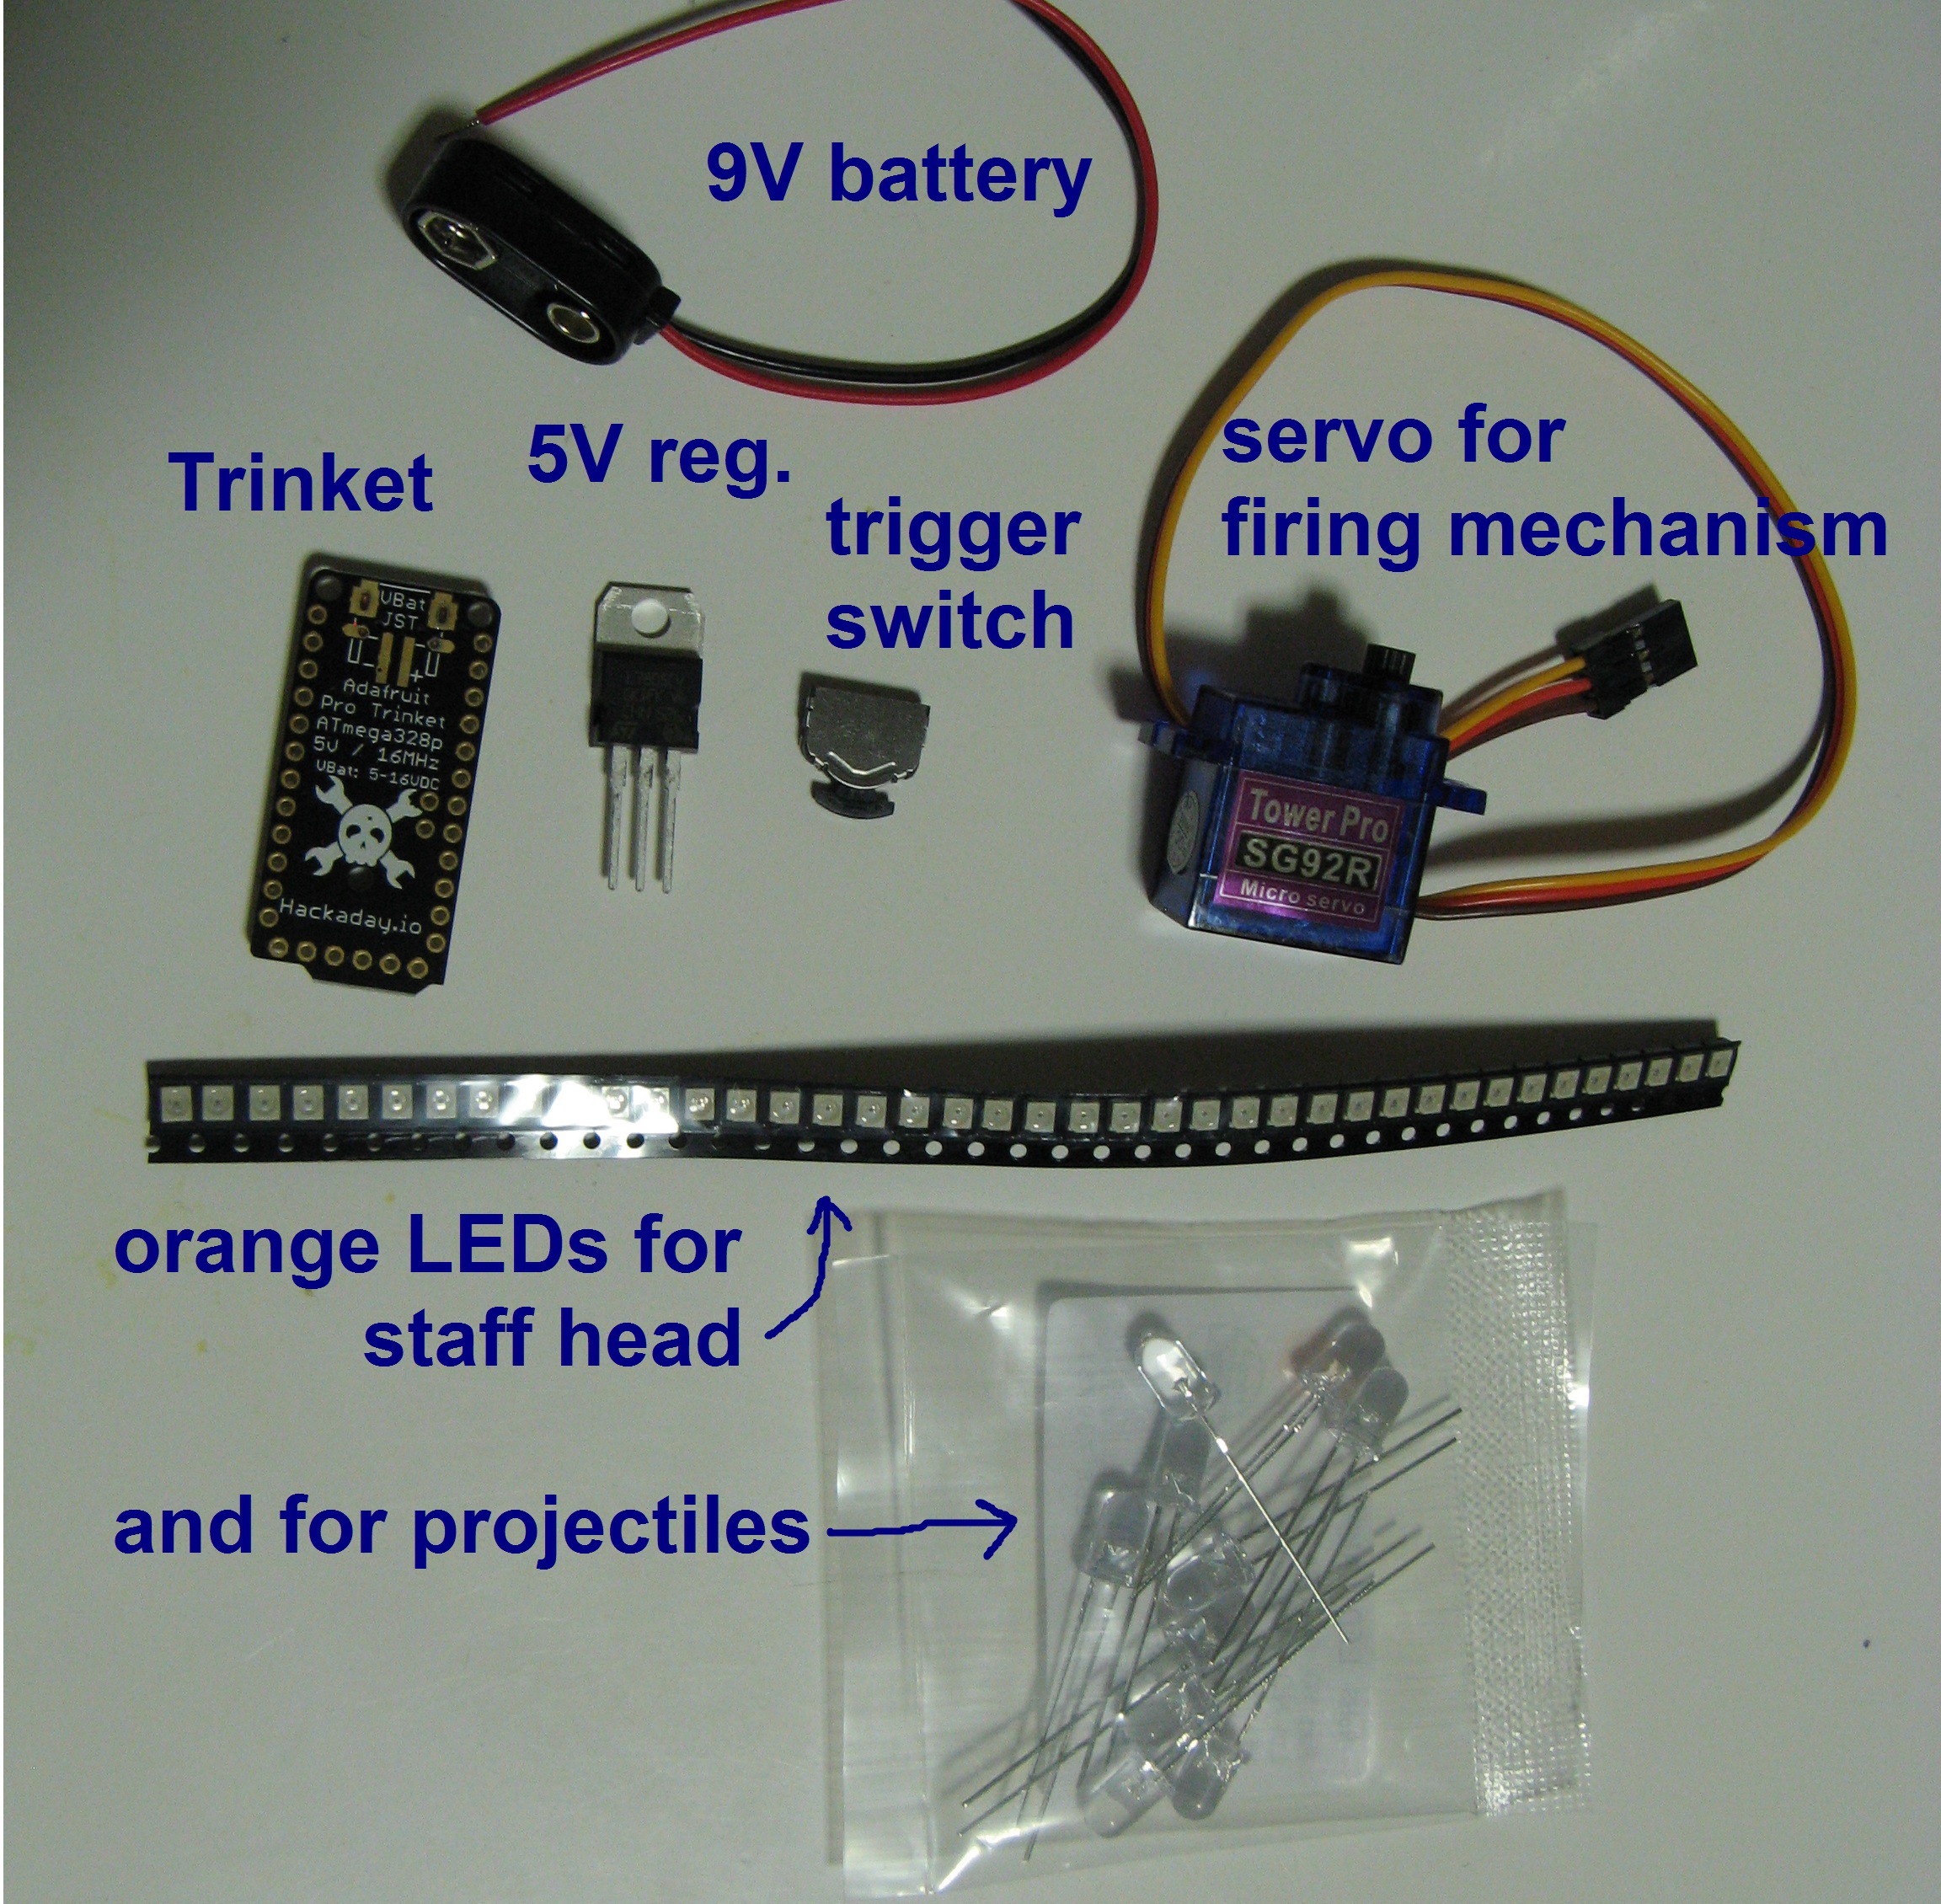
02/17/2017 at 13:05 • 0 commentsThe parts arrived. I haven't made up a proper schematic yet, but here is a rough overview of the electronics:
![]()
It is simple enough you can probably figure it out from just that. I'll post a schematic once the resistor, capacitor, and pin details are finalized.
Also, some progress has been made on the wooden aspect. I made this piece to attach the four head segments. I also cut a rabbet in the segments so everything locks together nicely.
![]()
![]()
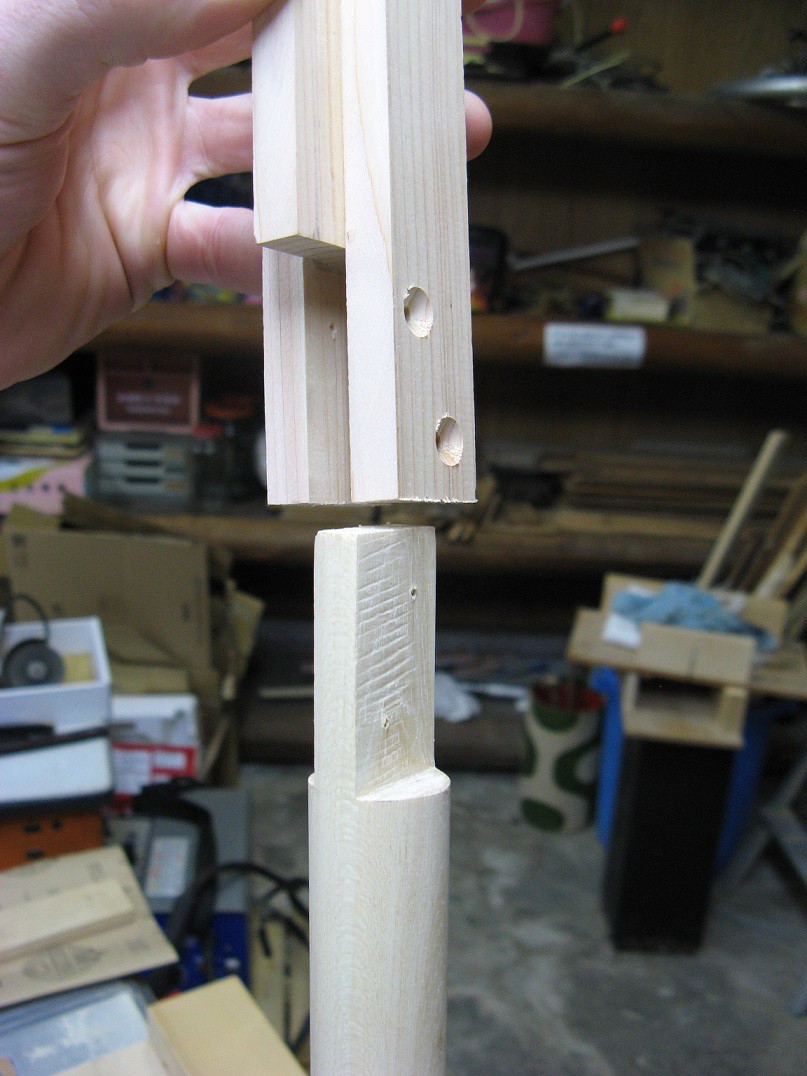
To attach it to the shaft I cut the end of the dowel to make a snug fitting tongue... well, that's easier to explain with a picture.
![]()
-
log 2: A little wood shaping and a lot of frustration
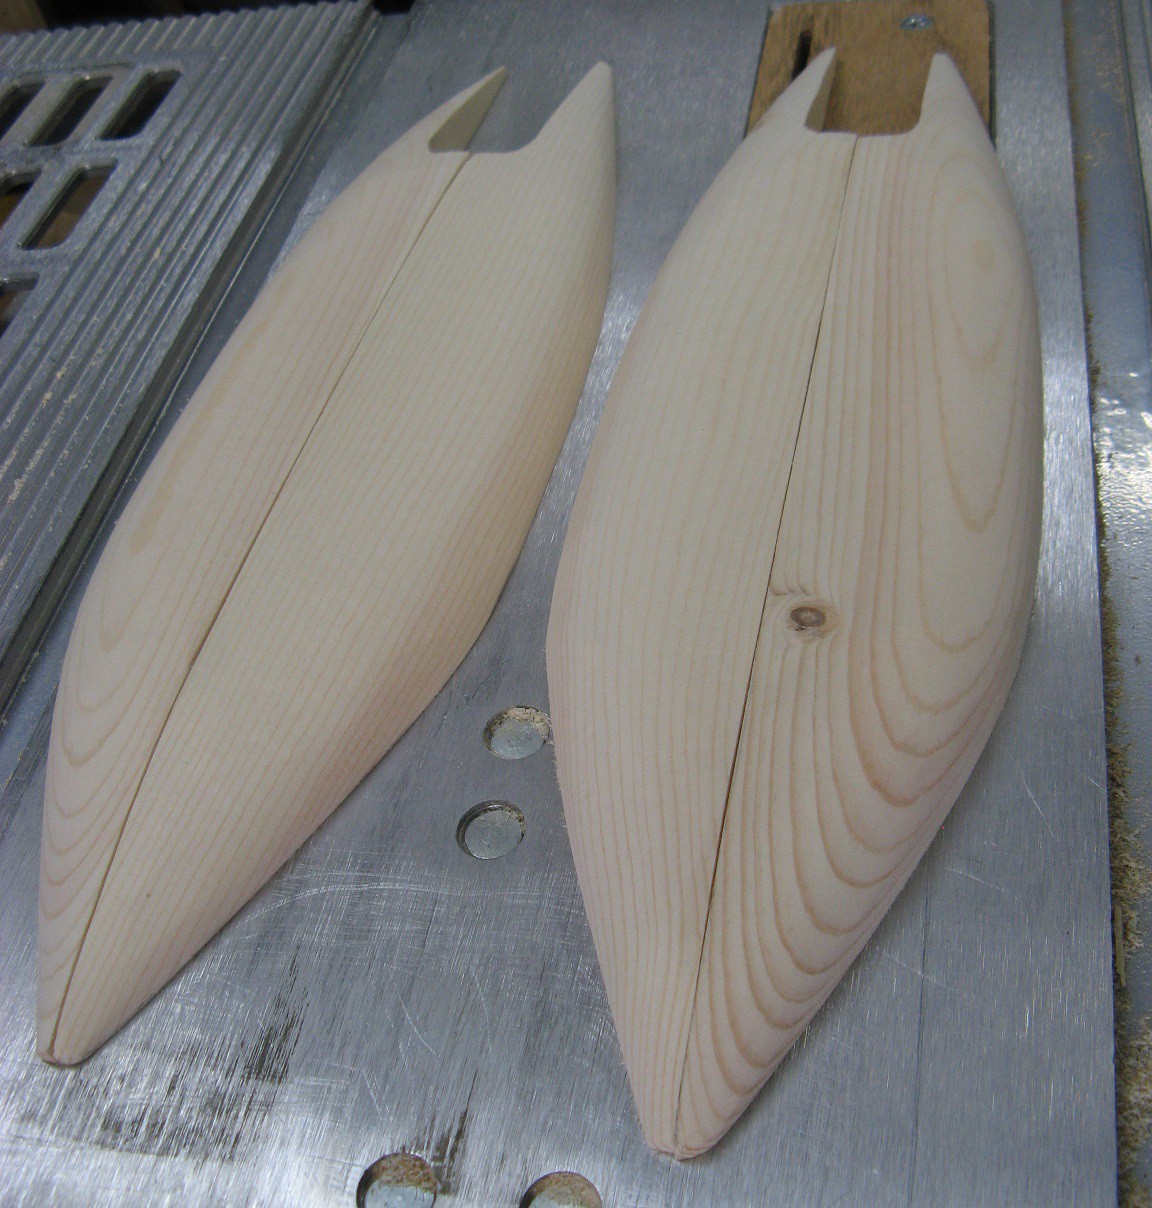
02/12/2017 at 11:33 • 0 commentsI'll start with the good news. I roughly made the four segments for the head. I'll show the last picture first.
![]()
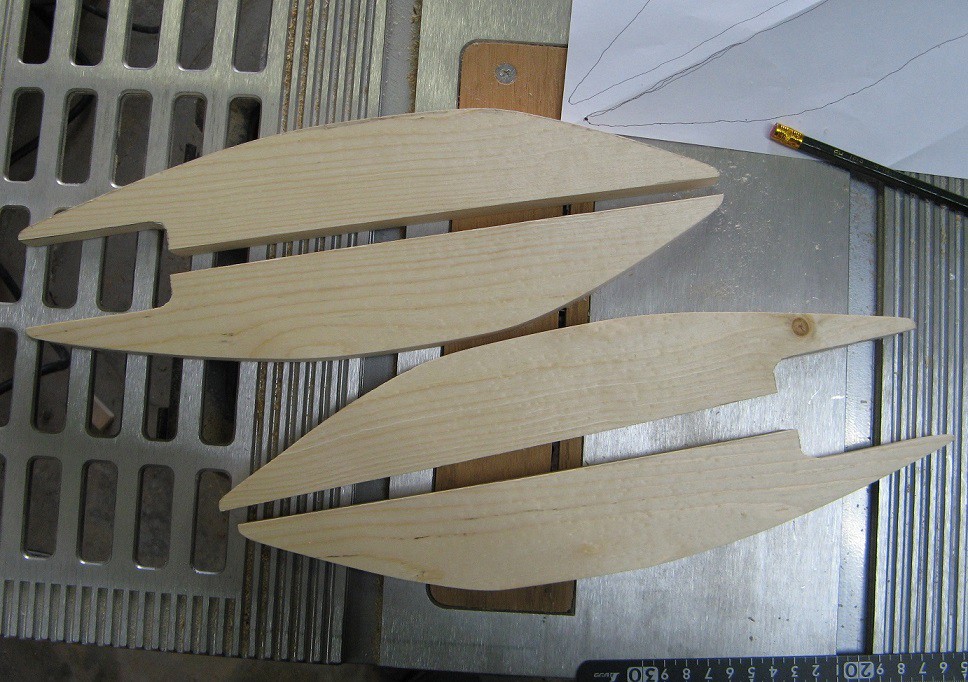
And here's the process. They were first cut out of a 1x4 using a bandsaw.
![]()
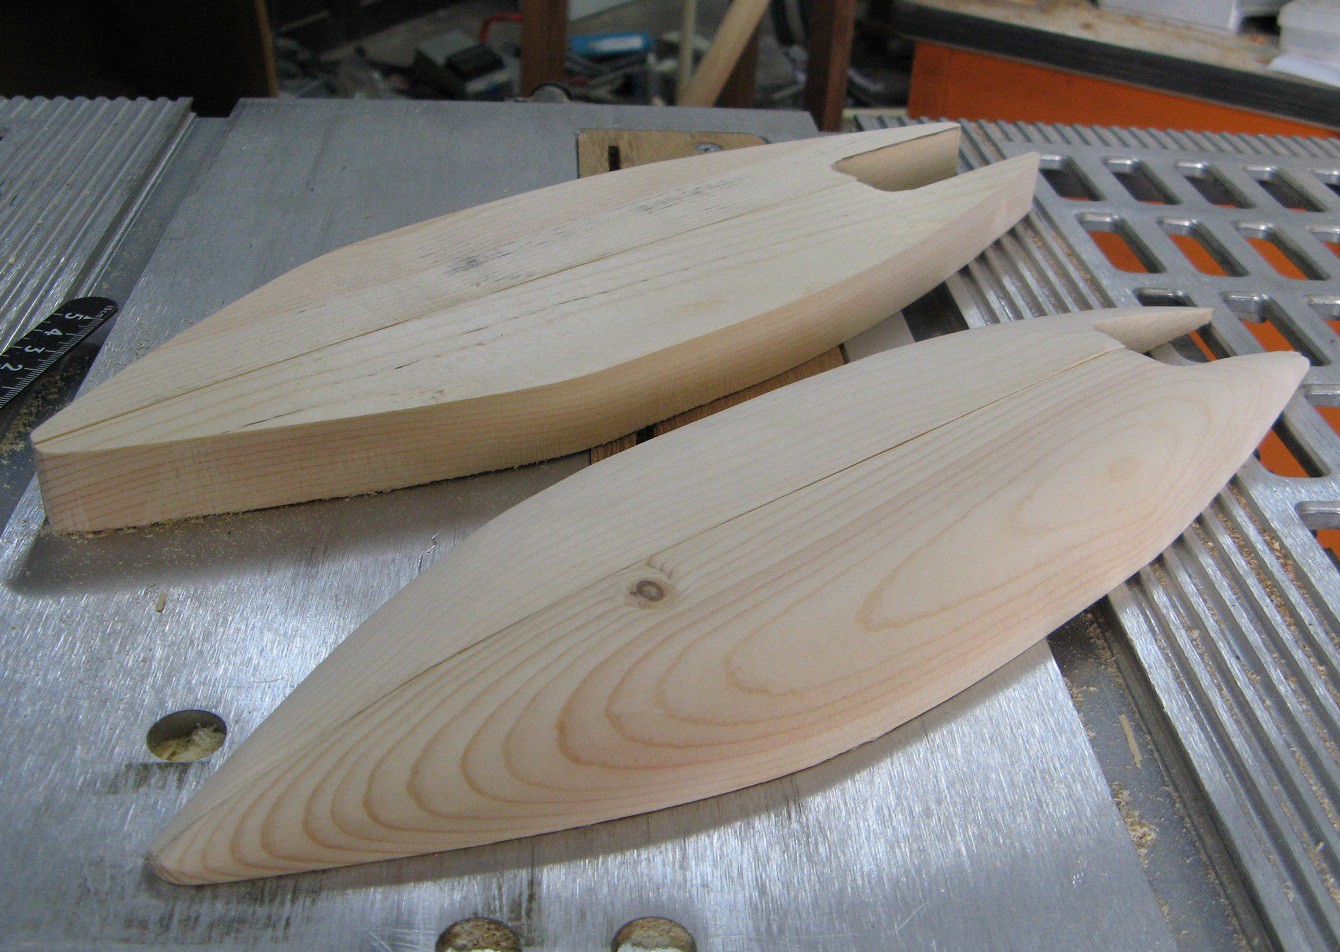
Then the corners were roughly trimmed on the bandsaw before lots of sanding on the belt sander. Here is a before and after pic to show the difference.
![]()
Well, those turned out pretty well. I've also begun the other parts of the staff like the control section and decorative loop thingy. They will be made out of plastic pipe salvaged from a vacuum.
Now for the bad news. I spent most of the weekend trying to fabricate a head opening mechanism. I tried idea after idea and ended up scrapping each one. The problem is that everything is so much smaller than I had imagined. It's too small for wood to be strong enough. My metalworking skills were clearly not up to the task. I tried a bit of plastic too, but to no avail. If I had a 3D printer I could probably get something to work. So if I win the 3D printer in this contest I'll go back in time and make the parts for this.
The outcome, if I want to get something built by the end of the contest I'm afraid I'll have to simplify things. The head will no longer open and close(unless I win that printer). It will be permanently open, in the armed state. This leaves me a lot more time to focus on the electronic aspect and this week I hope to design the lighting and order some LEDs.
Also, I had an idea for the projectile. AAA battery with LED and spring contact that closes upon firing. Chew on that, safety people.
-
log 1: measurements and design ideas
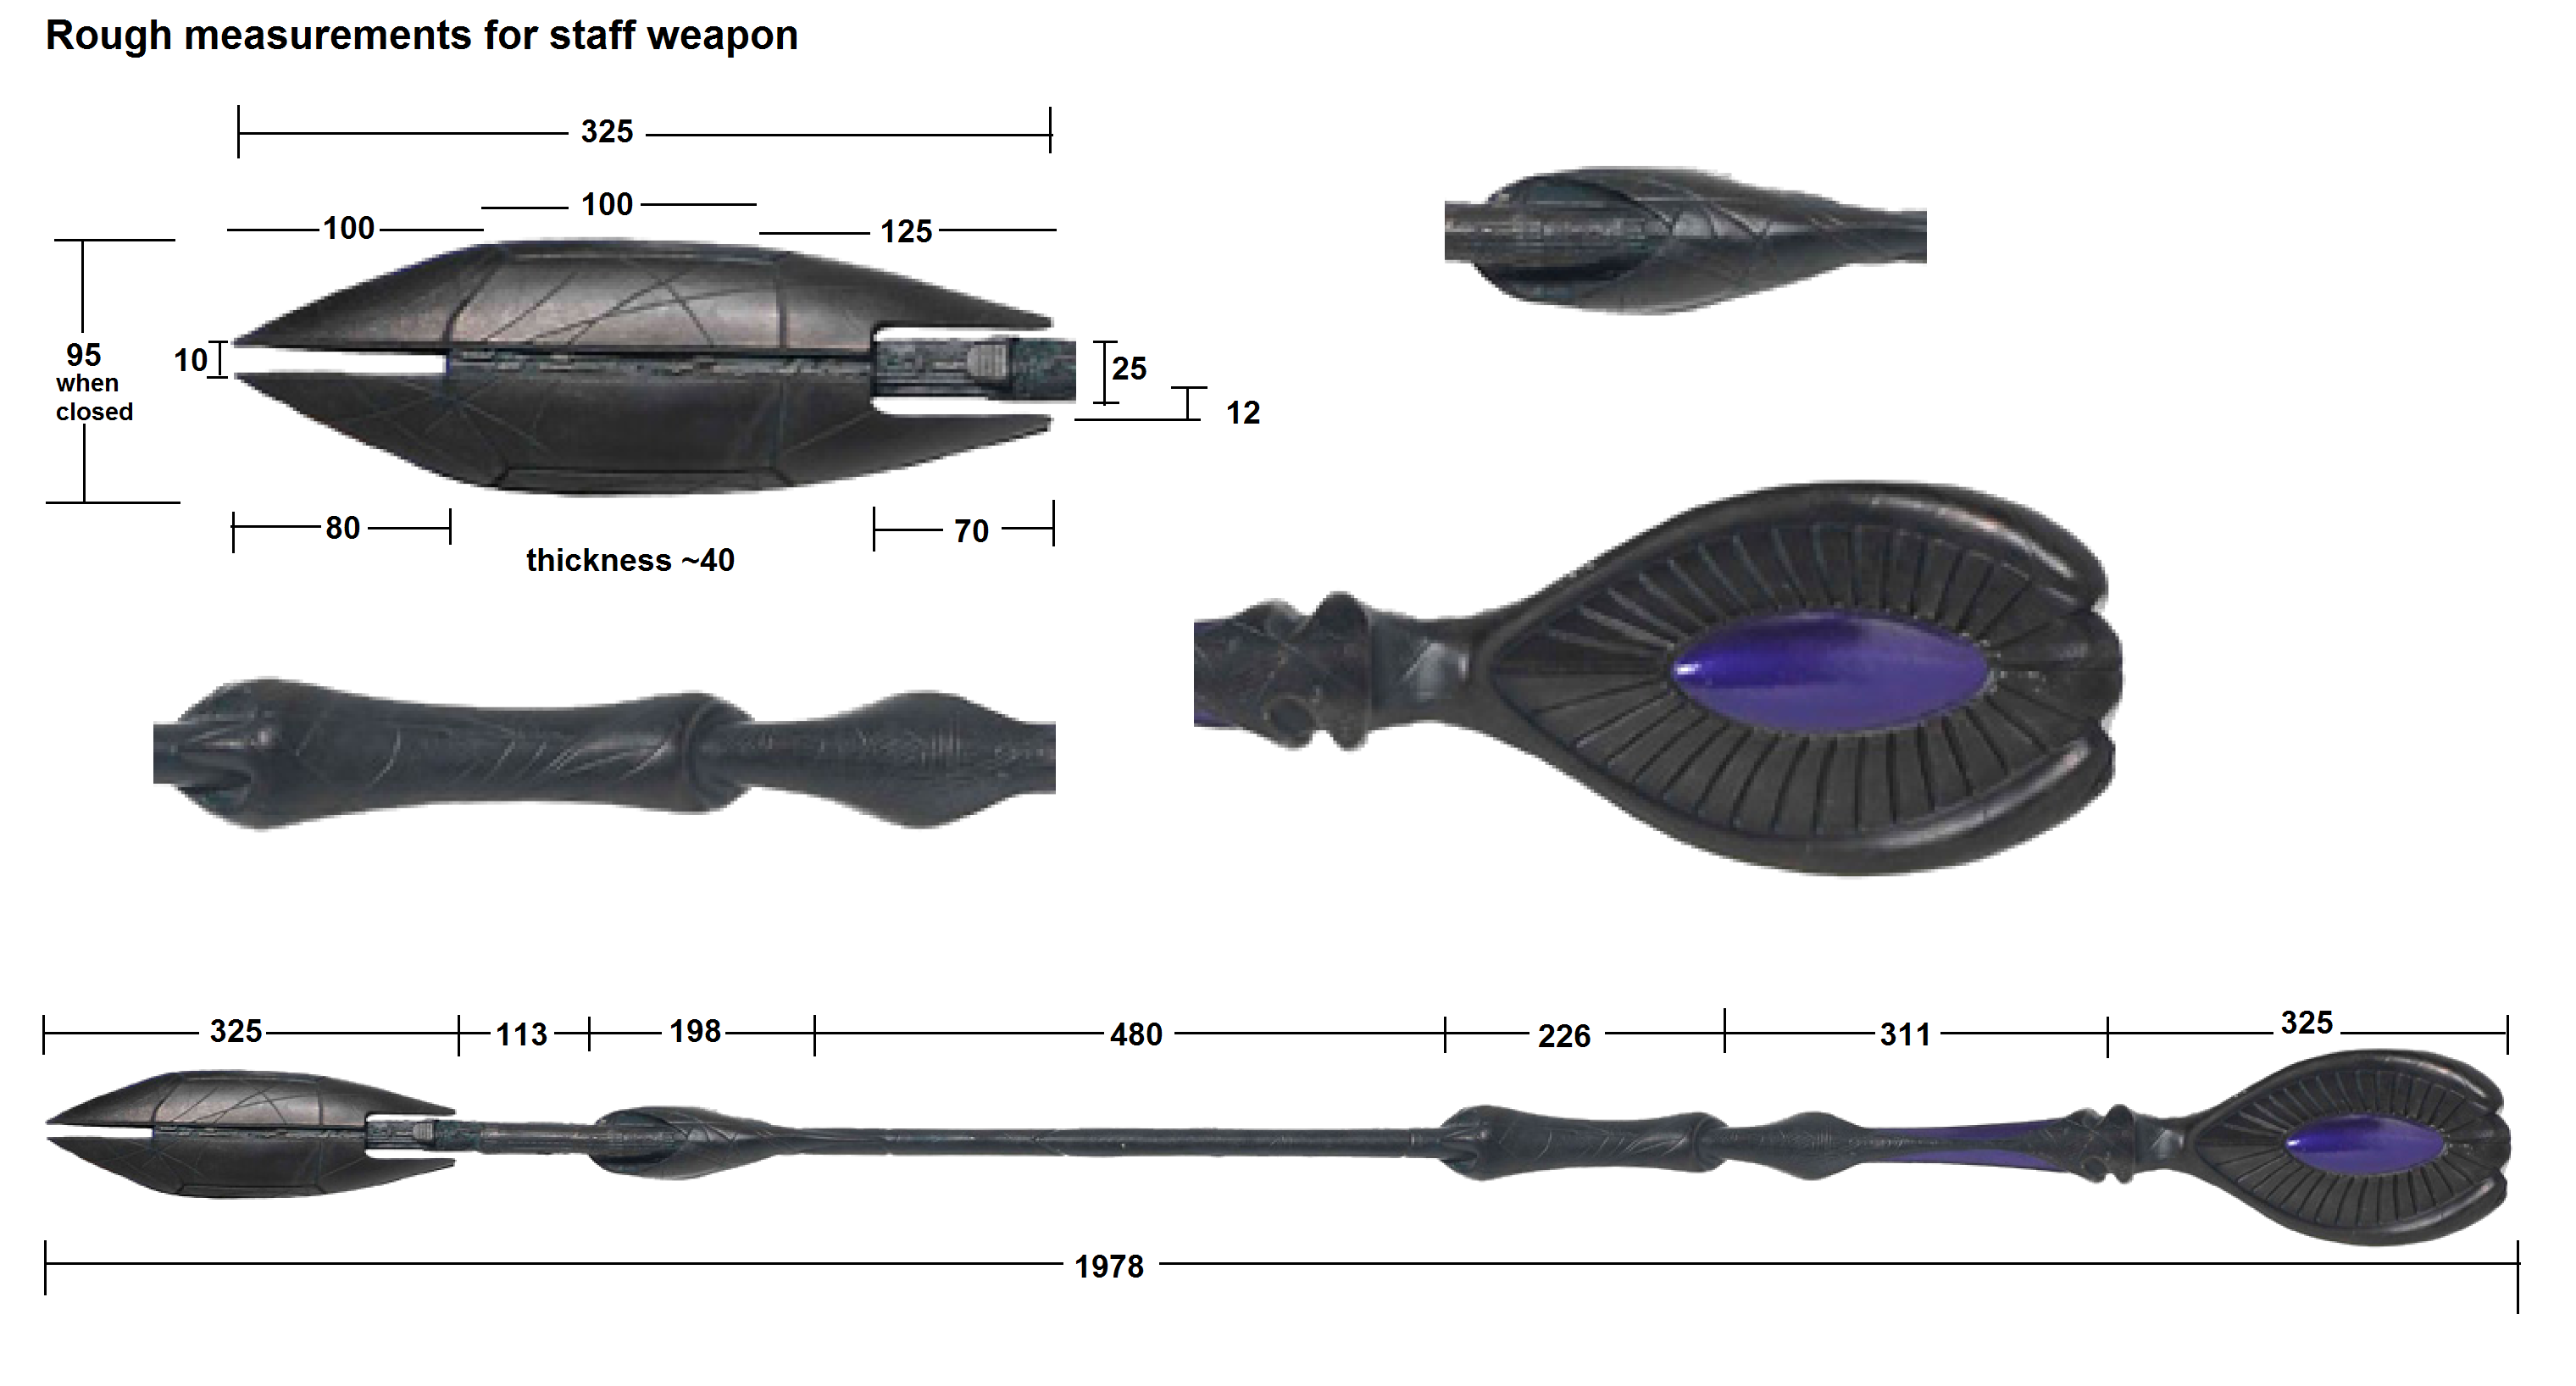
02/07/2017 at 12:44 • 1 commentAfter gathering as many useful pictures as I could find, I held a ruler up to the computer screen and started measuring. I scaled all measurements to give a total length around 2m and staff diameter of 25mm. I'm not finished, but I'll be focusing on the head first, so here are my rough measurements so far. All numbers are in mm.
![]()
I was surprised at how narrow the head is. In my mind it was much bigger.
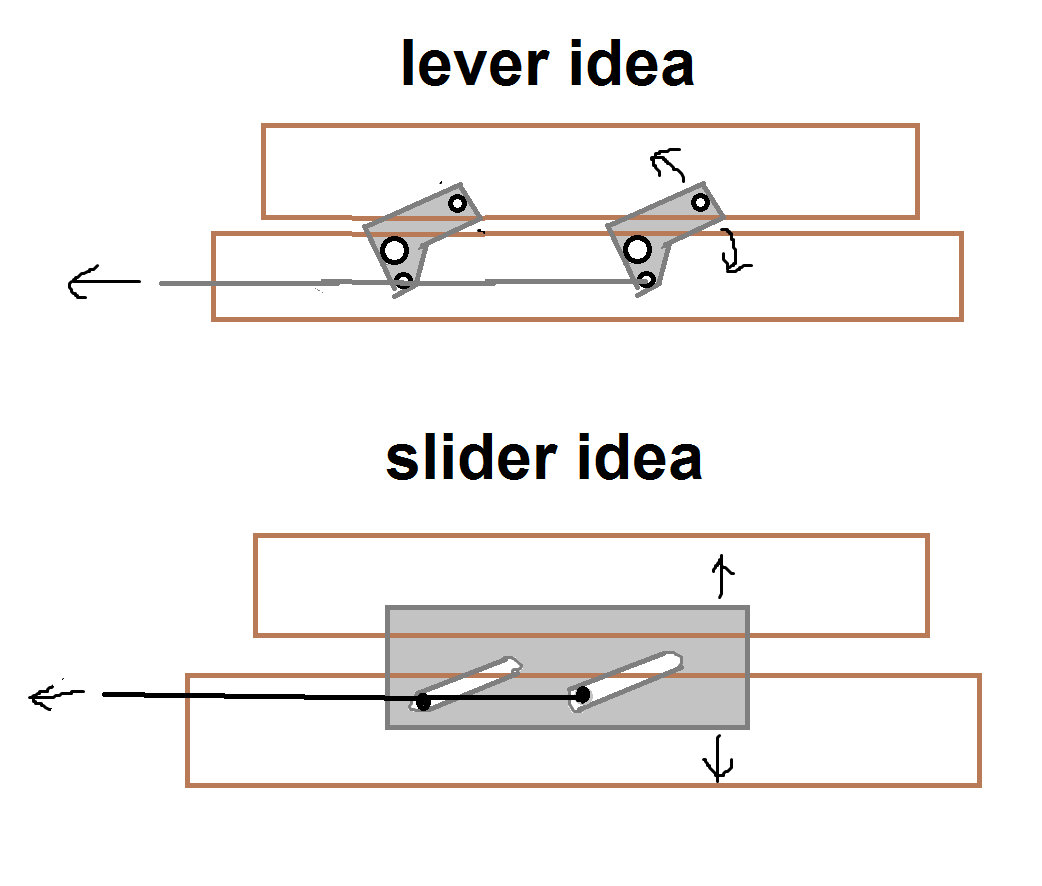
Next I began the hard part, figuring out how to make the head open and close. It is such a small movement, but it is vital to the project. I spent spent much of the day at work just thinking up designs in my head and here are two of the most realistic ones I came up with. Note that there will be a stiff metal rod embedded in the shaft connecting back to the control section of the staff. It will move forward and back to actuate the mechanism. Let me know what you think of the ideas or if you have any better ones.
![]()
Once I commit to a design I will begin construction. Then when the mechanicals are functioning, I'll start on the electrical. 3.5 weeks. I can do this.
Ma'Tok staff weapon from Stargate
A staff weapon made from wood with actions, lights and projectiles