 CanHobby.ca
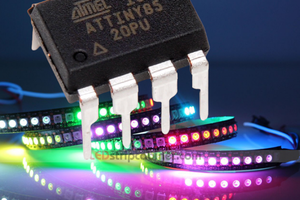
In my recent MILK-V NEOpixel project I hinted that I would try to do the same on an ATtiny10. I'm happy to report that the project is a success. I can light up a basic strip and even get a simple animation going.
Methodology:
There are typically several methods to produce the timing pulses required to light the NeoPixels on an LED strip. Because of the limited resources on the ATtiny10 the only realistic option is a bit-bash using a little assembler in the timing critical parts of the code. At the very basic a NEOpixel requires 400 and 800 nSec pulses in a specific order. The tolerances are quite wide especially for the "LOW" part of the pulse.
The ATtiny10 can be programmed to run at 1, 2, 4 and 8 MHz. The eight MHz turns out to be pretty much the only easy option. At this frequency minimum pulse width is 125 nSec. So 3 consecutive SetBit instructions give us a 375 nSec HIGH pulse. A single ClearBit instruction is typically sufficient due to following code that will extend it. As long as it is not low for longer than 50 uSec everything works fine. The ATtiny10, like most AVR MCUs, has 2 very simple, but very powerful, single byte instructions. These are sbi and cbi which can set or clear a bit in a register using only a single clock cycle. Exactly the power and efficiency we need to light up your NEOpixel strip.
Becase we have tight timing requirements we have to disable interrupts which means we cannot use the delay function. Some blocking delay functions are provided in the sketch.
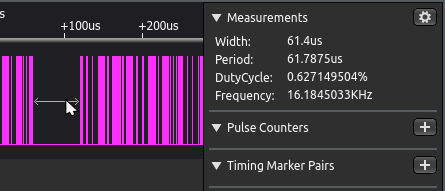
The idea is to produce a 375 nSec pulse when we want to send a 0 and a 750 nSec pulse when we want a 1. I call these NEObits. To light a single pixel we need to send 24 NEObits corresponding to the RGB colour desired for the pixel. Here is a sample, as seen with the logic analyzer, of a 0 followed by a 1.
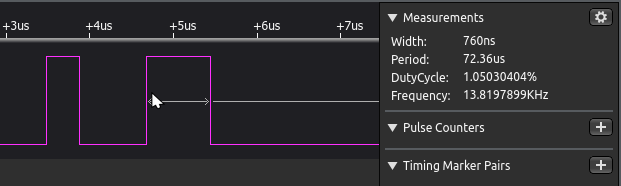
timing inaccuracies are due to running the Logic Analyzer near it's Max speed.
Due to the limited flash memory, I chose to use a simple compression scheme for the RGB information. Rather than 8 bits times 3 colours I pack each pixel into a single byte in a GGGRRBBB layout. The show() function in my sketch decompresses the RGB values in the strip array and sends the appropriate pulse stream. An approximately 60 uSec delay is added at the end to tell the strip we are done.
Note: I am using the term RGB loosely - most NEO pixels use a GRB configuration, but not all. Your may have to change my colour defines appropriately.
- It should also be noted that the Tiny10 Core Arduino boards package cannot handle 32 bit variables, only 8 and 16 bit may be used. The compiler does not complain but simply truncated your variable to 16 bits which can leave you scratching your head.
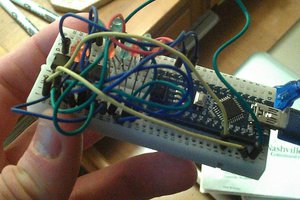
- If you are powering the ATtiny10 from the USBasp programmer you cannot power the NEOpixel strip from the USBasp. (I used a breadboard power supply) You should also note the upload process may very well light up the first pixel. This should be overwritten once we send a good pixel stream.
Recall that the strip remembers the last valid pixel stream sent to it. A simple way to clear it is to momentarily remove the power.
The example included in the Files section has comments to help you understand my logic. I also included a simple "ripple" animation.
I am leaving this project as ongoing for a while because I intend to add more animation - the sketch in the files section will be updated when I do this.
Happy pixels from an MCU smaller then the...
Read more »

 Matthias Kampa
 j0z0r pwn4tr0n
https://abnielsen.com/2019/04/24/driving-300-ws2812b-rgb-leds-with-a-3-cent-microcontroller-pms150c/