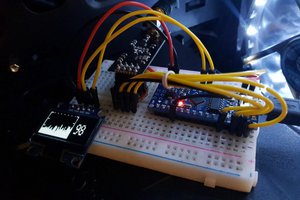
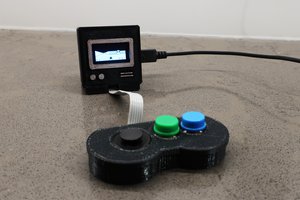
The code for the project is into 4 main parts: ship, walls, collision detection, and accelerometer input. I found this easiest as each part of the program can operate on its own independent update rate. An example of this is for the wall code where the position of the wall updates based on the speed which is controlled by the player's current score.
See Wall Update Code Below:
void updateWall(){
  if (y_wall==0){
  y_wall = SCREEN_HEIGHT;
  x_wall = random(w_gap/2, SCREEN_WIDTH-w_gap/2);
  score++;
  sspeed = 100 - score*5;
  if (ttspeed<=5){sspeed =5;}
  }

  double c_time = millis();
  if ((c_time-prev_time) > sspeed){
  y_wall--;
  prev_time=c_time;
  }
}

void displayWall(){
  display.drawRect(0, y_wall , x_wall-w_gap/2,10, SSD1306_WHITE);
  display.drawRect(x_wall+w_gap/2, y_wall , SCREEN_WIDTH - (x_wall+w_gap/2),10, SSD1306_WHITE);
}
Along with this was also the need to create code to control the ship, this is directly handled by the accelerometer the simplest way to explain this is that the Y-Axis acceleration is divided by the magnitude of the acceleration. This allows the game to determine the current direction the IMU Is rotated based on the direction of gravity. This also accounts for any movement the player makes as any stray acceleration may cause the sensors to read an acceleration which is not caused by gravity.
Ship and Accelerometer Code:
void updateAccelerometer(){
  uint8_t sensorId;
  int result;

  result = mySensor.readId(&sensorId);
  if (result == 0) {
    Serial.println("sensorId: " + String(sensorId));
  } else {
    Serial.println("Cannot read sensorId " + String(result));
  }

  result = mySensor.accelUpdate();
  if (result == 0) {
    aX = mySensor.accelX();
    aY = mySensor.accelY();
    aZ = mySensor.accelZ();
    aSqrt = mySensor.accelSqrt();
    Serial.println("accelX: " + String(aX));
    Serial.println("accelY: " + String(aY));
    Serial.println("accelZ: " + String(aZ));
    //Serial.println("accelSqrt: " + String(aSqrt));
  } else {
    //Serial.println("Cannod read accel values " + String(result));
  }
}

int initial_w_ship = 10;
int w_ship = 10;
int h_ship = 10;
int x_ship = SCREEN_WIDTH/2;
int y_ship = 0;

void updateShip()
{
  x_ship = -1*aY*SCREEN_WIDTH/2 + SCREEN_WIDTH/2 ;
  // use accelerometer data to update ship position
}
I will save the part of the program that handles the collision detection as it is relatively simple and uses a square bounding box to measure if the points representing the perimeter of the box pass within the barriers. This part also is used to reset the game in the case of a collision, resetting the score and game speed in the process.

 CiferTech
 Louis Paul
 Alex Ryker