Hardware
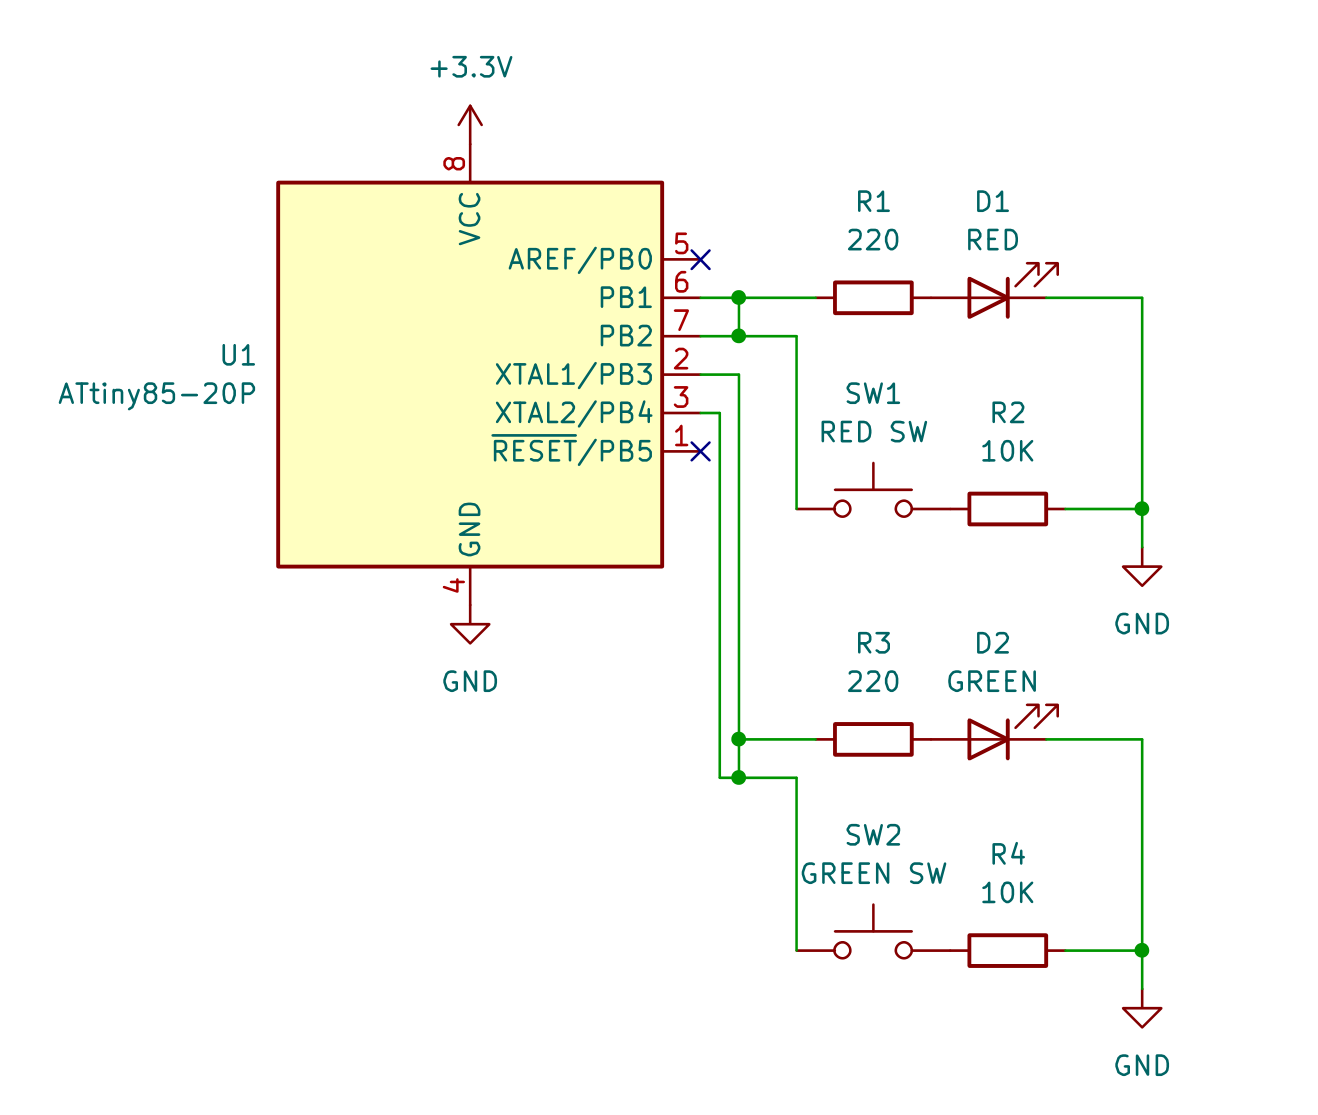
A Digikey cart for the kit can be found here. This cart contains all the elctronic components needed to build the kit (including the ATTiny programmer) except for the protoboard--at the time of this writing Digikey does not carry a protoboard with the correct dimensions (5cm x 7cm, or 2.75in x 2in). Protoboards of that size can be ordered through Adafruit here. Larger boards can obviously be used as well, and may be better suited for younger students. Solid core hookup wire can be found in a variety of places and quantities--I happened to have this kit from Sparkfun on hand. You will also need solder and a soldering iron to assemble this kit--both can be found on Sparkfun, Adafruit, Amazon, etc. The schematic for the circuit is below. For those who wish to go further and design a custom PCB for the game, the KiCAD project for the schematic is attached to this project.
Software
The code for the game is a relatively simple Arduino program. It is heavily commented to aid in understanding. Students are encouraged to modify different portions of the code to experiment with how the behavior changes. A good place to start is the number of levels in the game--by default there are 50 levels, but makers may understandably want to reduce that number! The code file is attached to this project, and listed in a project log below.
Tips for Educators
This kit is designed to be tailored to the skill level of the person making it. Here are some suggestions for parents and educators:
Beginner
- Soldering Tutorial: Program and assemble the kit almost completely, but leave out one or two components (for young children I would suggest an LED, resistor, or button). Have the student solder in the missing components.
- Programming Tutorial: Solder the kit completely, then help the student step through the code and program the ATTiny. Encourage them to tweak parameters such as the number of levels.
Intermediate
- Soldering Connections: Solder all components in place, then have the student use the schematic to plan out paths for wires and solder bridges. Once they have the wires placed, let the students solder the paths themselves.
- Program Your Way: Using the provided code as a reference, create a requirements list for students and allow them to write their own program that implements the requirements. This list can be as vague or detailed as makes sense for the students' skill level.
Advanced
- Solder on Your Own: Give the students a printout of the schematic, and let them assemble the entire kit themselves.
- Write Your Own Version: Without providing the existing source code or any detailed requirements, instruct students to "program Simon Says." Hints or other assistance can be provided according to their skill level.
 Alex Ryker
 ElectroBoy
 SimpleTronic