Close
0%
0%

DIAVOX Cellphone

Turning an old diavox phone into a cellphone. No smart stuff, just a telephone. Pick up the handset and dial just like the old days.

Similar projects worth following
807 views
0 followers
I remember the days when a phone was just a phone. Pick up the handset dial the number, just you the phone and the other person you are talking to. Place the handset back on and the call ends. No fancy smart features to distract you. This project is about turning an old telephone into a portable cellphone and learning new things on the way.

The Diavox Project "Old phone cellphone"

Where to start?

The scope of the project is rather large so it is divided into sub-projects and their individual tasks. Some have dependencies which have to be completed first.

Sub-projectStatus
Debug probeCompleted  
Rust programming toolchainCompleted  
Bell ringerAlmost Done
Keypad matrix scanningNot Started
DTMF keytone generationNot Started
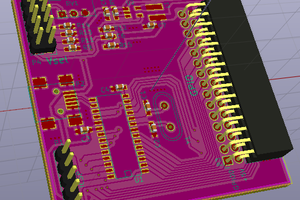
Codec breakout PCBStarted
LTE ModemNot Started
Connecting everything togetherNot Started
Power supplyNot Started
ProgrammmingStarted
Read more »

  • Bells

    Anders Helgessona day ago 0 comments

    I had some time the other day to work on my project so I connected the oscillscope and checked the time between the channels when it turns off and then on.

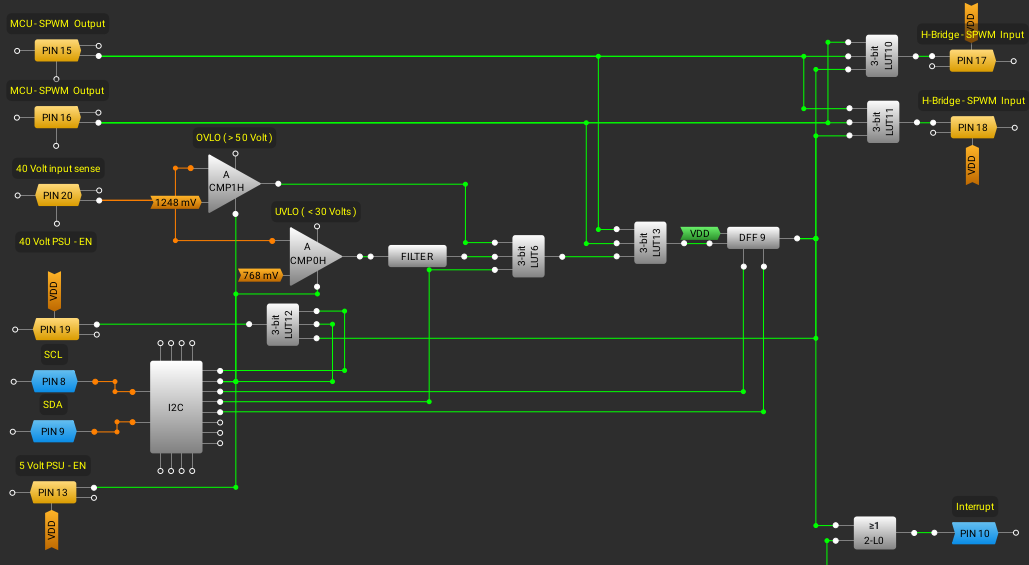
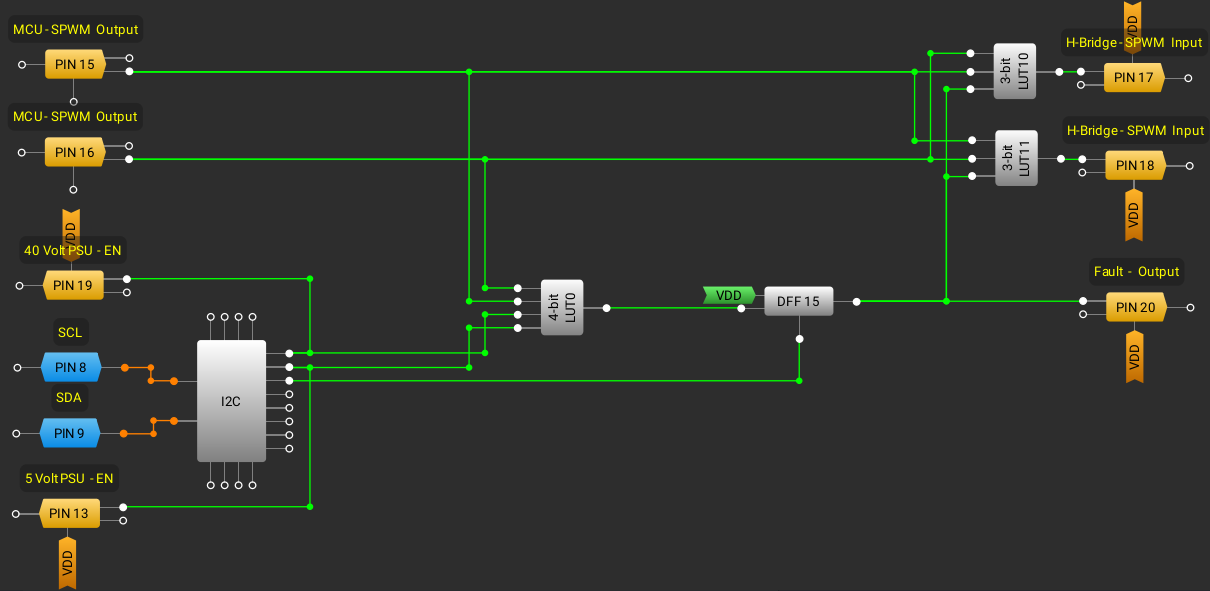
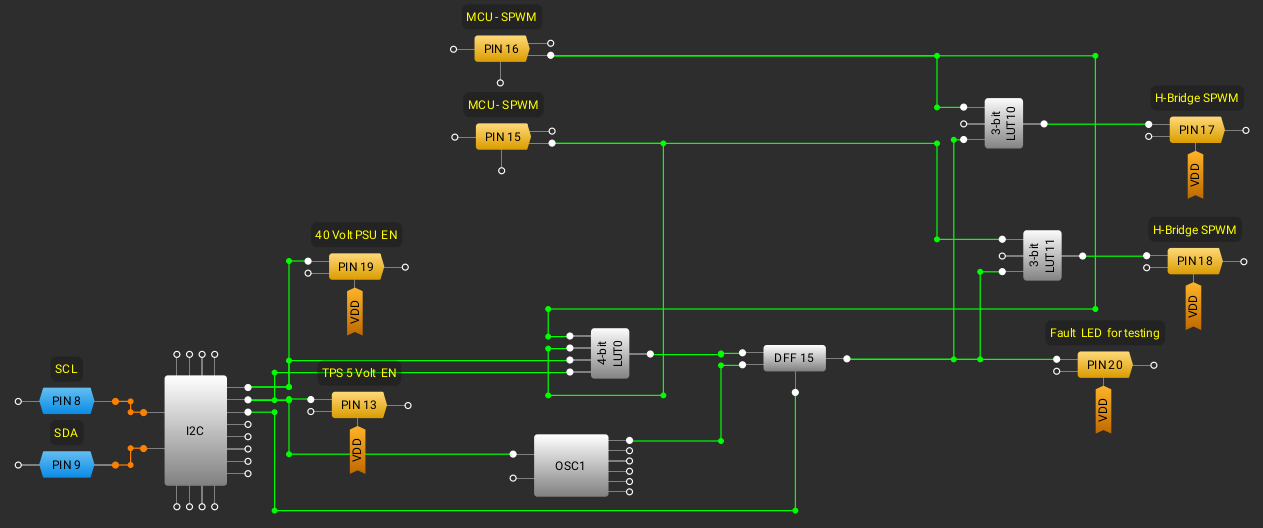
    I will never run the h-bridge over 50hz but even if I run it as quickly as I can with my 20kHz pwm output, just one LUT element of deadtime is enough since the h-bridge can handle up 400kHz. My deadtime is in the microsecond range and the h-bridge do stuff in the nanosecond range. So I should be safe to connect the h-bridge.

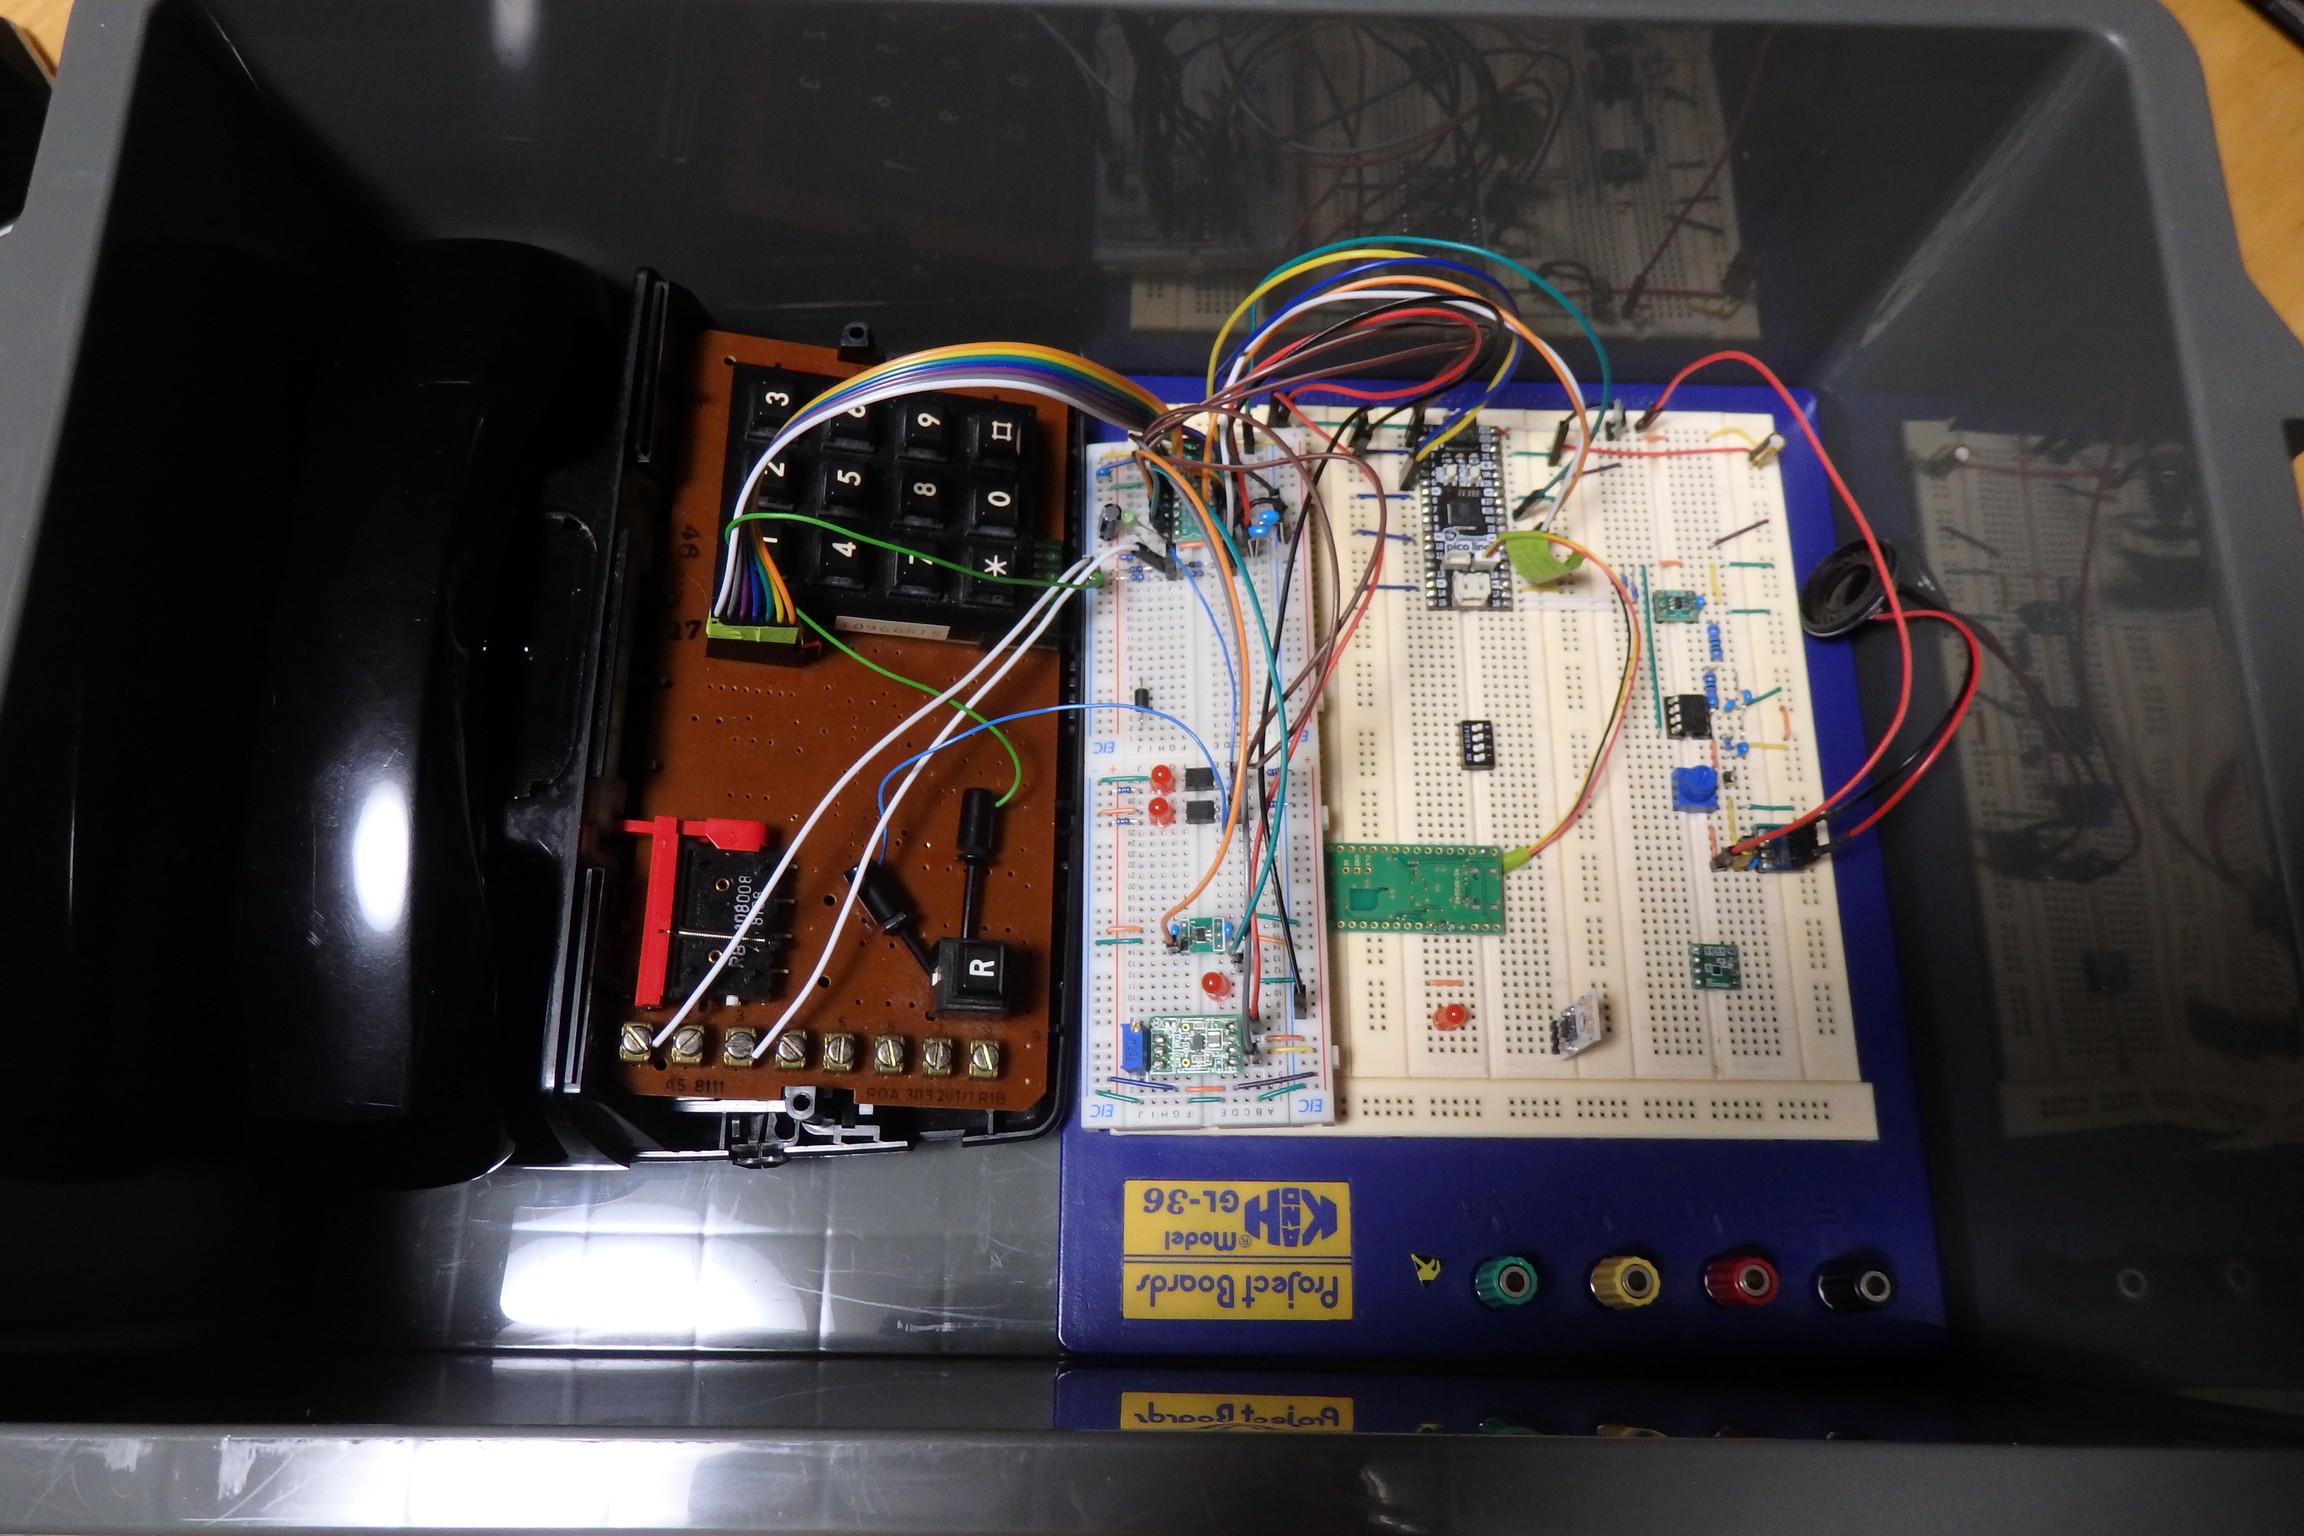
    I've desoldered the connections to the old h-bridge from the PSU and added input and output capacitors which will hopefully give me lower coldstart times. I also soldered the pin header on the h-bridge. I also soldered the socket header on my uart module which I'm going to use for another project for a bit.

    Now I just have to make sure we don't get any back emf from the coil back to the h-bridge as our 40 volts is very close to the maximum voltage of the h-bridge which is 44 volts.

    I removed the old capacitor from the bell ringer replaced it with a new one, added resistors to protect from back emf.

    As I read through the h-bridge IC datasheet I notice that it seems to put in a deadtime of 200-300ns in hardware, which I missed.
    It was written more like a note instead of on the specifications page, which is why I missed it so many times looking through the datasheet.

    I connected everything together. Turned it on and the bells rang nicely. I read the voltage coming out of the H-bridge IC it was at 44 volts which is the H-bridge maximum. I have to take readings with the oscillscope to see whats going on.

    The fact that this motor driver can be used have reduced the size of the h-bridge to a small IC chip.

  • DMA and AI

    Anders Helgesson10/27/2024 at 20:25 0 comments

    After trying to get the SPWM working on the pico LiPo for quite some time I finally managed to make it work. I have to check the output with an oscillscope to make sure I have enough deadtime. I couldn't get the internal DMA pacing timer to work so, I used another pwm slice as timer for now. If I need to I might use PIO for timing. Still have to make measurements and do live testing to see if it's good enough.

    Using AI has been from very useful to not so much to downright misleading. Mixing API's, assume microcontroller functionality and so on. I looked through the documentation, the API's for the libraries used and manged to get it to work. Although the AI led me on a wild goose chase it was helpful in most cases but not so much for writing functional code at least in rust.

    Like one big CEO said that one shouldn't learn programming as AI's can do that. Well we are not there yet I think. With current AI technology they are trained and do not reflect or correct their training on their own, they still go by equation of "shit in = shit out". Perhaps mere mortals don't have access to these super programming AI's but then where are those bug free drivers?

  • LUT, PIO and SPWM

    Anders Helgesson10/13/2024 at 21:40 0 comments

    I've been looking at how I should set up the SPWM there are some options but using a PWM slice should suffice. A LUT will store the sinewave data, I'm thinking of using 1024 samples at 32 bits which holds 180 degress of the sinewave for both pwm slices. Using 16 bits for each channel. 

    Since the LUT begins with both channels at 0 and both channels are 0 in the middle and at the end. We should have enough deadtime to not cause shoot through. It depends on how fast we feed the PWM slice with data. I have to check to make sure that it's enough.

    DMA will be used to feed data to the PWM peripheral so we can free up the cpu for other tasks. 

  • ADC troubles

    Anders Helgesson10/10/2024 at 22:37 0 comments

    This morning I worked on reading the ADC so we can get the battery voltage. I'm pretty sure I'm missing something beacuse I always got similar results even when plugging in the USB which starts charging the LiPo. I have to look at the schematic and see how the voltage divider works. I'll think I'll leave this for now until it becomes relevant during the power supply part of the project. On to other things.

  • Dual-tone multi-frequency tones

    Anders Helgesson10/08/2024 at 04:34 0 comments

    Something occured to me that to get the experience of a old phone I need to feed DTMF tones into the AUX of the Codec. This could also be used to get the dialtone.

    I'm thinking of feeding a DAC from LUTs for each tone or superimposed tones, an op-amp adjust it to line-level before feeding it into the codec. I've also read about using PWM to output audio and perhaps with a good filter it can make clean sinewave tones.

    This adds more complexity and more things to learn. :)

    Then I could change the setting in the codec, if I want to get the tone out to the Modem so the person on the other end also can hear the DTMF tones.

    I guess this part will be more relevant after I get the keypad matrix scanning working.

  • Bell ringer

    Anders Helgesson10/06/2024 at 01:57 0 comments

    I've been thinking about how to set up the new H-bridge for the bell ringer.

    We need 2 SPWM signals with dead-time inserted, going to try to use PIO to do this. My power supply gives out 40 volts, the H-Bridge IC datasheet mentions explicitly that going over 44 volt even for a brief time is not allowed. I have to make sure that the H-bridge IC does not receive back EMF from the coil exceeding 44 volts. 

    I'm pretty sure that the ringer inductor have minimal back emf but I'm going to add a resistor over the coil anyway to be sure. I think I need to add a filter to remove pwm noise from the sinewave too.

  • Finished porting examples

    Anders Helgesson10/04/2024 at 20:42 0 comments

    This morning I finished porting all the examples from the raspberry pi pico to the pimoroni pico lipo for the rp-hal-boards. I did a pull request so we will see how that goes. I will also make a example reading the voltage and calculating the charge of the battery connected to the Pico LiPo. After that I will add the AE-RP2040 board, but first work a bit on my project.

    I'm probably going to use github to manage the project code. I'll probably not have another coffee spill accident but just in case.

  • Morning Soldering & Programming

    Anders Helgesson10/03/2024 at 00:17 0 comments

    I soldered pin headers on my Pimoroni Pico LiPo this morning. The first row went fine the second row got a bit misaligned. I should have checked the alignment after soldering 1 pin, a bit hard to insert into a breadboard but it works. I noticed my chisel for the soldering iron is a bit big, I'll have to get a smaller one if I'm going to do more detailed work like soldering wires onto the modem module.

    I forked and created a new feature branch to port more examples for the pimoroni pico lipo. I tried some examples worked fine but the SSD1306 oled display example didn't work, it's probably broken. I spent some time during my lunchbreak troubleshooting, it just will not work so not worth spending more time on that, since I will not use it for my project into the junk box it goes.

  • Contribute to rp-hal-boards

    Anders Helgesson09/30/2024 at 21:12 0 comments

    Since it was so easy setting up the toolchain, I've decided to contribute to rp-hal-boards by adding the AE-RP2040 and porting examples for it and the pico lipo. It will give me more experience using rust for embedded programming. I'm pretty rusty at using github so I'll get a refresher on that as well. It shouldn't take long for the Pimeroni pico LiPo as it is pin compatible with the Raspberry Pi Pico.

    I actually bought two AE-RP2040 boards which means I can solder on pin headers on the unused one and put it on a breadboard to try out some examples.

    The pimeroni pico LiPo also needs headers, so I can put it on a breadboard for prototyping. For the final version I'm not sure how I will connect everything, I might not even end up using the pimeroni pico LiPo at all, not sure yet. I might go for a stamp or standard rp pico instead and solder that to a board with levelshifters and such. When the breadboard prototype works I can figure that out. A problem for future me.

  • Monday morning soldering

    Anders Helgesson09/29/2024 at 21:15 0 comments

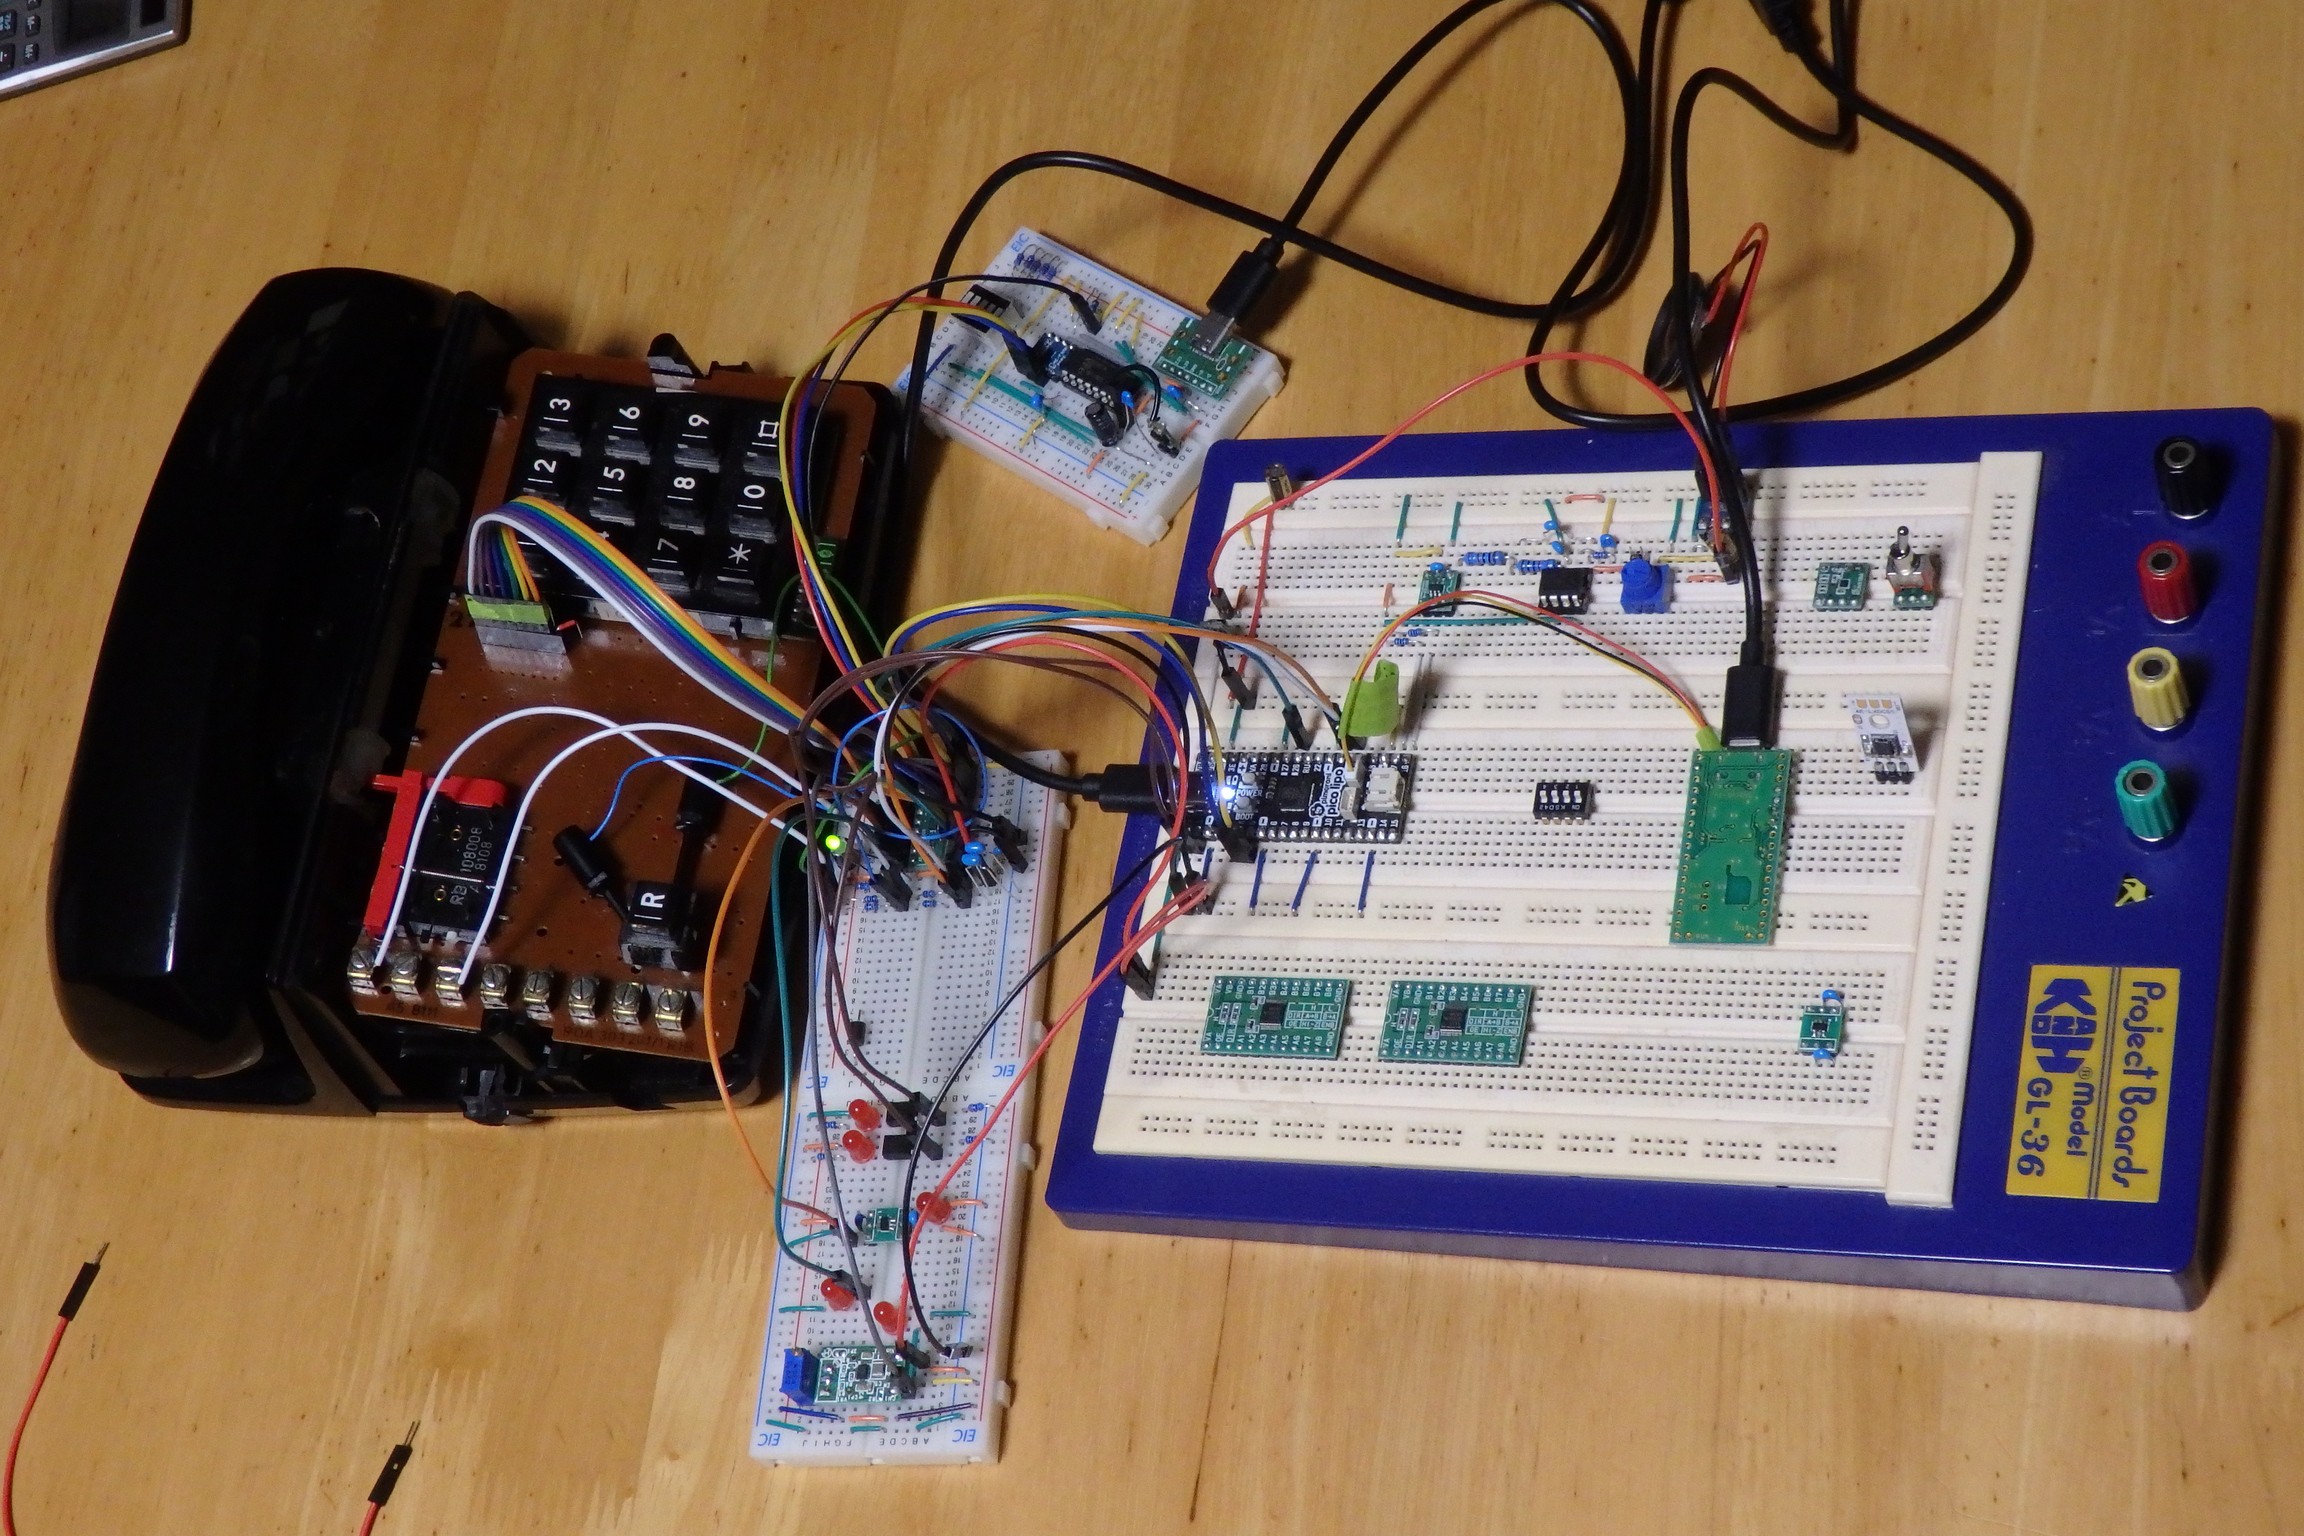
    I did some soldering this morning. I soldered the Switch DIP module, a TPS regulator module in standing cofiguration and a USB-C connecter DIP module which I managed to mess up. So how did I mess it up? Well, I soldered the connector on the wrong side of the board... it isn't a much of a problem but even using a solder sucker and solder wick I couldn't get all the solder to remove it from the board. I do not have a hot air gun so I guess I'll have to do without it.

    Looking at the picture I should have soldered both sides of the potentiometer pins on the board.

View all 19 project logs

Enjoy this project?

Share

Discussions

Similar Projects

Does this project spark your interest?

Become a member to follow this project and never miss any updates